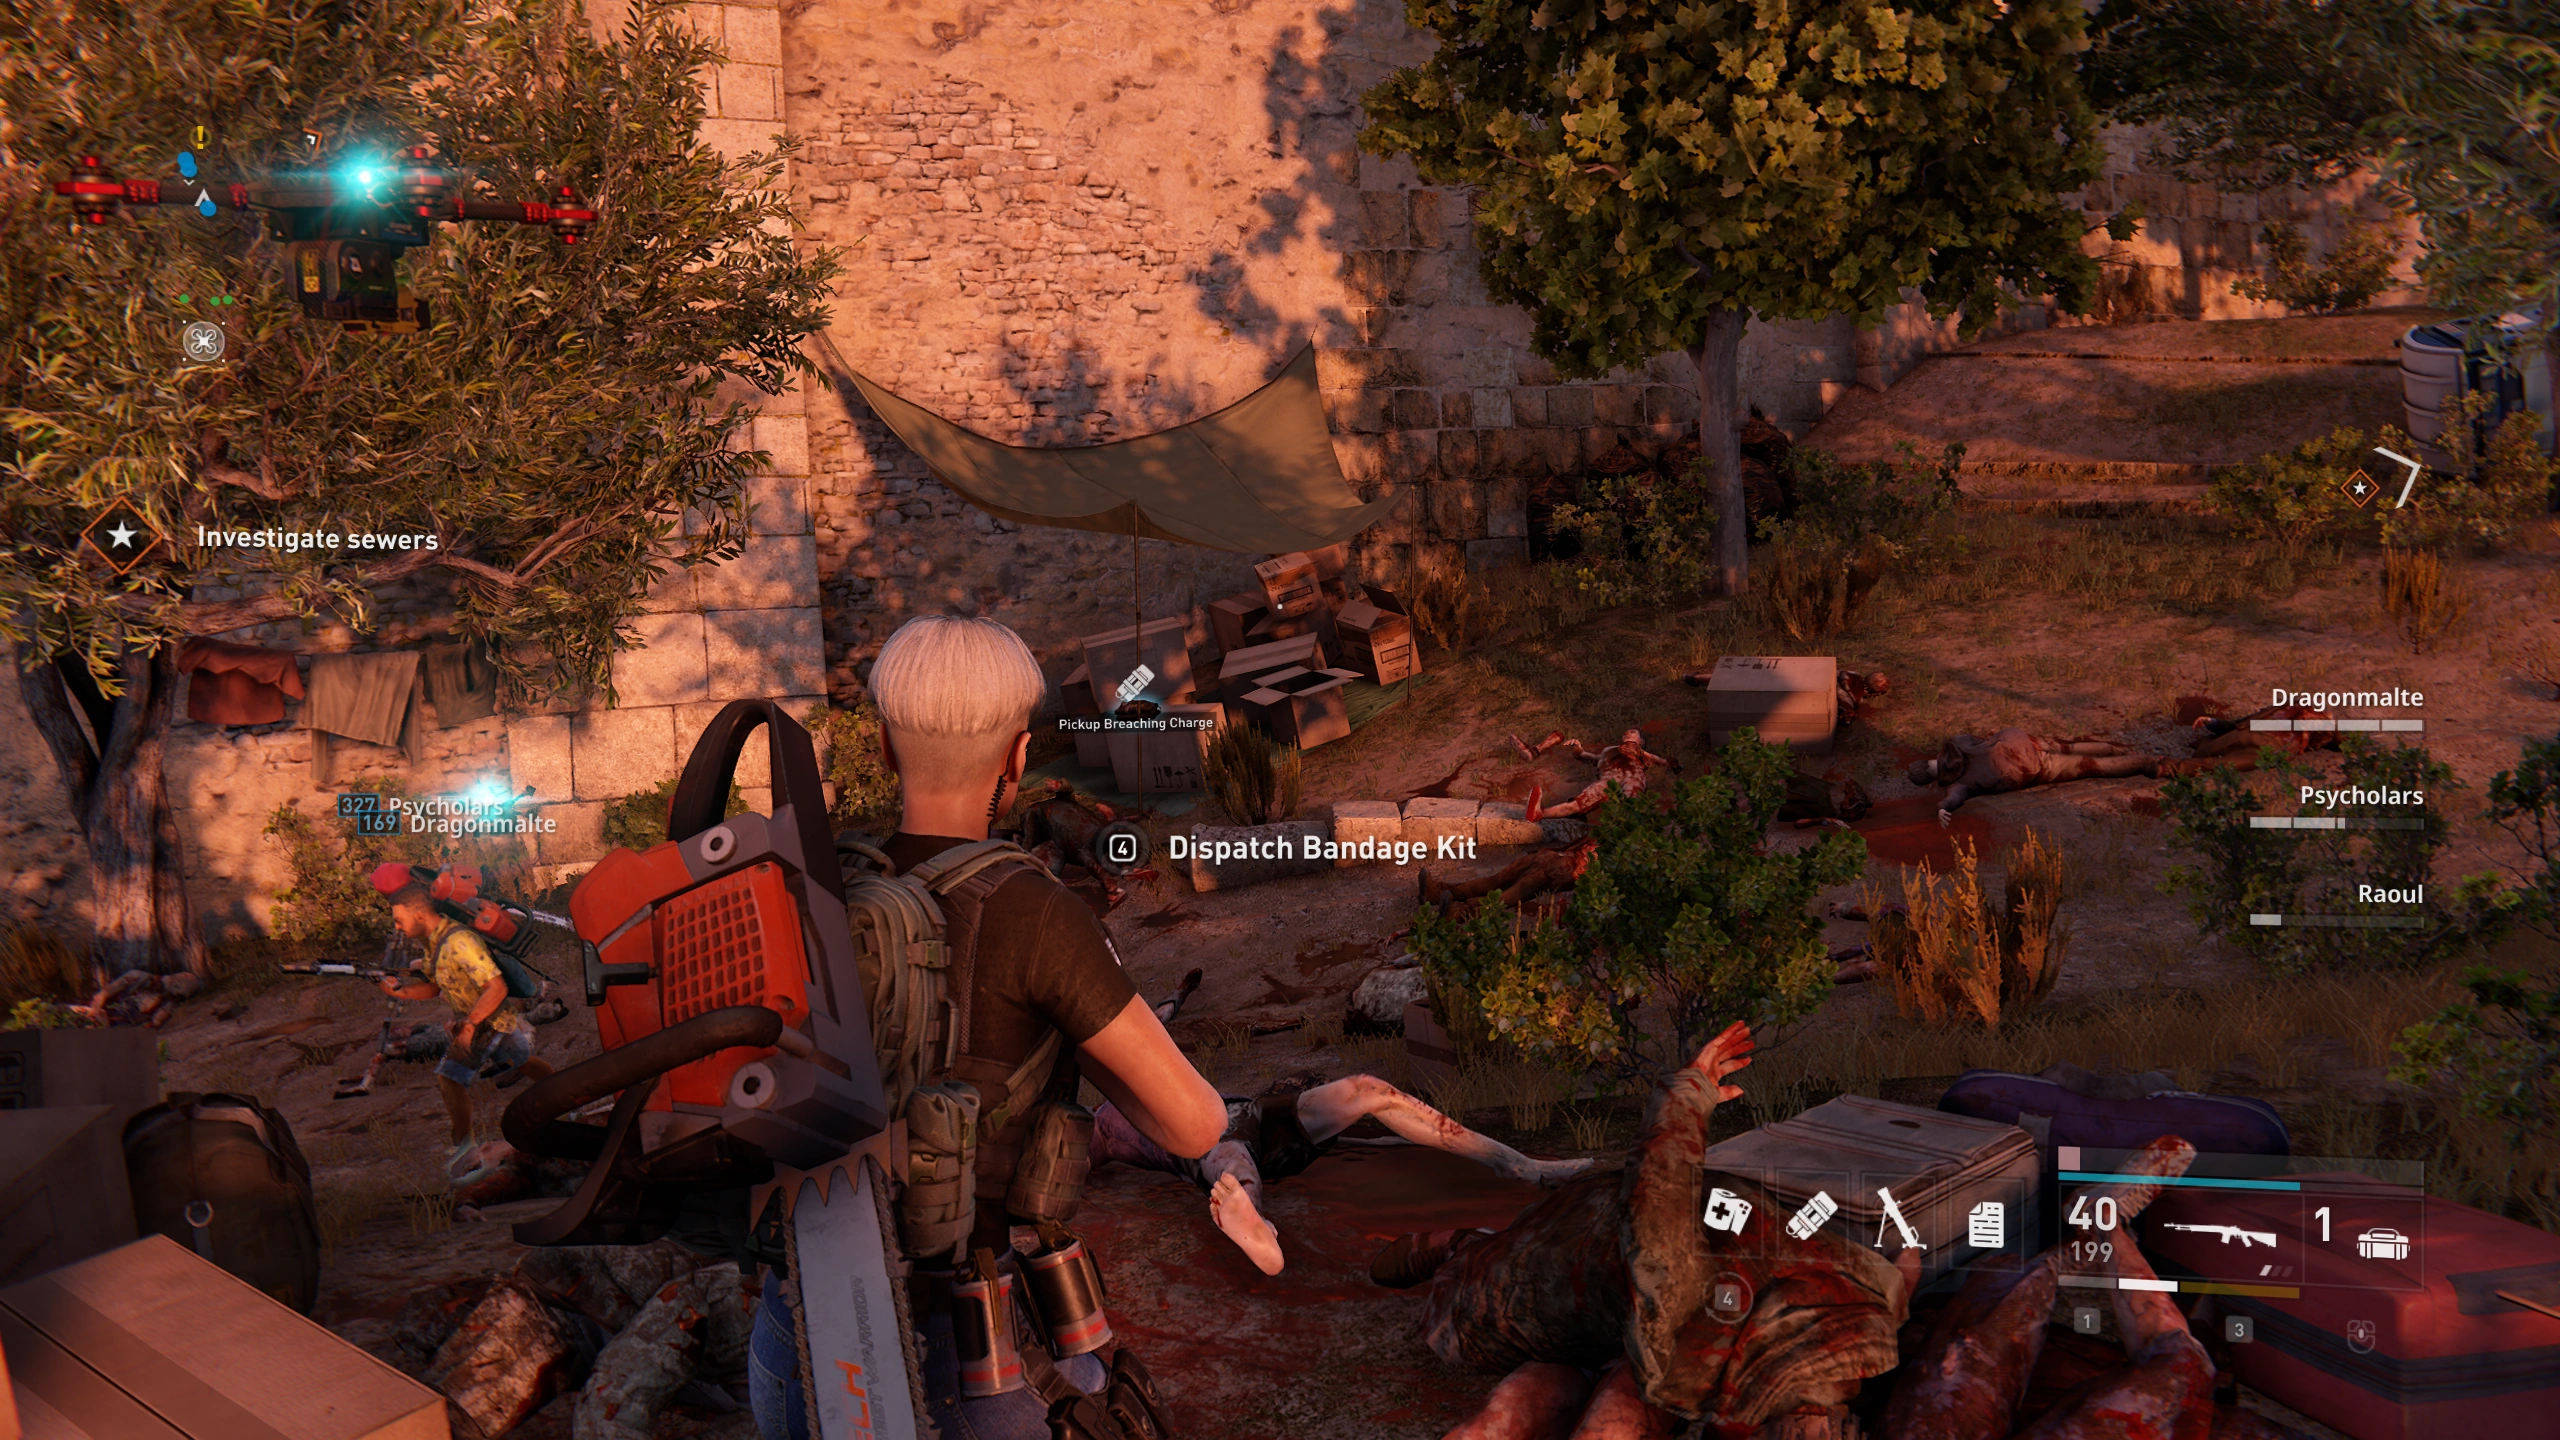
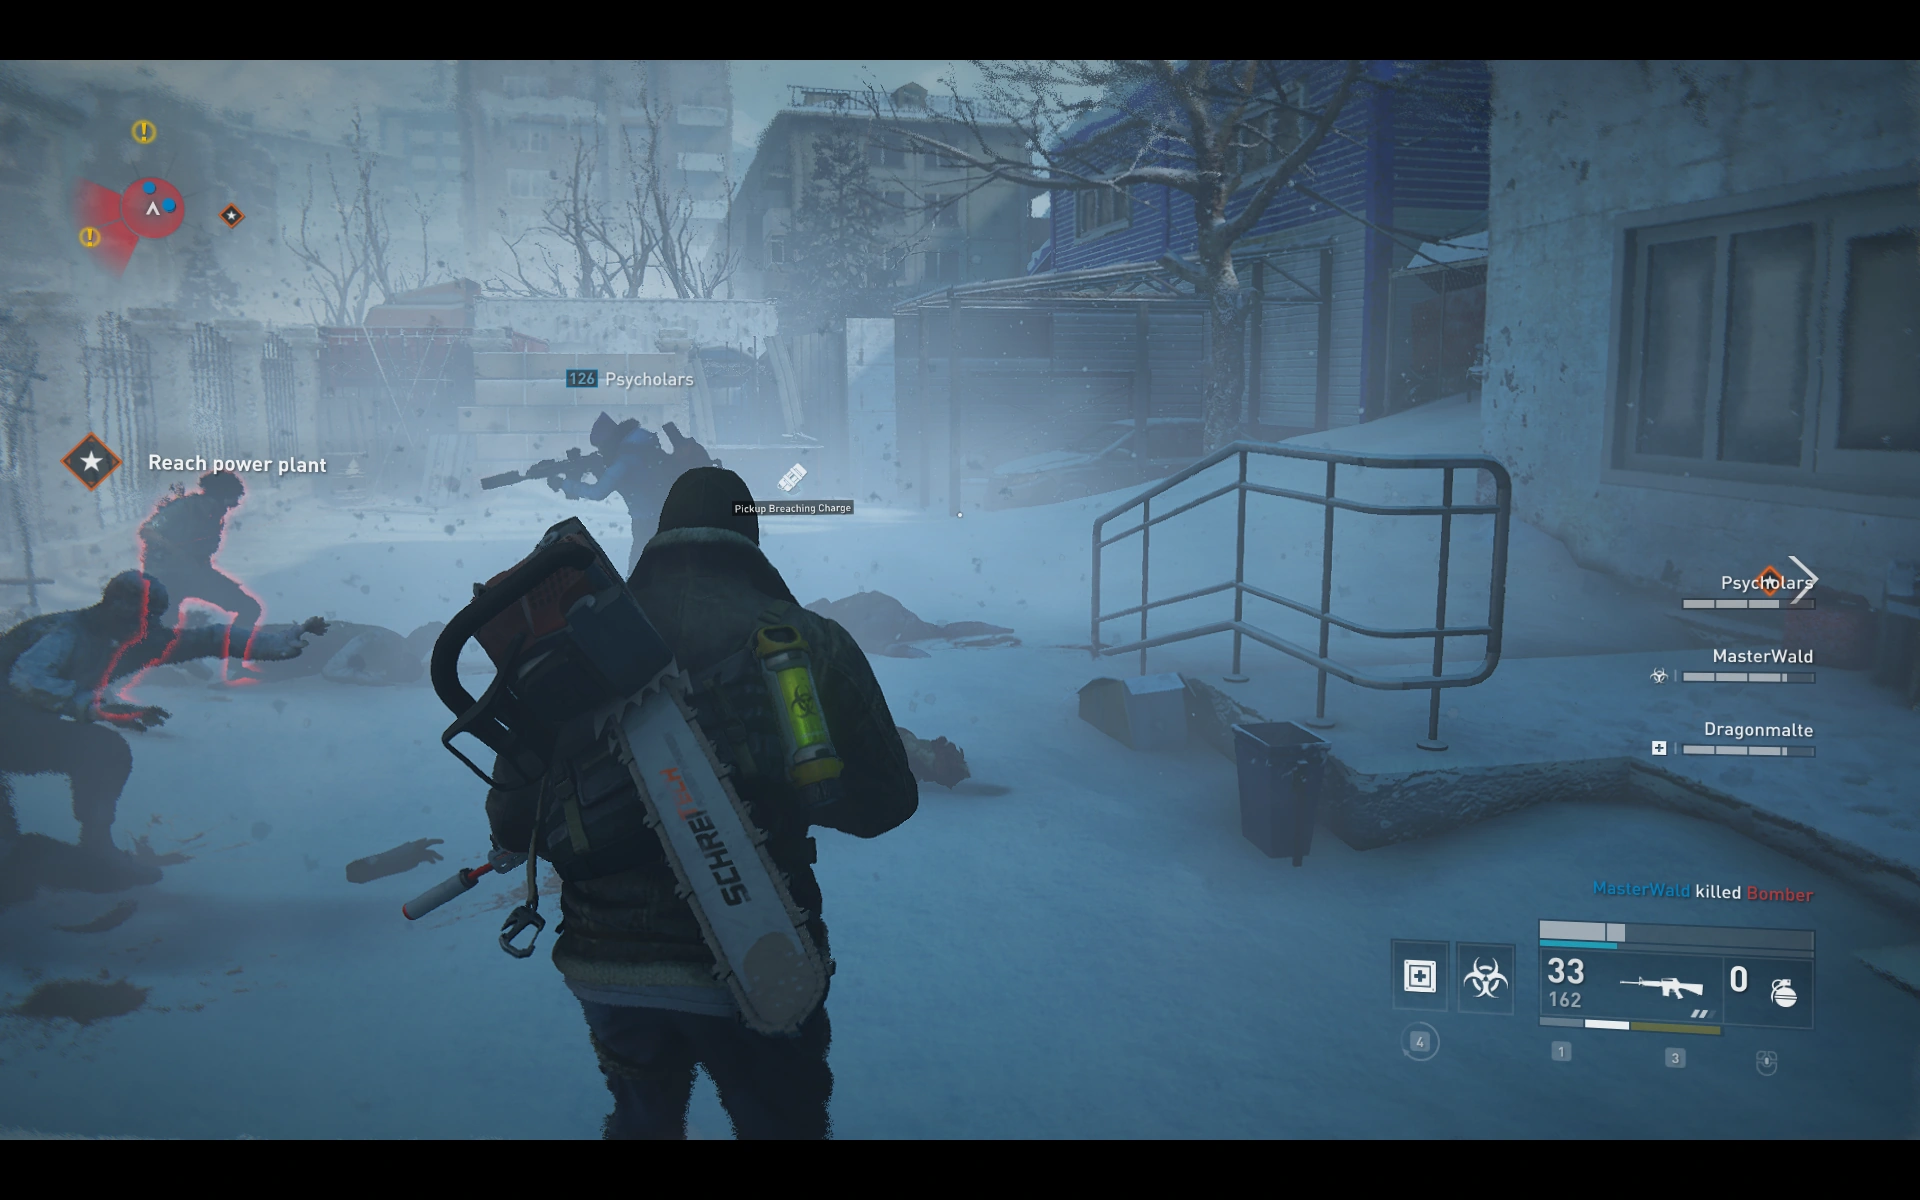
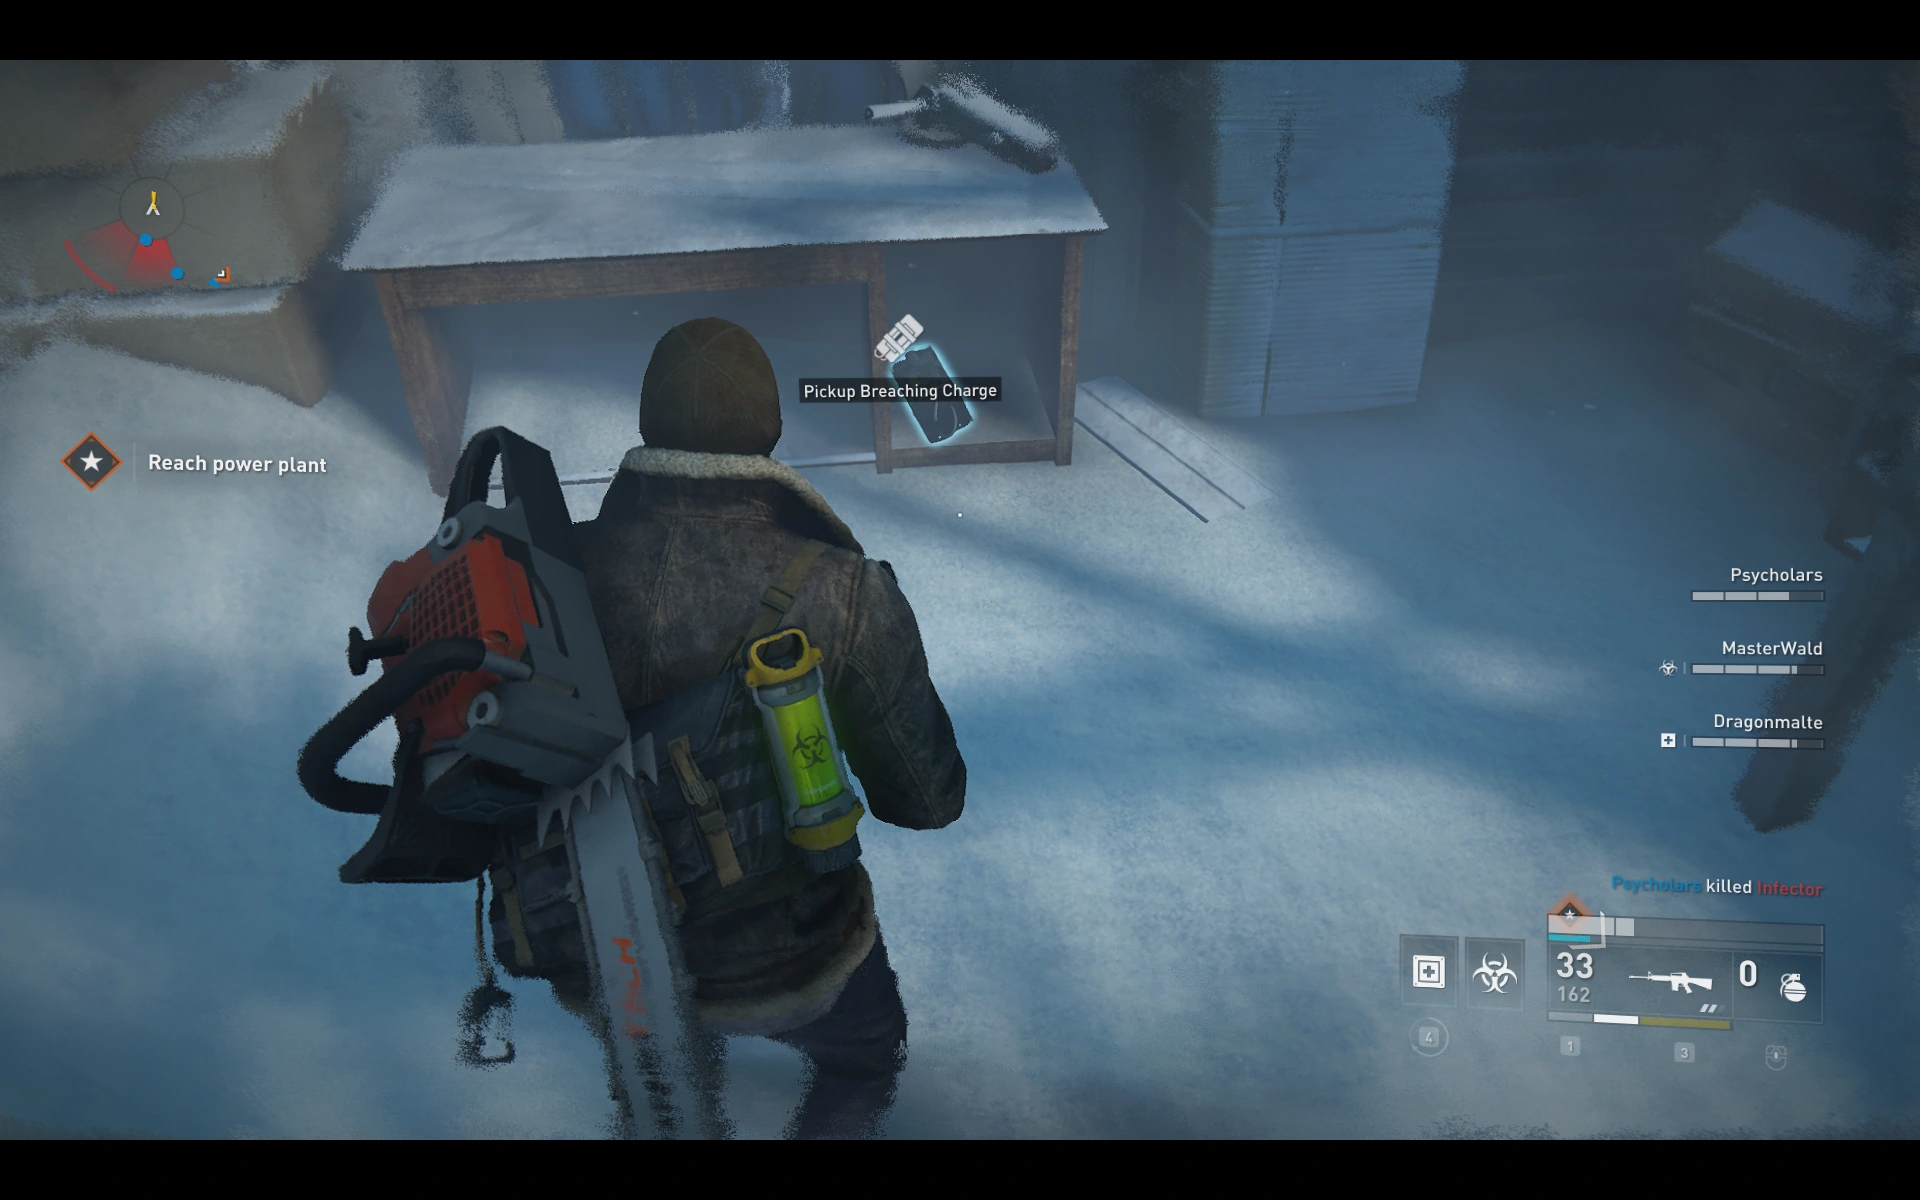
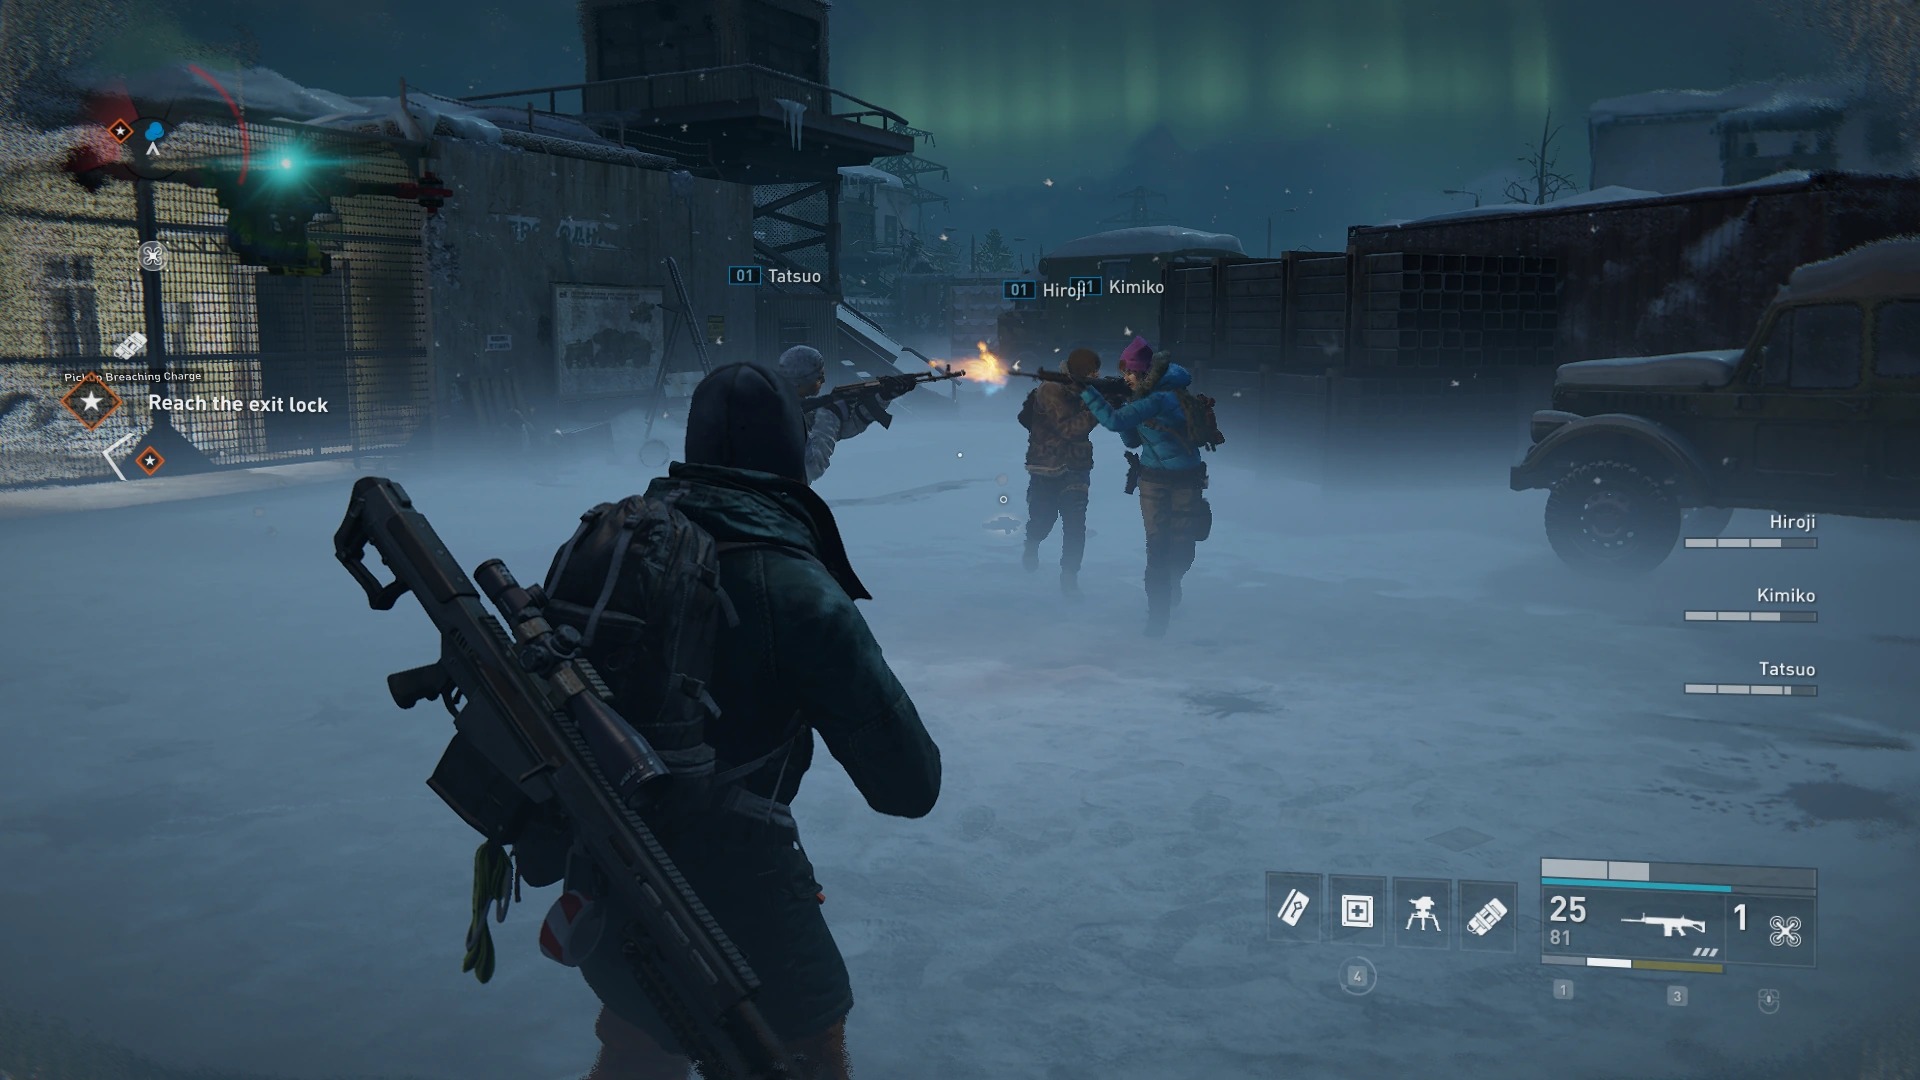
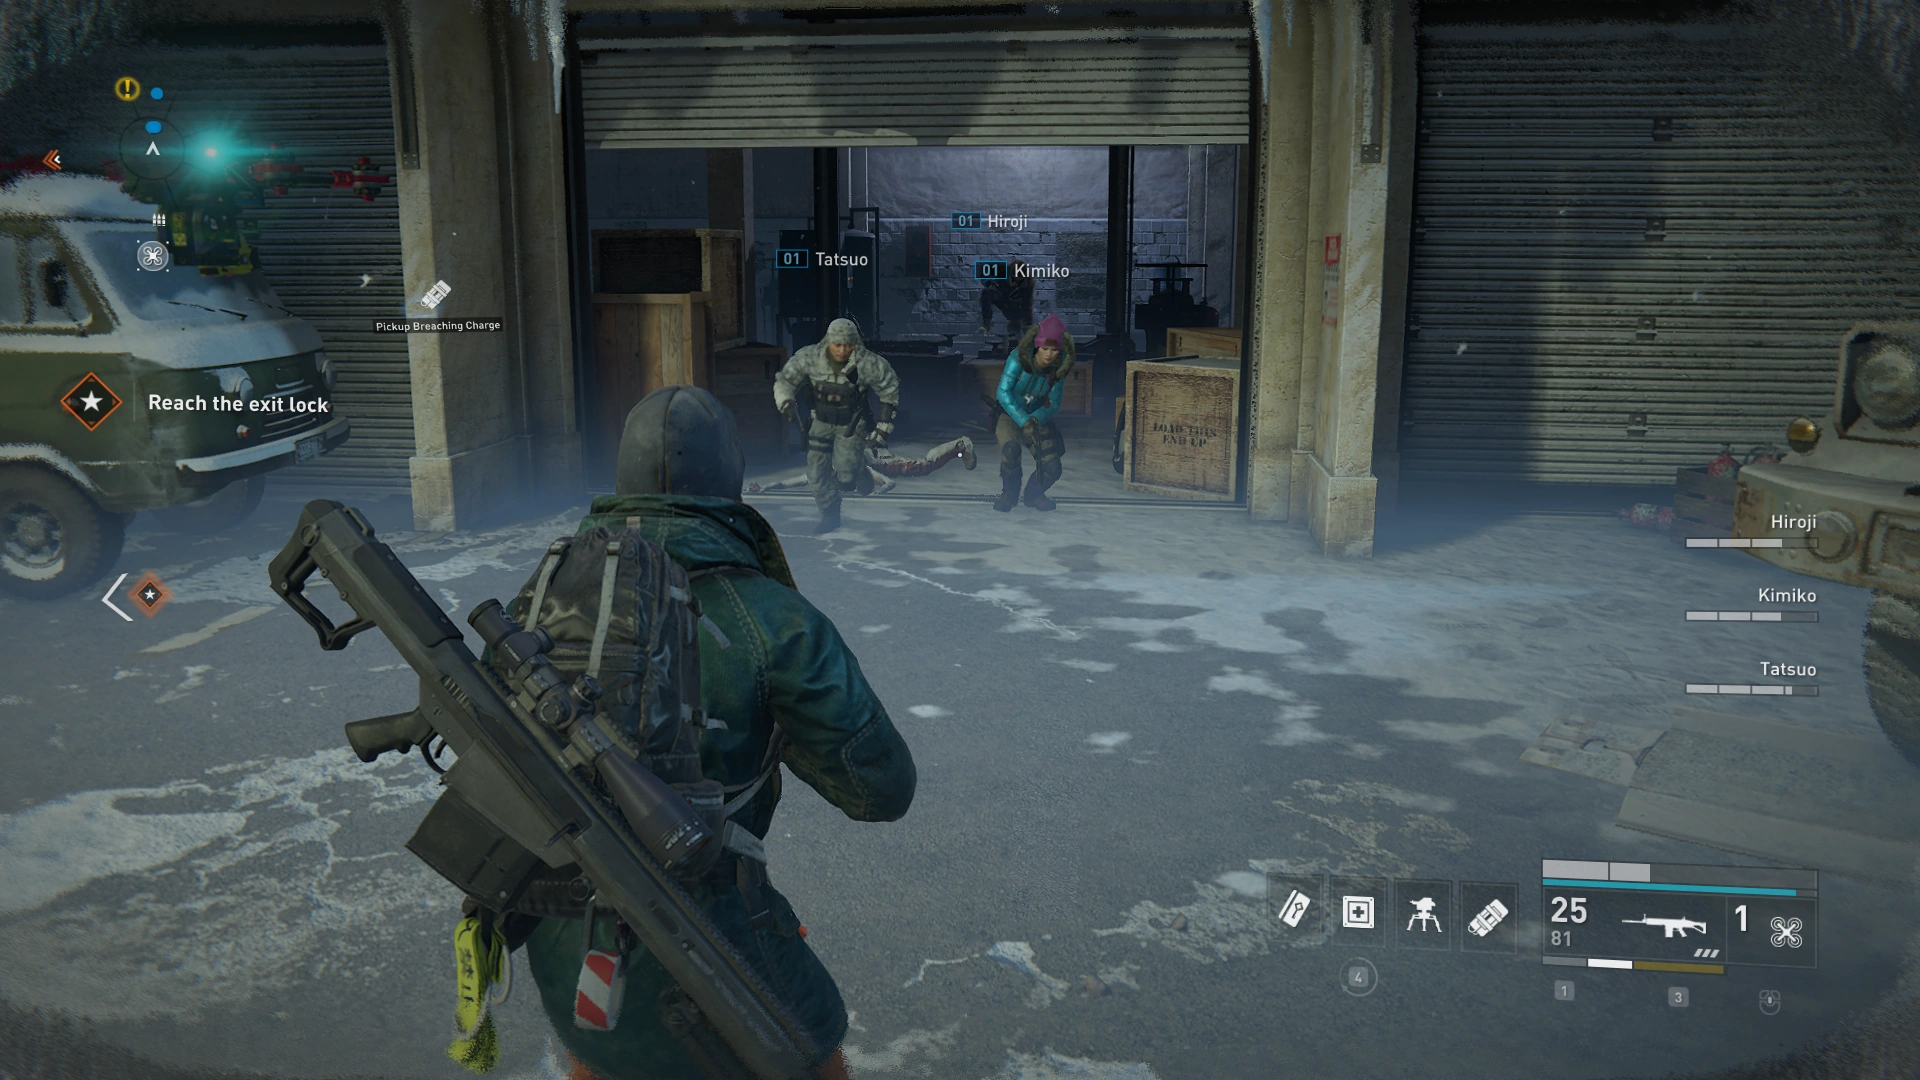
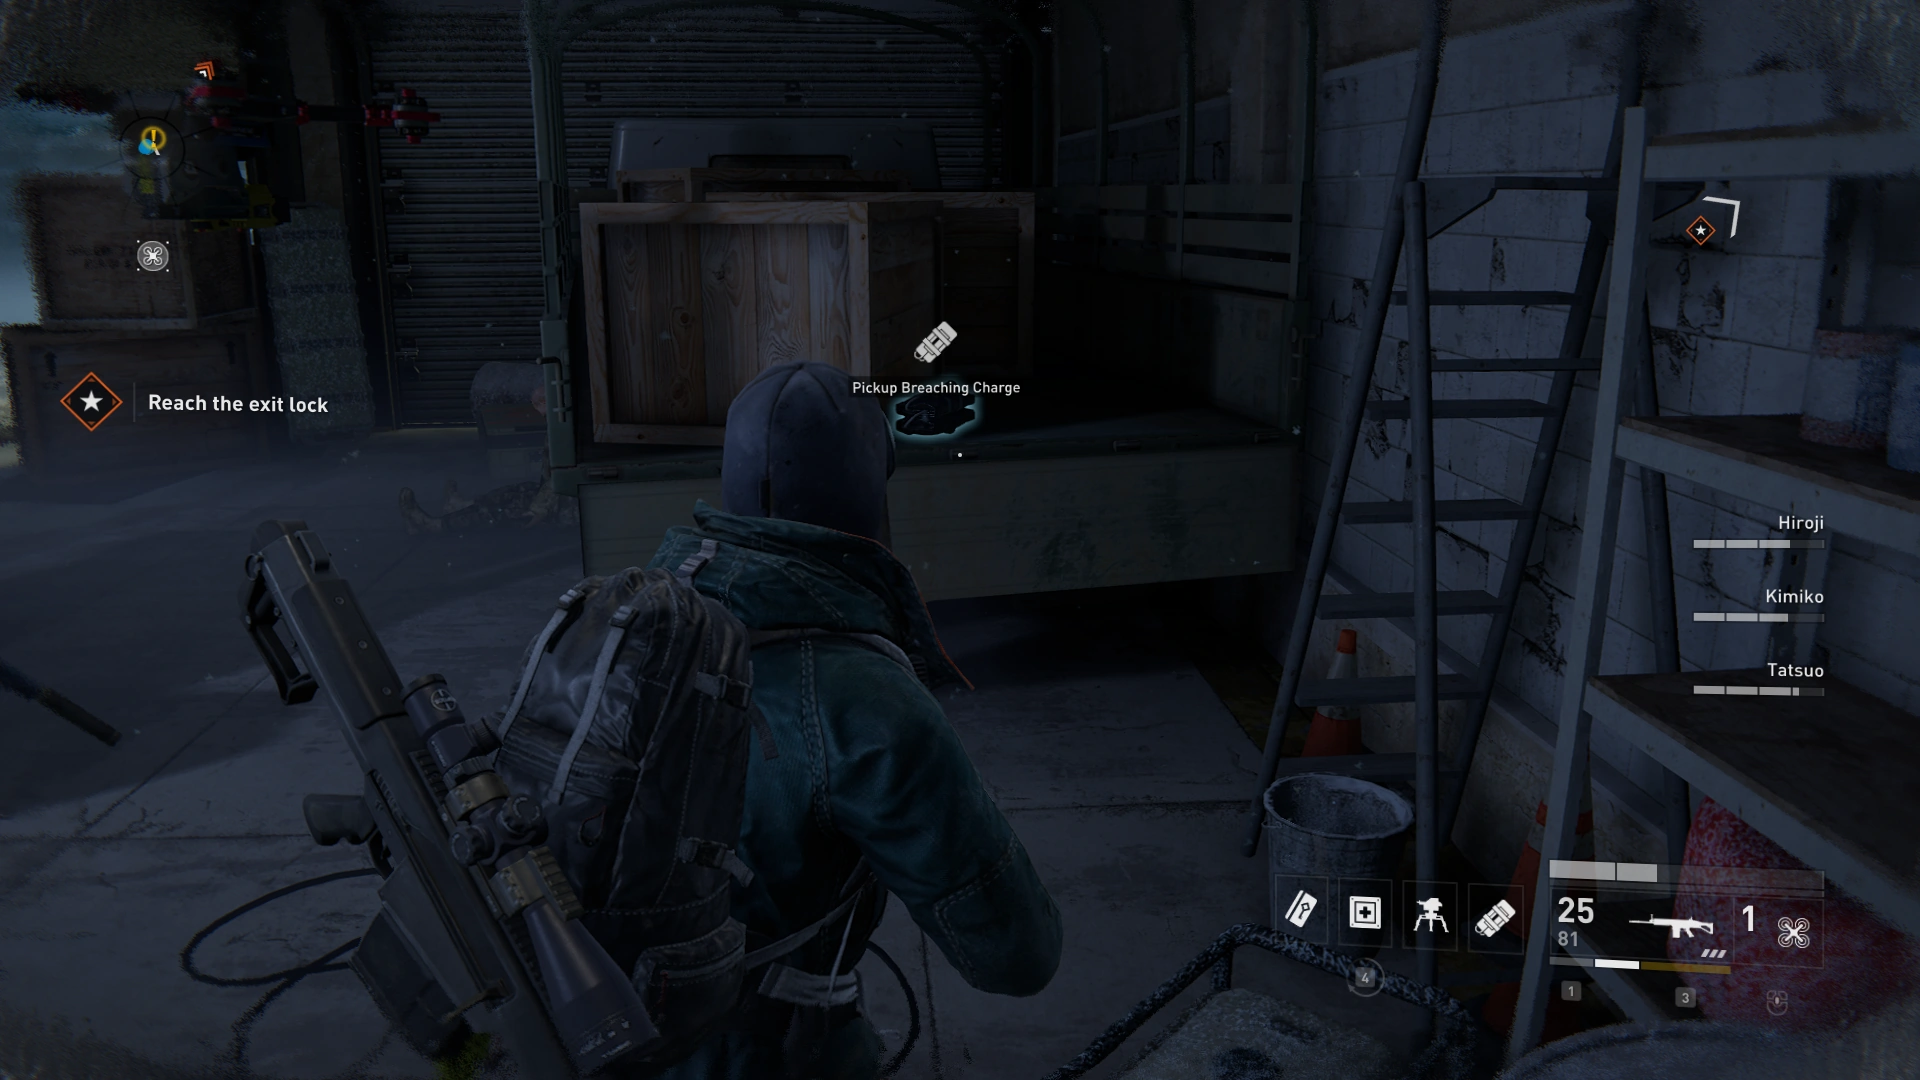
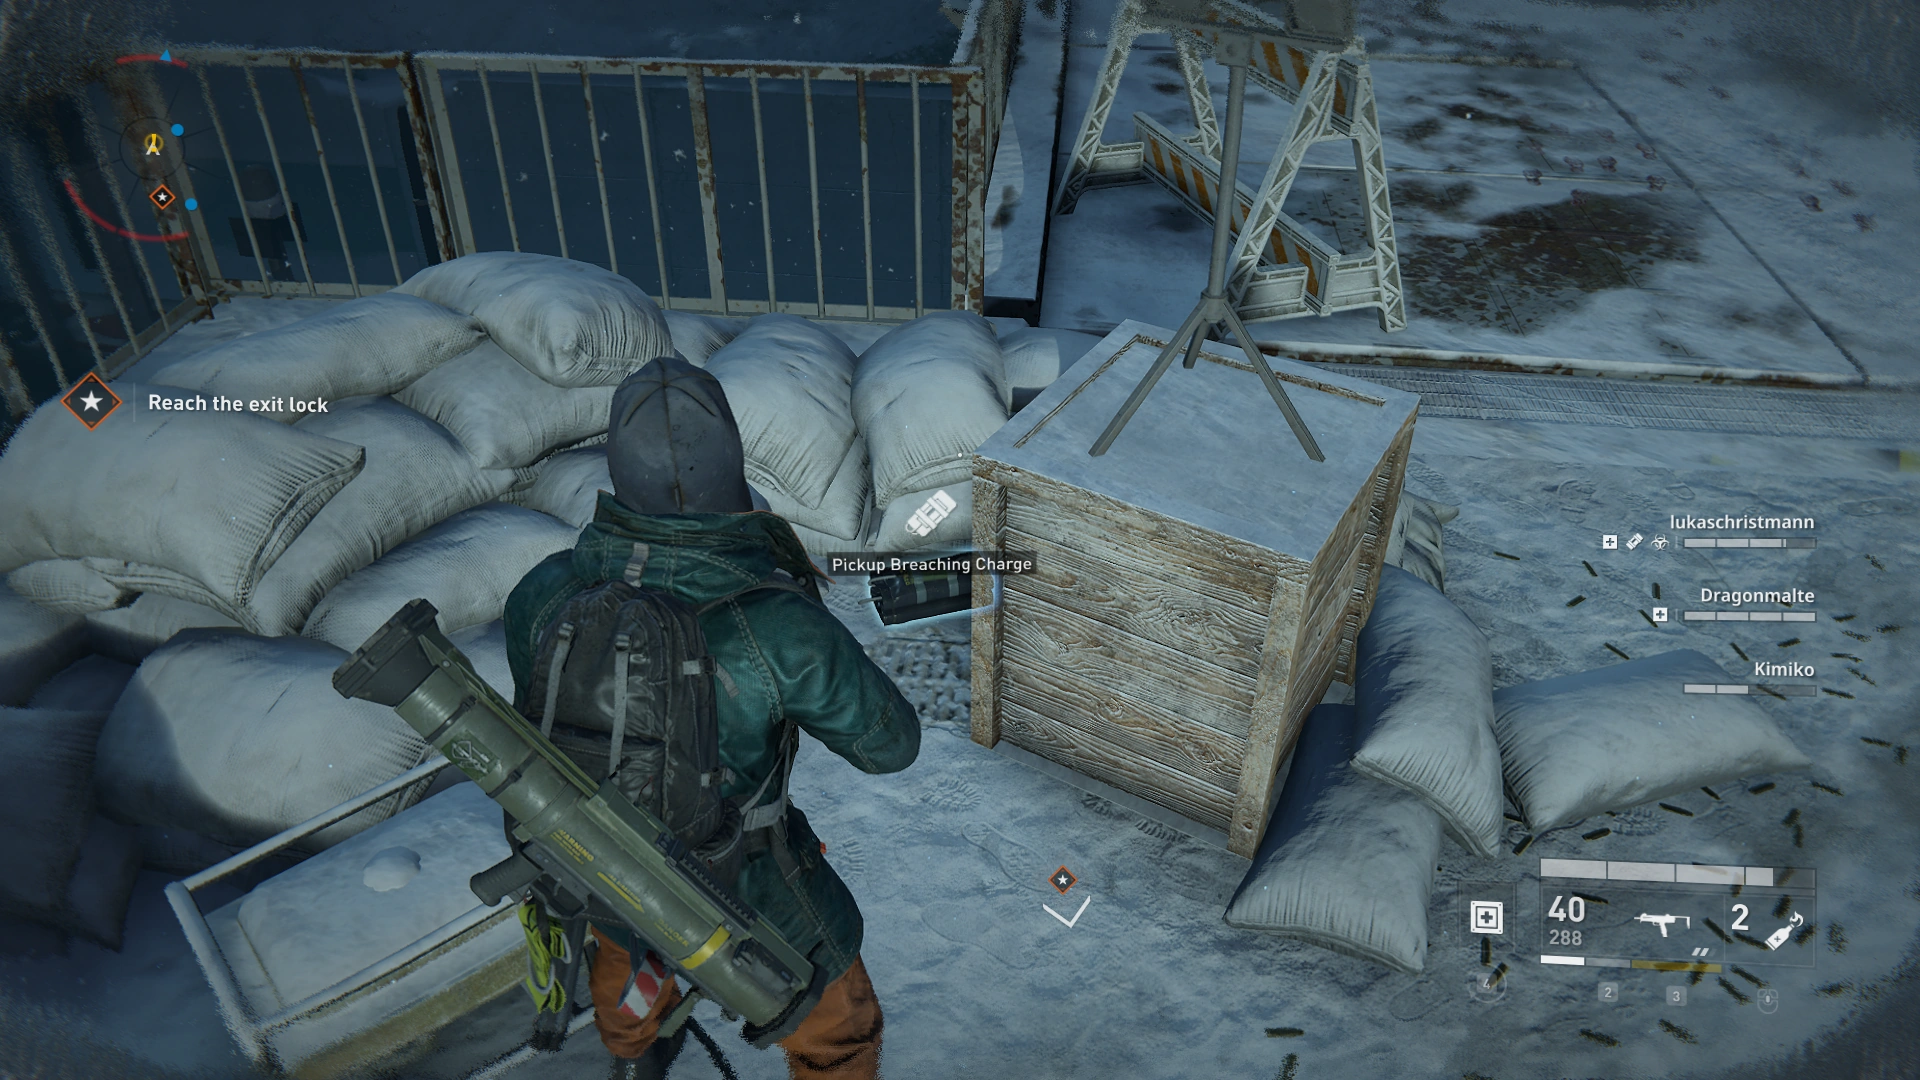
Breaching Charges can be found in specific locations throughout the chapter.
Depending on the chosen Difficulty, the less possible areas there are for finding a Breaching Charge. The Difficulty Icon besides each Location indicates the highest Difficulty on which that particular Charge has been found.
Breaching Charge Location List[]
New York[]
Chapter 1: Descent[]
Chapter 1 of New York is the only chapter in the entire game without Breaching Charges. Additionally, there are no areas for a Breaching Charge to be used.
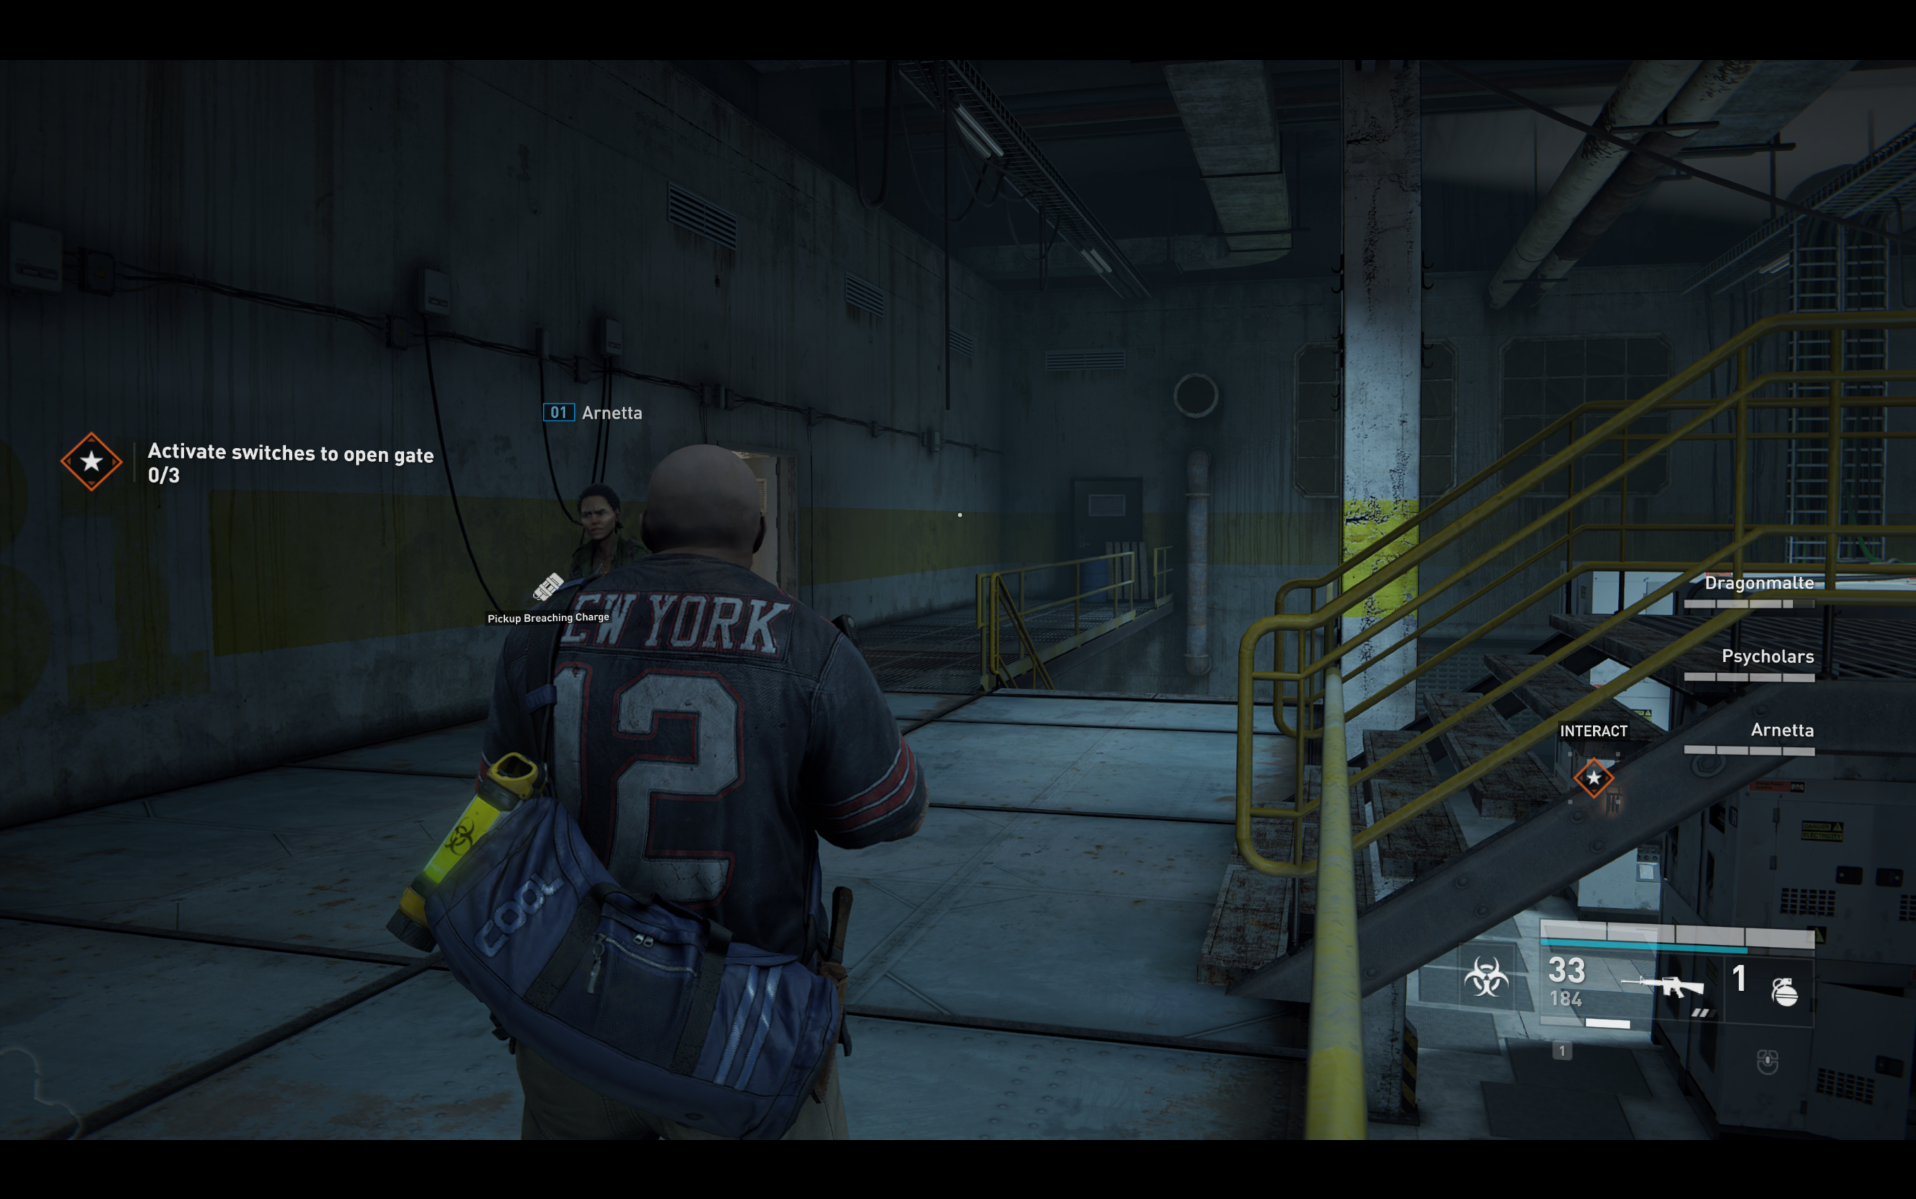
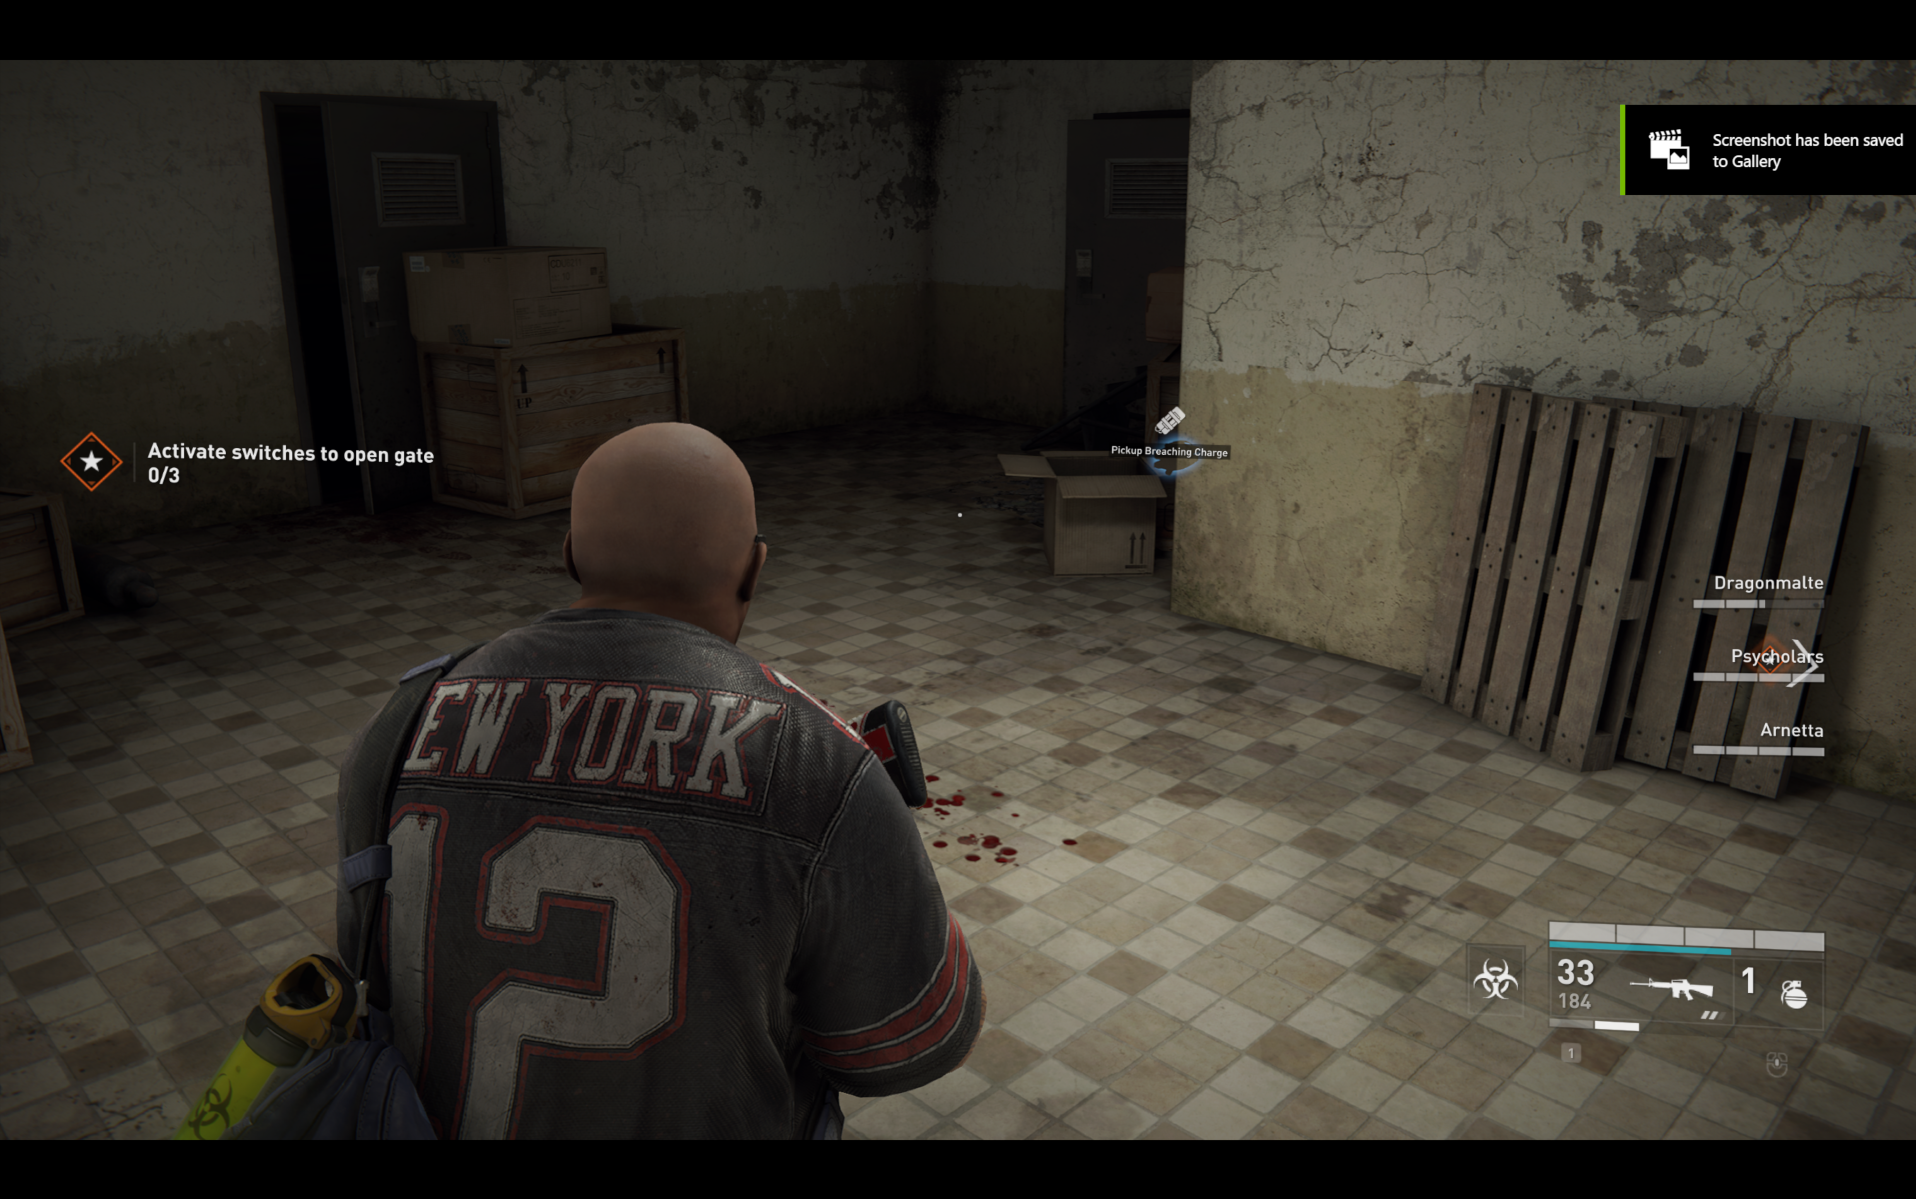
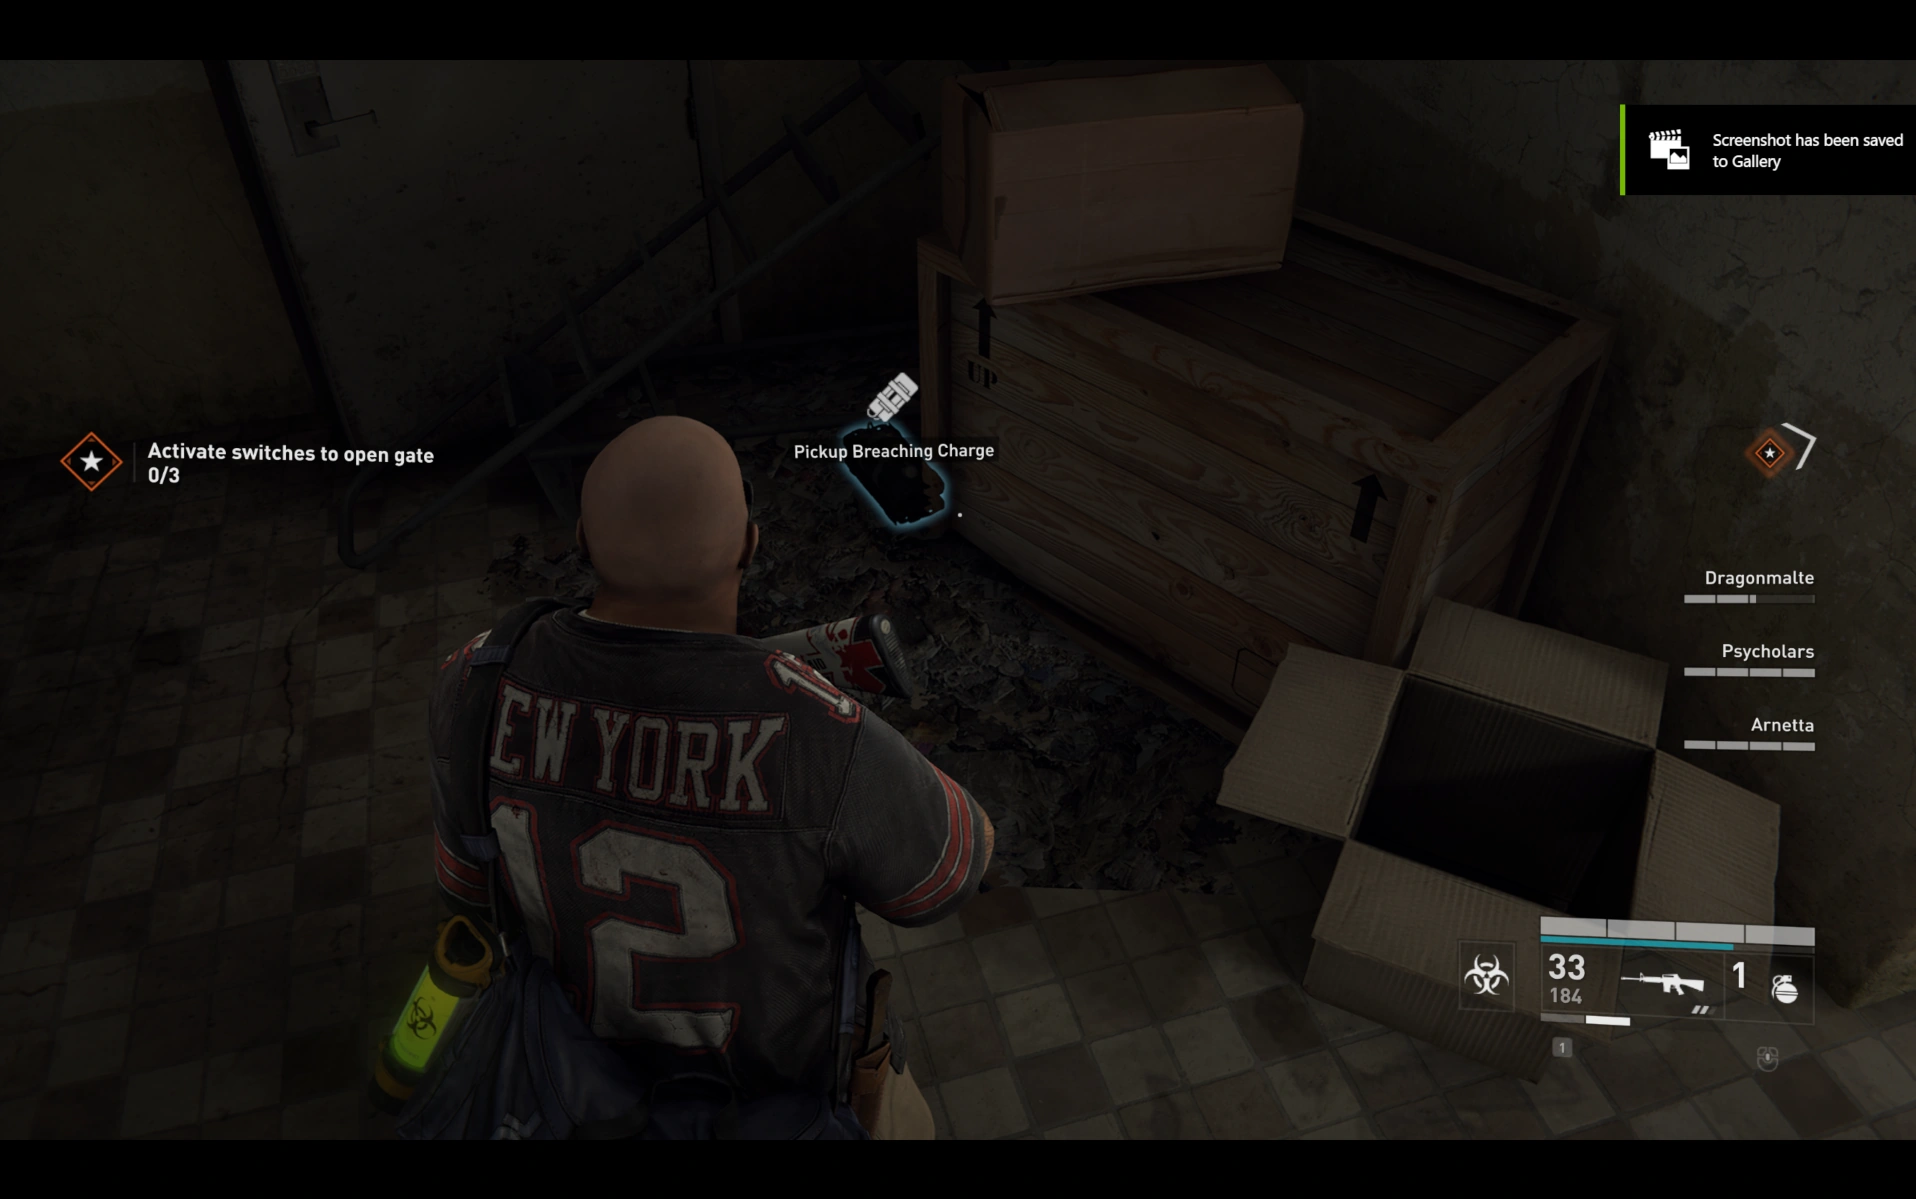
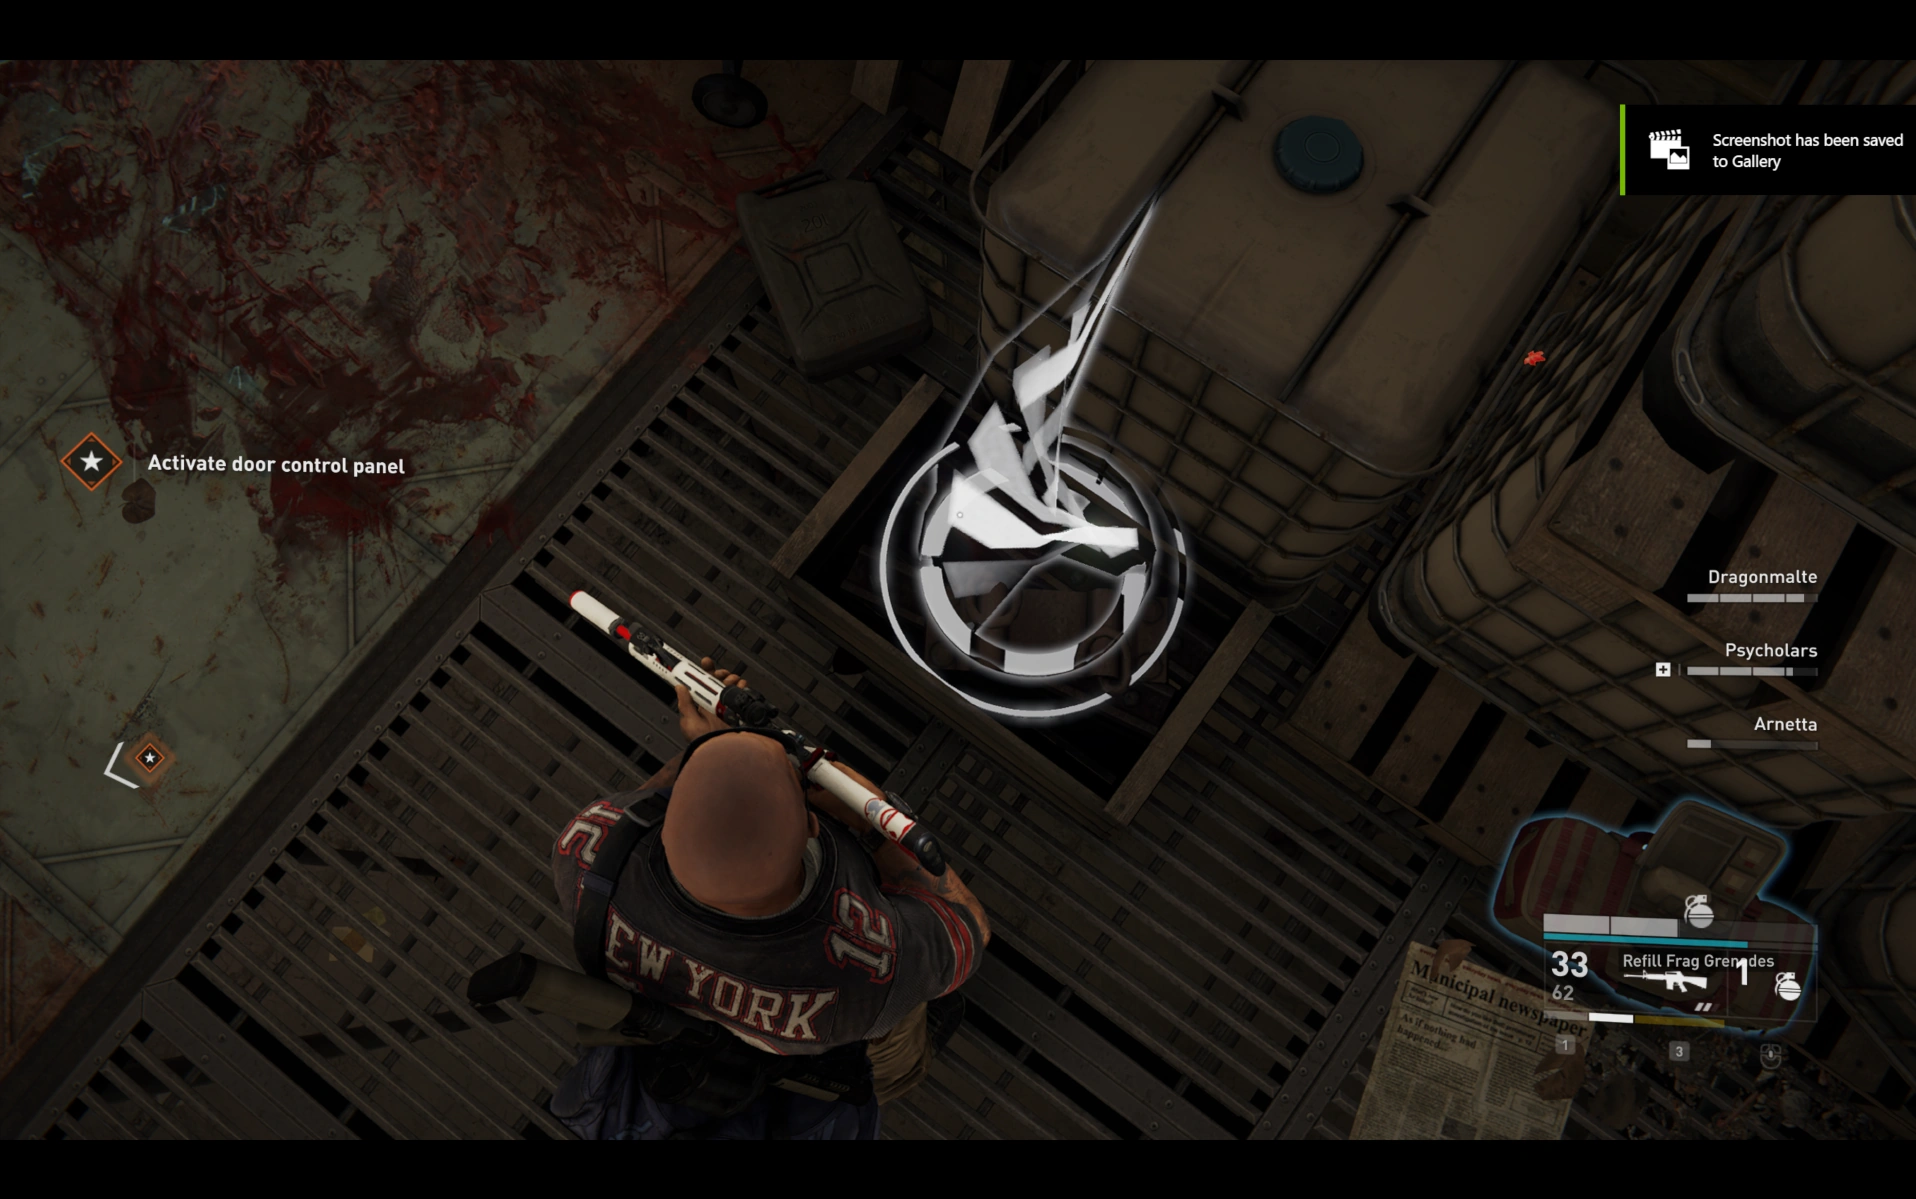
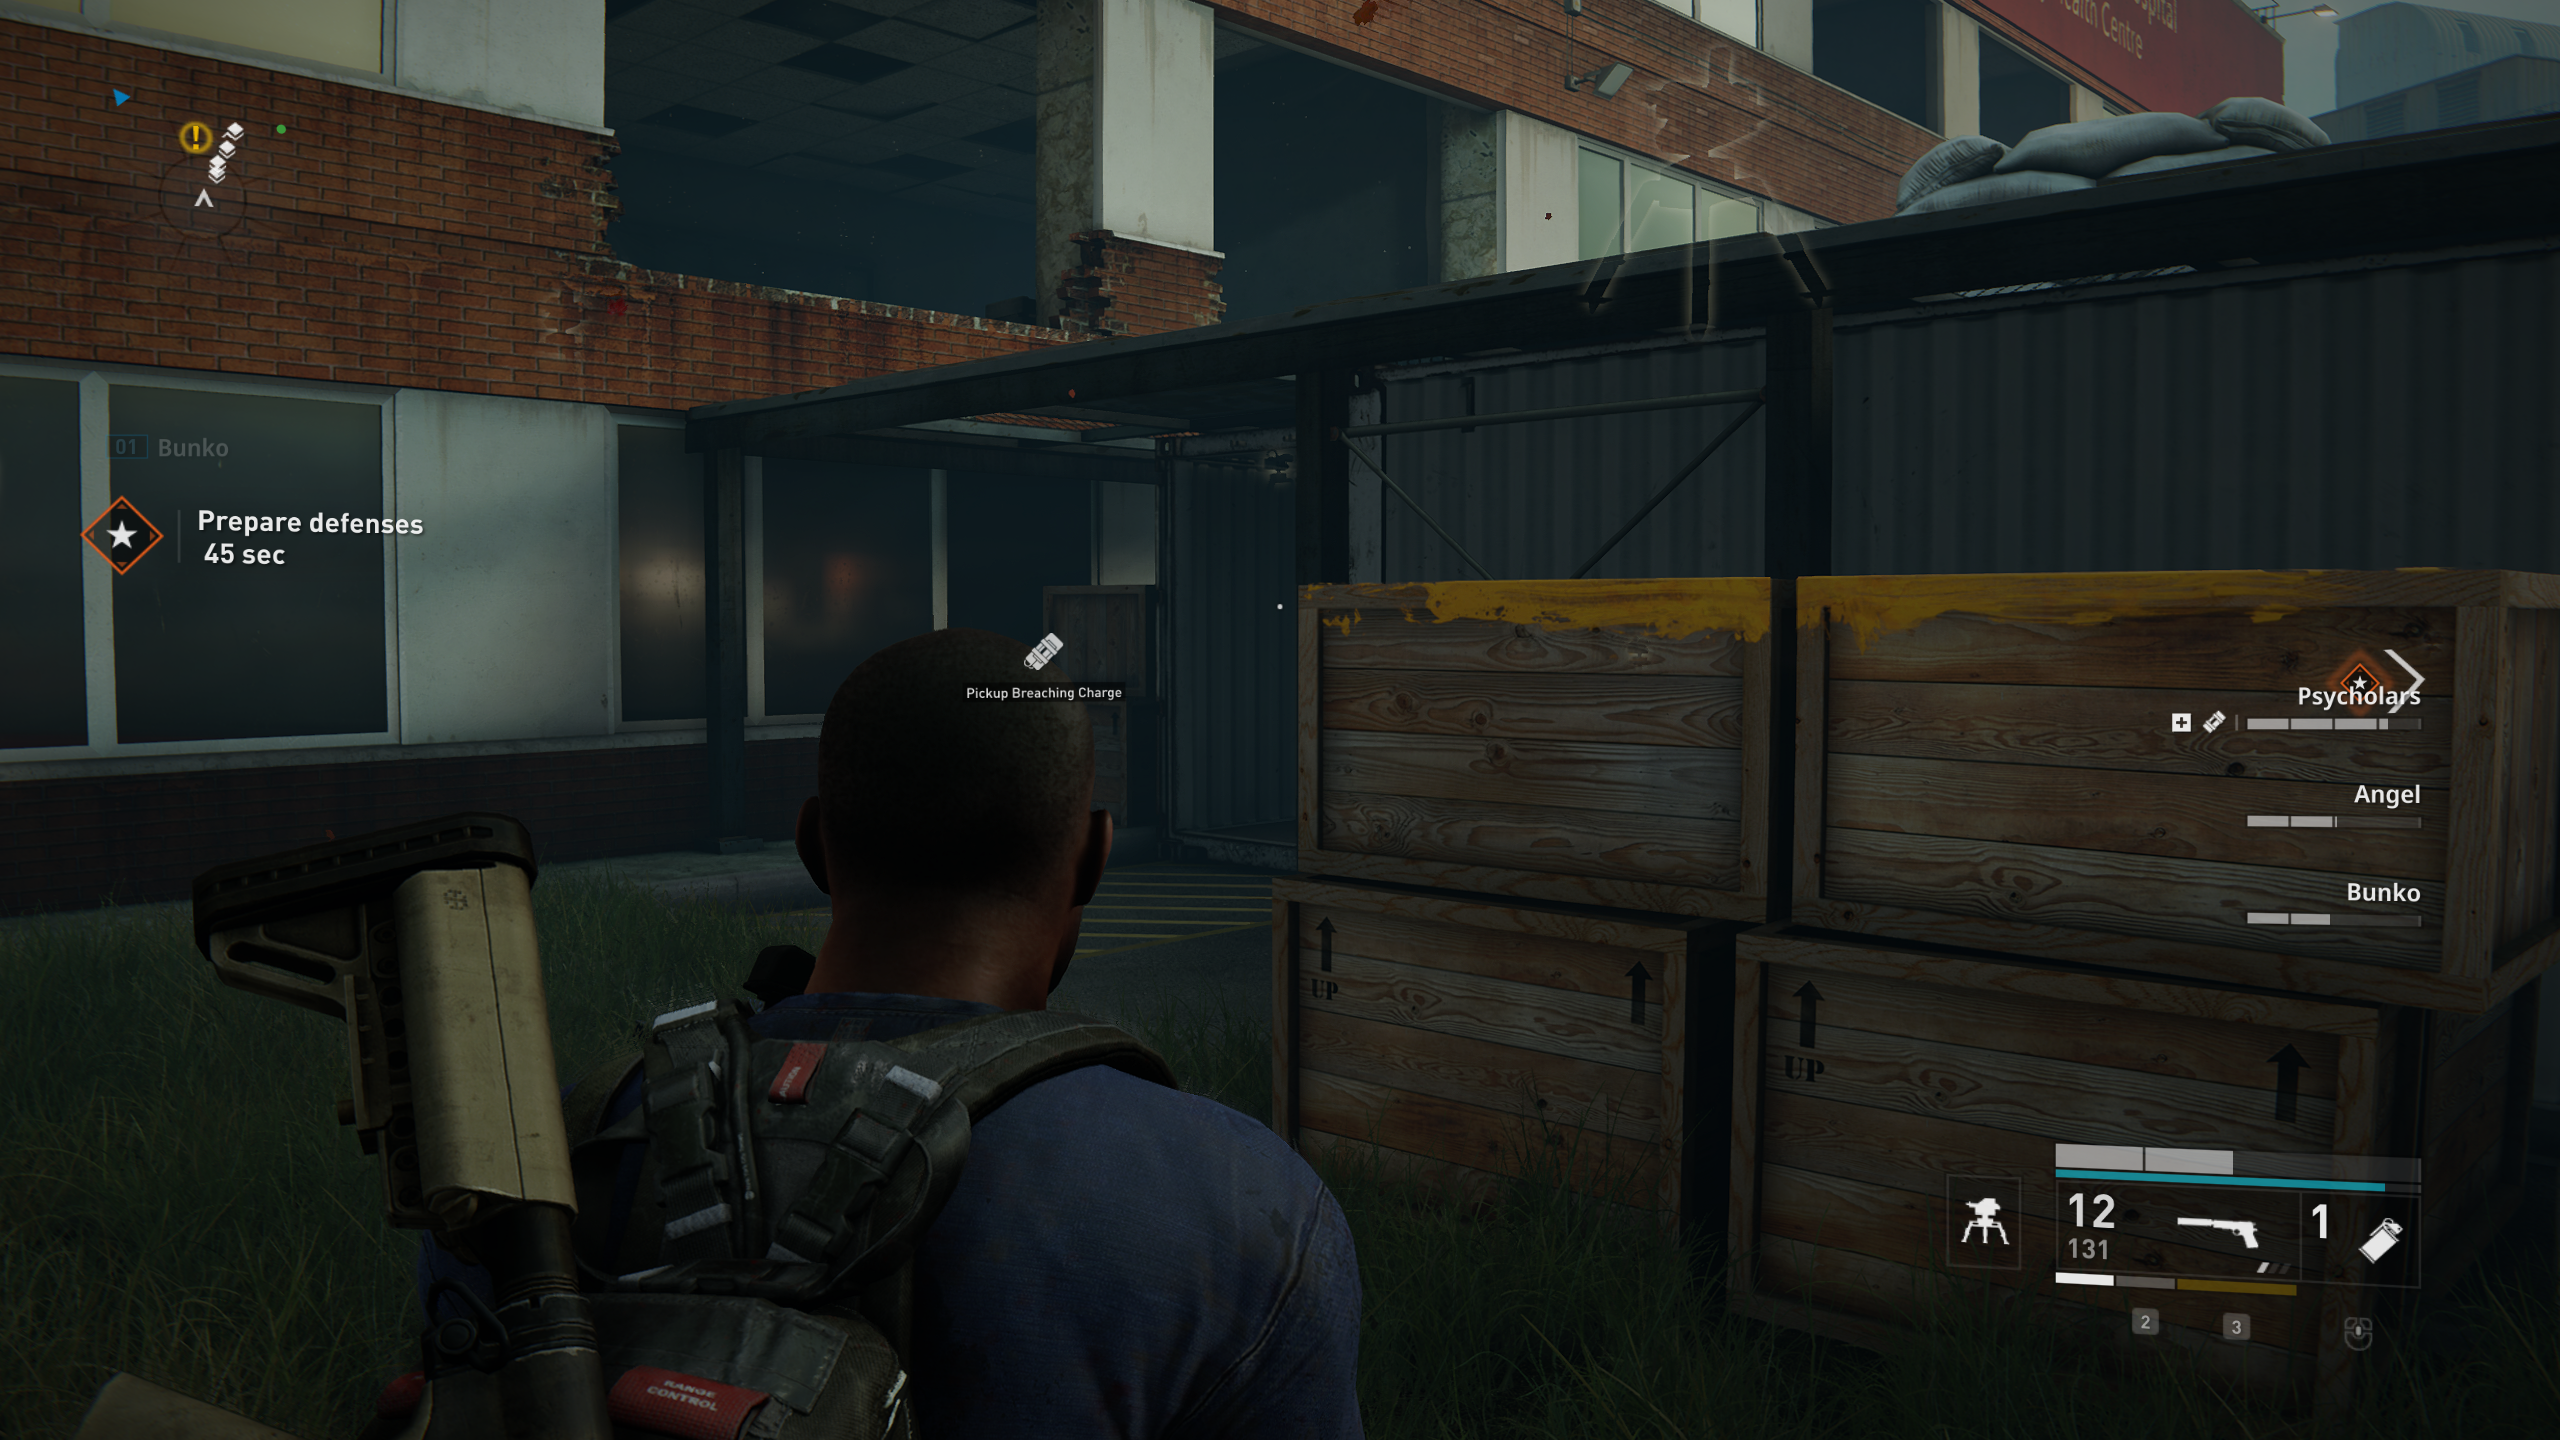
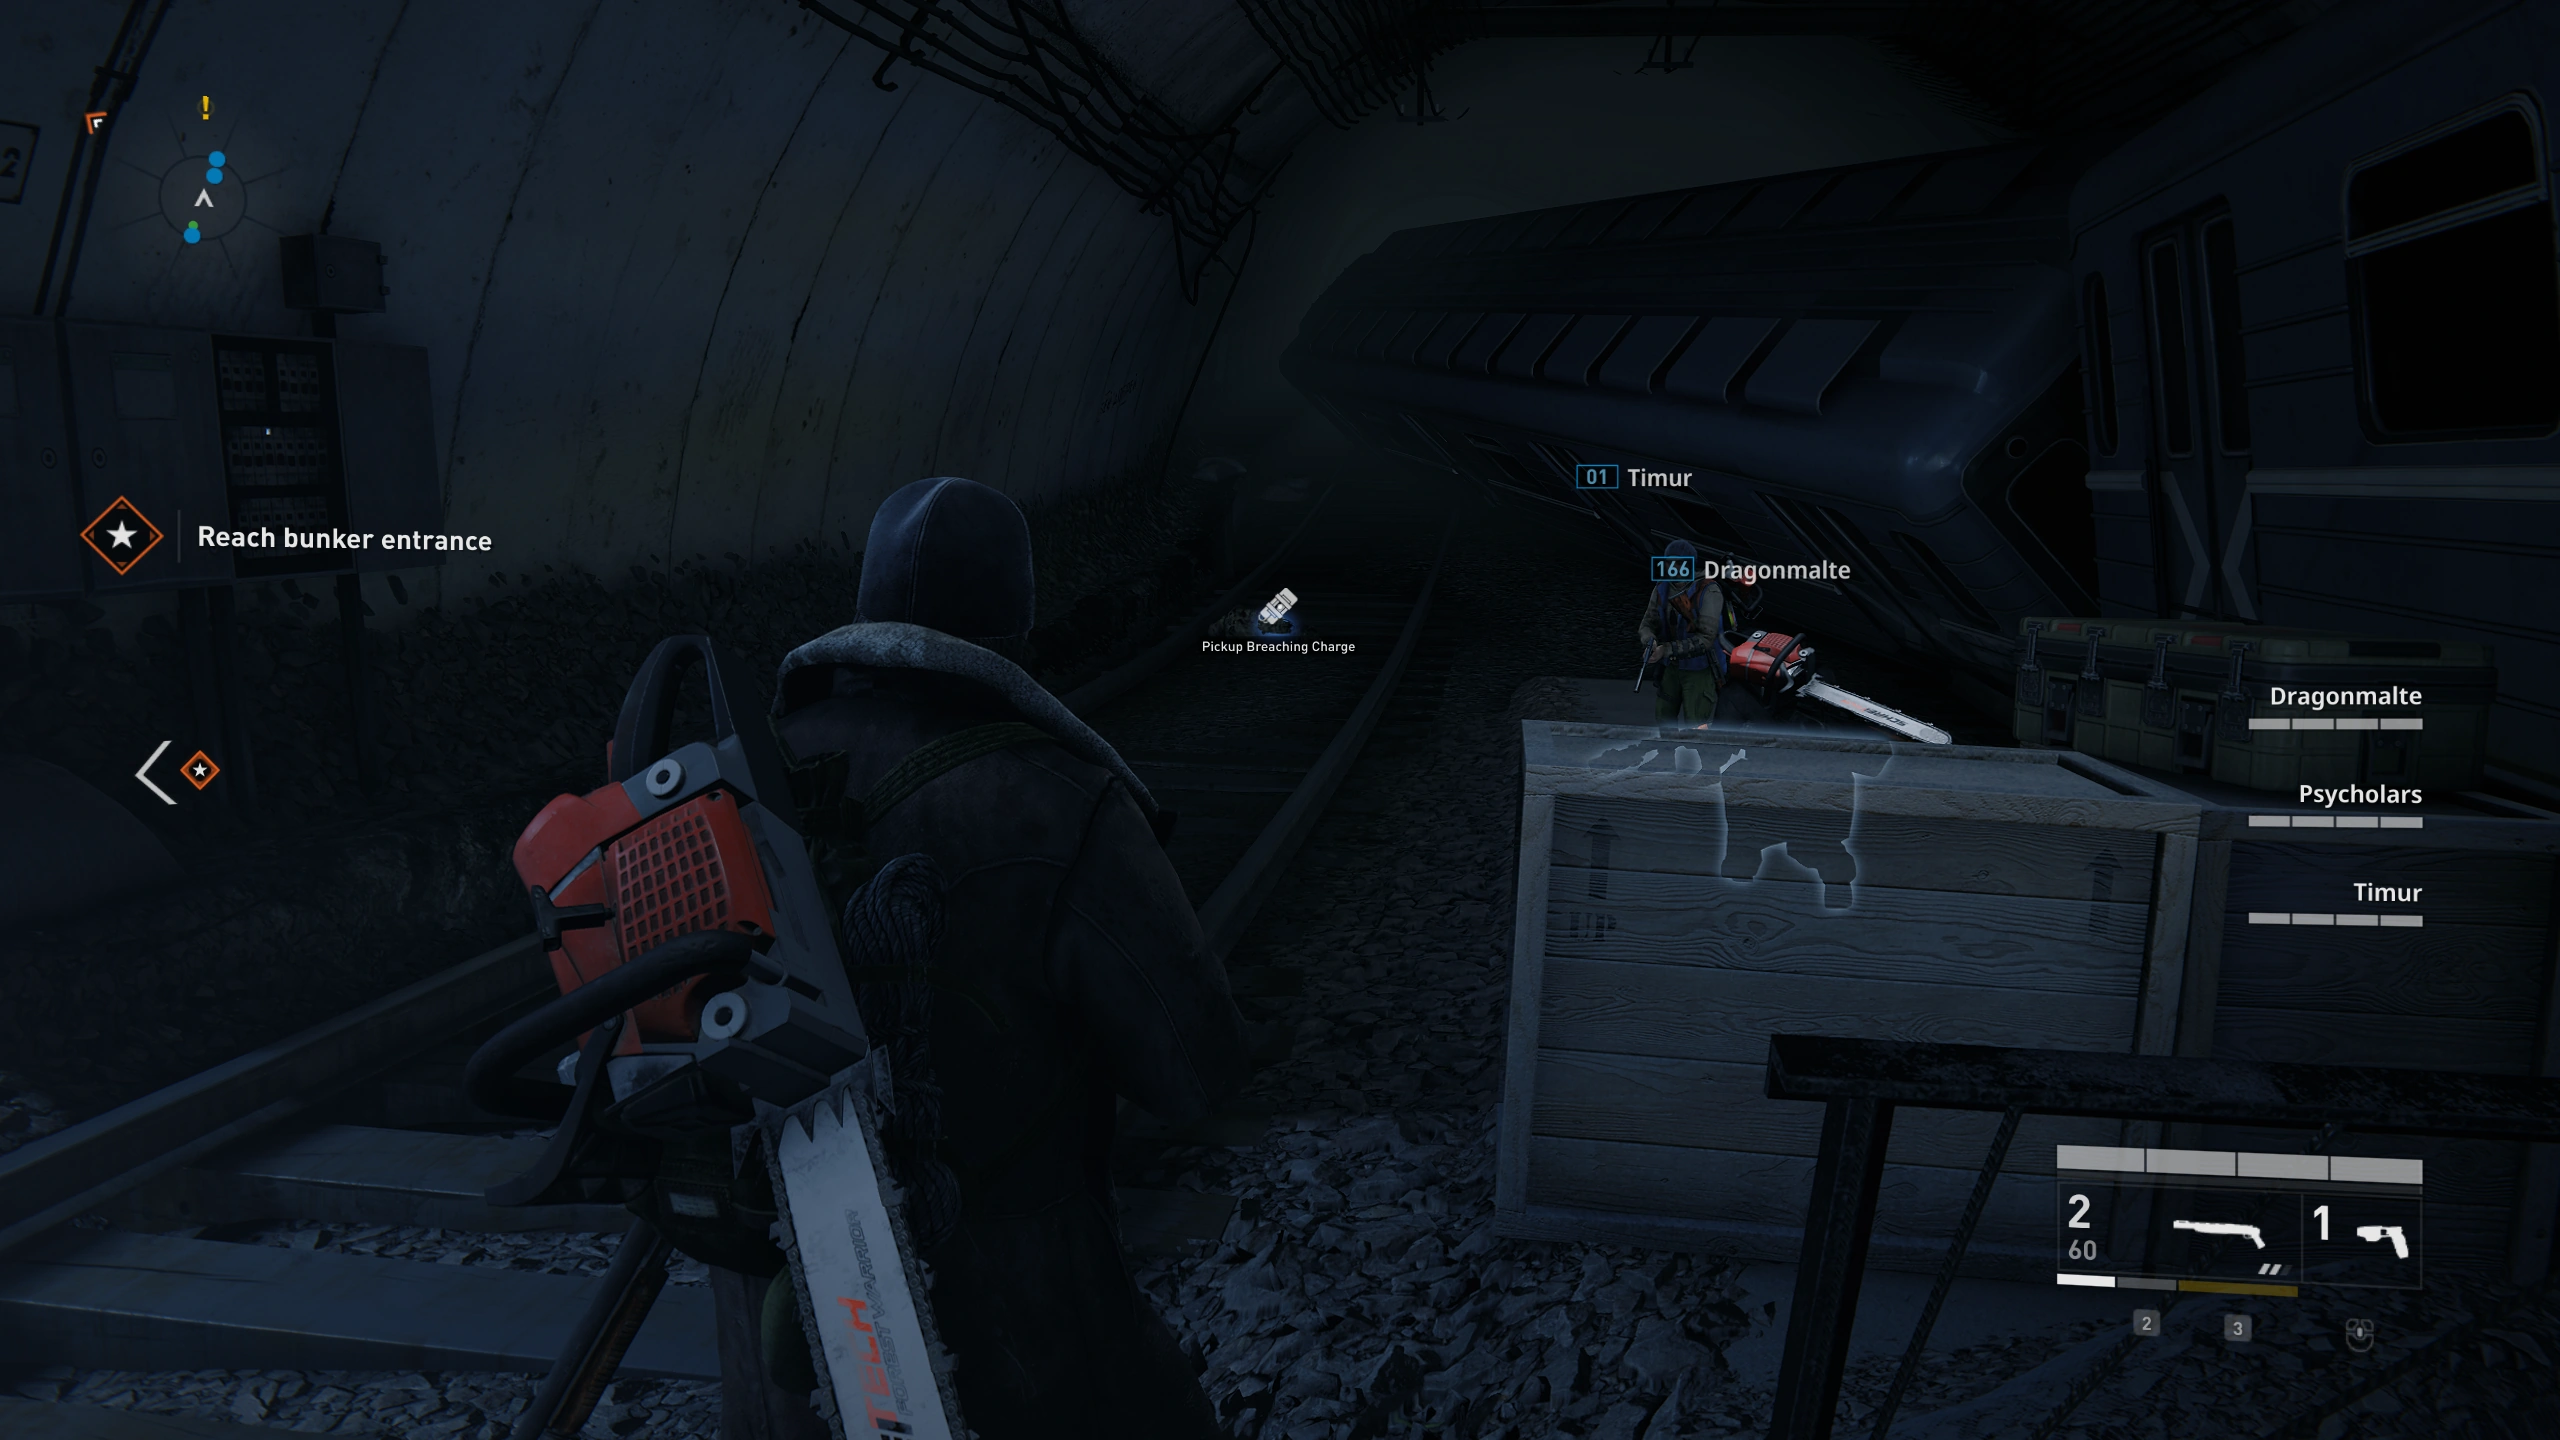
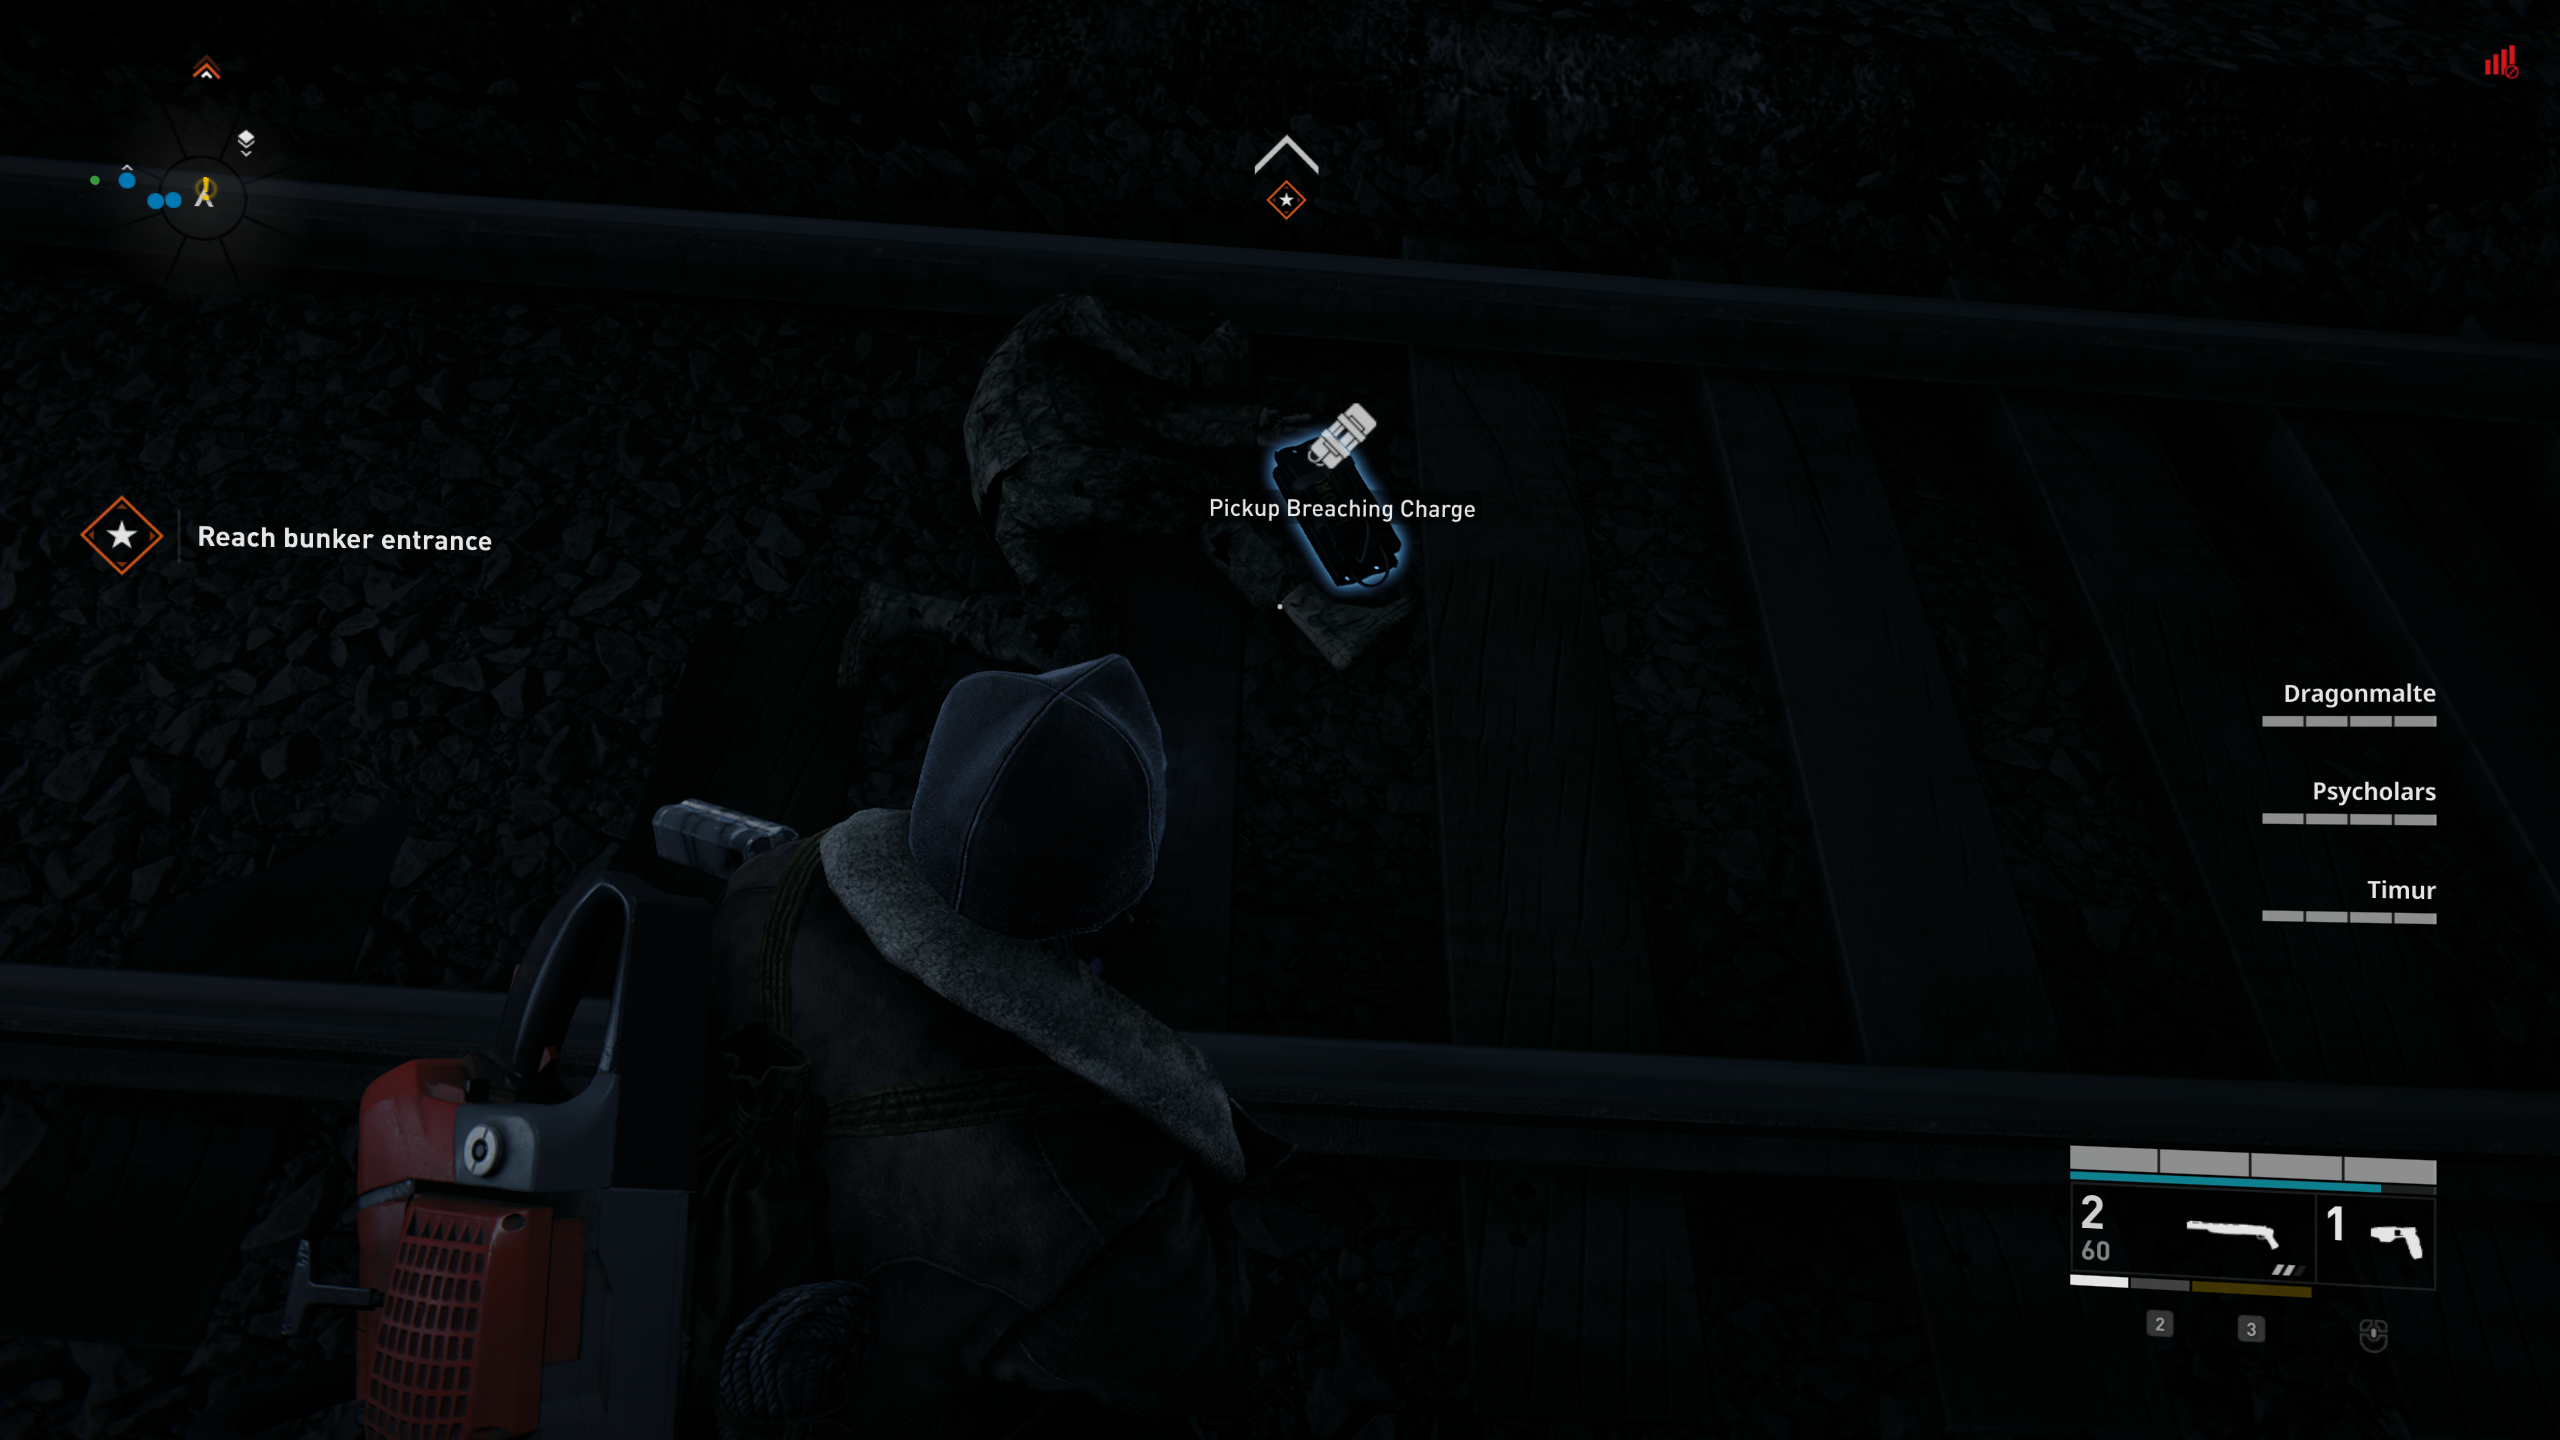
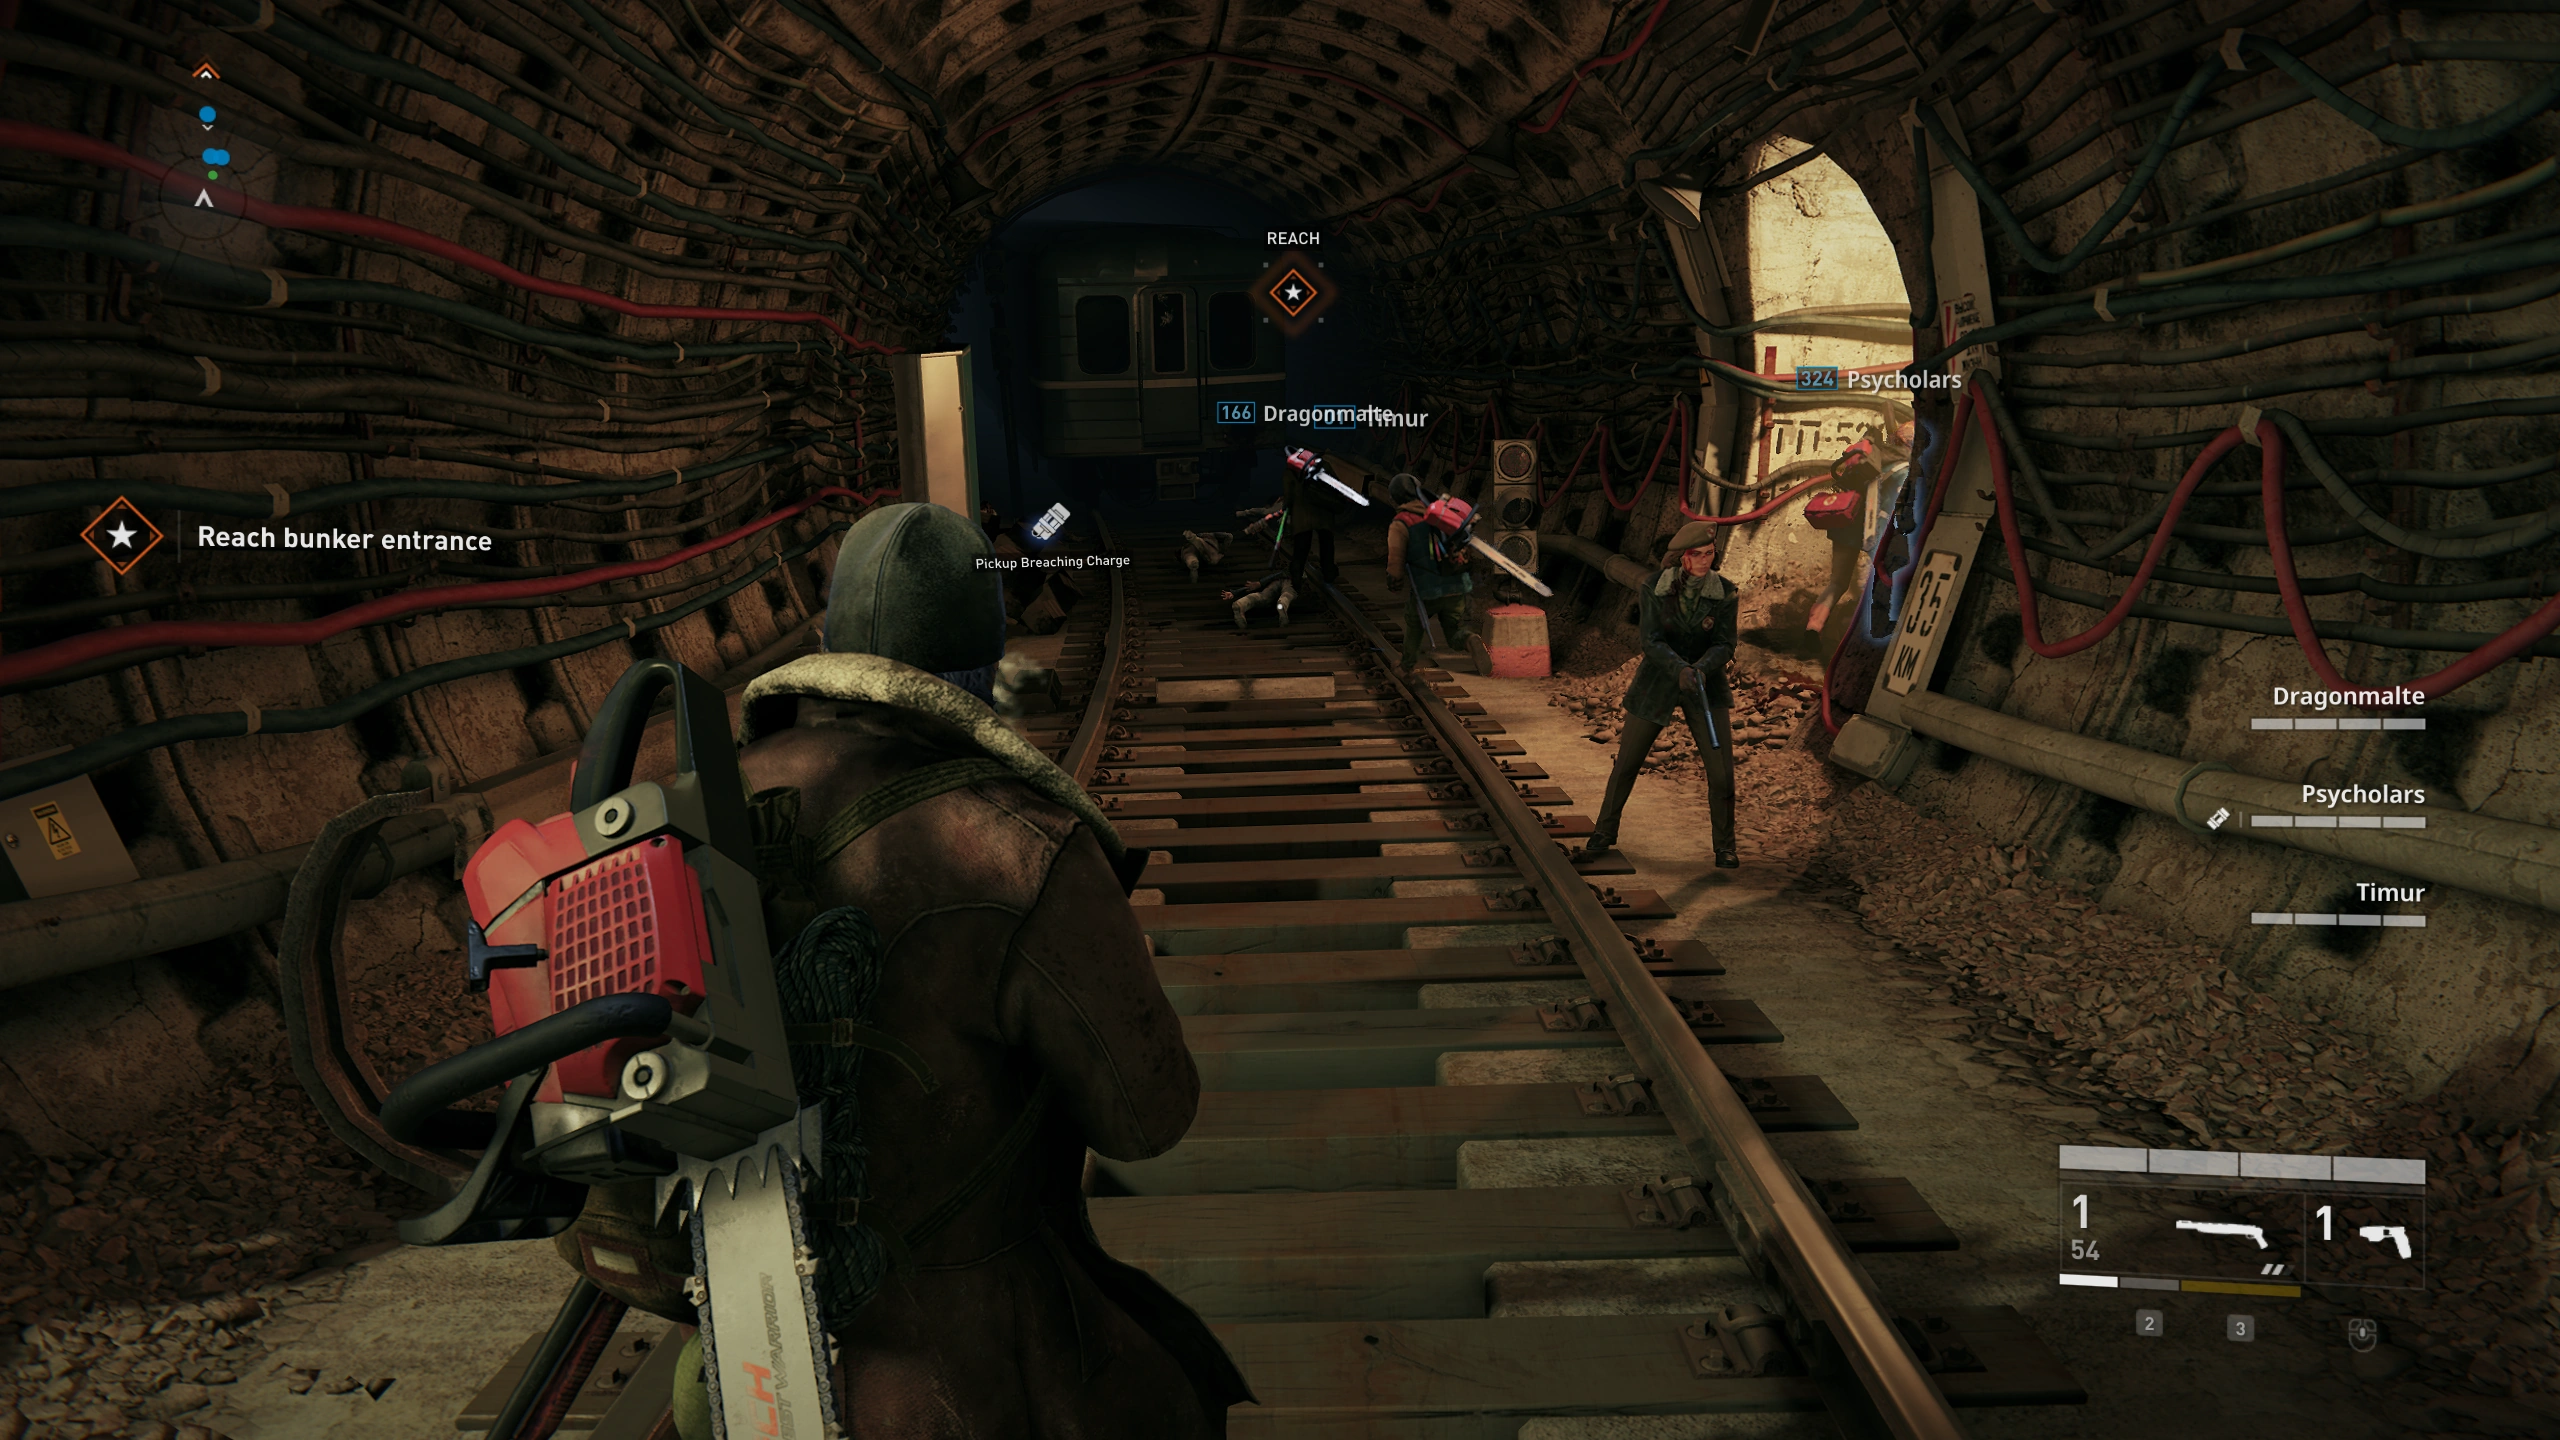
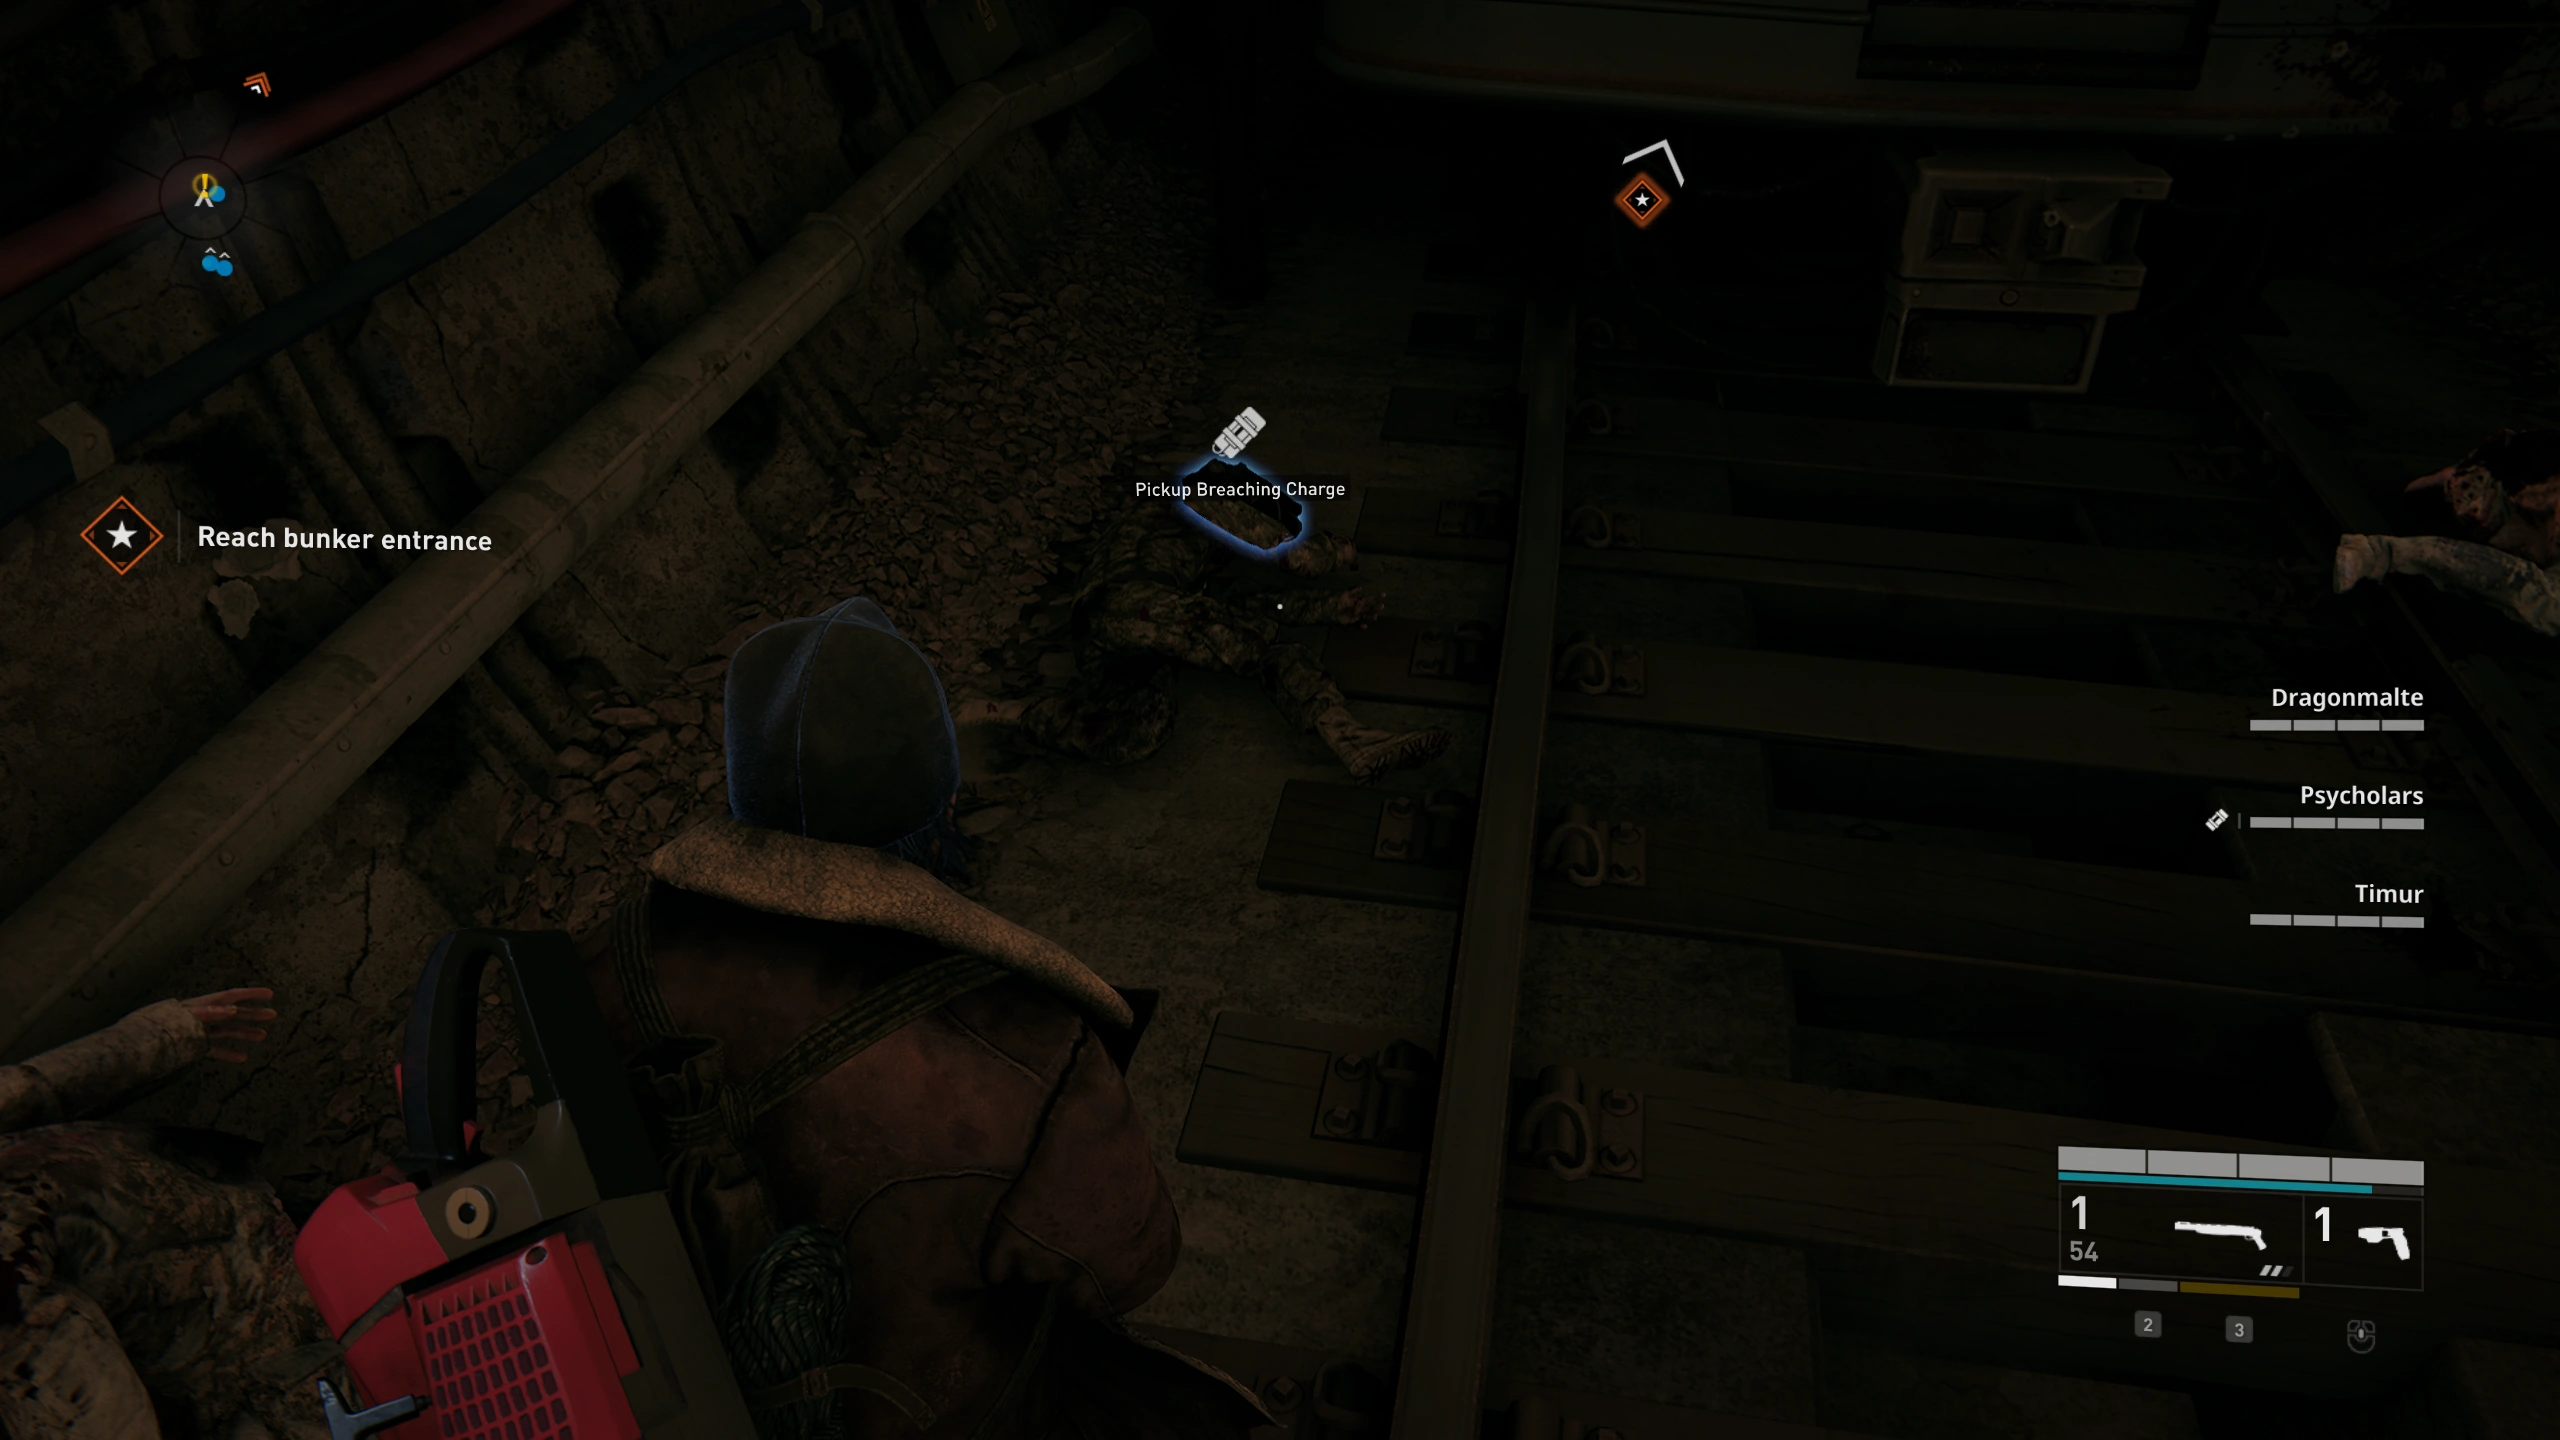
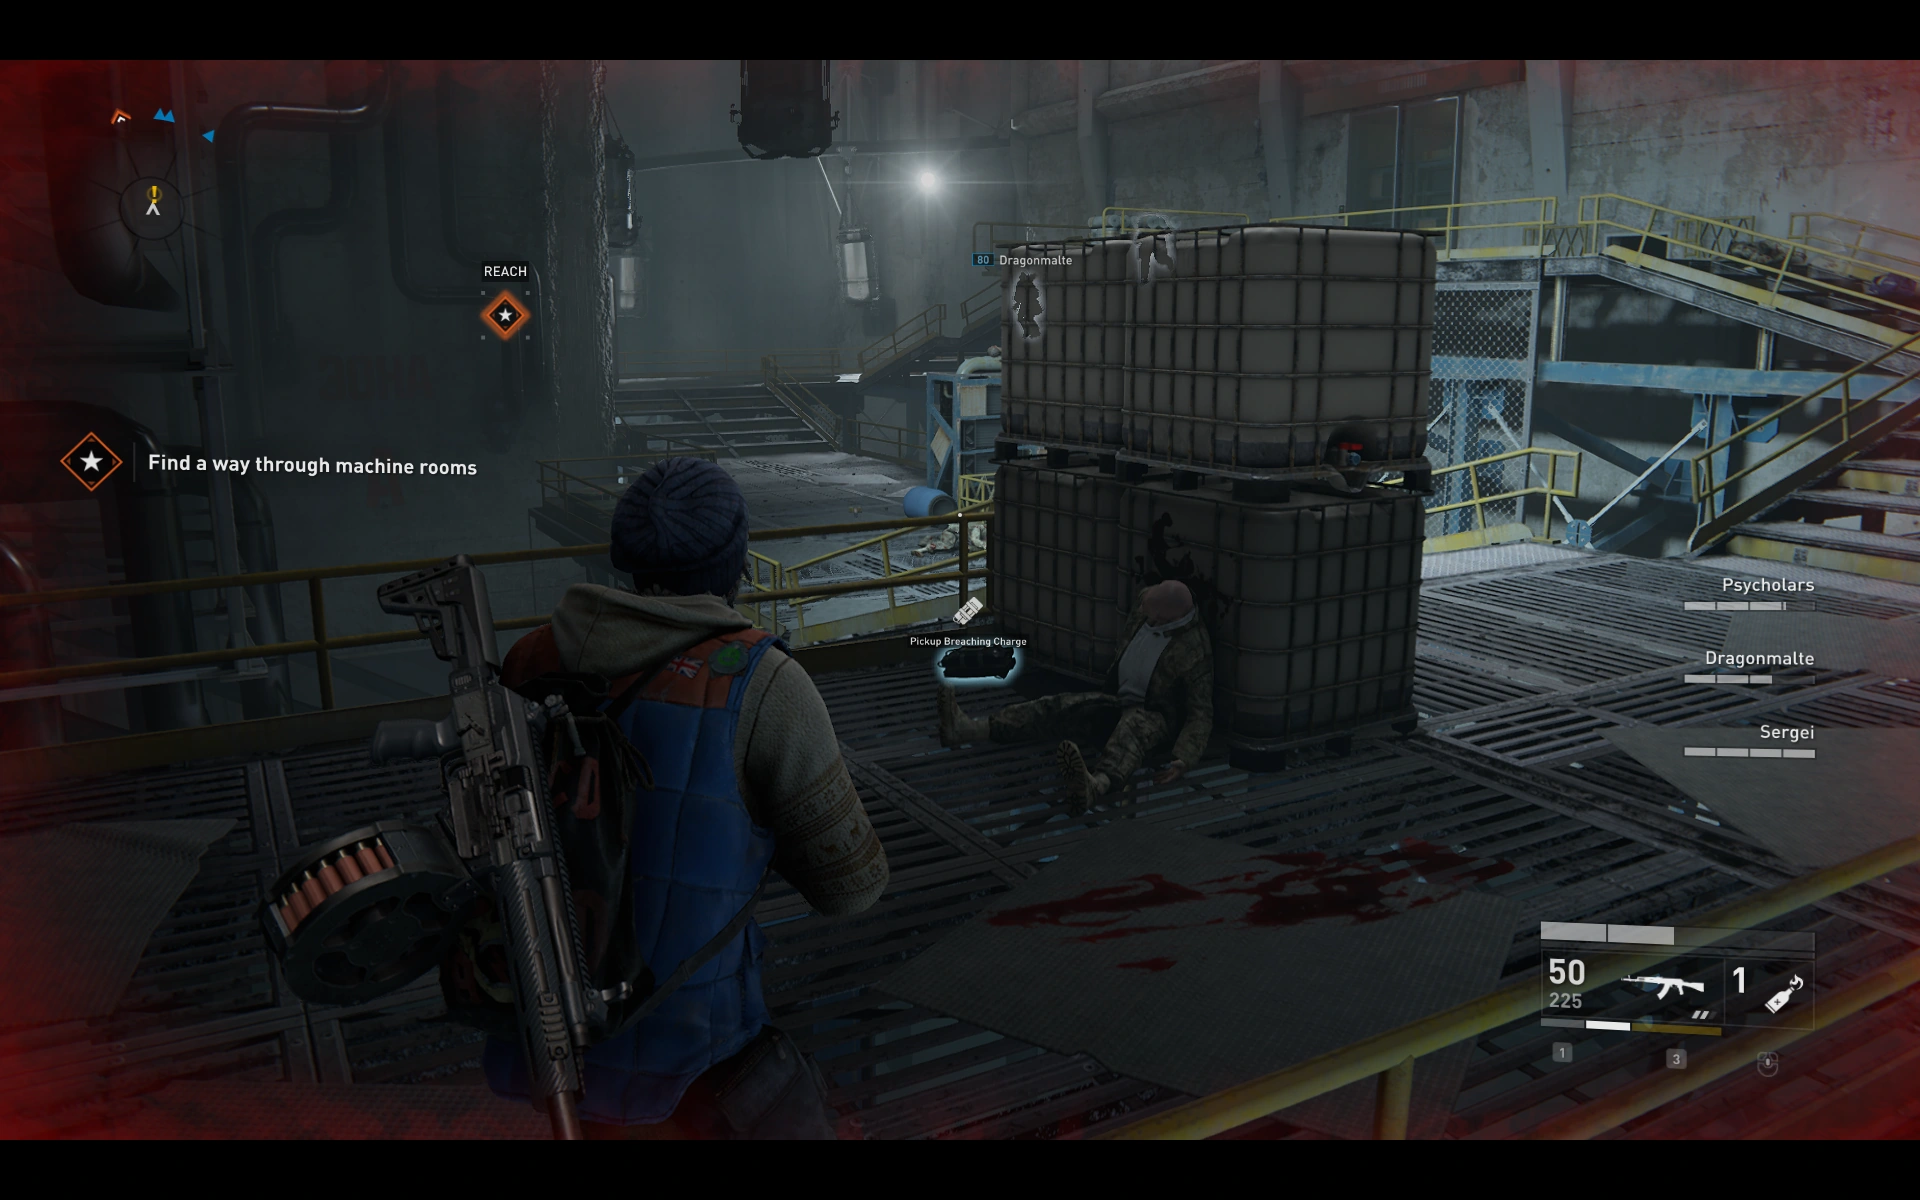
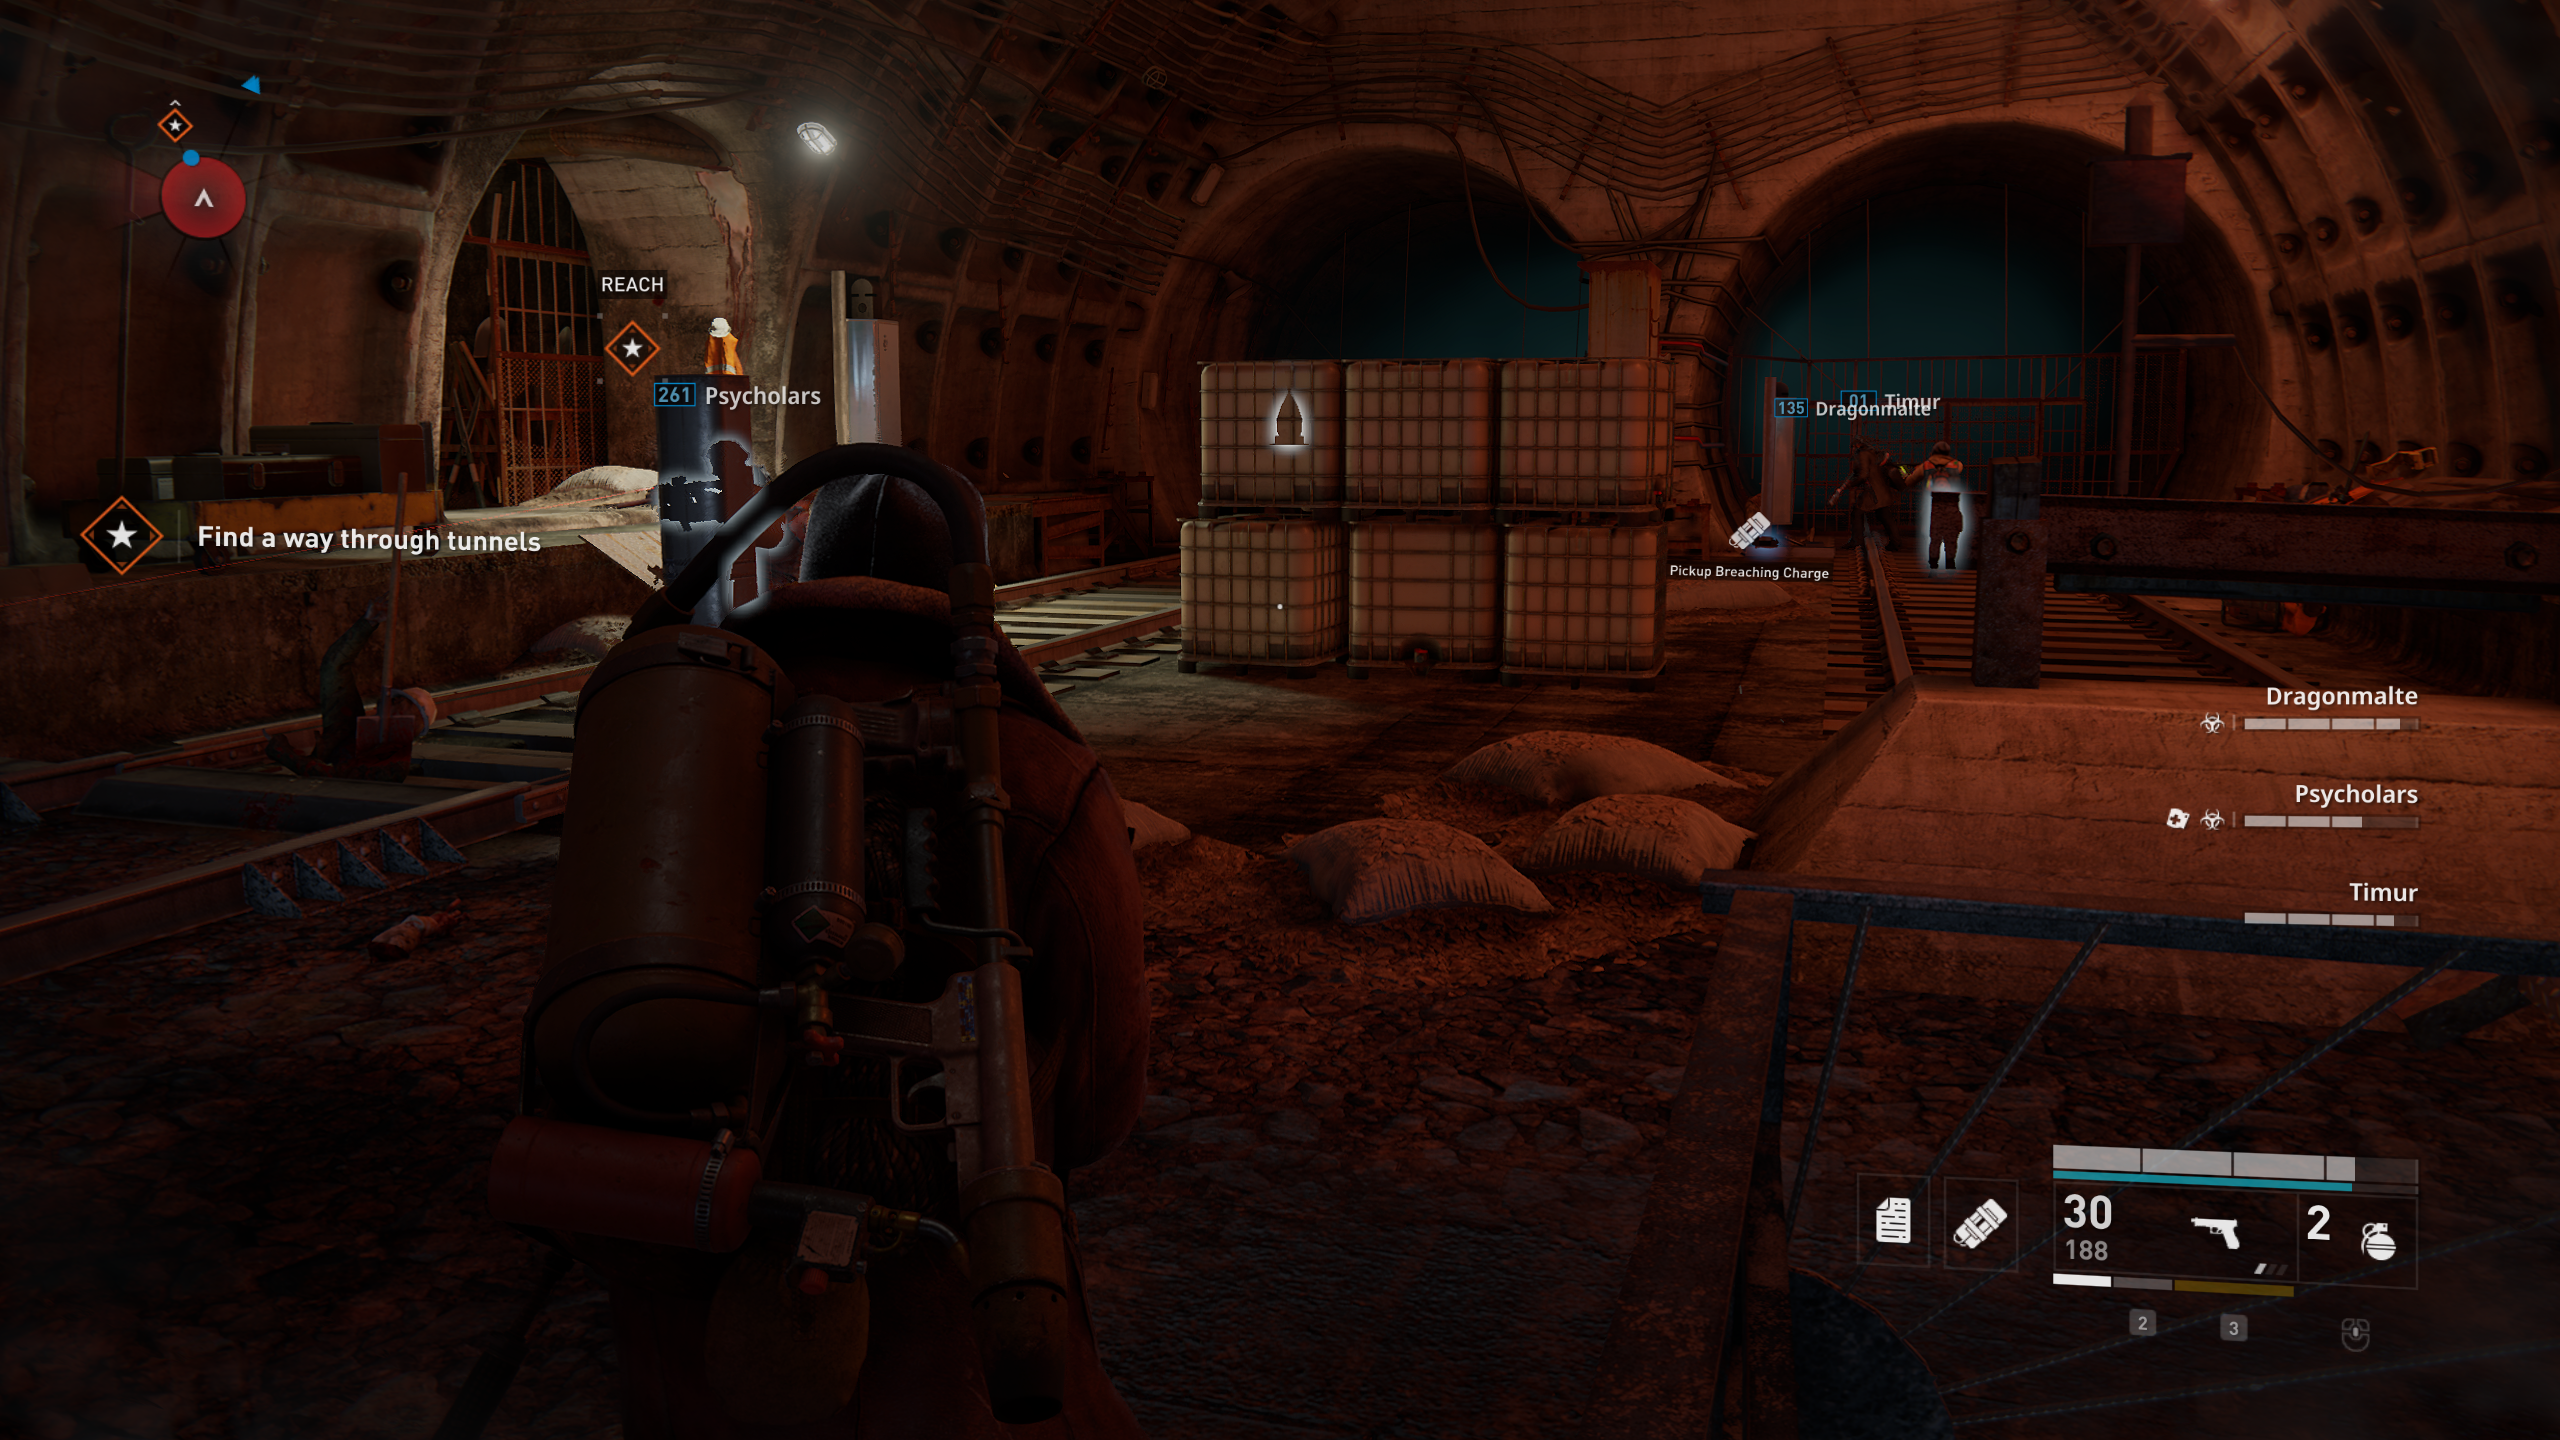
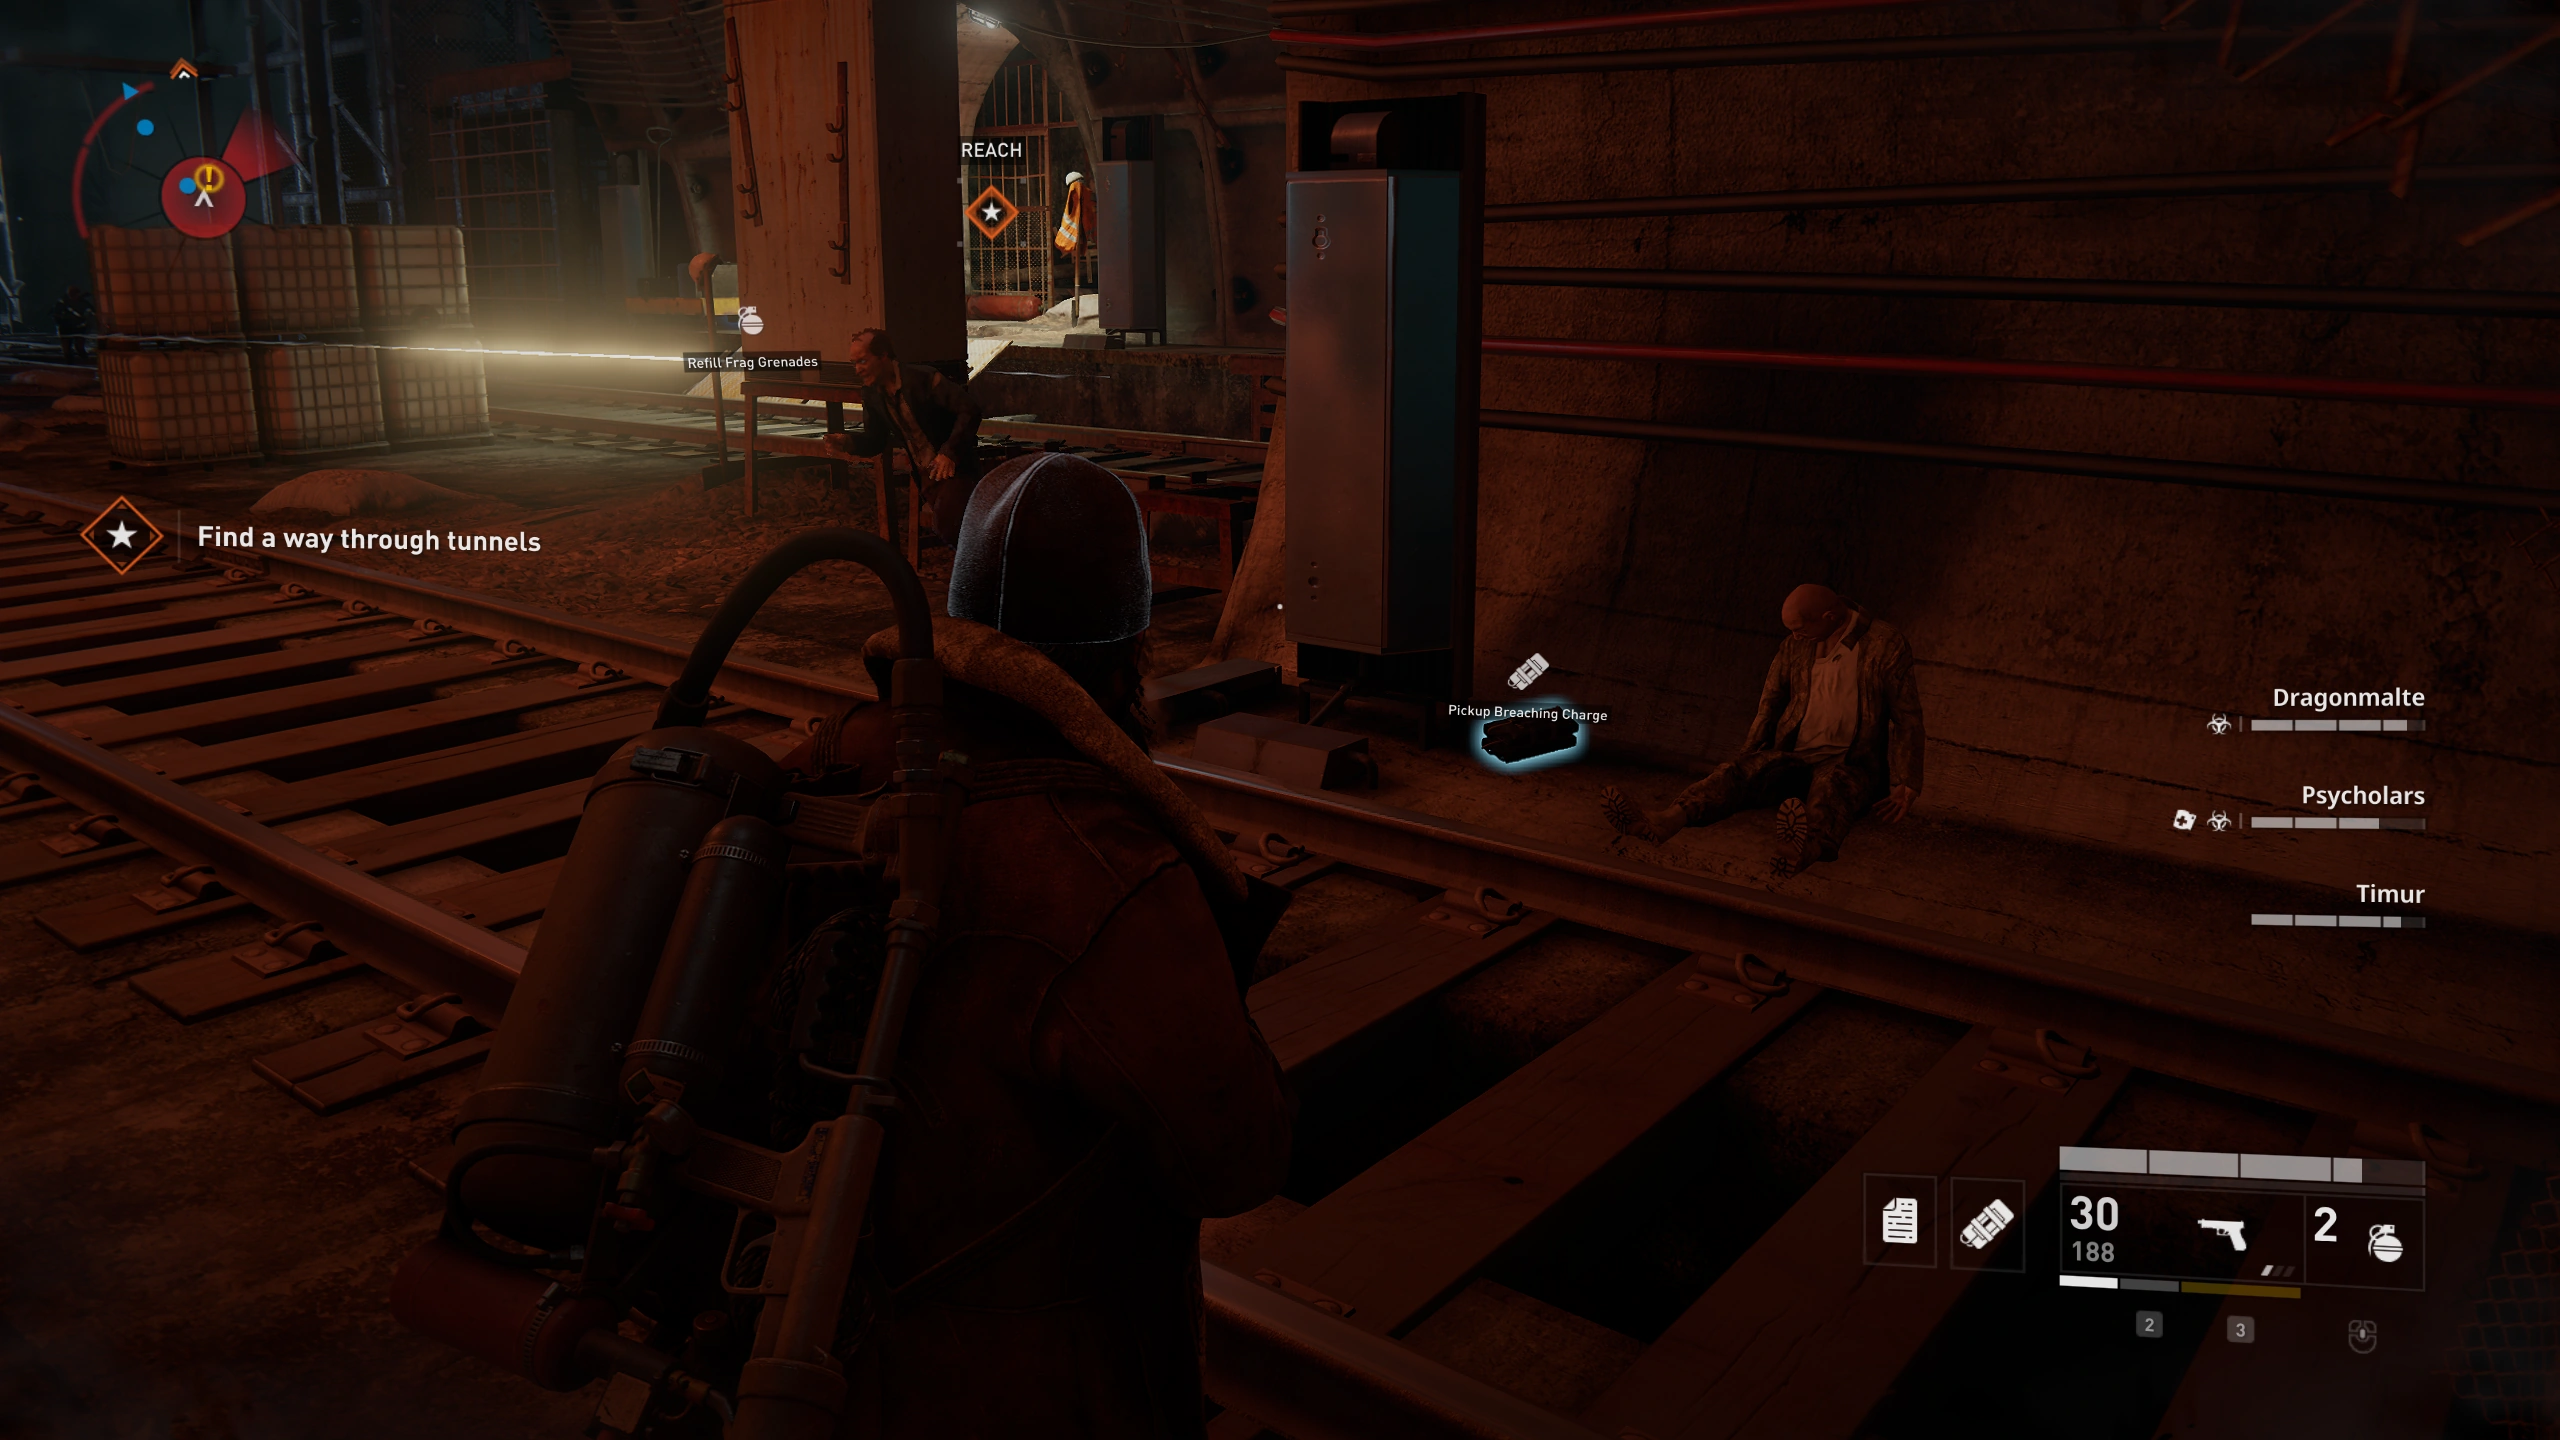
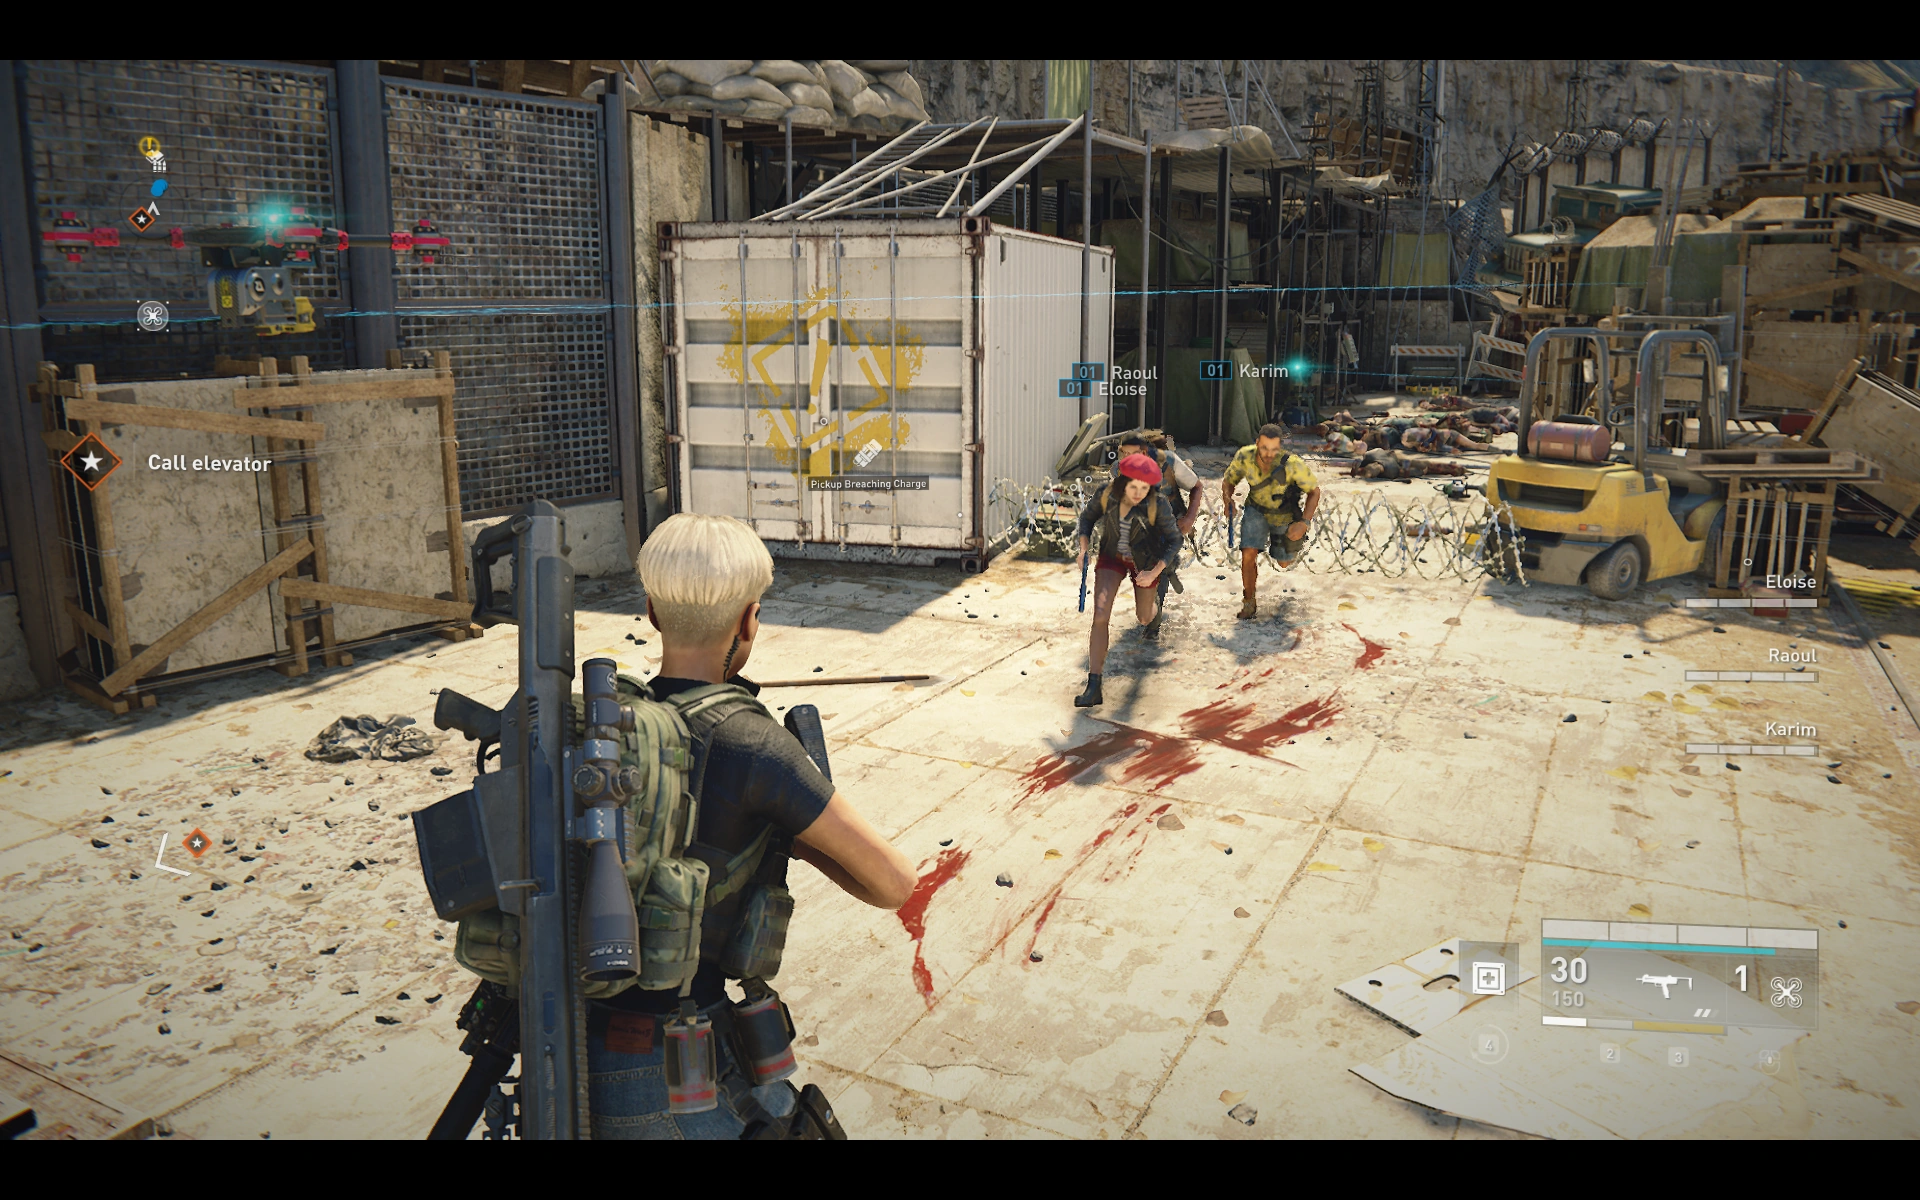
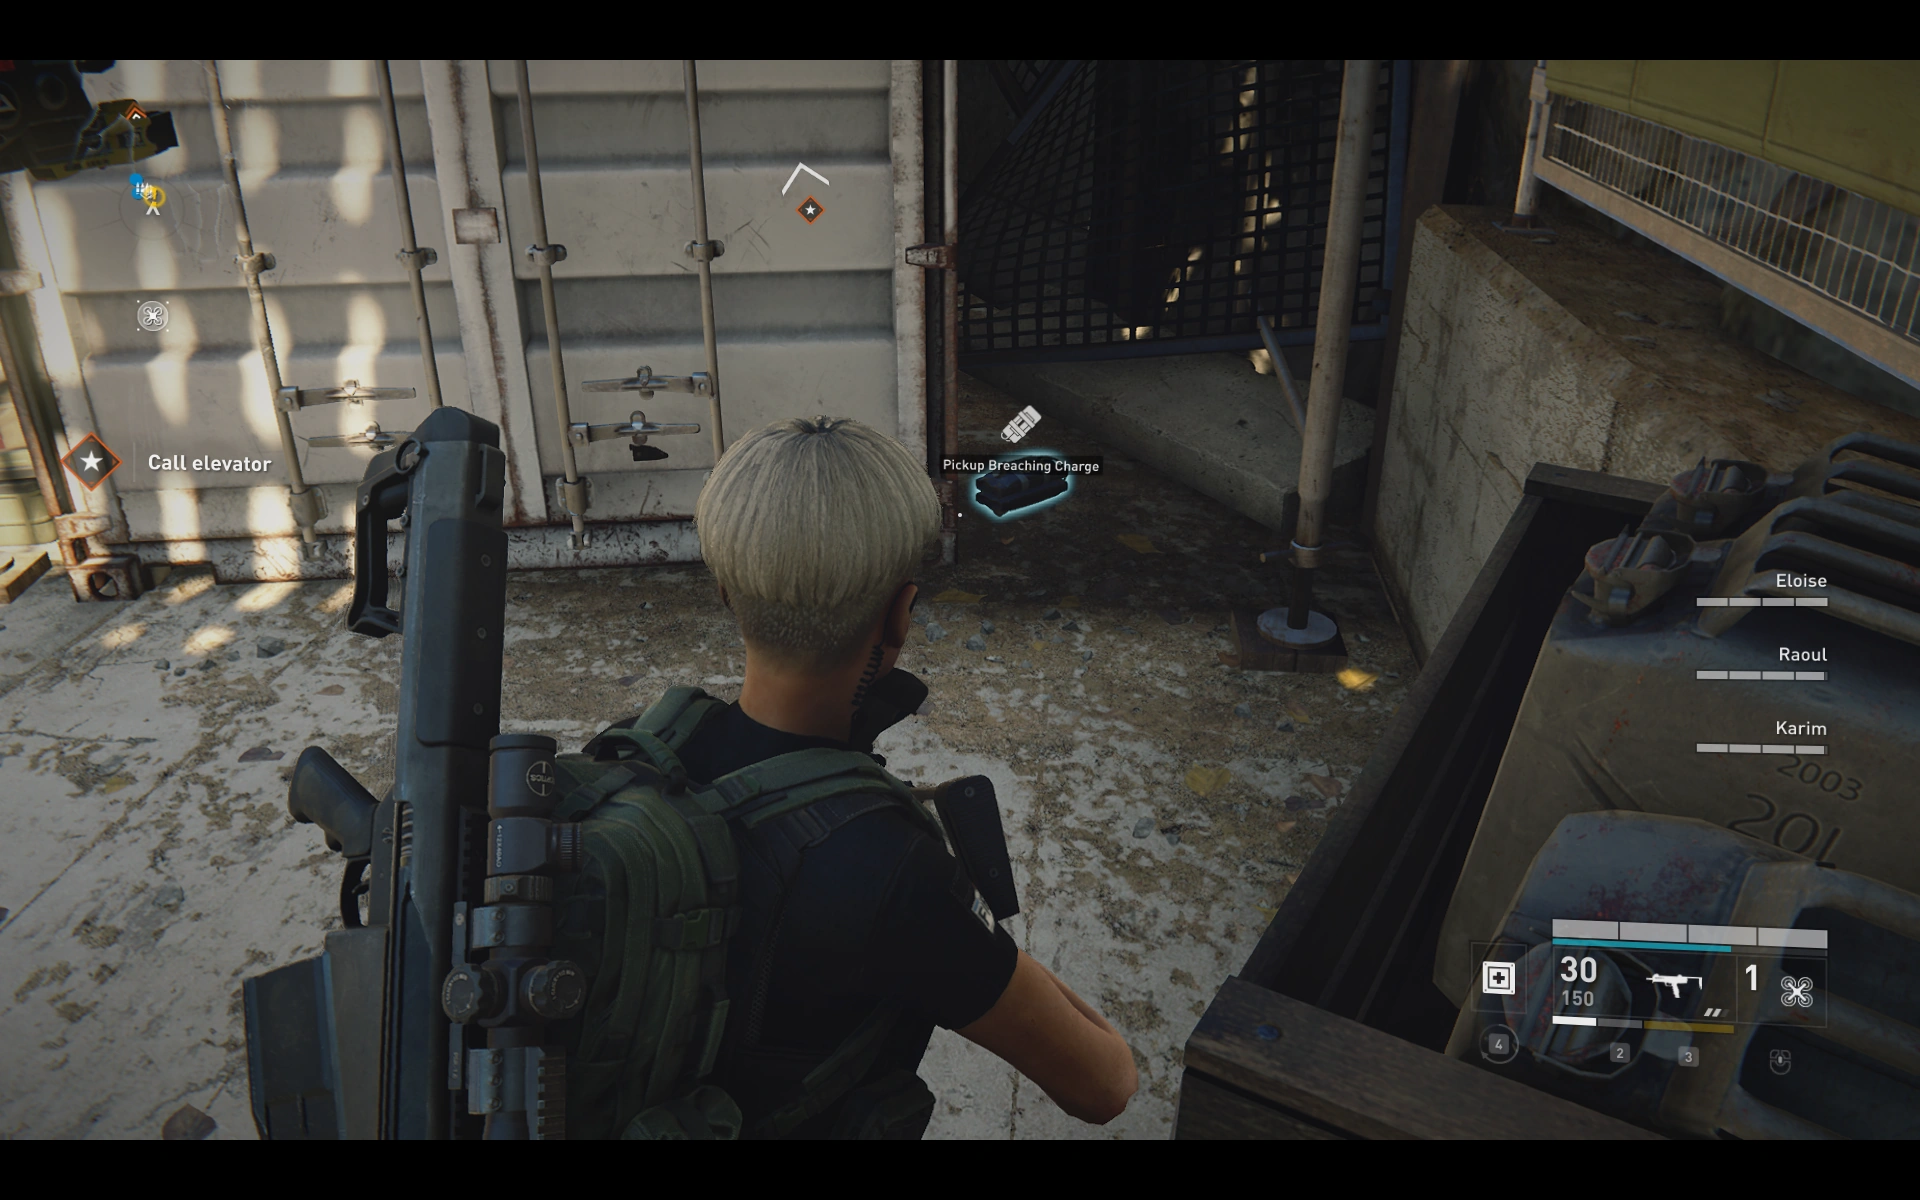
Chapter 2: Tunnel Vision[]
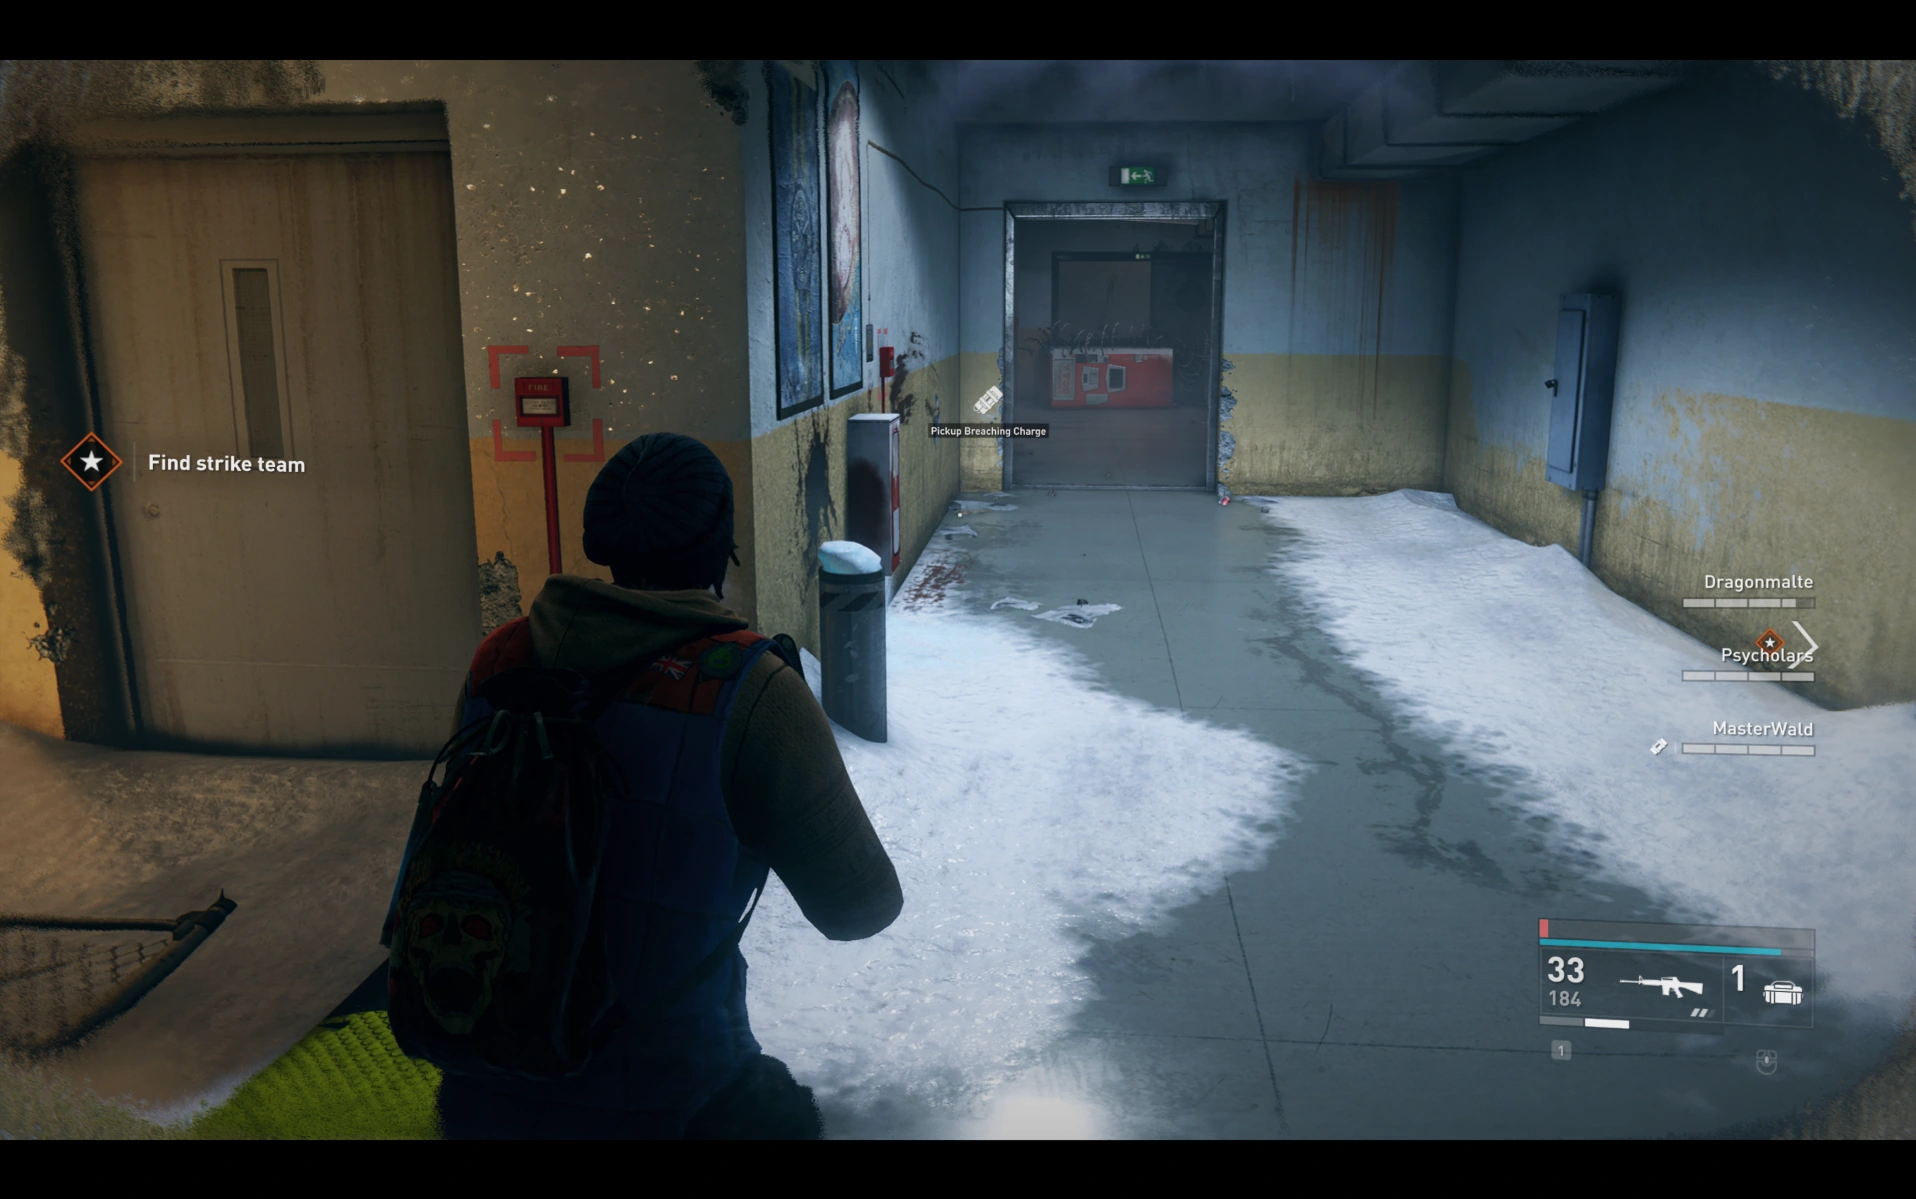
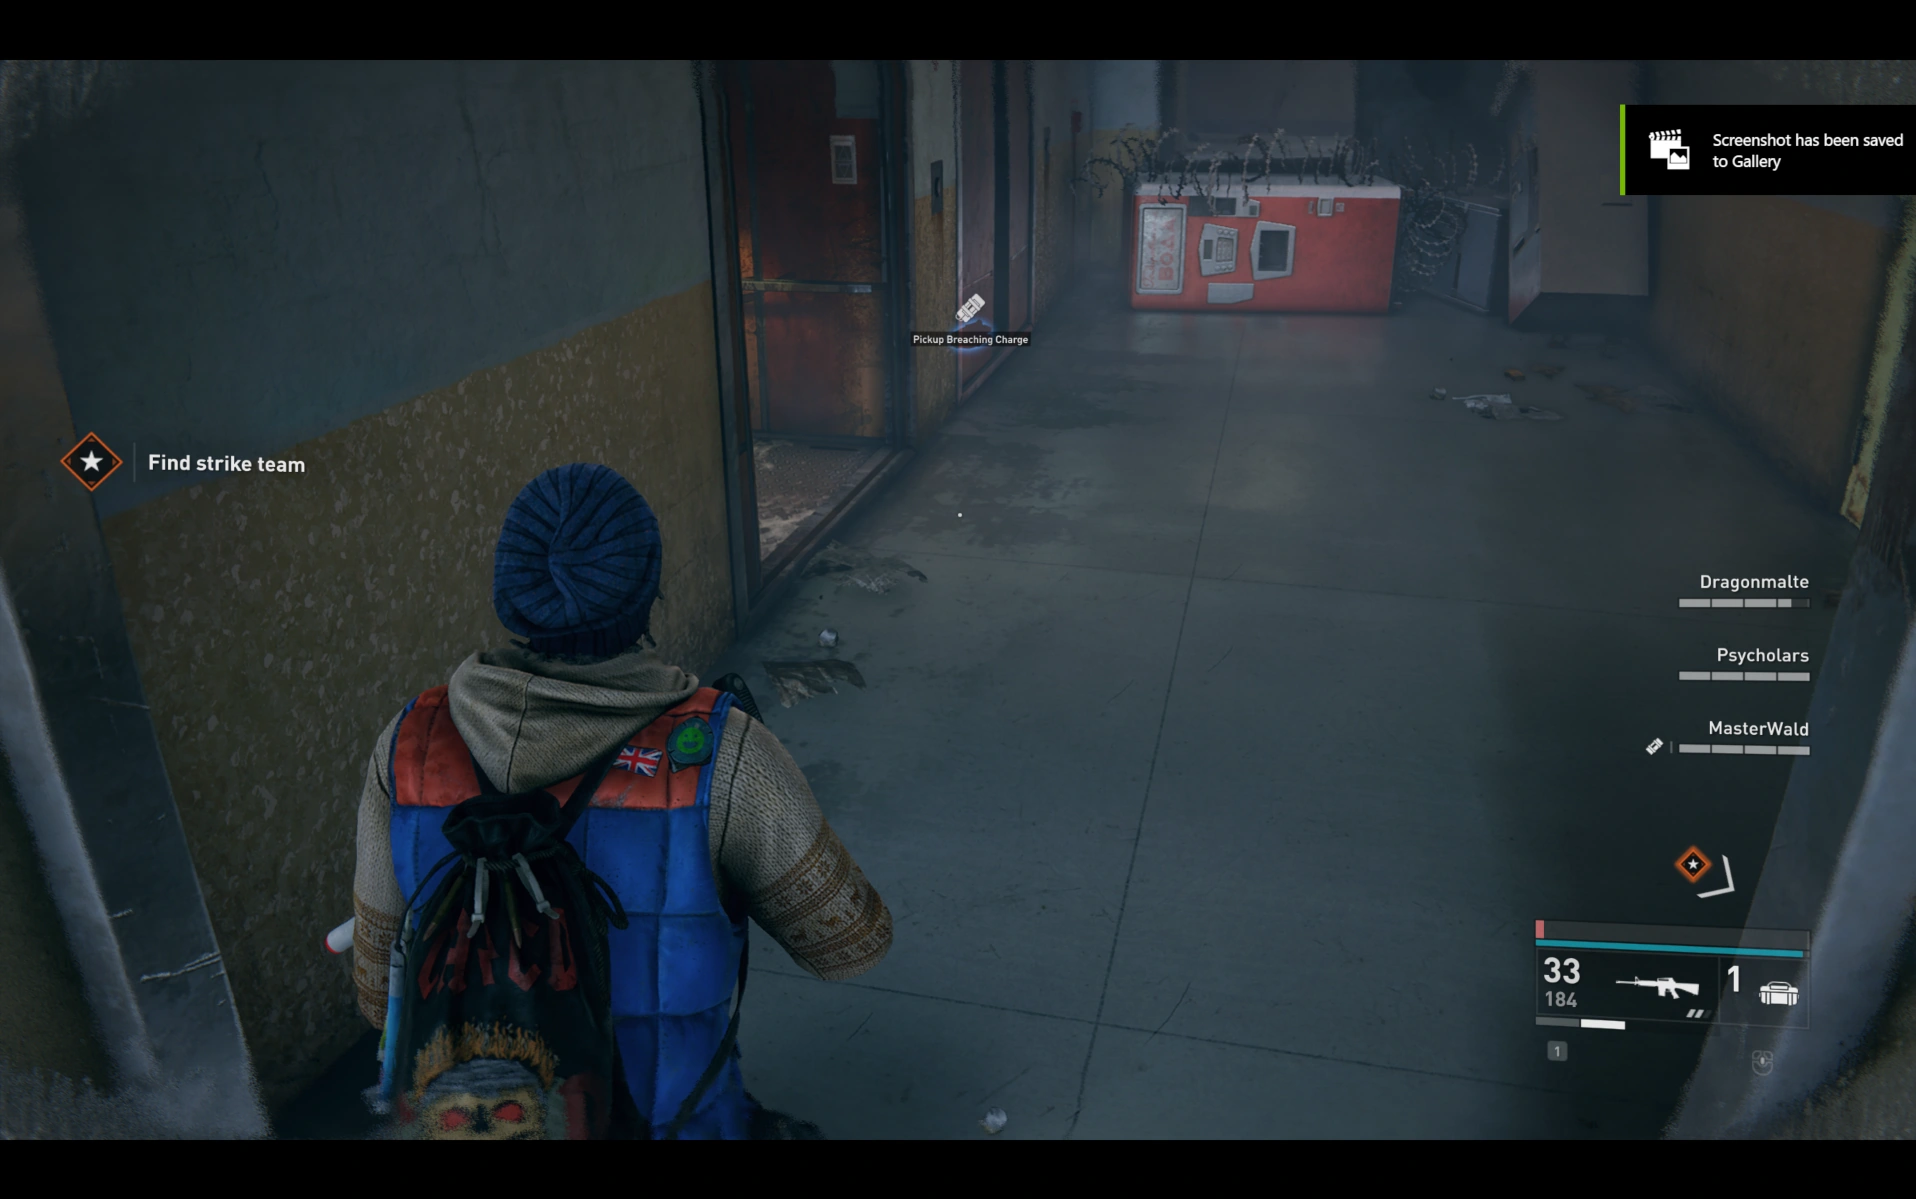
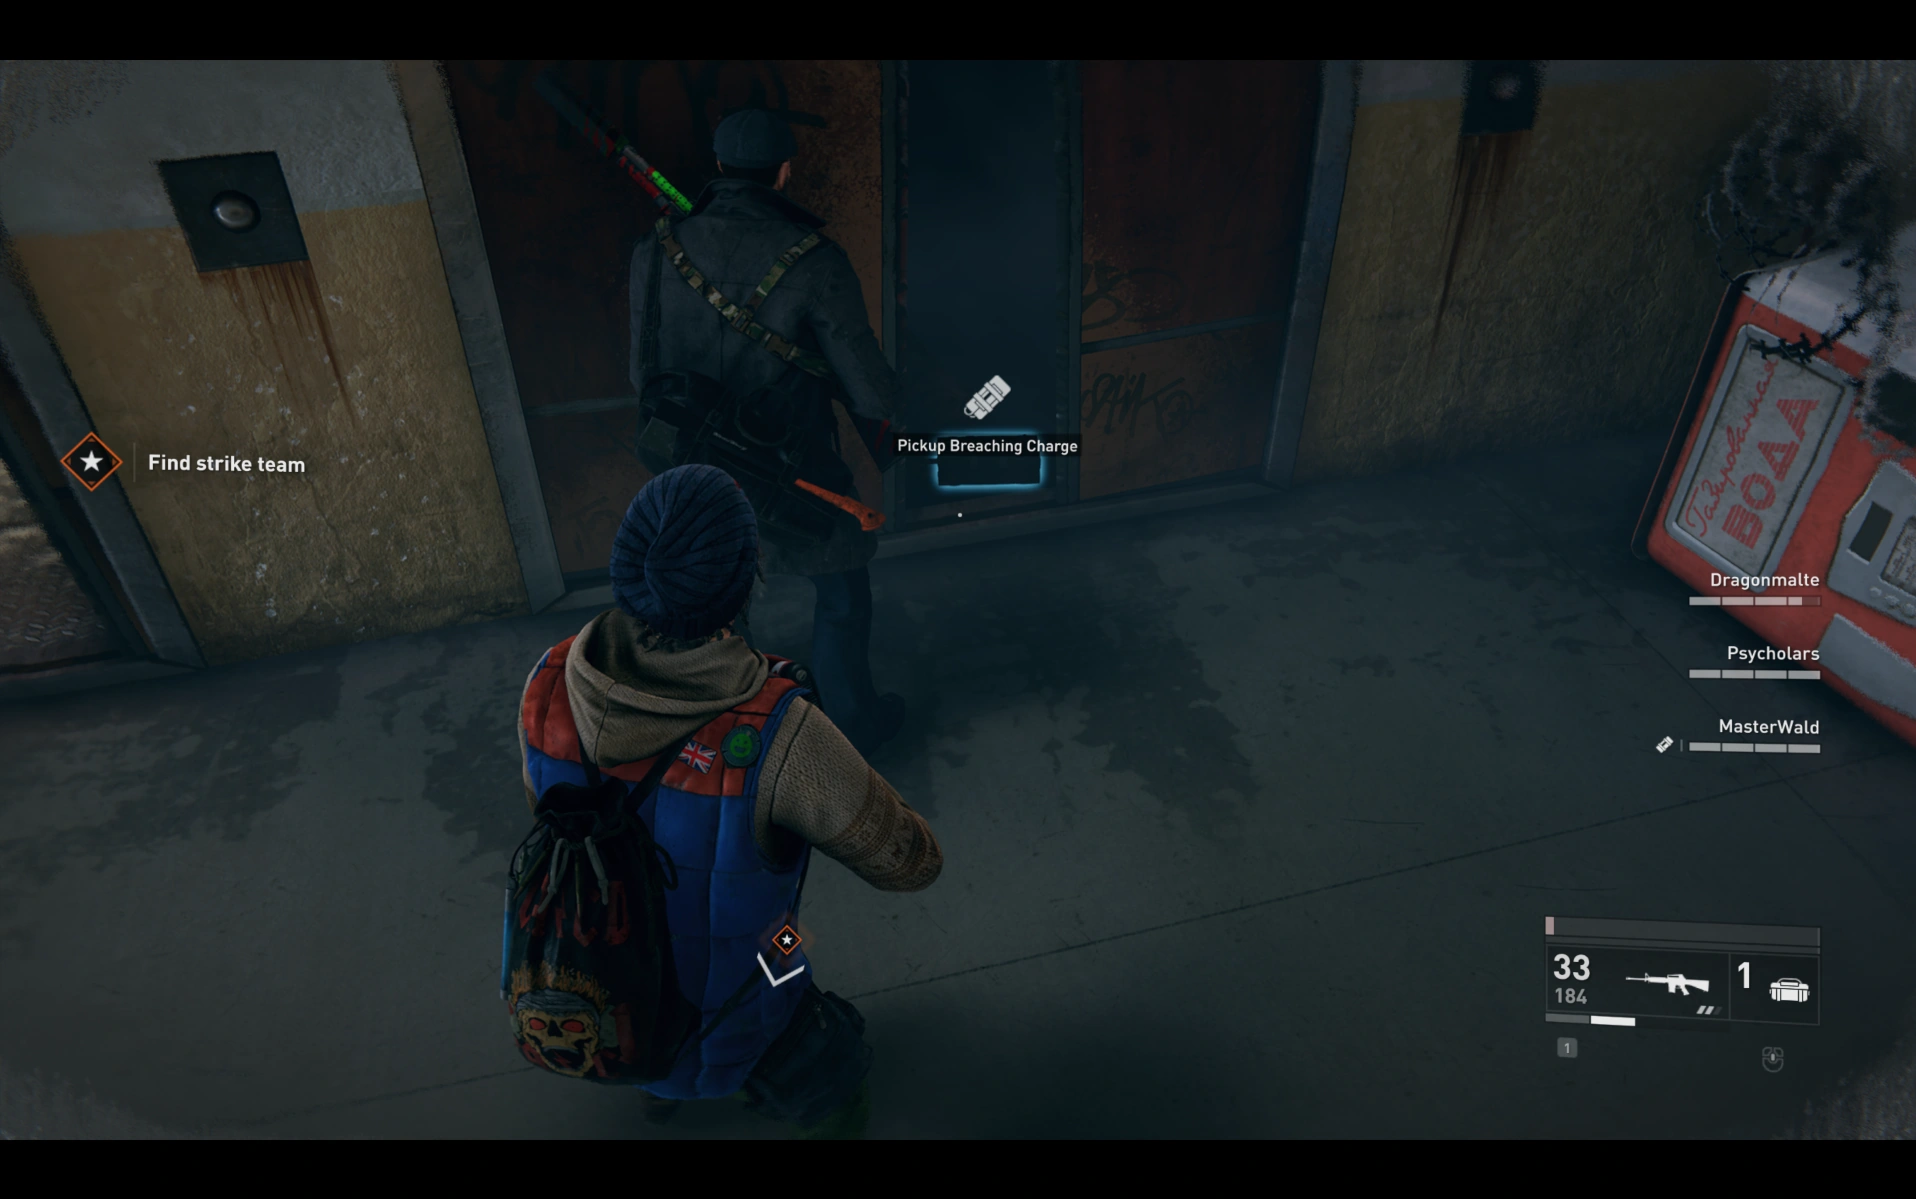
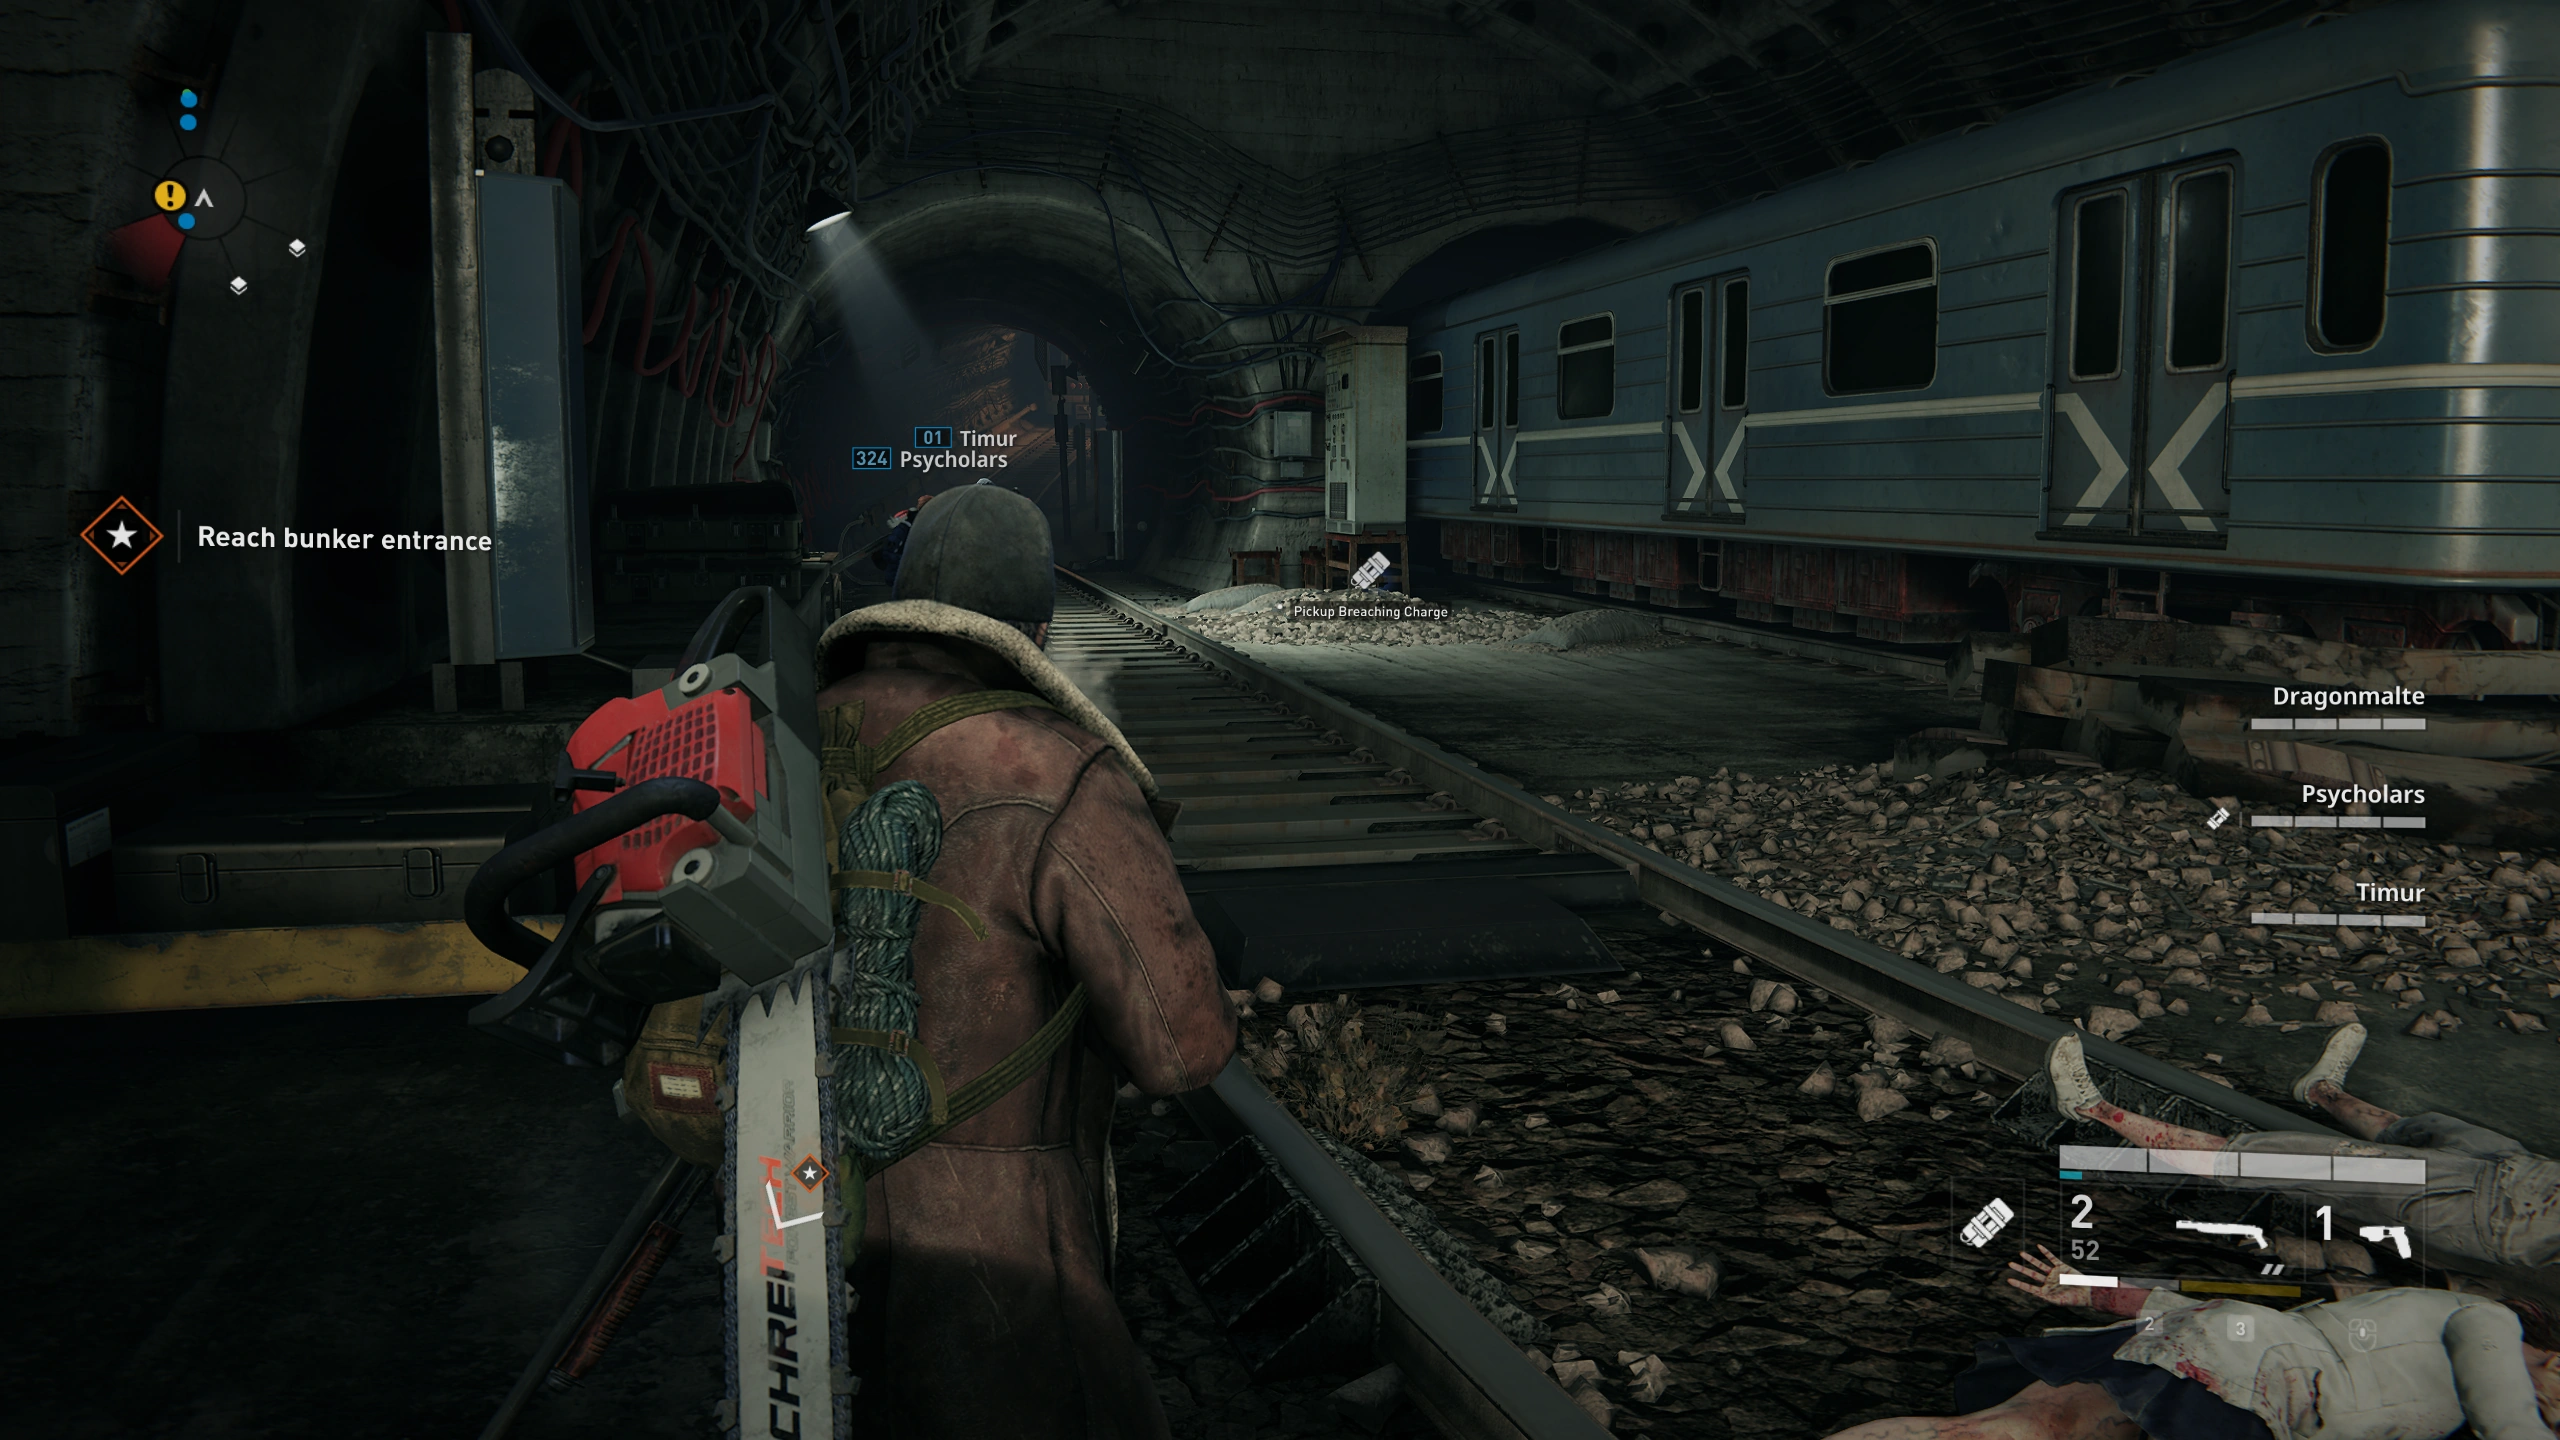
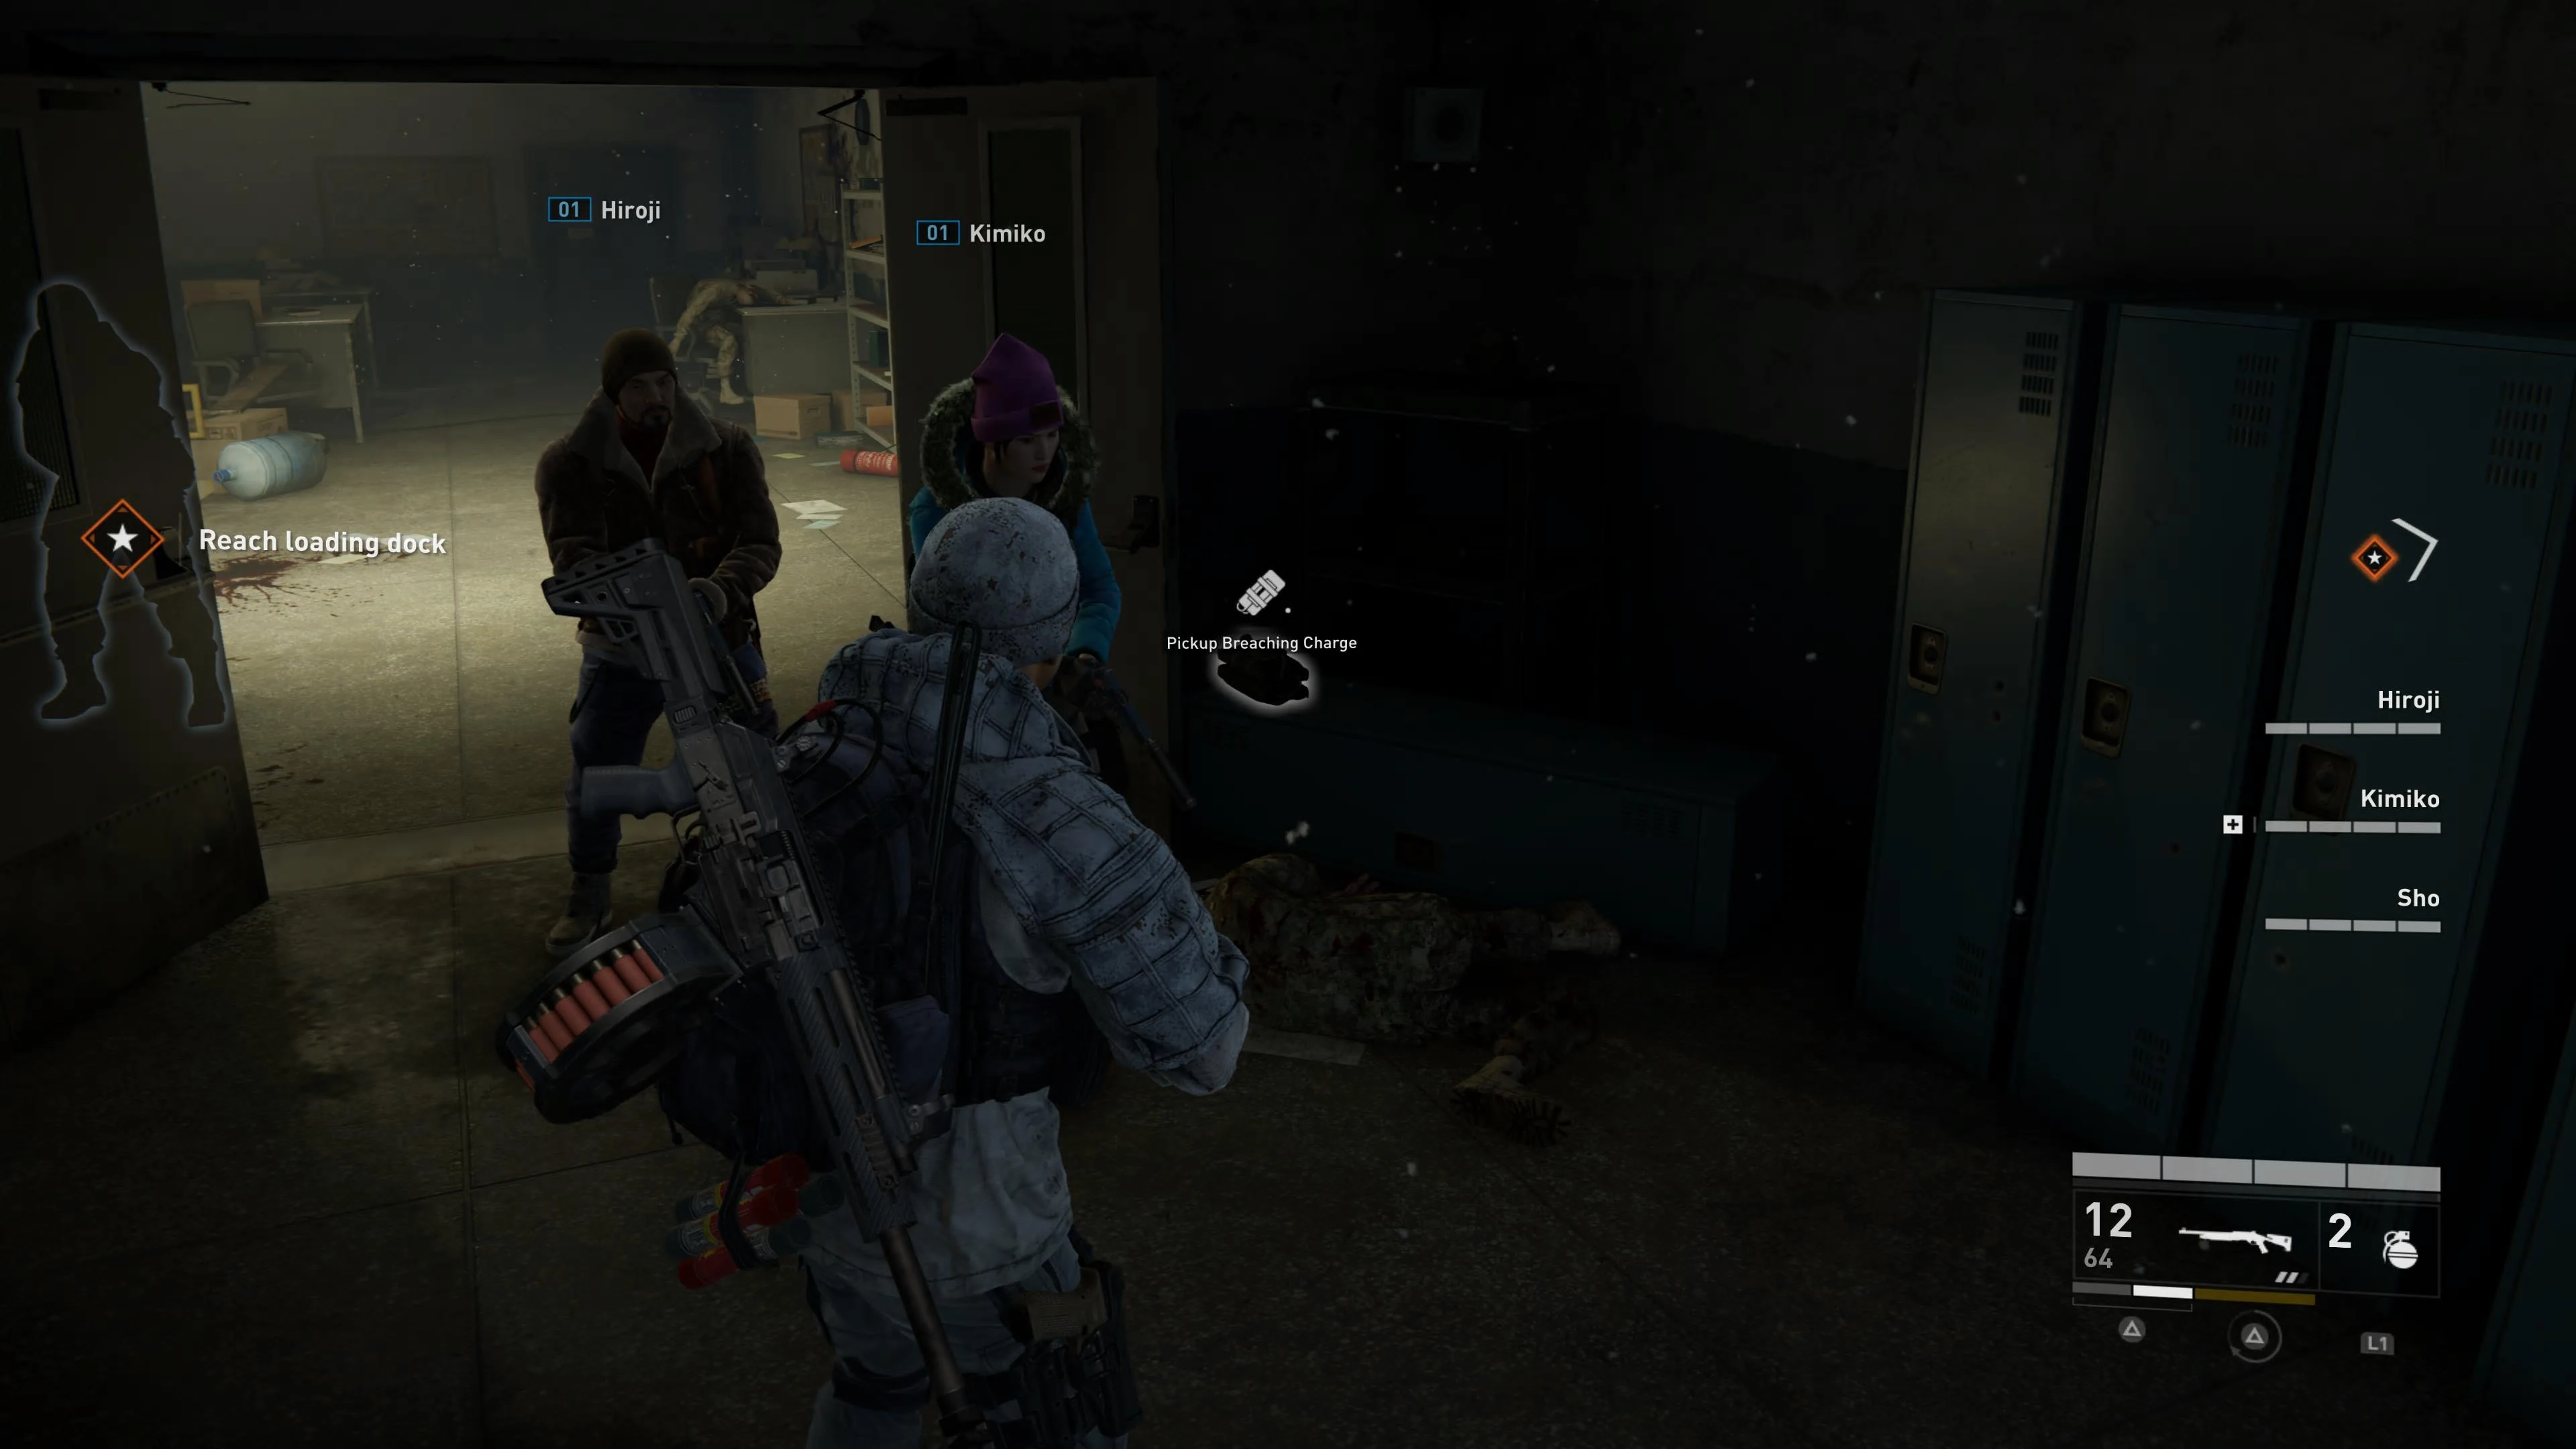
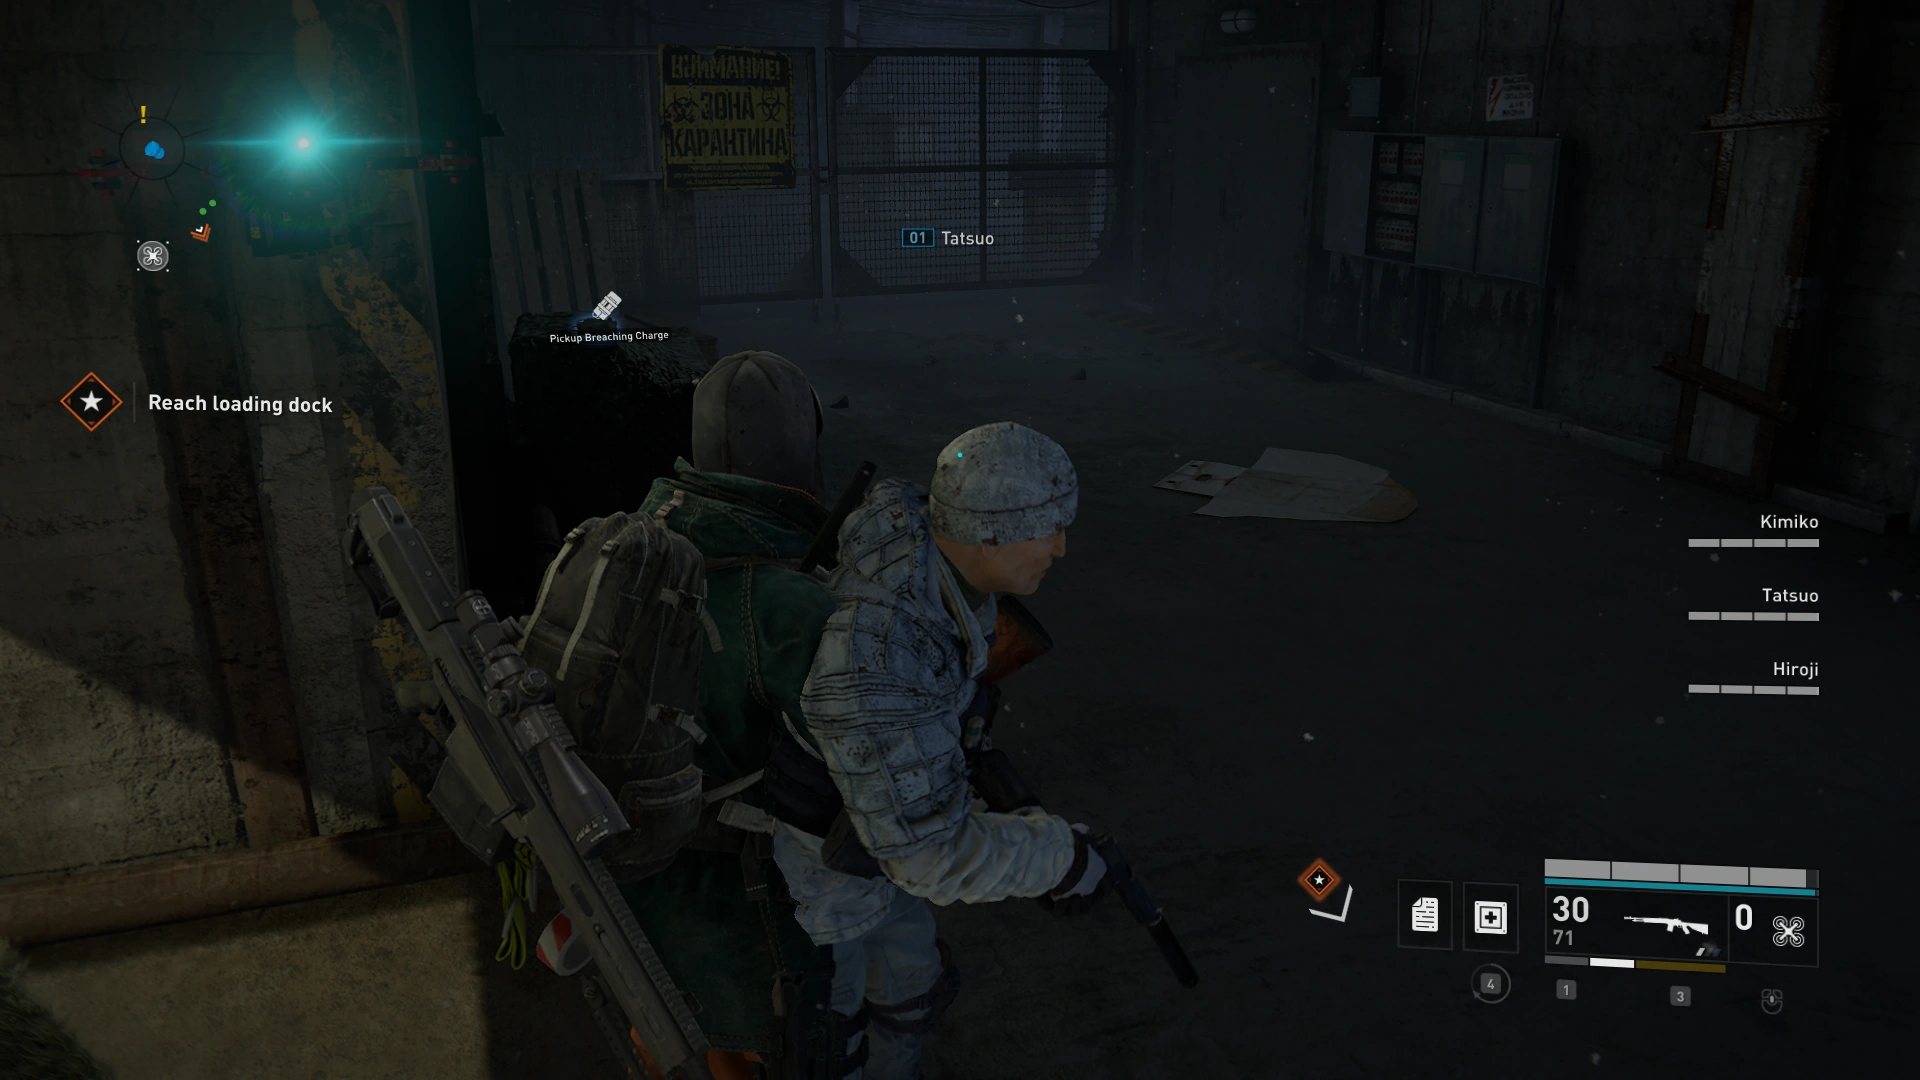
Location 1: ![]()
After the first timed gate, on the upper floor in the room on the left side.
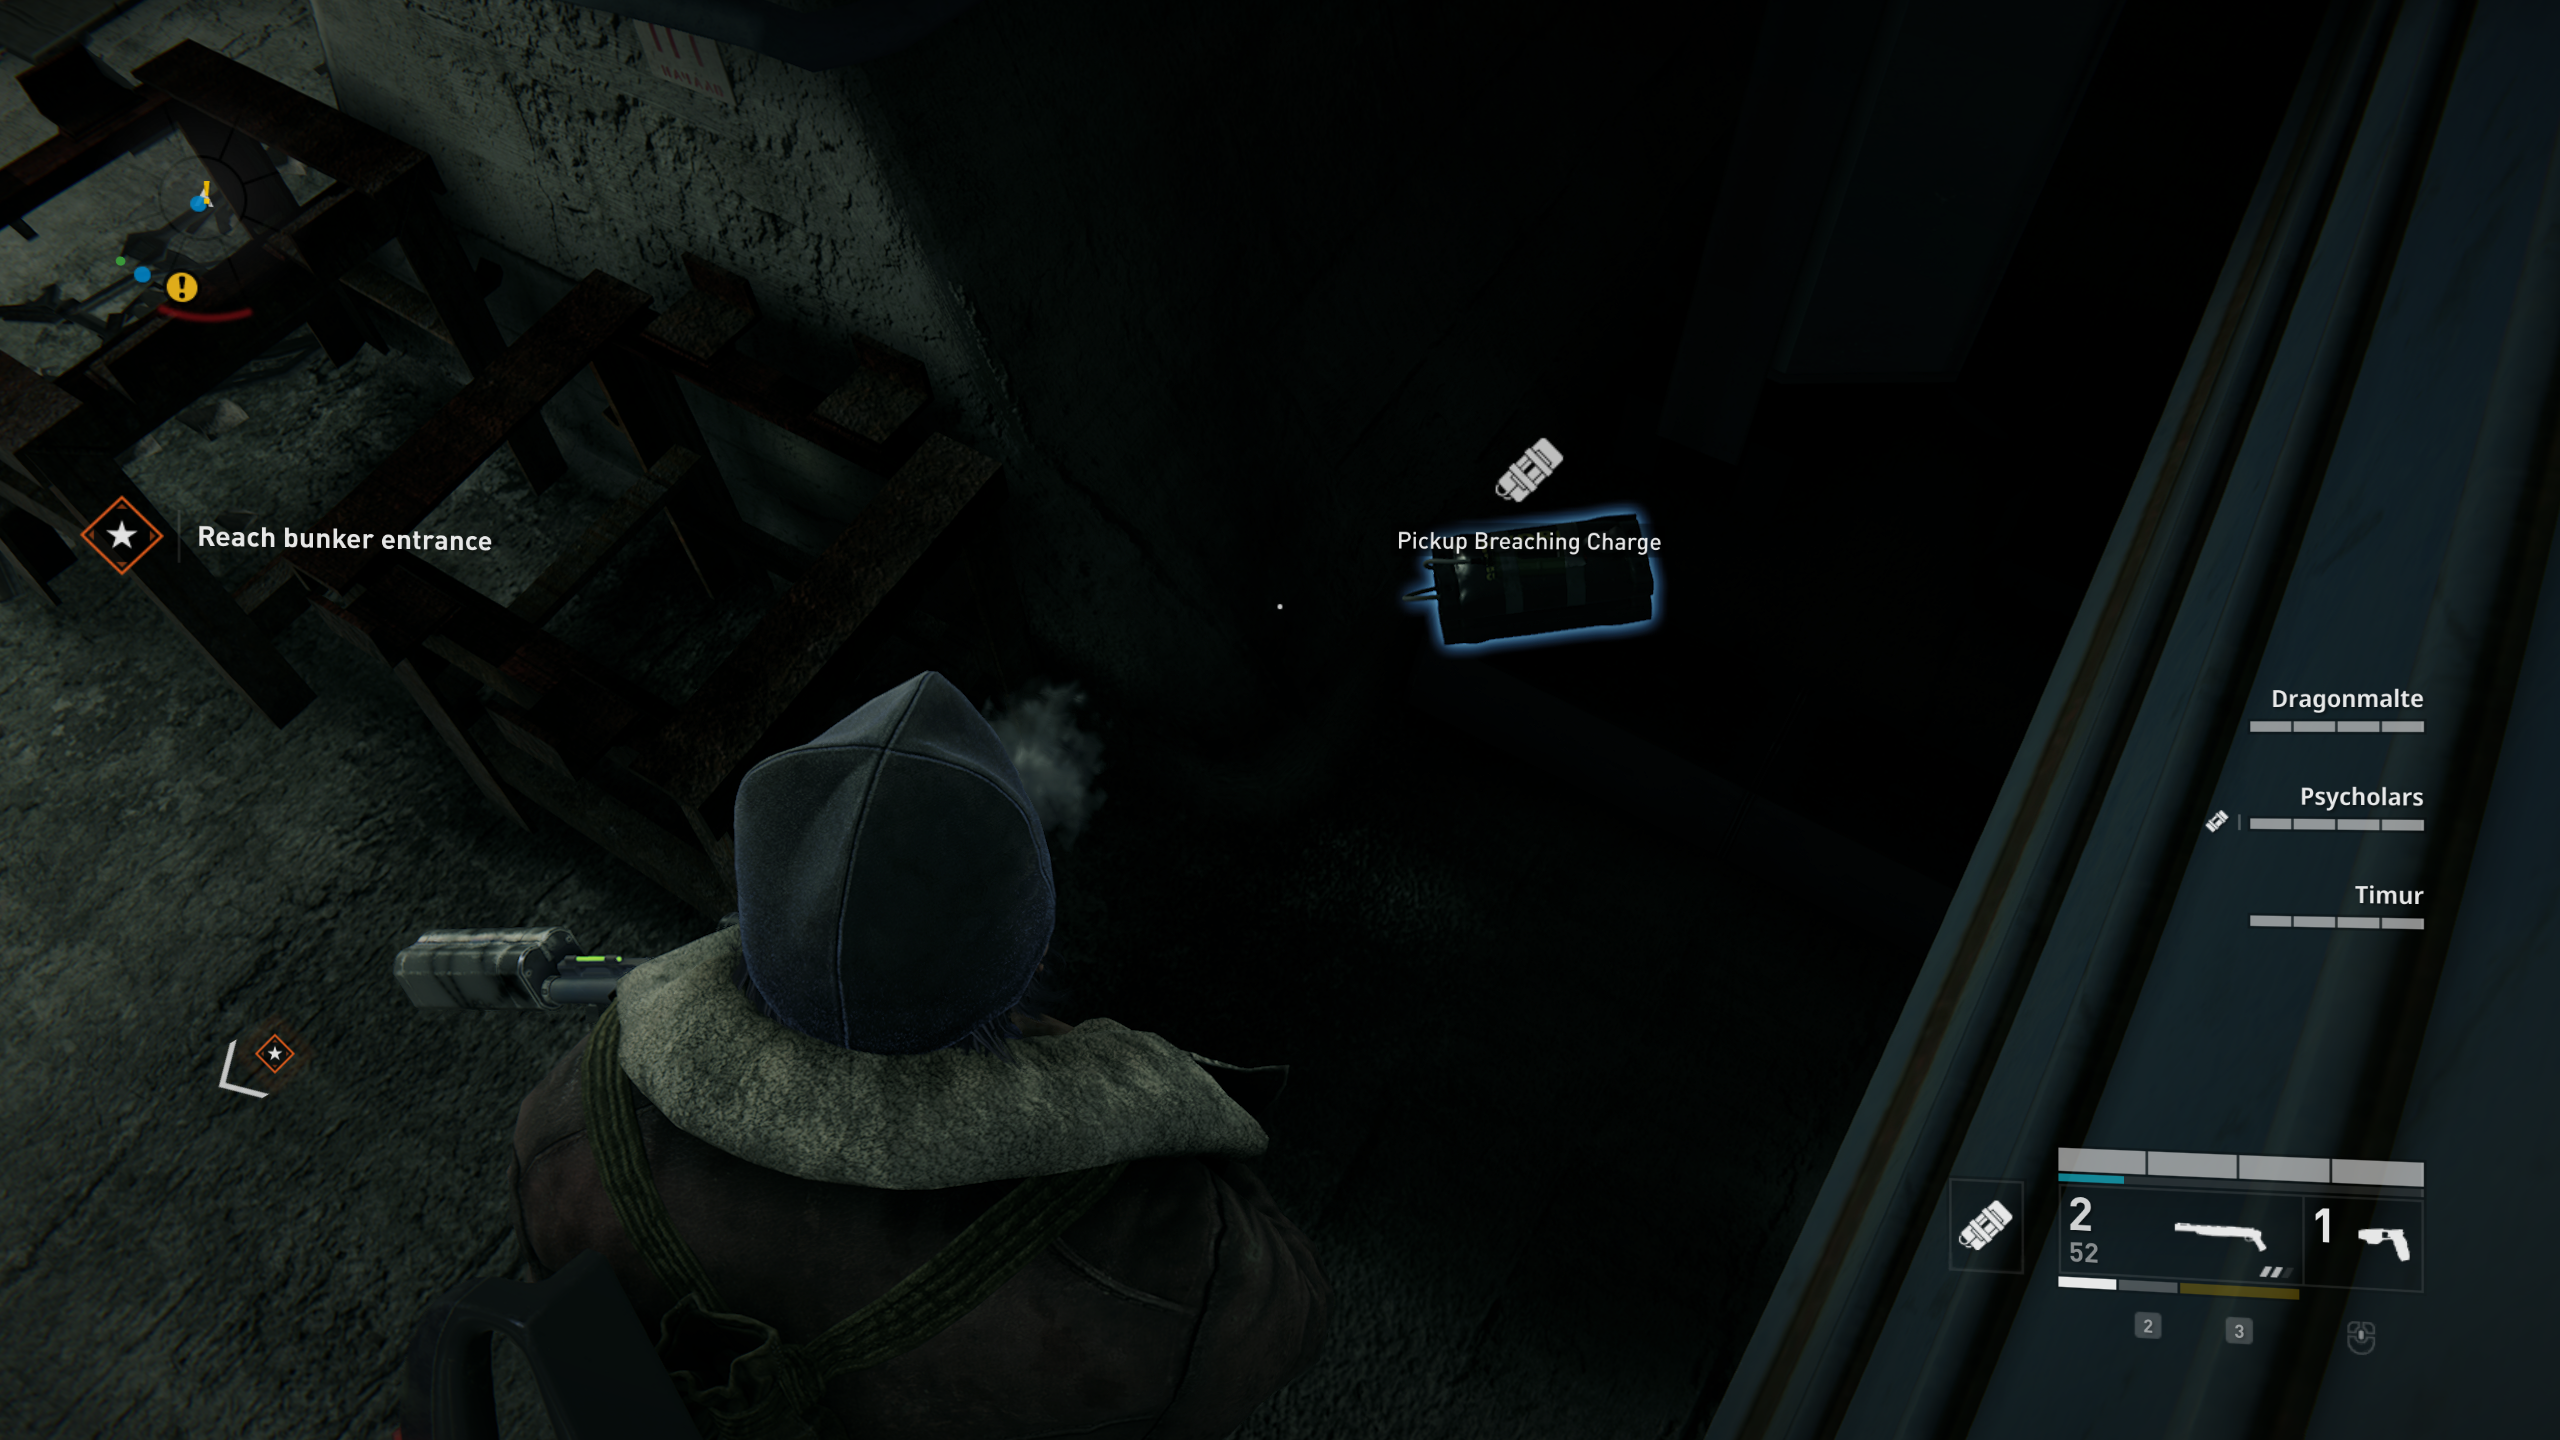
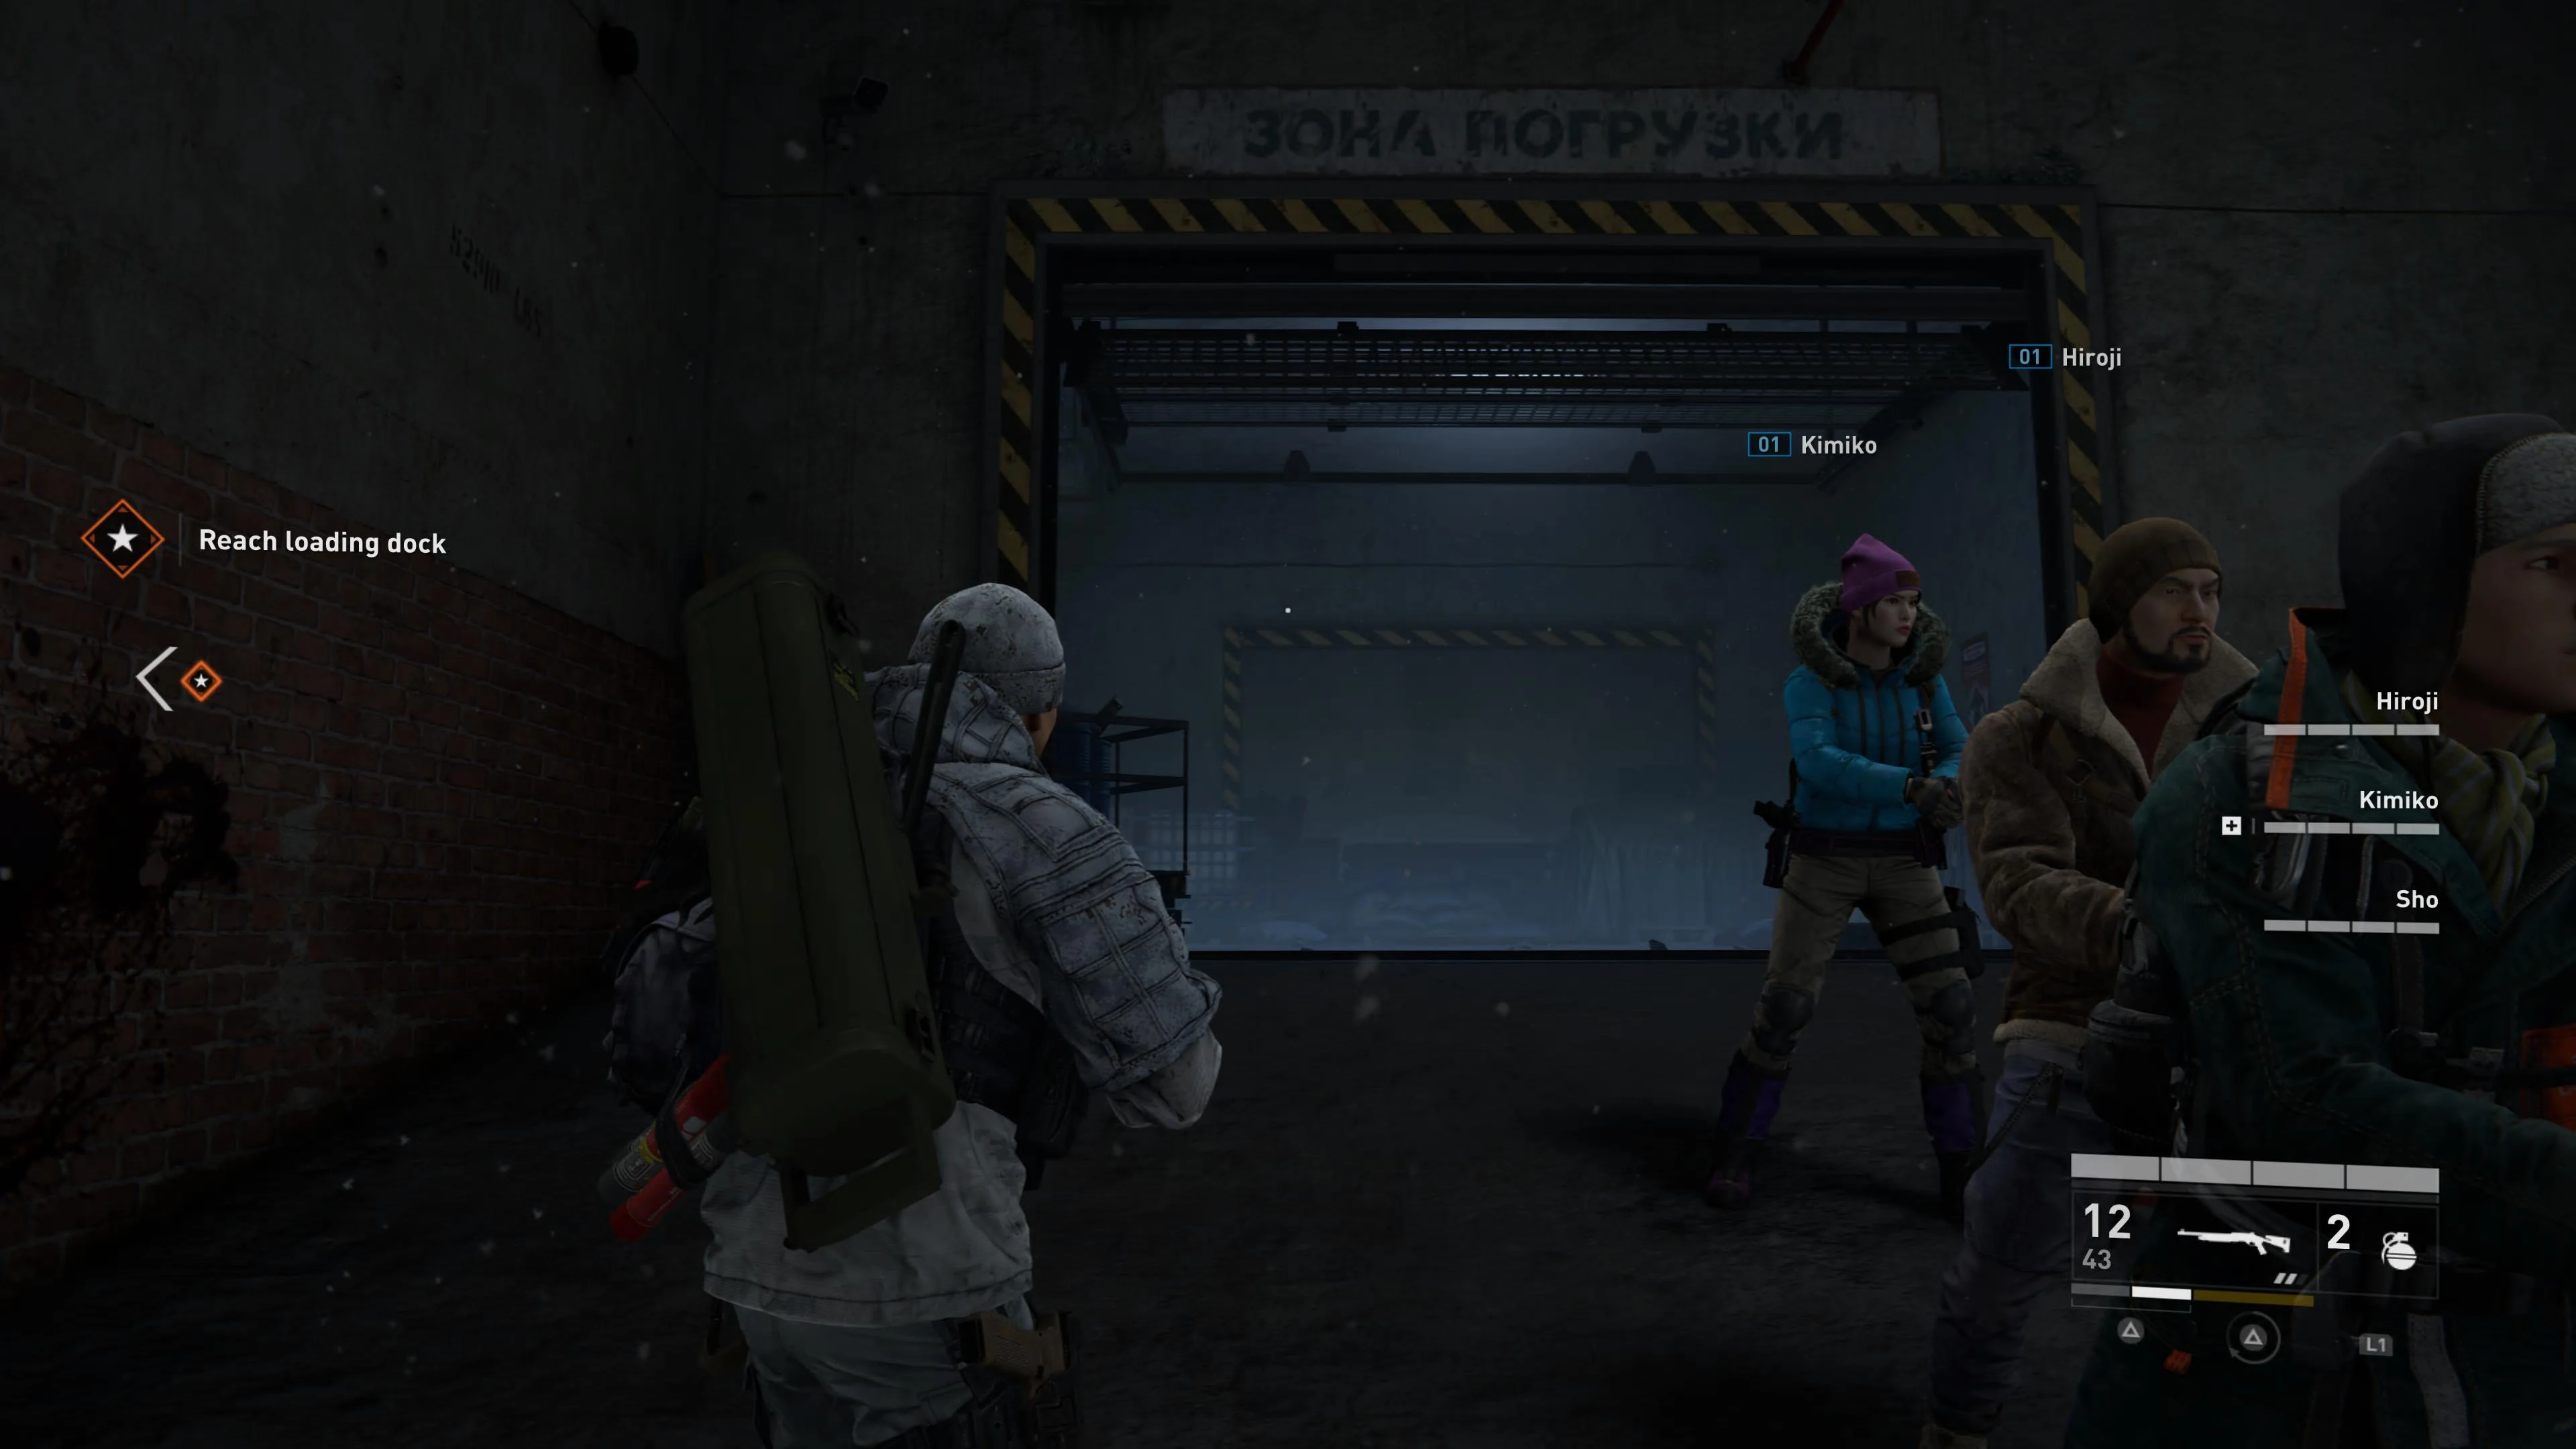
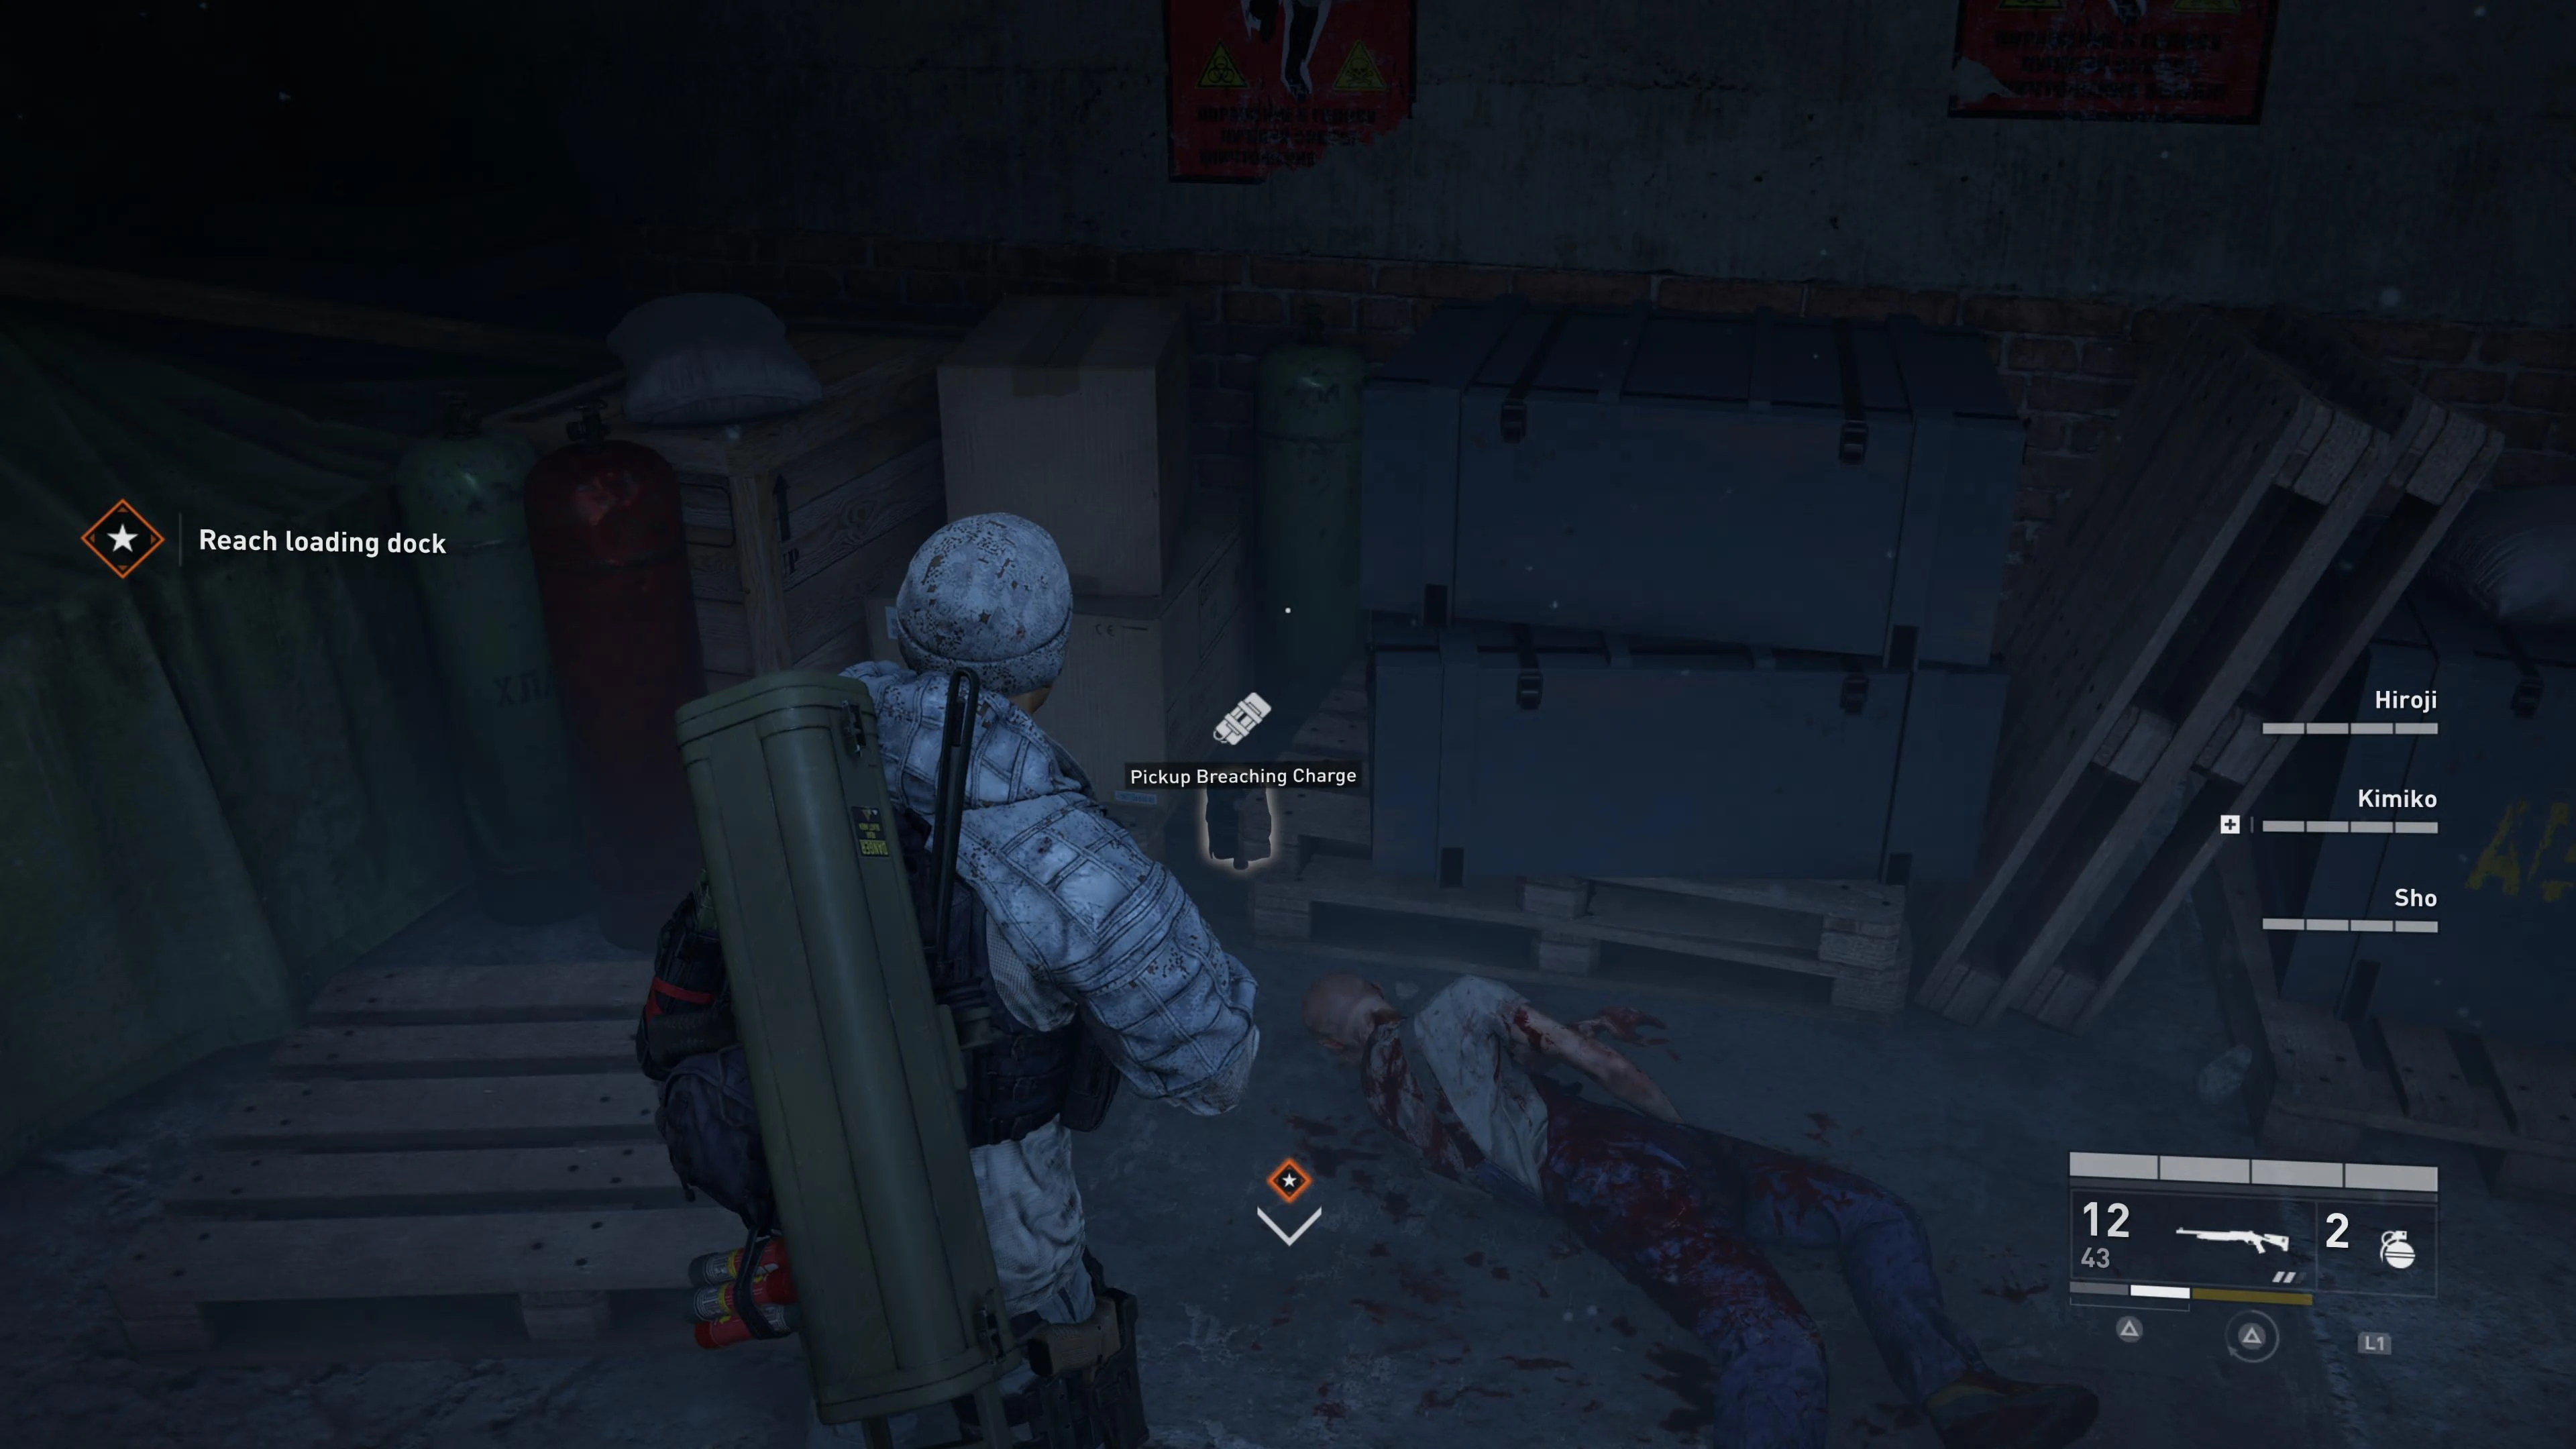
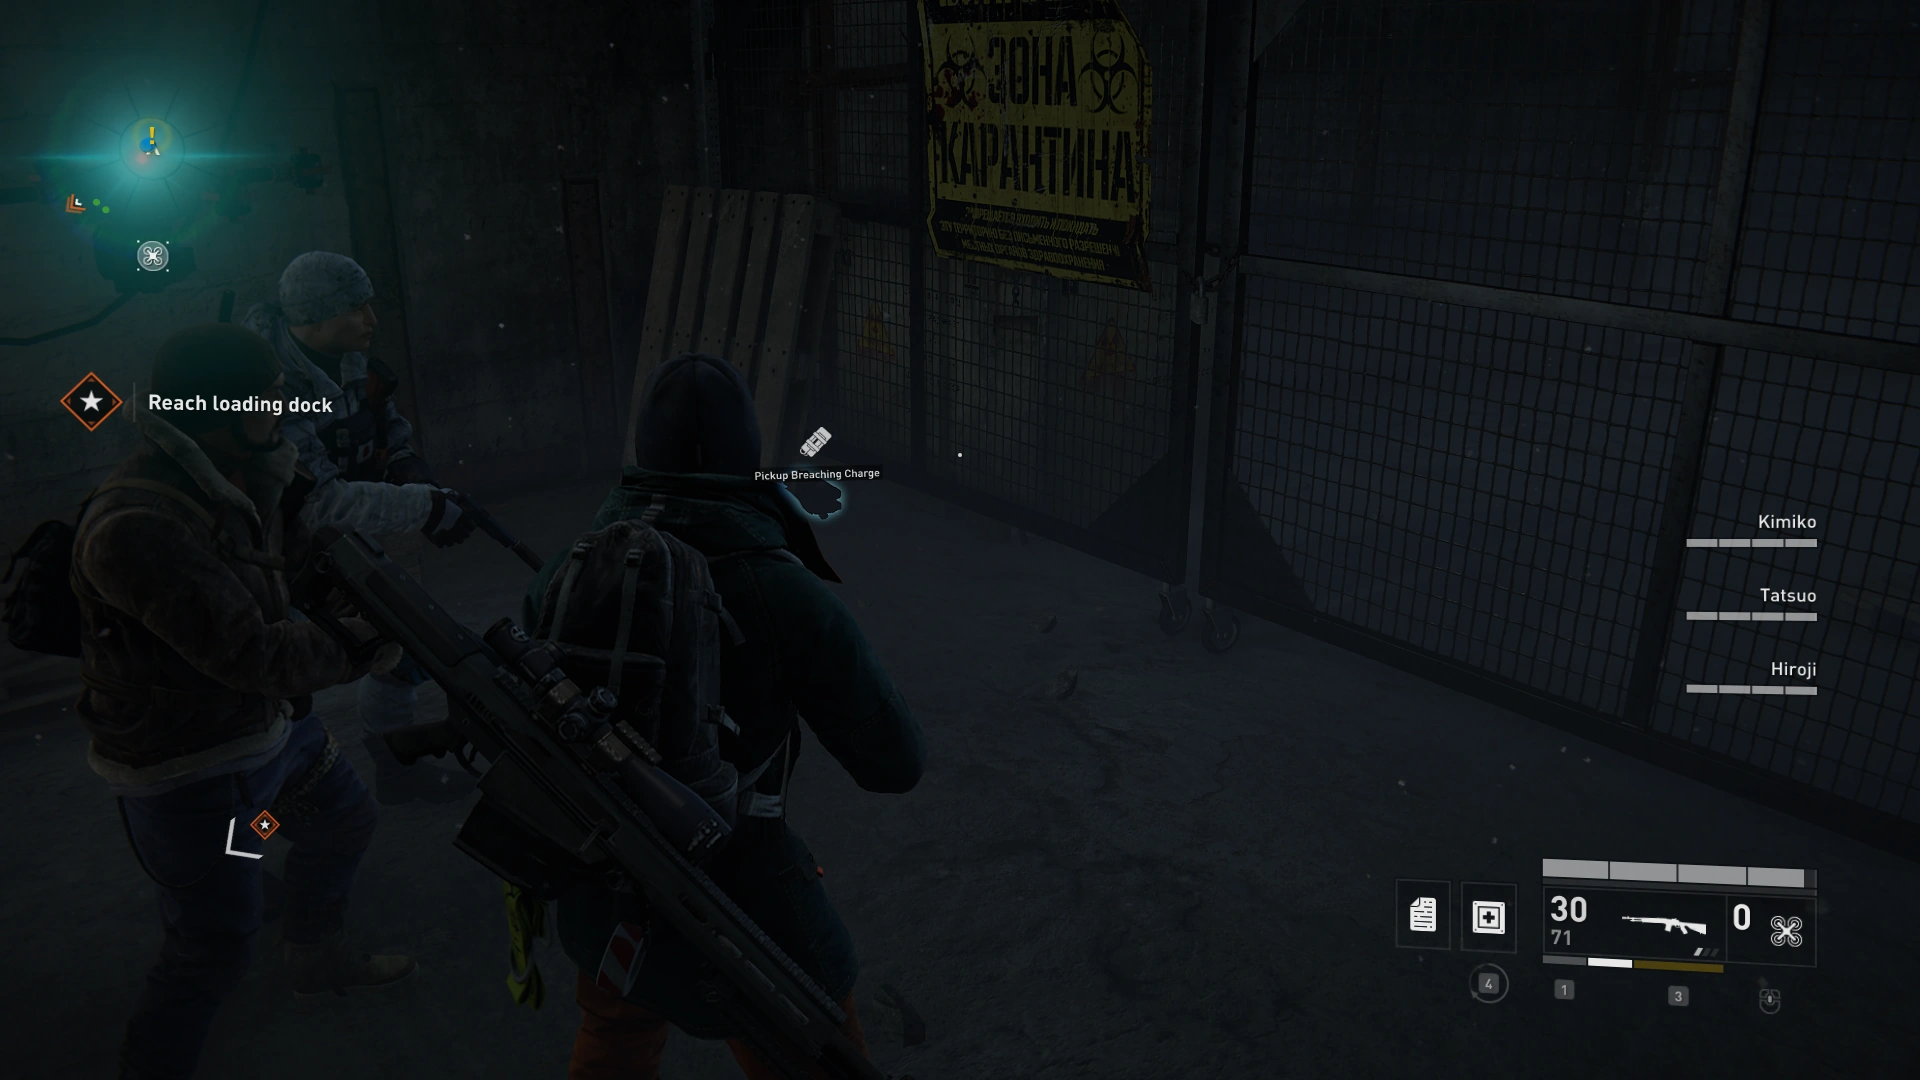
Location 2: ![]()
When entering the first defense area hug the right wall until you have to turn left. It is in a basket on the far wall (where the tag in the images is, charge was not there in that run.
Location 3: ![]()
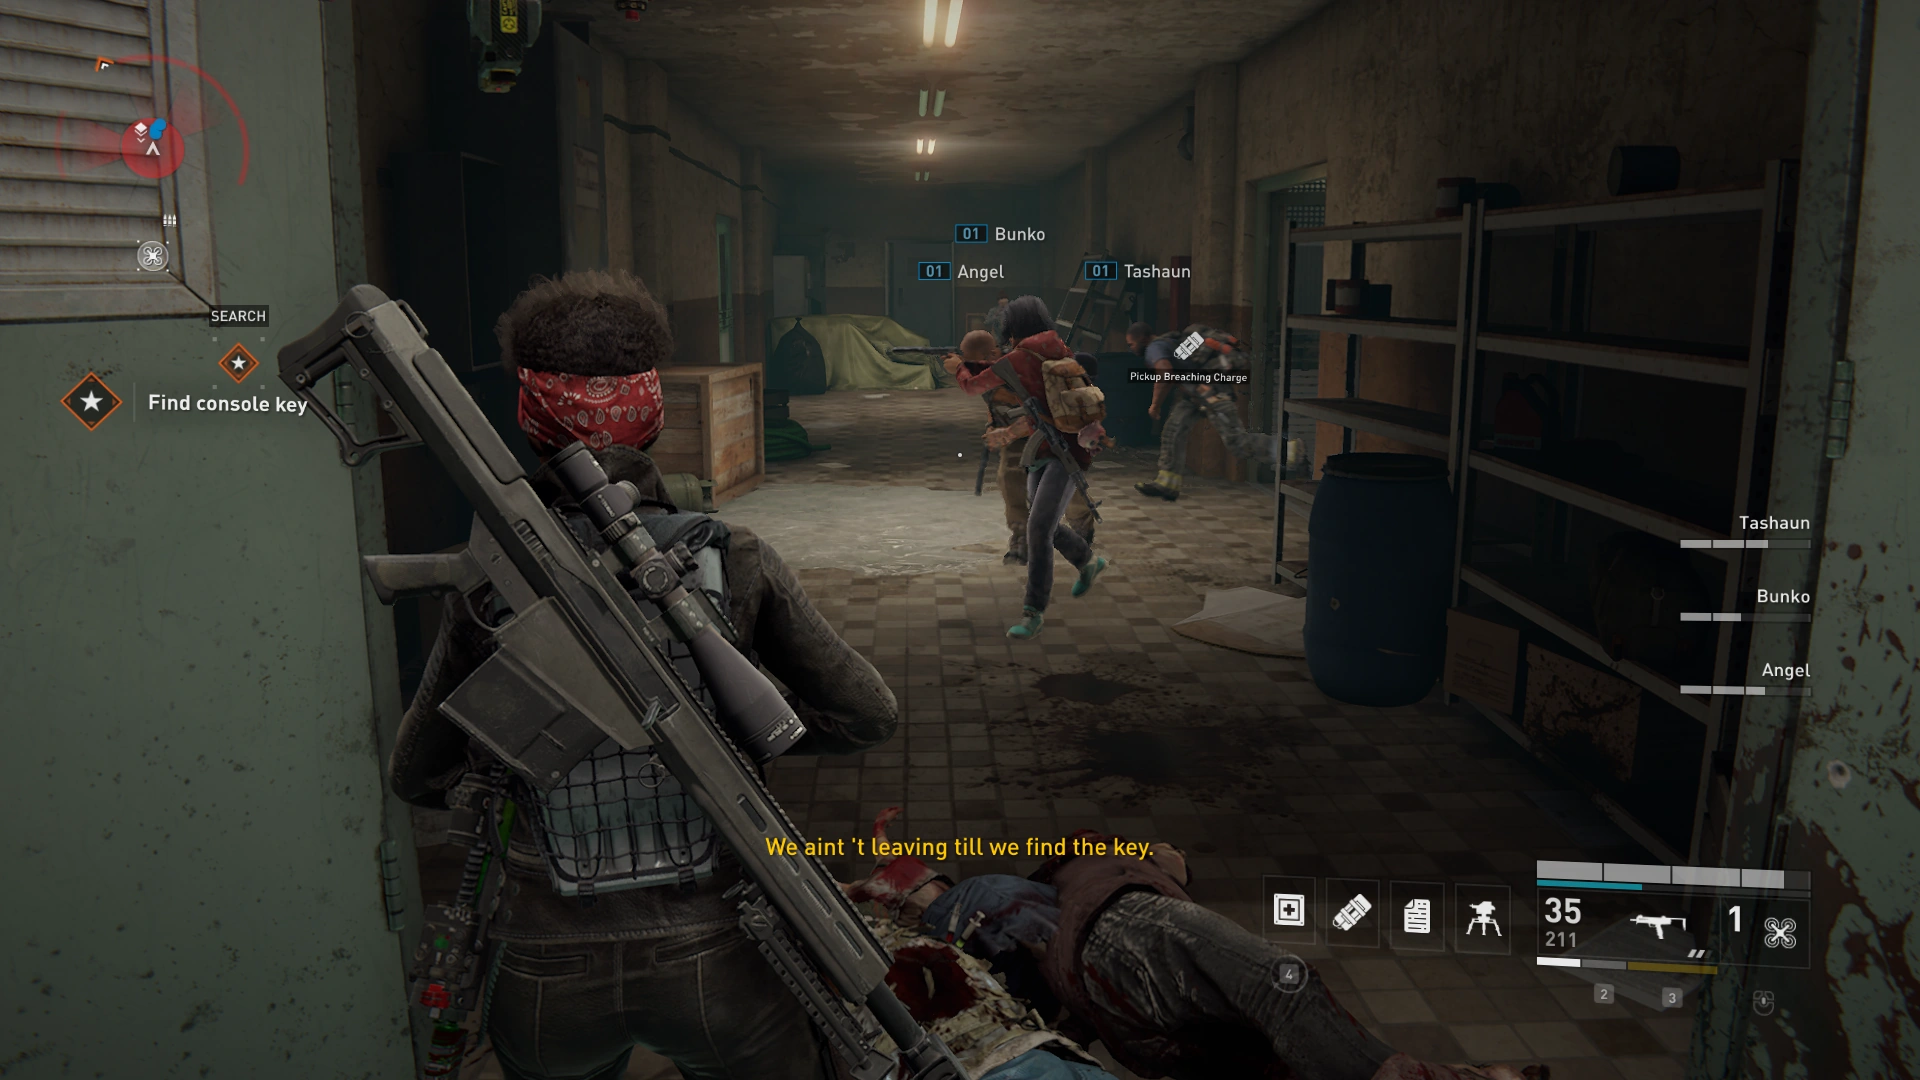
On the second floor of the area where you have to vent the gas. The Breaching Charge is behind a pillar on the left side of the room.
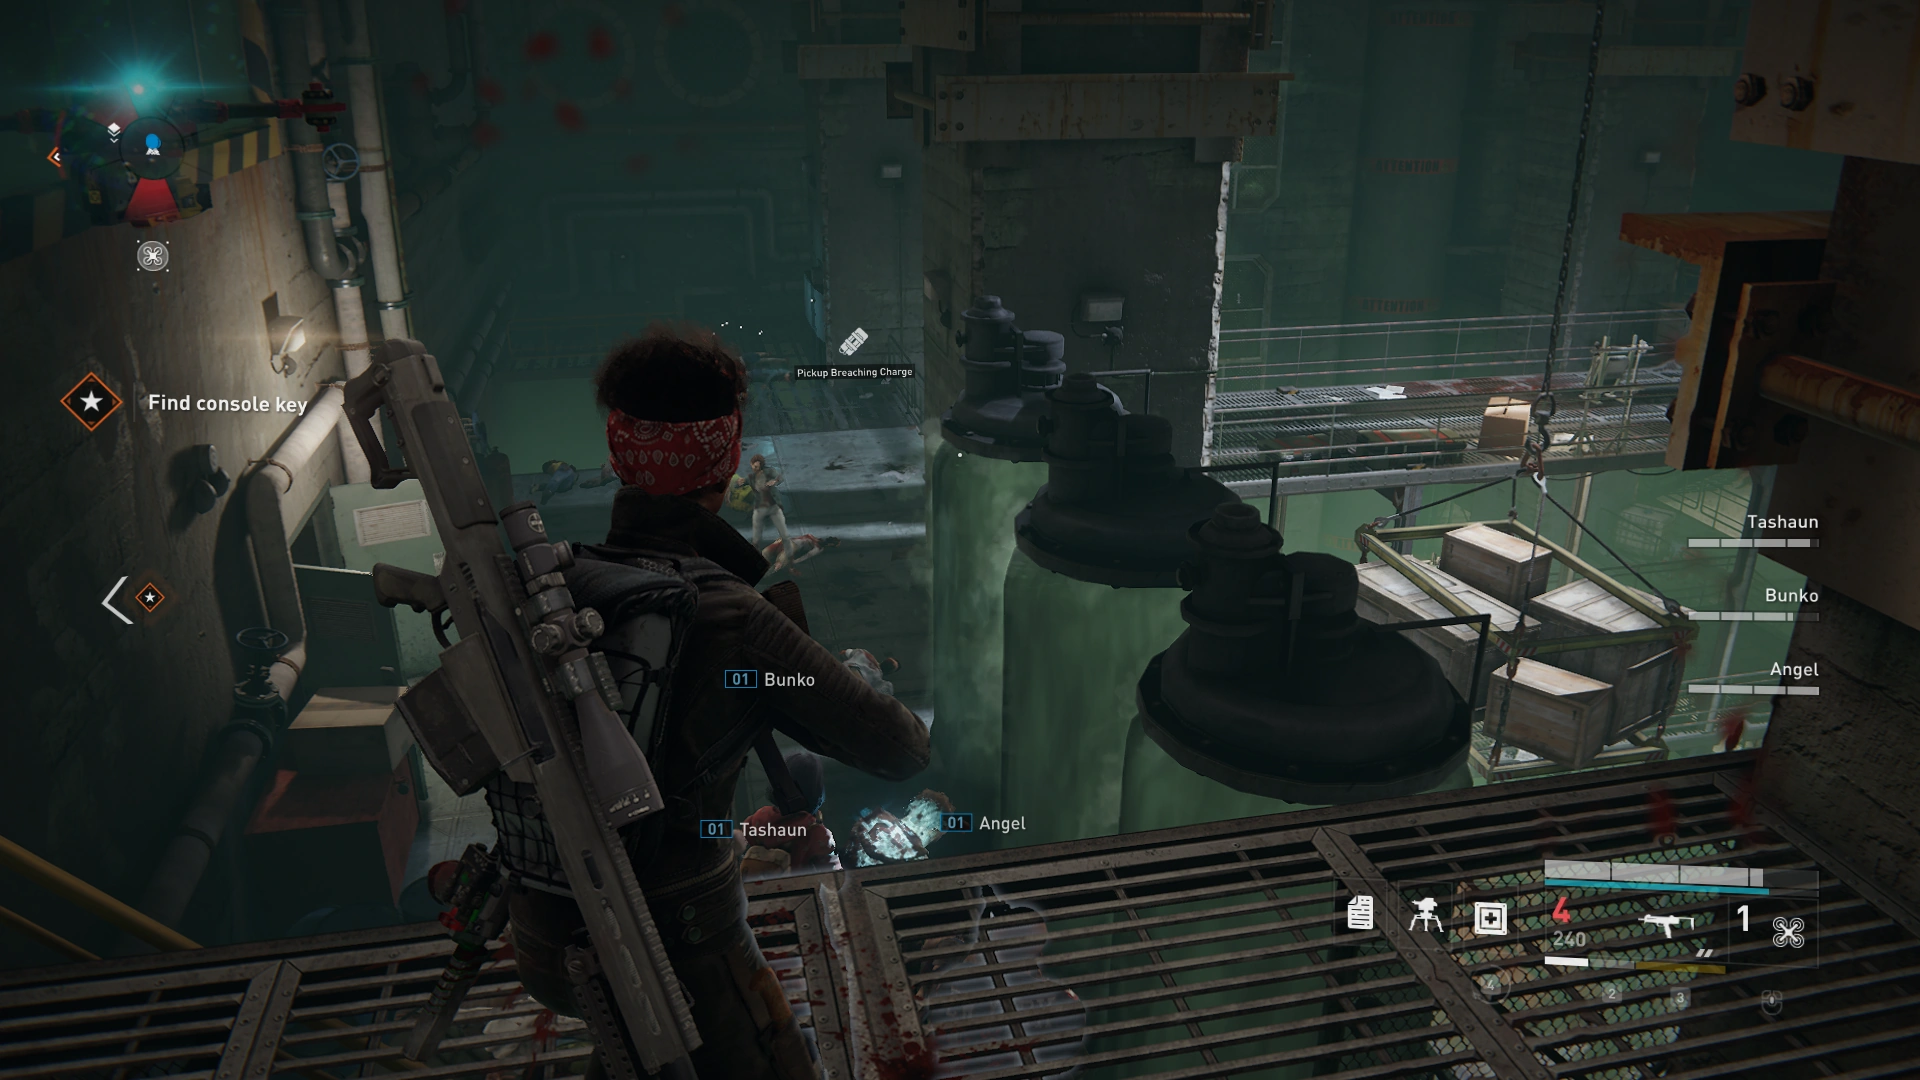
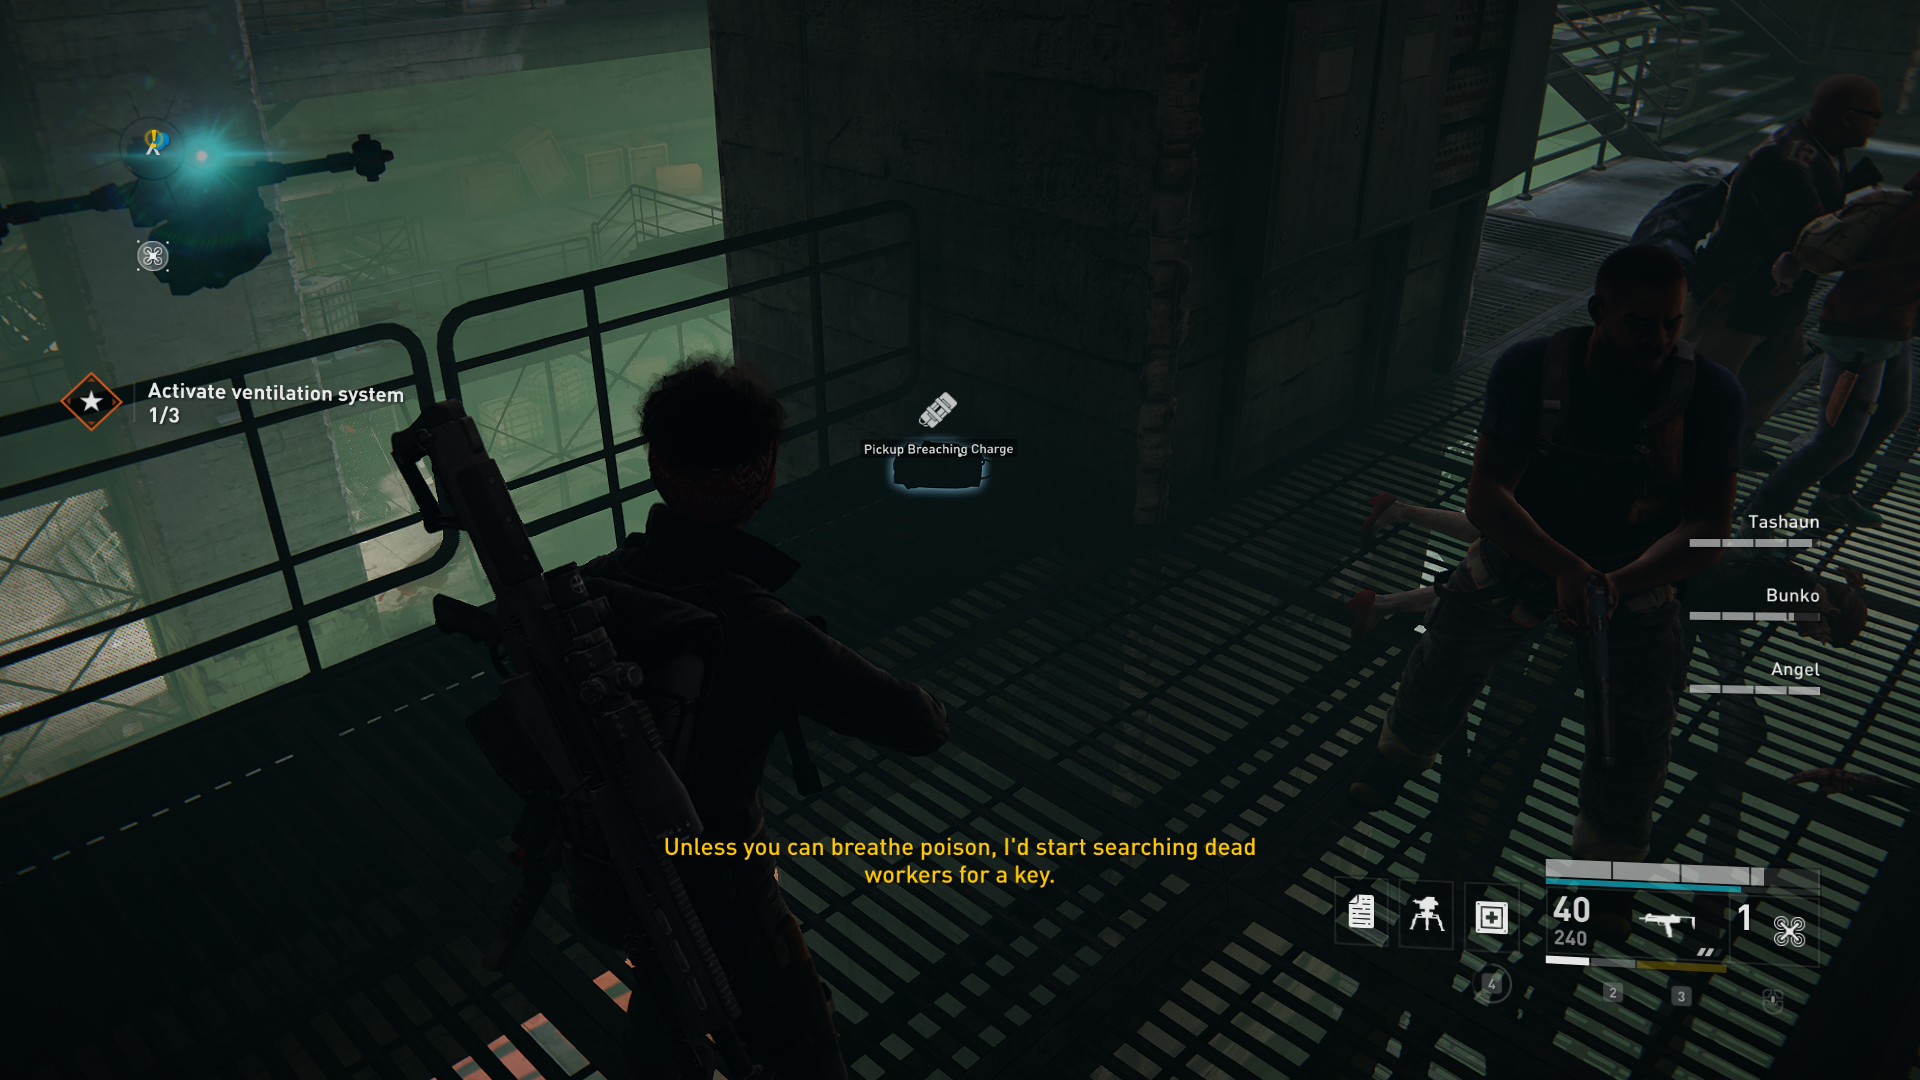
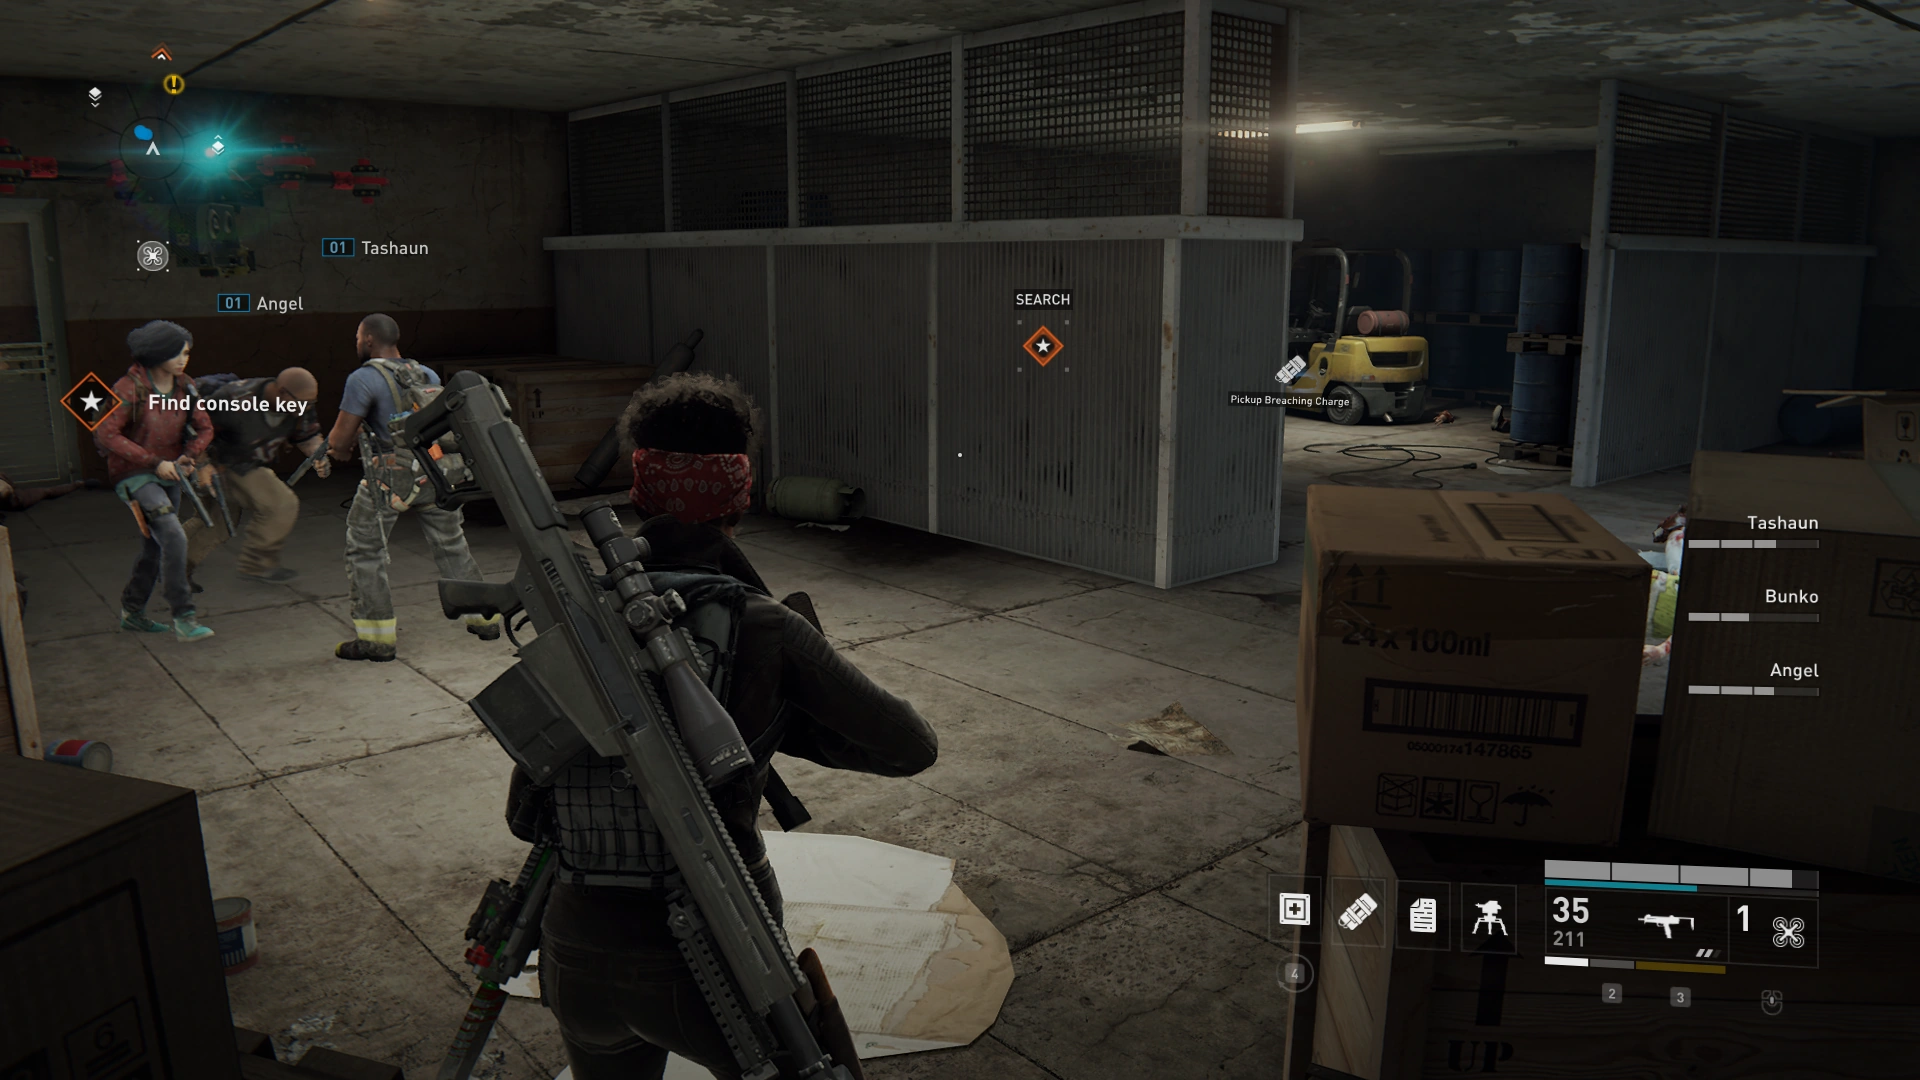
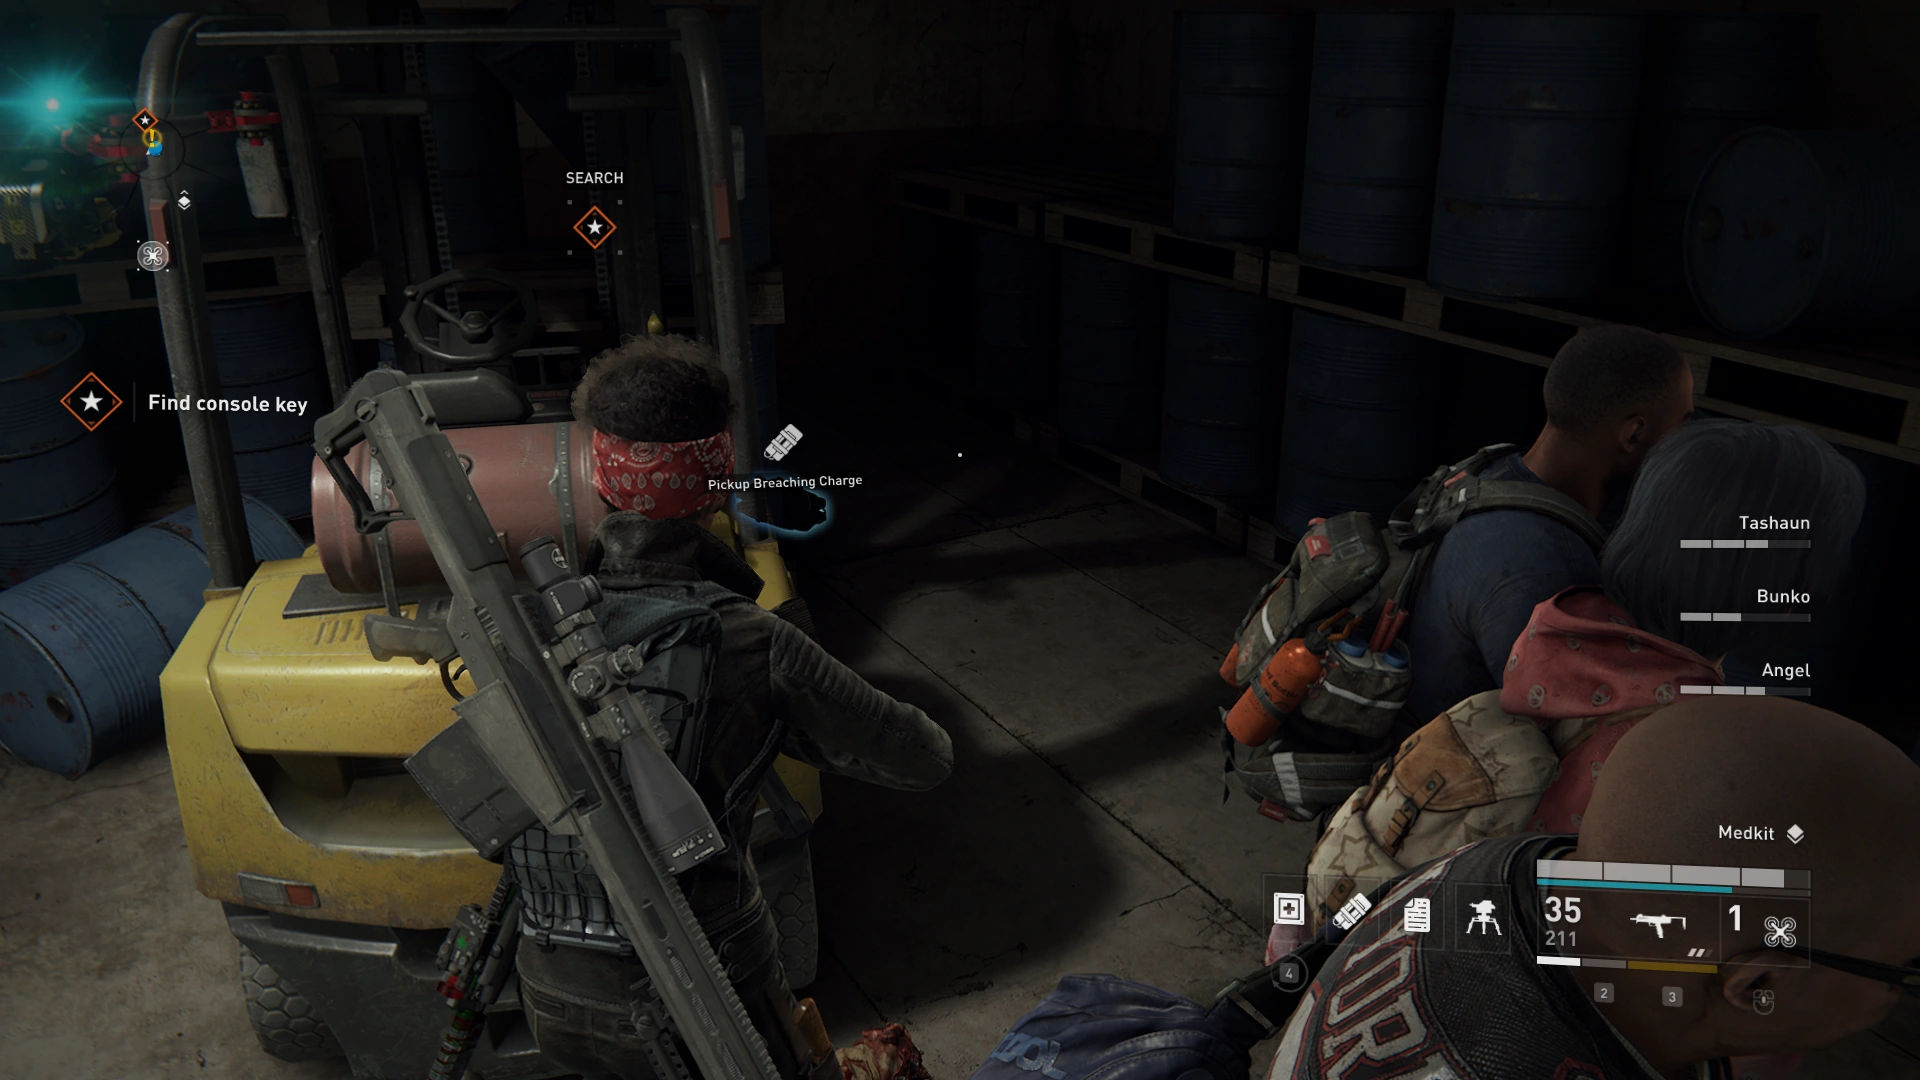
Location 4: ![]()
On the second floor of the area where you have to vent the gas, head in the left hallway and take the right door. The Breaching Charge is in the far corner of the room behind a forklift.
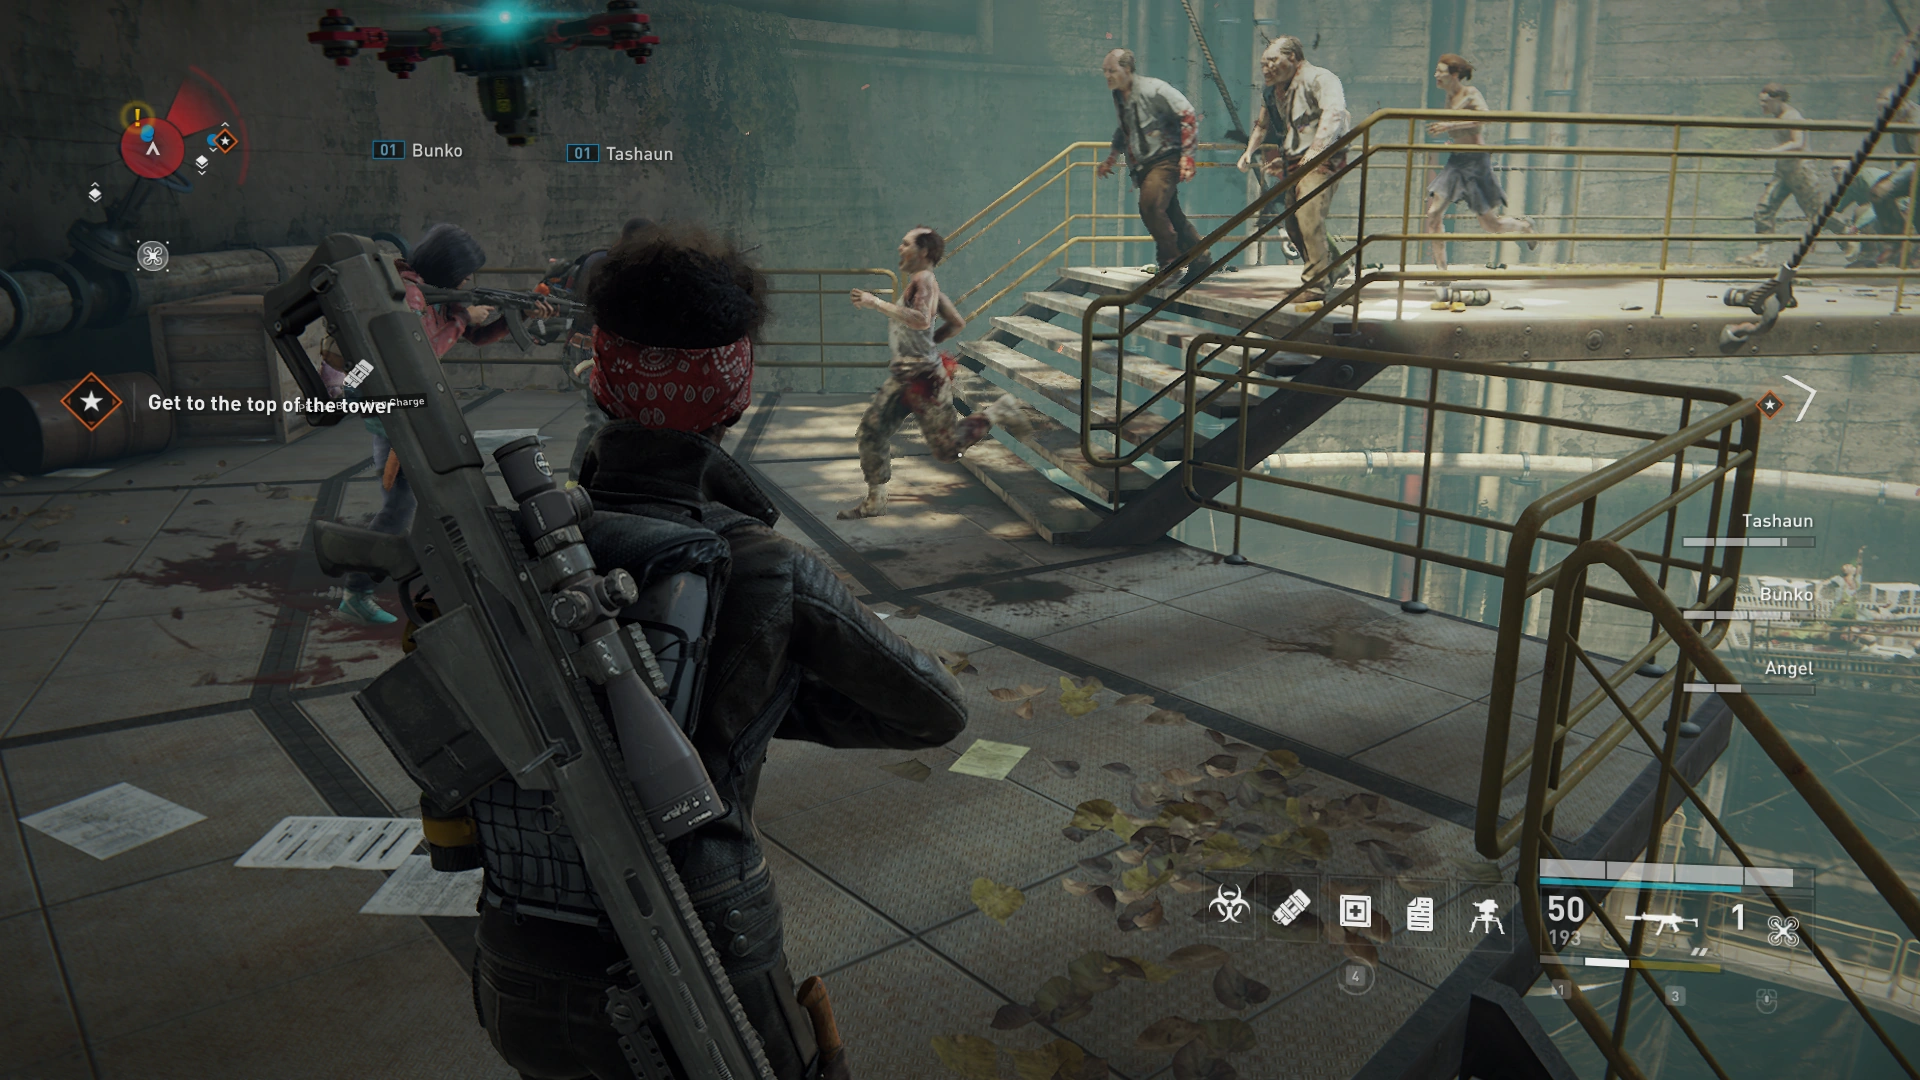
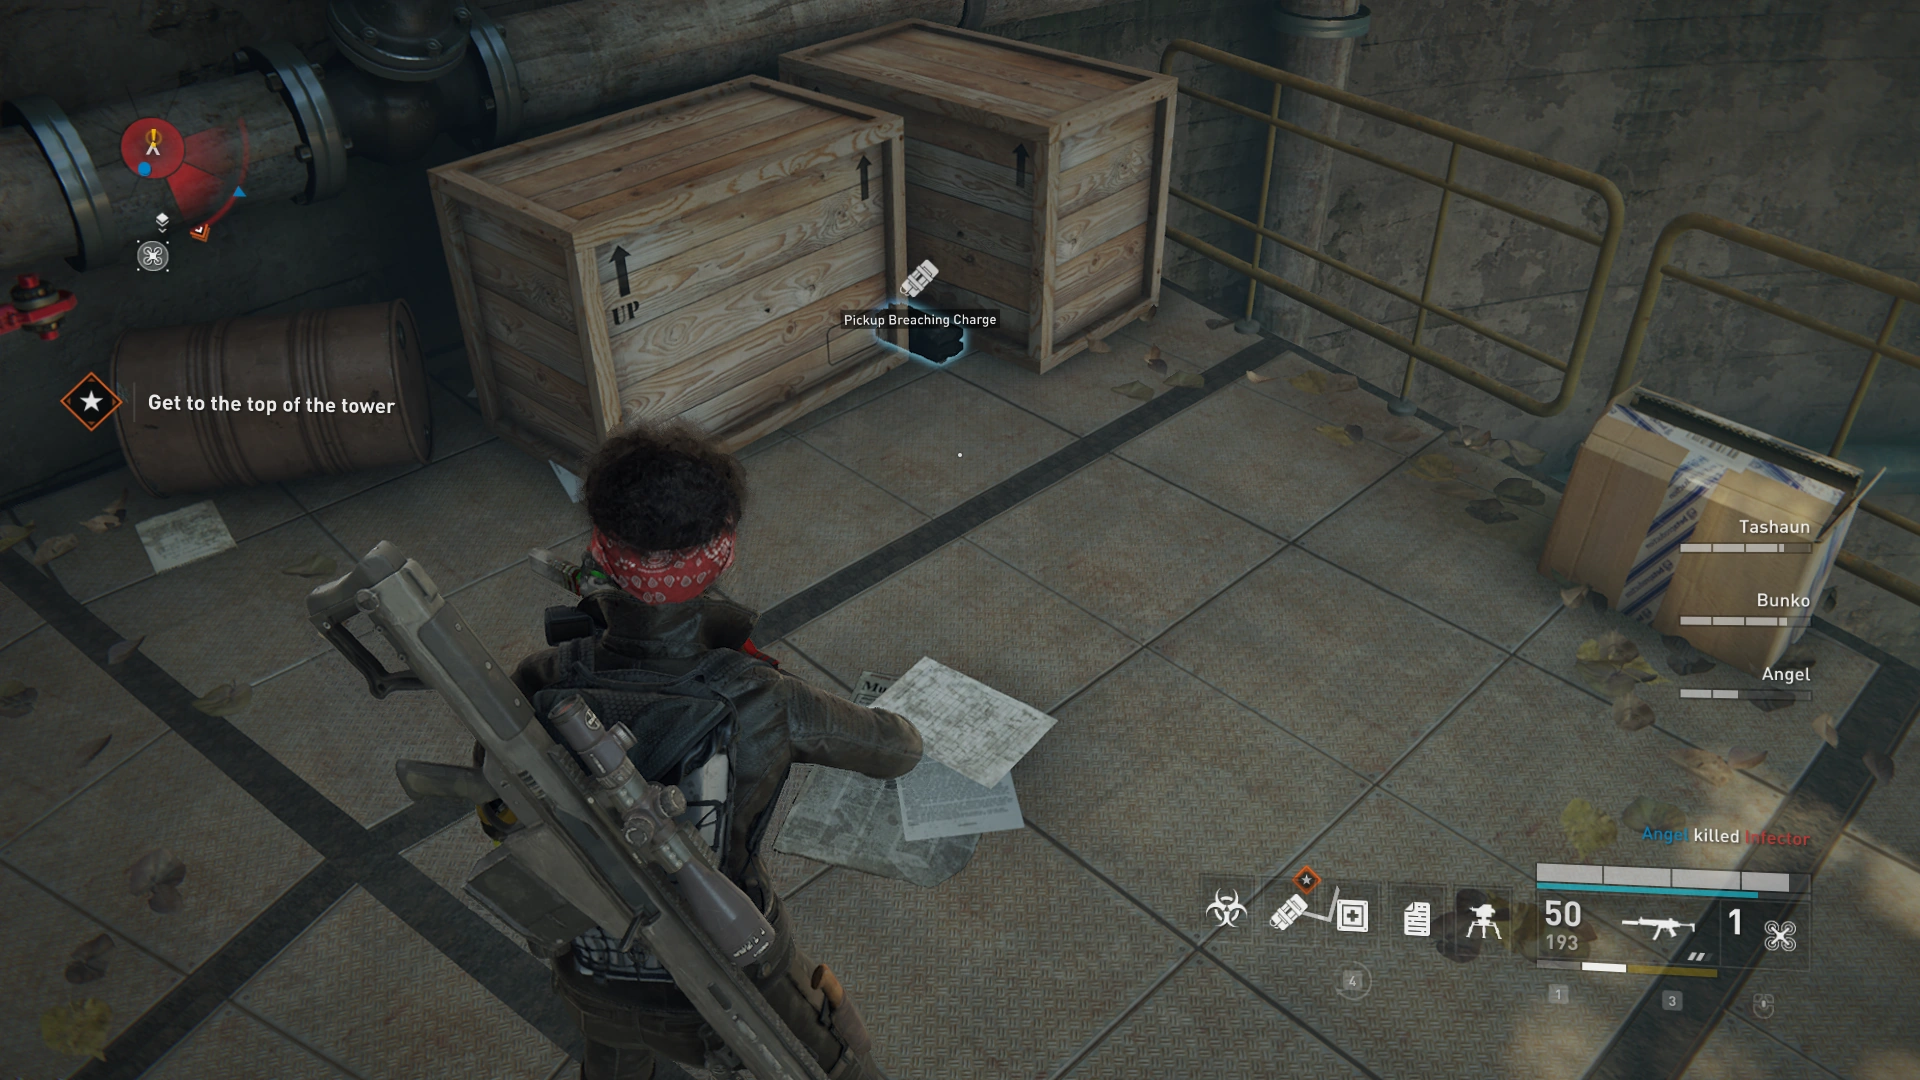
Location 5: ![]()
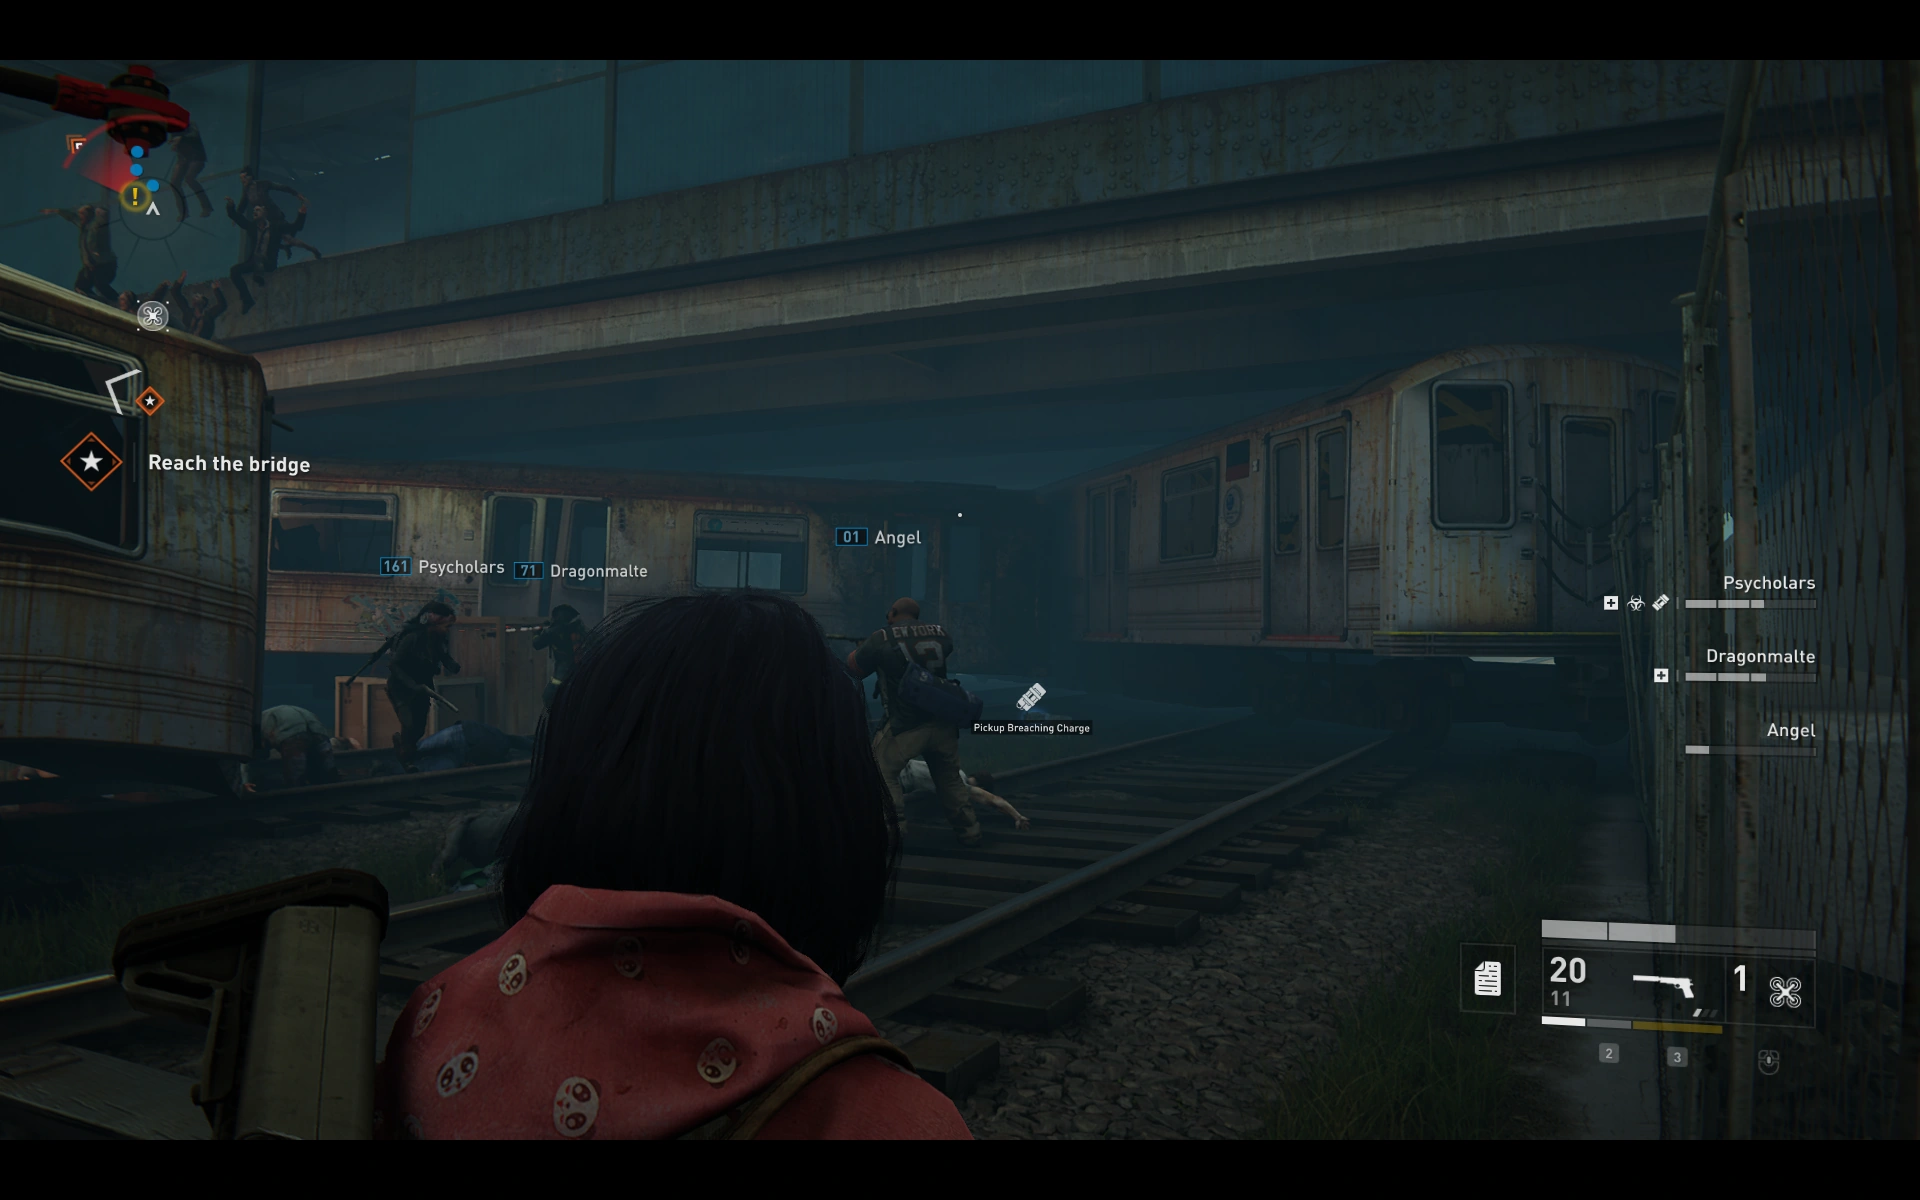
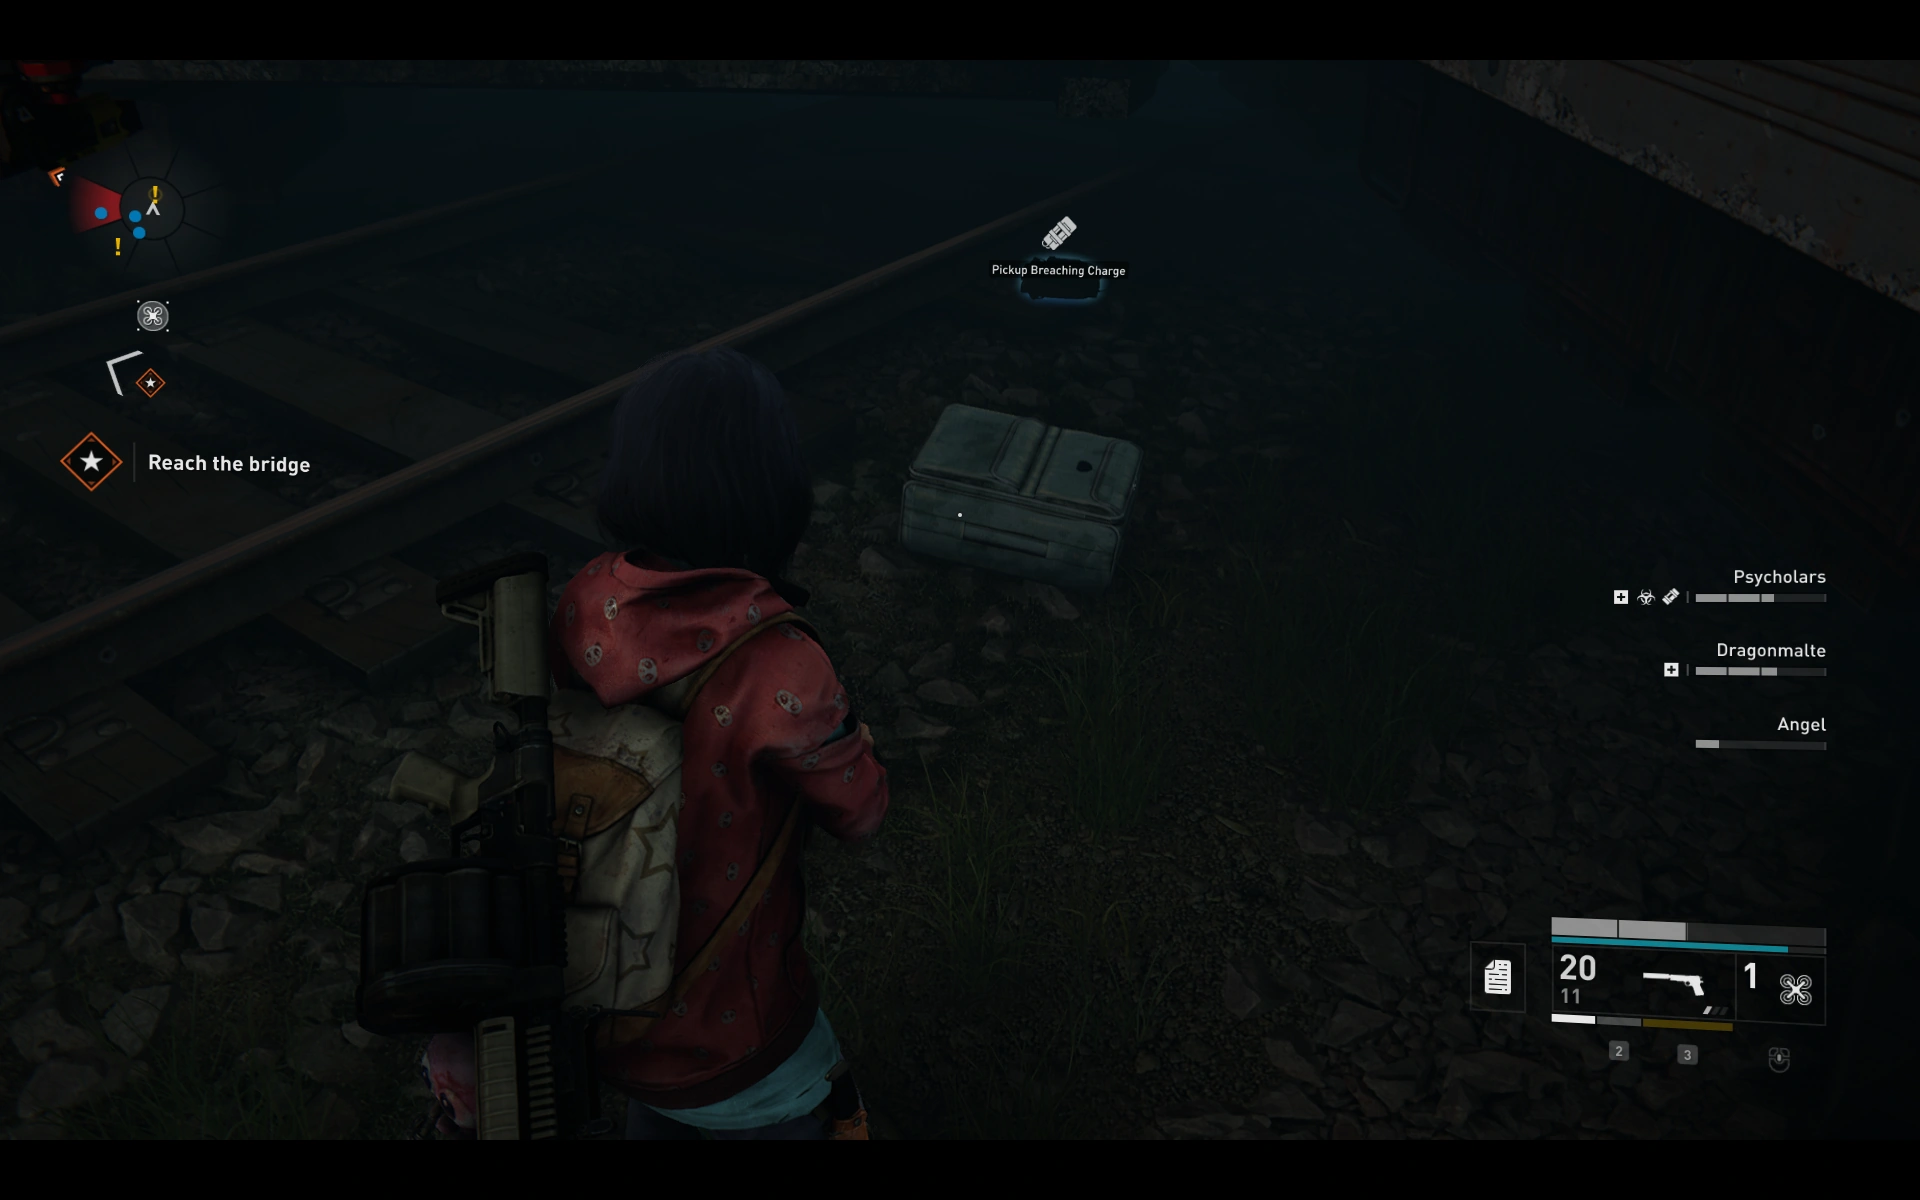
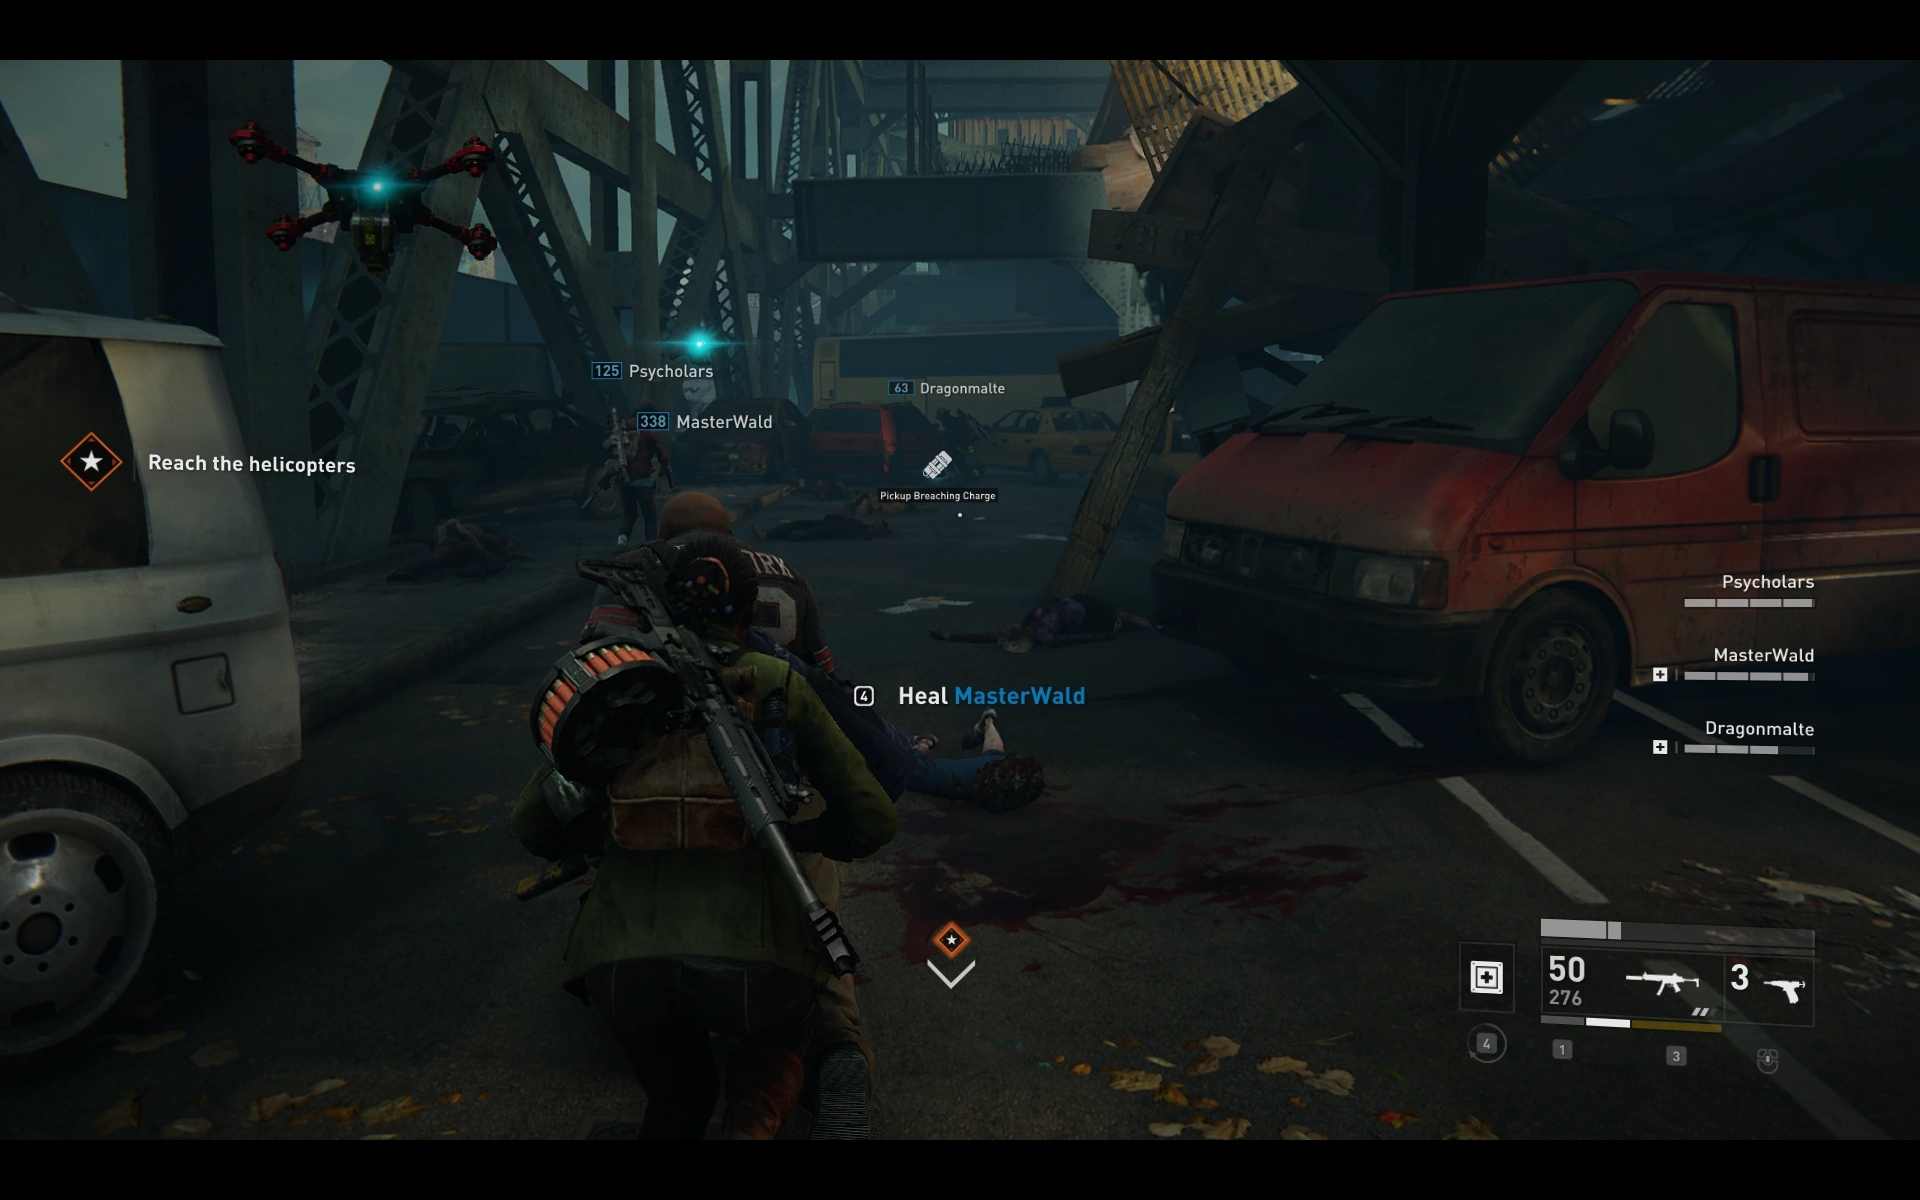
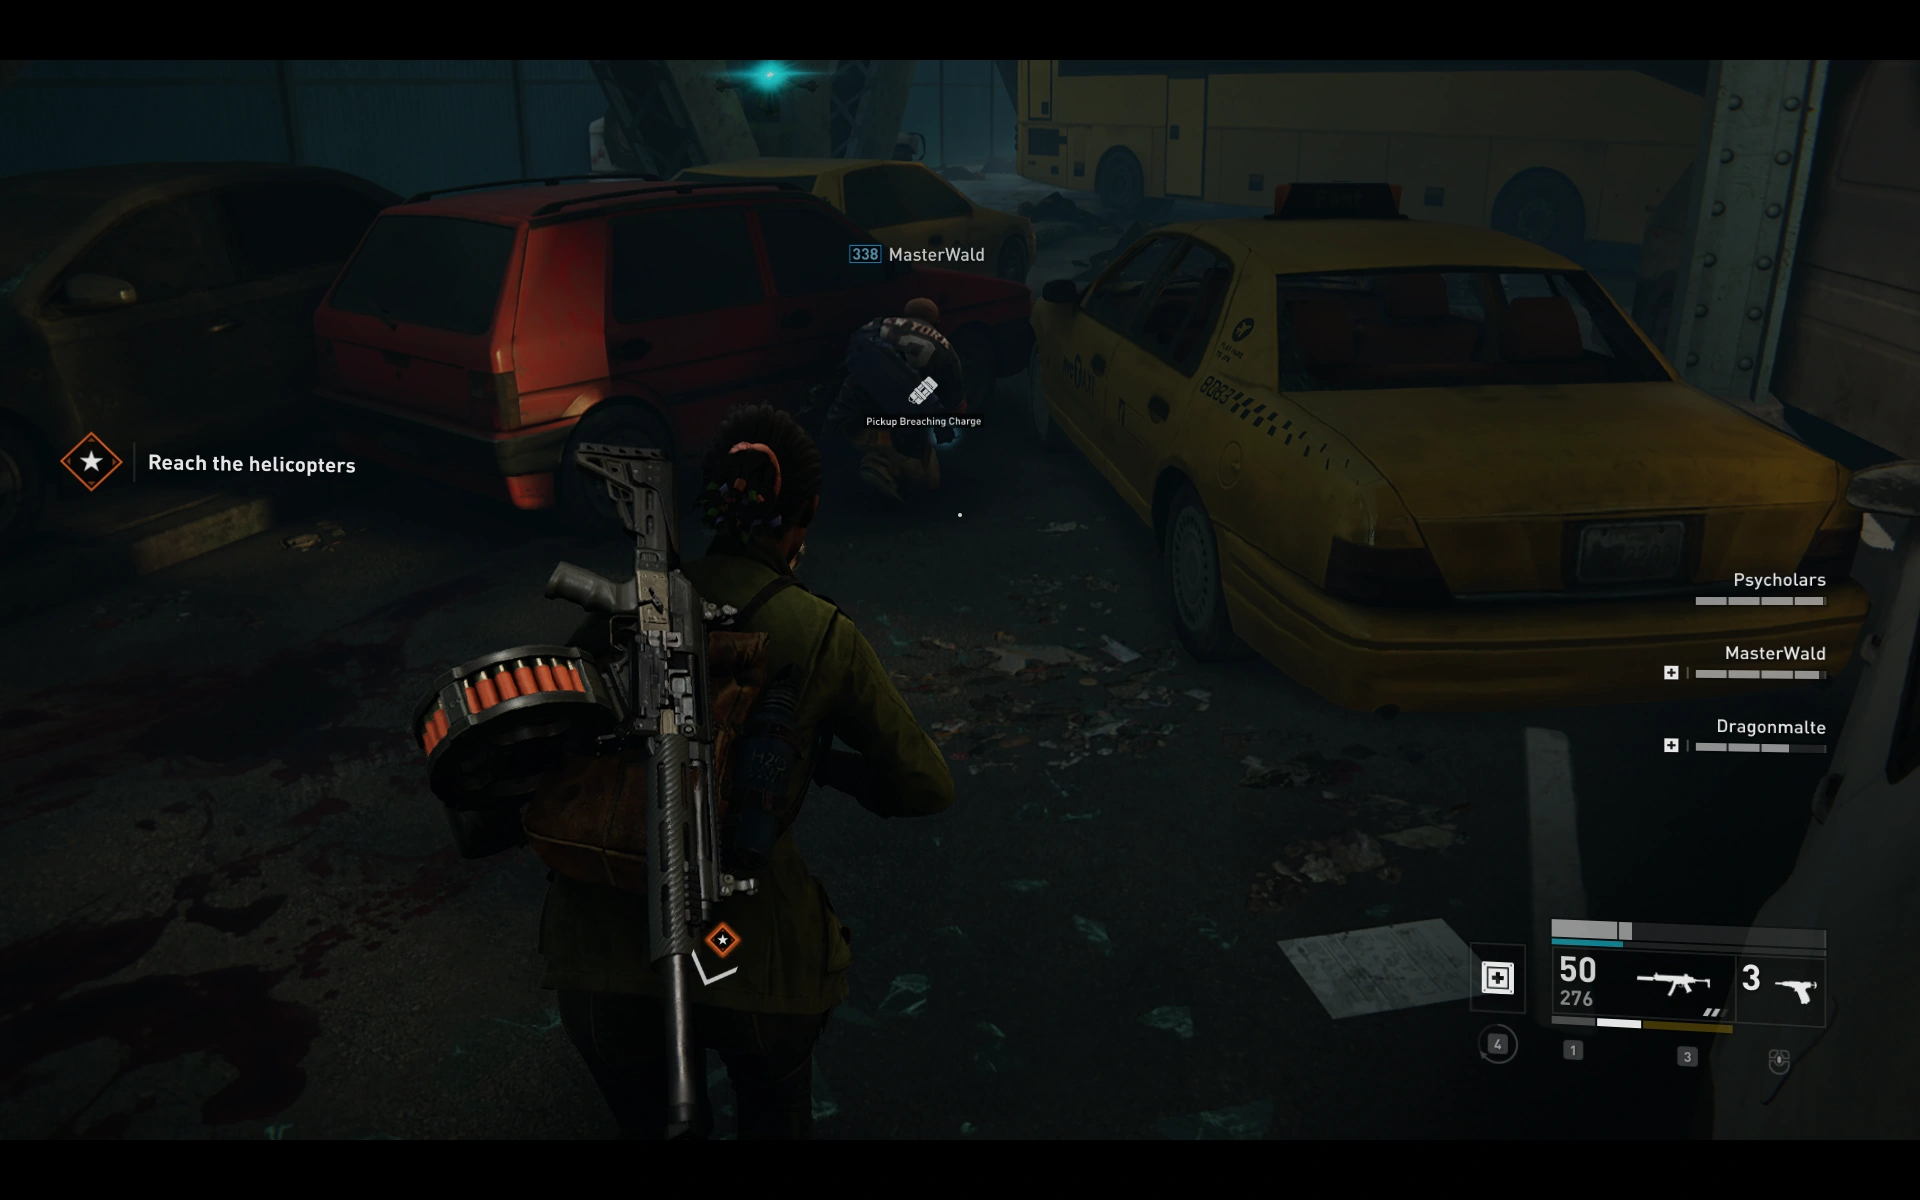
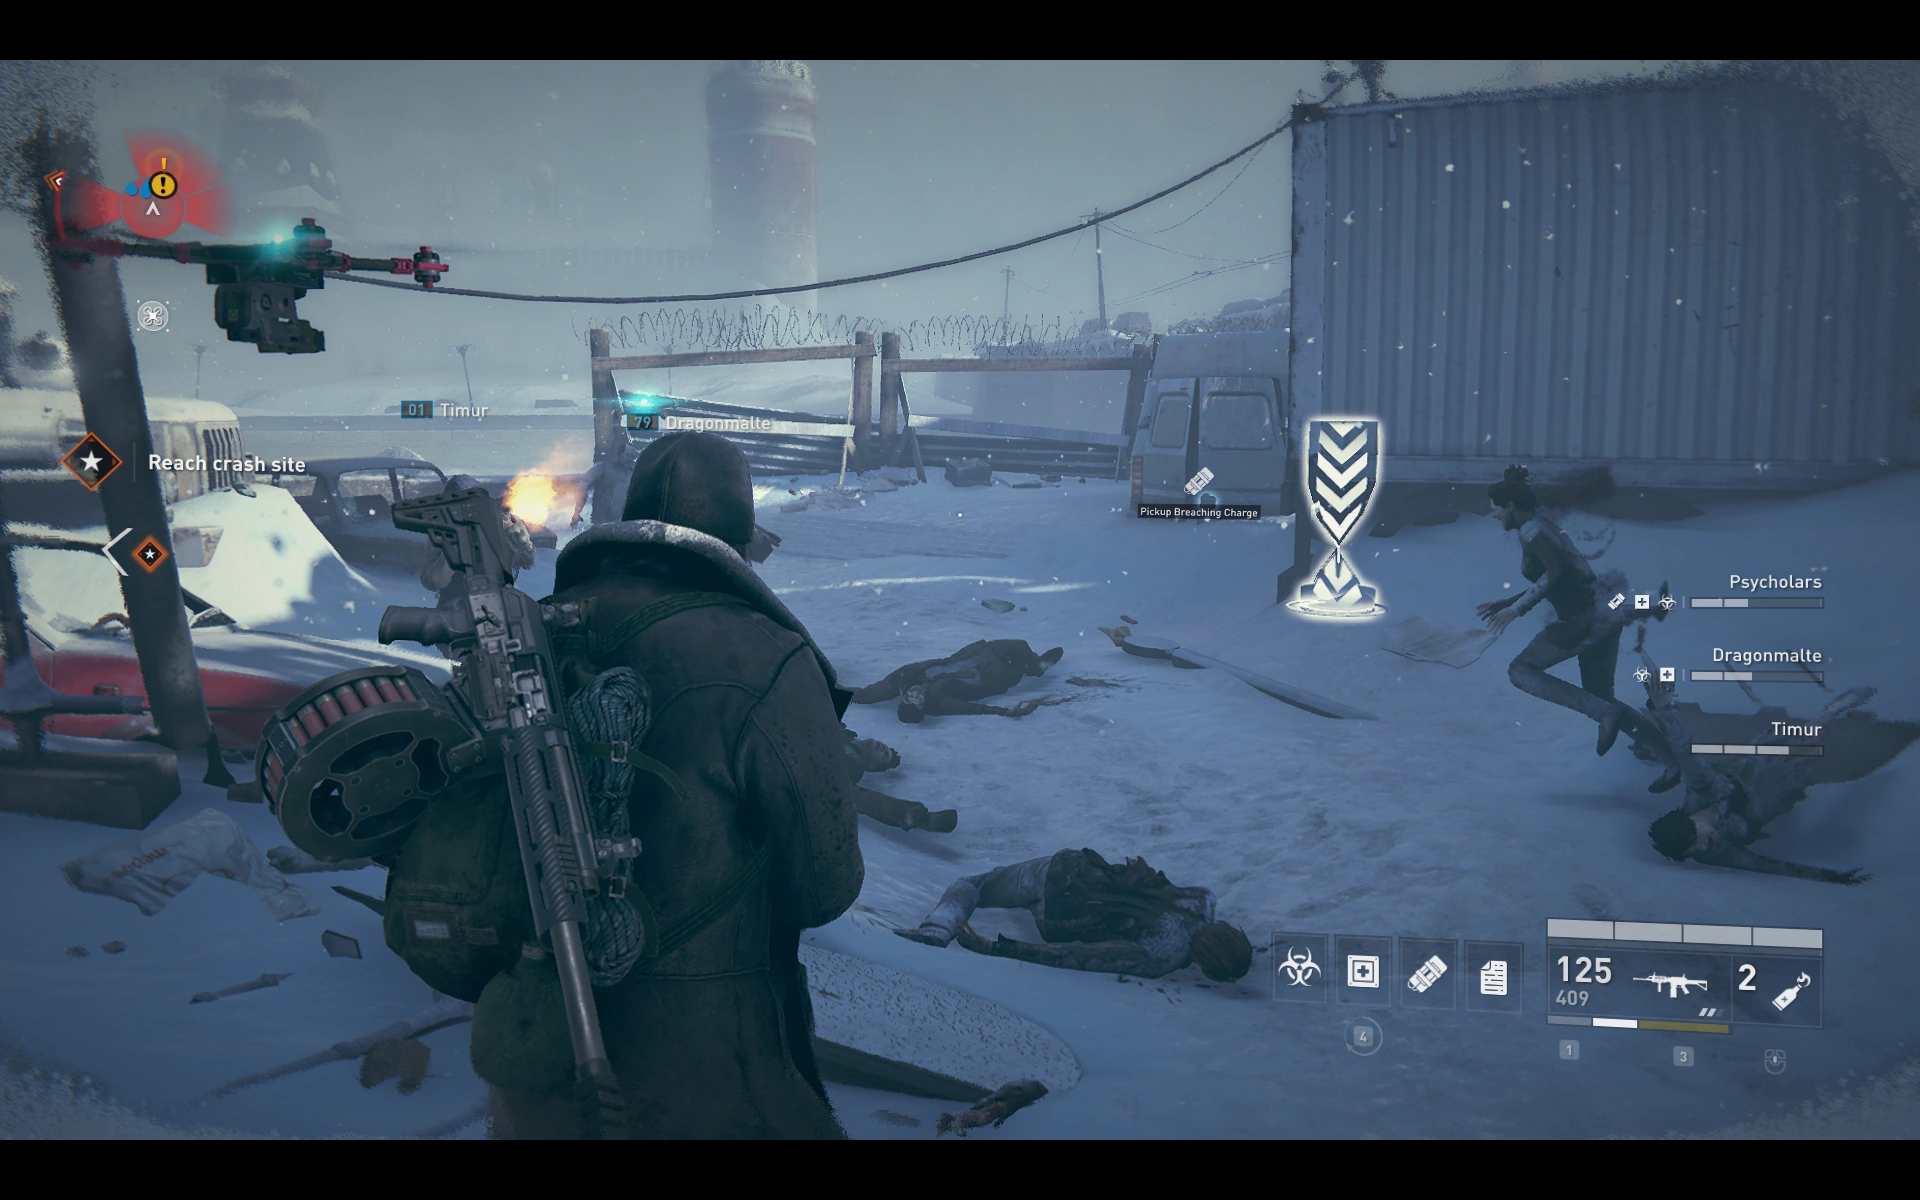
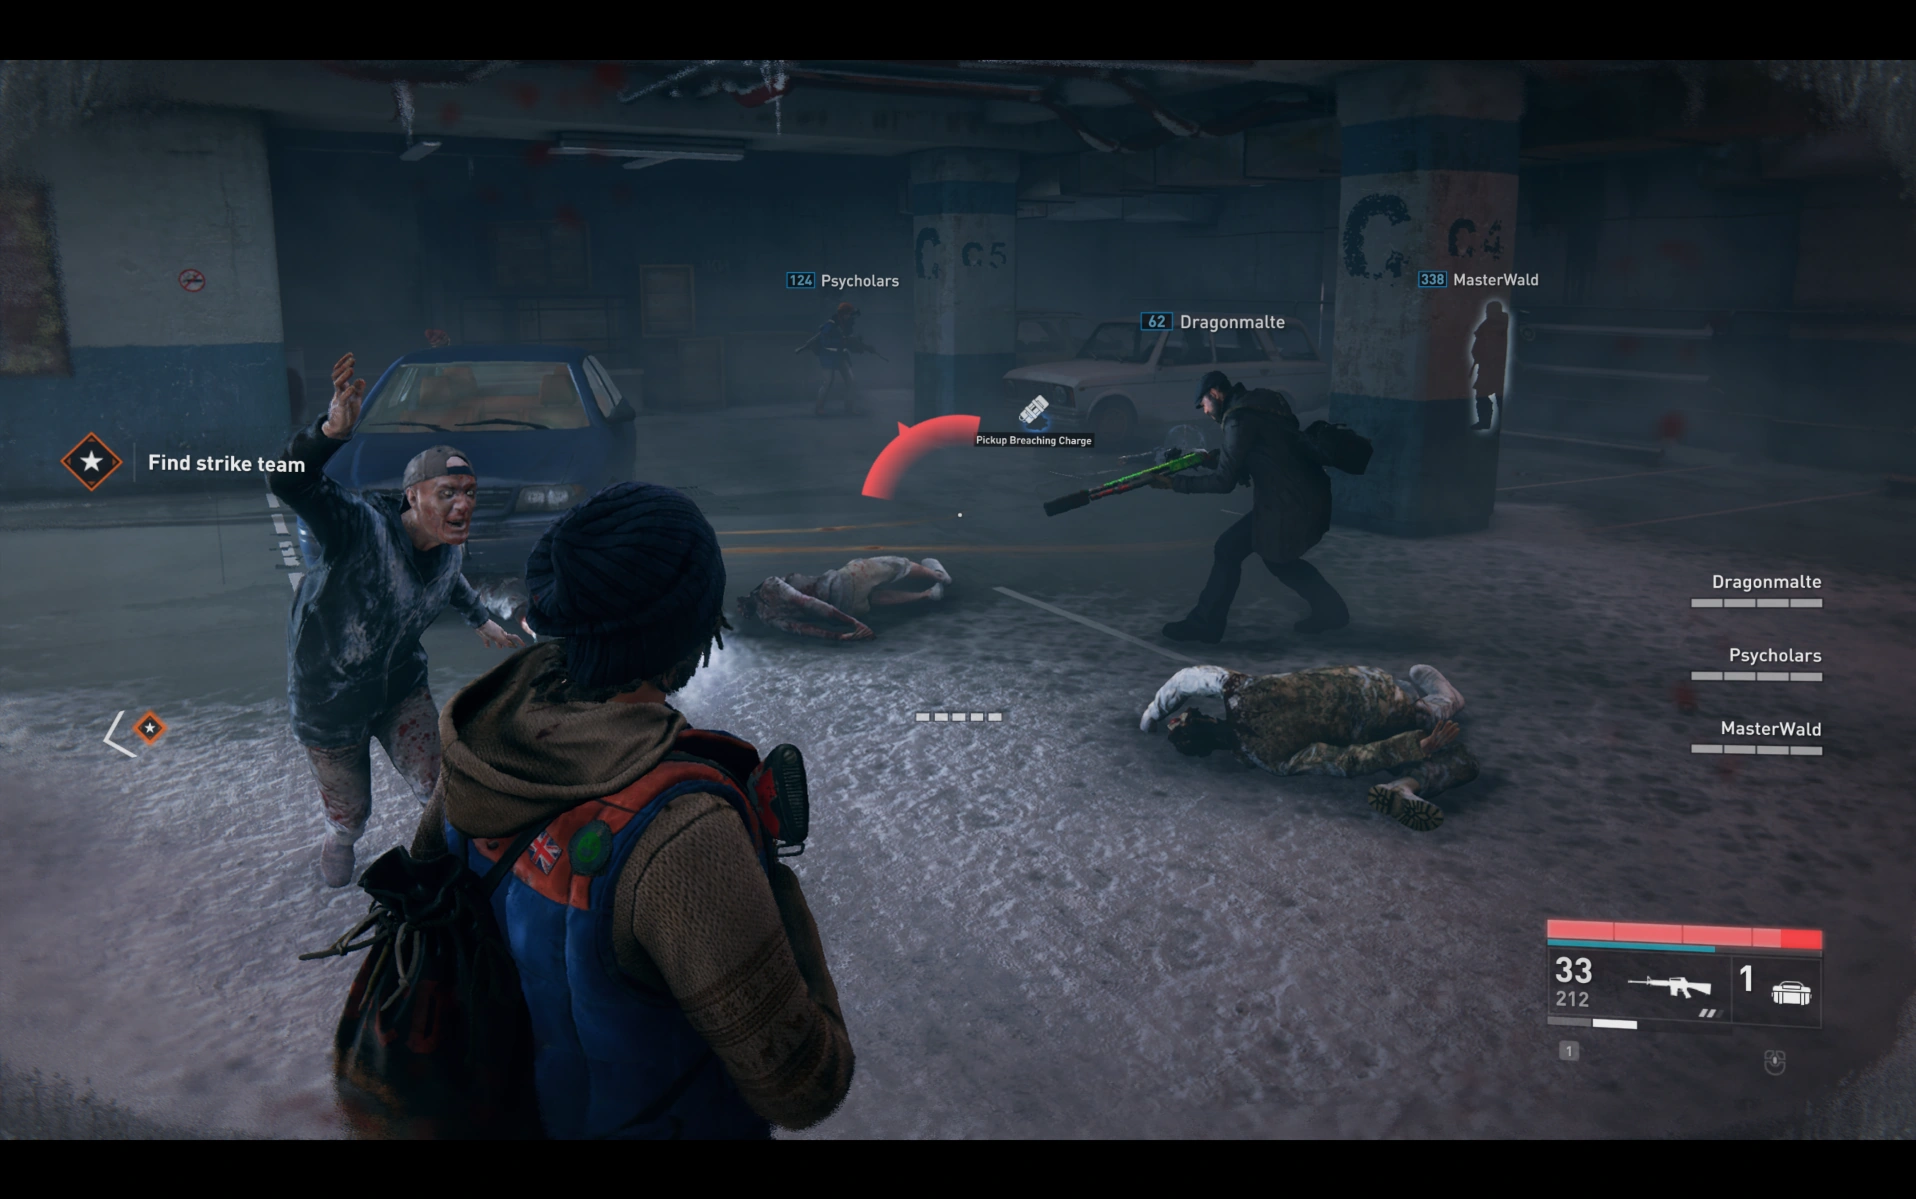
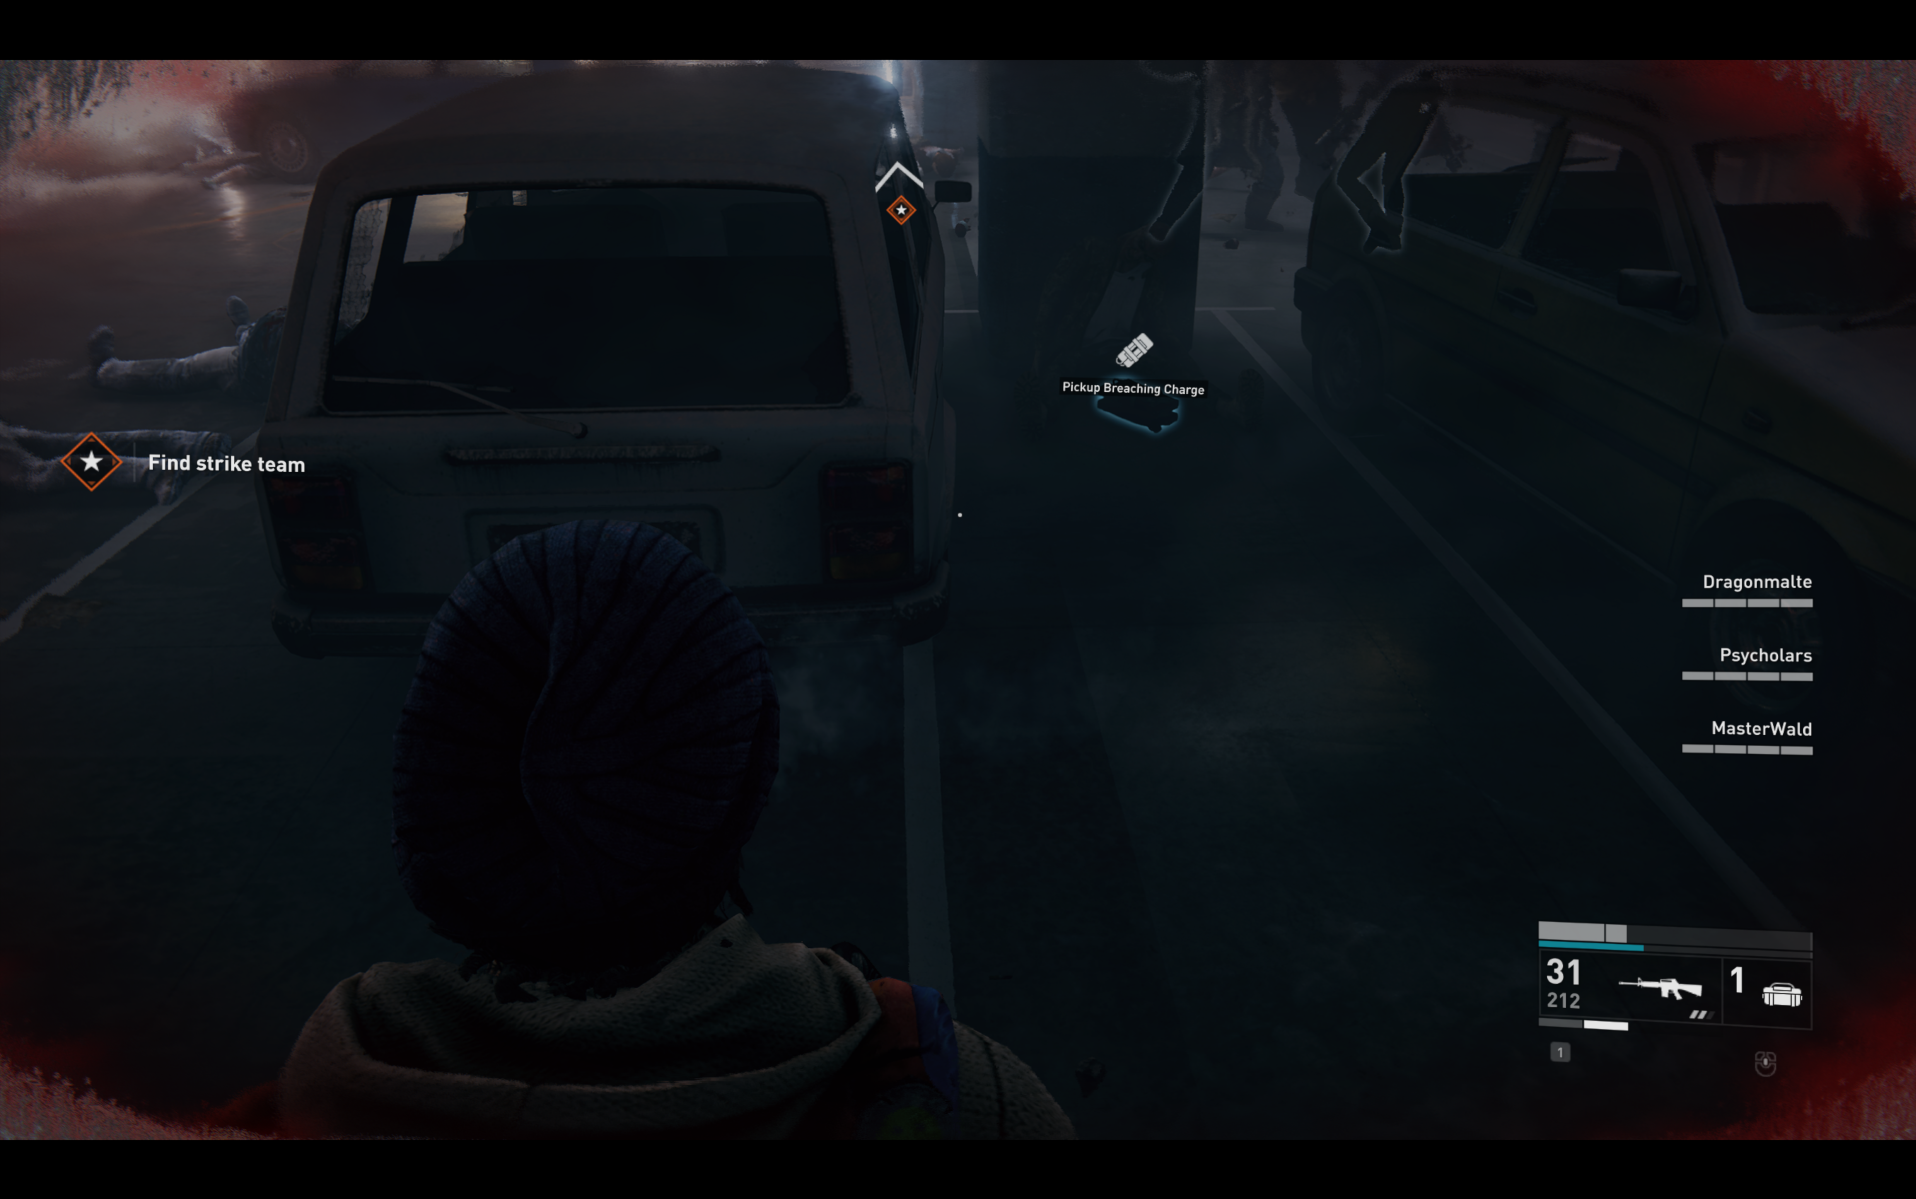
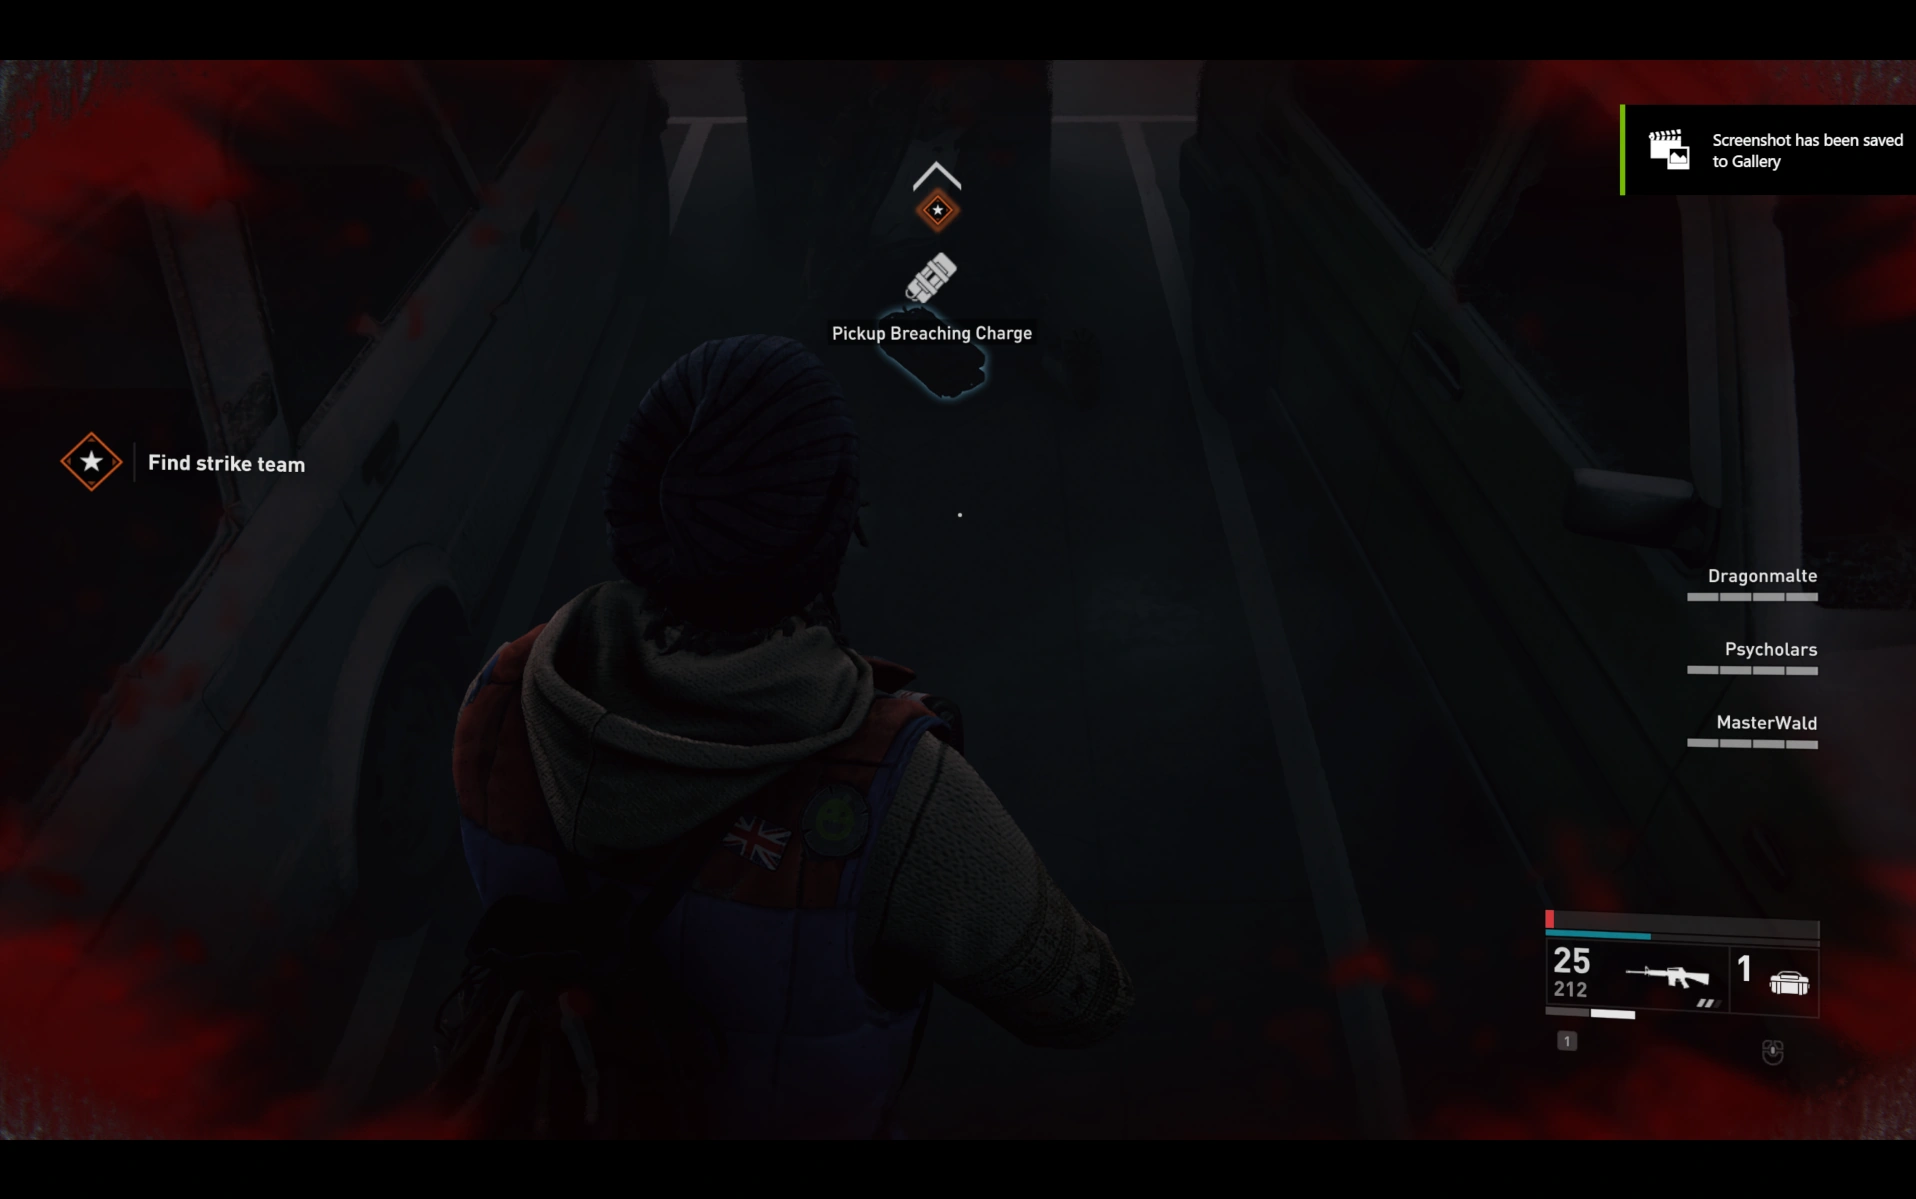
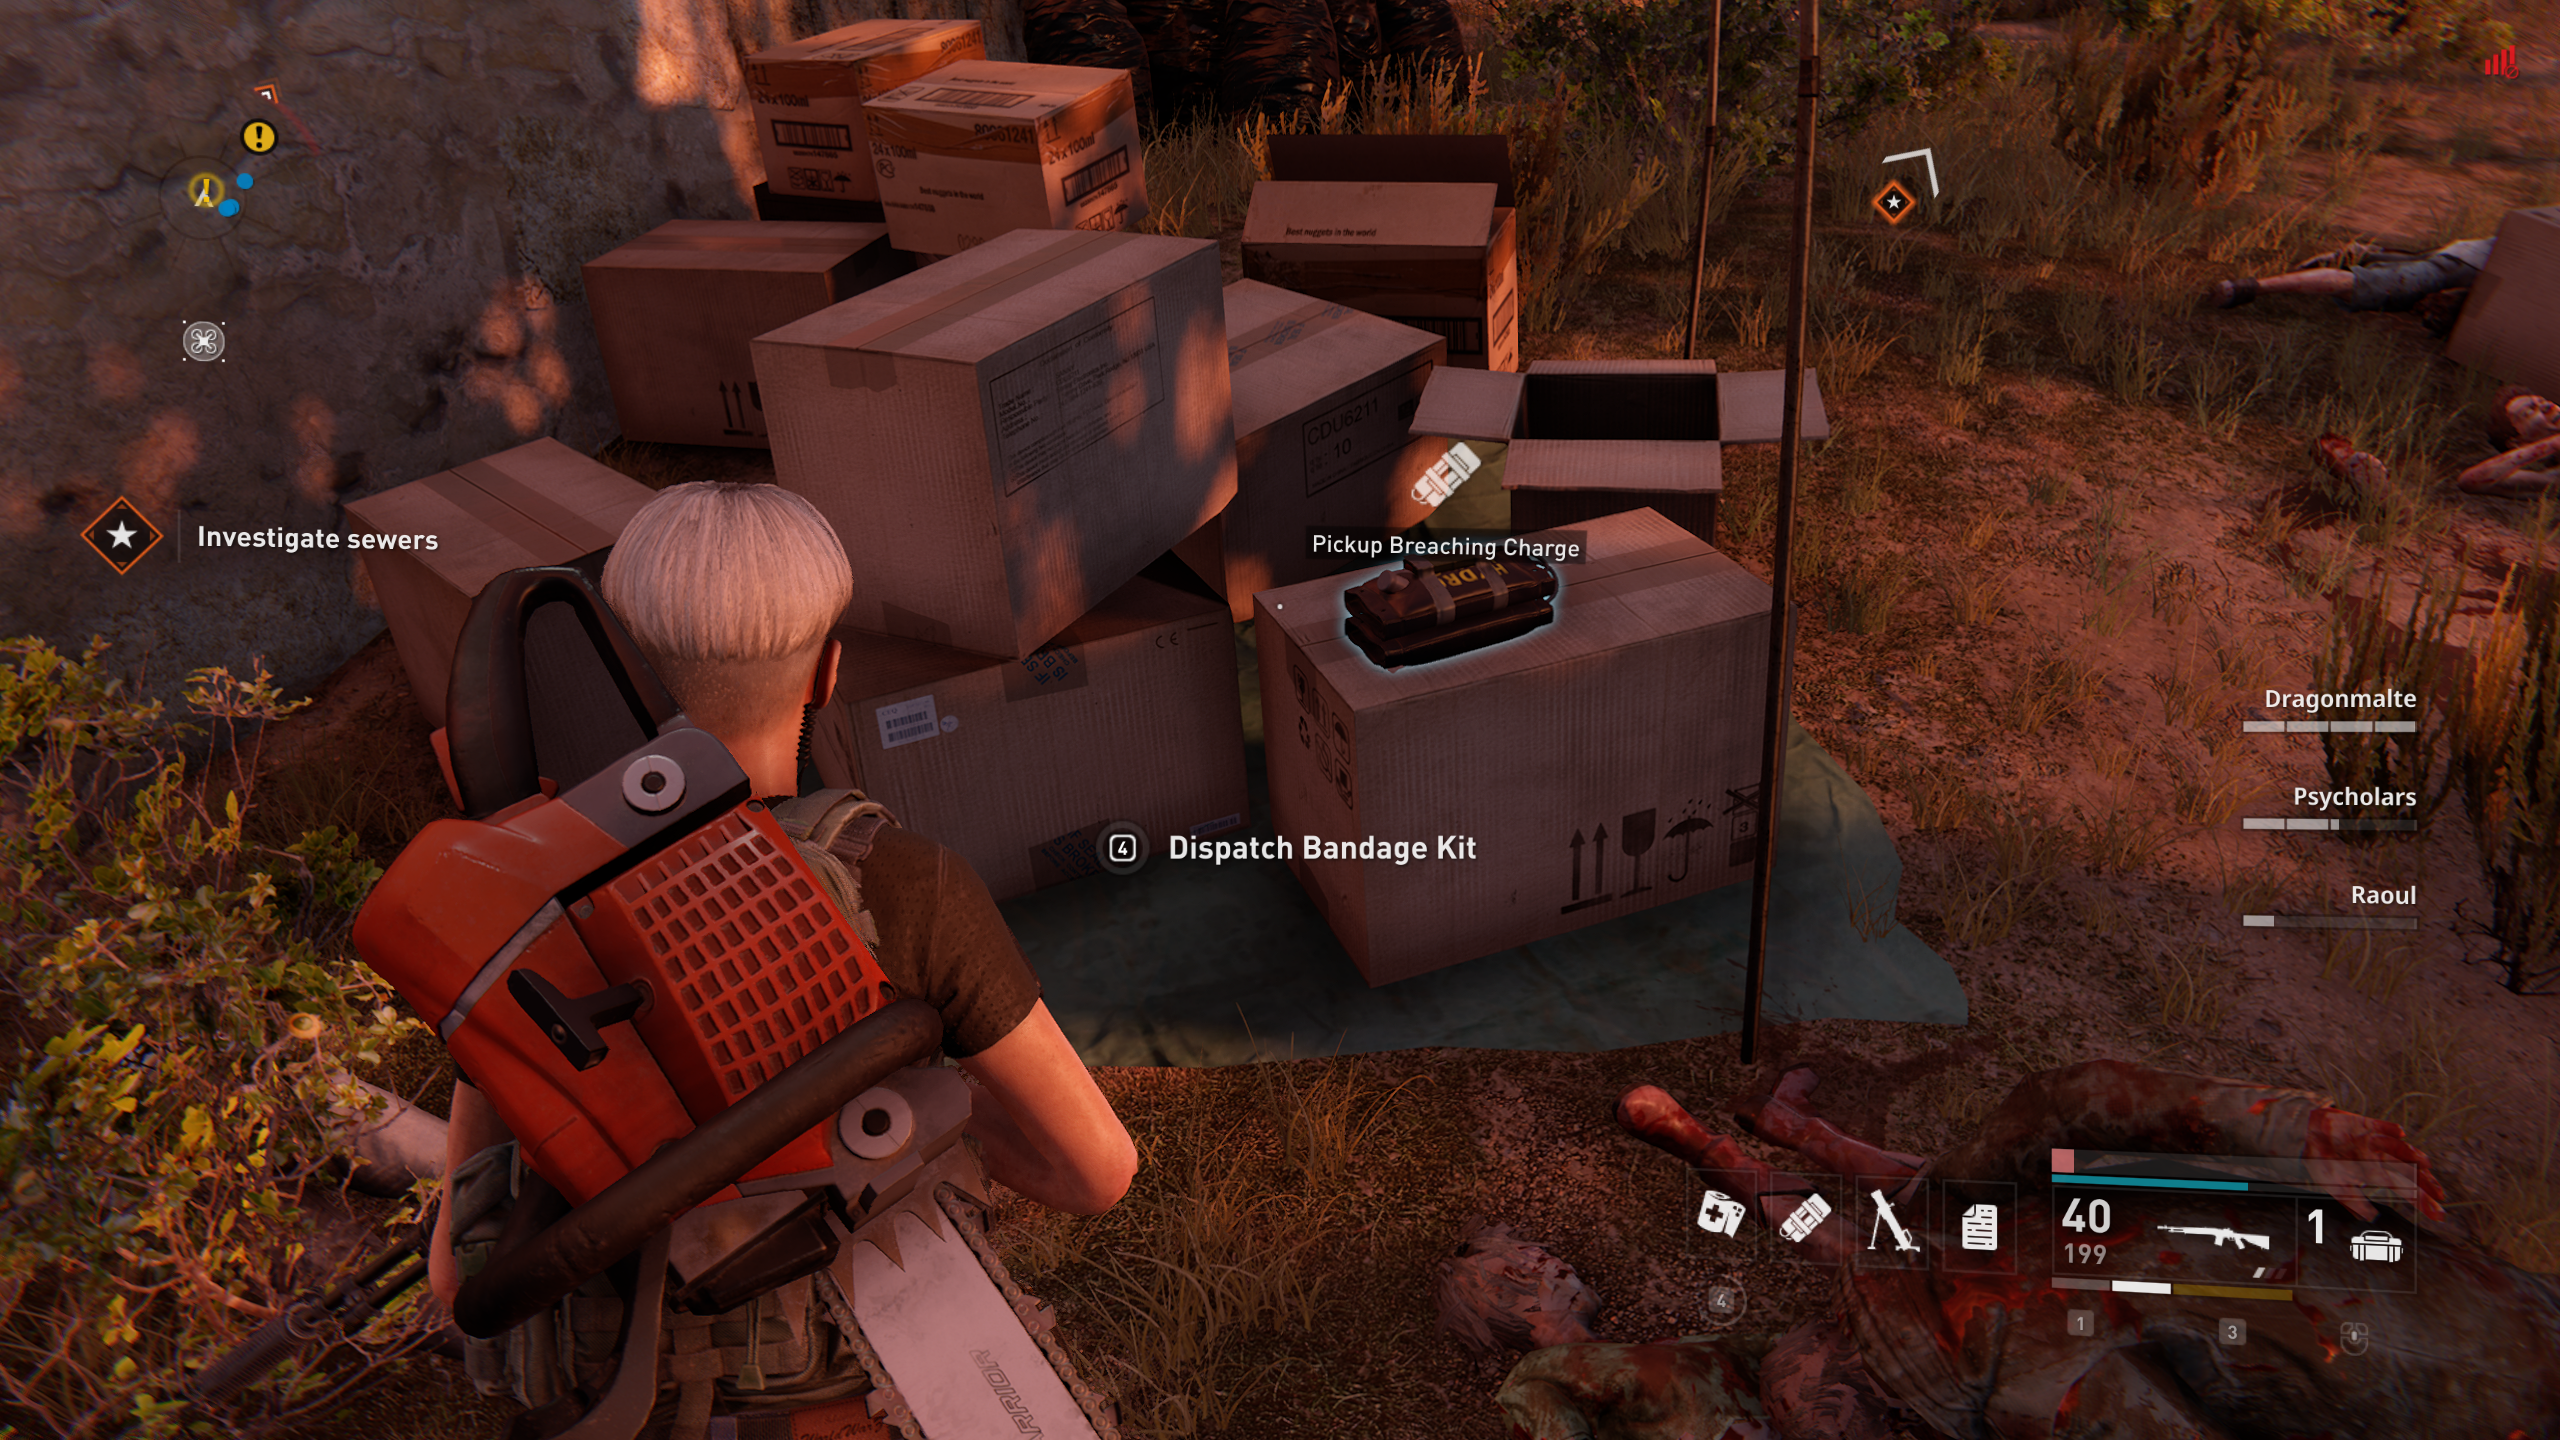
In the tower where you are chased by zombies after the gas area. Around halfway to the top before you cross a bridge to the other side. The Breaching Charge is between some boxes to the left
Location 6: ![]()
Location 7: ![]()
Location 8: ![]()
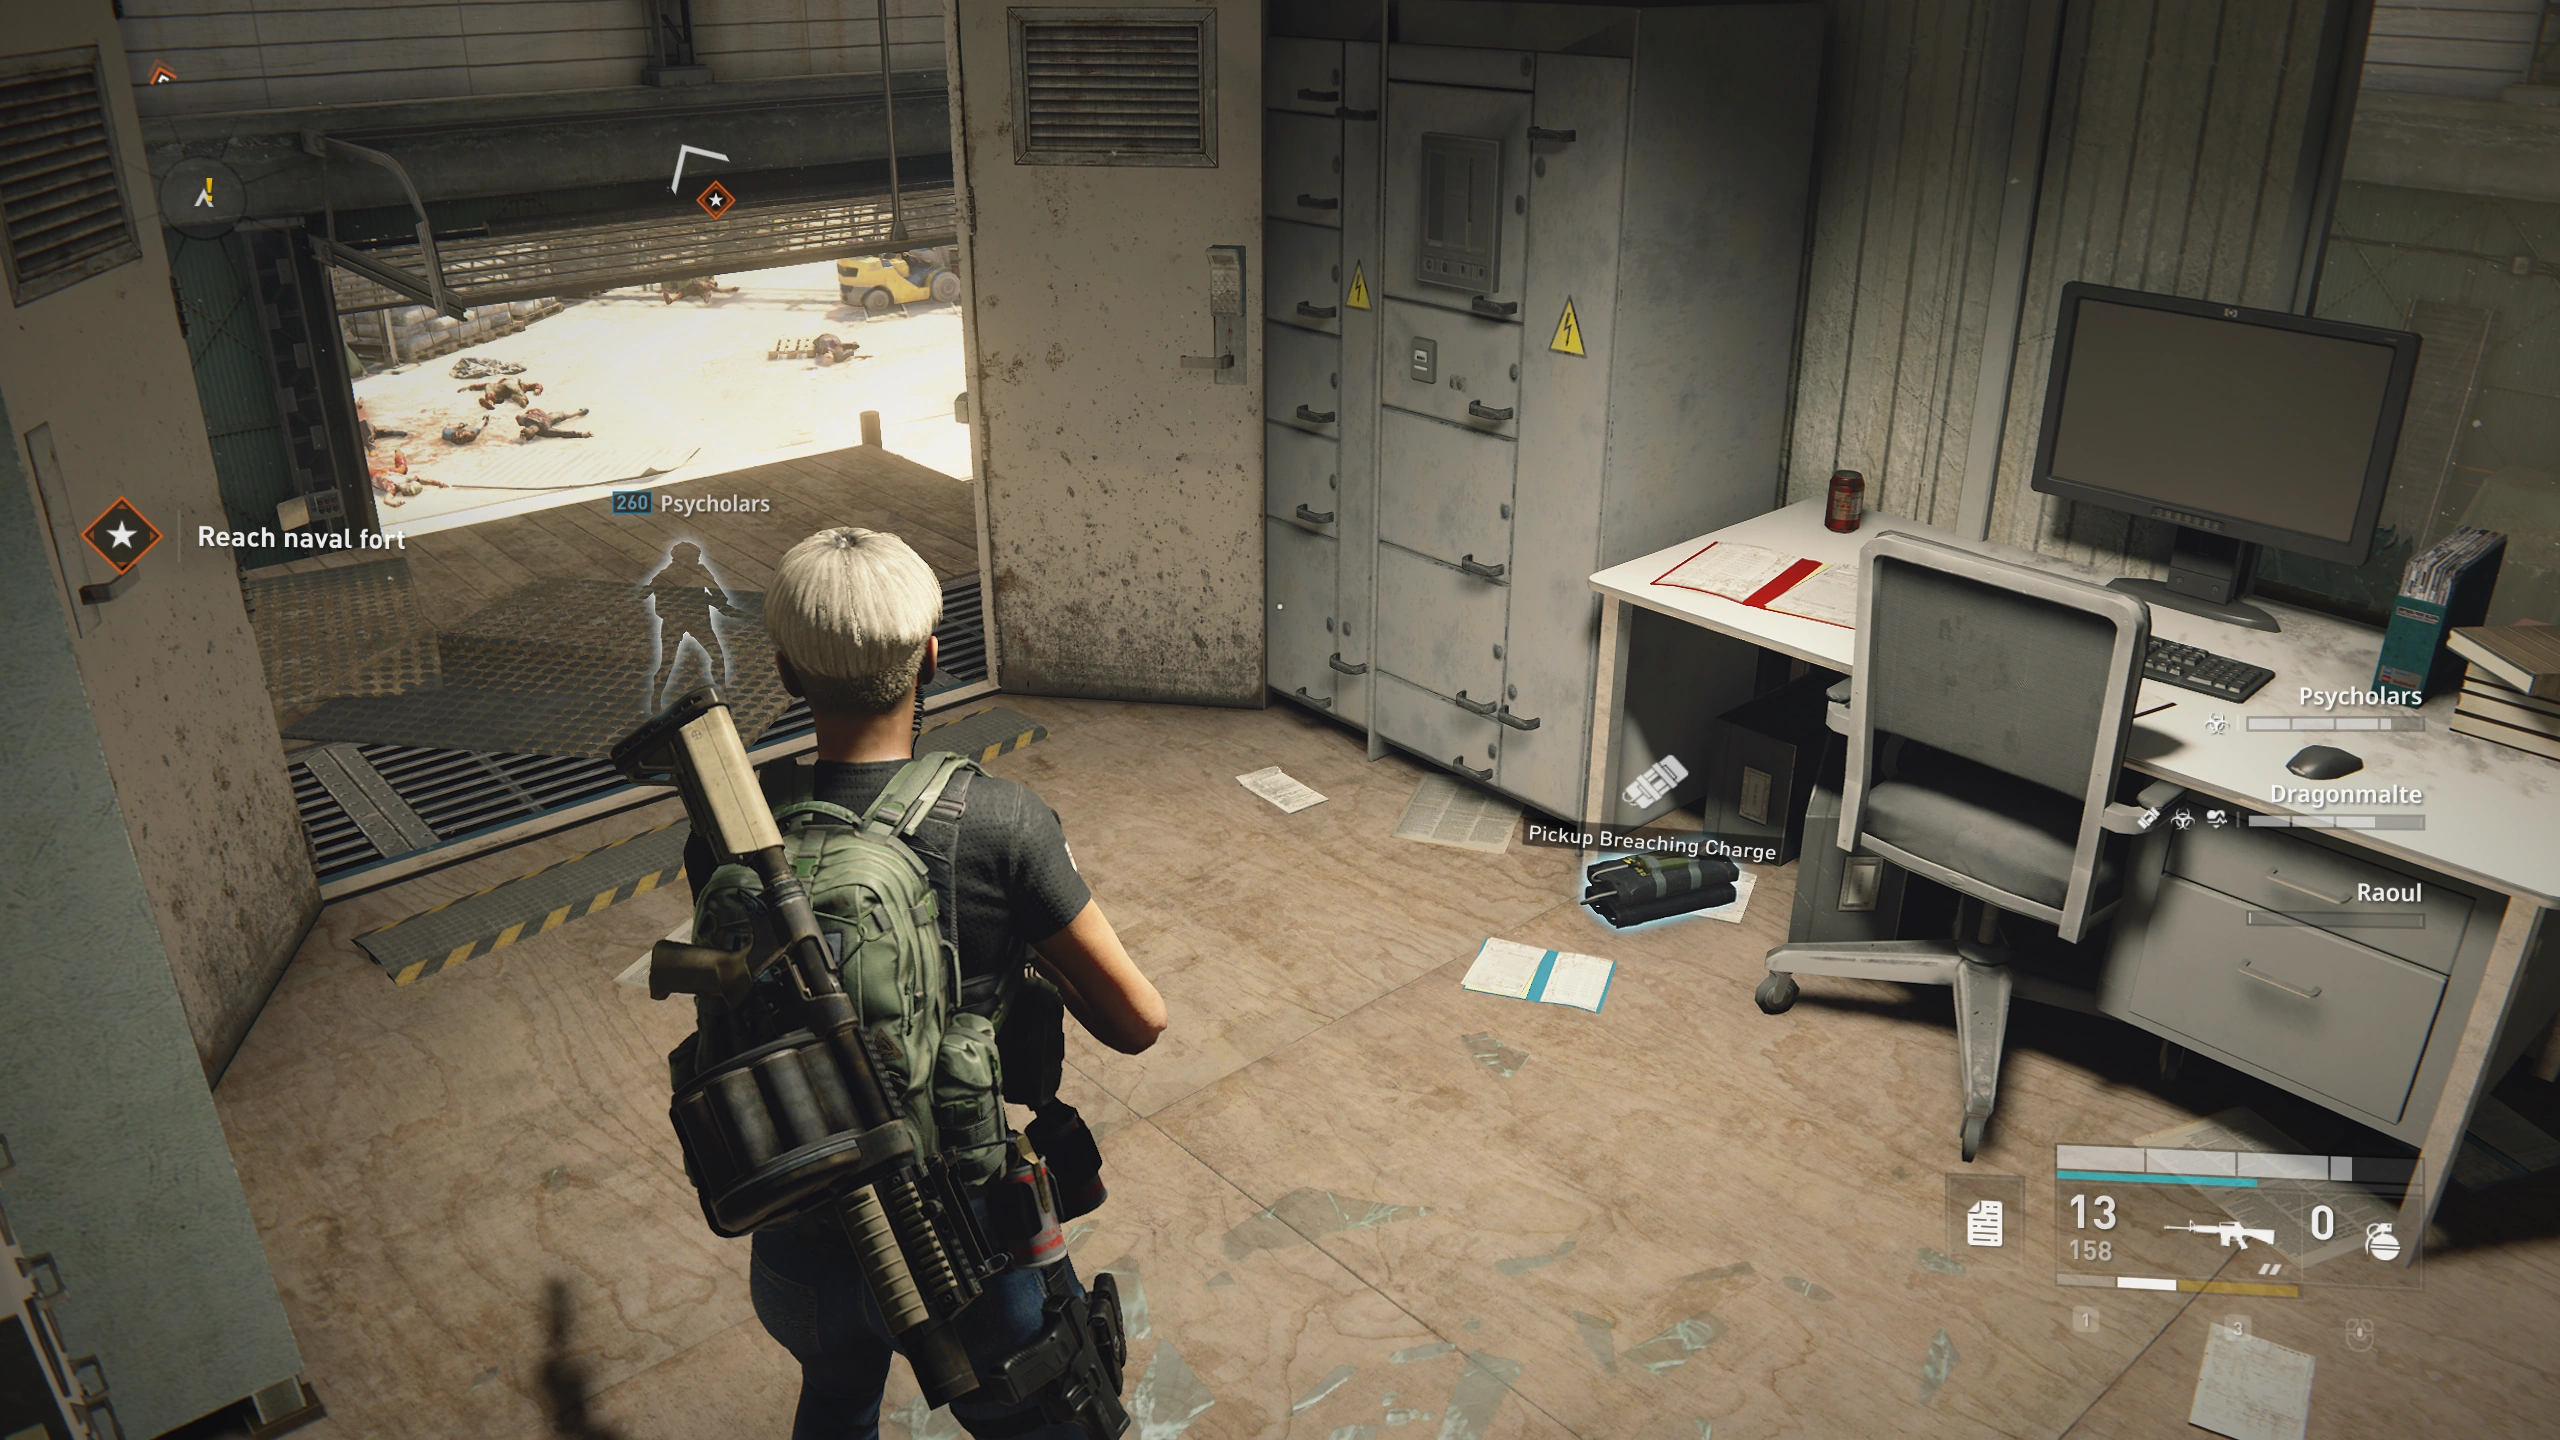
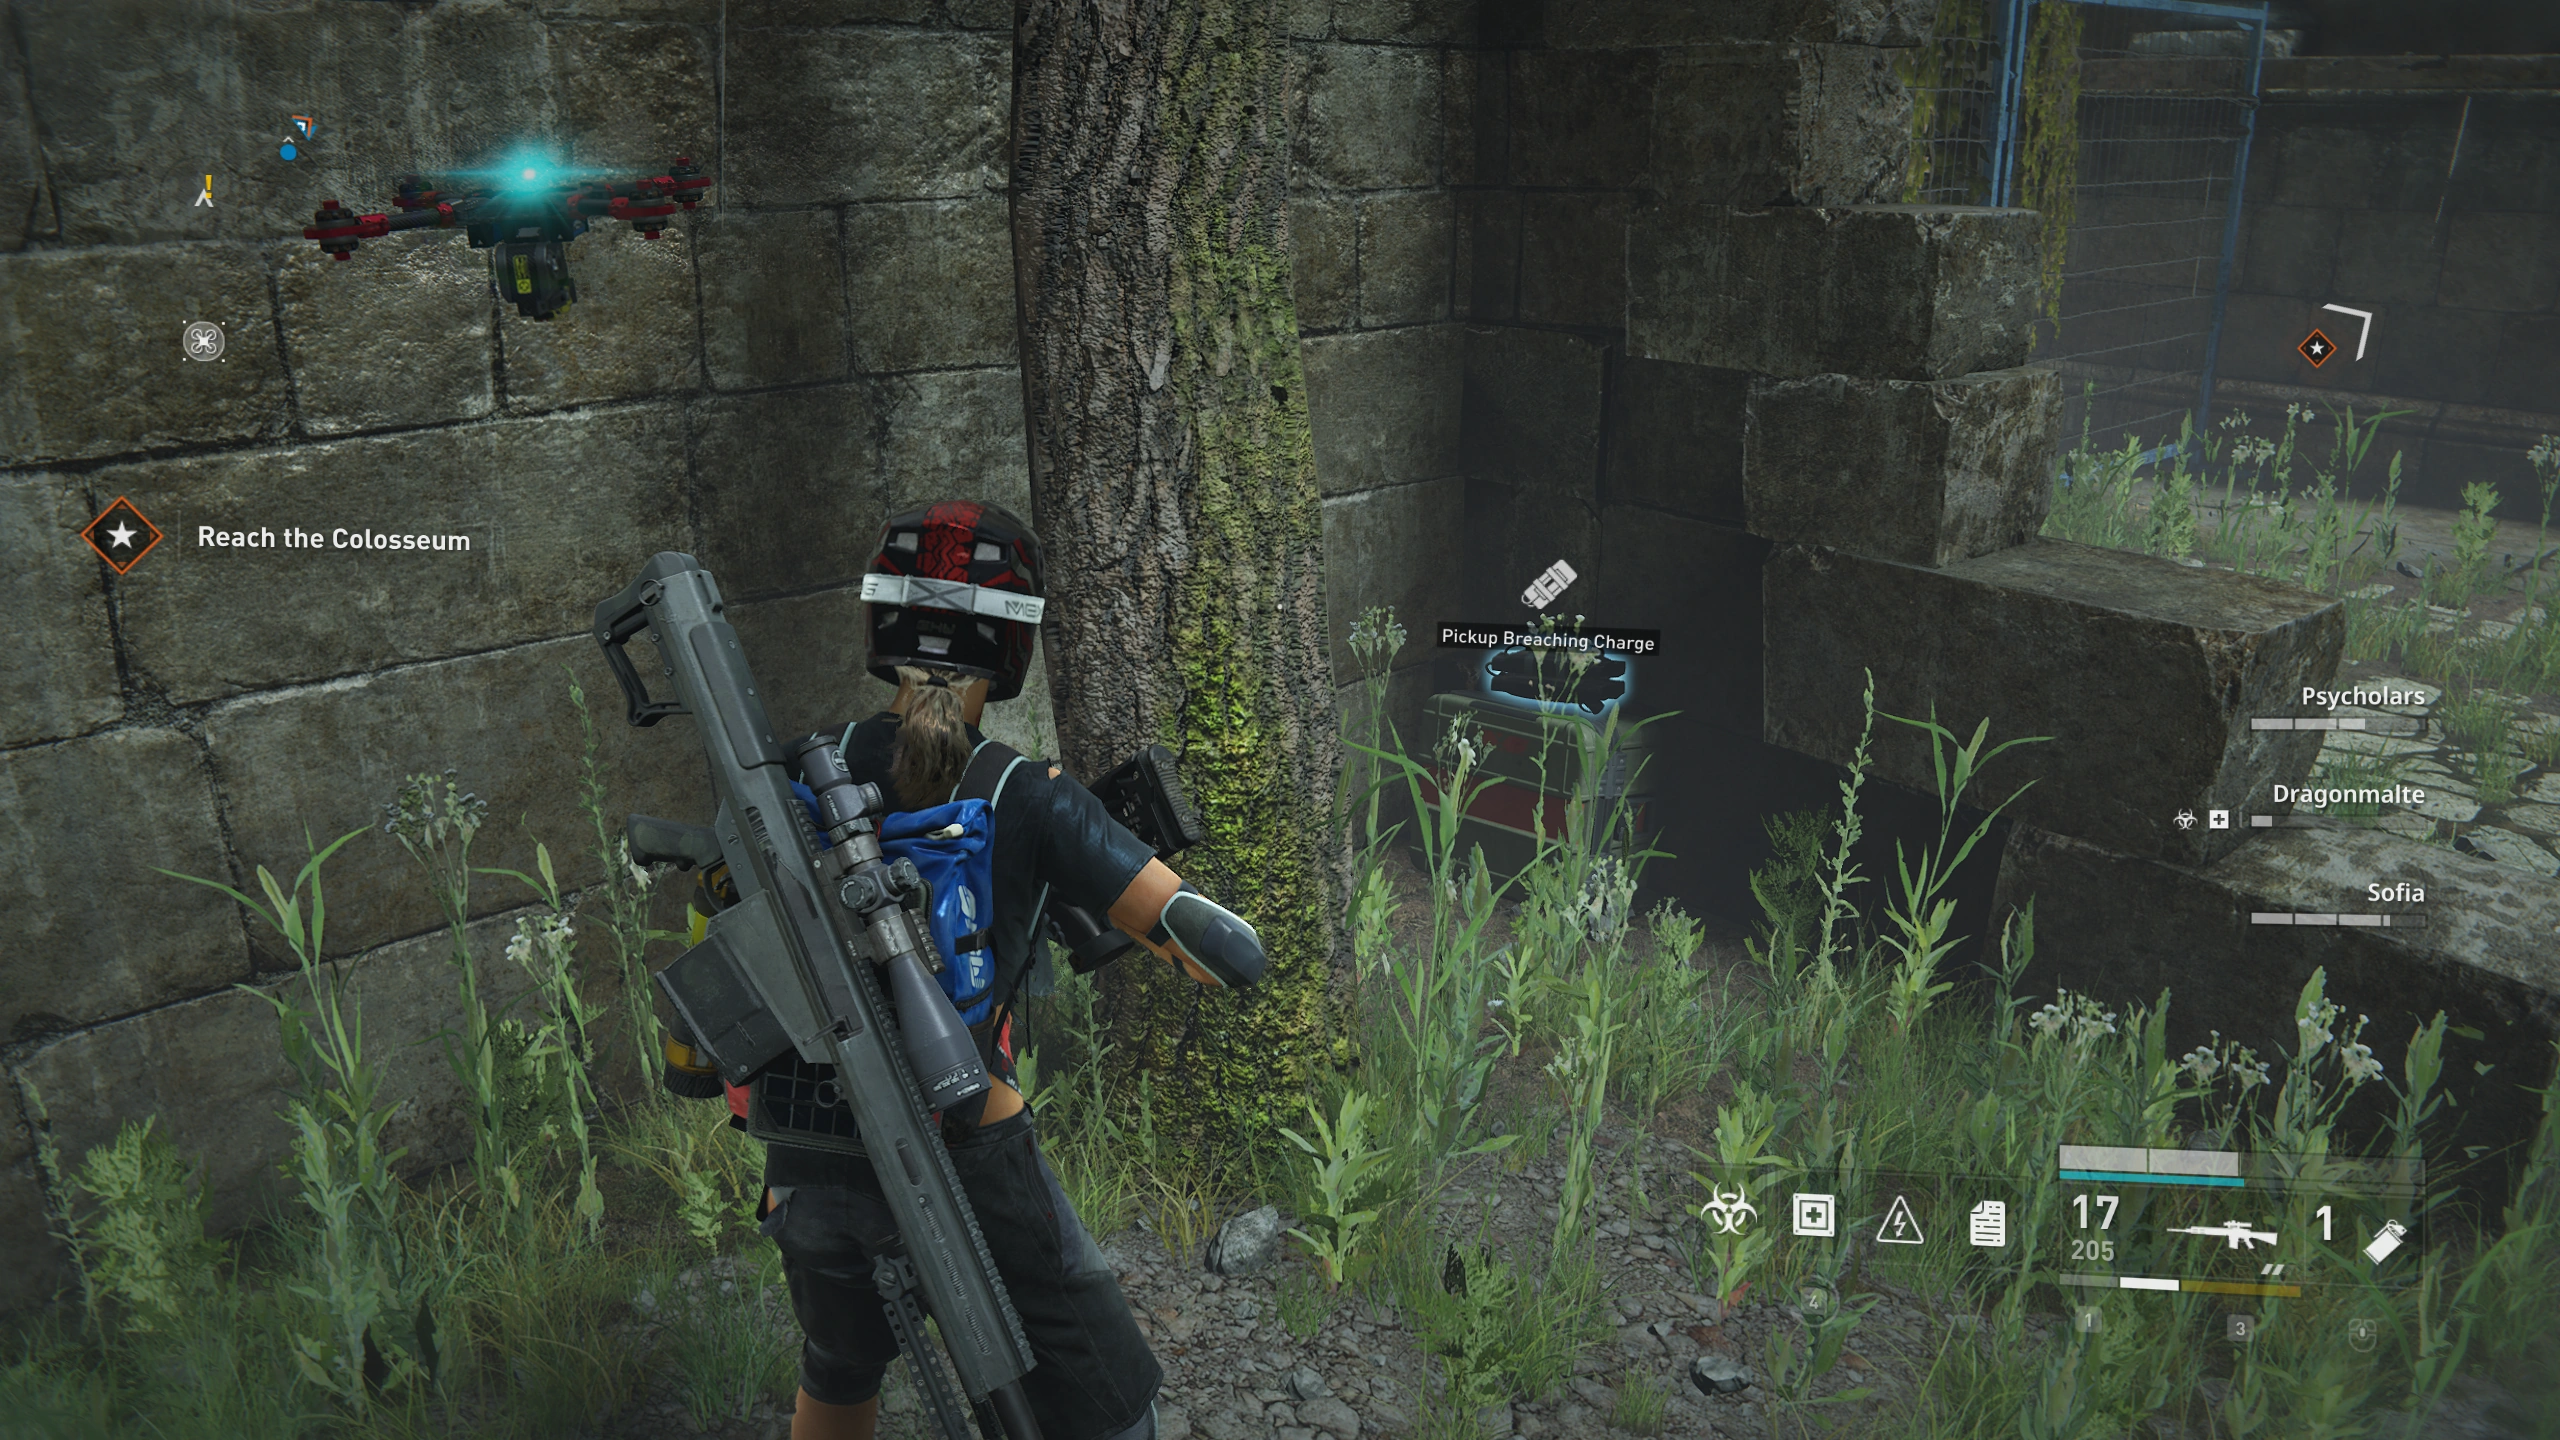
Chapter 3: Hell and High Water[]
Location 1: ![]()
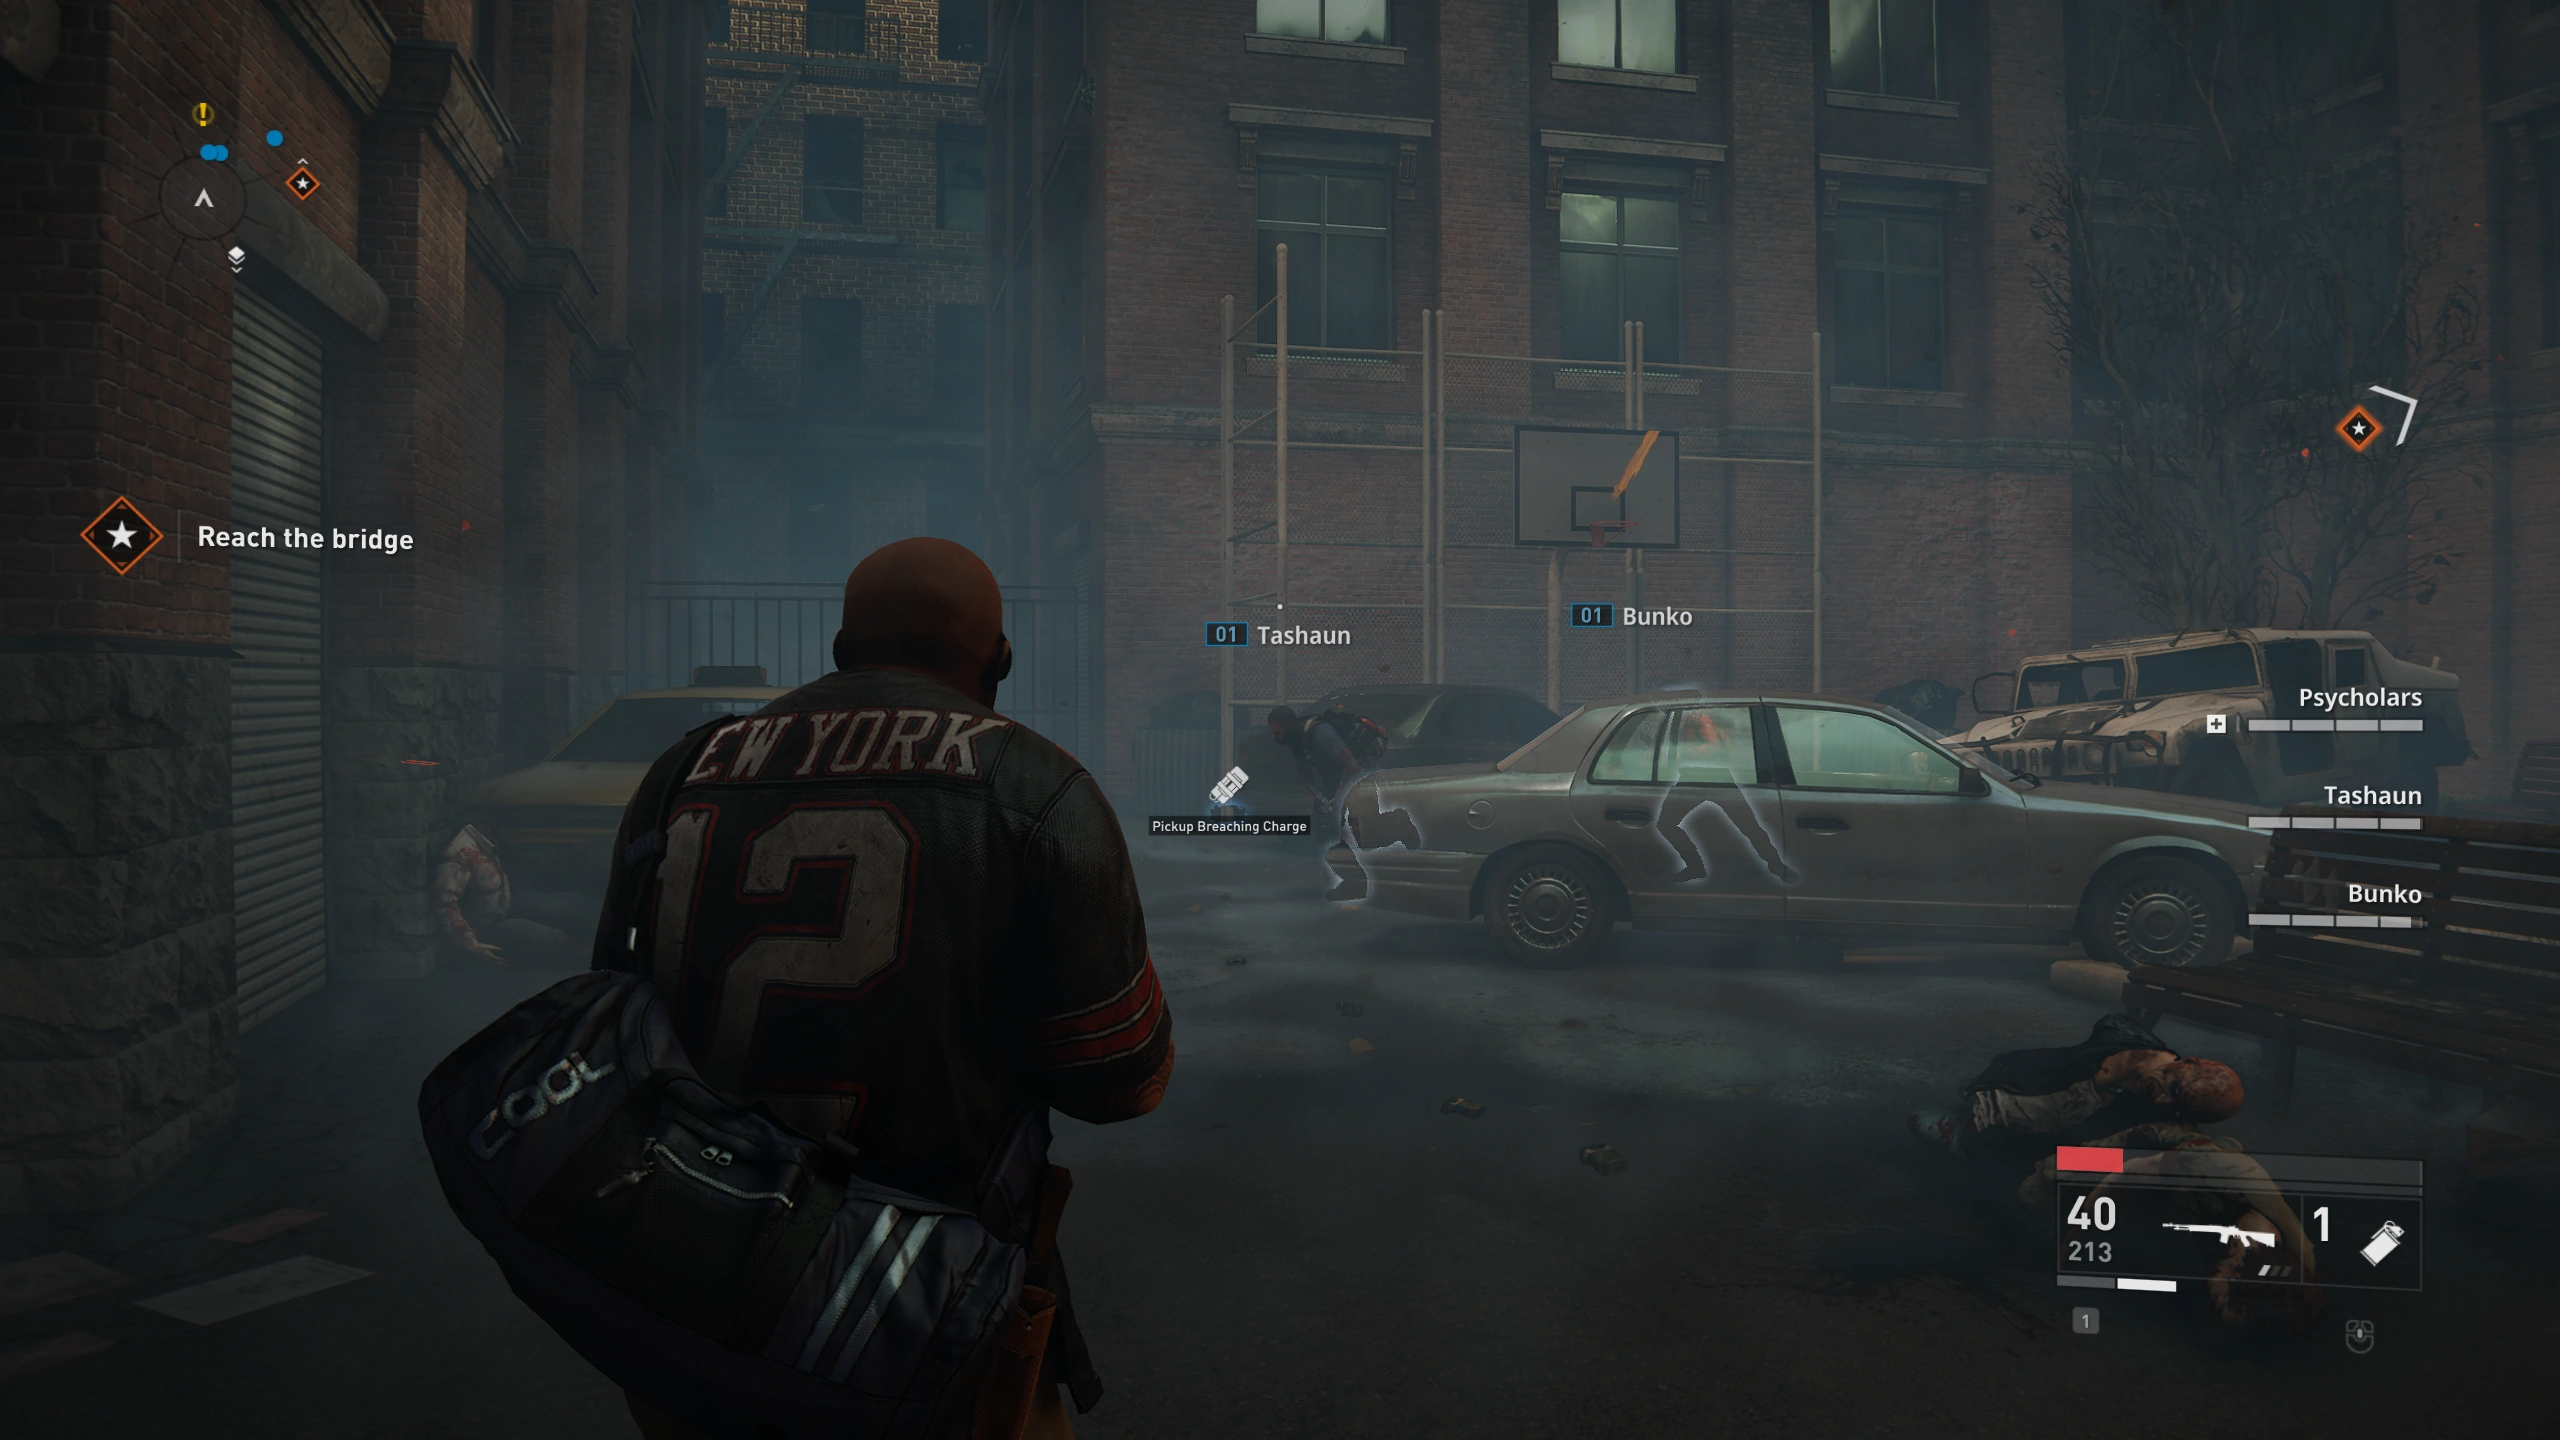
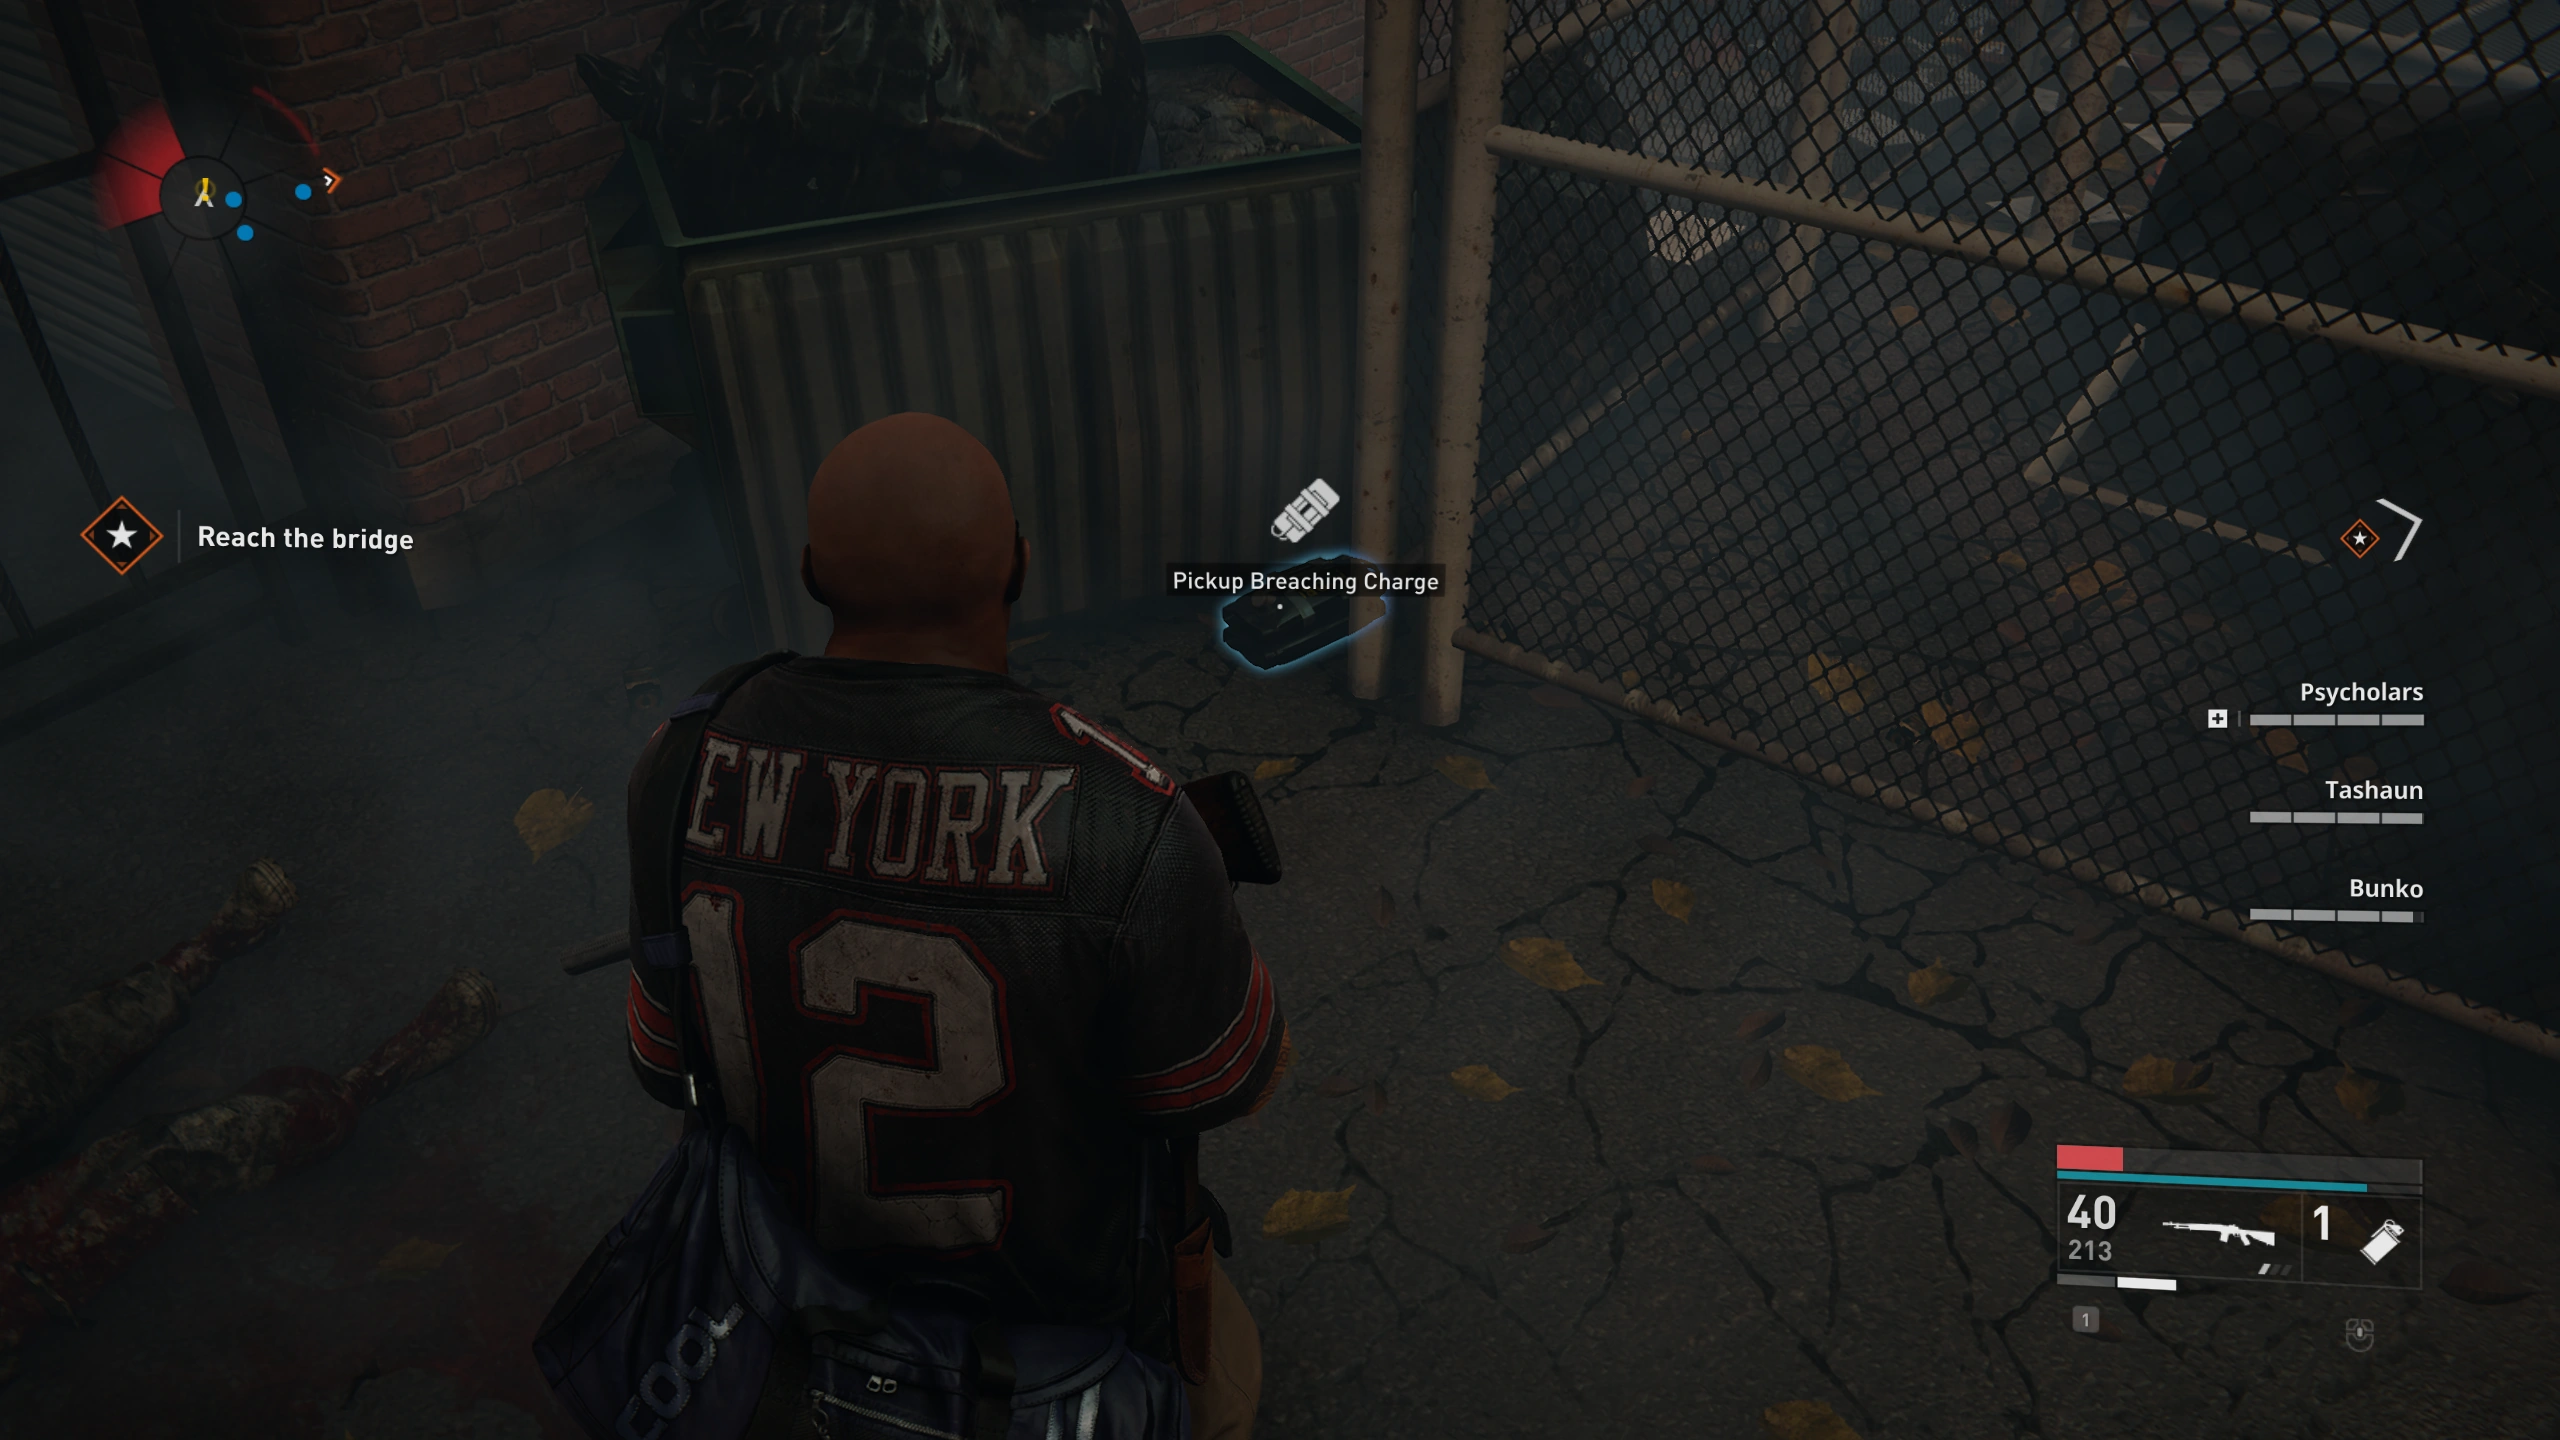
In the first street area, in the partially fenced area on the right side.
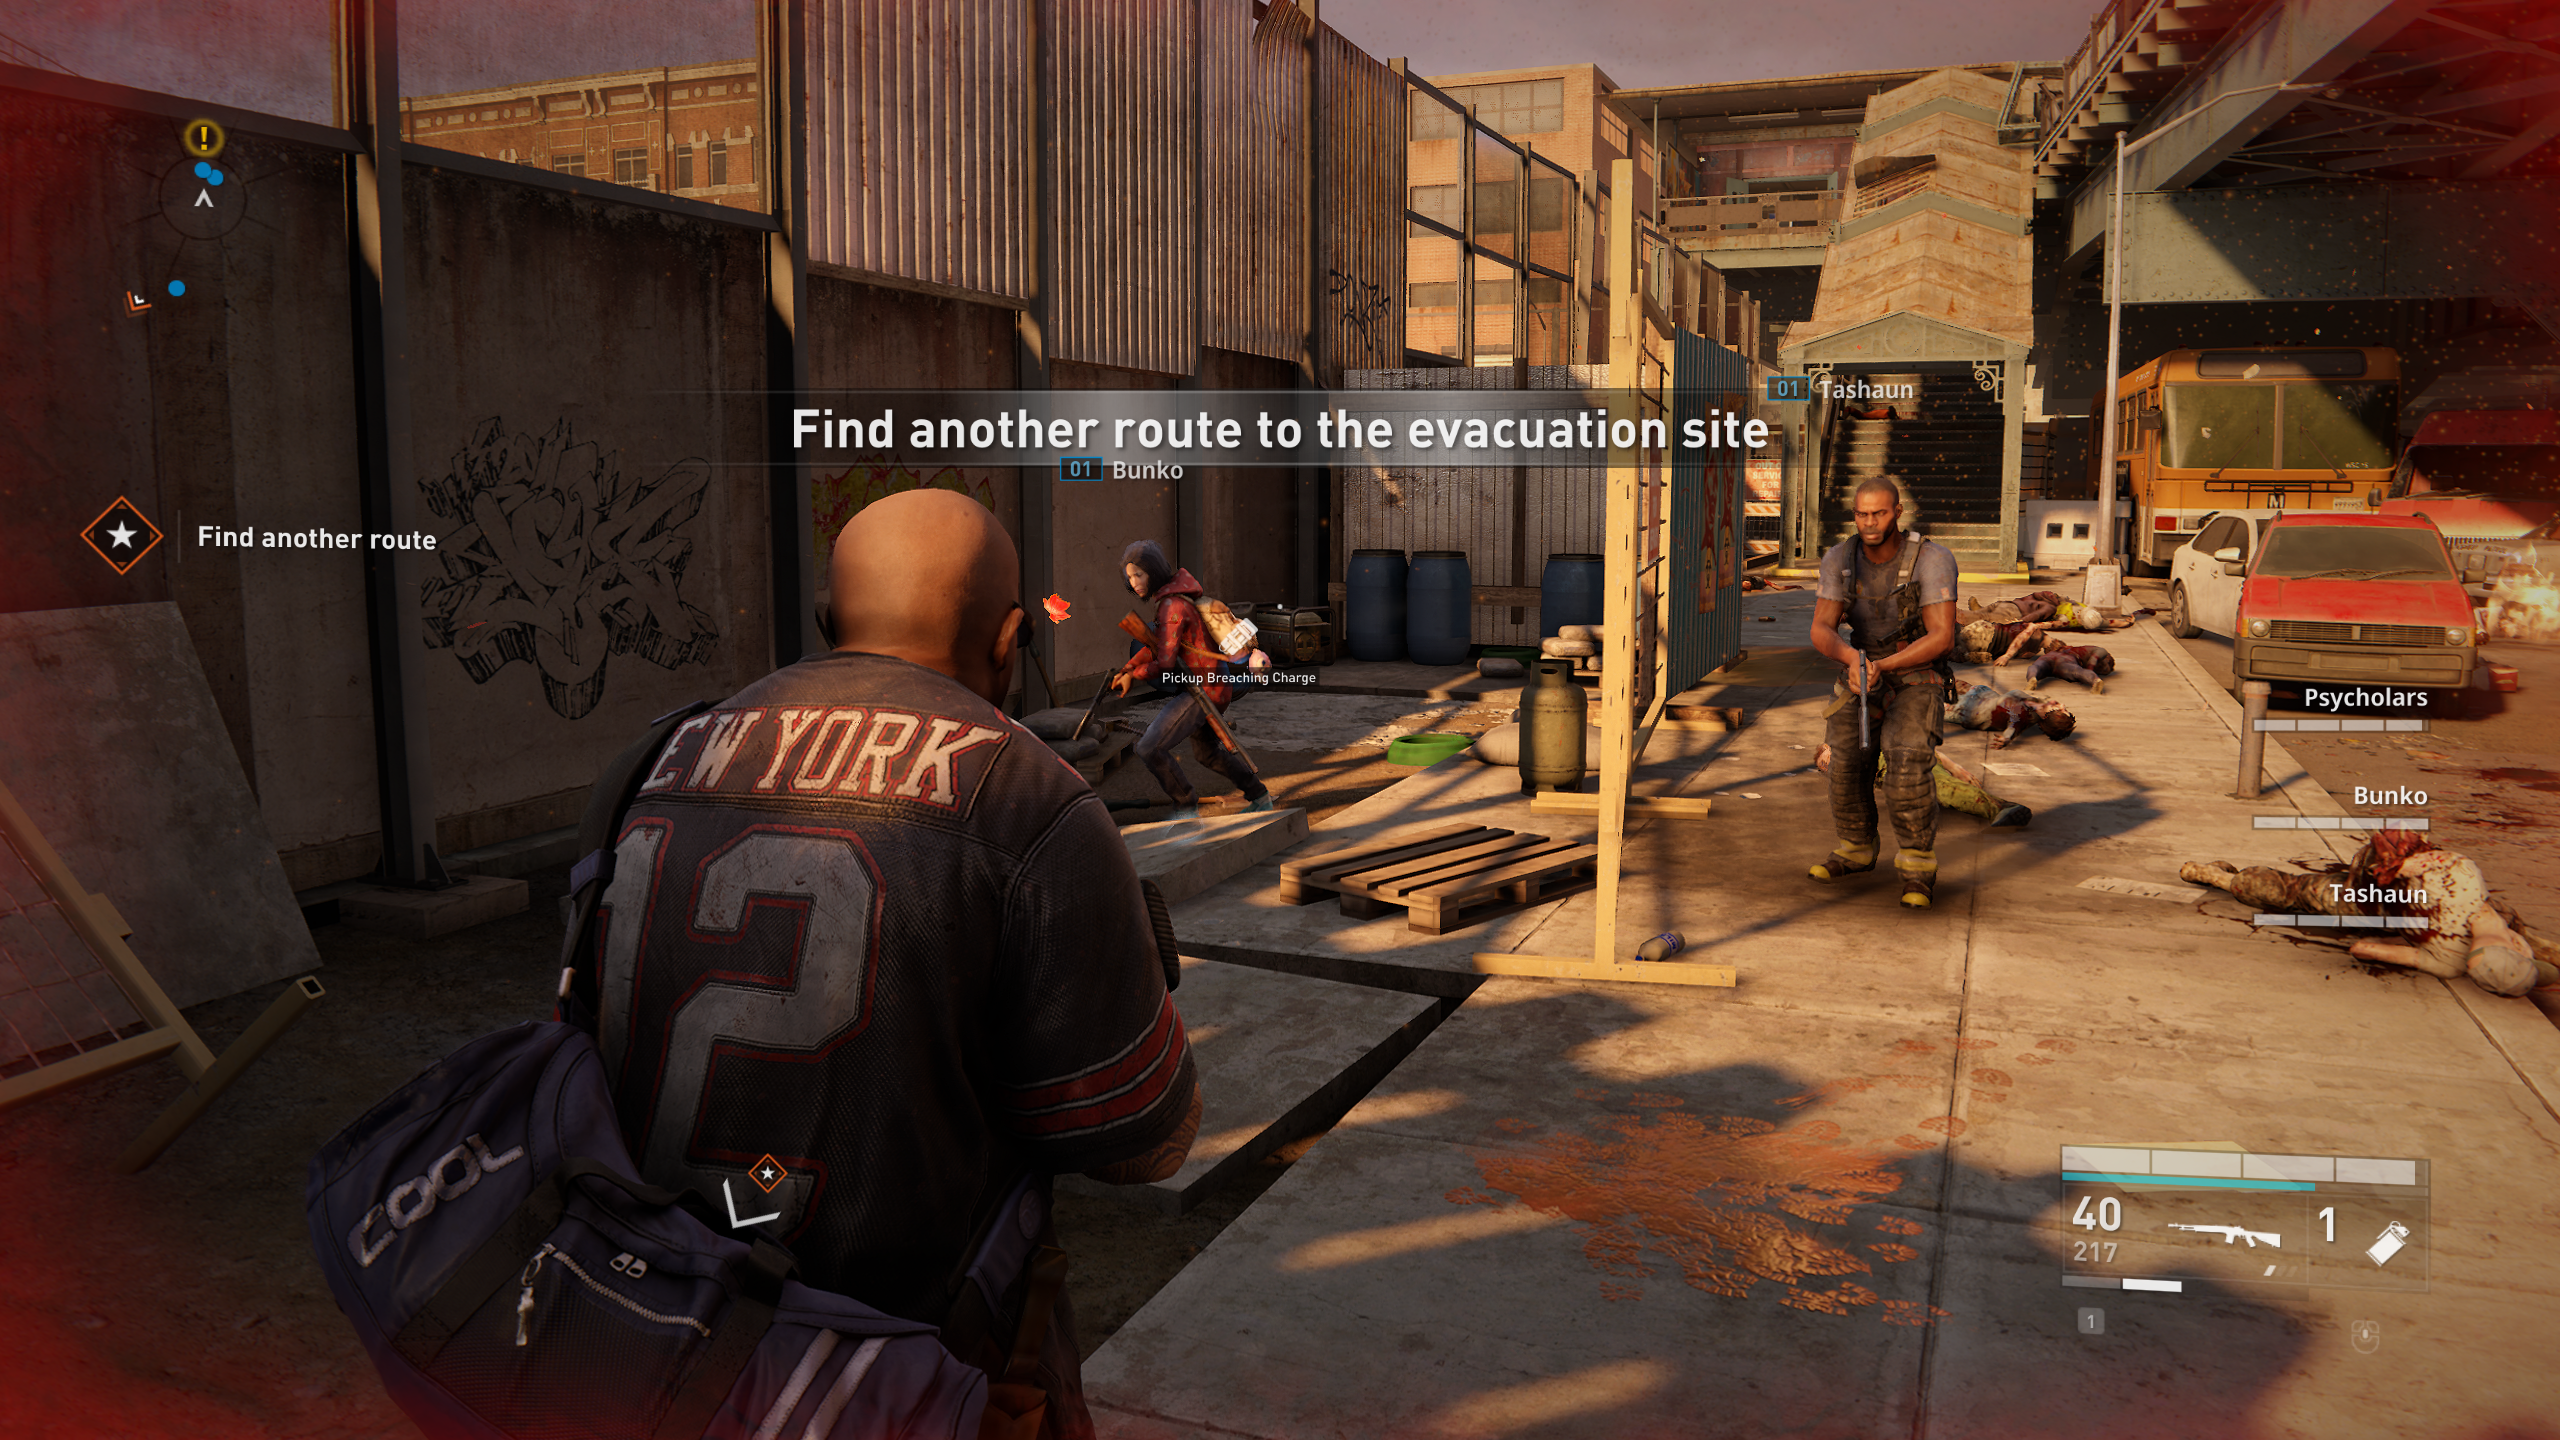
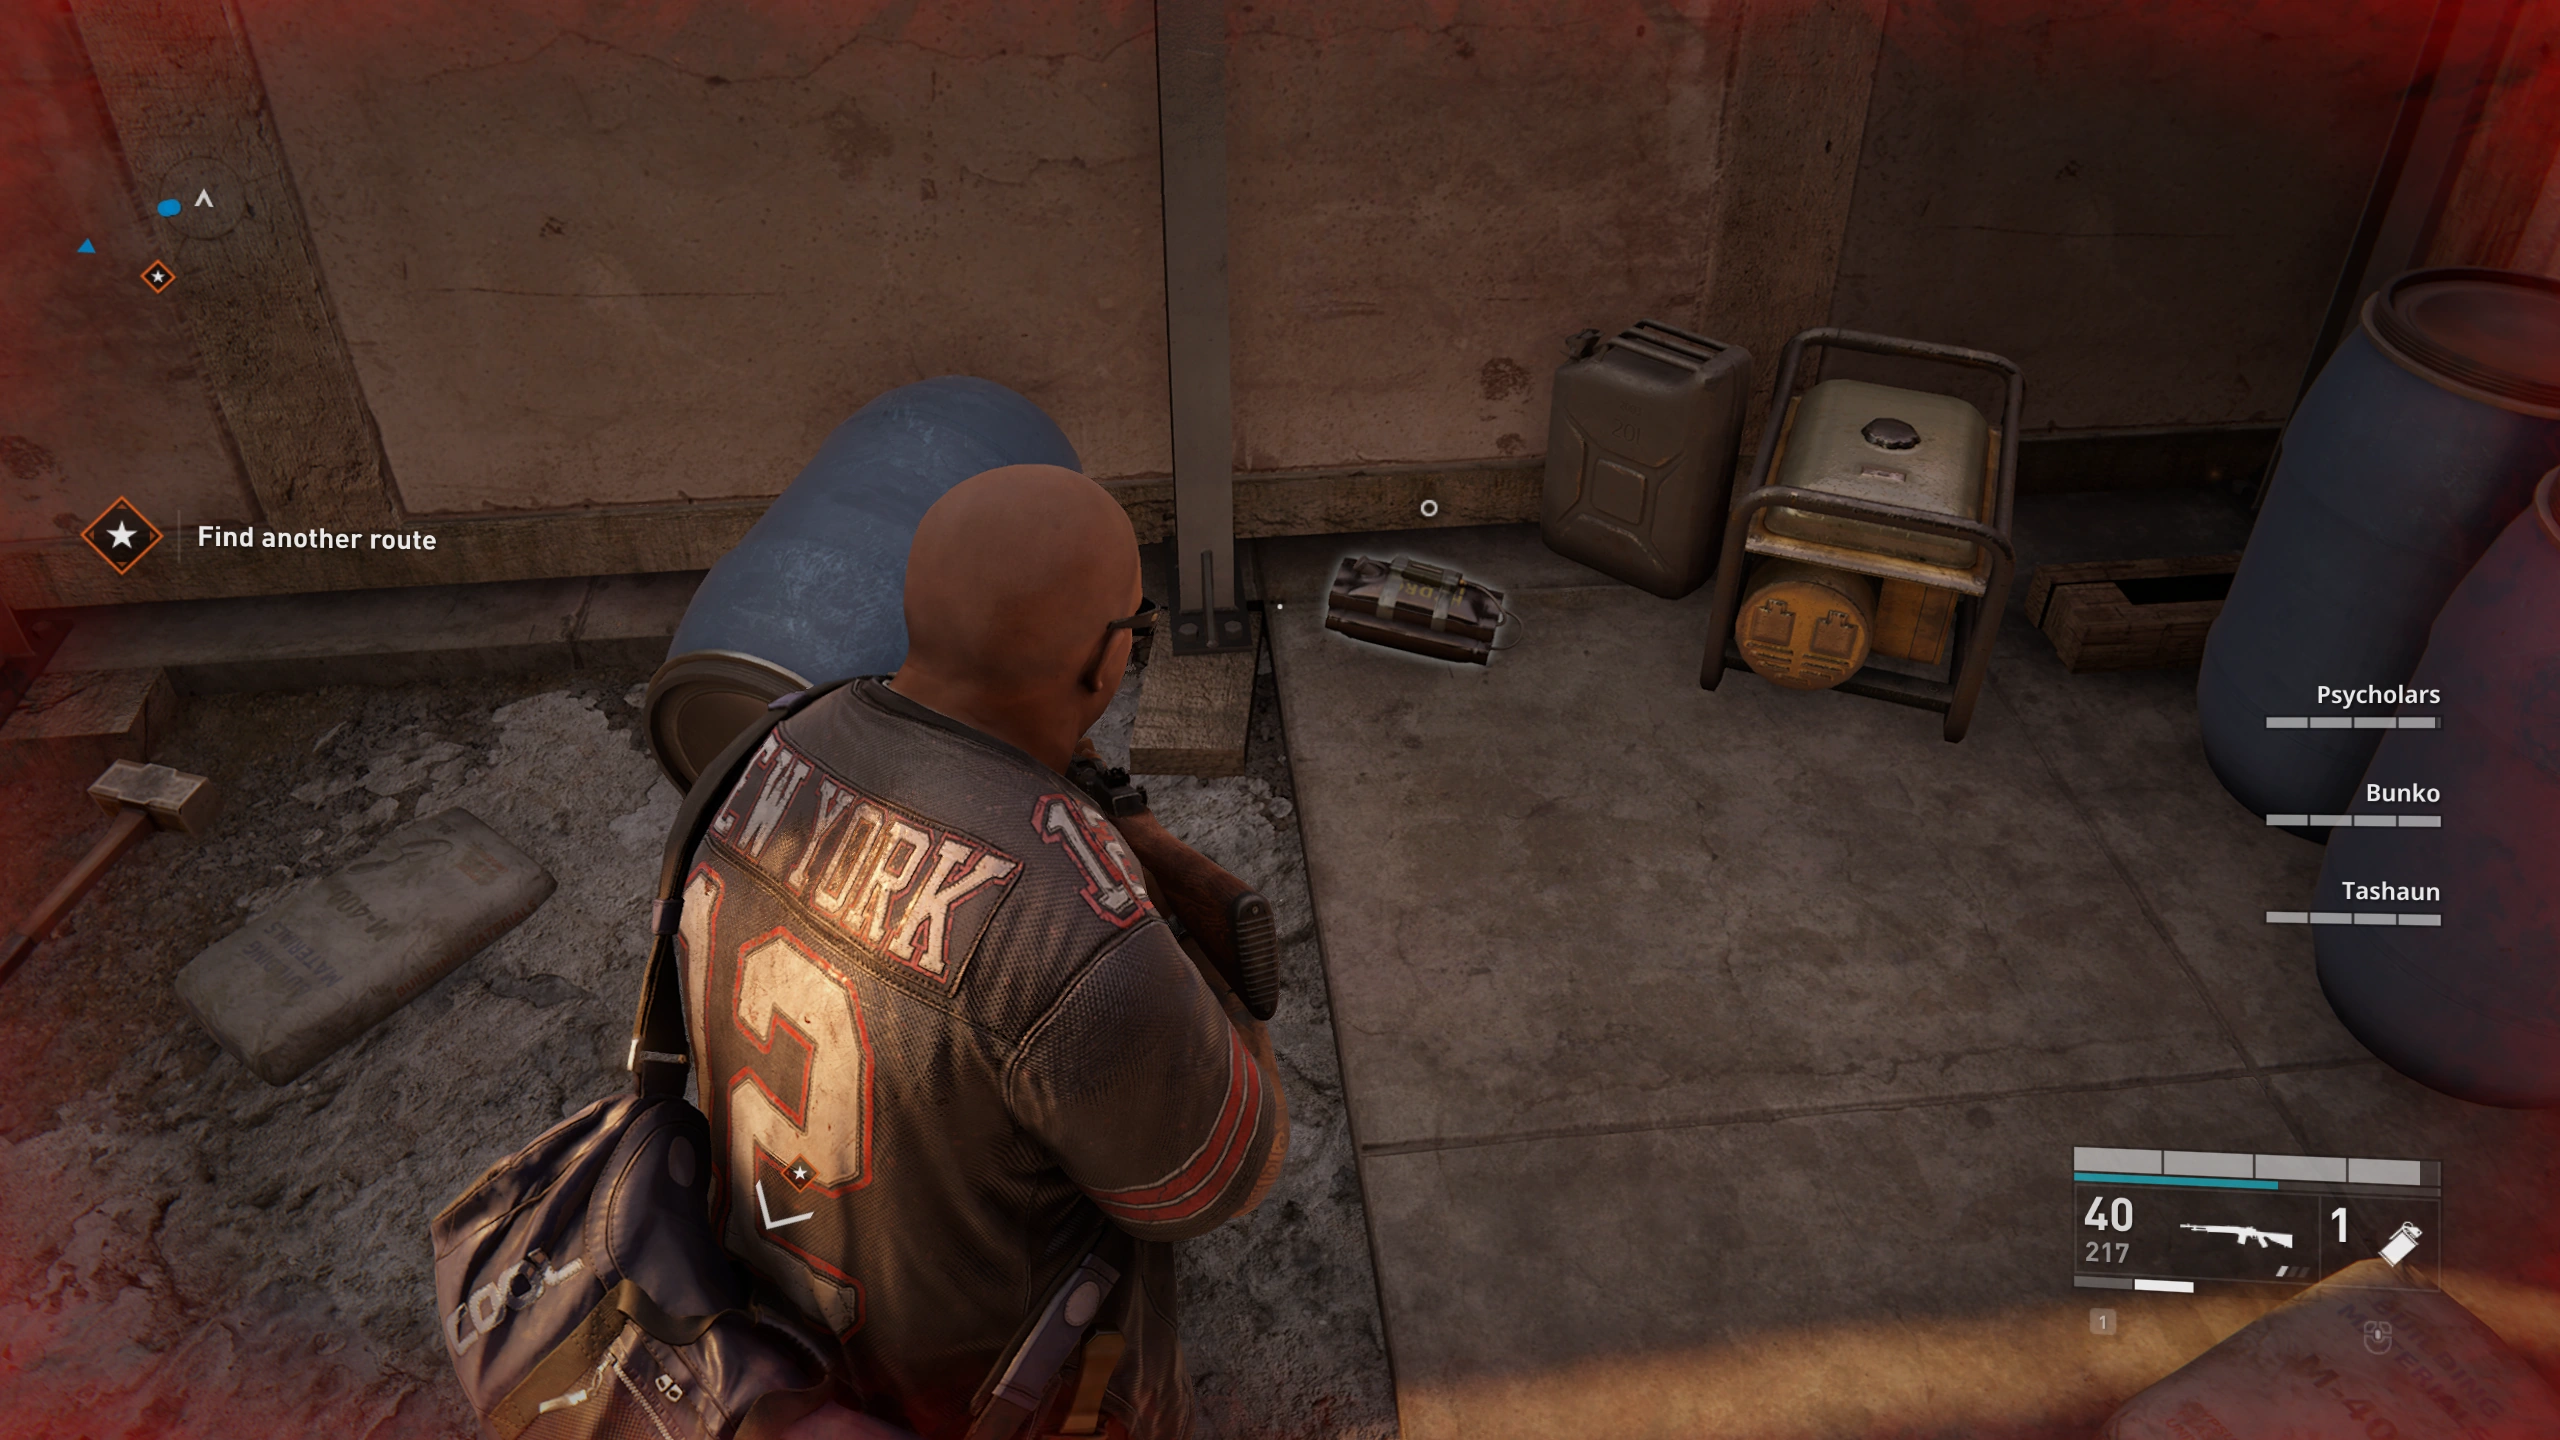
Location 2: ![]()
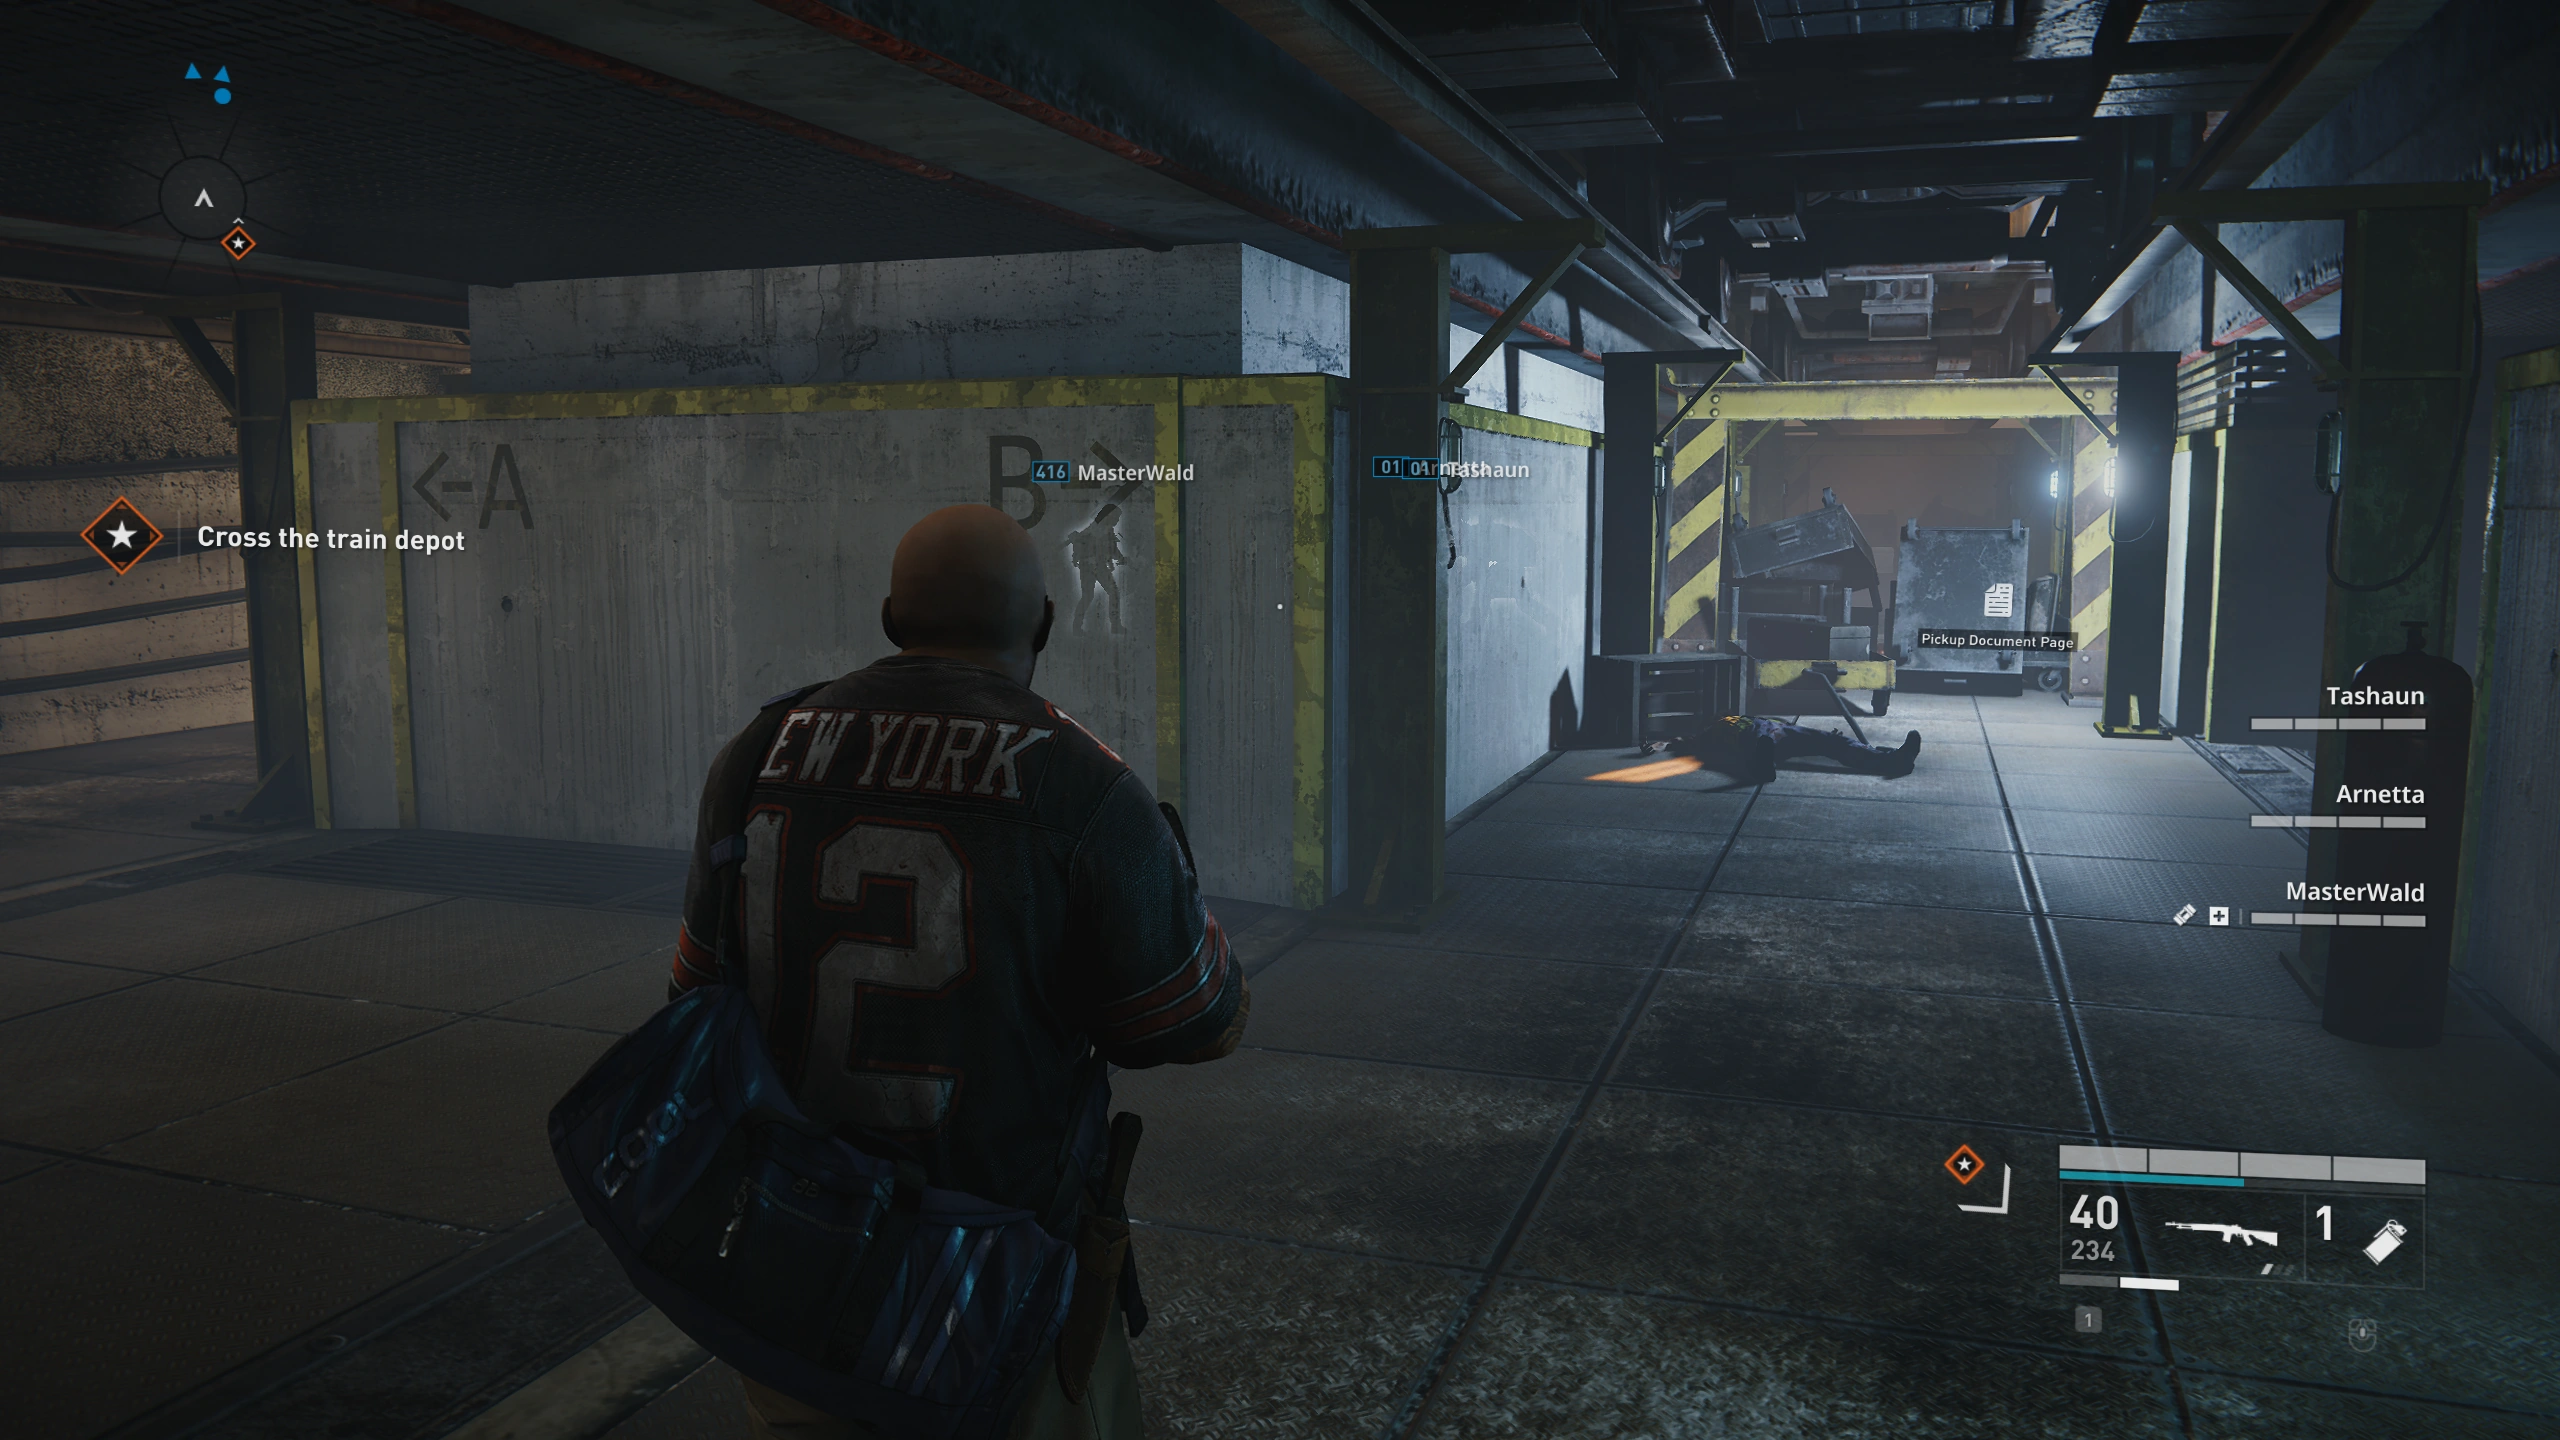
After you leave the street, in the parking lot in front of the train depot, in the small area between the ramp and the guard house.
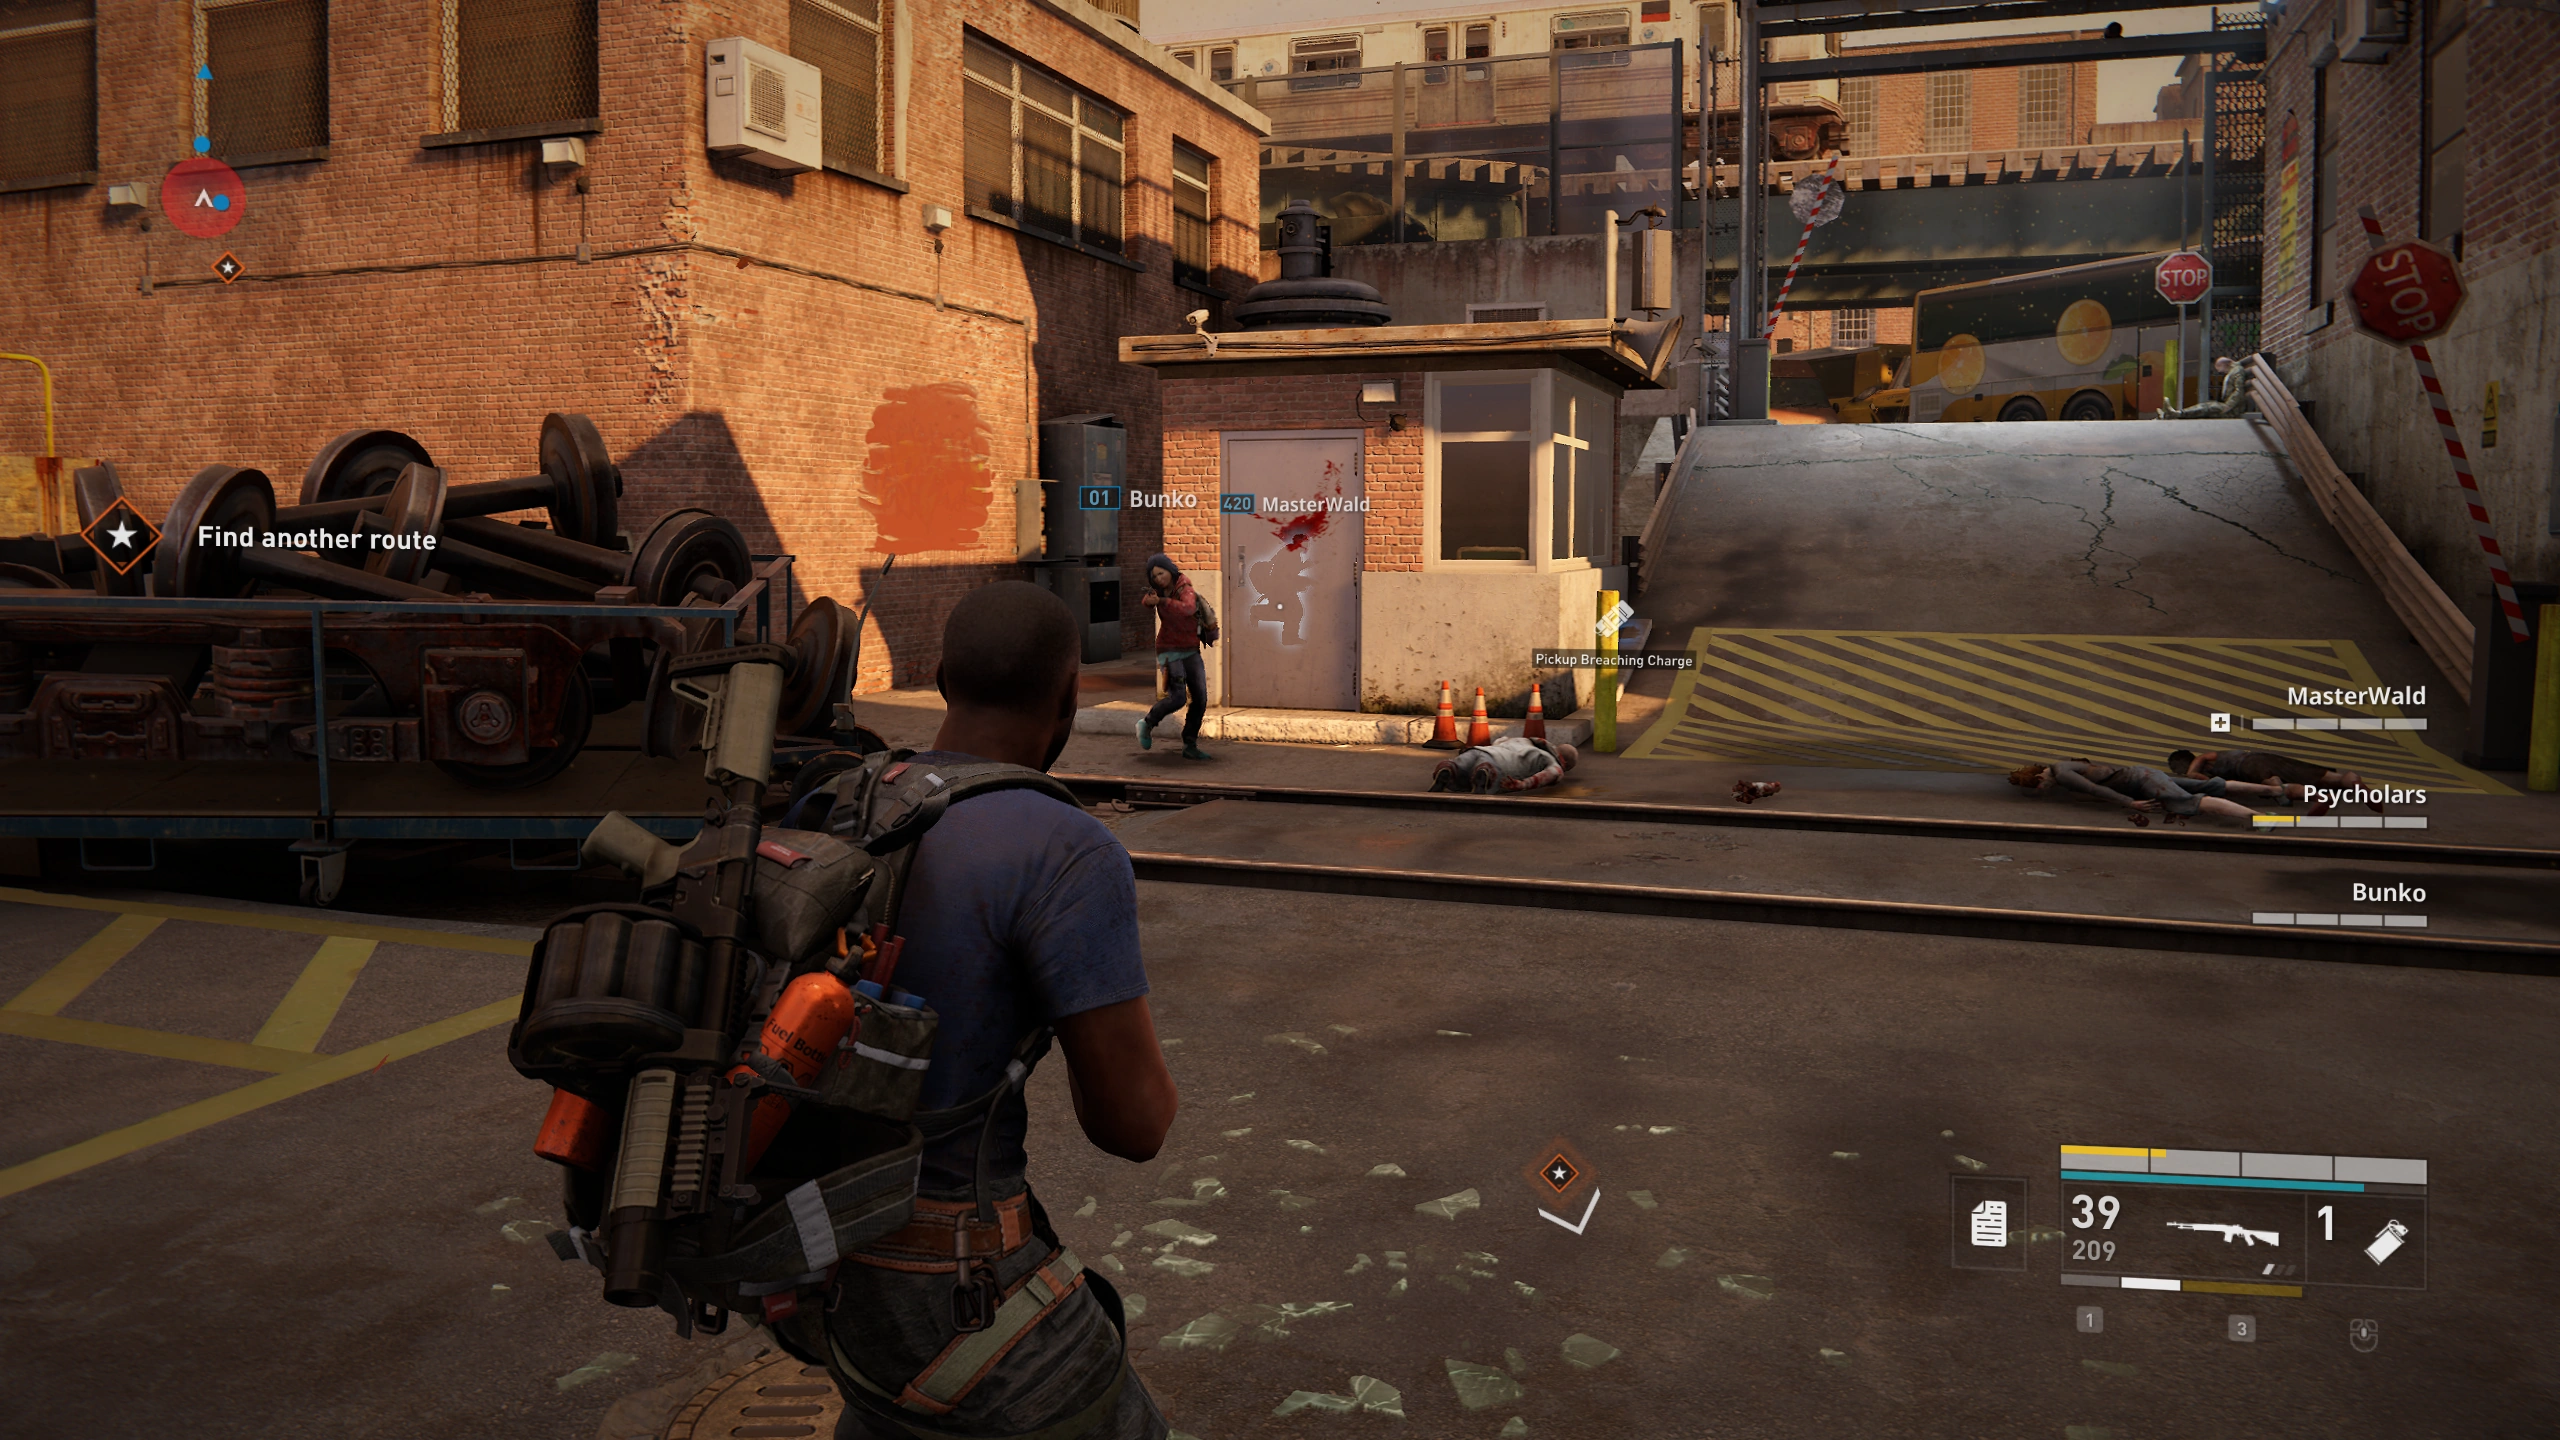
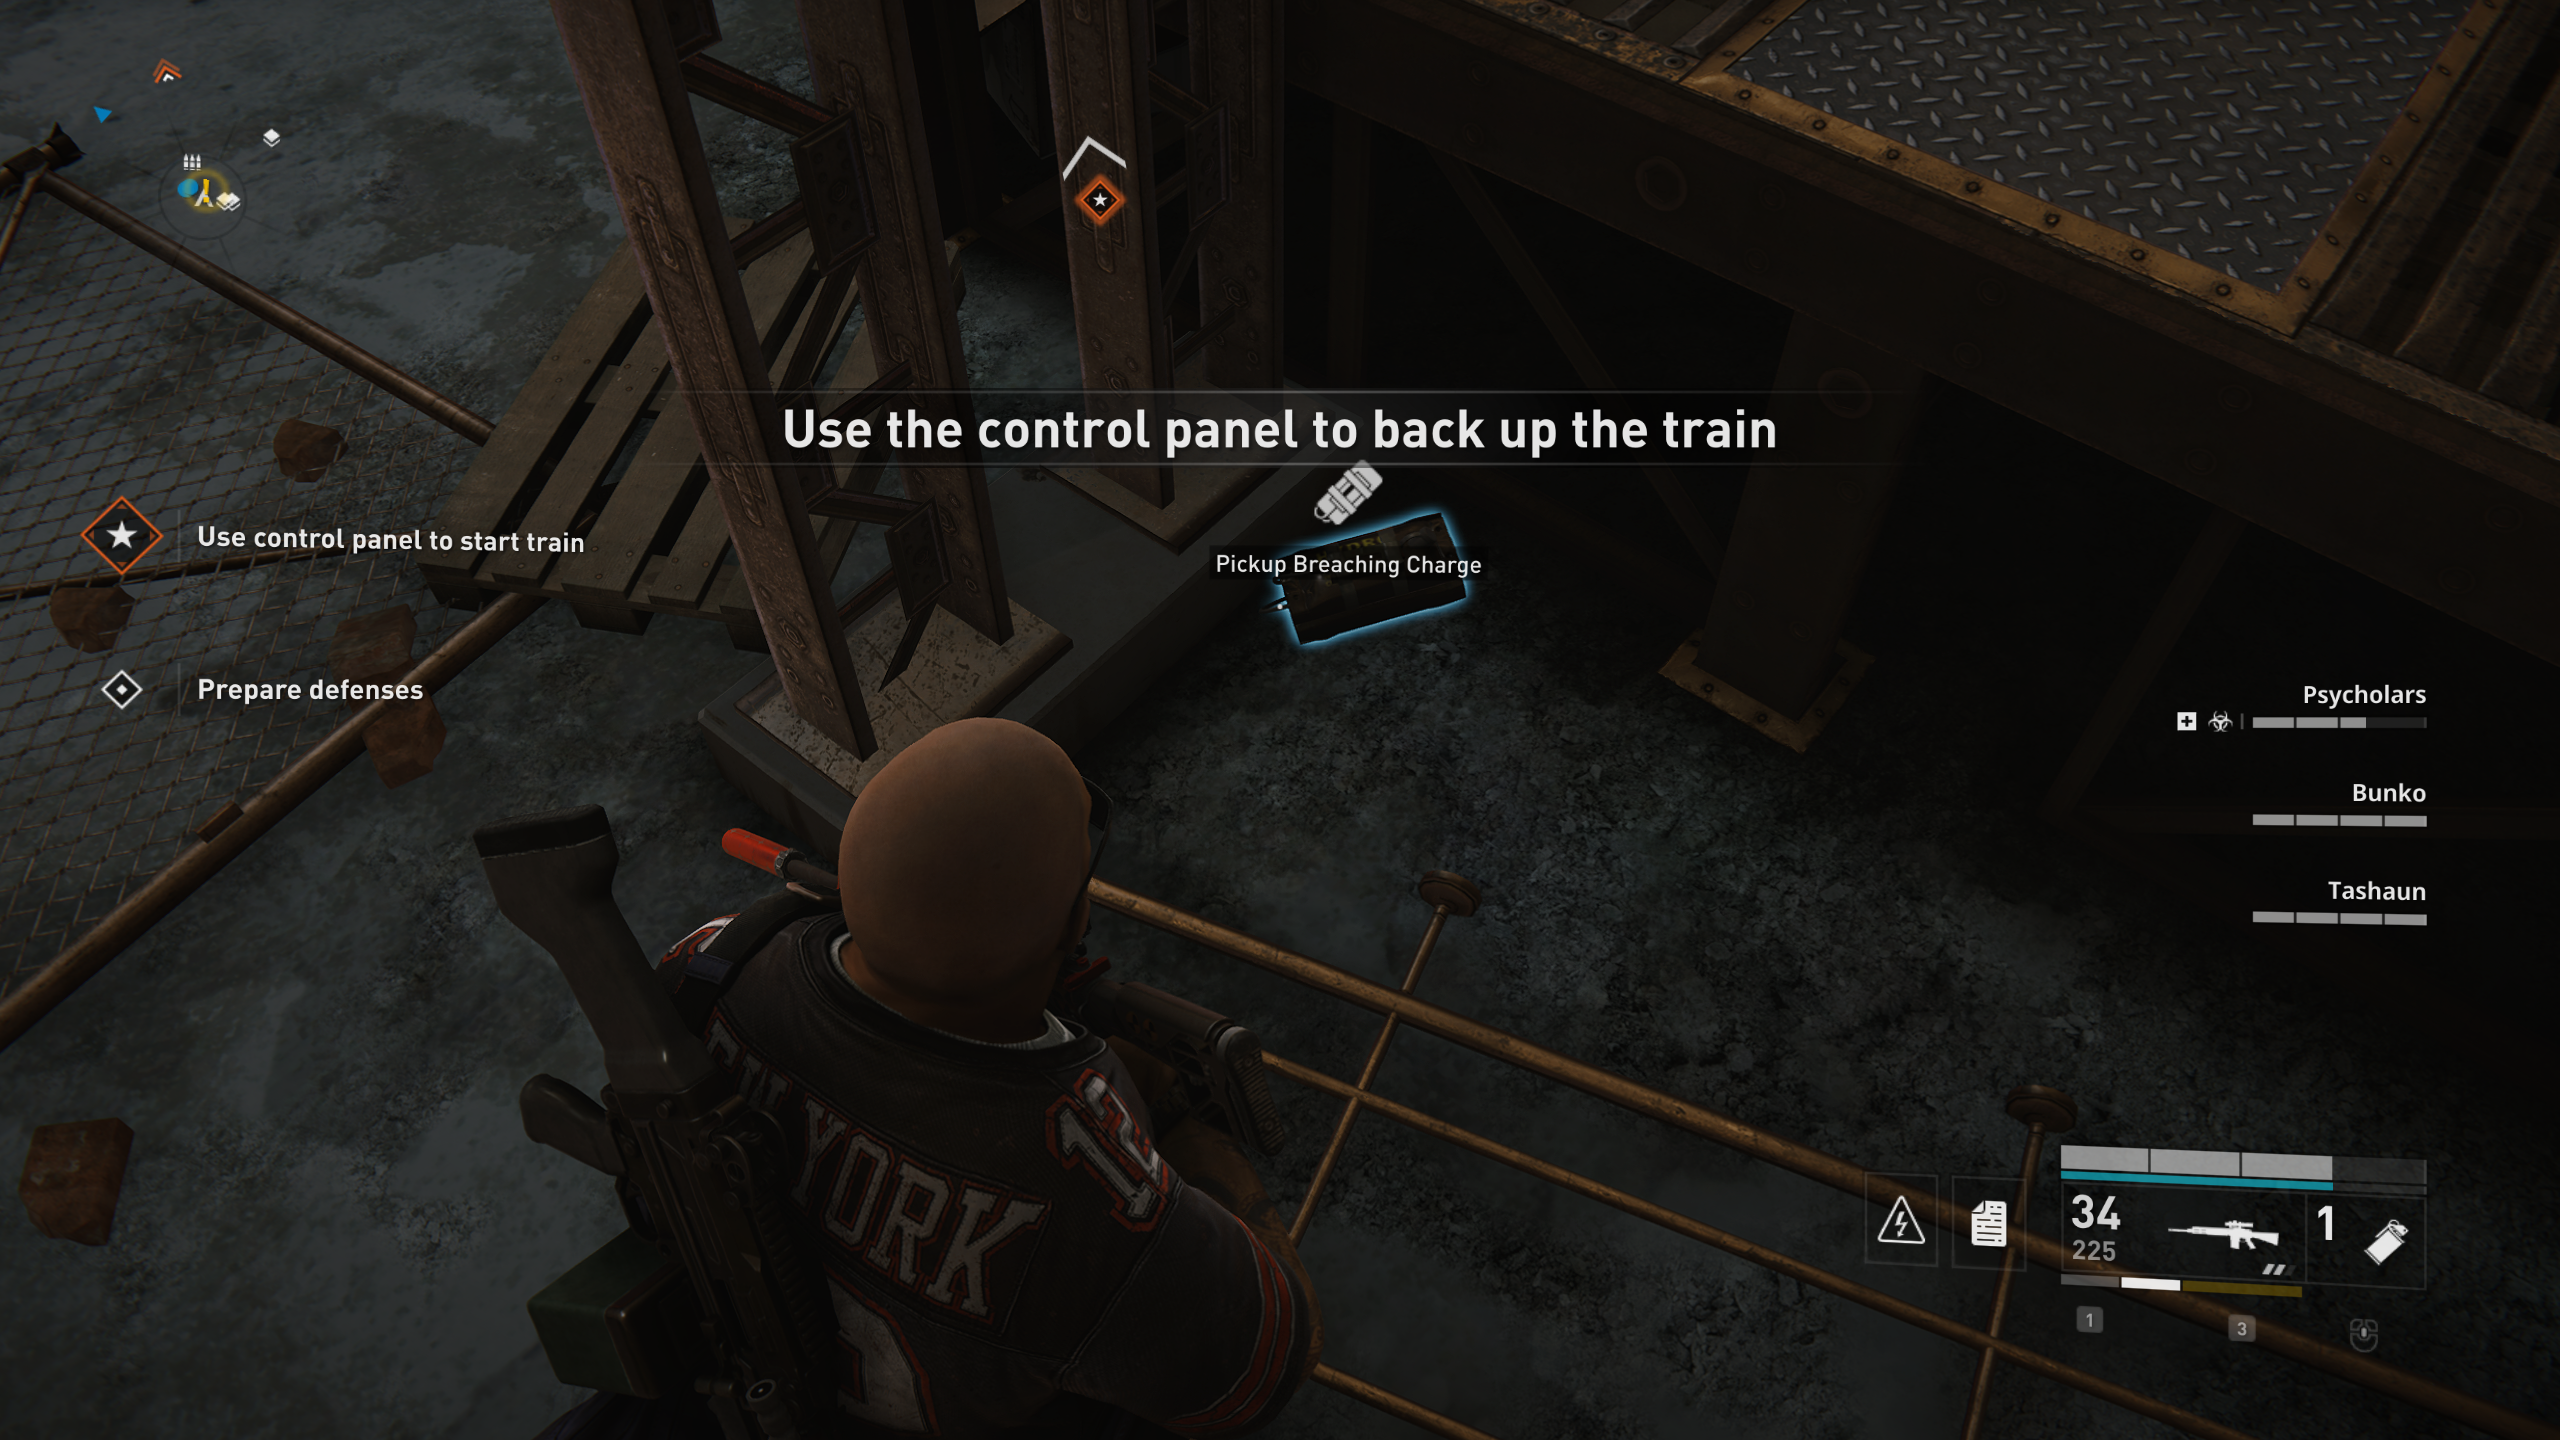
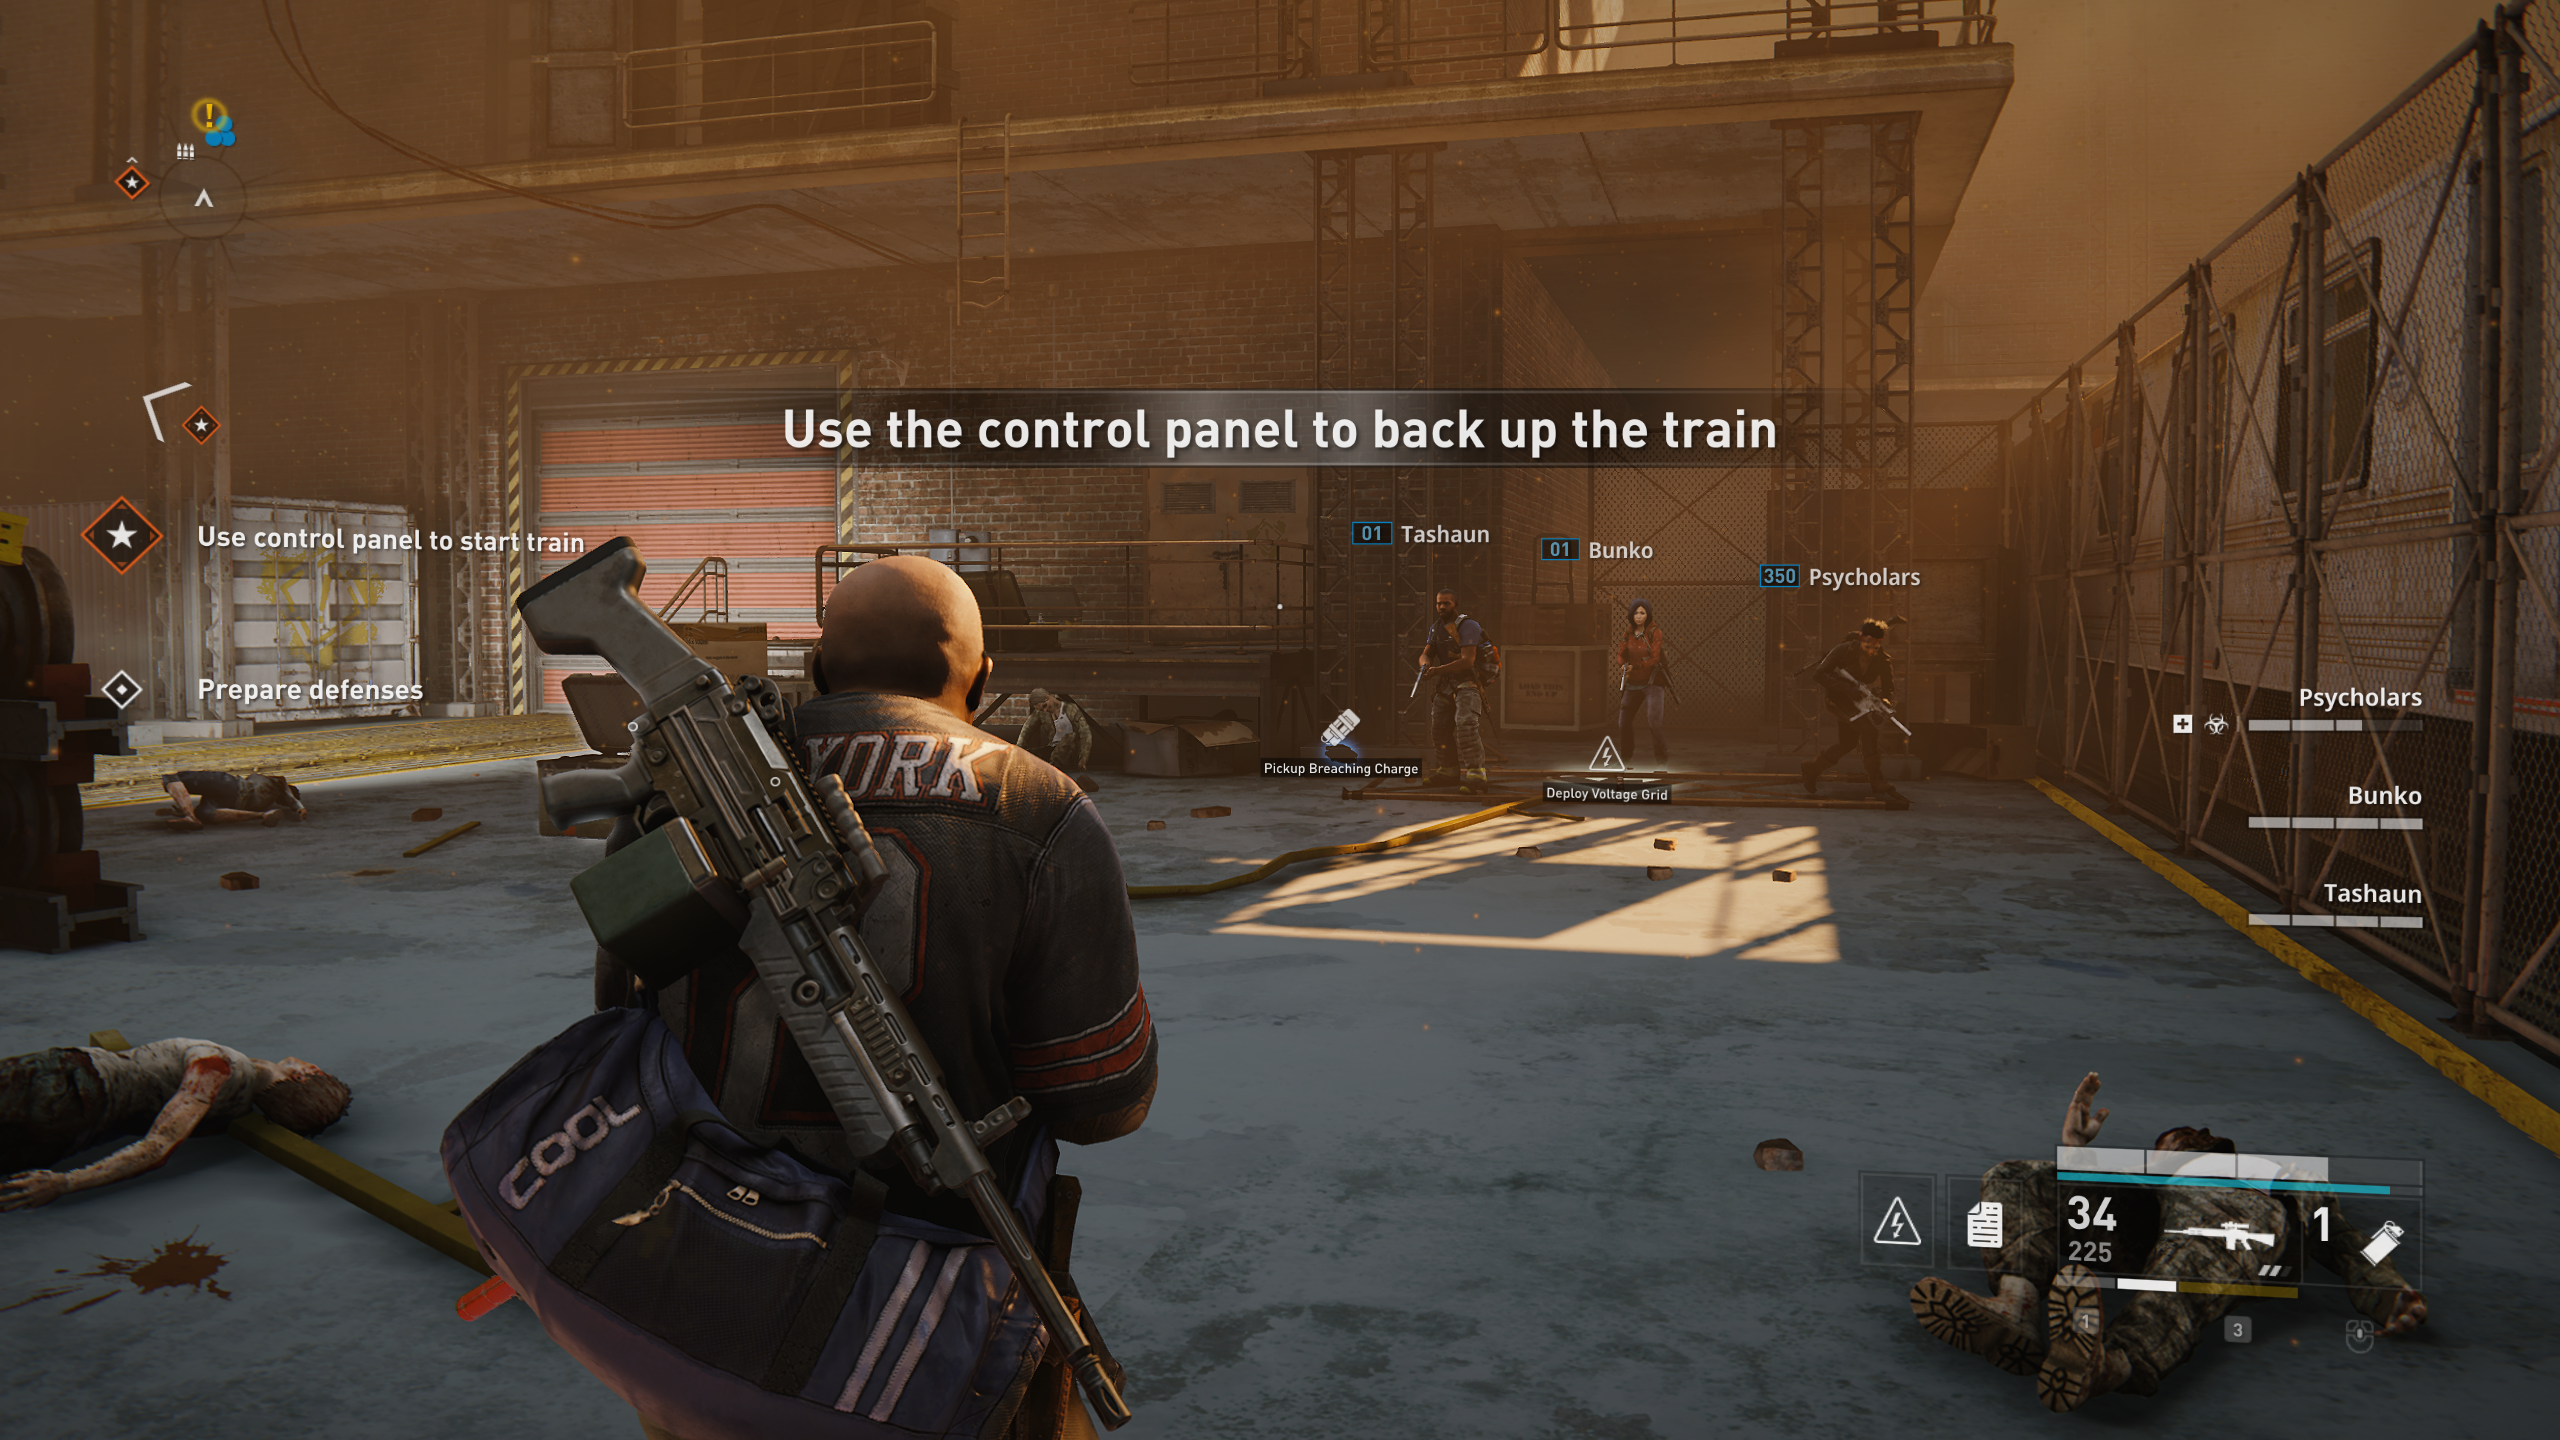
Location 3: ![]()
In the defense area inside the train depot, on the left side behind the small scaffold in front of the breaching charge door.

Location 4: ![]()
Just before the final defense, far to the left in the area with claymores and turrets.
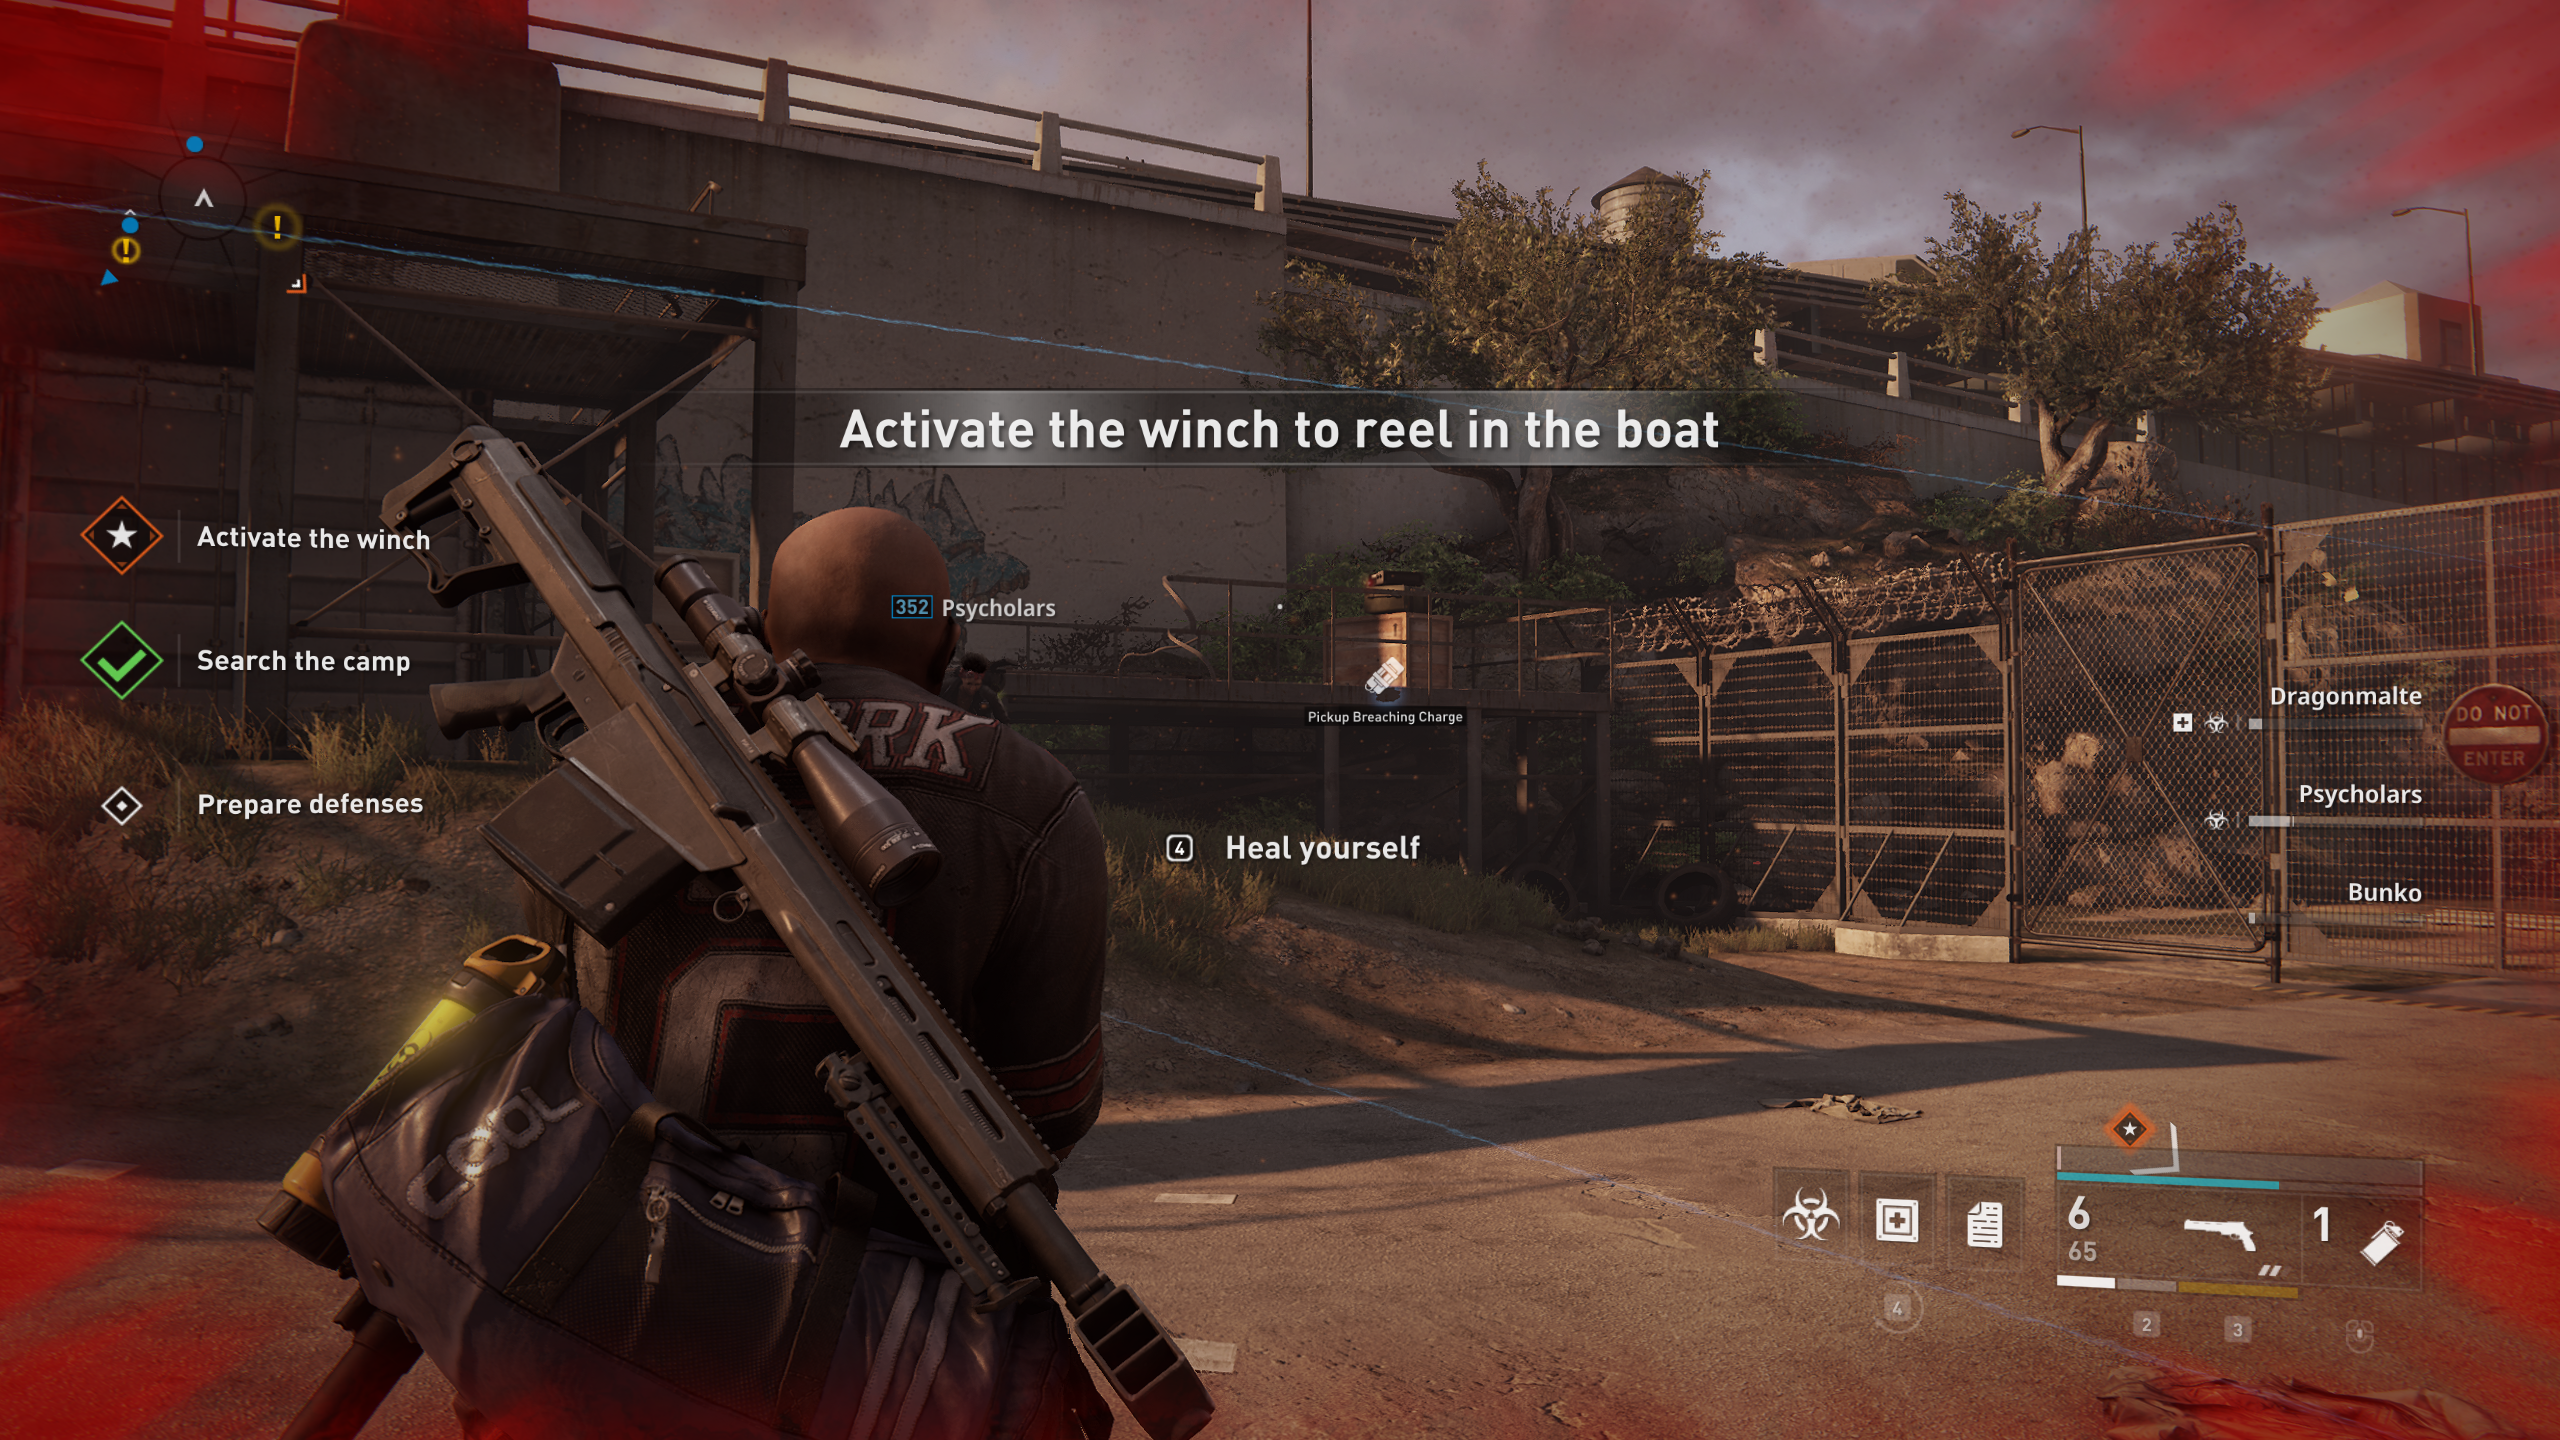
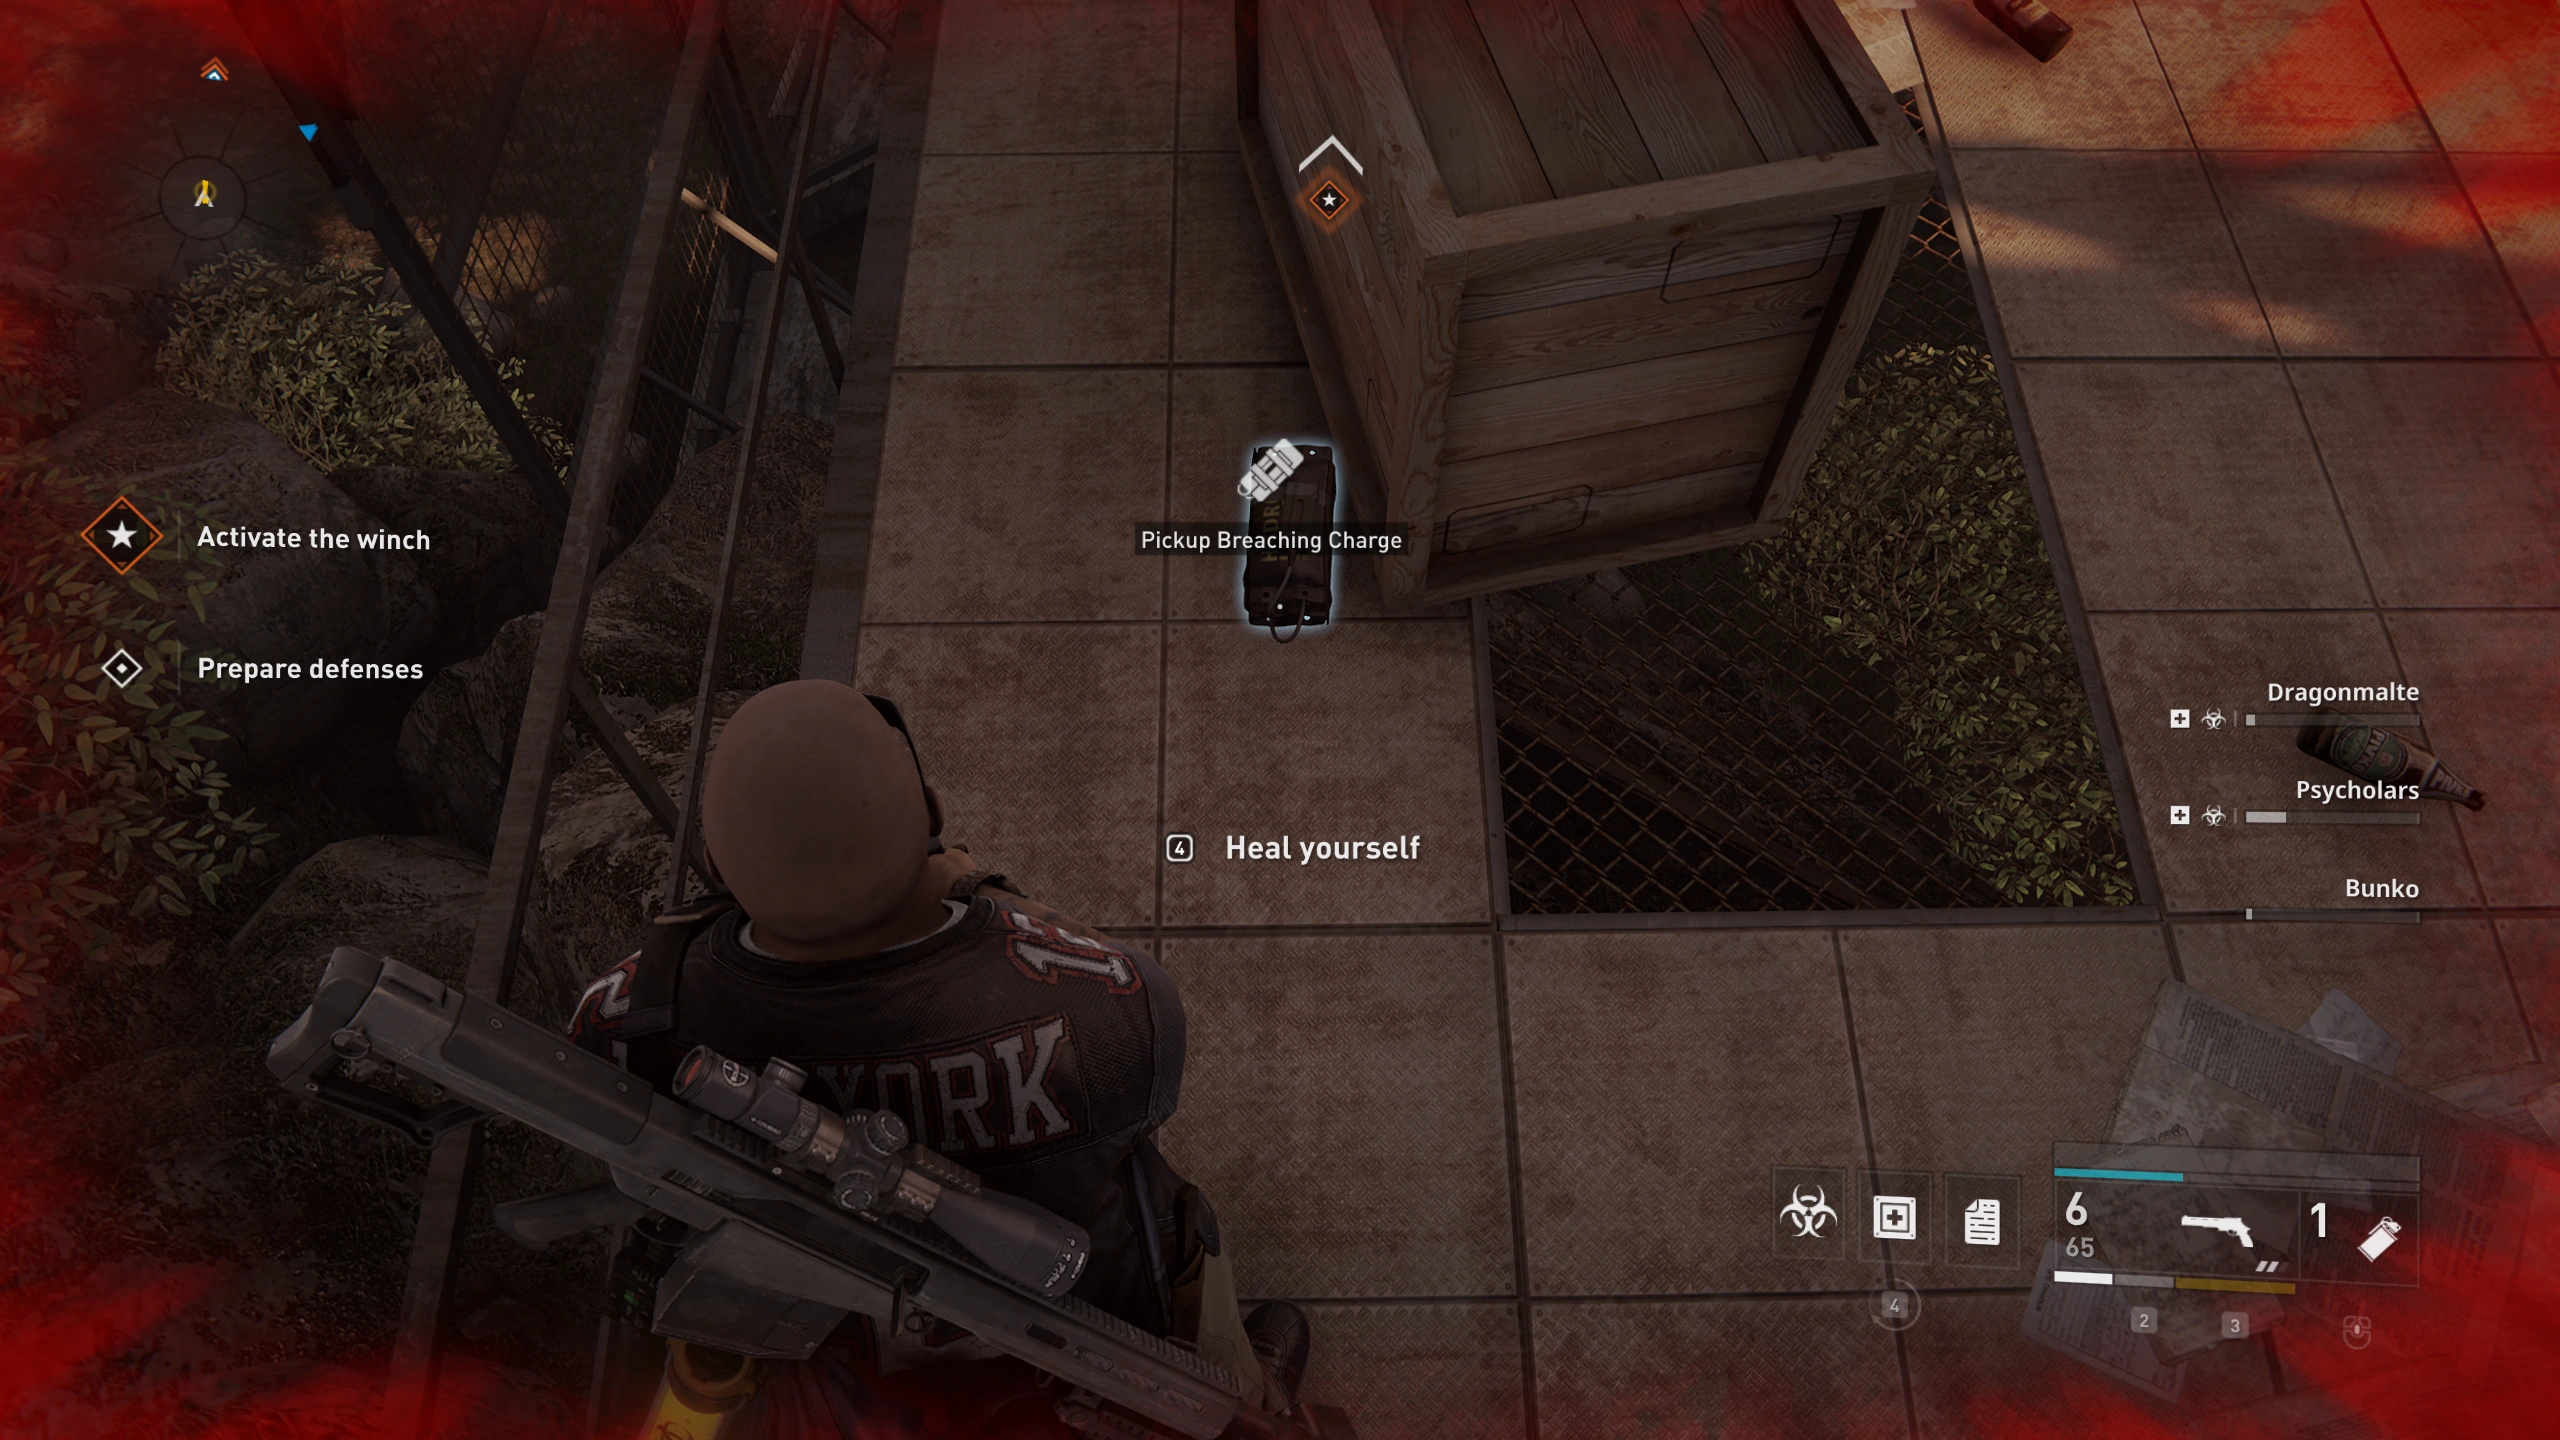
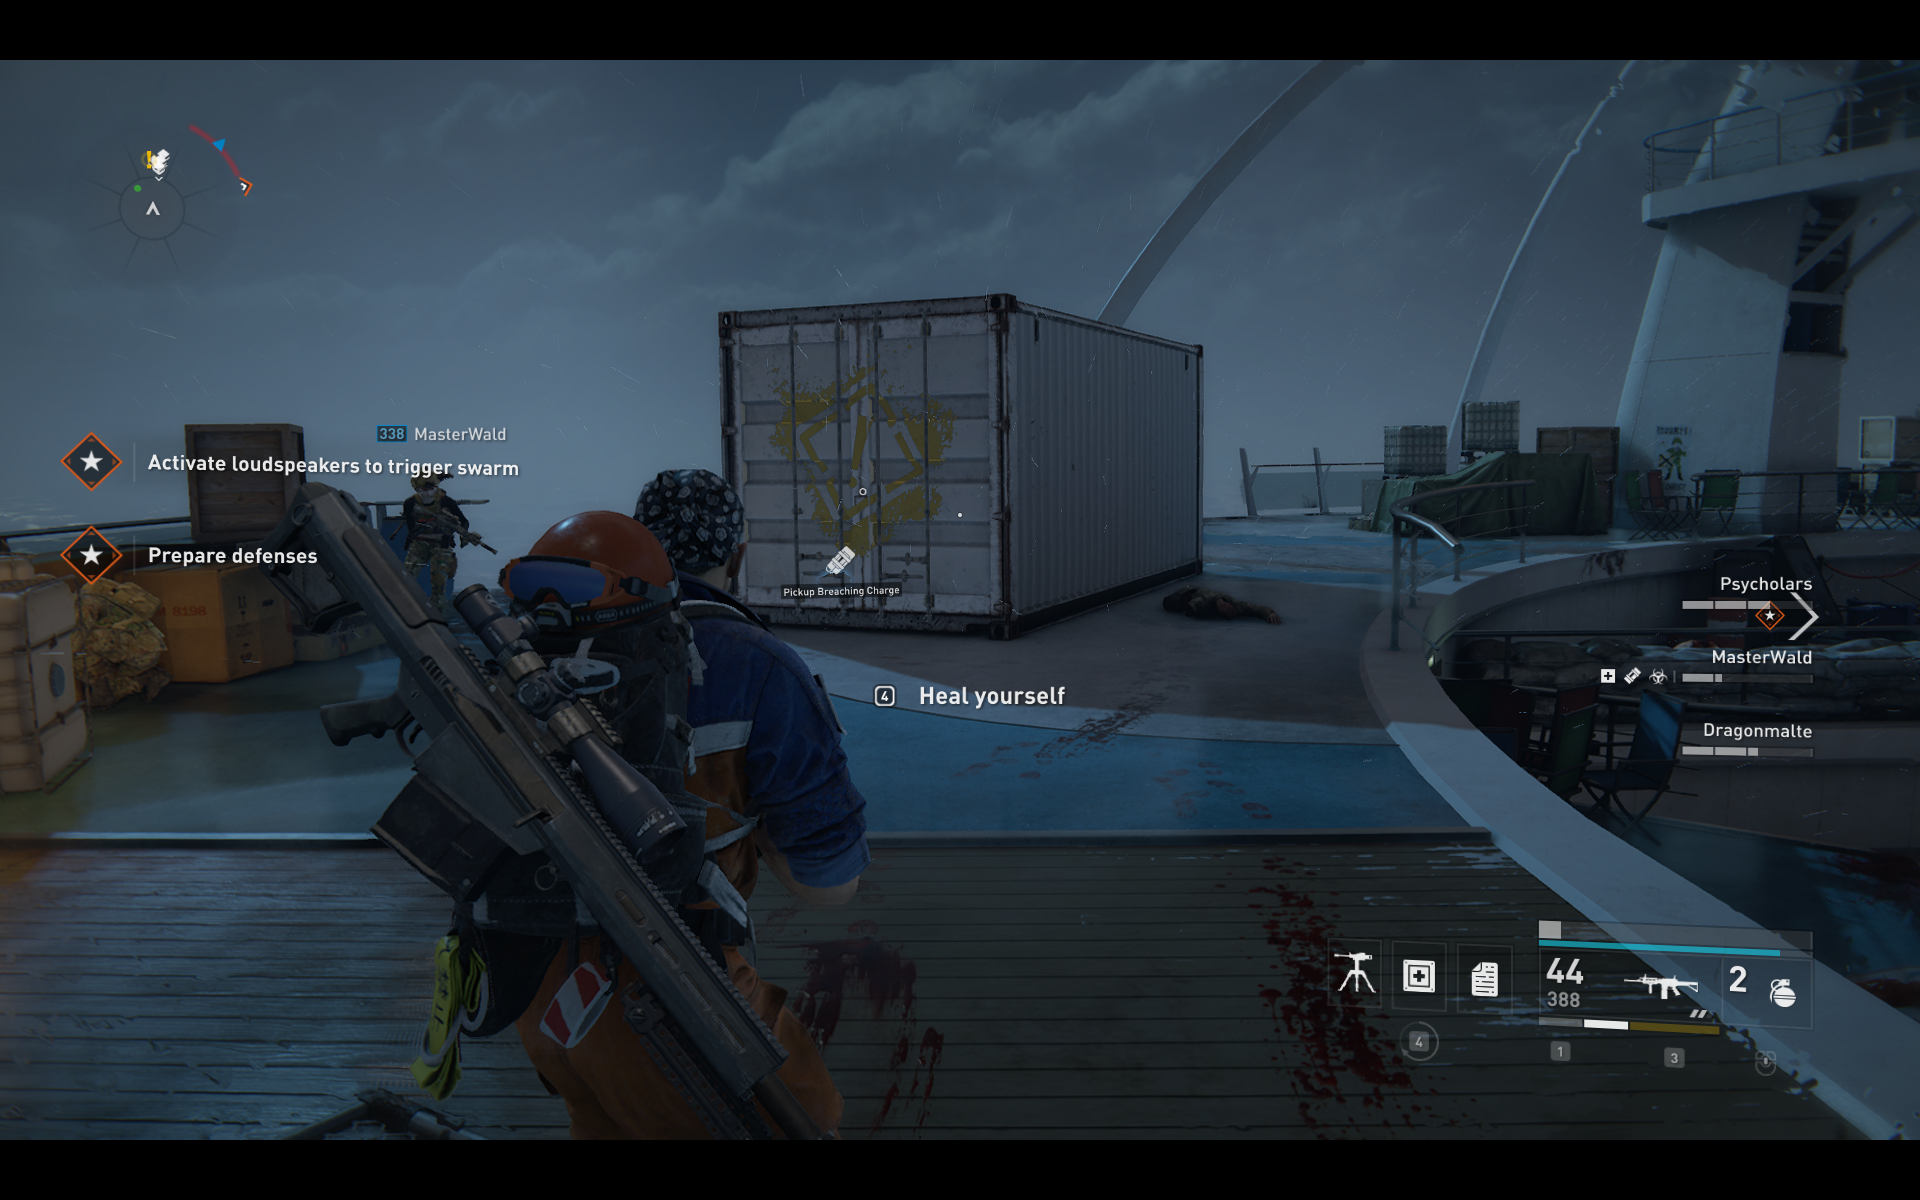
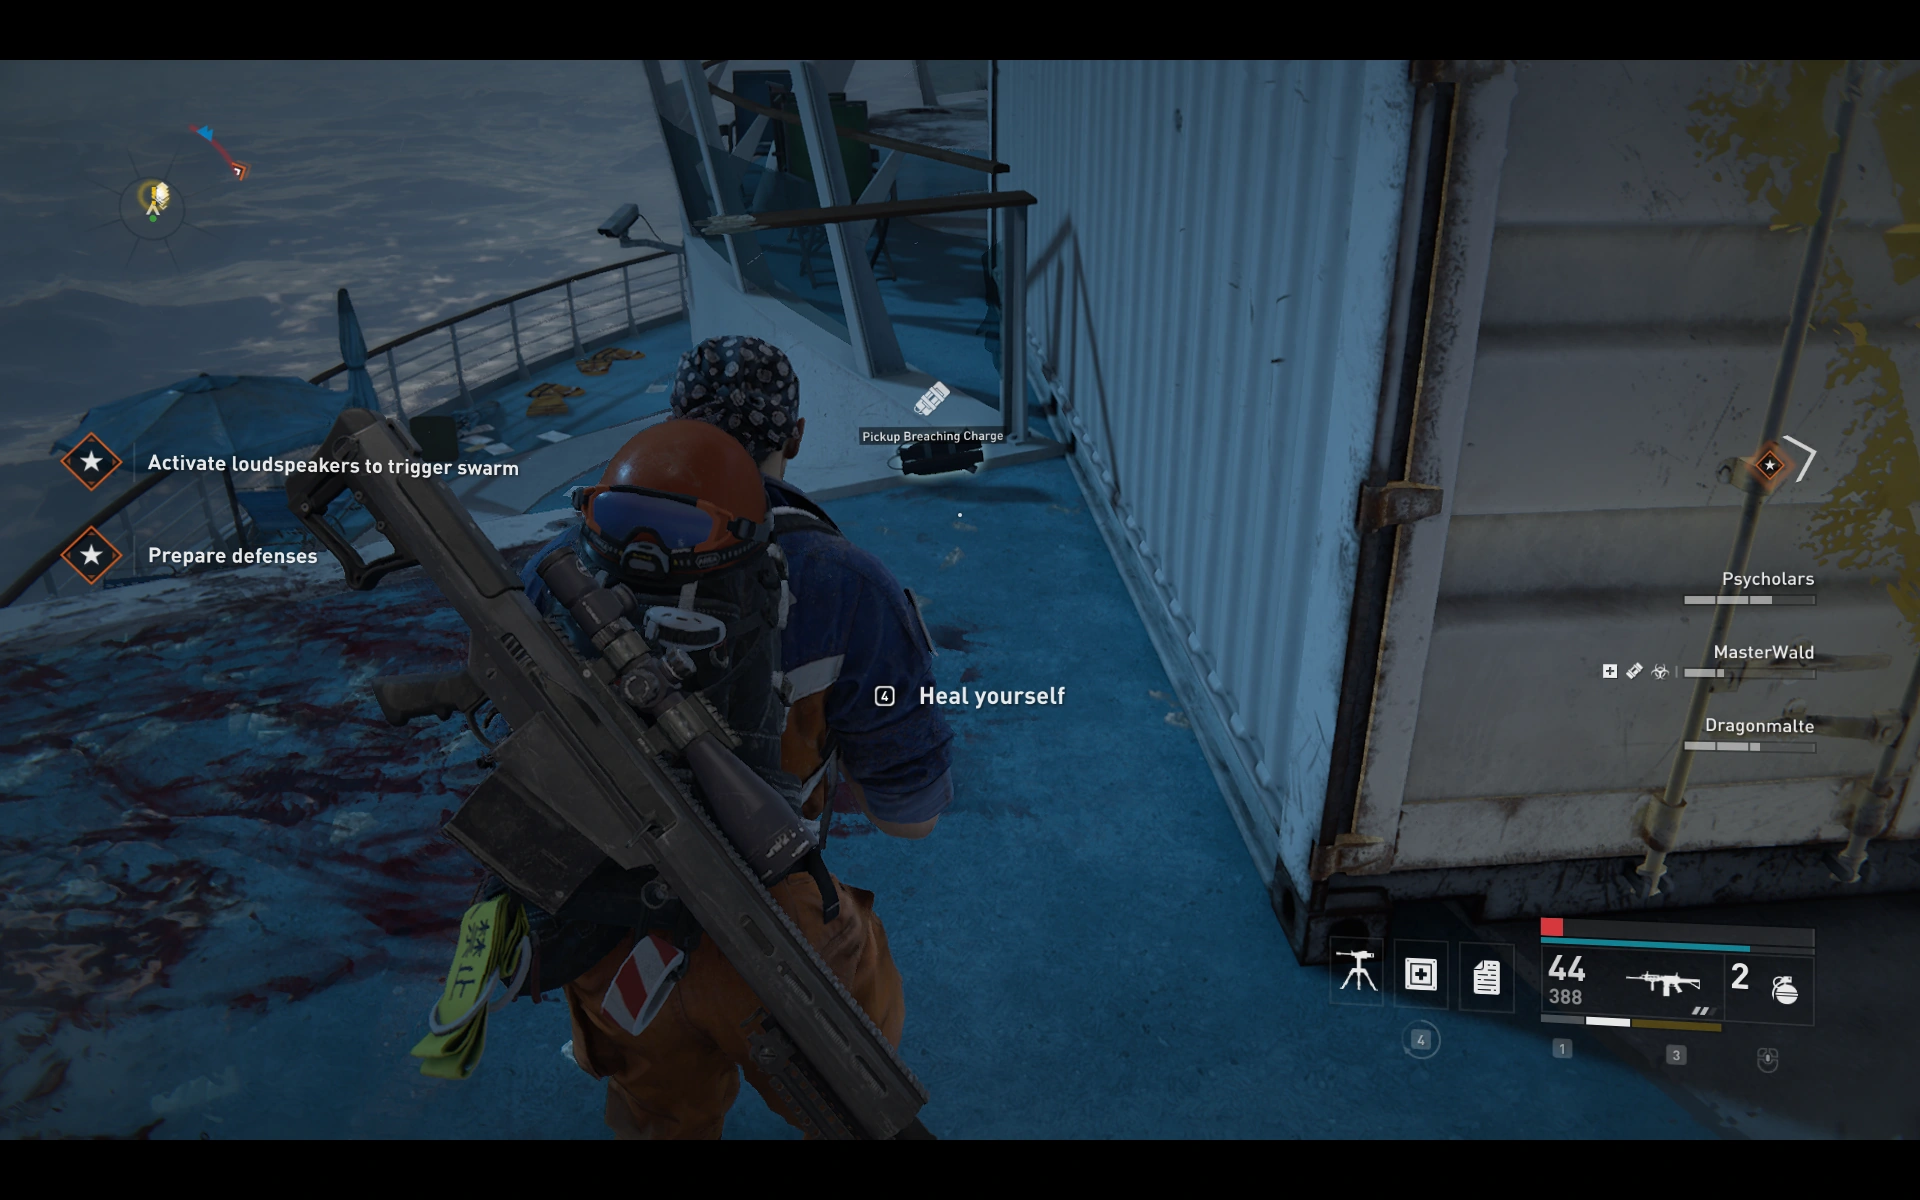
Location 5: ![]()
In the final defense area, behind the crate with the radio on it besides the fence closest to the boat.
Location 6: ![]()
Location 7: ![]()
Location 8: ![]()
Chapter 4: Dead in the Water[]
Location 1: ![]()
If you take the right path (down to the train station) to the far right on the side at the fence.

Location 2: ![]()
Also on the right path, right before you climb up.
Location 3: ![]()
On the left path, before climbing into the ruined house. The breaching charge is on the floor near a trashcan to the left of the area.
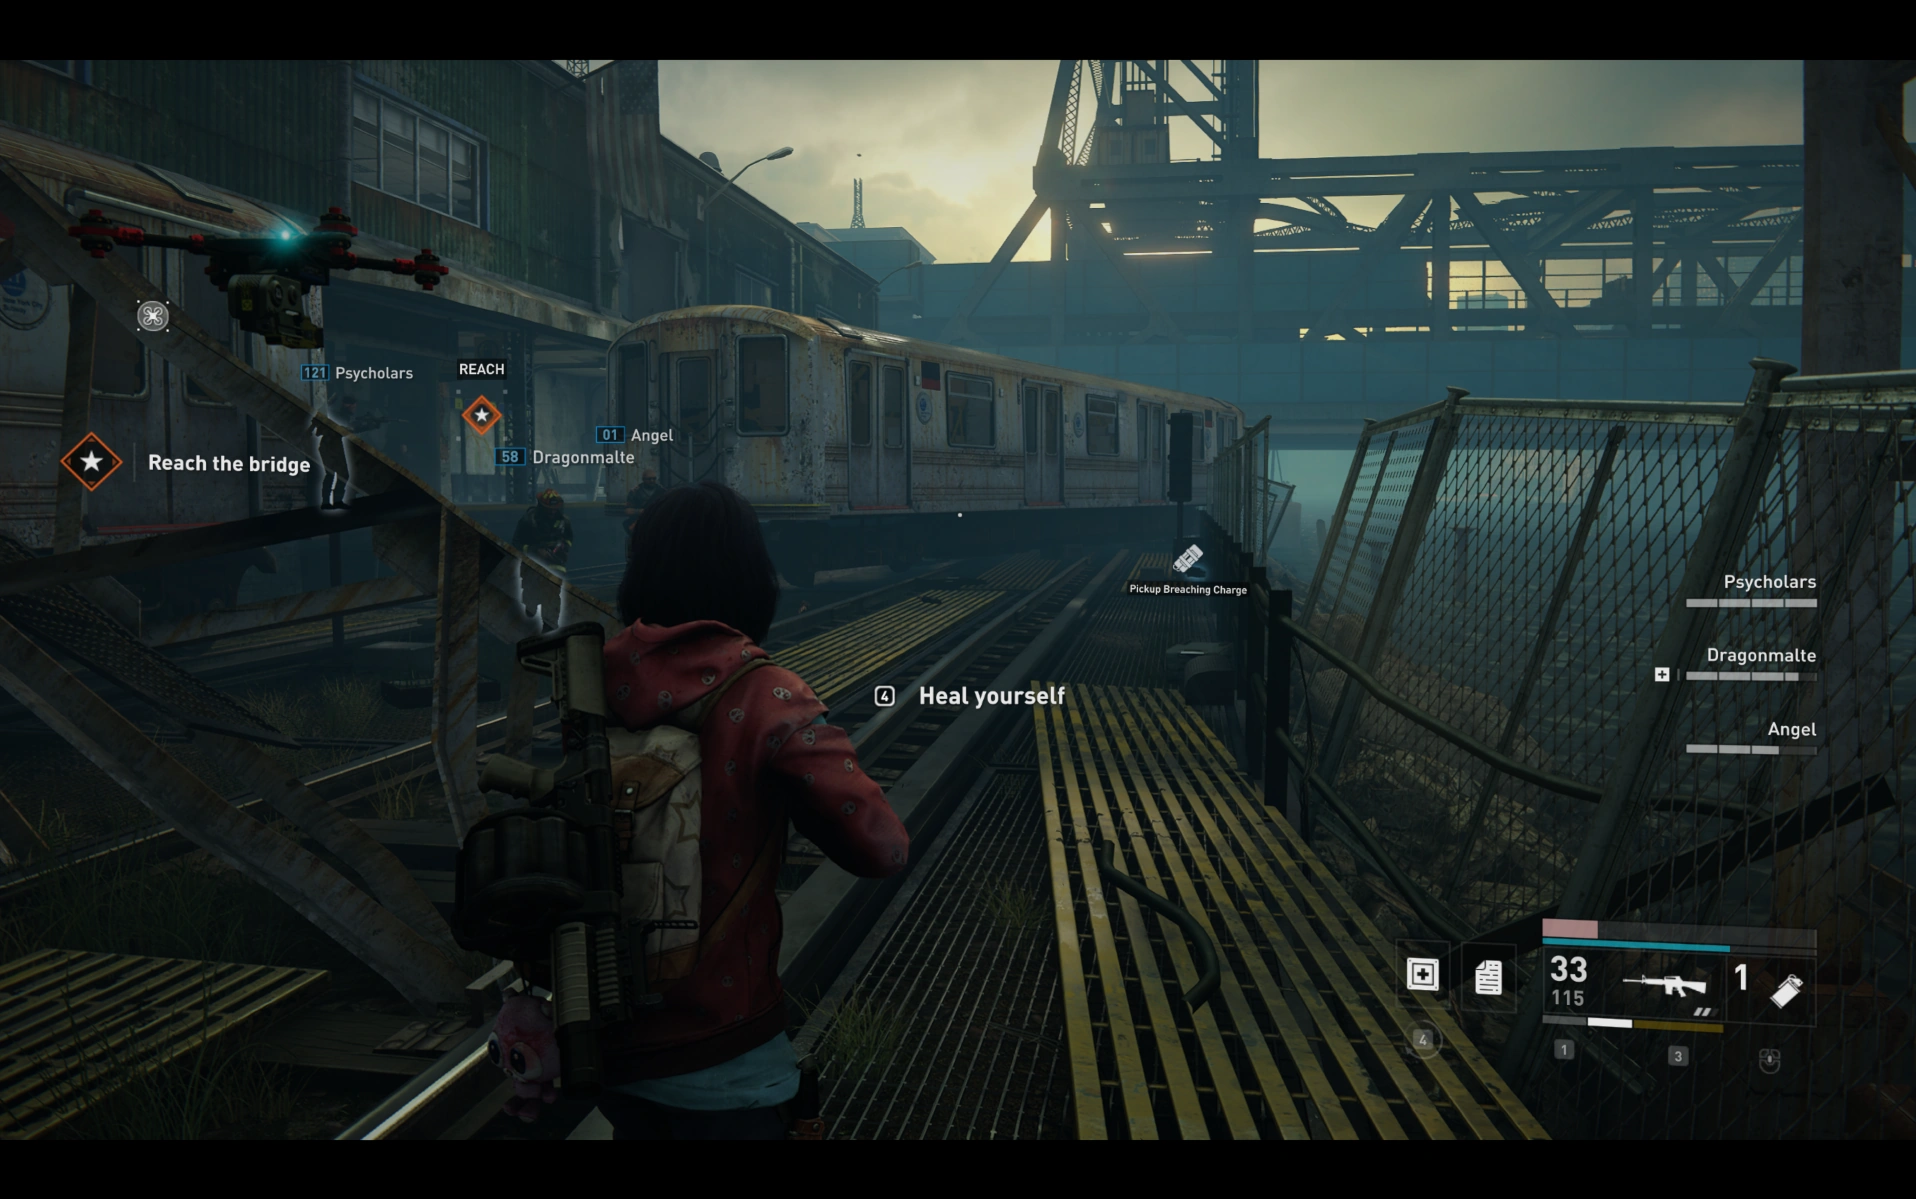
Location 4: ![]()
After you crossed the bridge, left side of the drop.
Location 5: ![]()
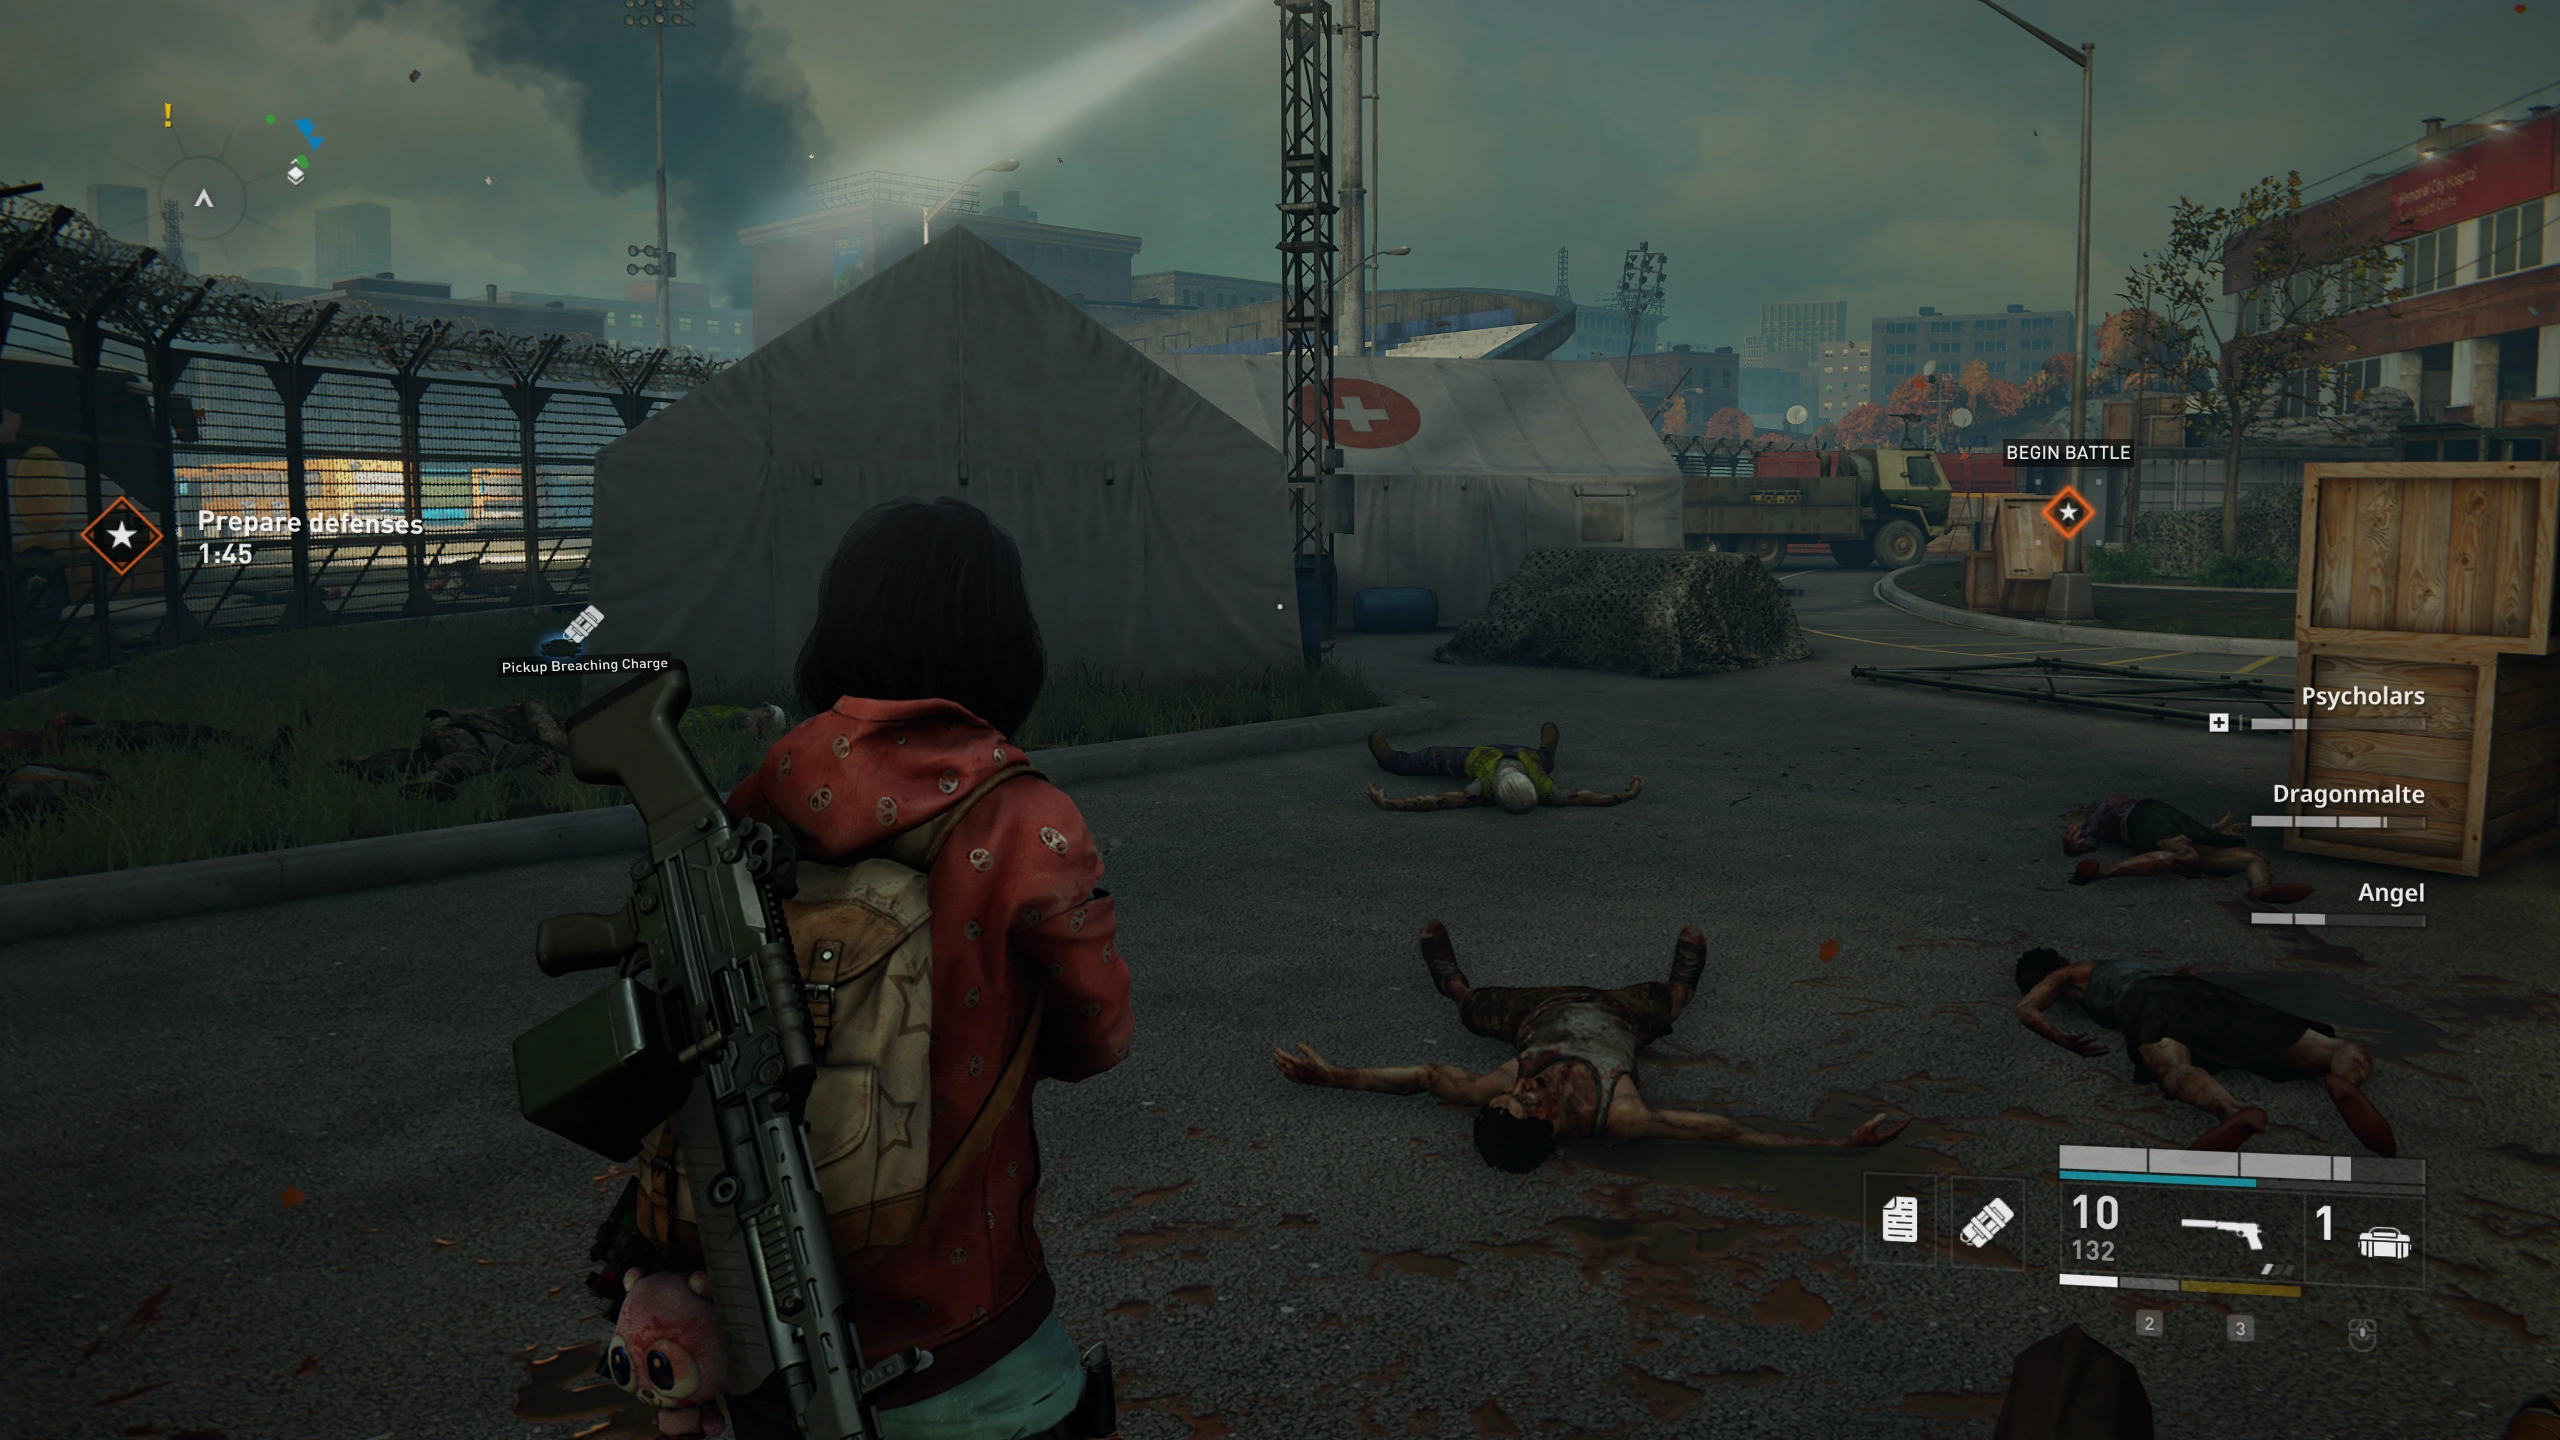
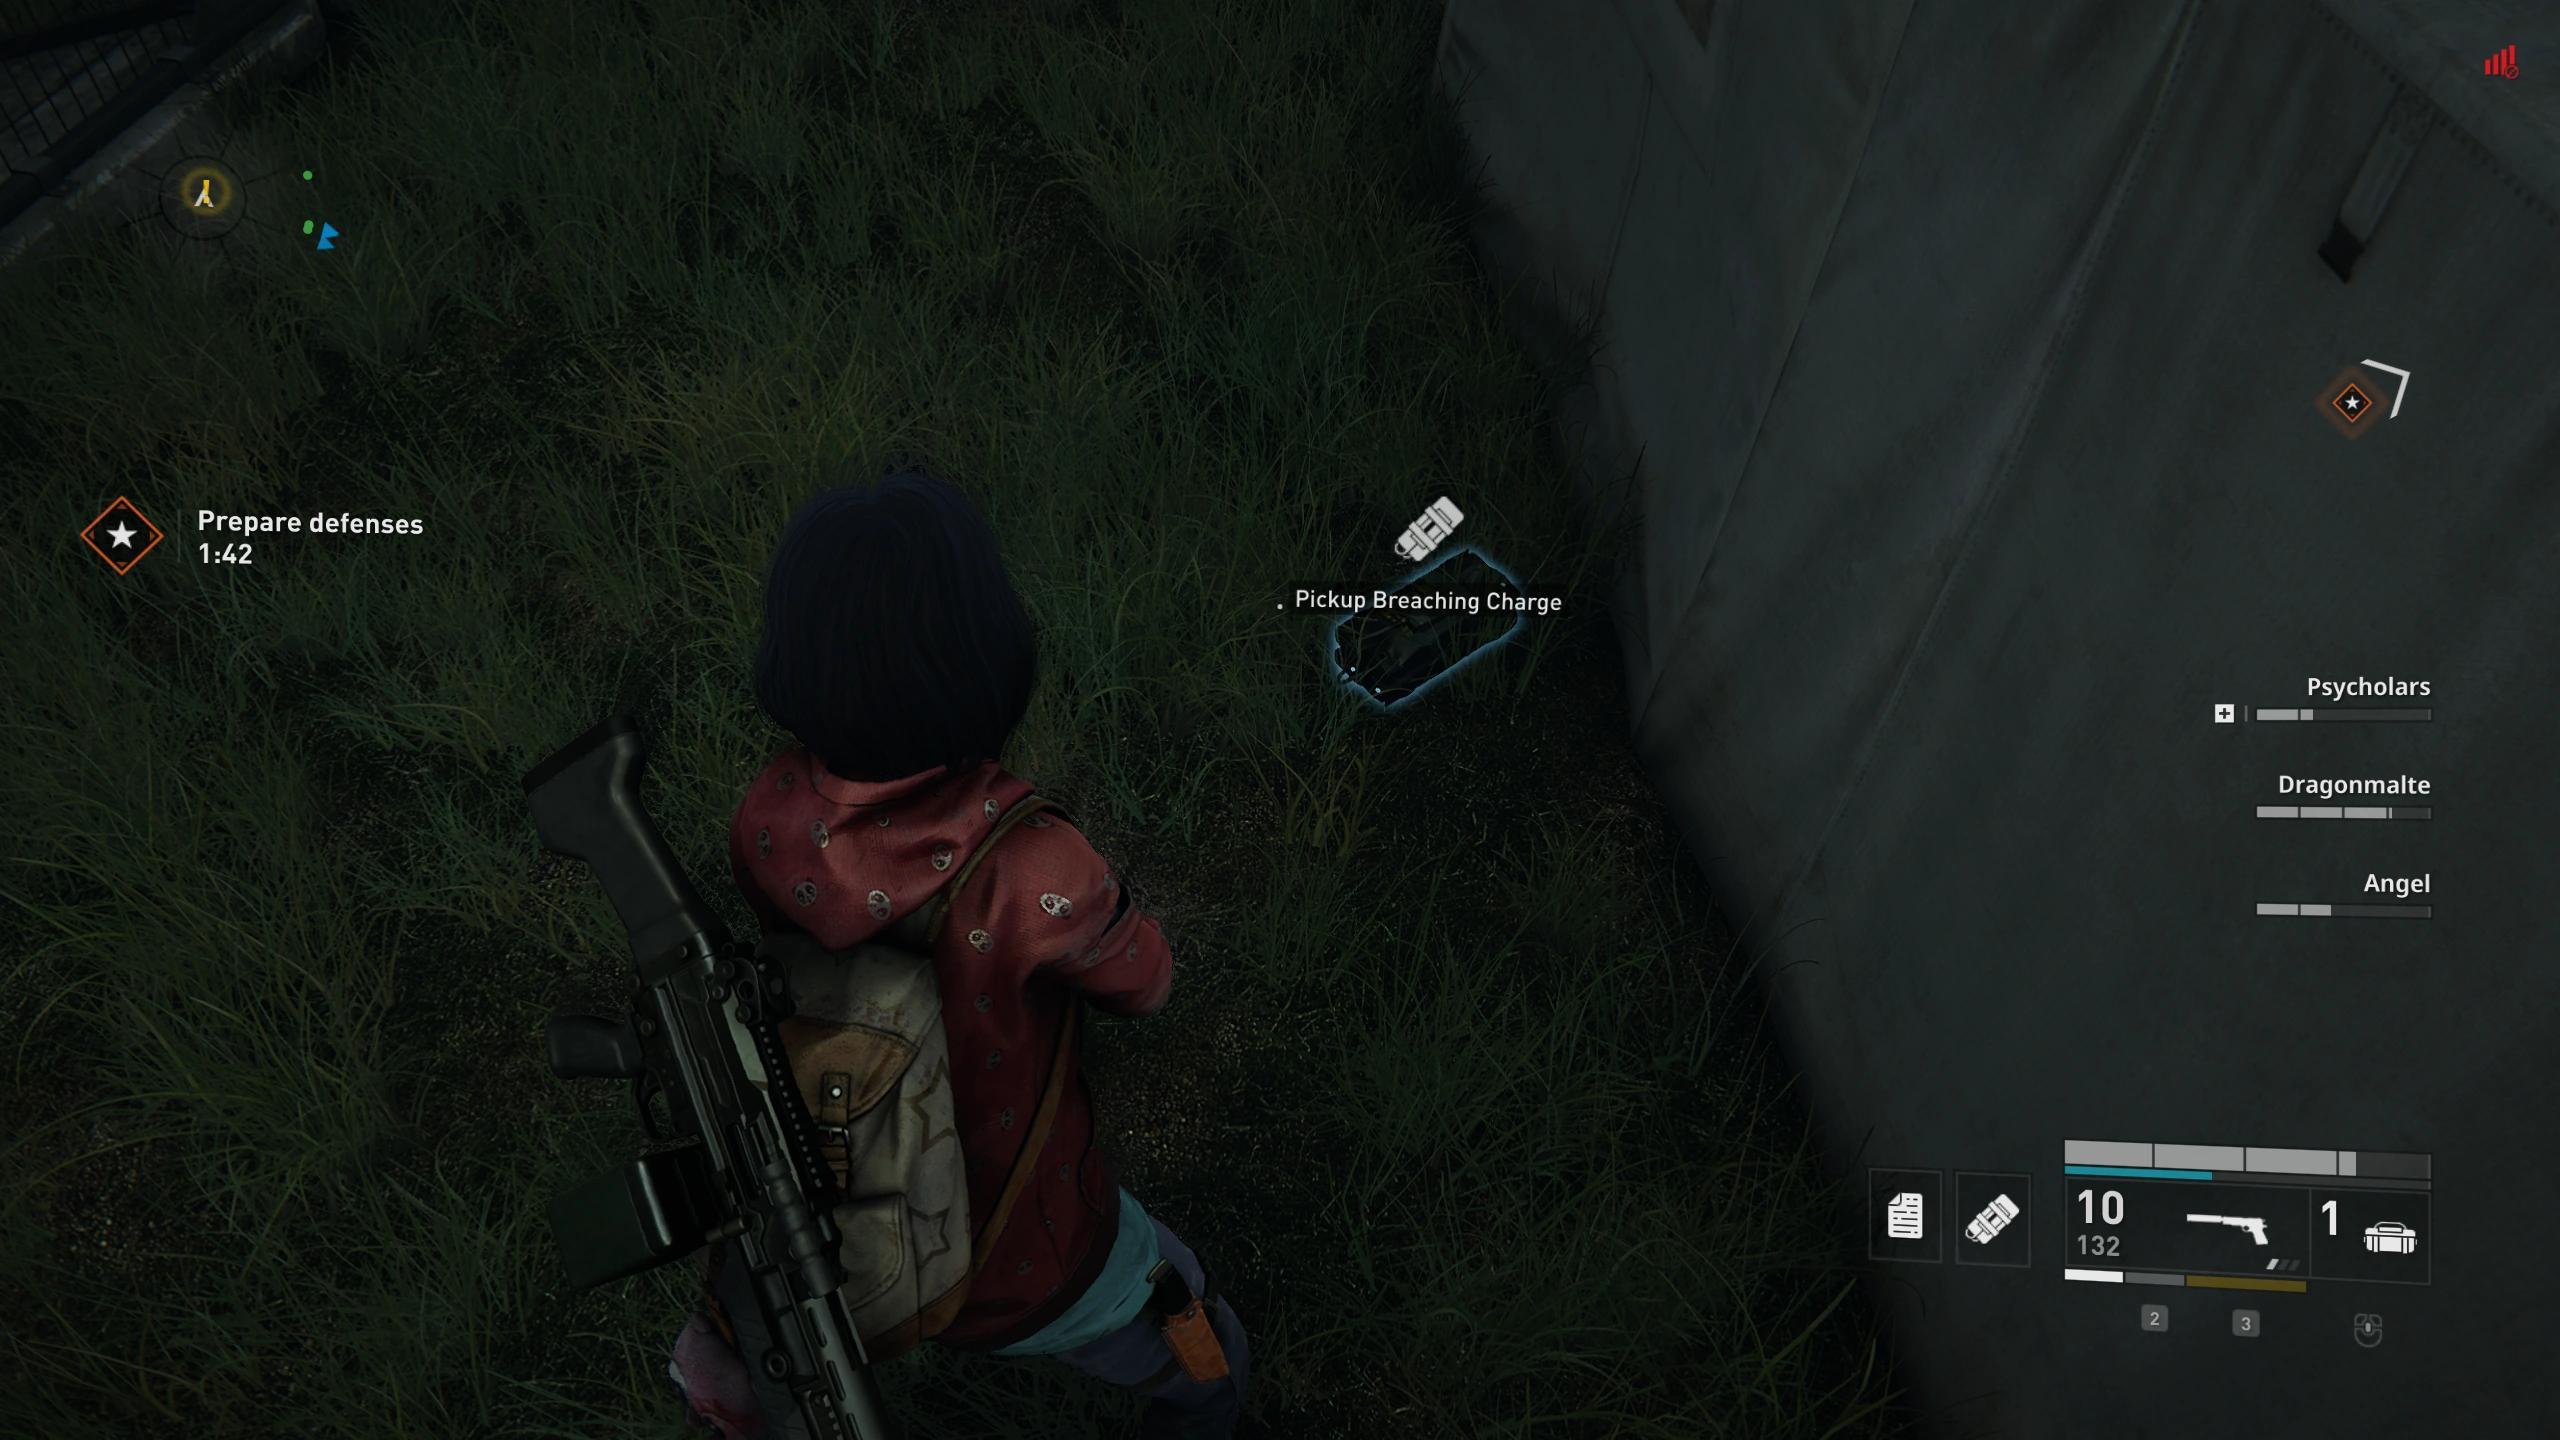
During the final defense, behind a tent near the fence to the stadium.
Location 6: ![]()
During the final defense, near the parking garage, below the containers you can build defenses on.
Location 7: ![]()
Location 8: ![]()
Jerusalem[]
Chapter 1: Brain Surgery[]
Location 1: ![]()
In the starting area, in the pile of bodies to the far left.
Location 2: ![]()
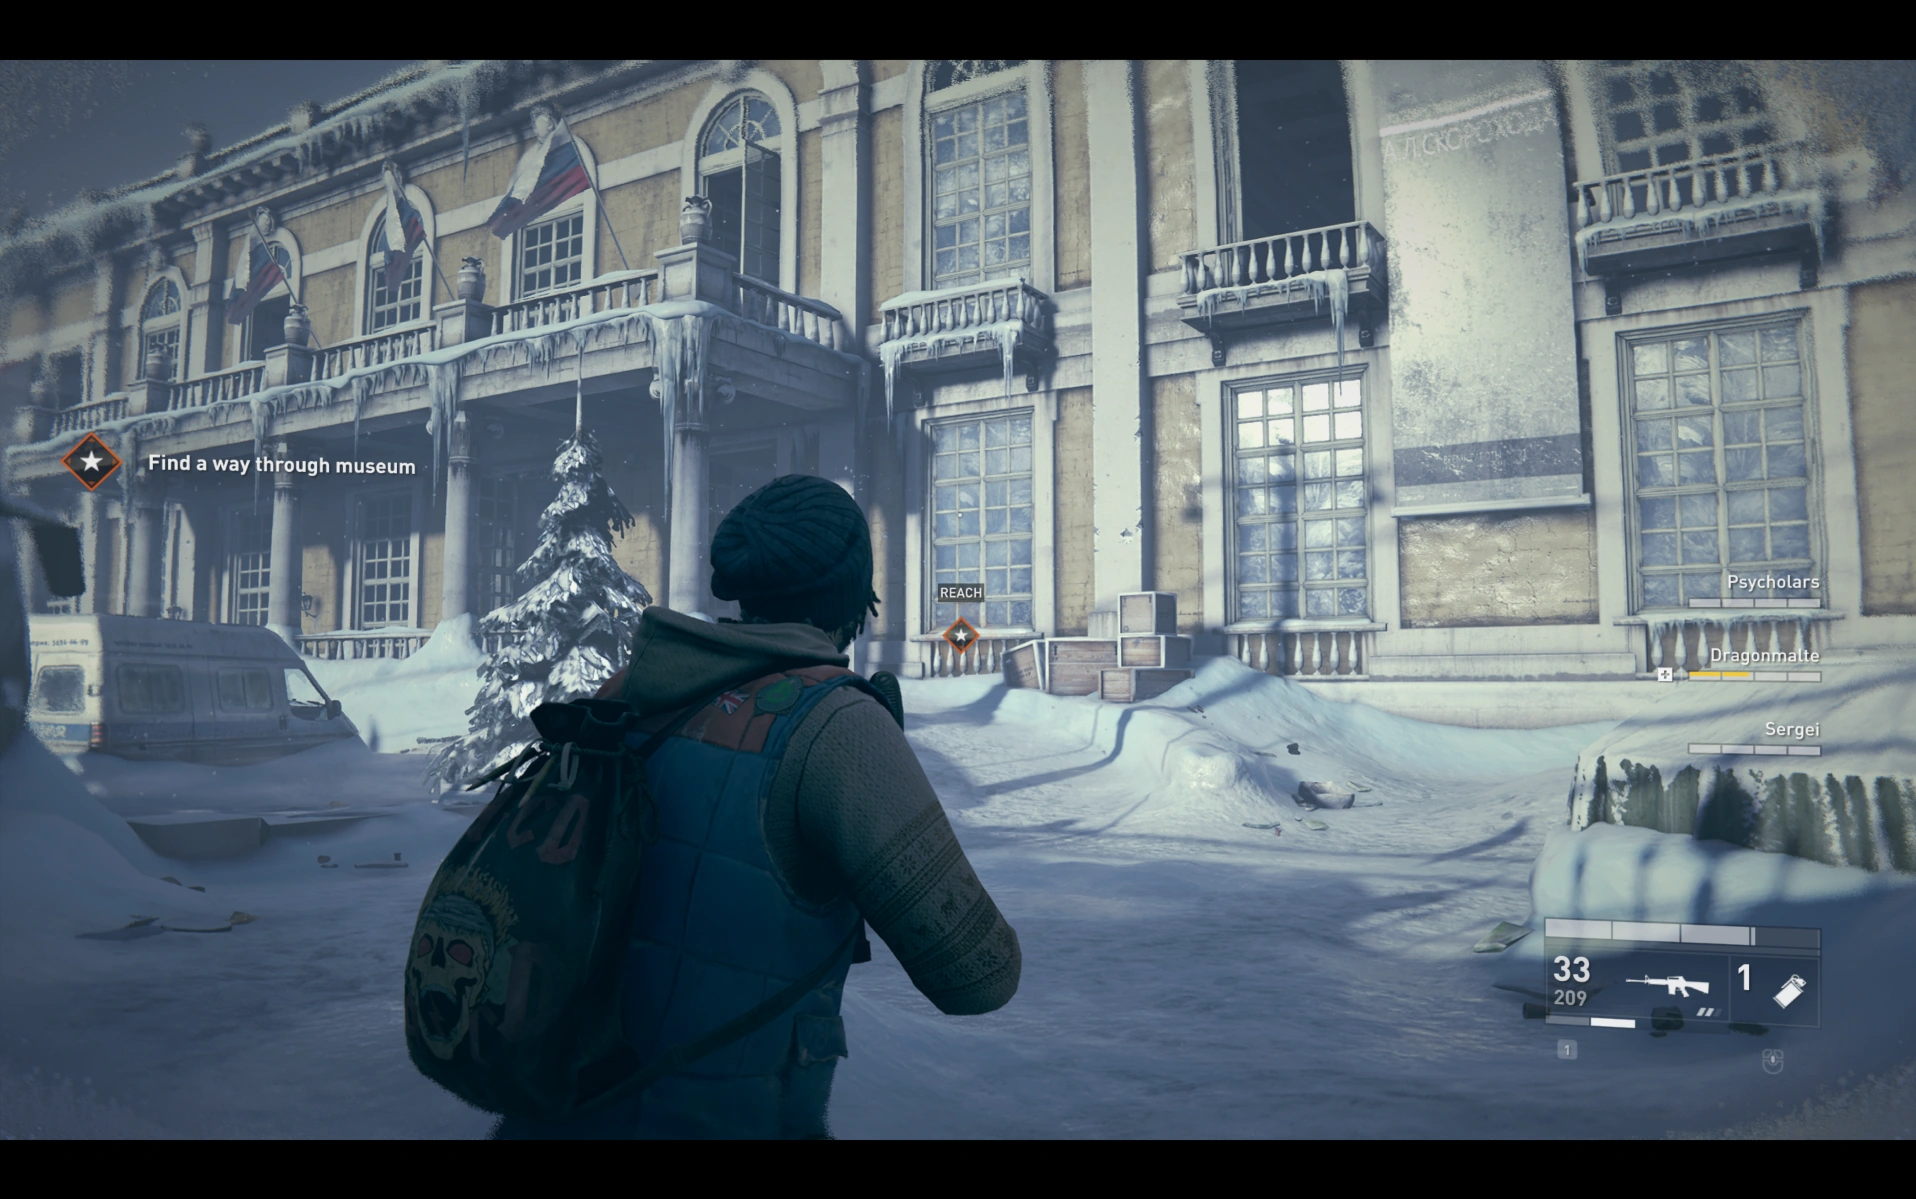
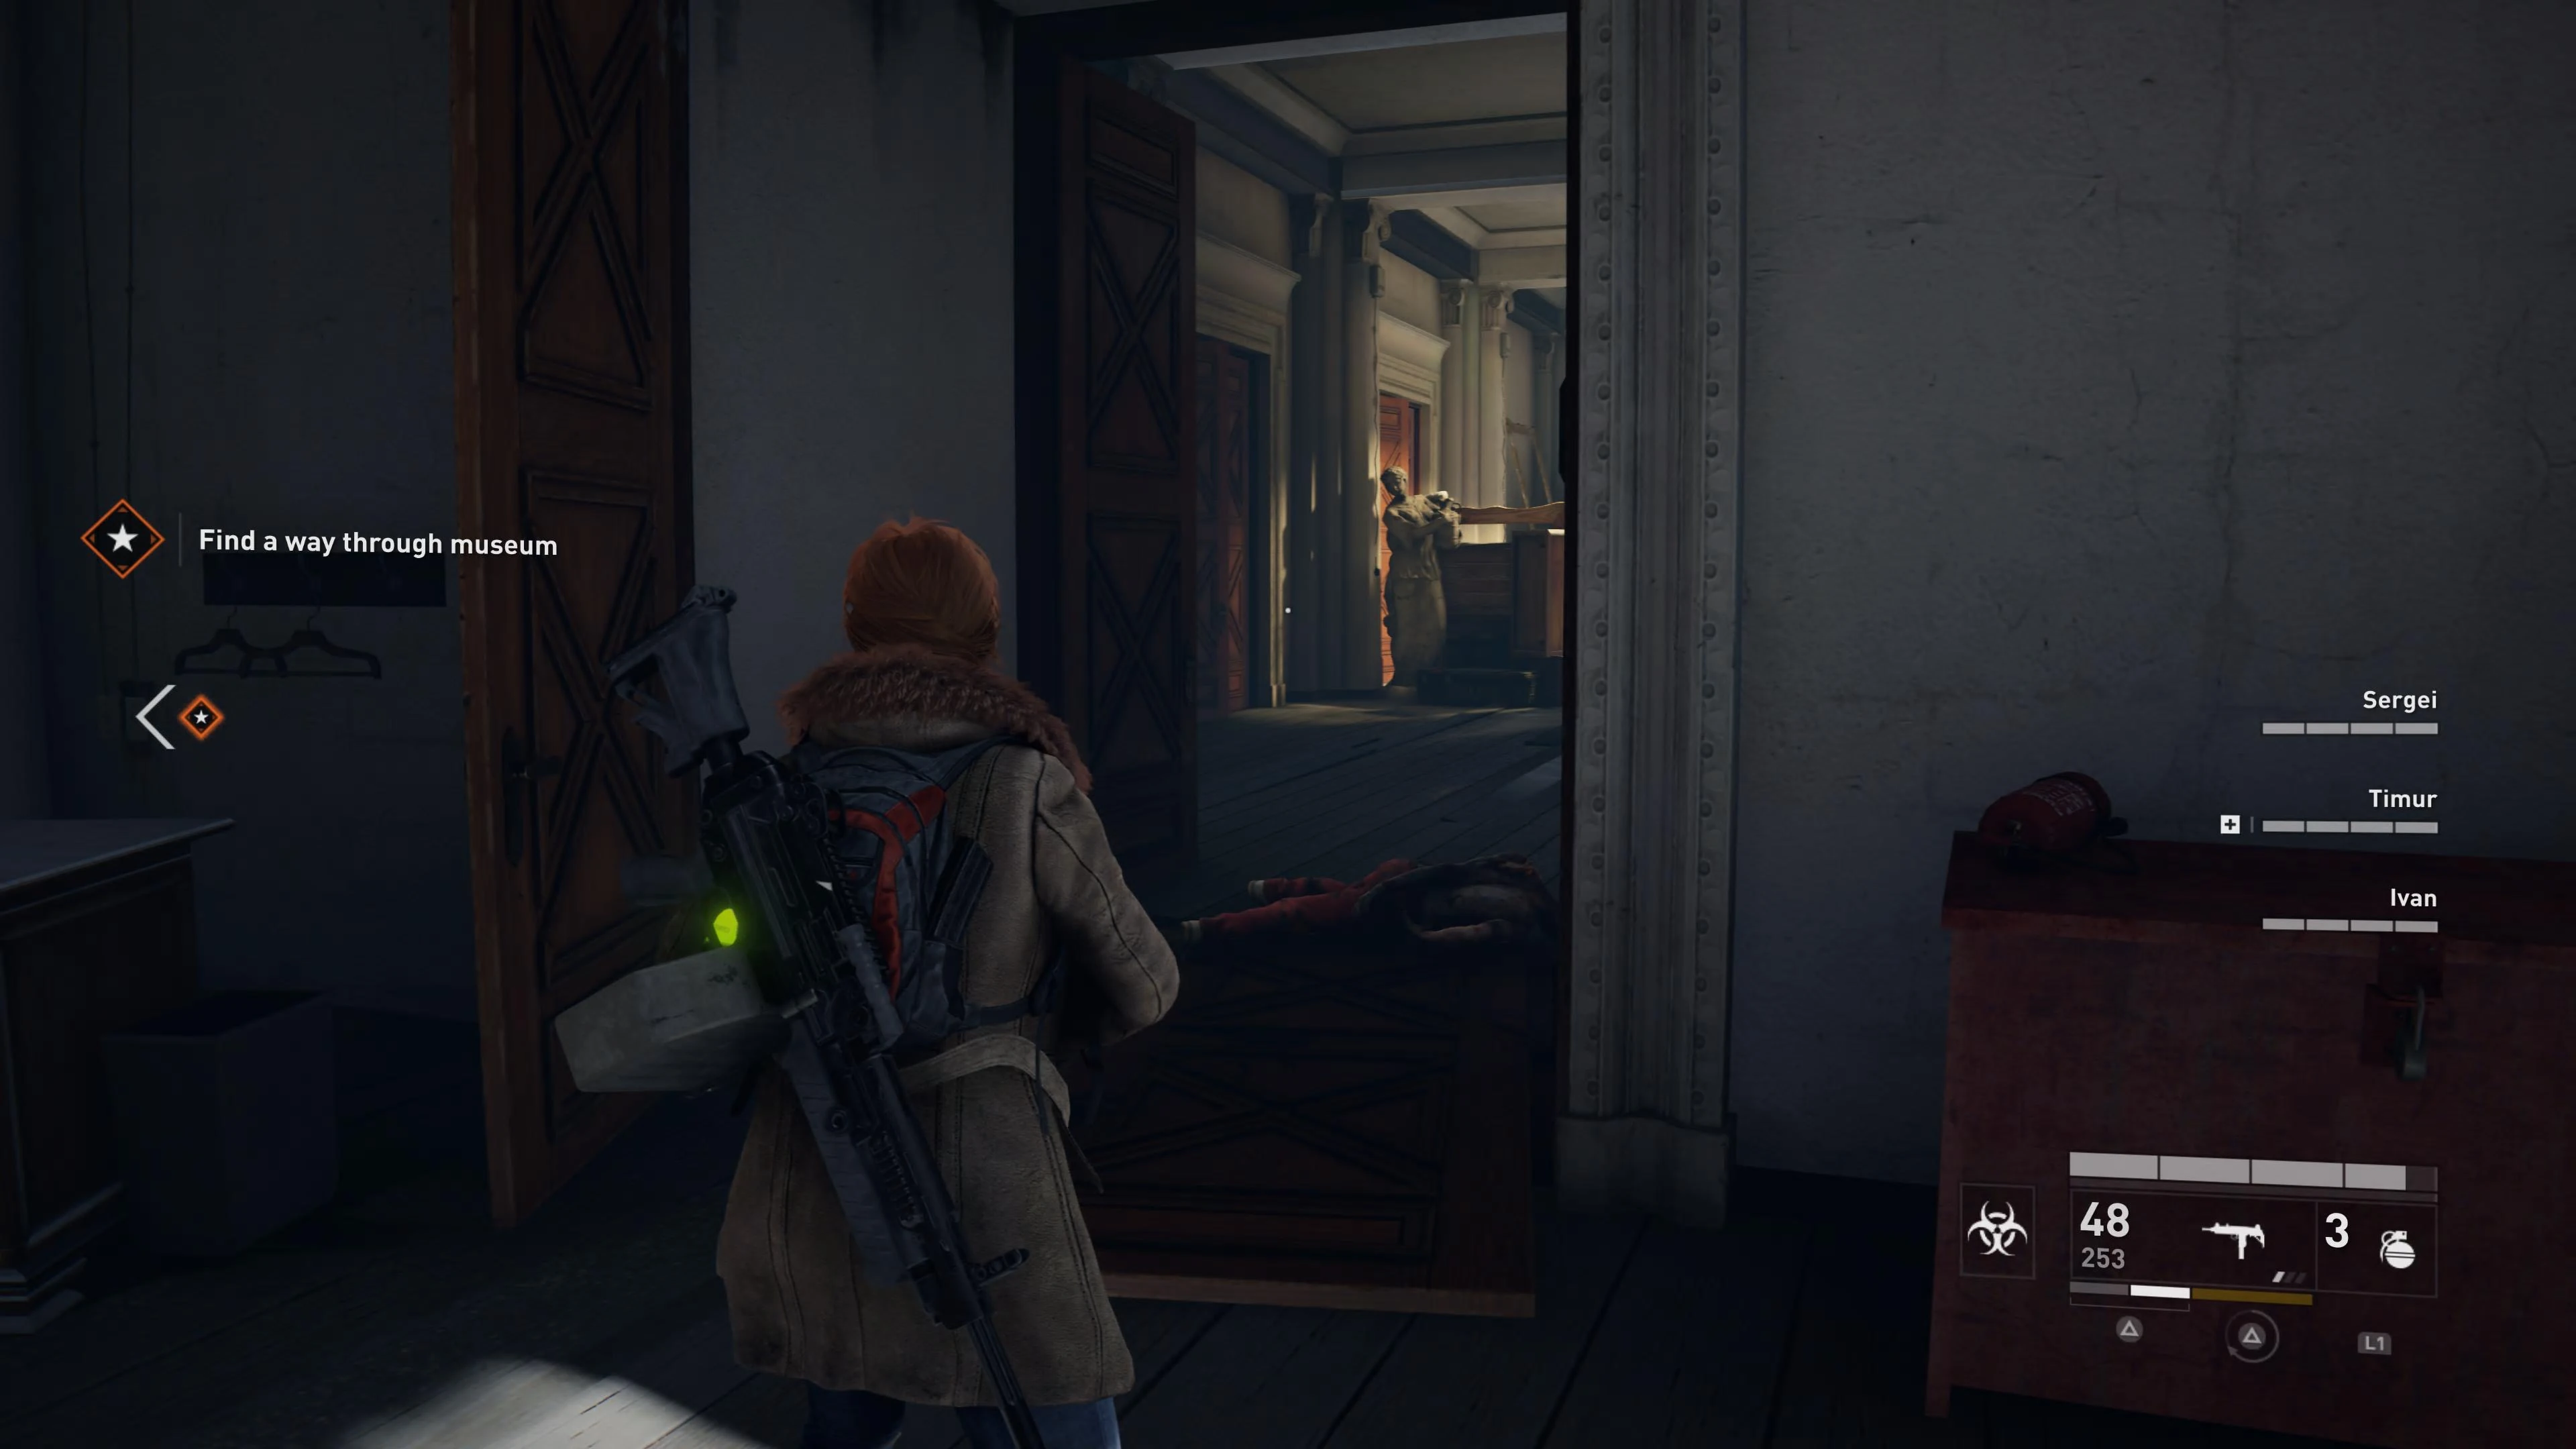
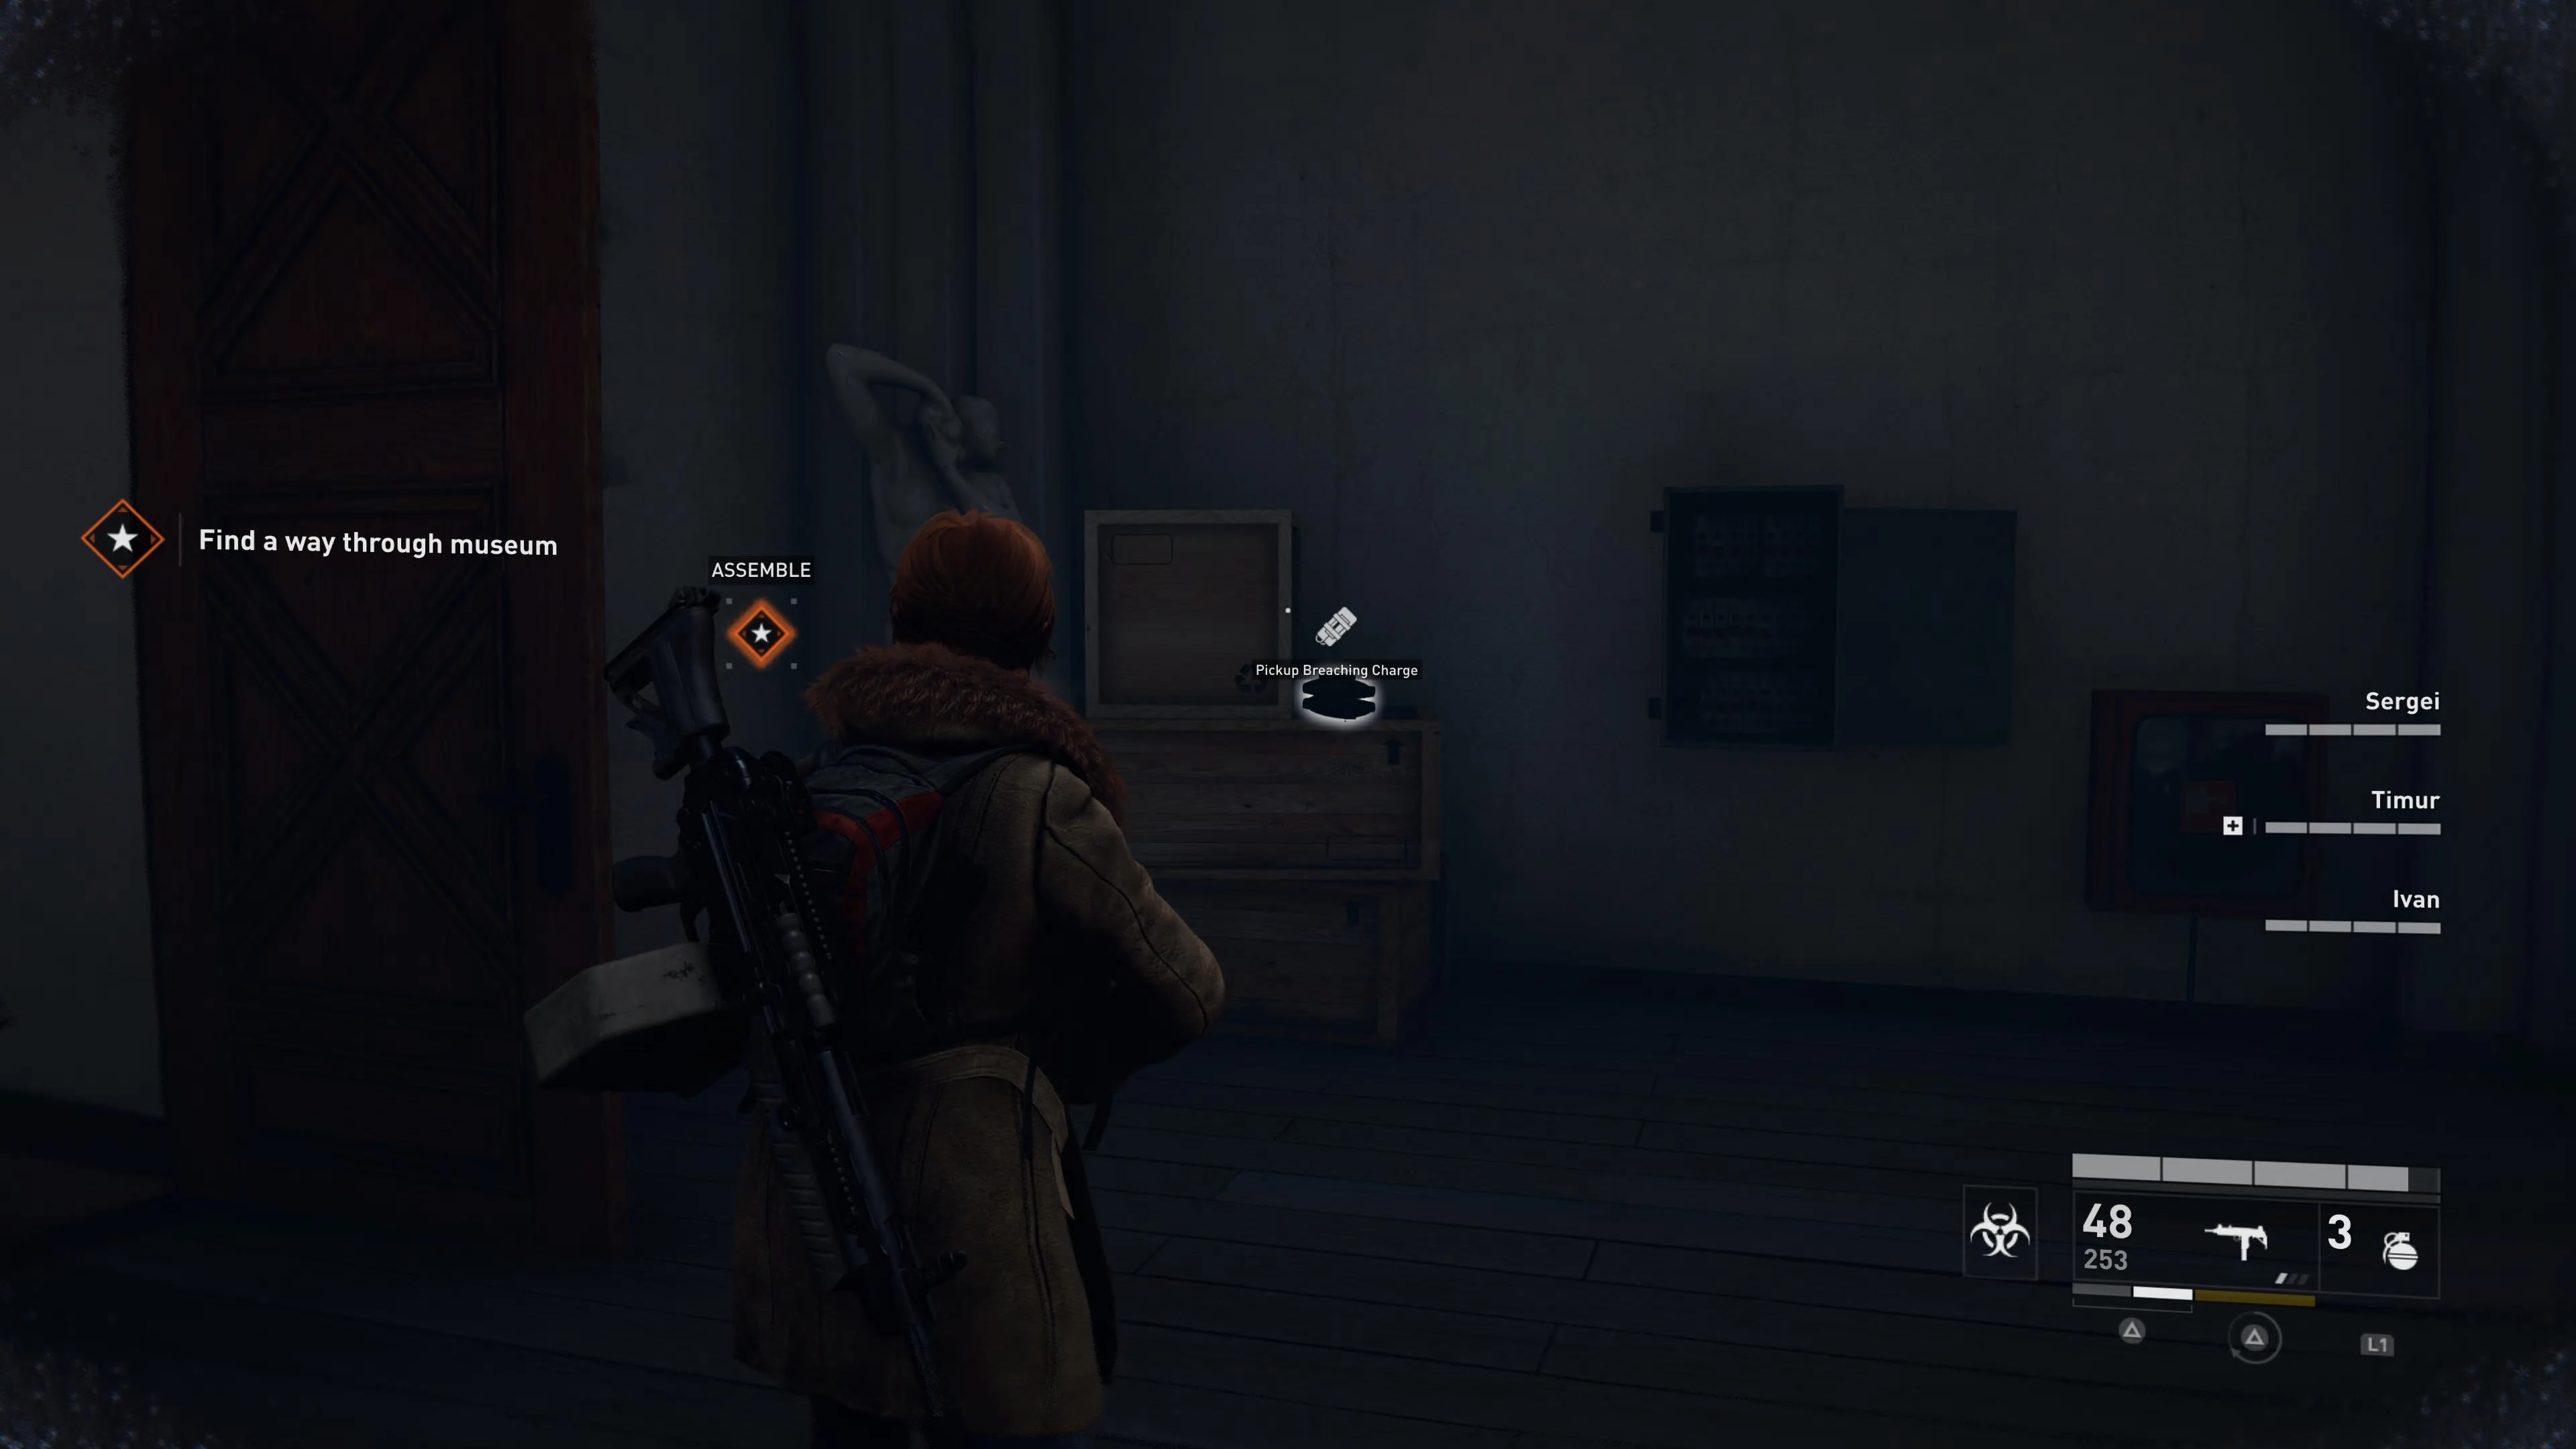
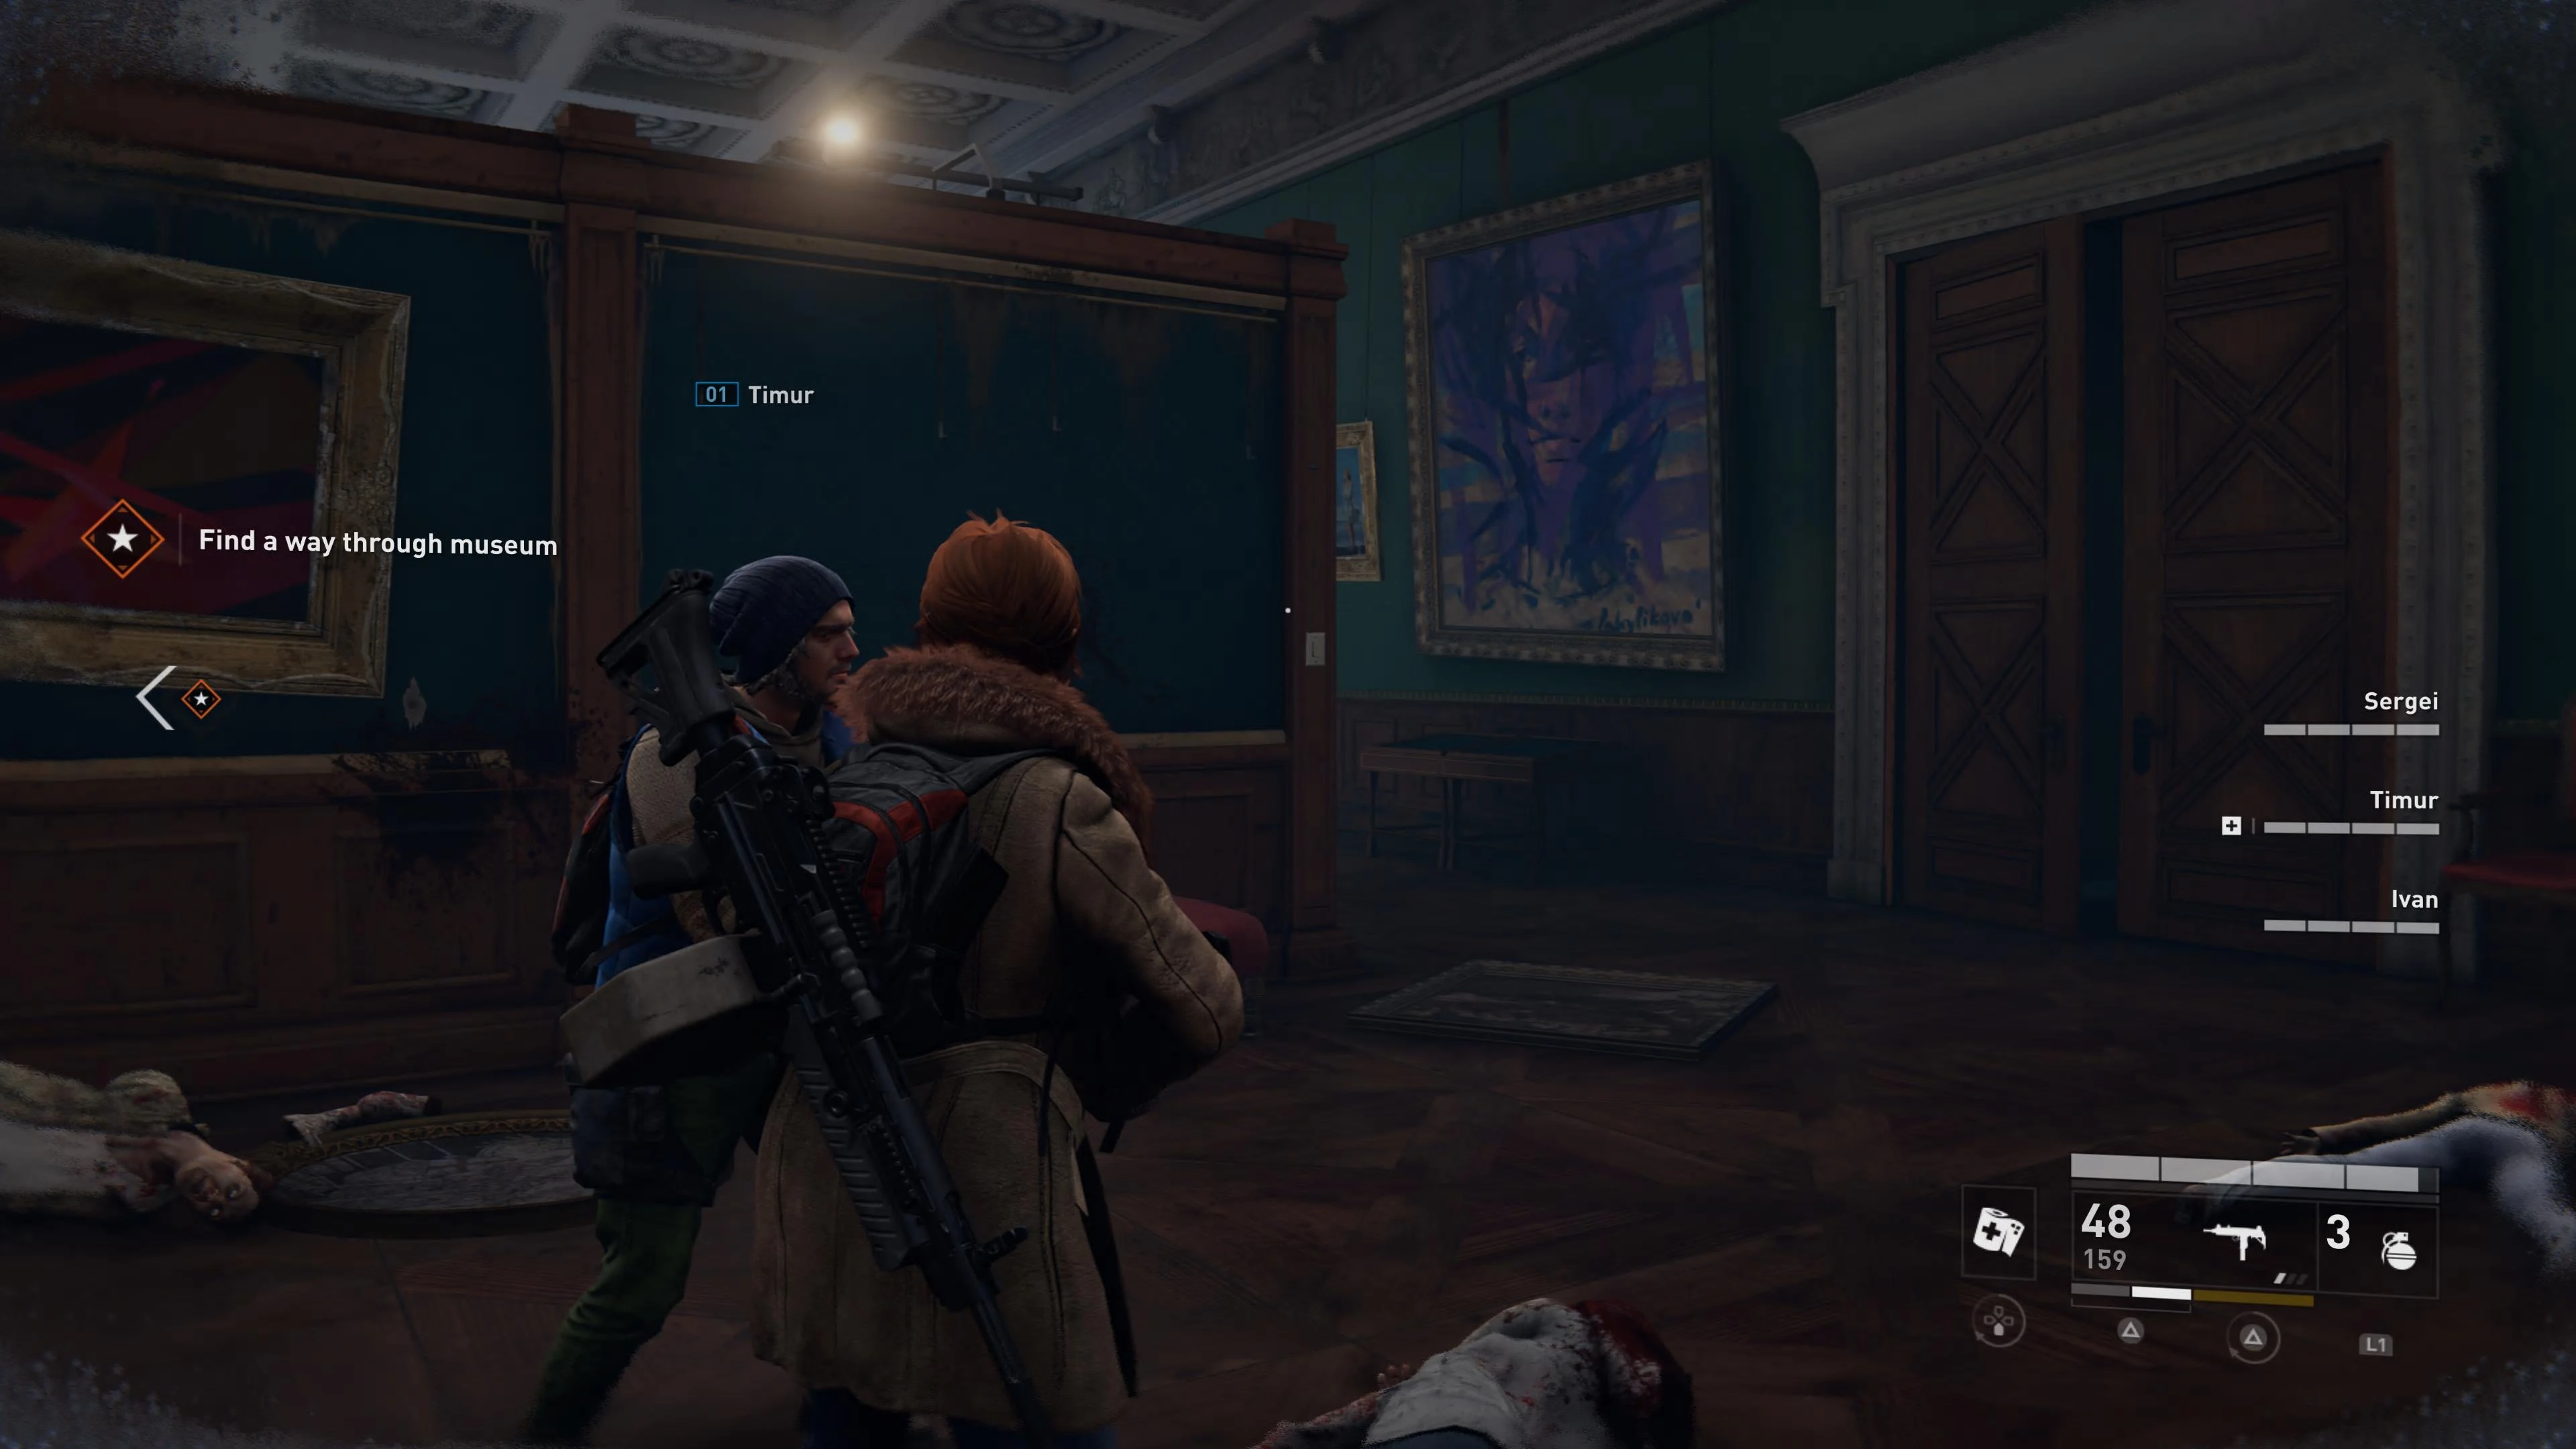
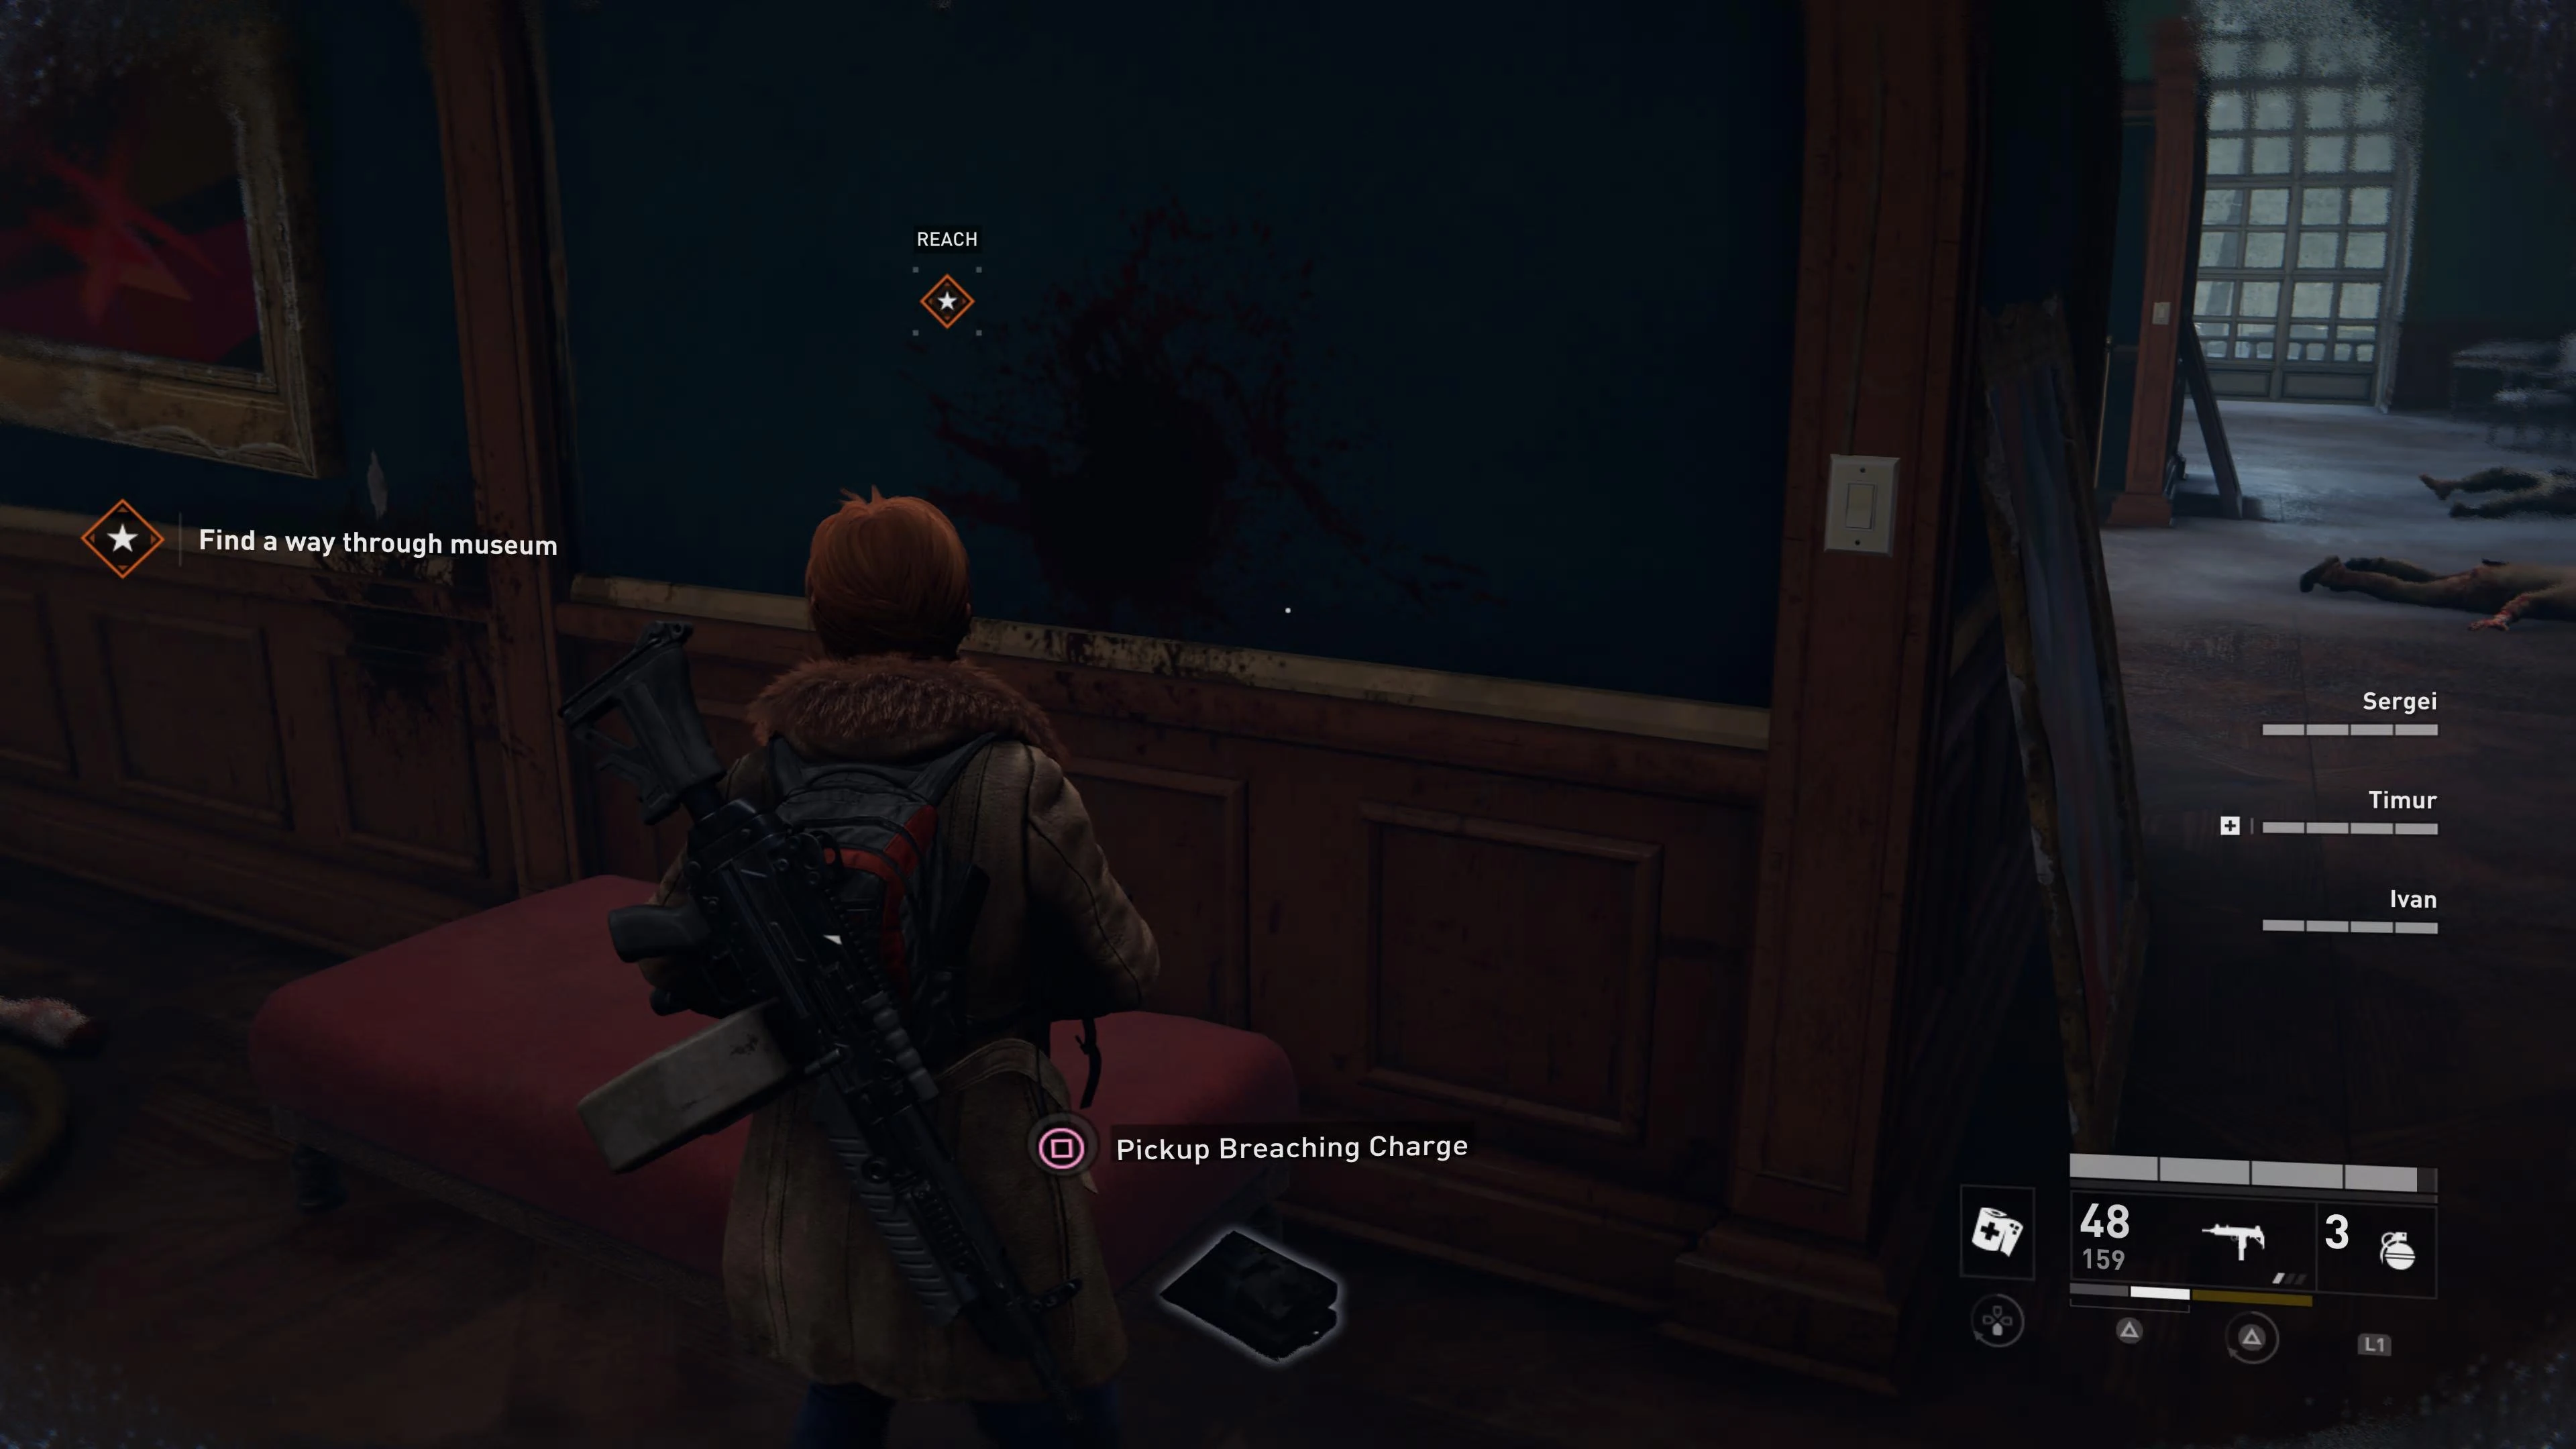
In the museum, on the upper floor.

Location 3: ![]()
After the museum, diagonally across the square from where you exit the building
Location 4: ![]()
After the first defense , before the rightside building with one of the launch Codes.

Location 5: ![]()
After the first defense, in the building with launch codes to the left. Lower floor, in a trash bin near the breachable door.
Location 6: ![]()
After the first defense, in the building with launch codes to the left. Upper floor, on a windowsill.
Location 7: ![]()
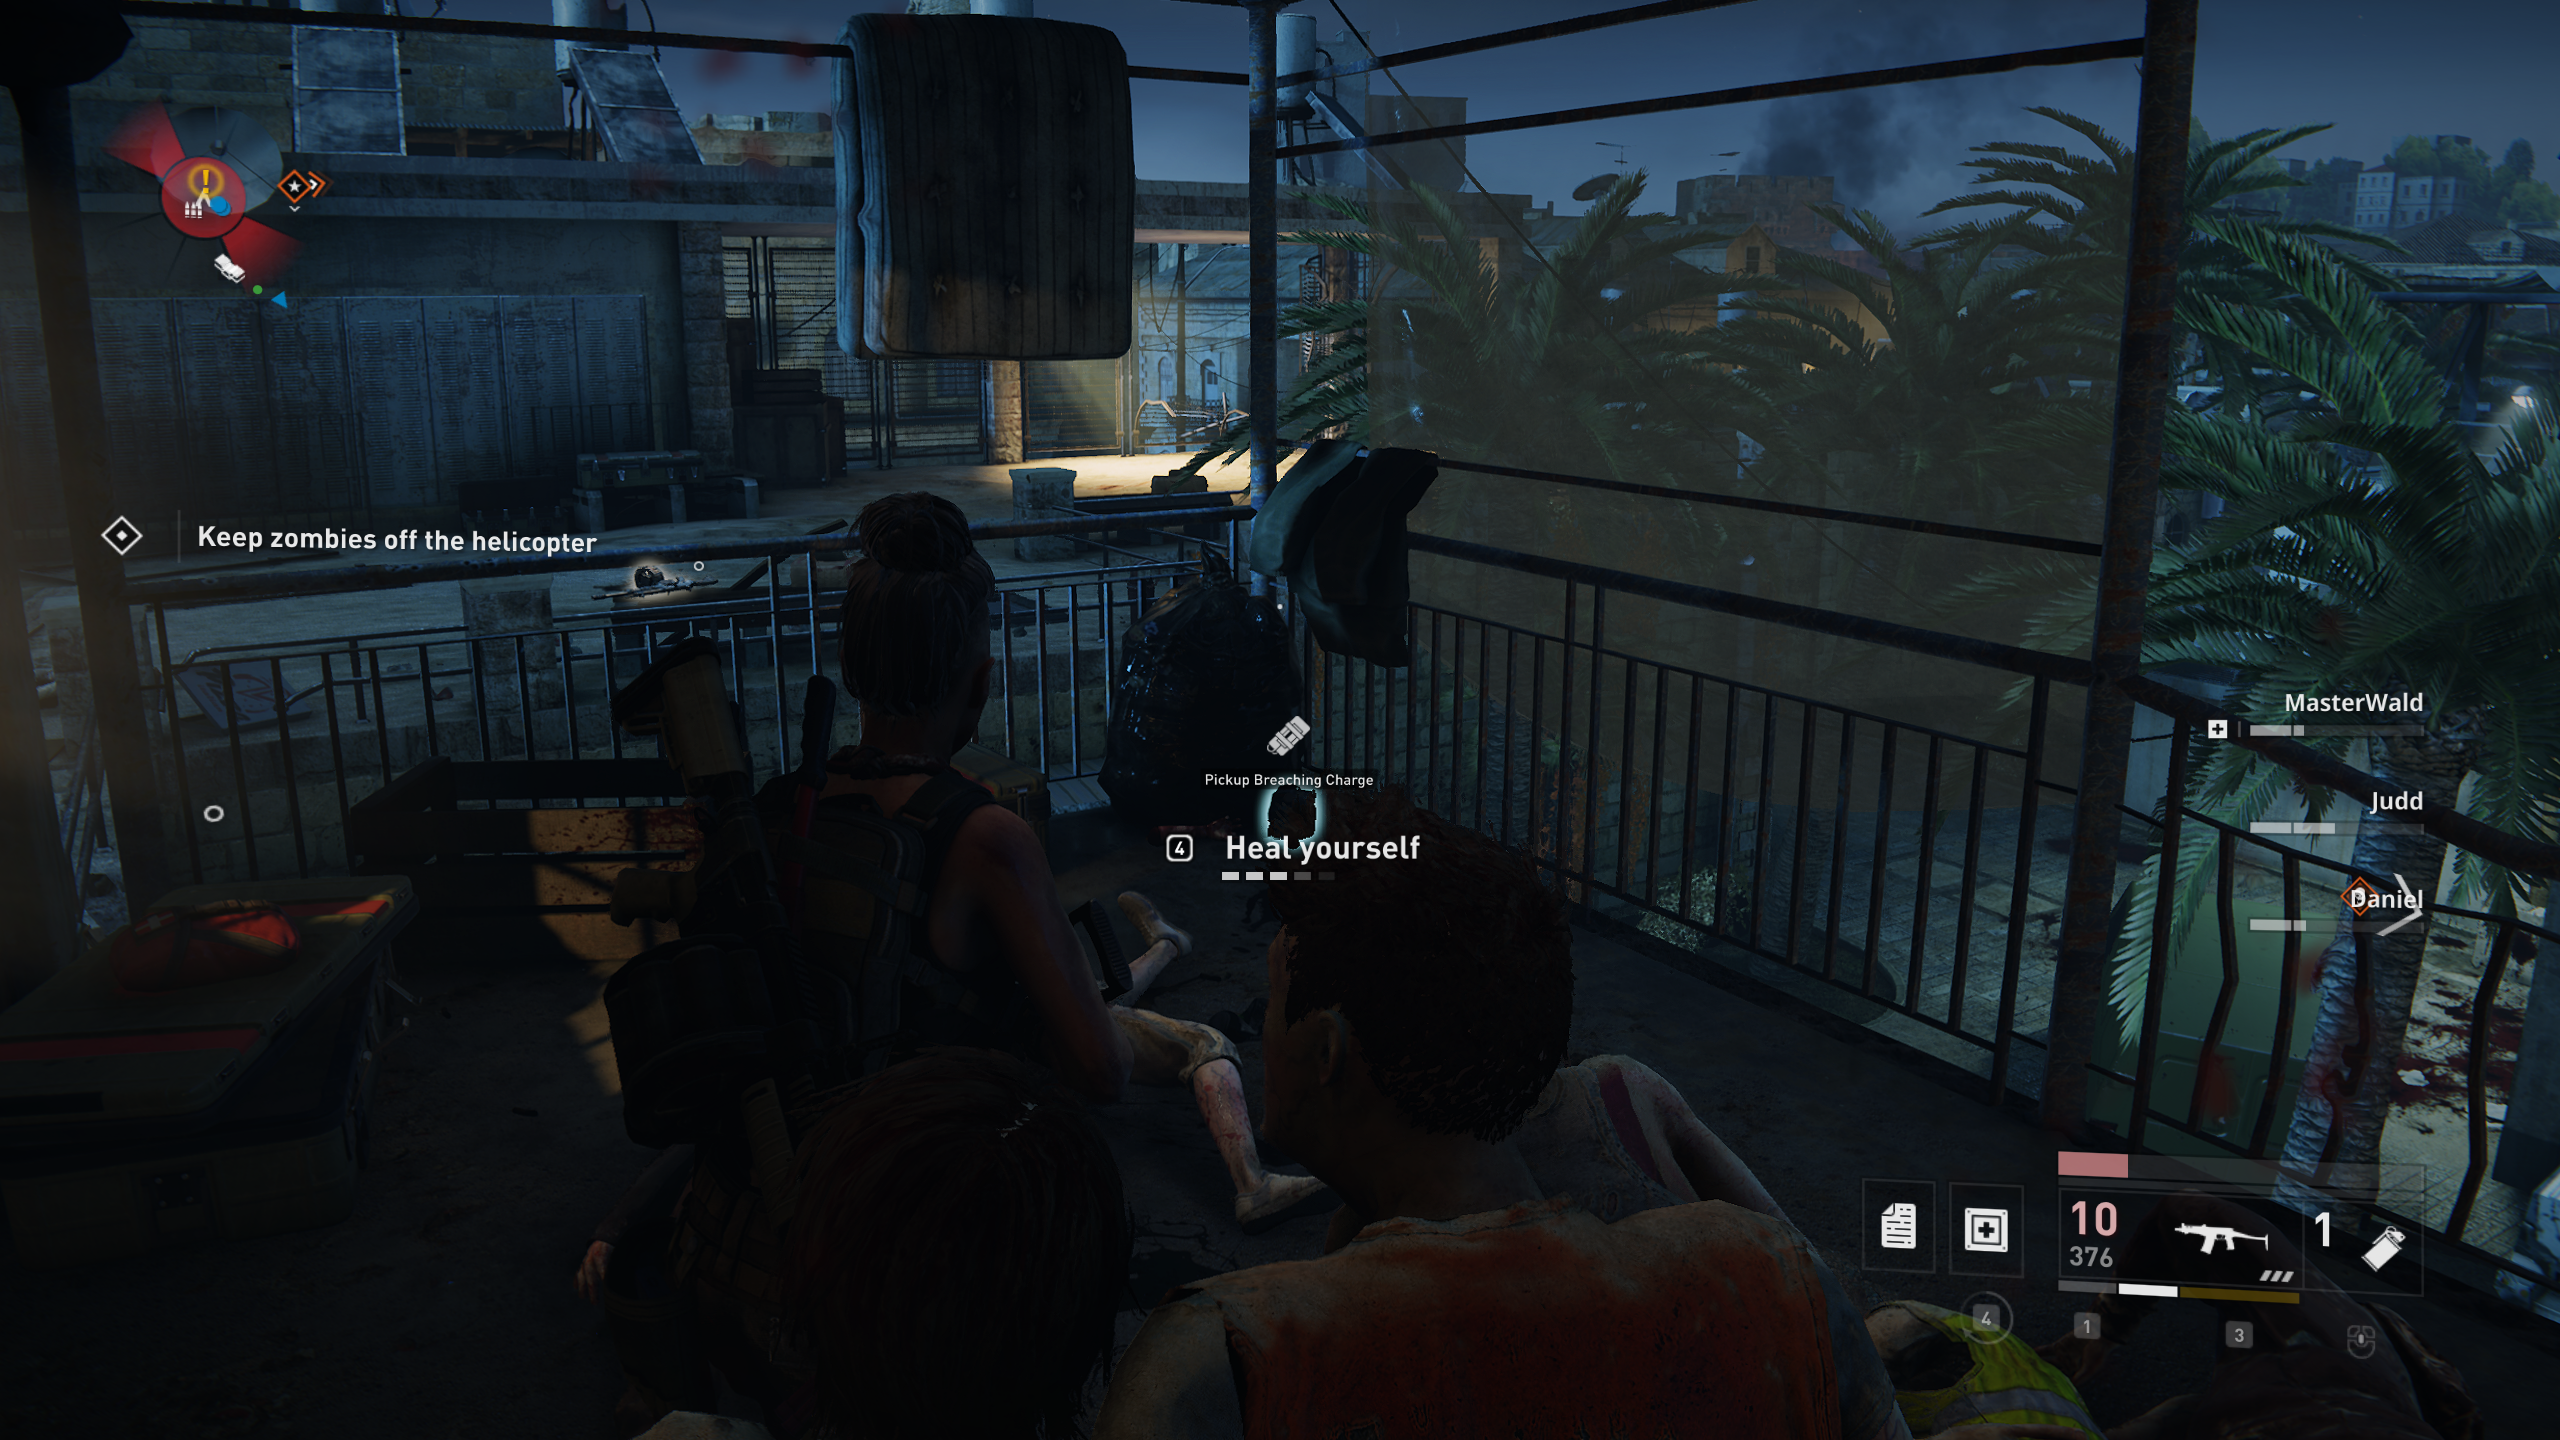
At the start of the final defense, after getting through a wooden barricade, to the left in the corner of the balcony.
Location 8: ![]()
Chapter 2: Dead Sea Stroll[]
Location 1: ![]()
Right at the start of the mission, on a rock in the middle.
Location 2: ![]()
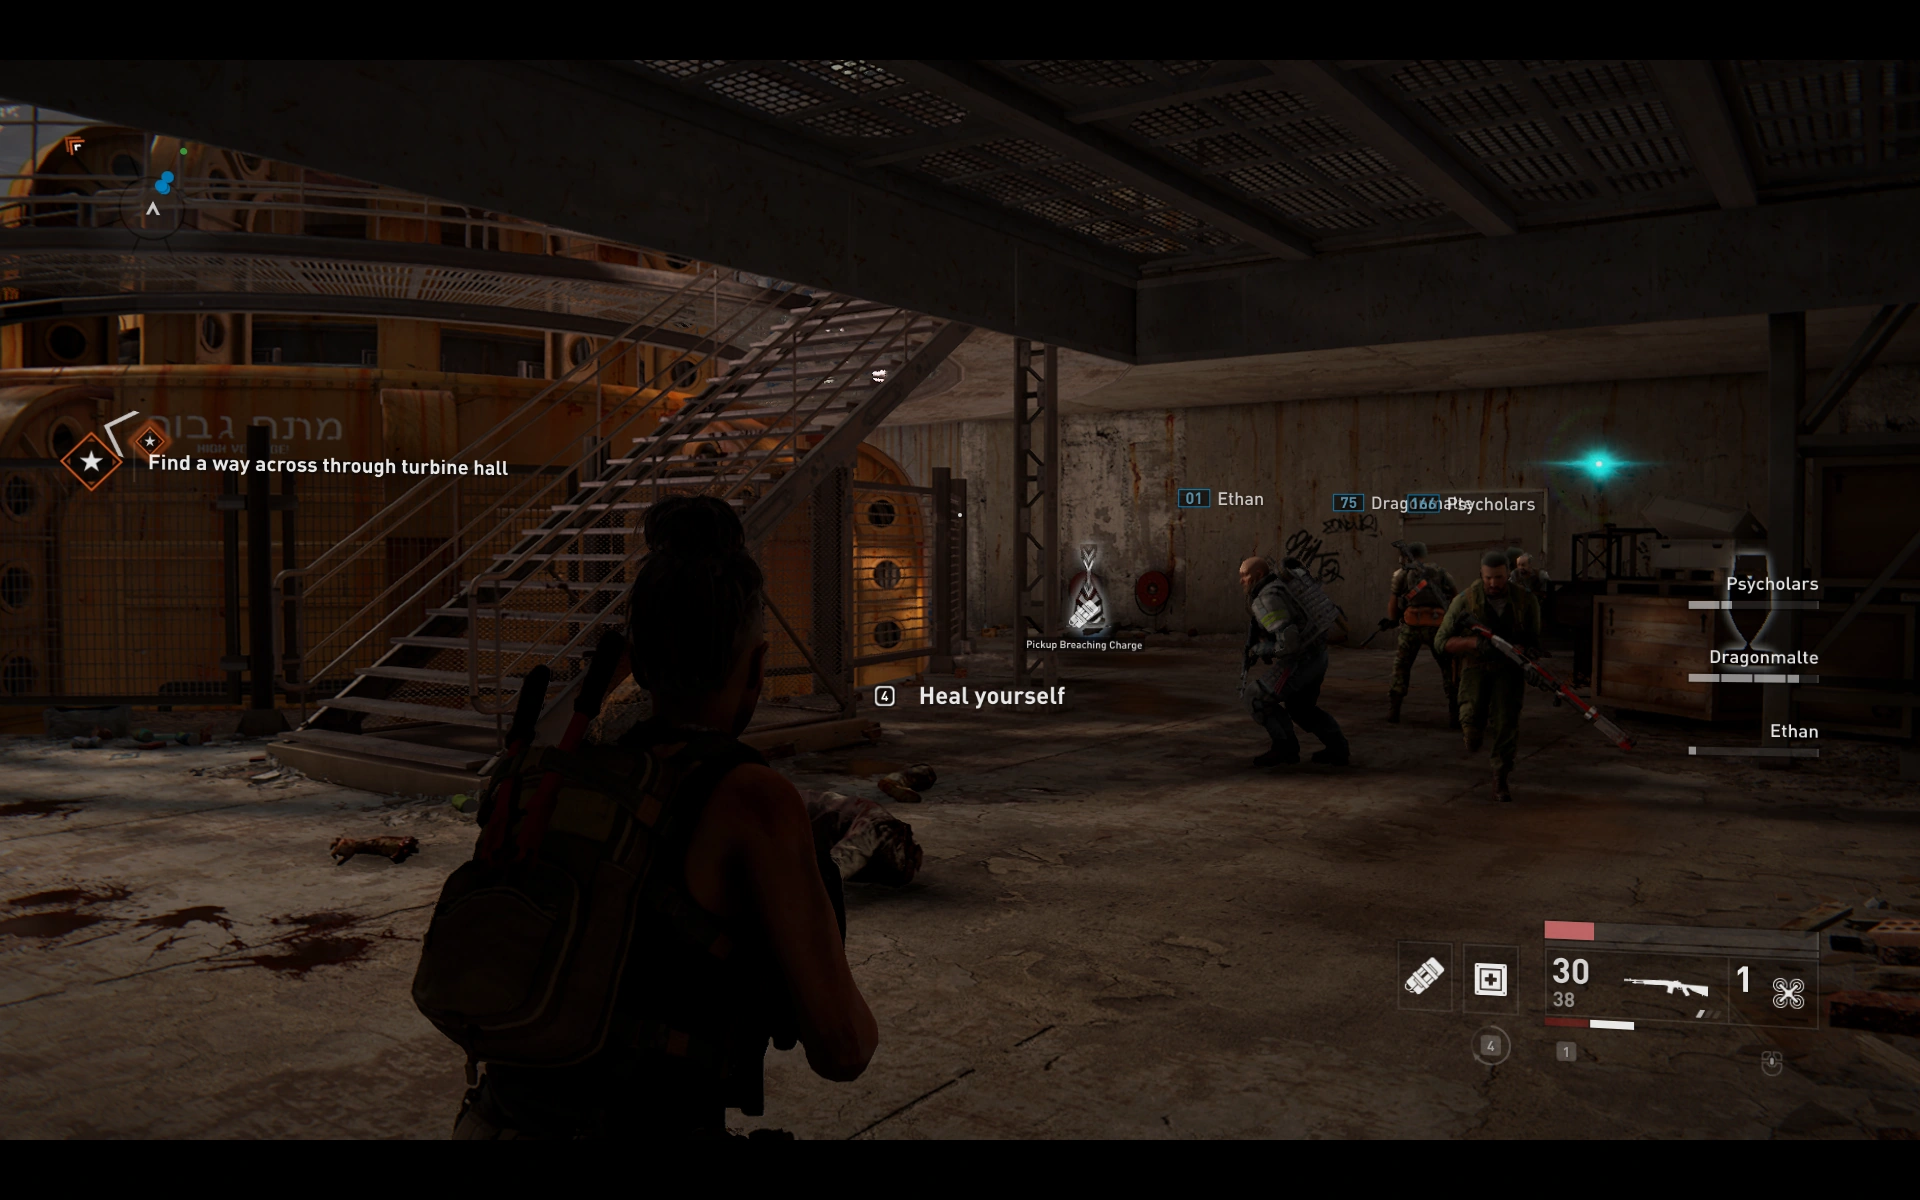
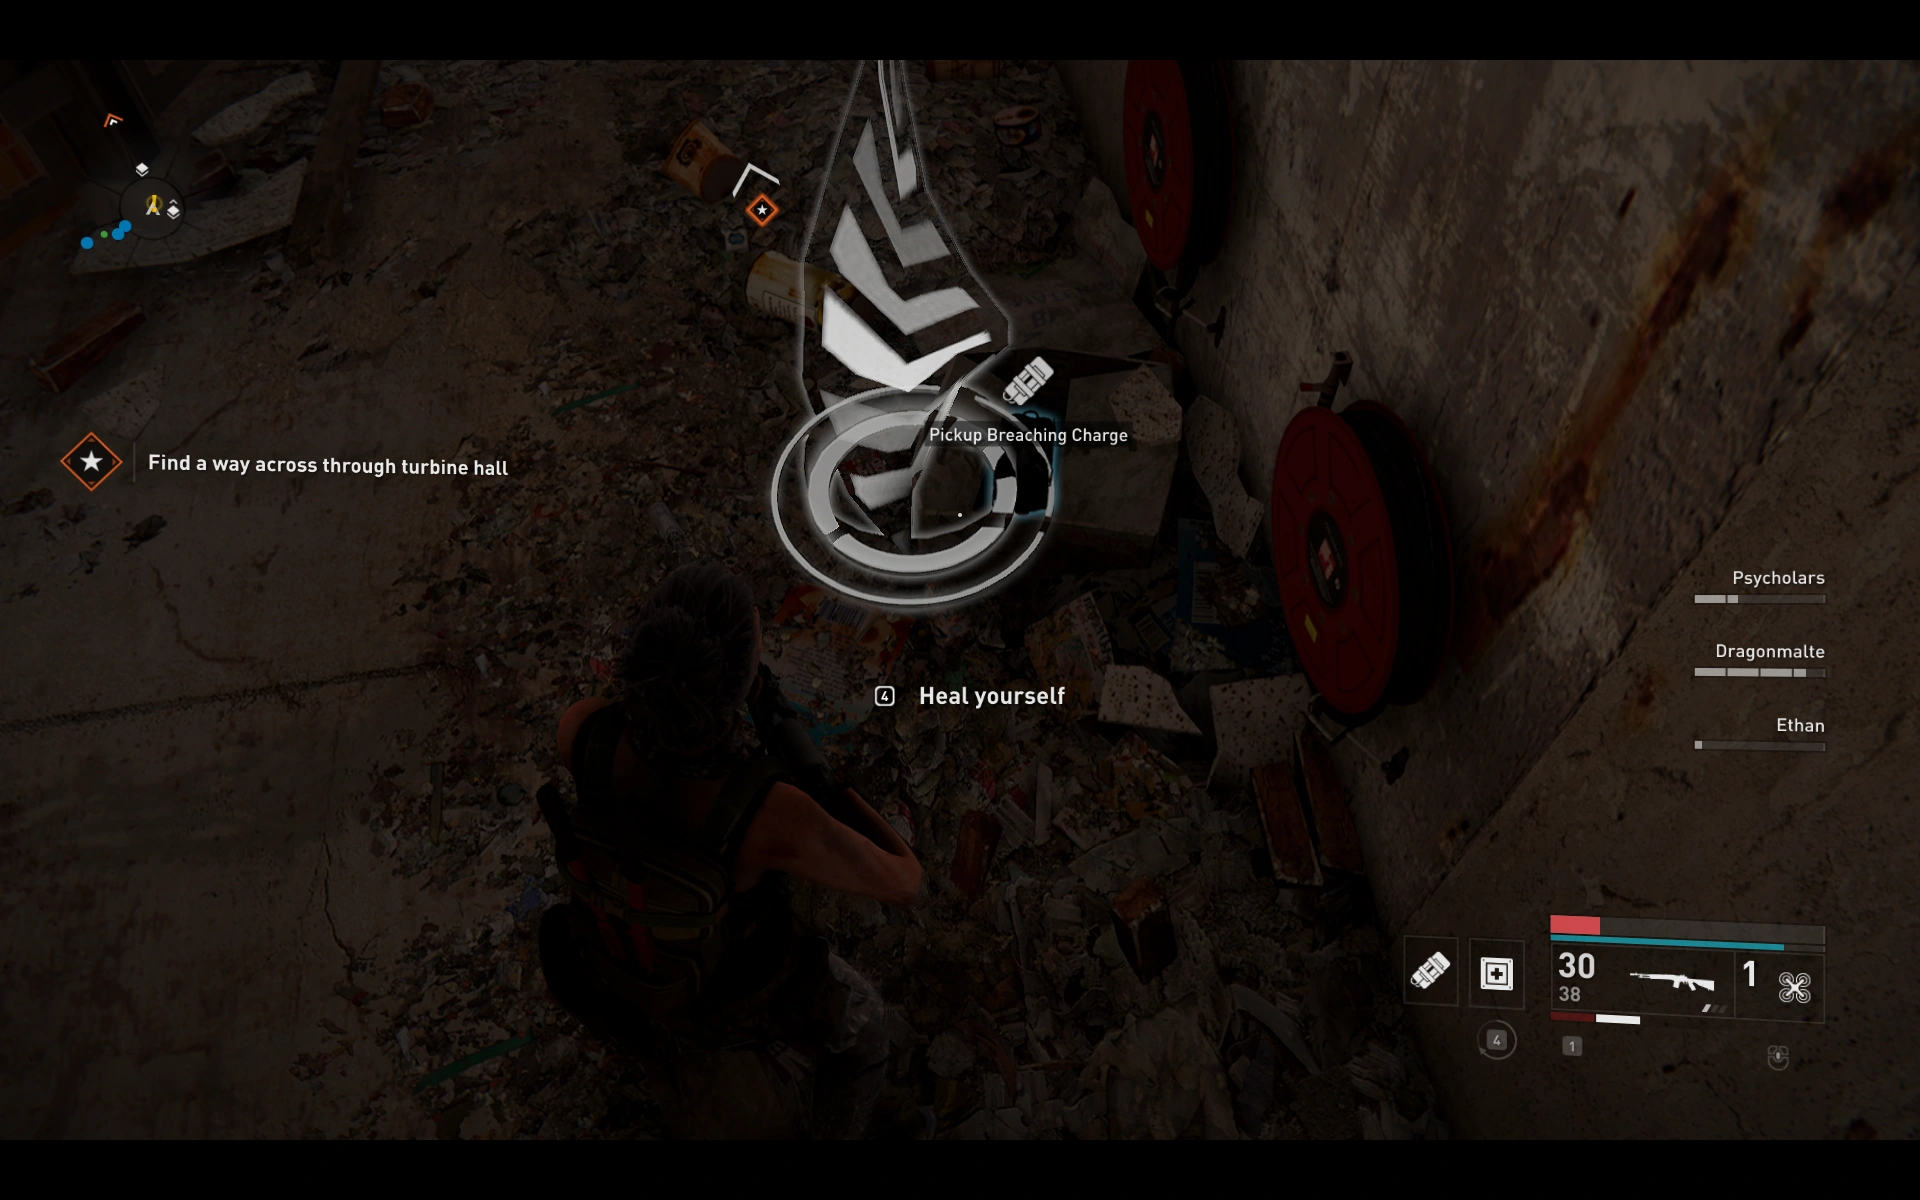
When you enter the turbine hall on your left side, behind a crate.
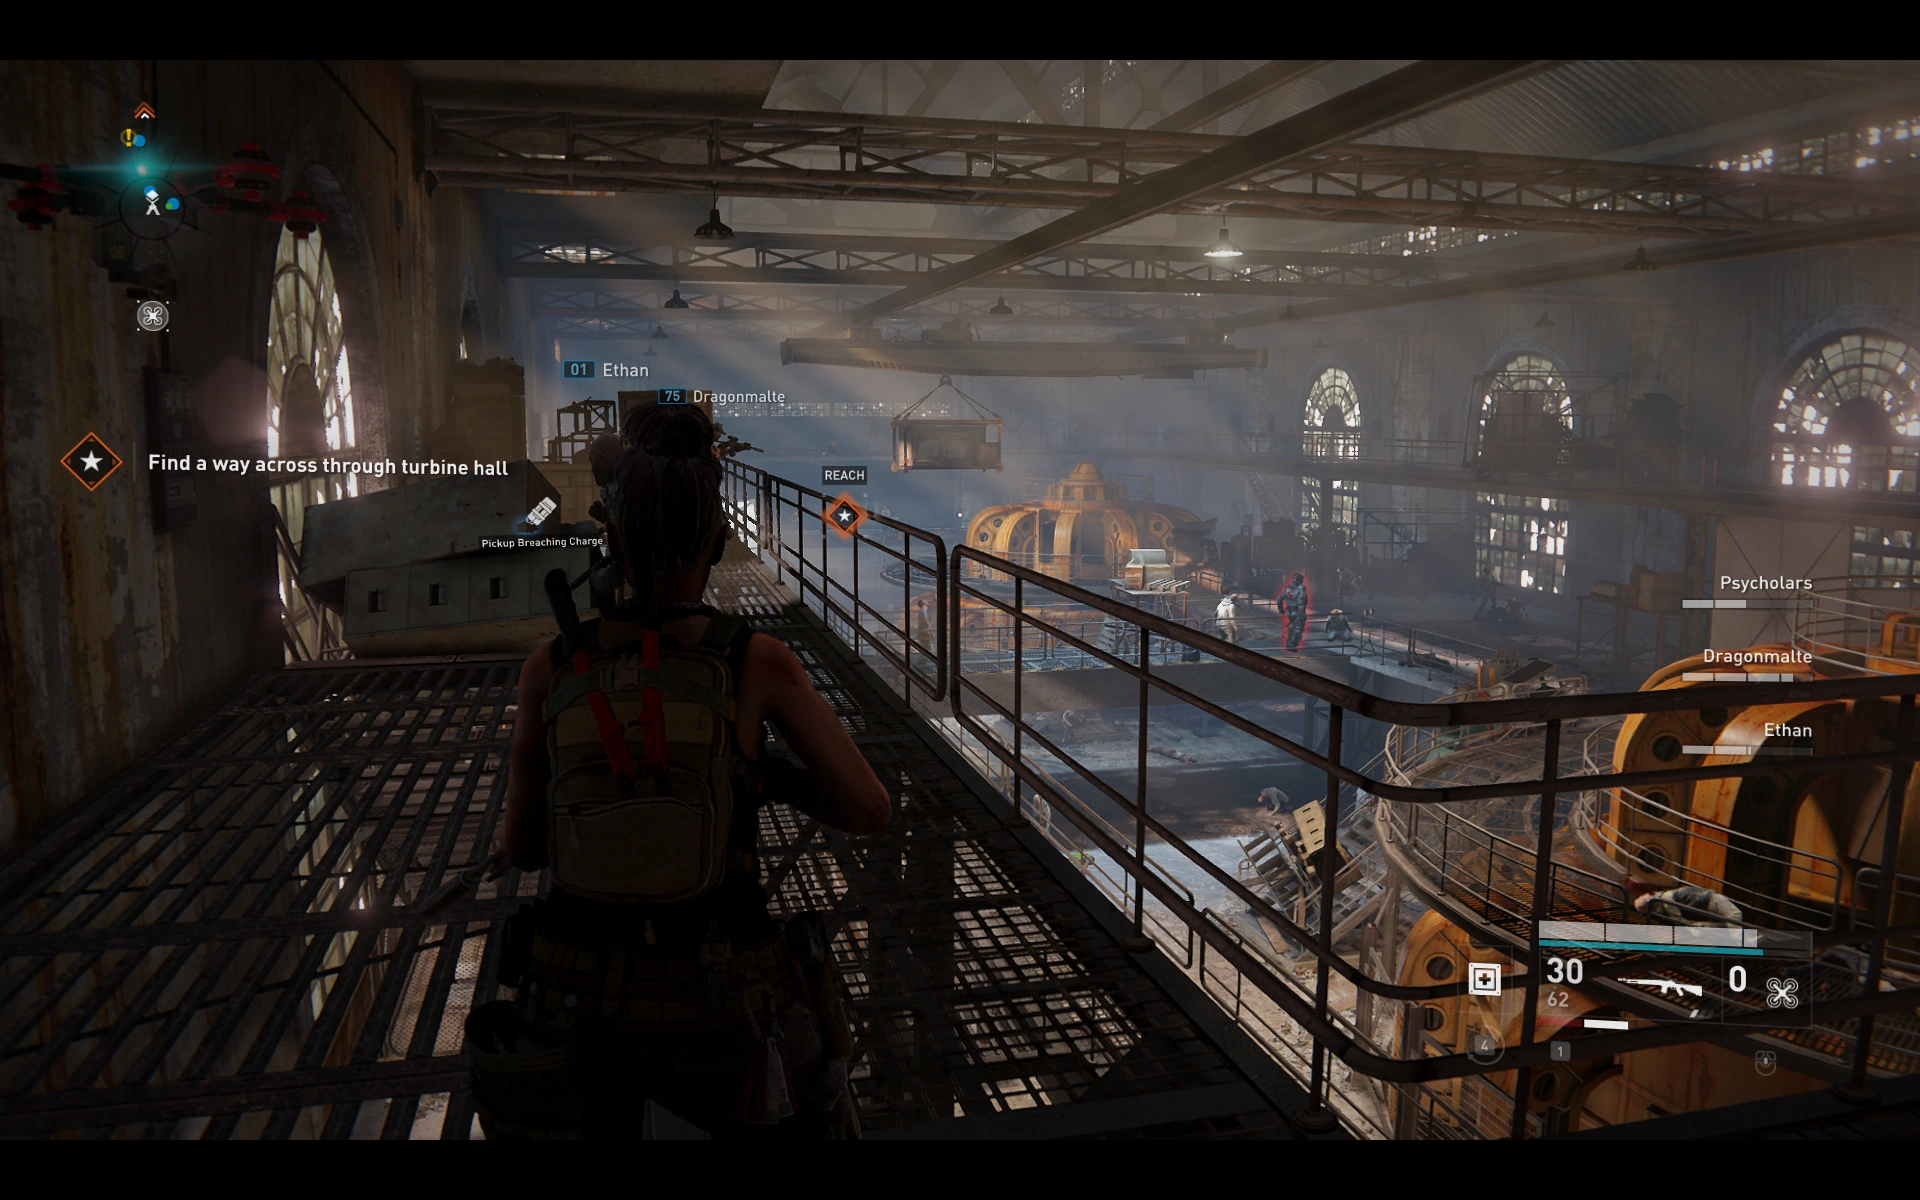
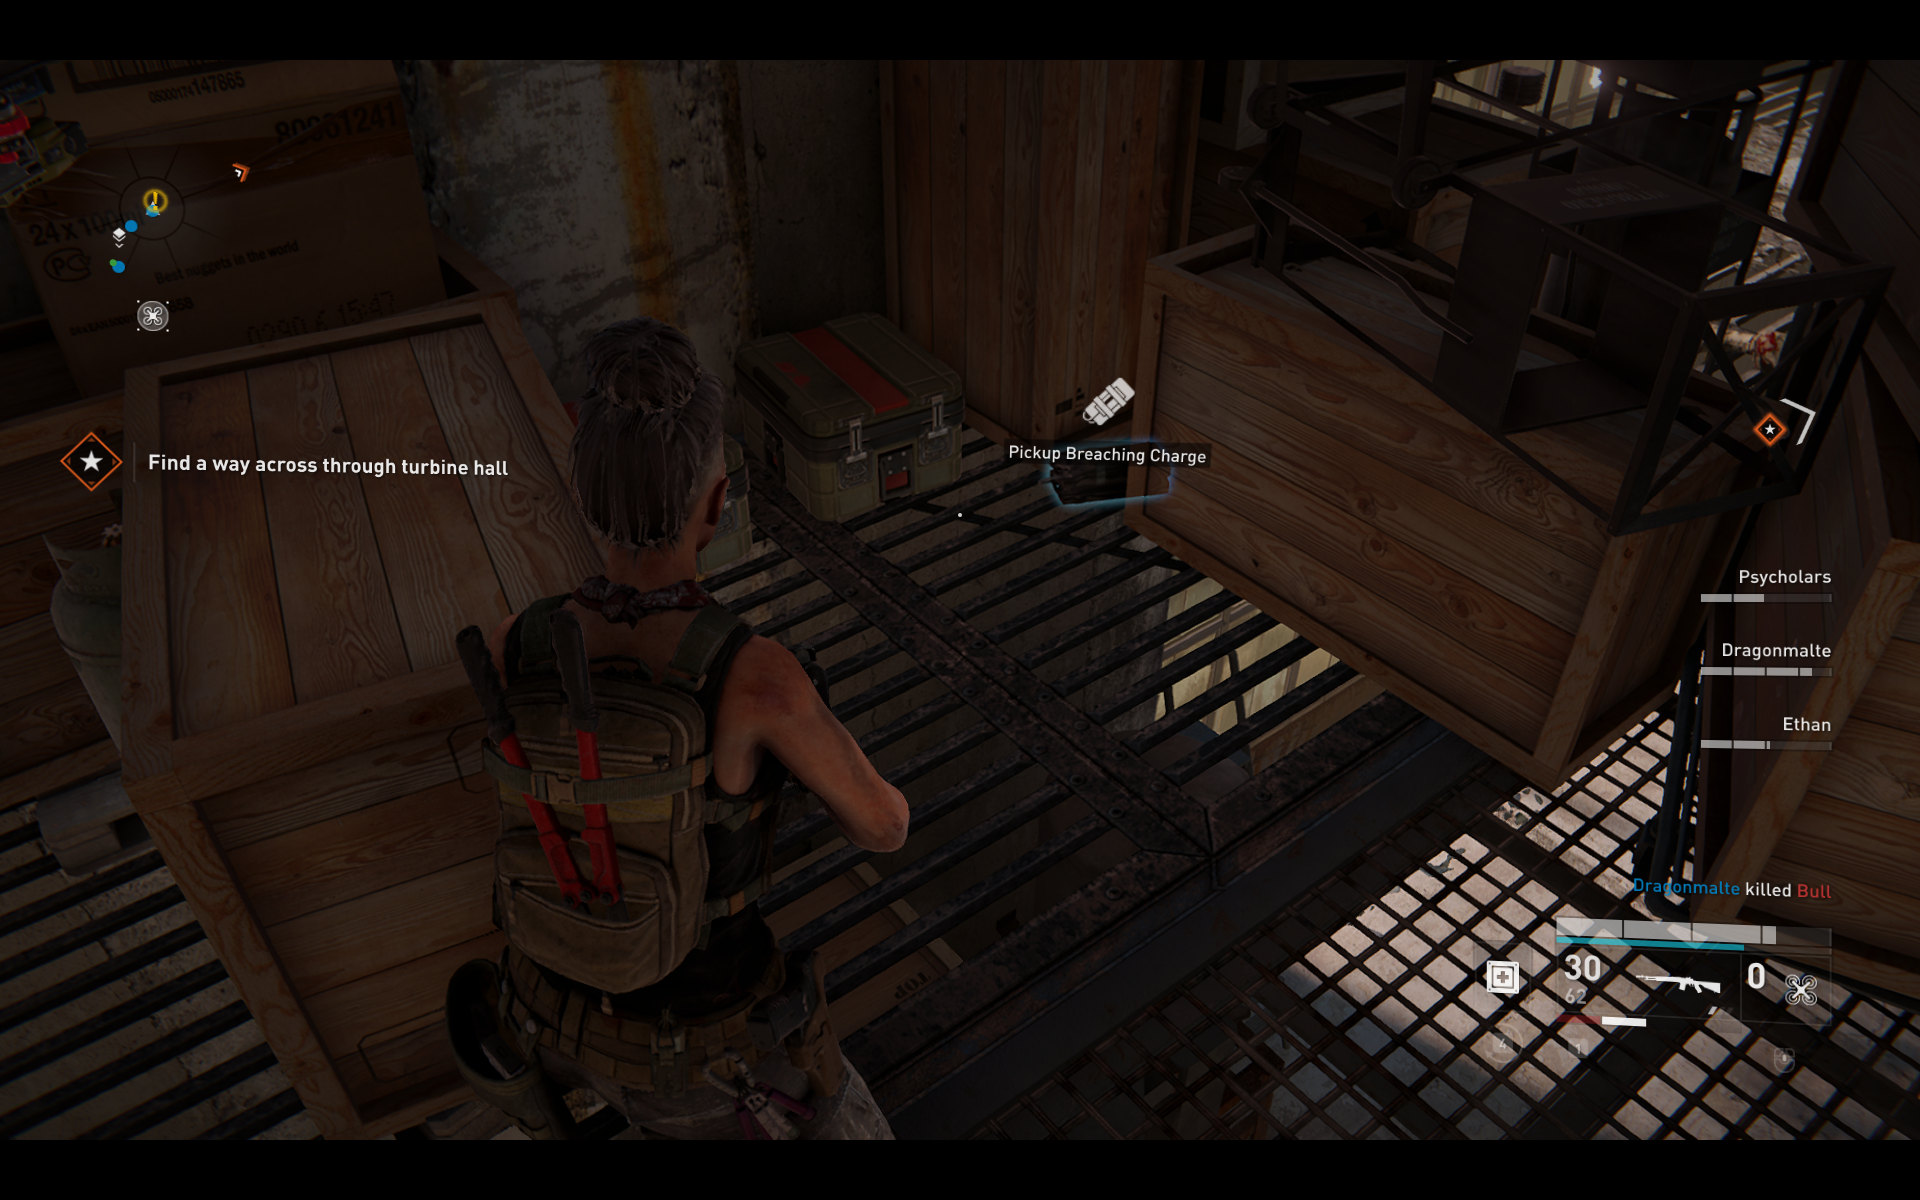
Location 3: ![]()
When you enter the turbine hall, opposite to the entry on the ground floor.
Location 4: ![]()
Location 5: ![]()
Location 6: ![]()
Location 7: ![]()
Location 8: ![]()
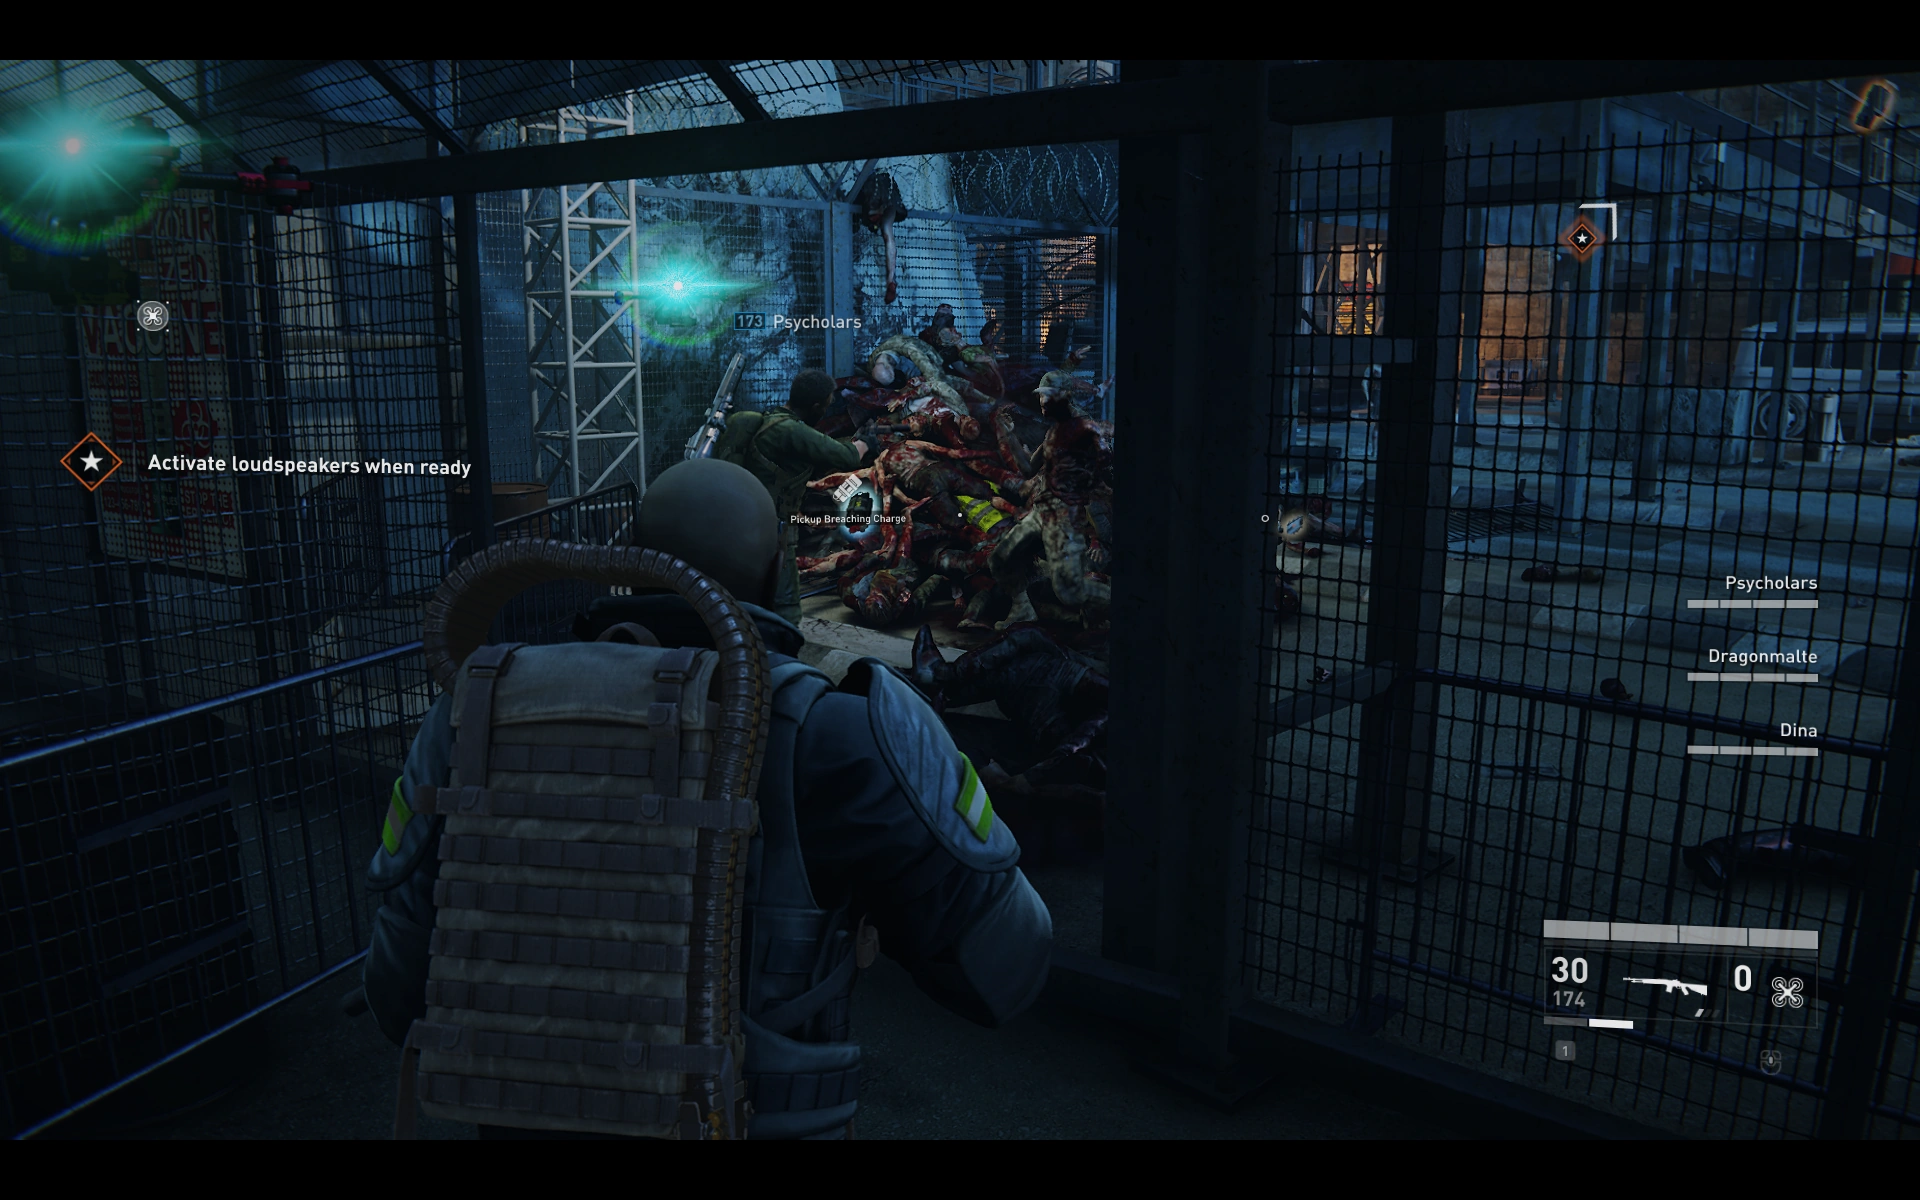
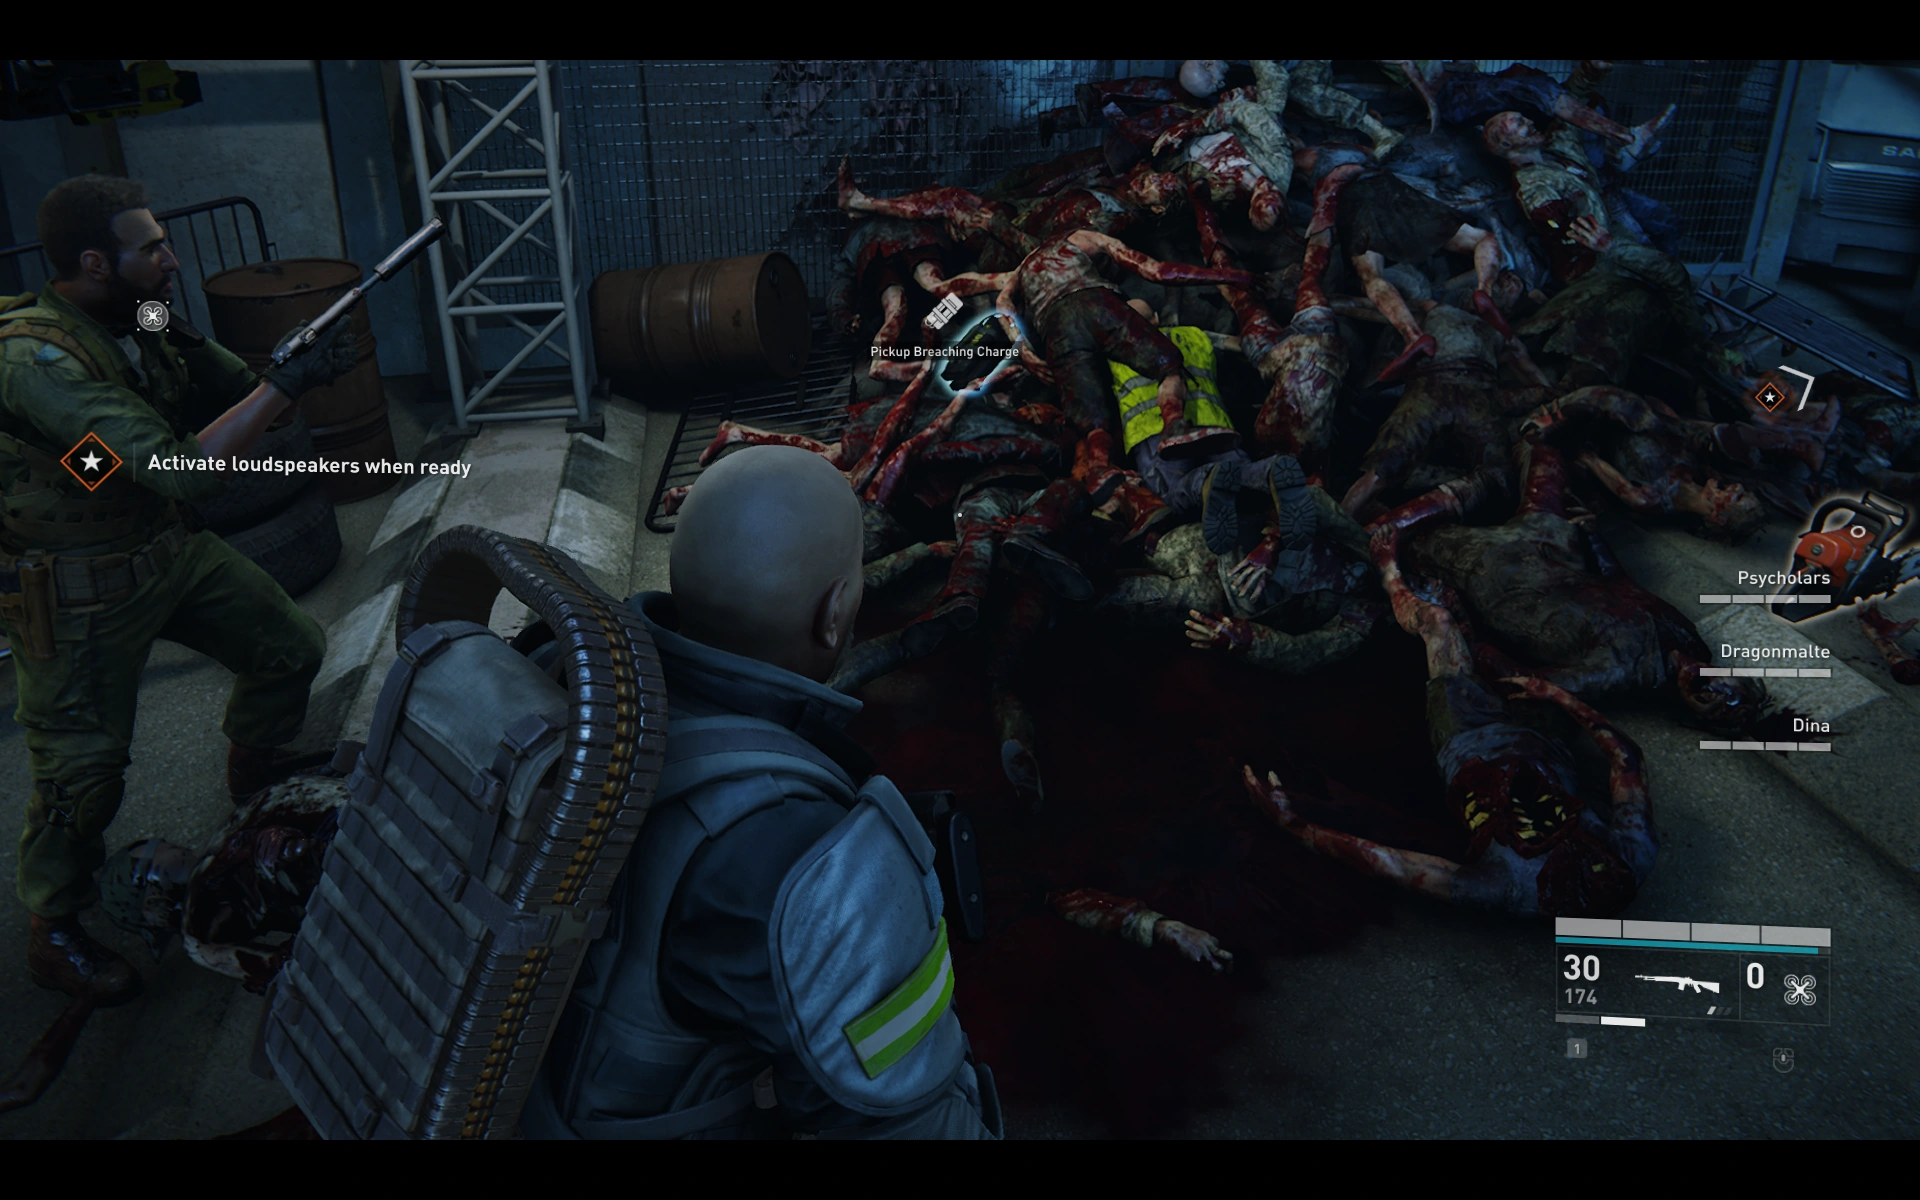
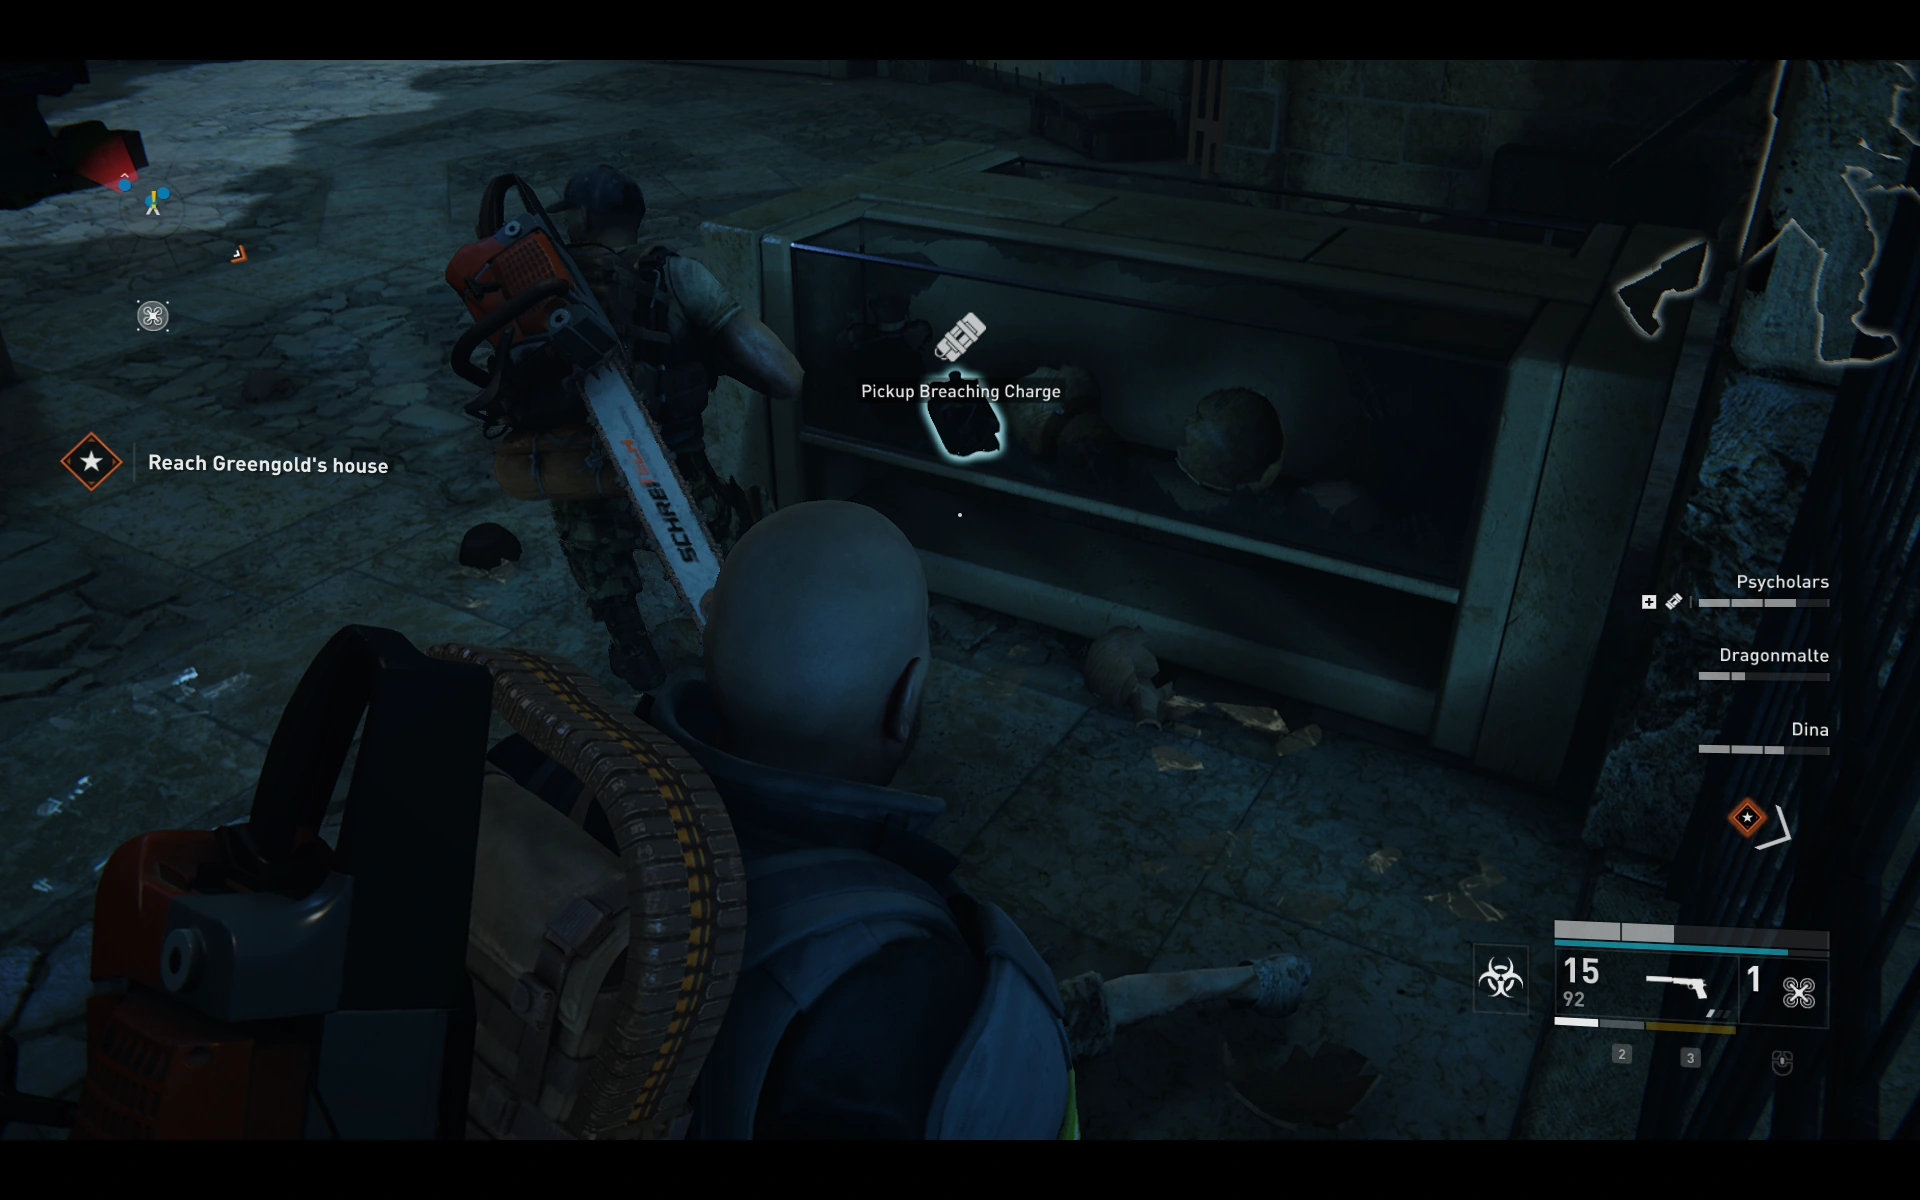
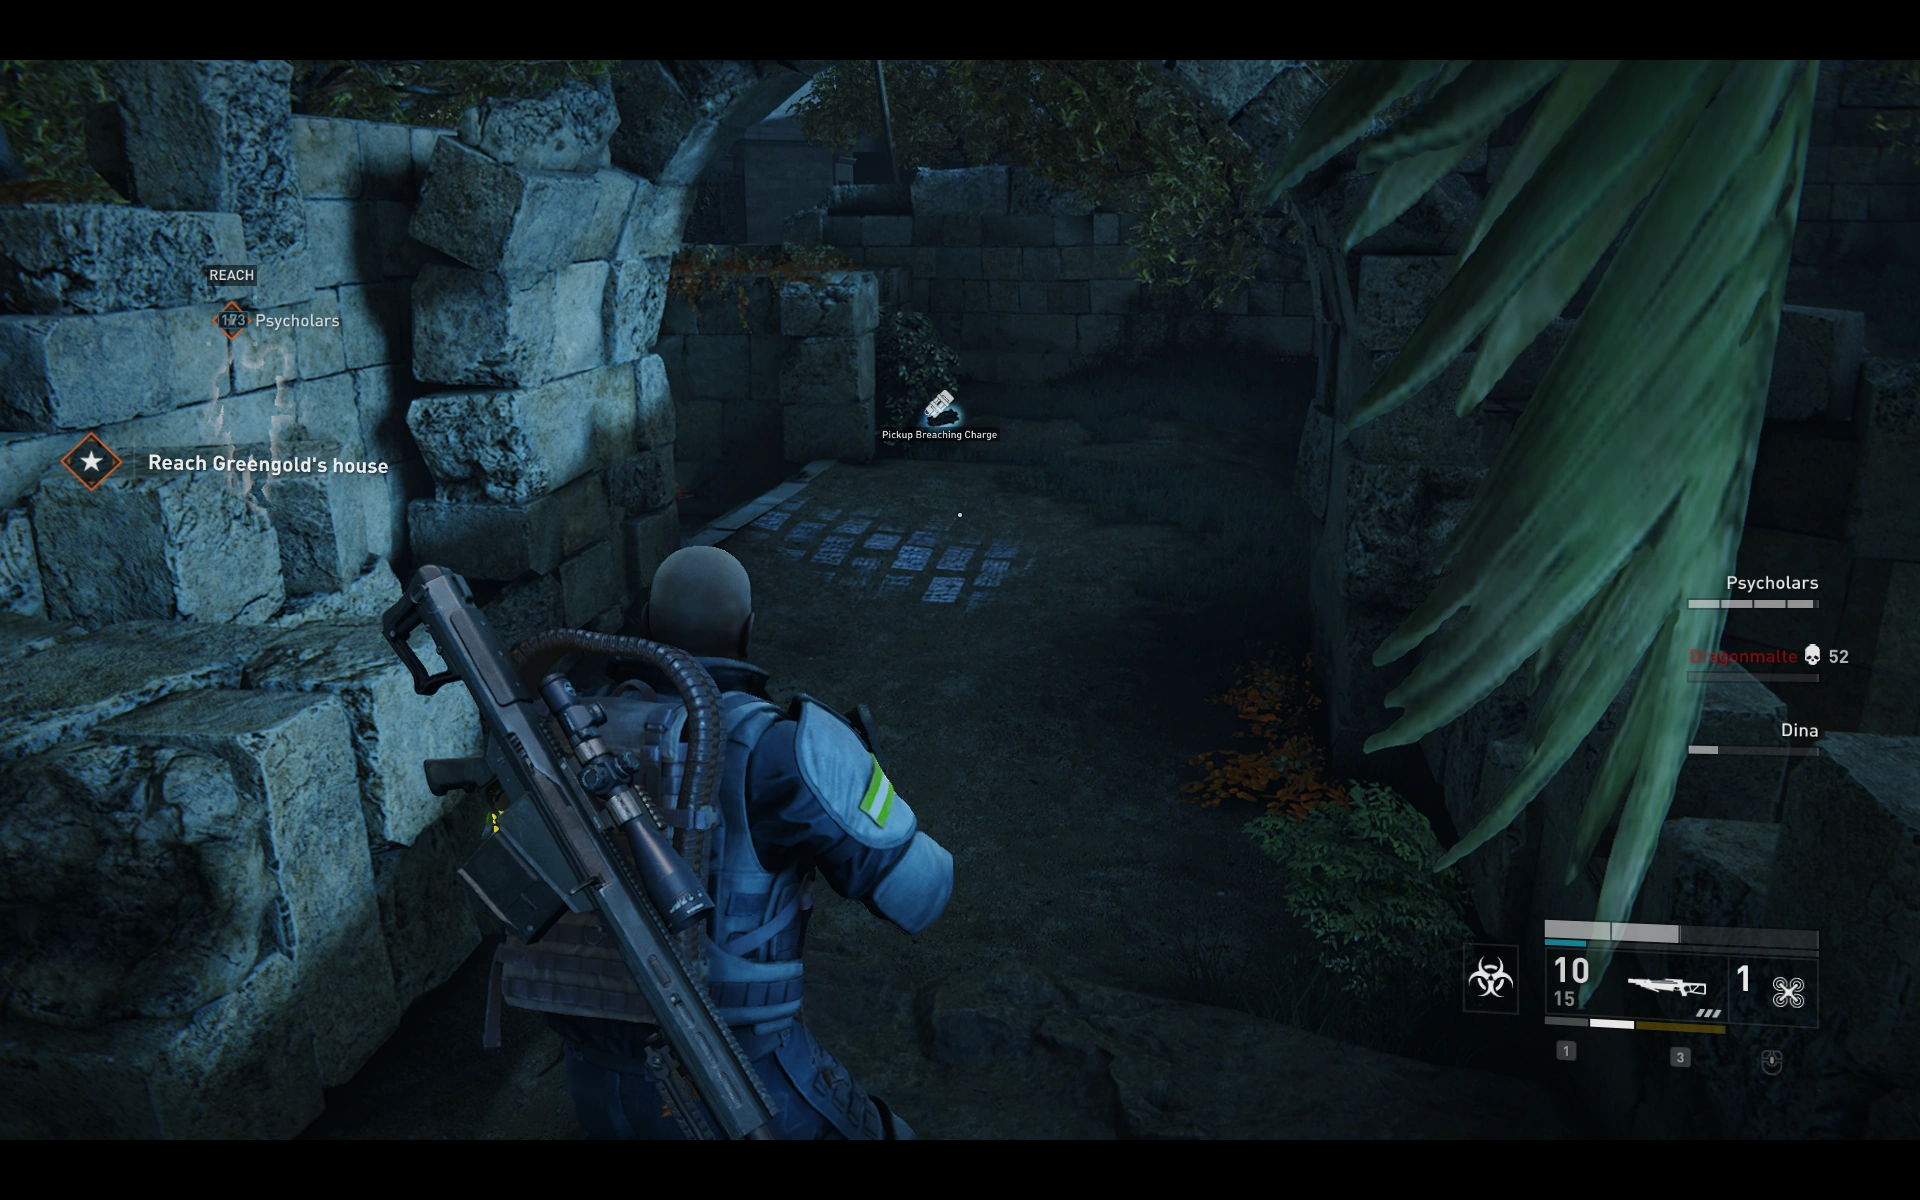
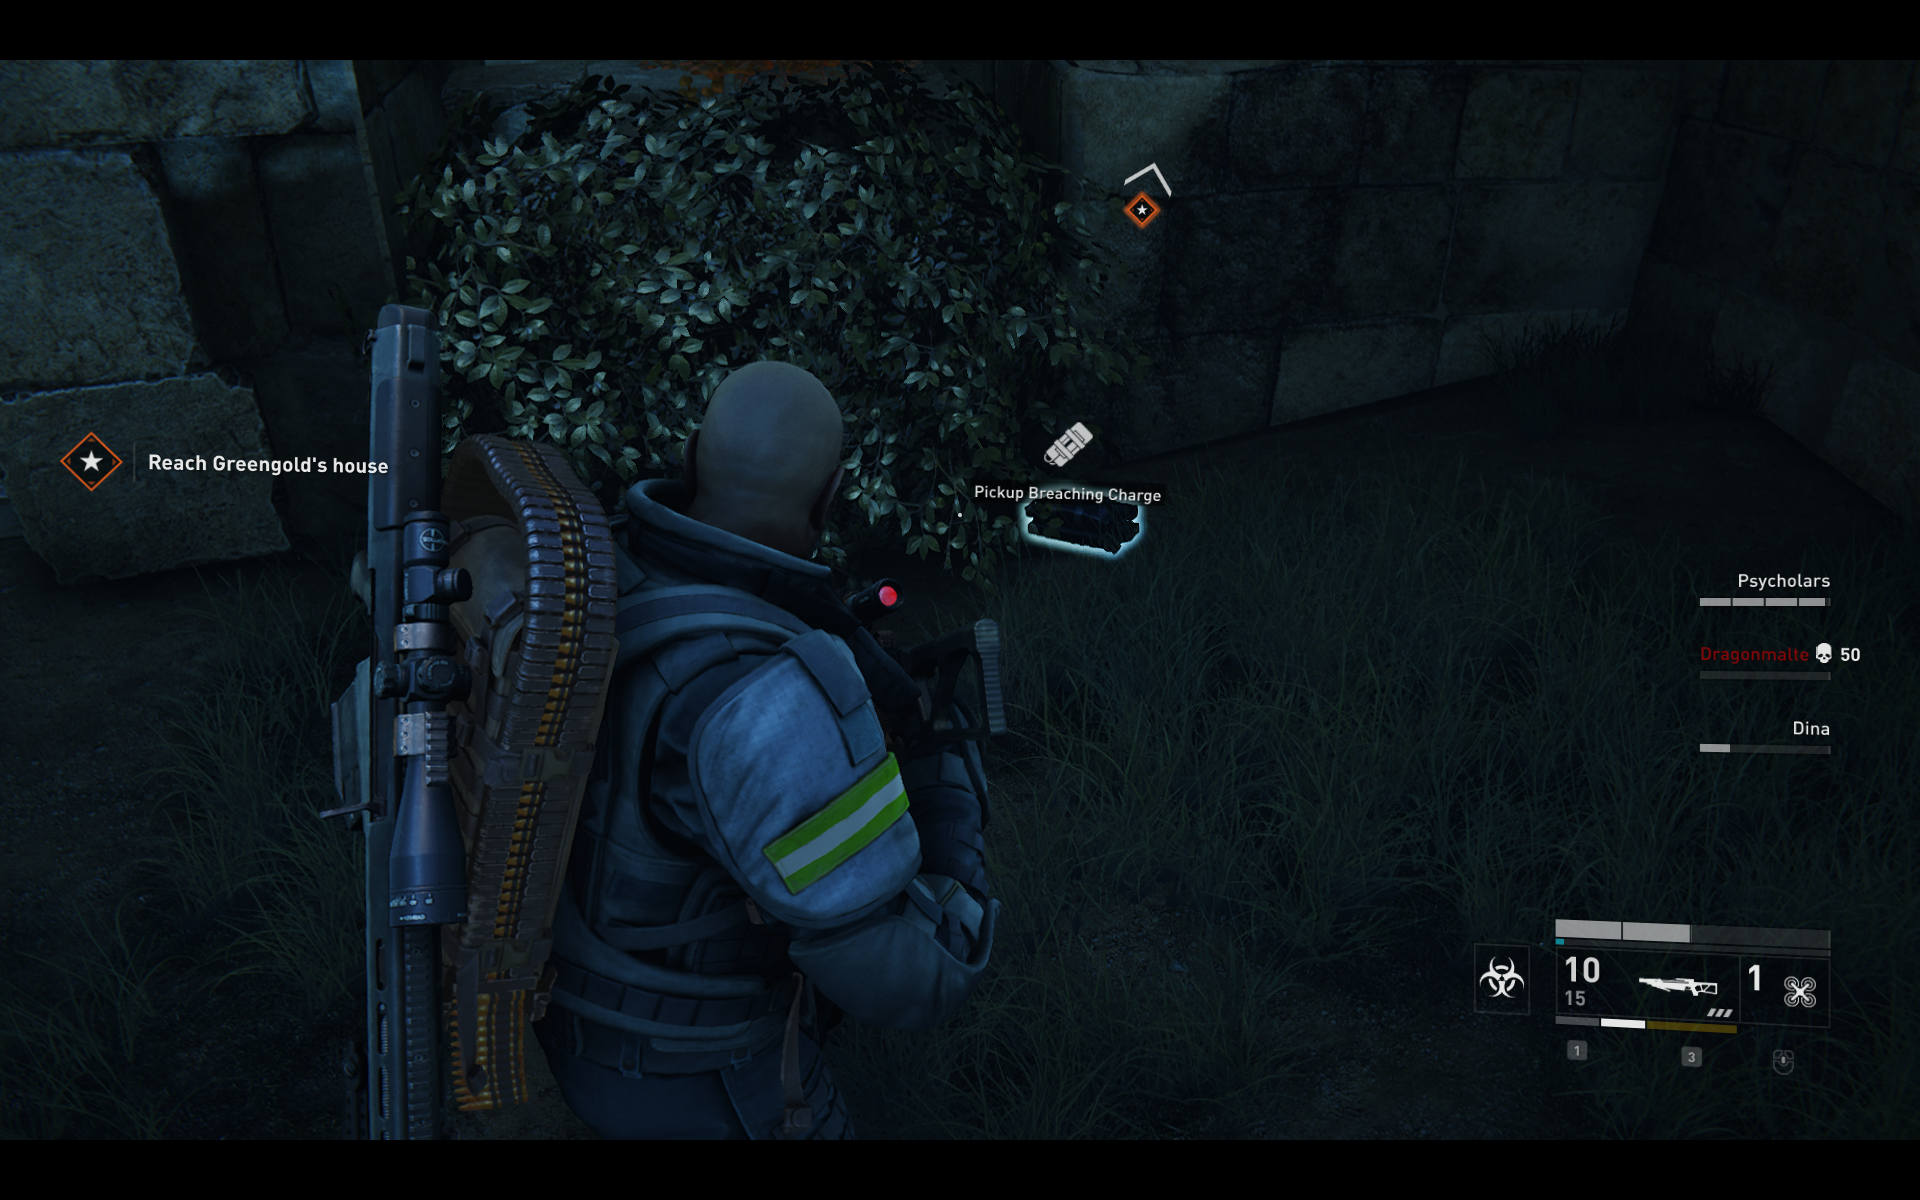
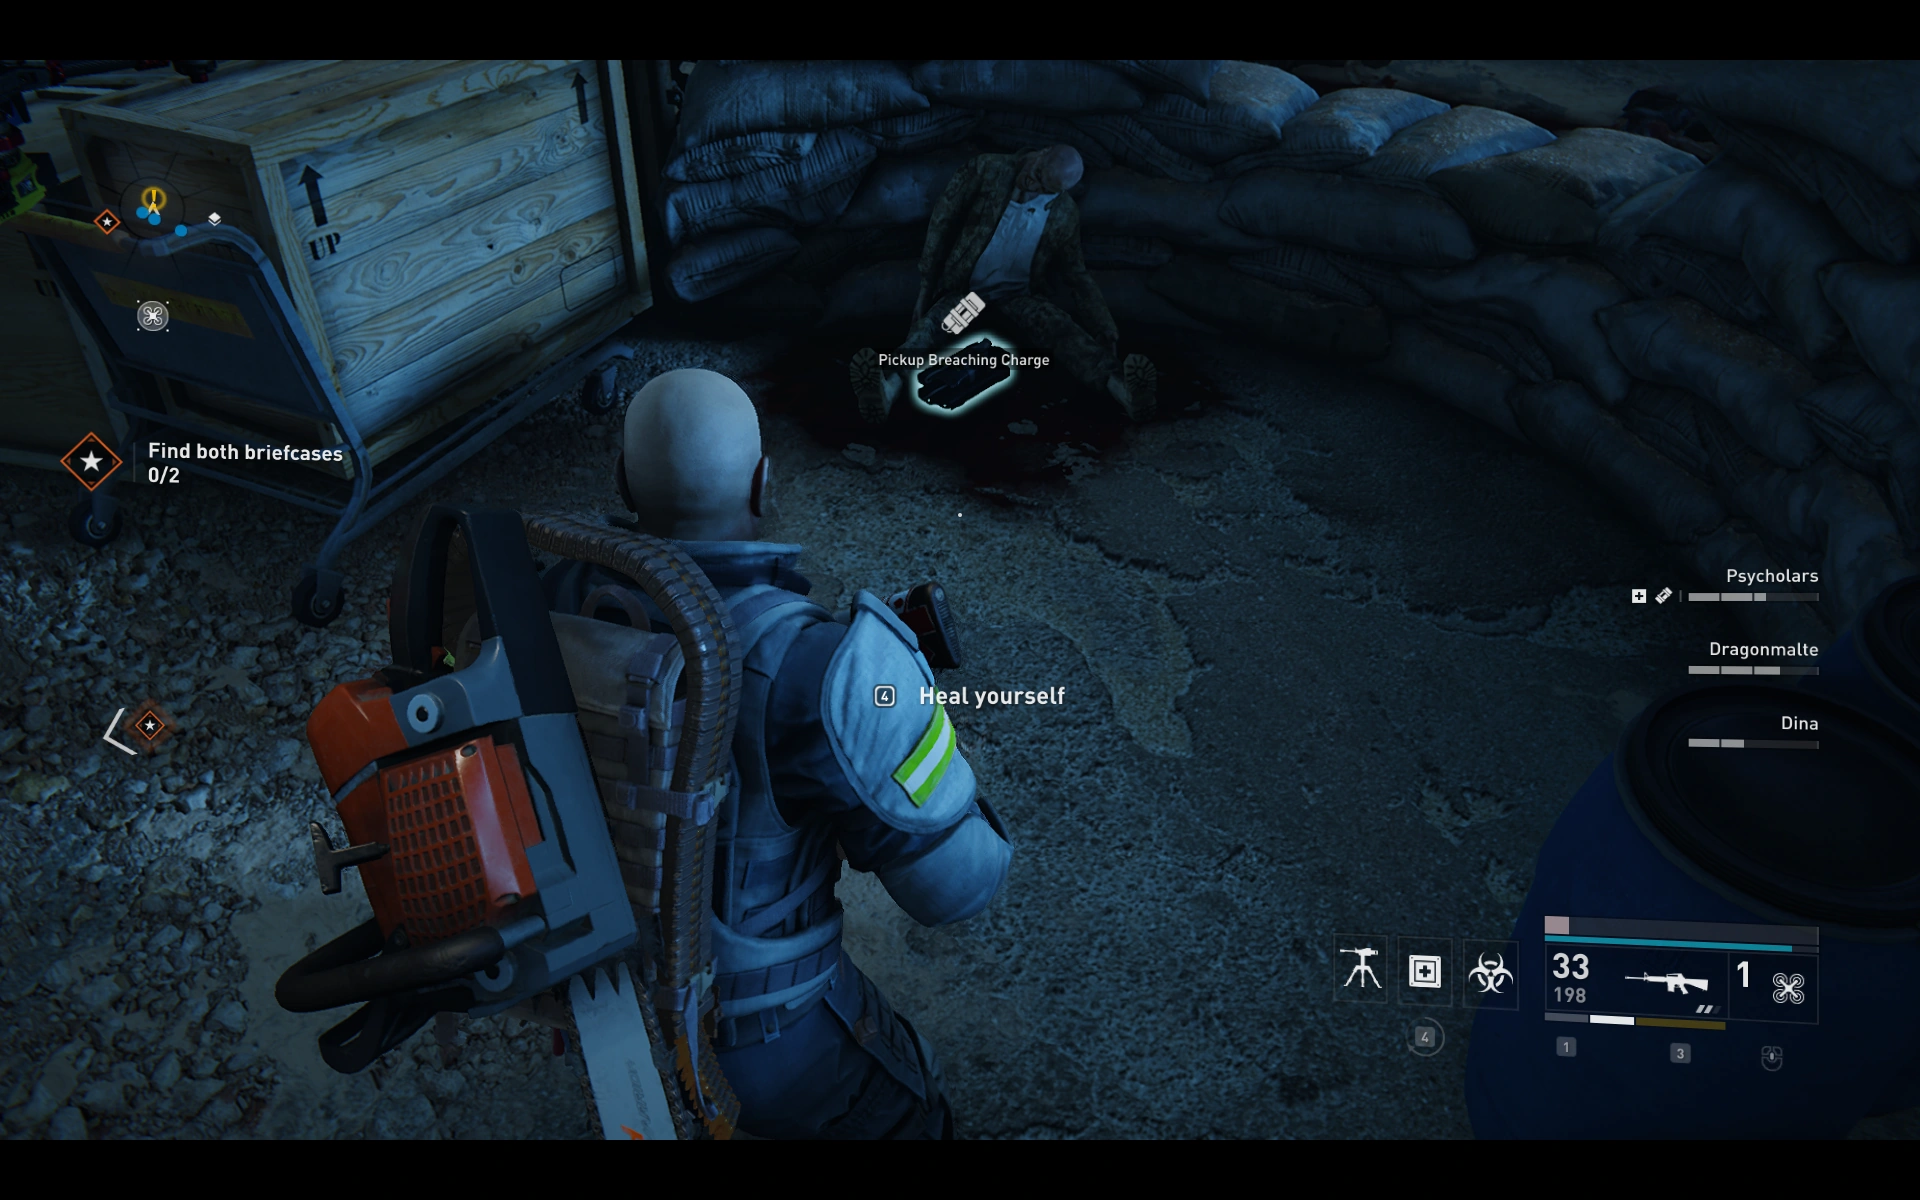
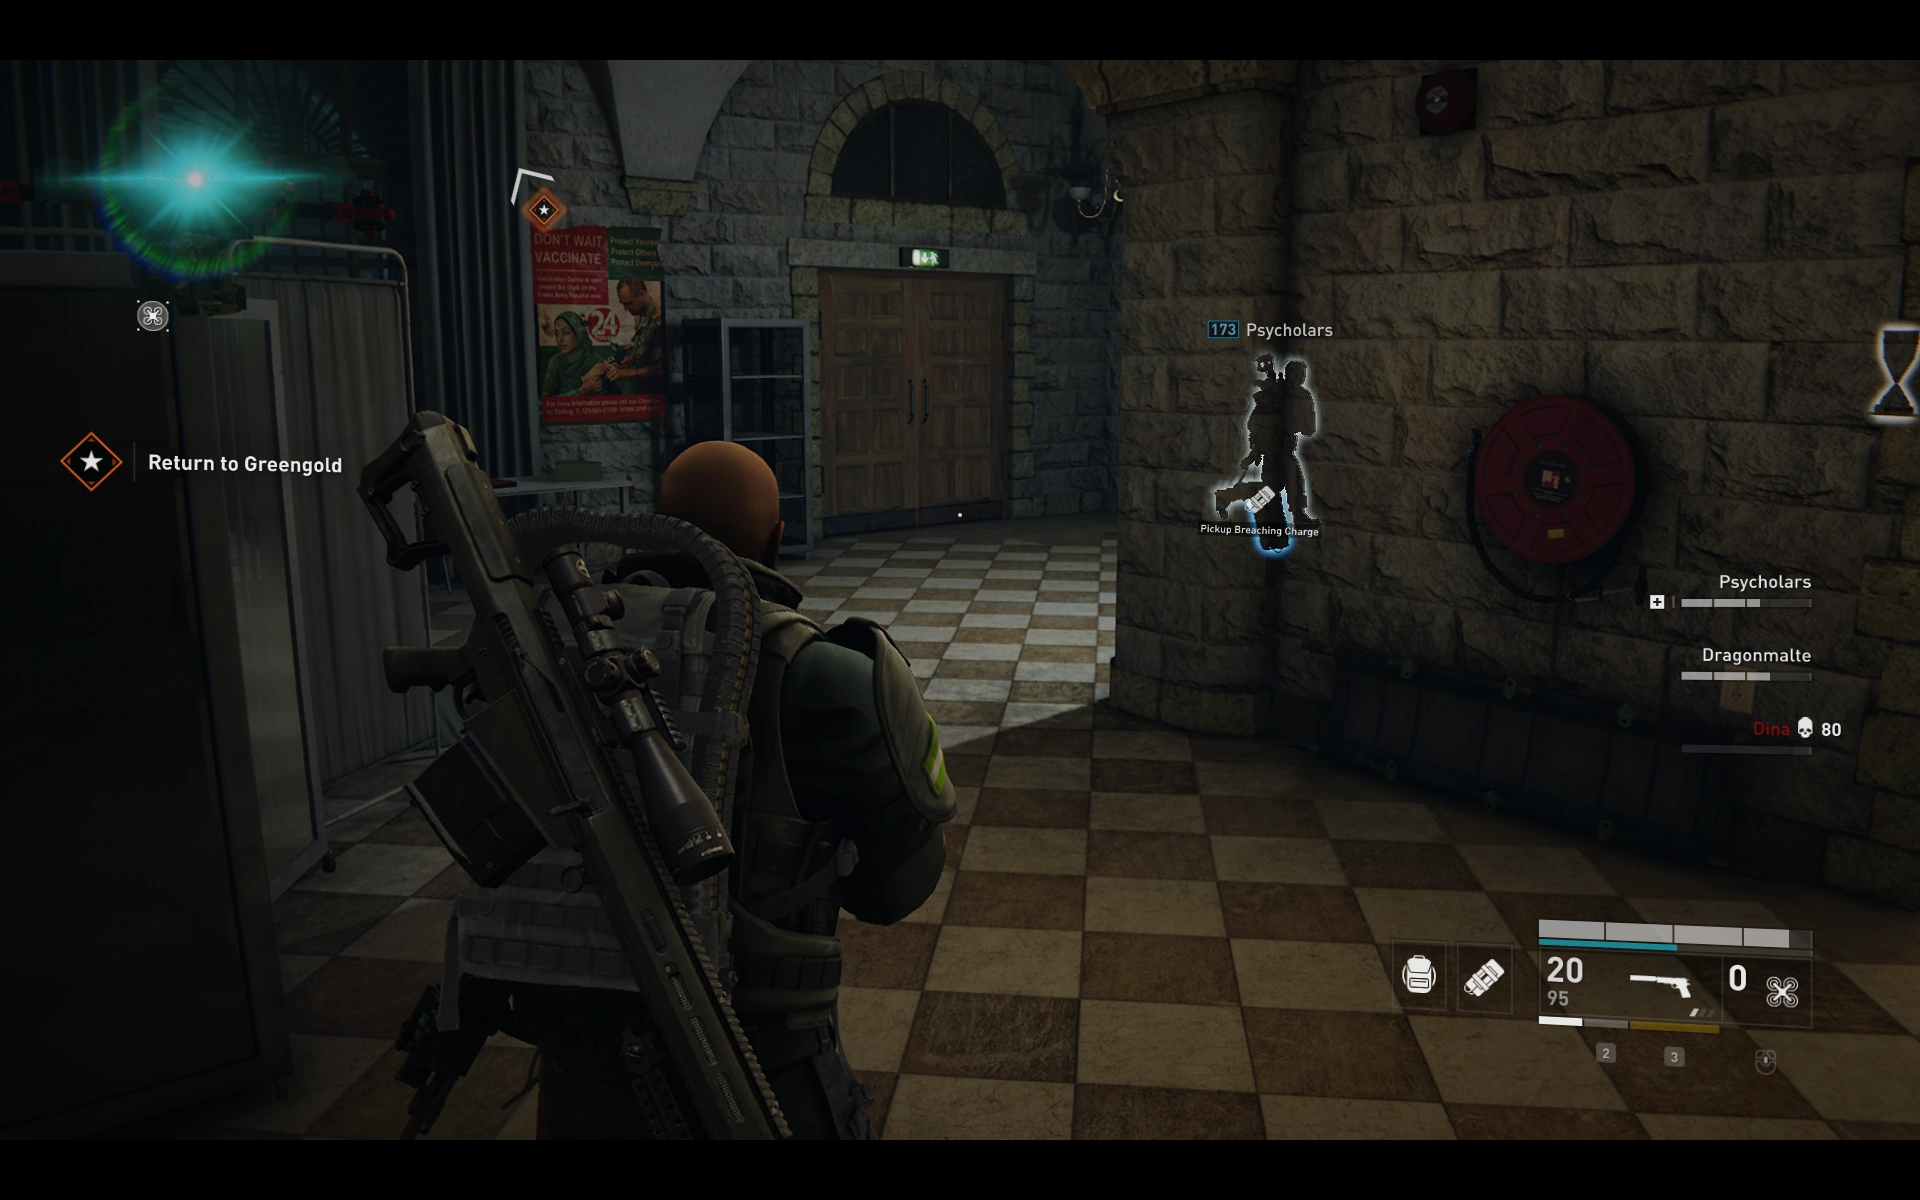
Chapter 3: Tech Support[]
Location 1: ![]()
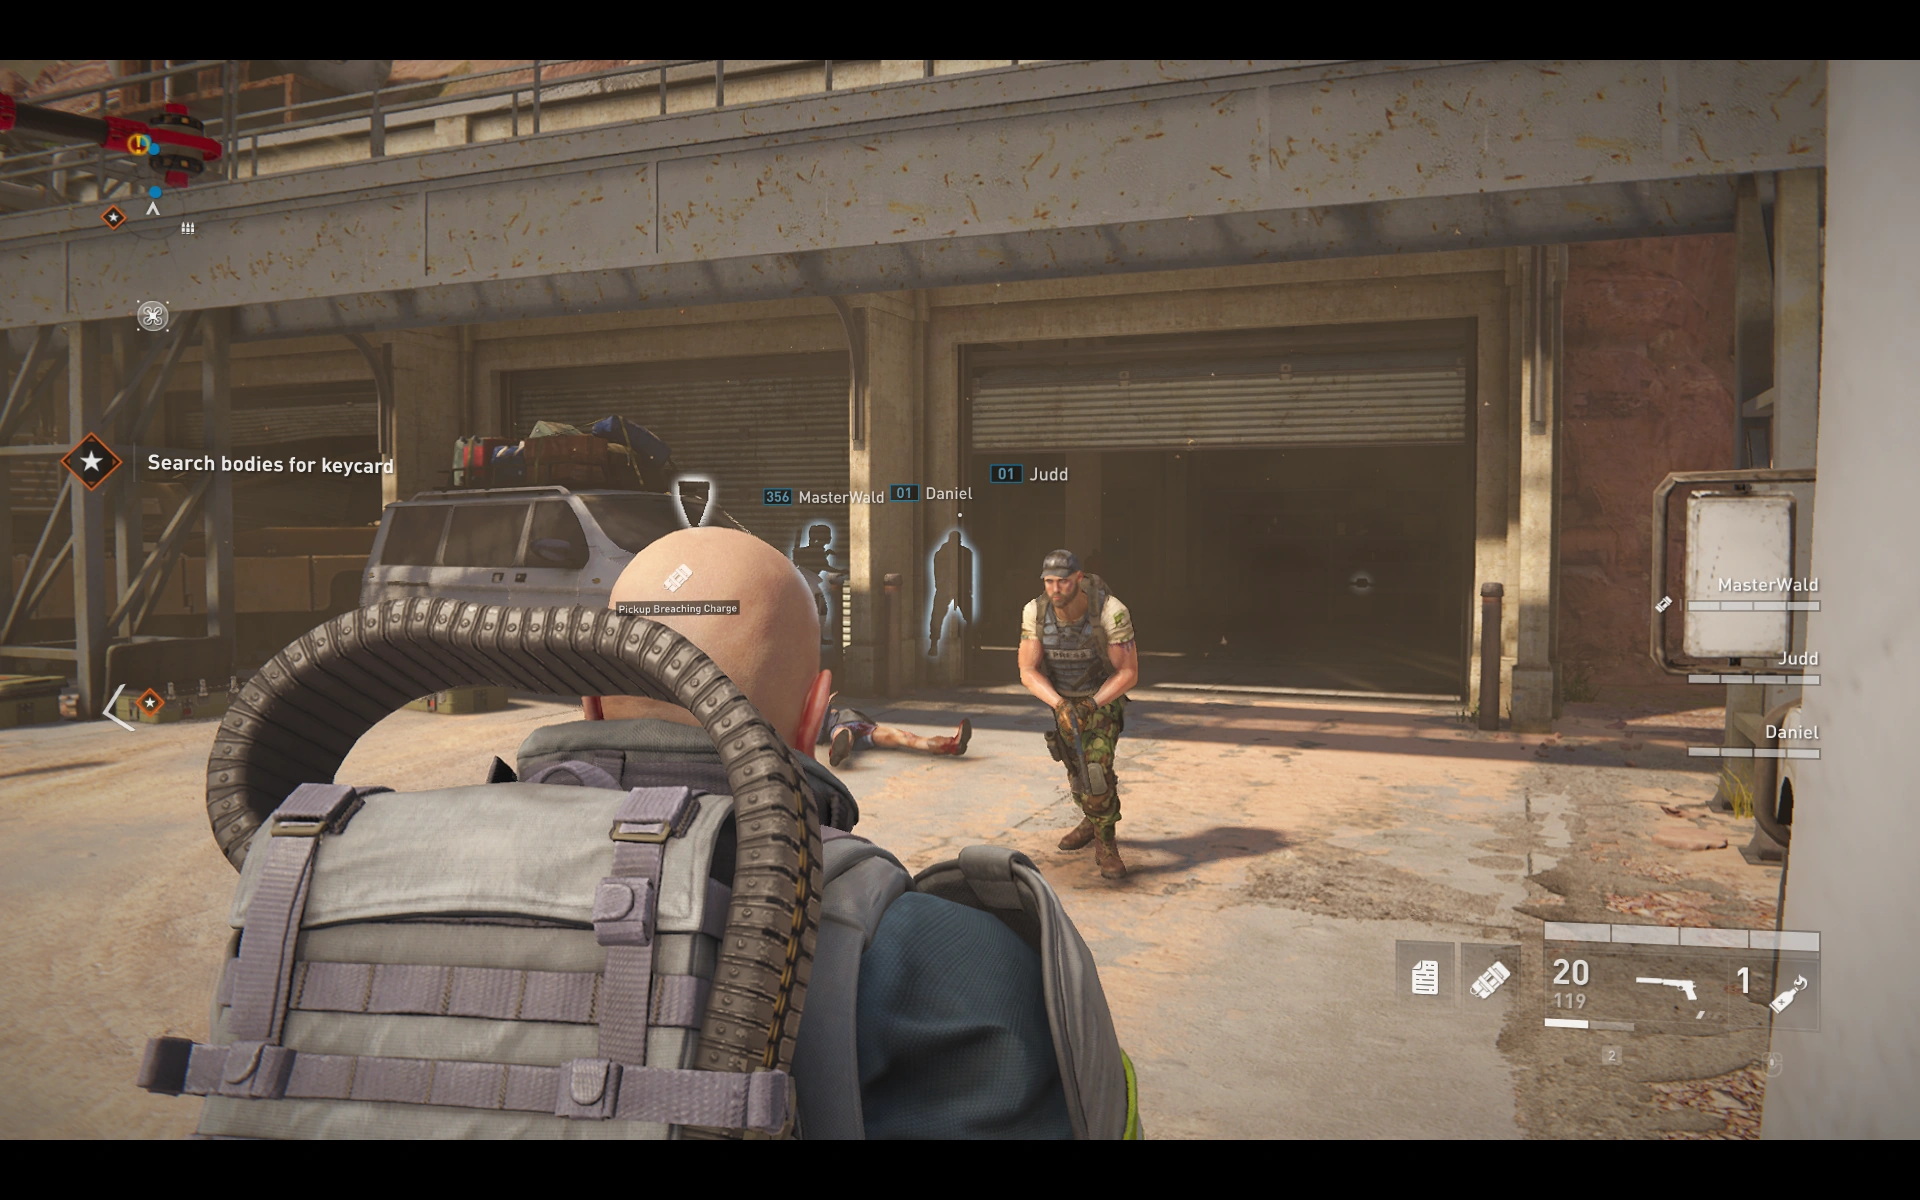
Right after the start, on the left side behind some crates.

Location 2: ![]()
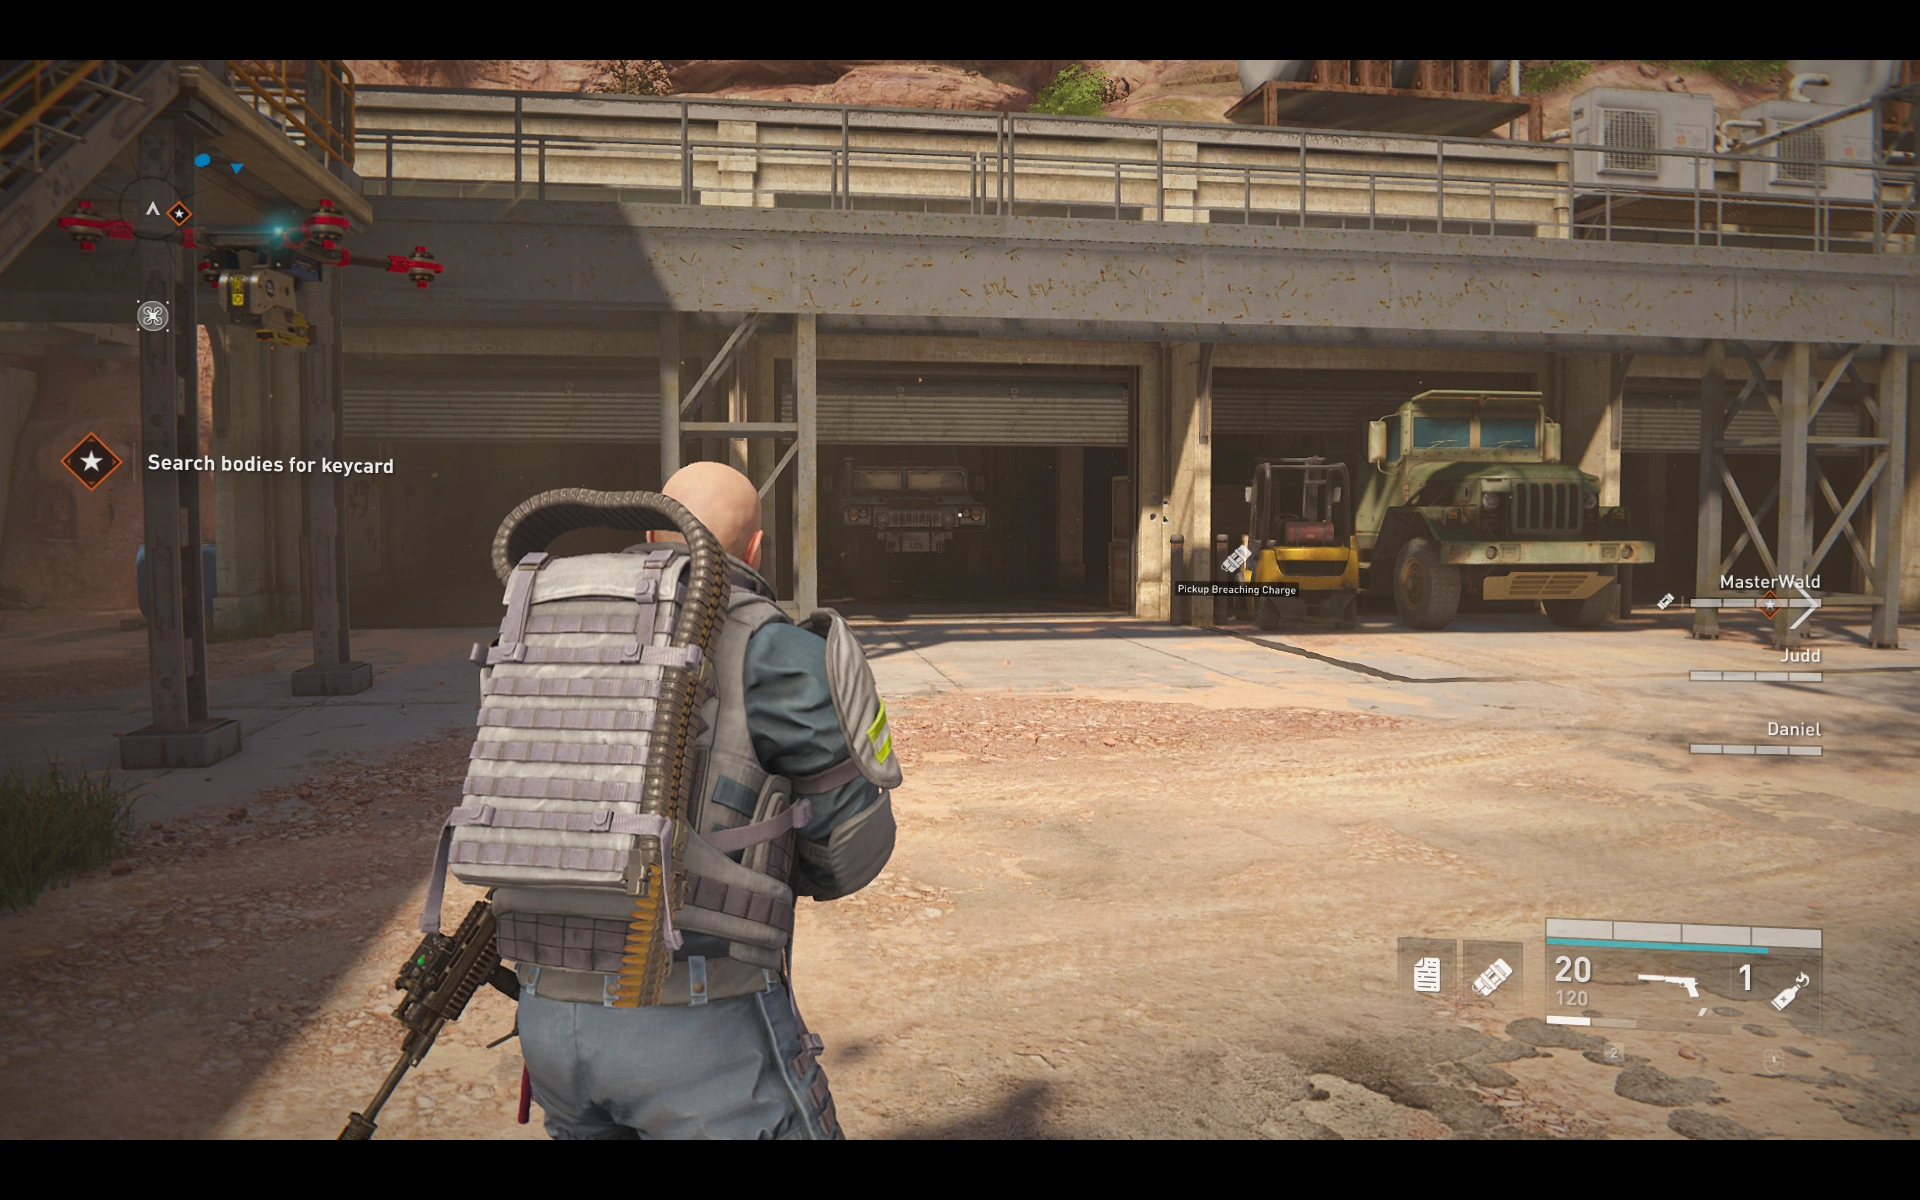
After the start, go head on - in the second garage from the left.

Location 3: ![]()
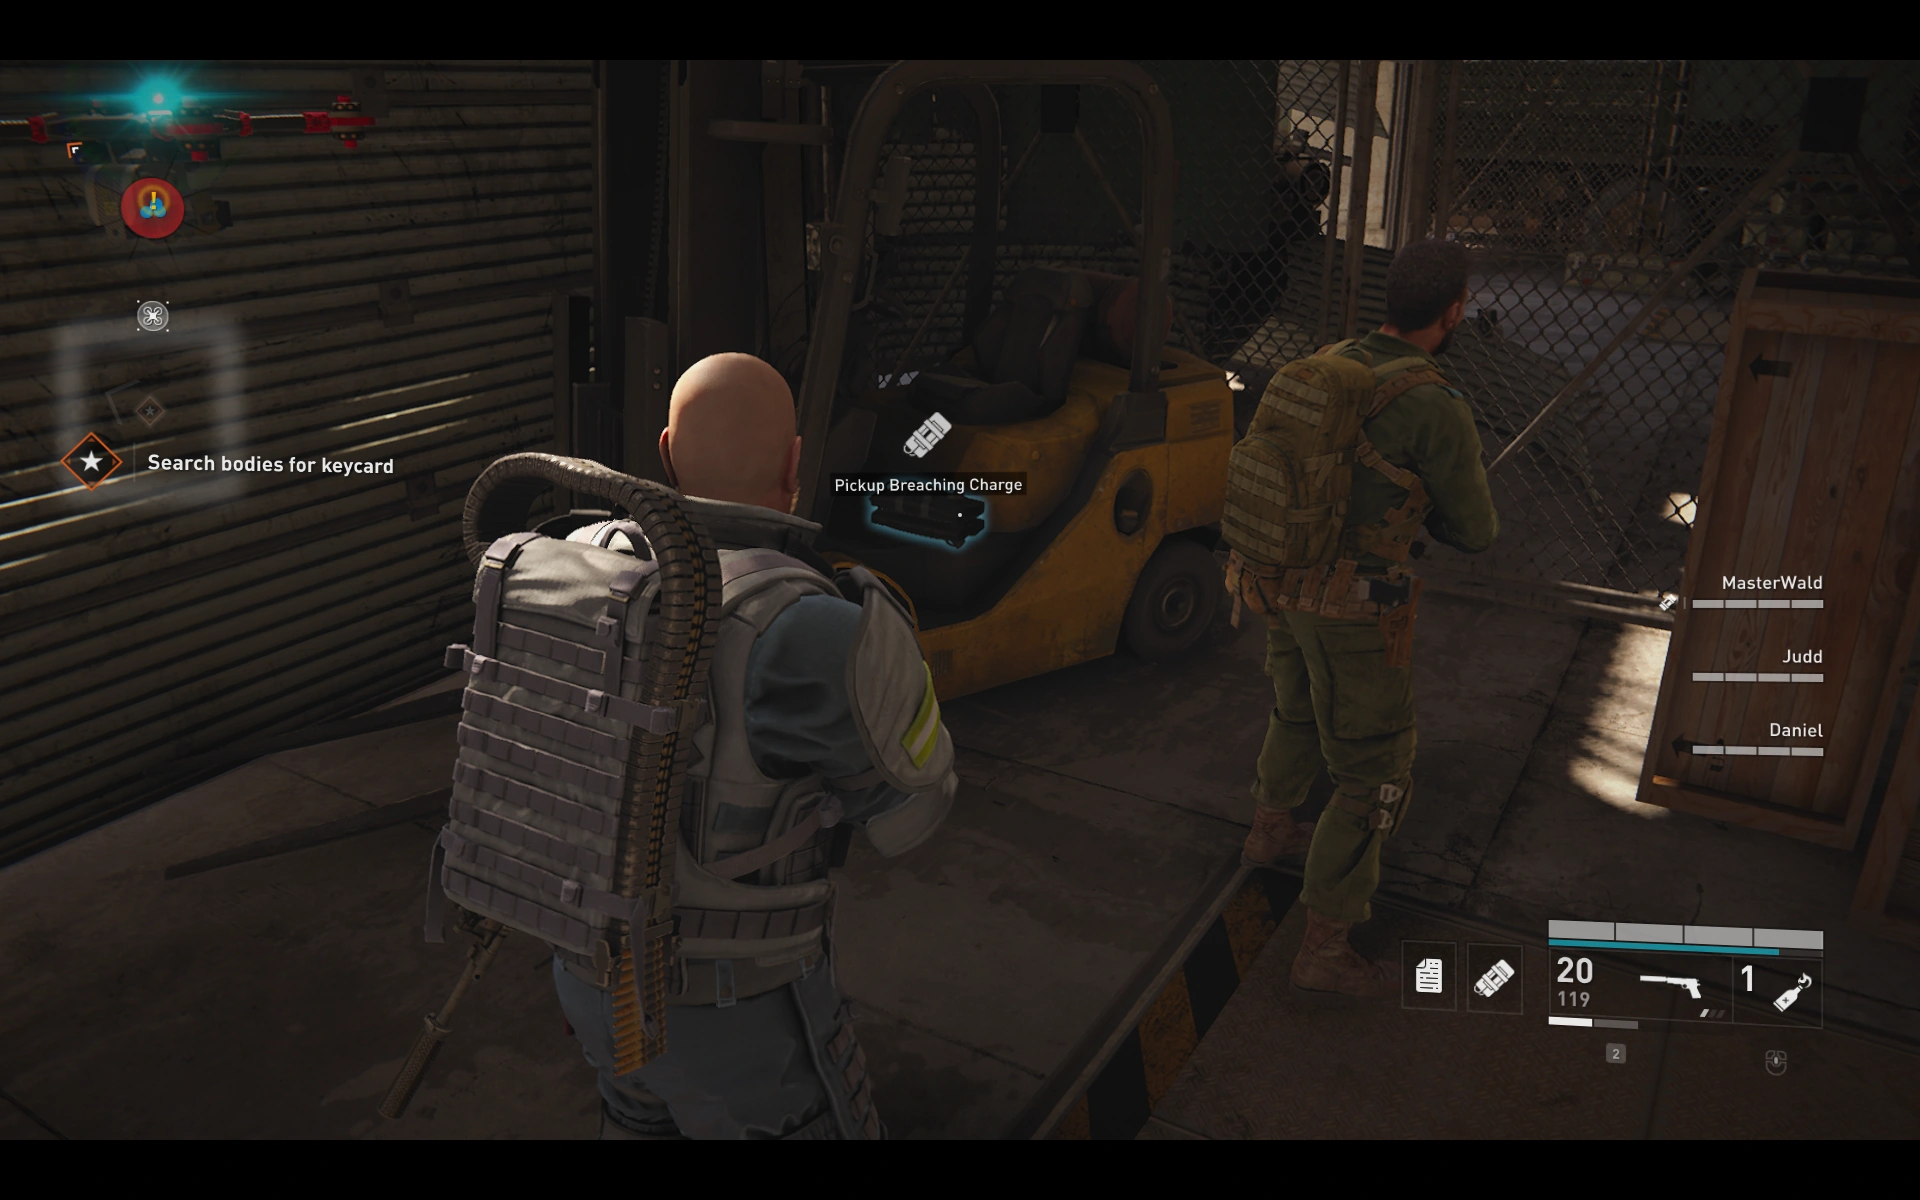
After the second charge, the rightmost garage. It is in the forklift.
Location 4: ![]()
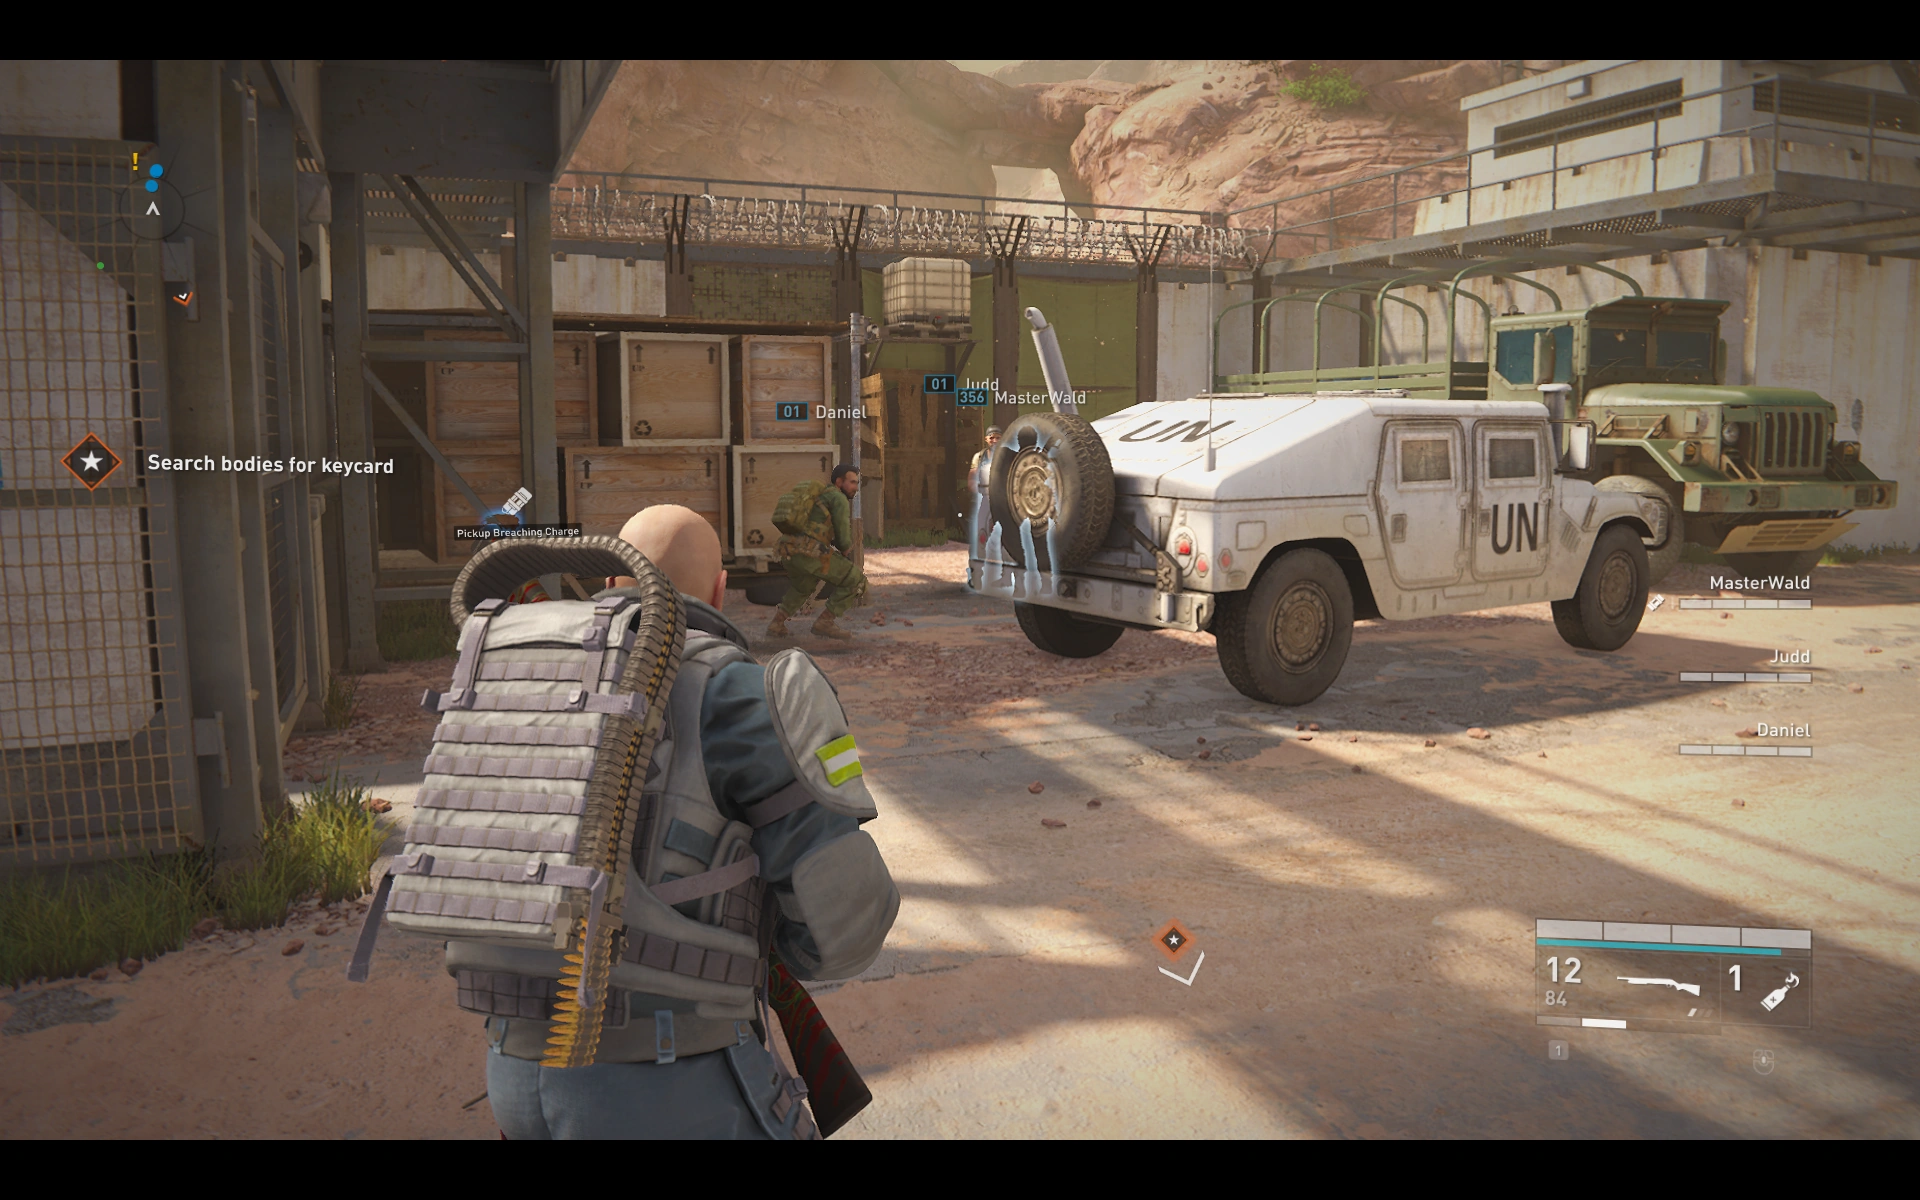
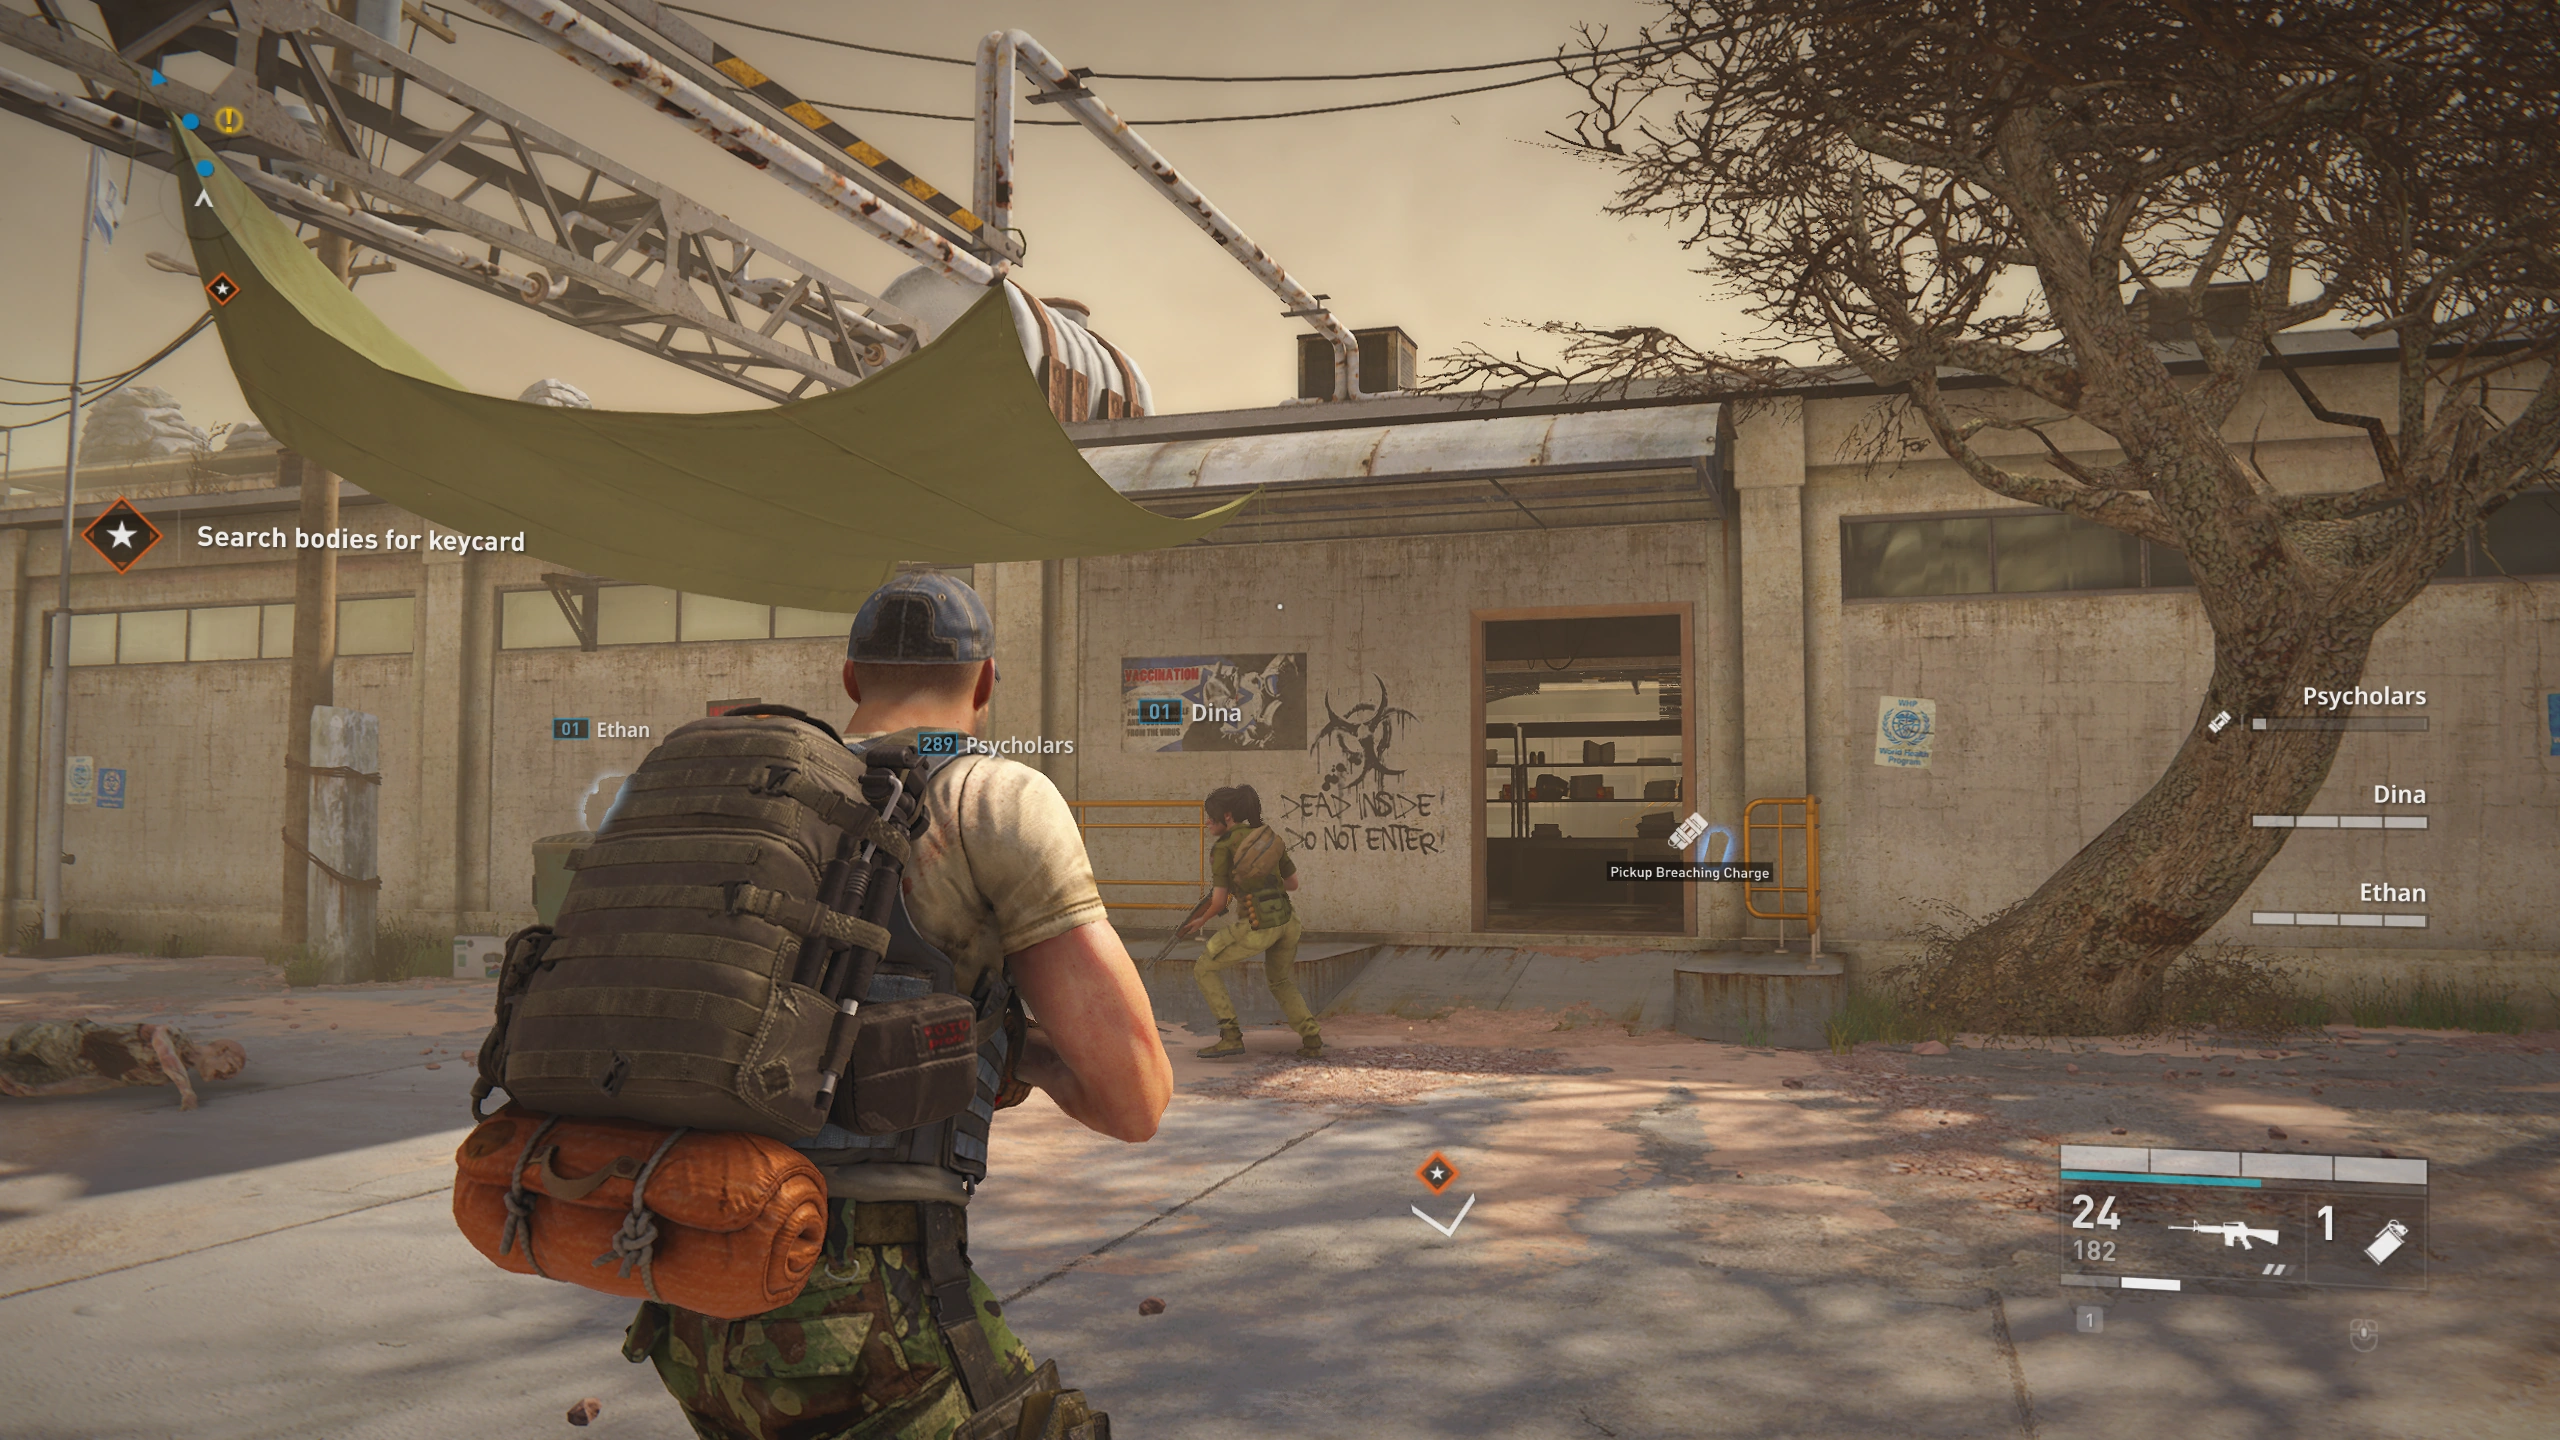
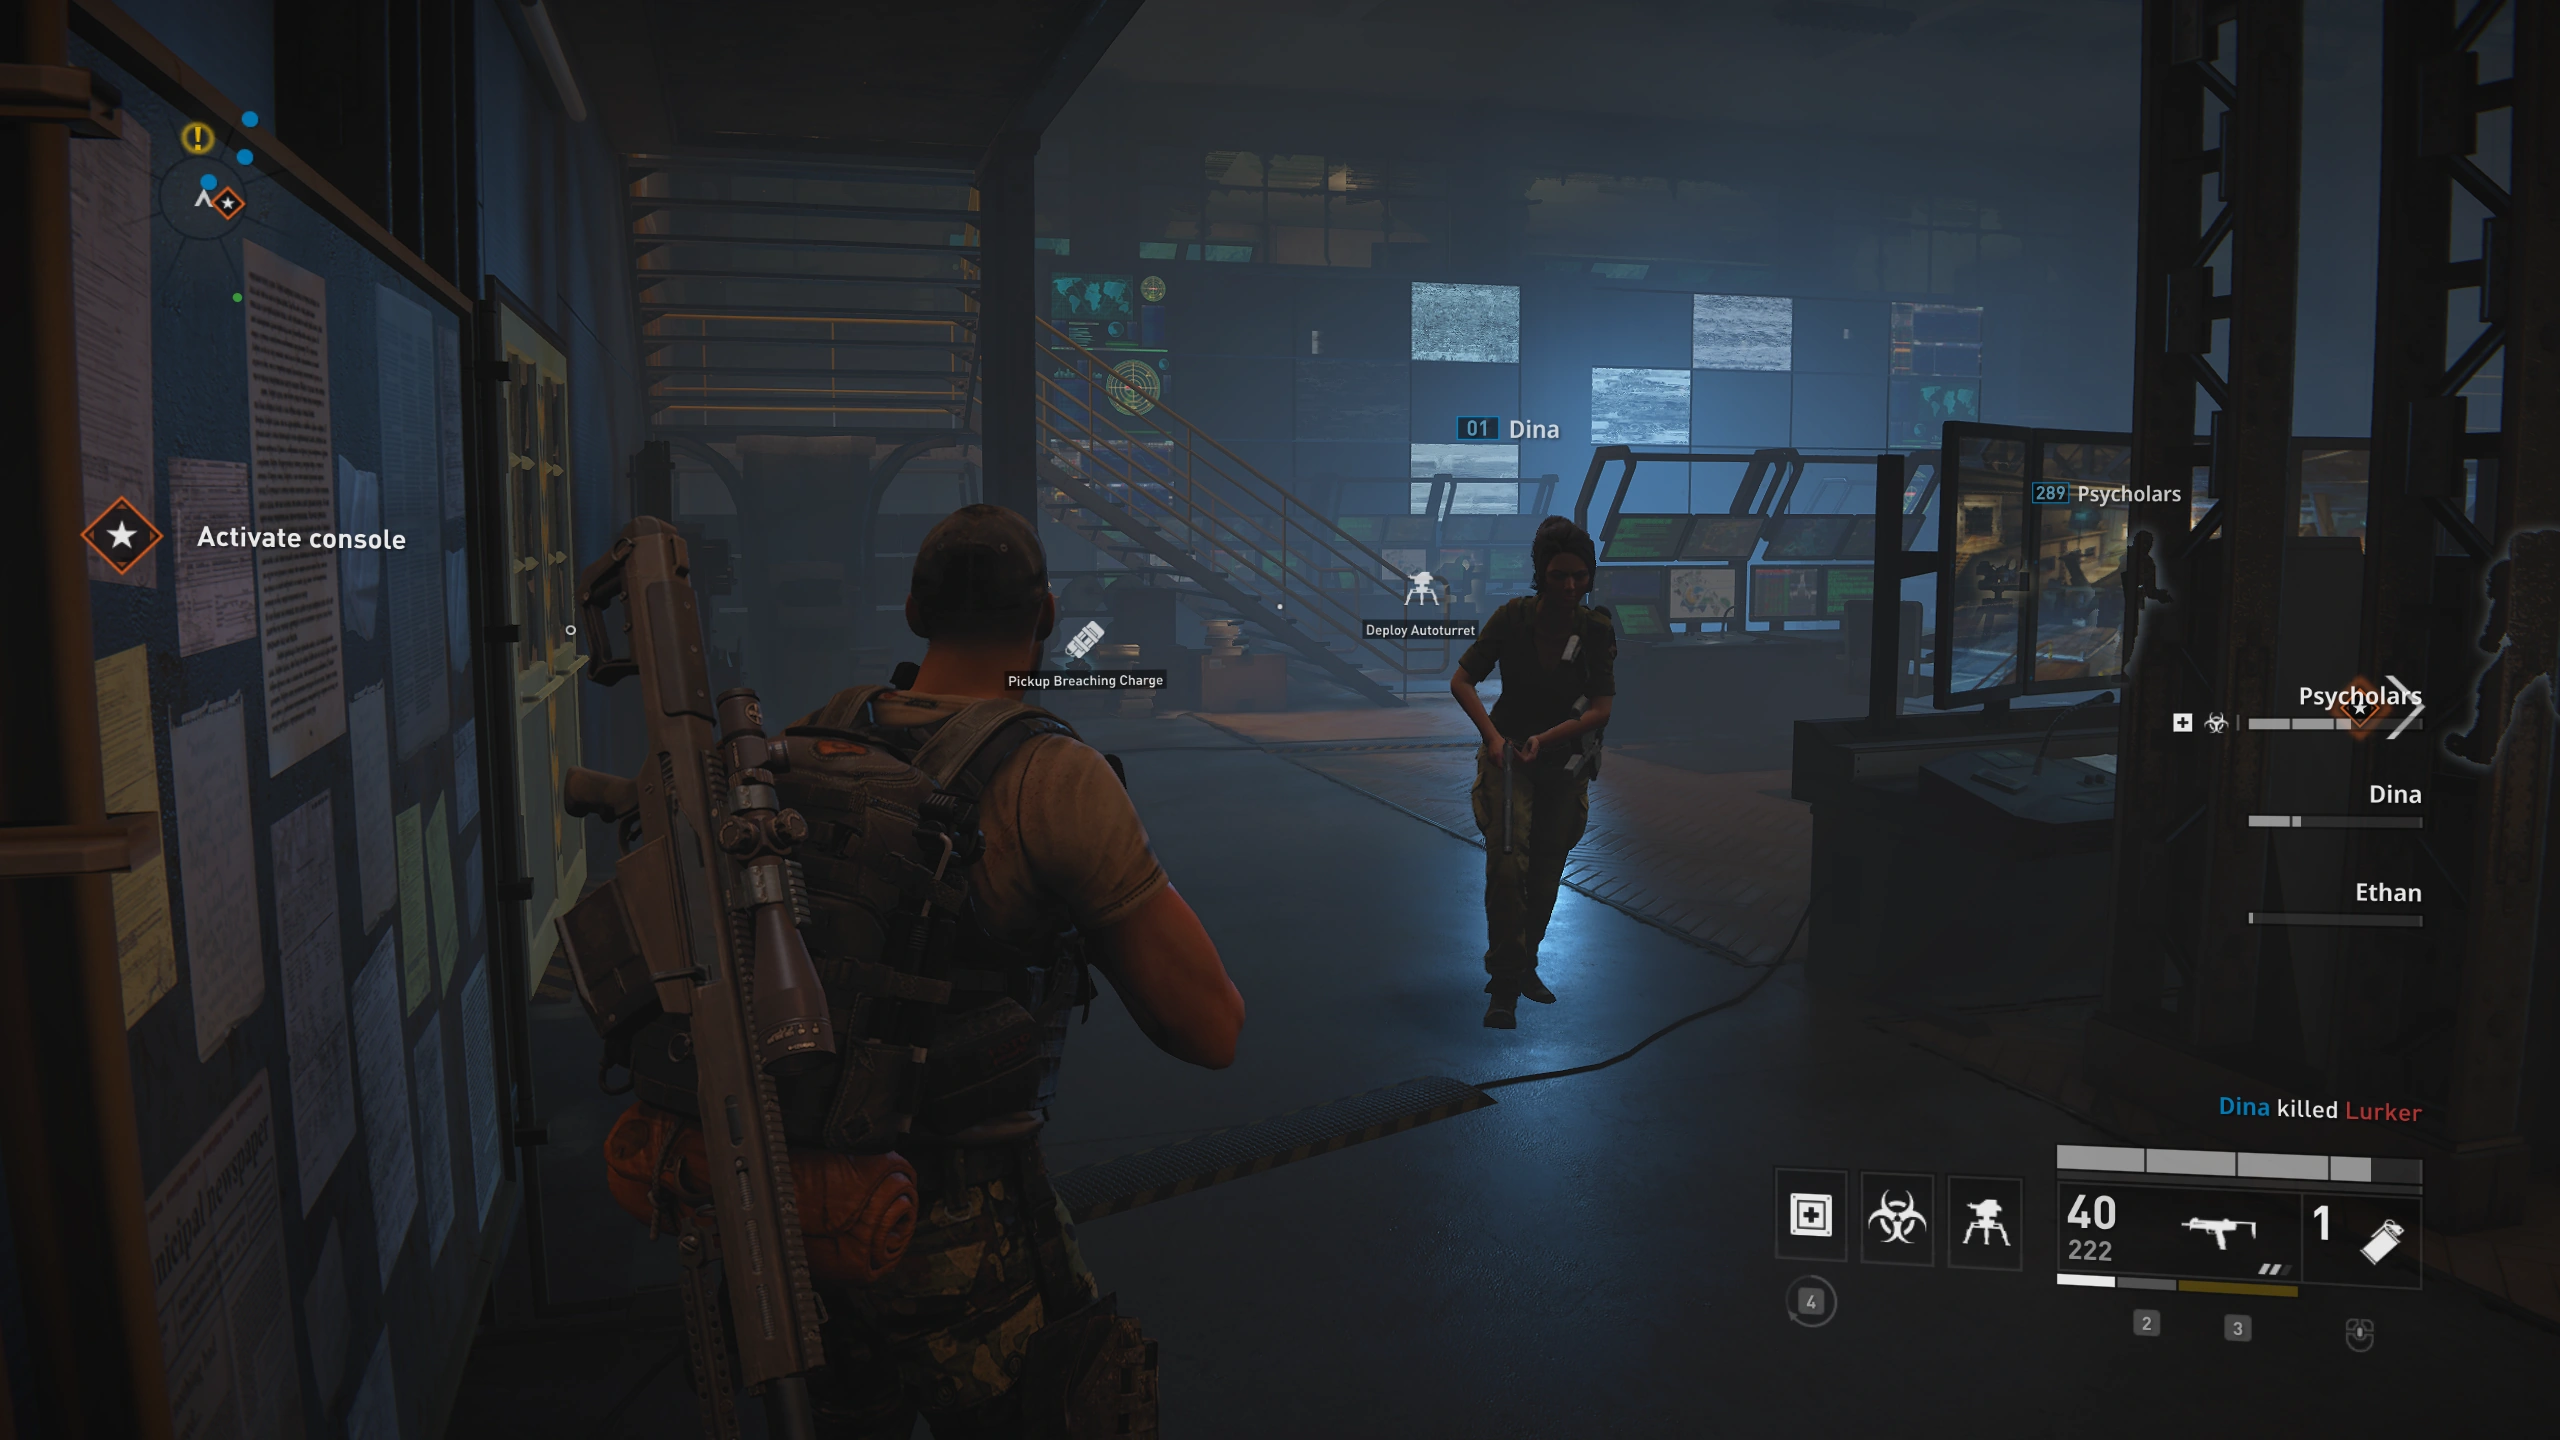
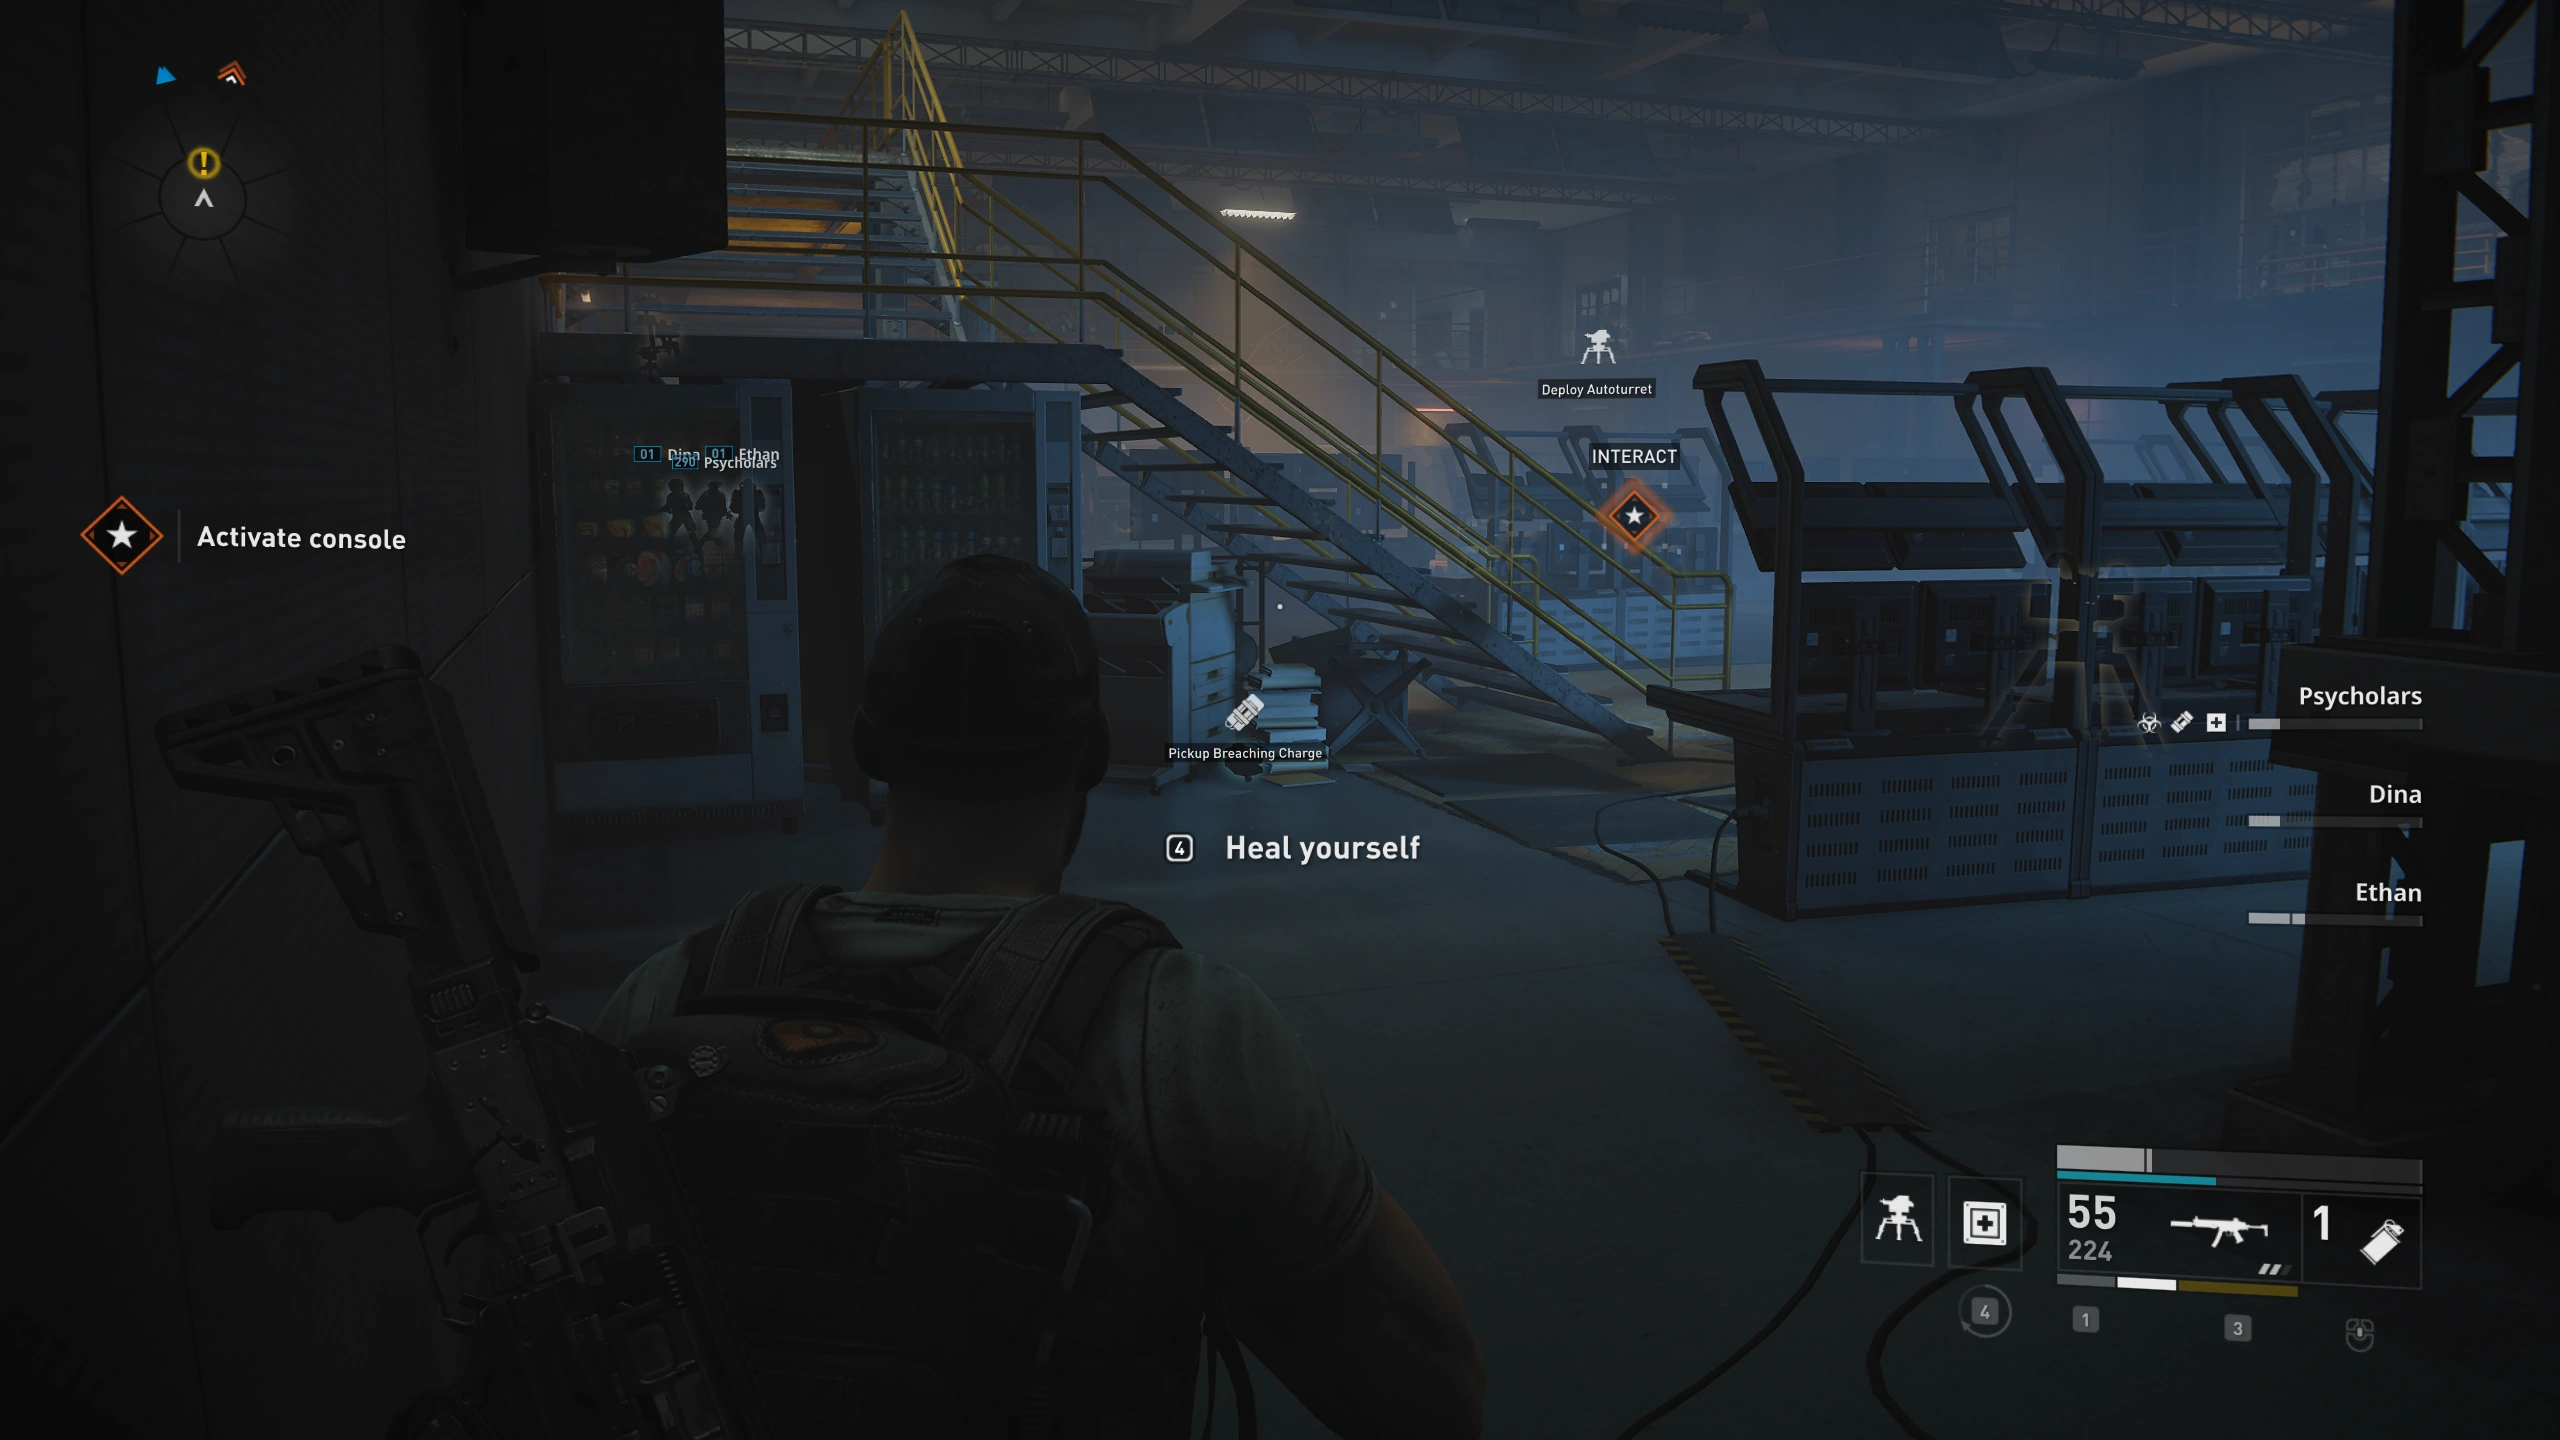
In the starting area, where you have to find a keycard, in the middle building in a box.

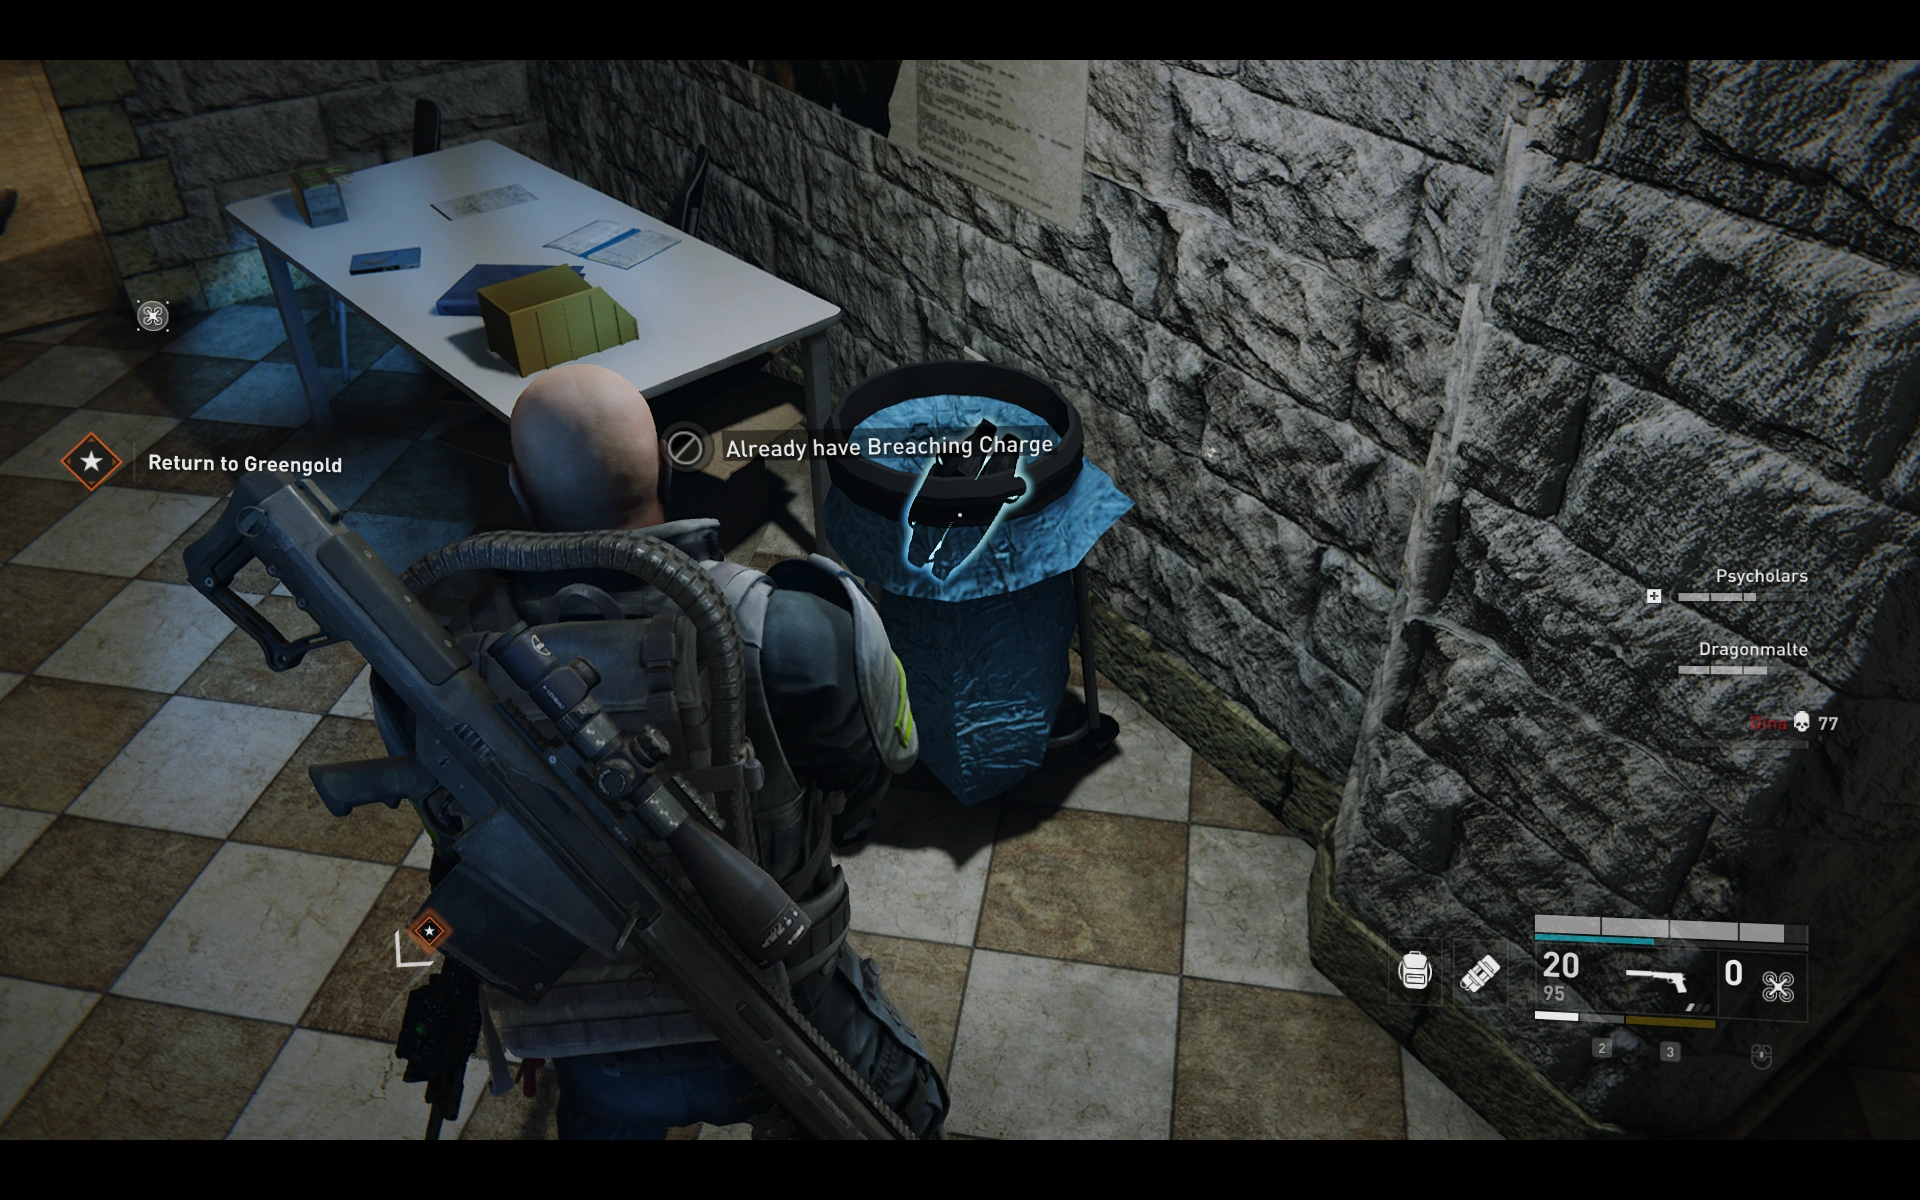
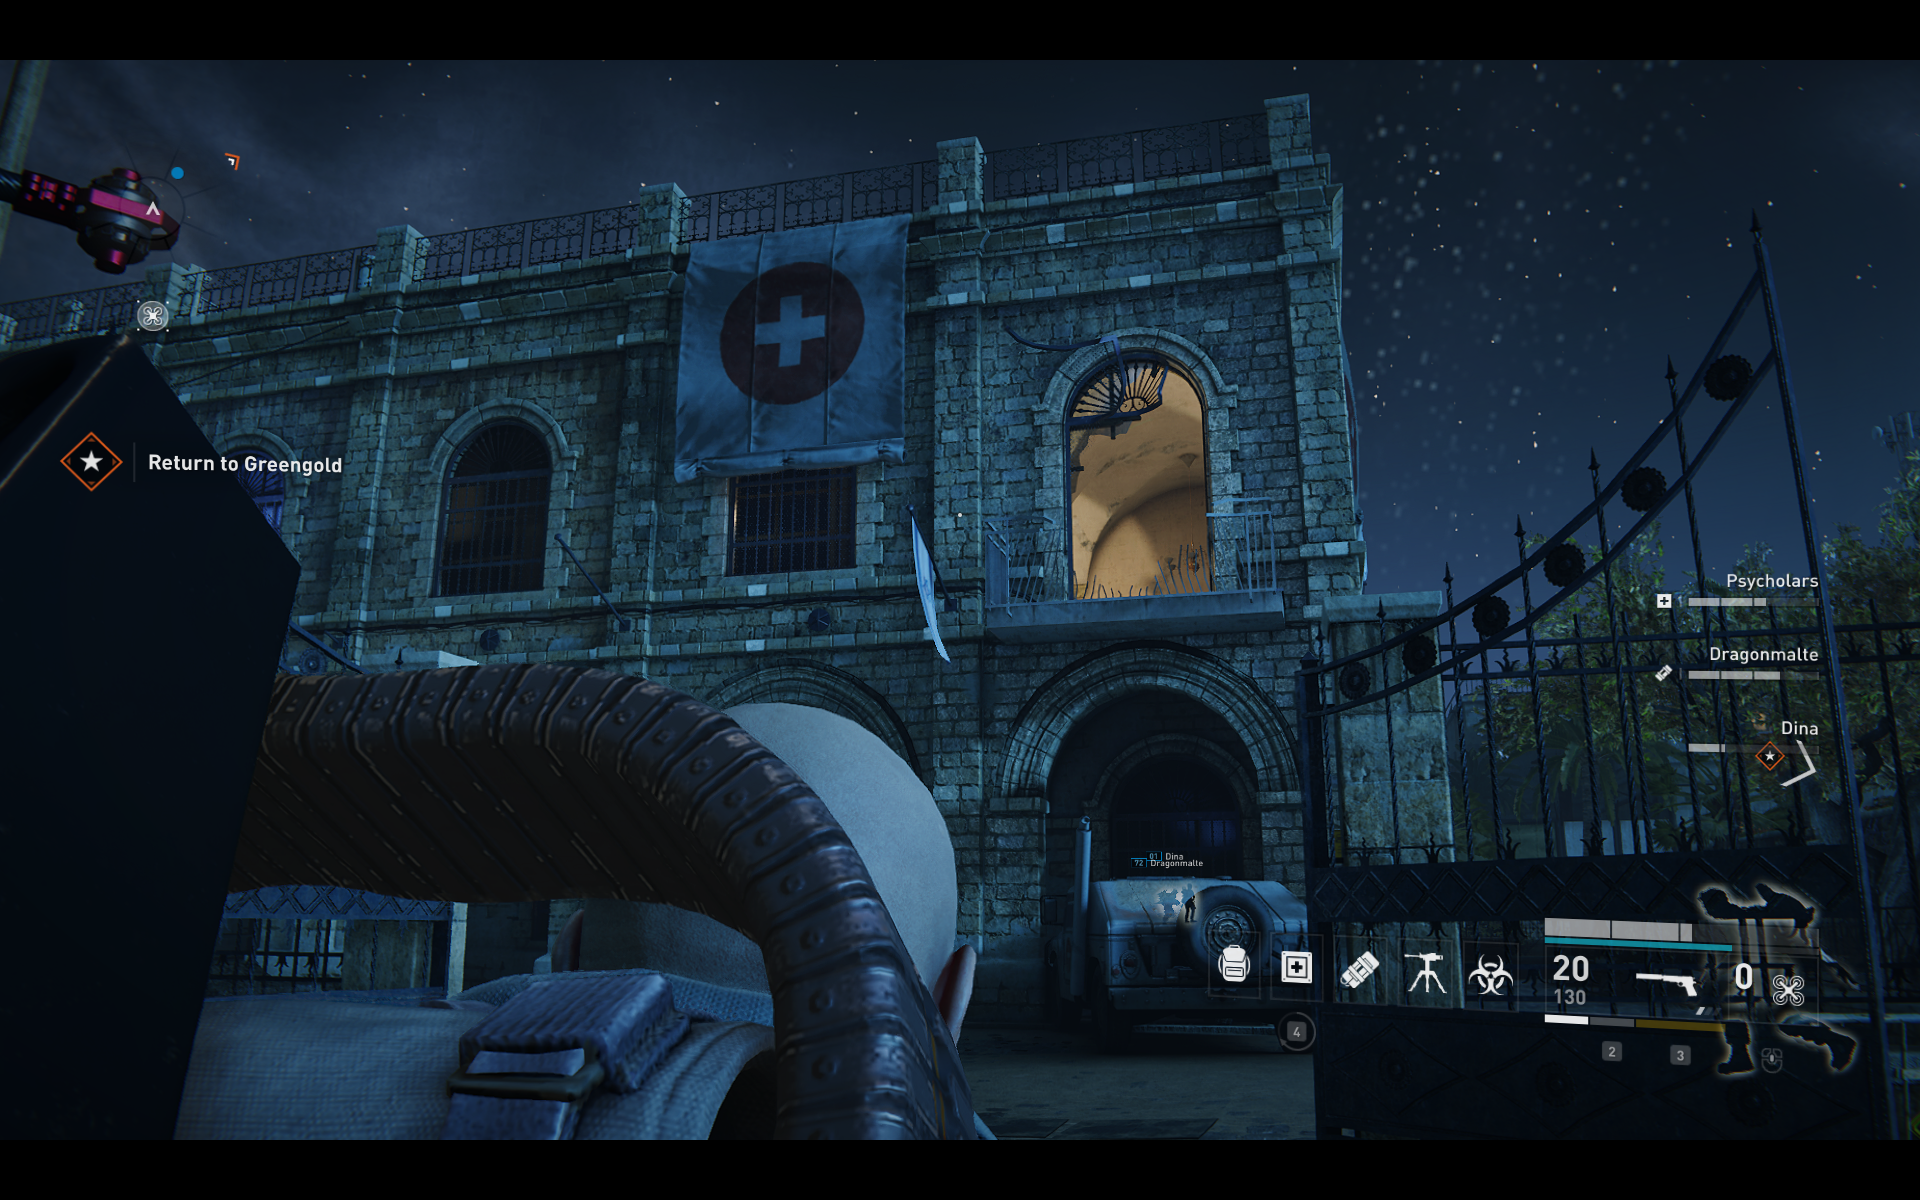
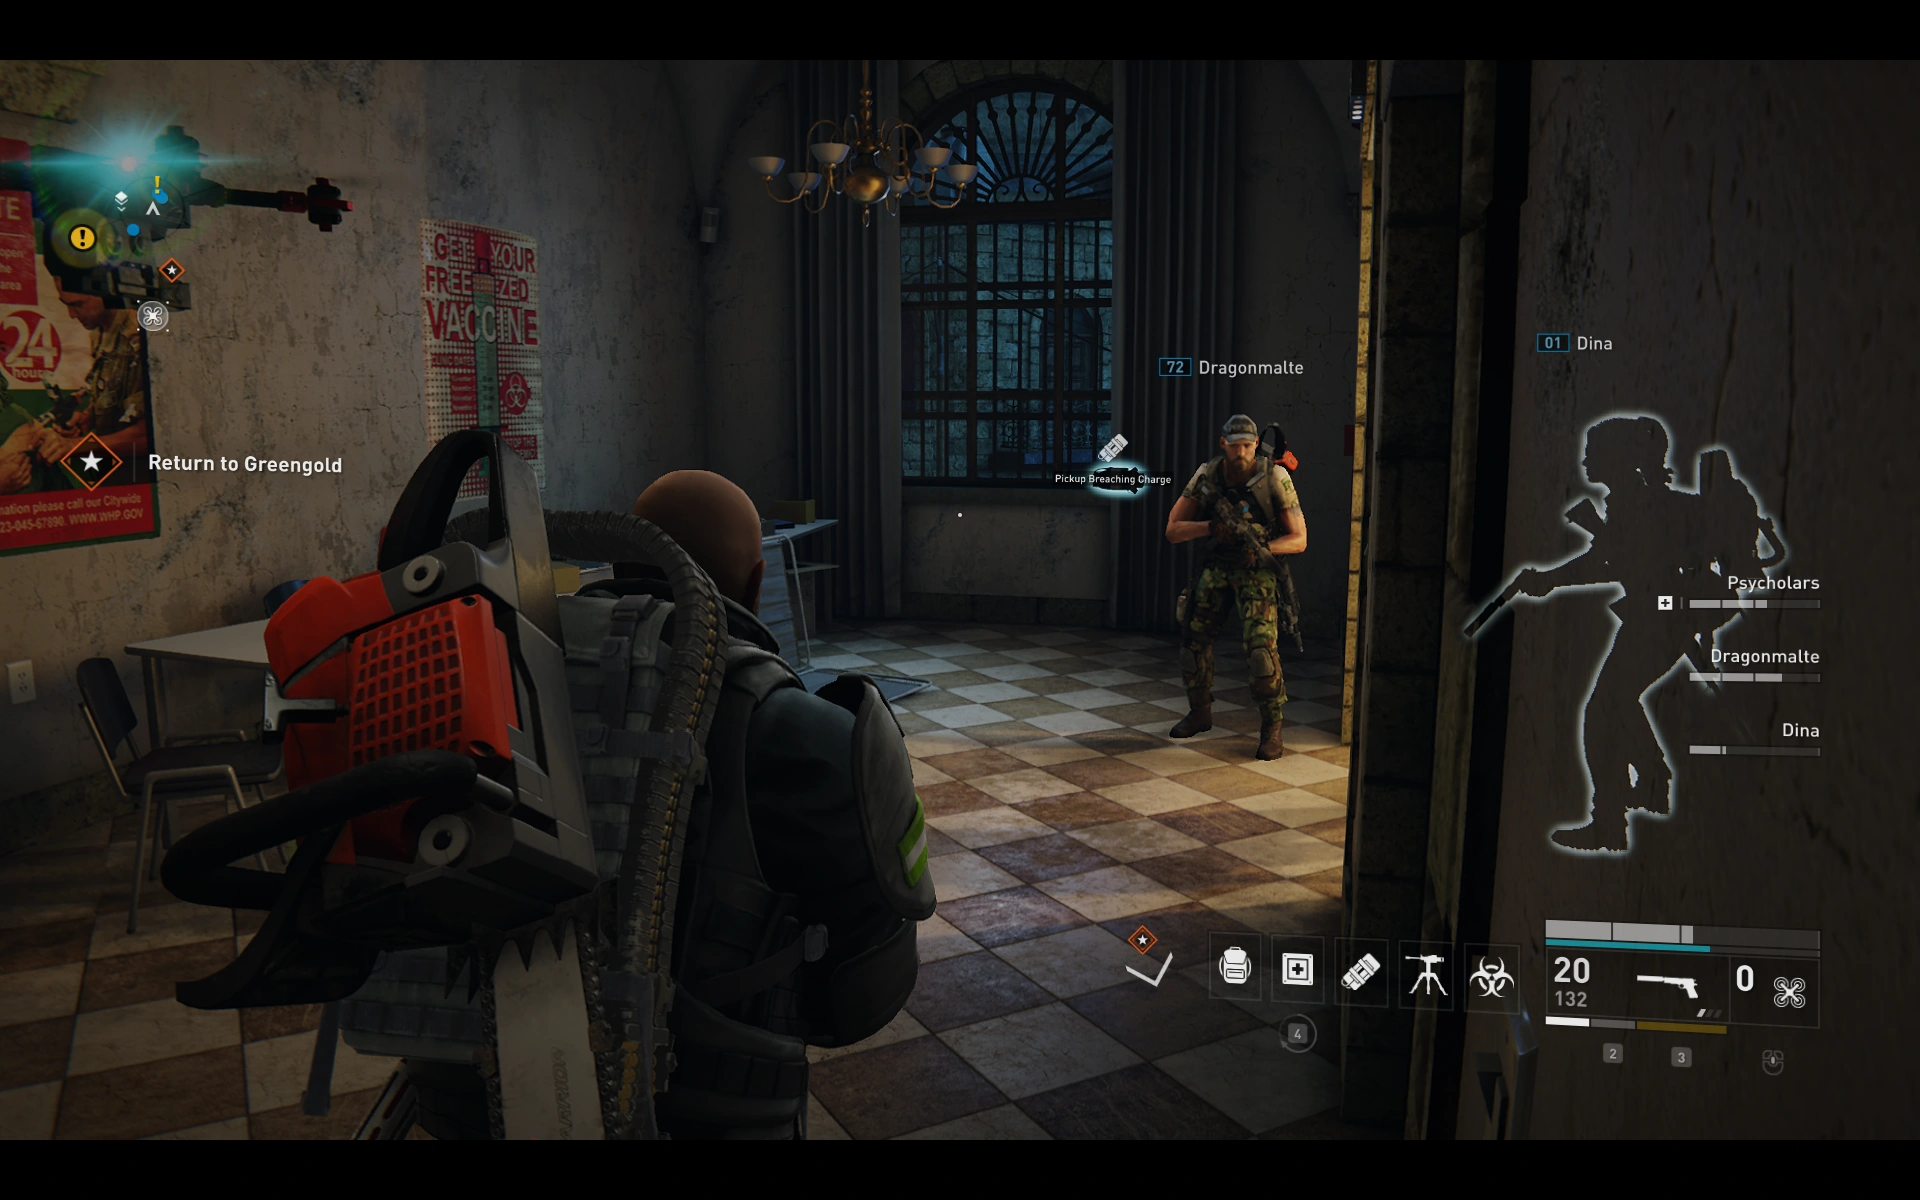
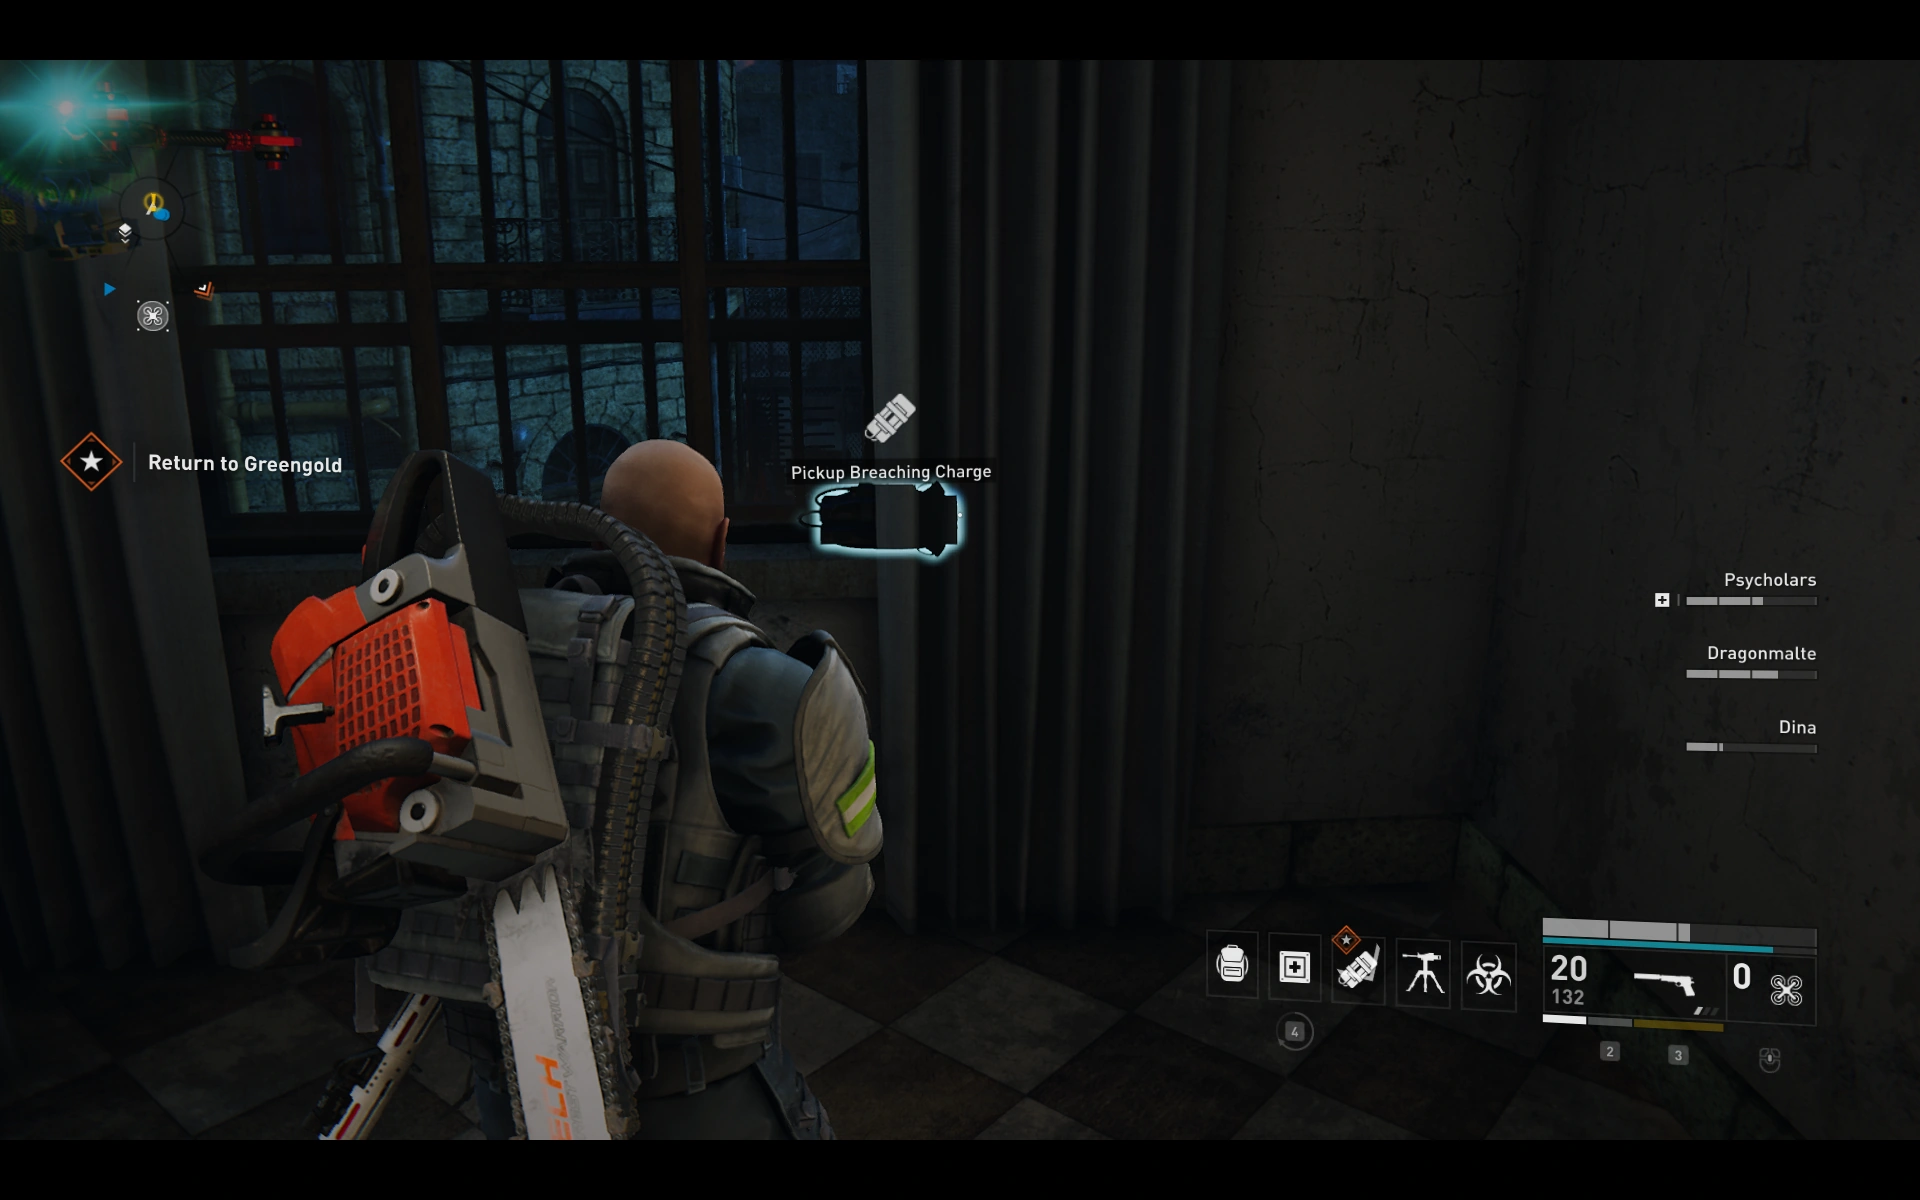
Location 5: ![]()
While defending Greengold on the bottom floor below the left staircase.
Location 6: ![]()
Location 7: ![]()
Location 8: ![]()
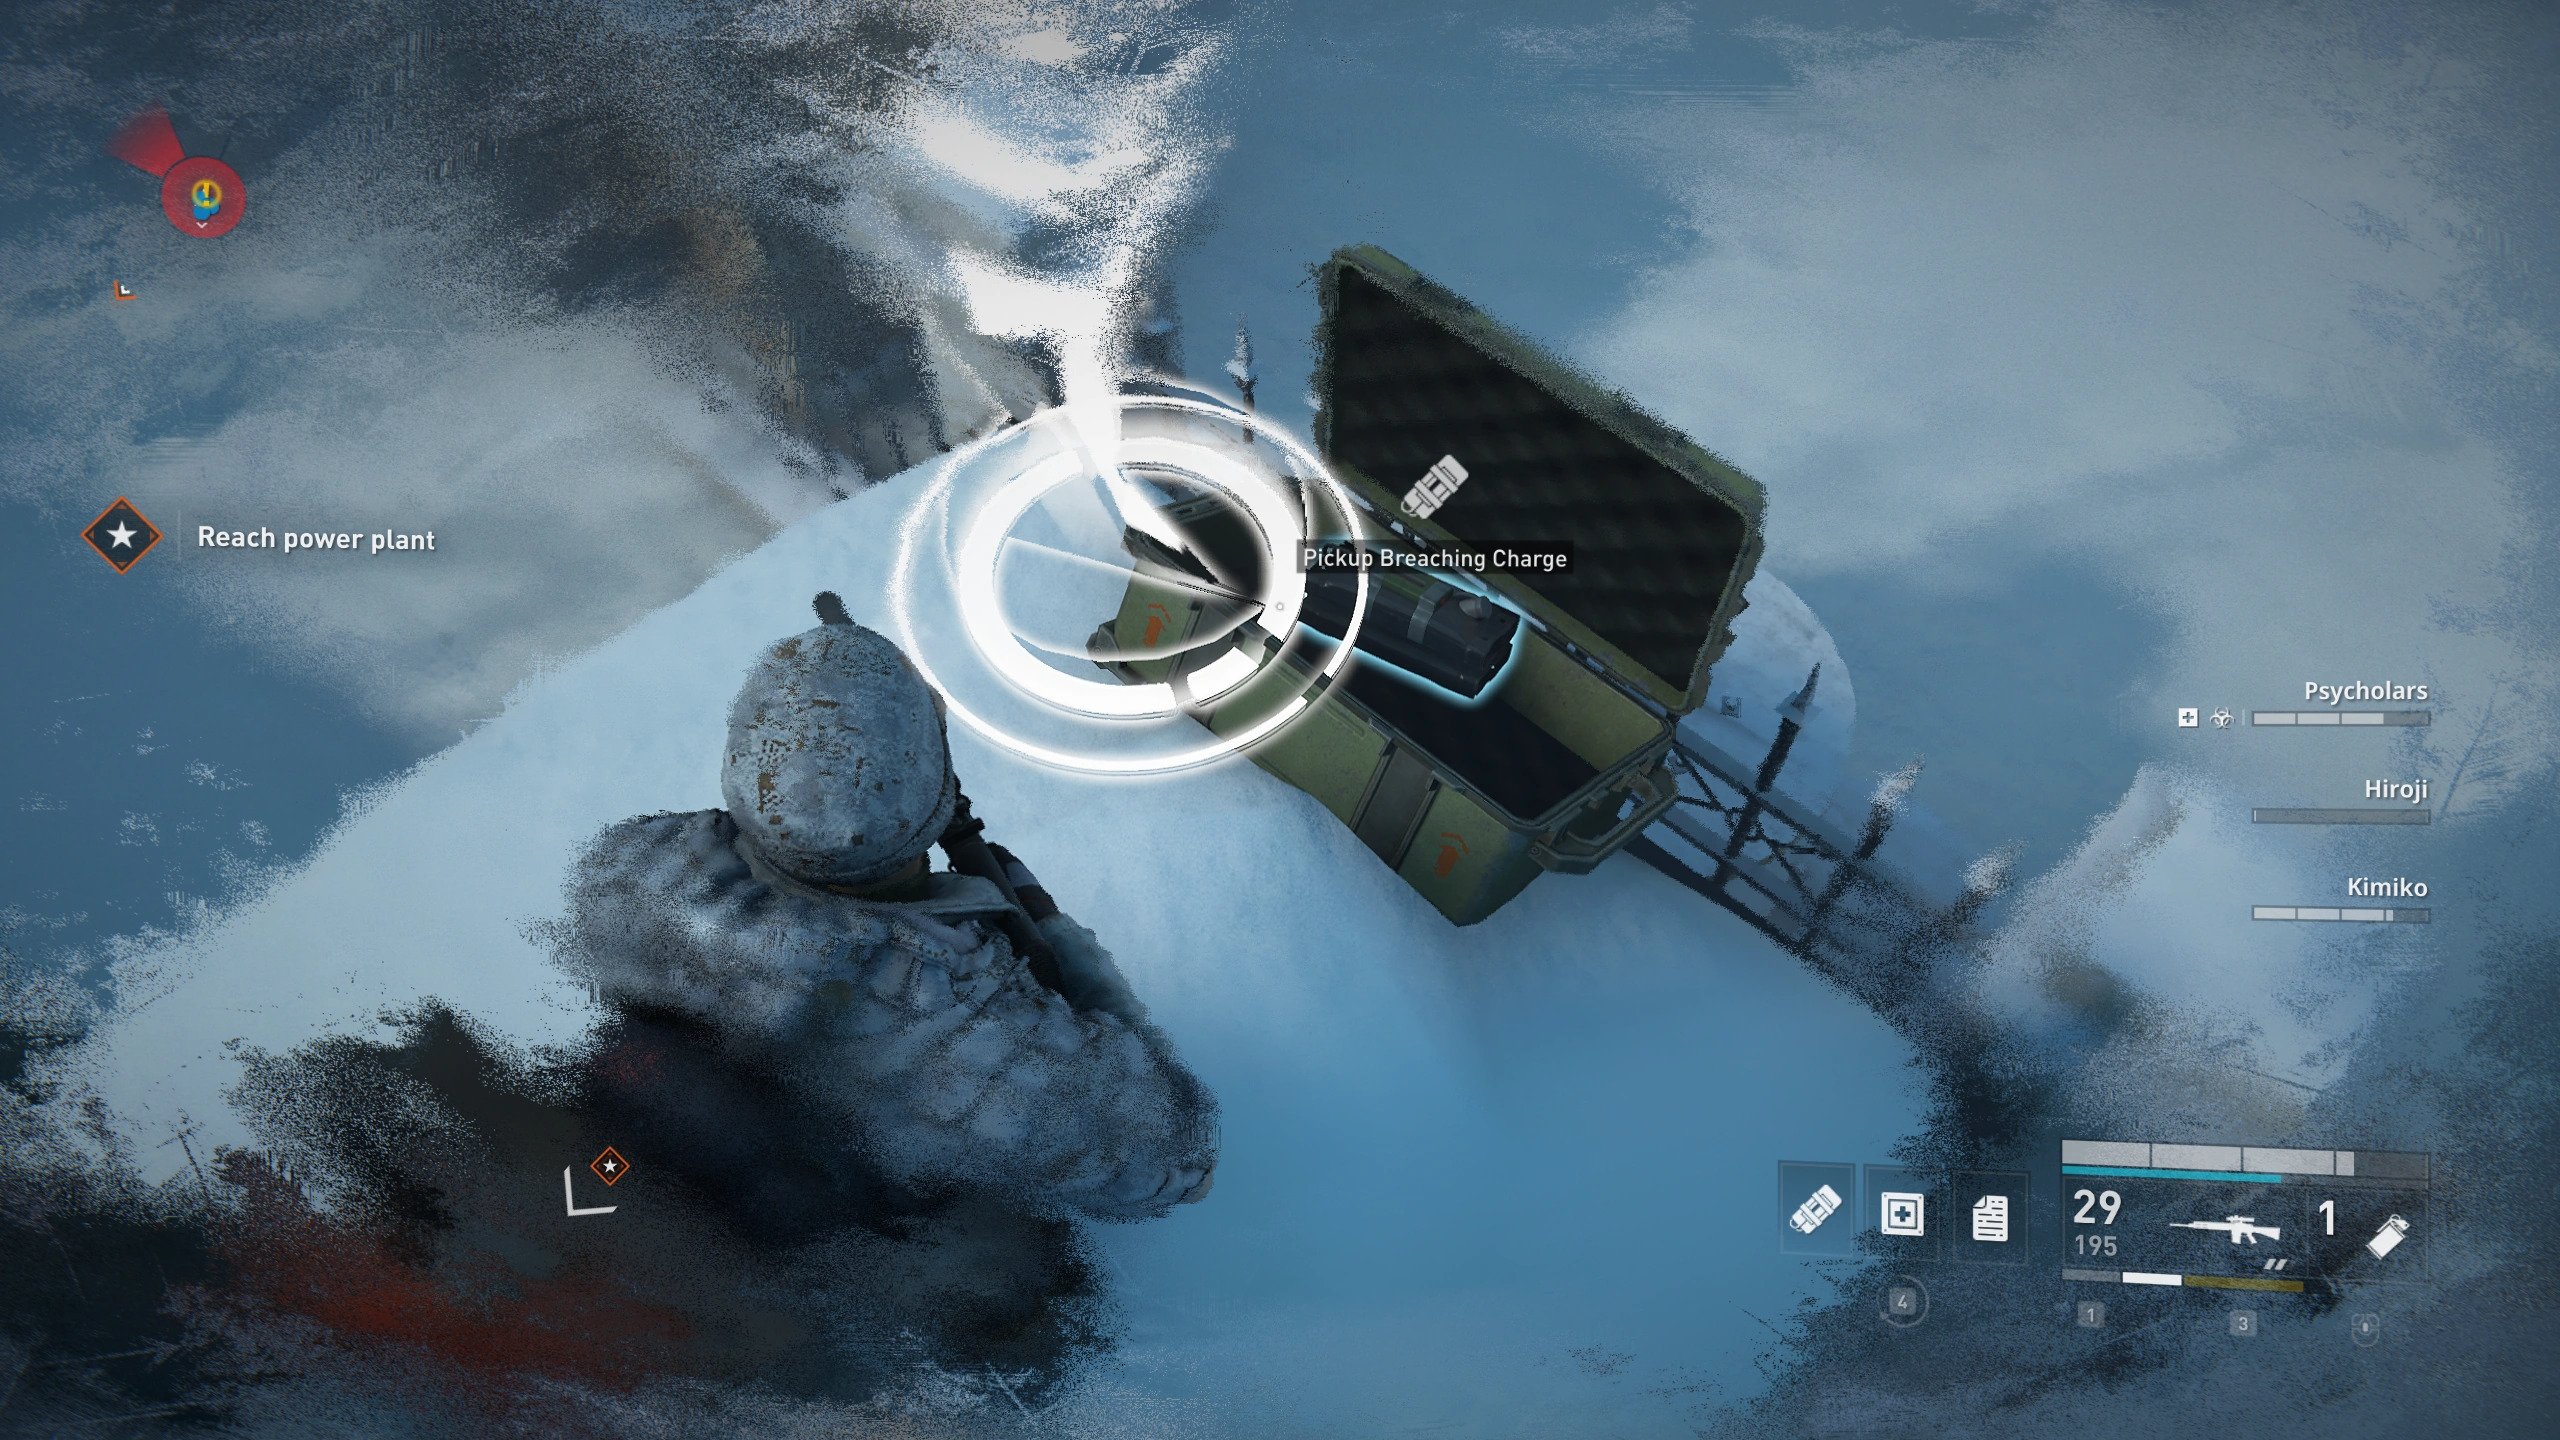
Moscow[]
Chapter 1: A Sign from Above[]
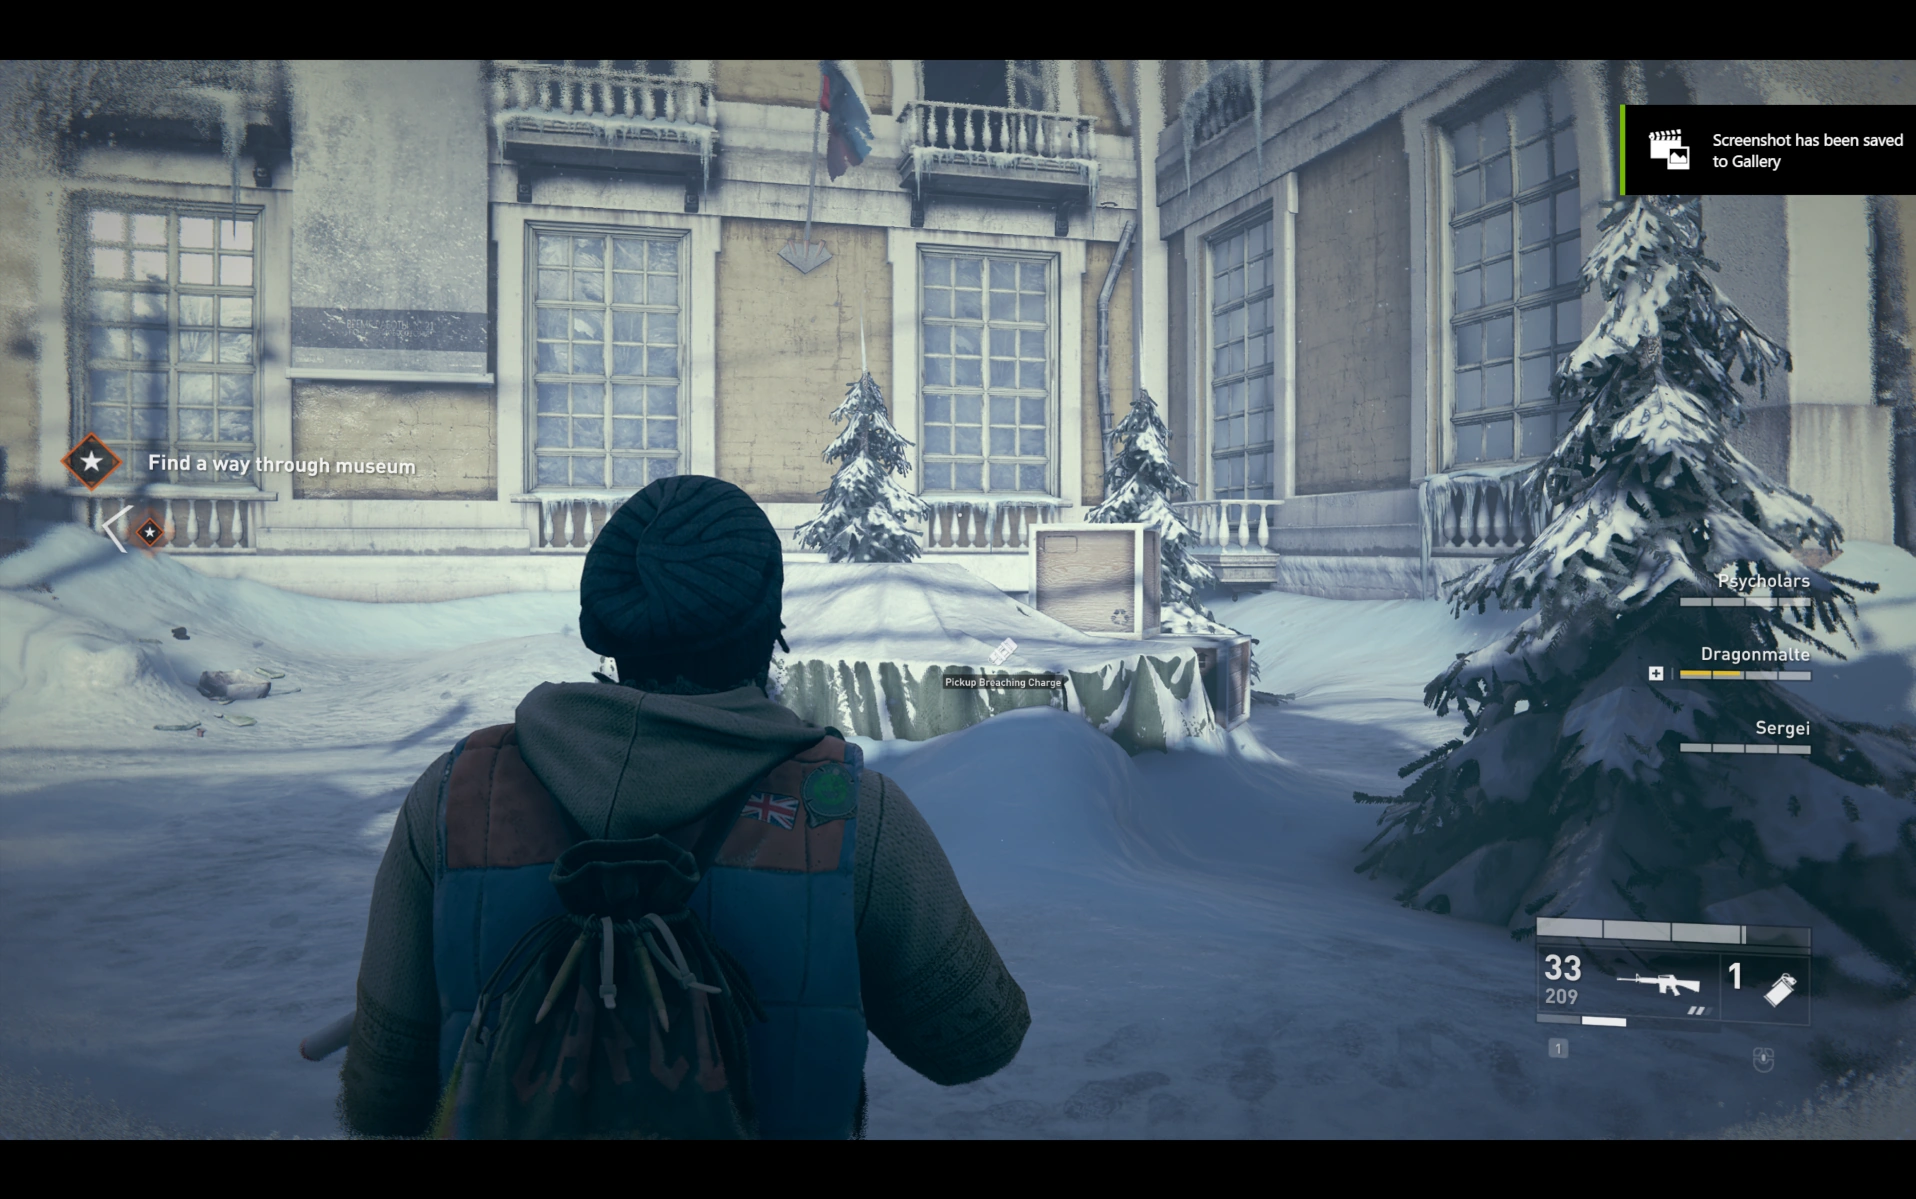
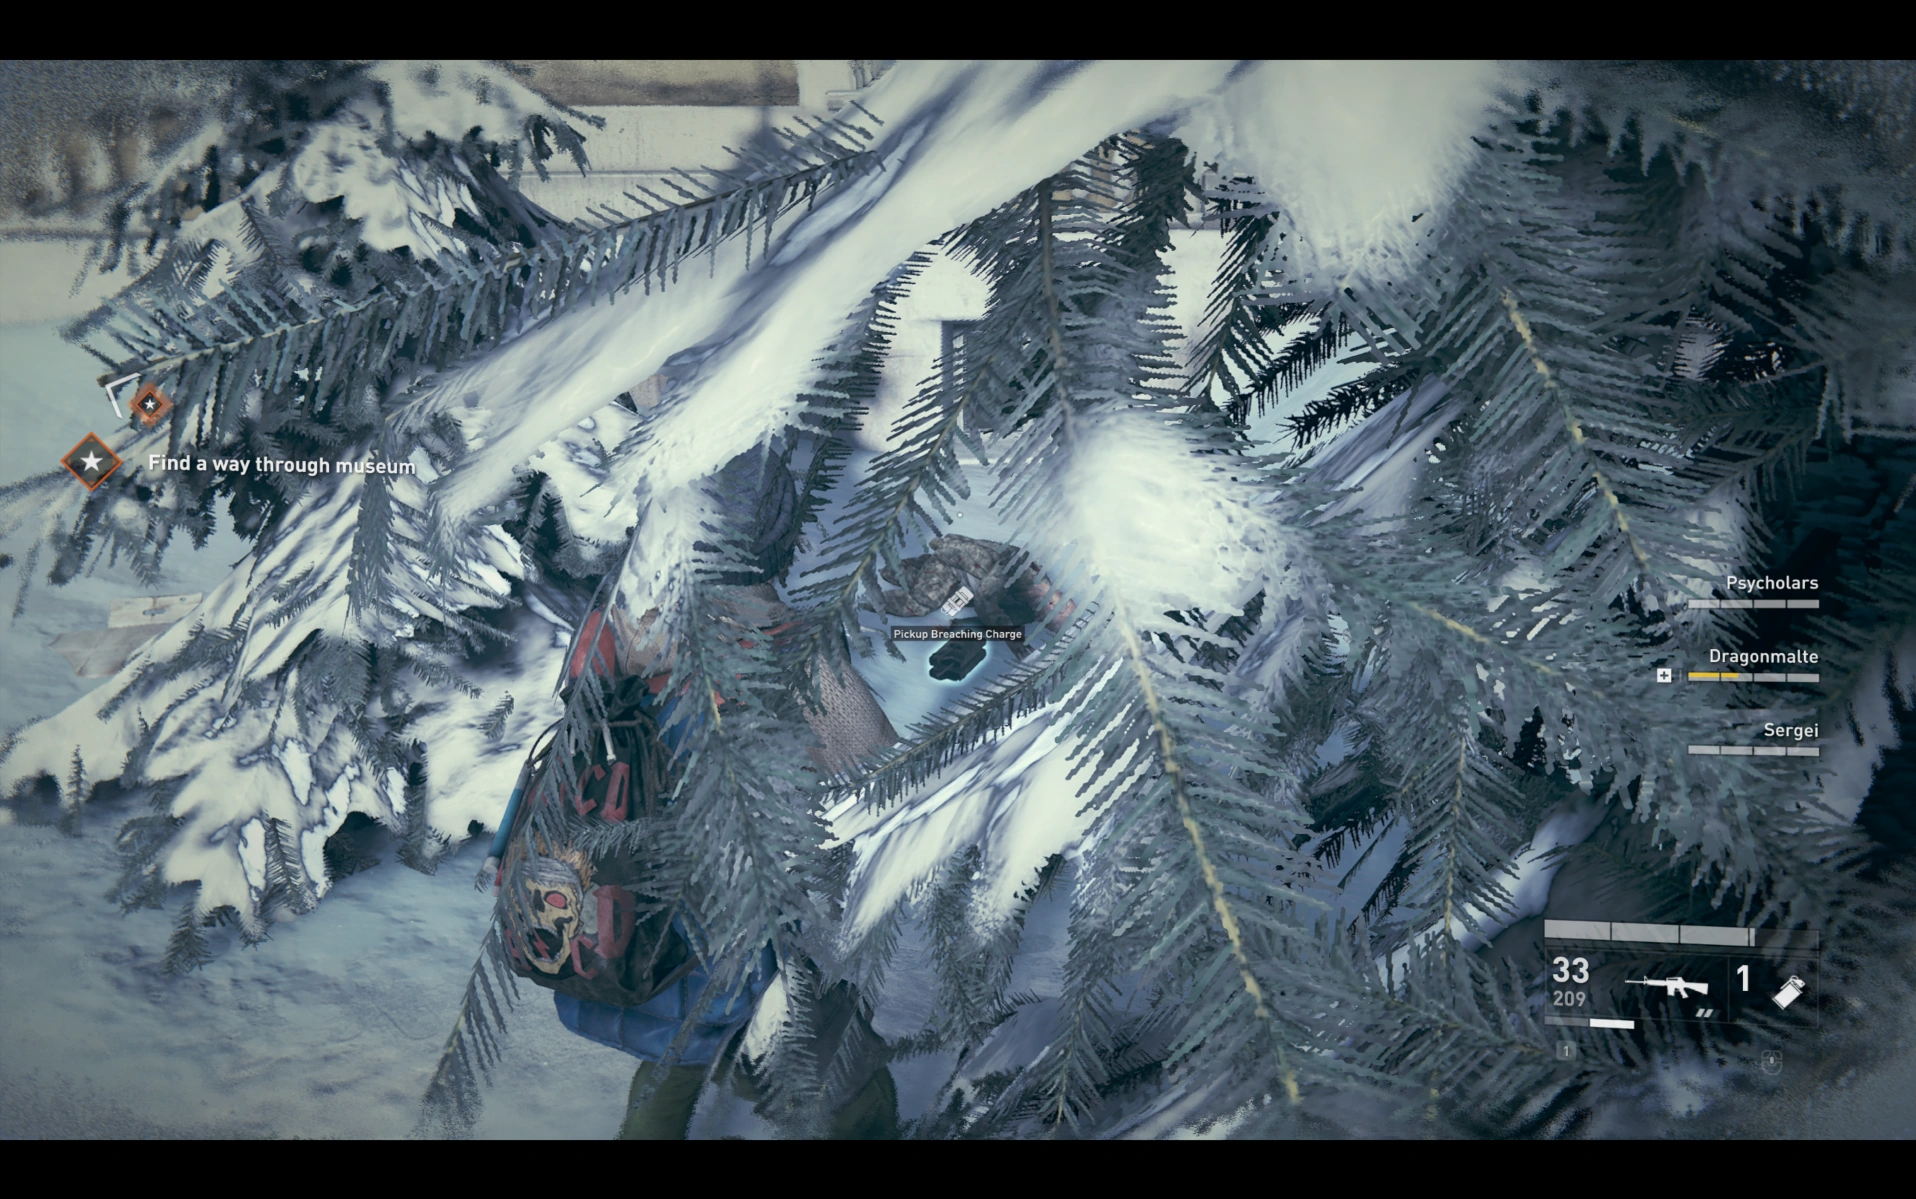
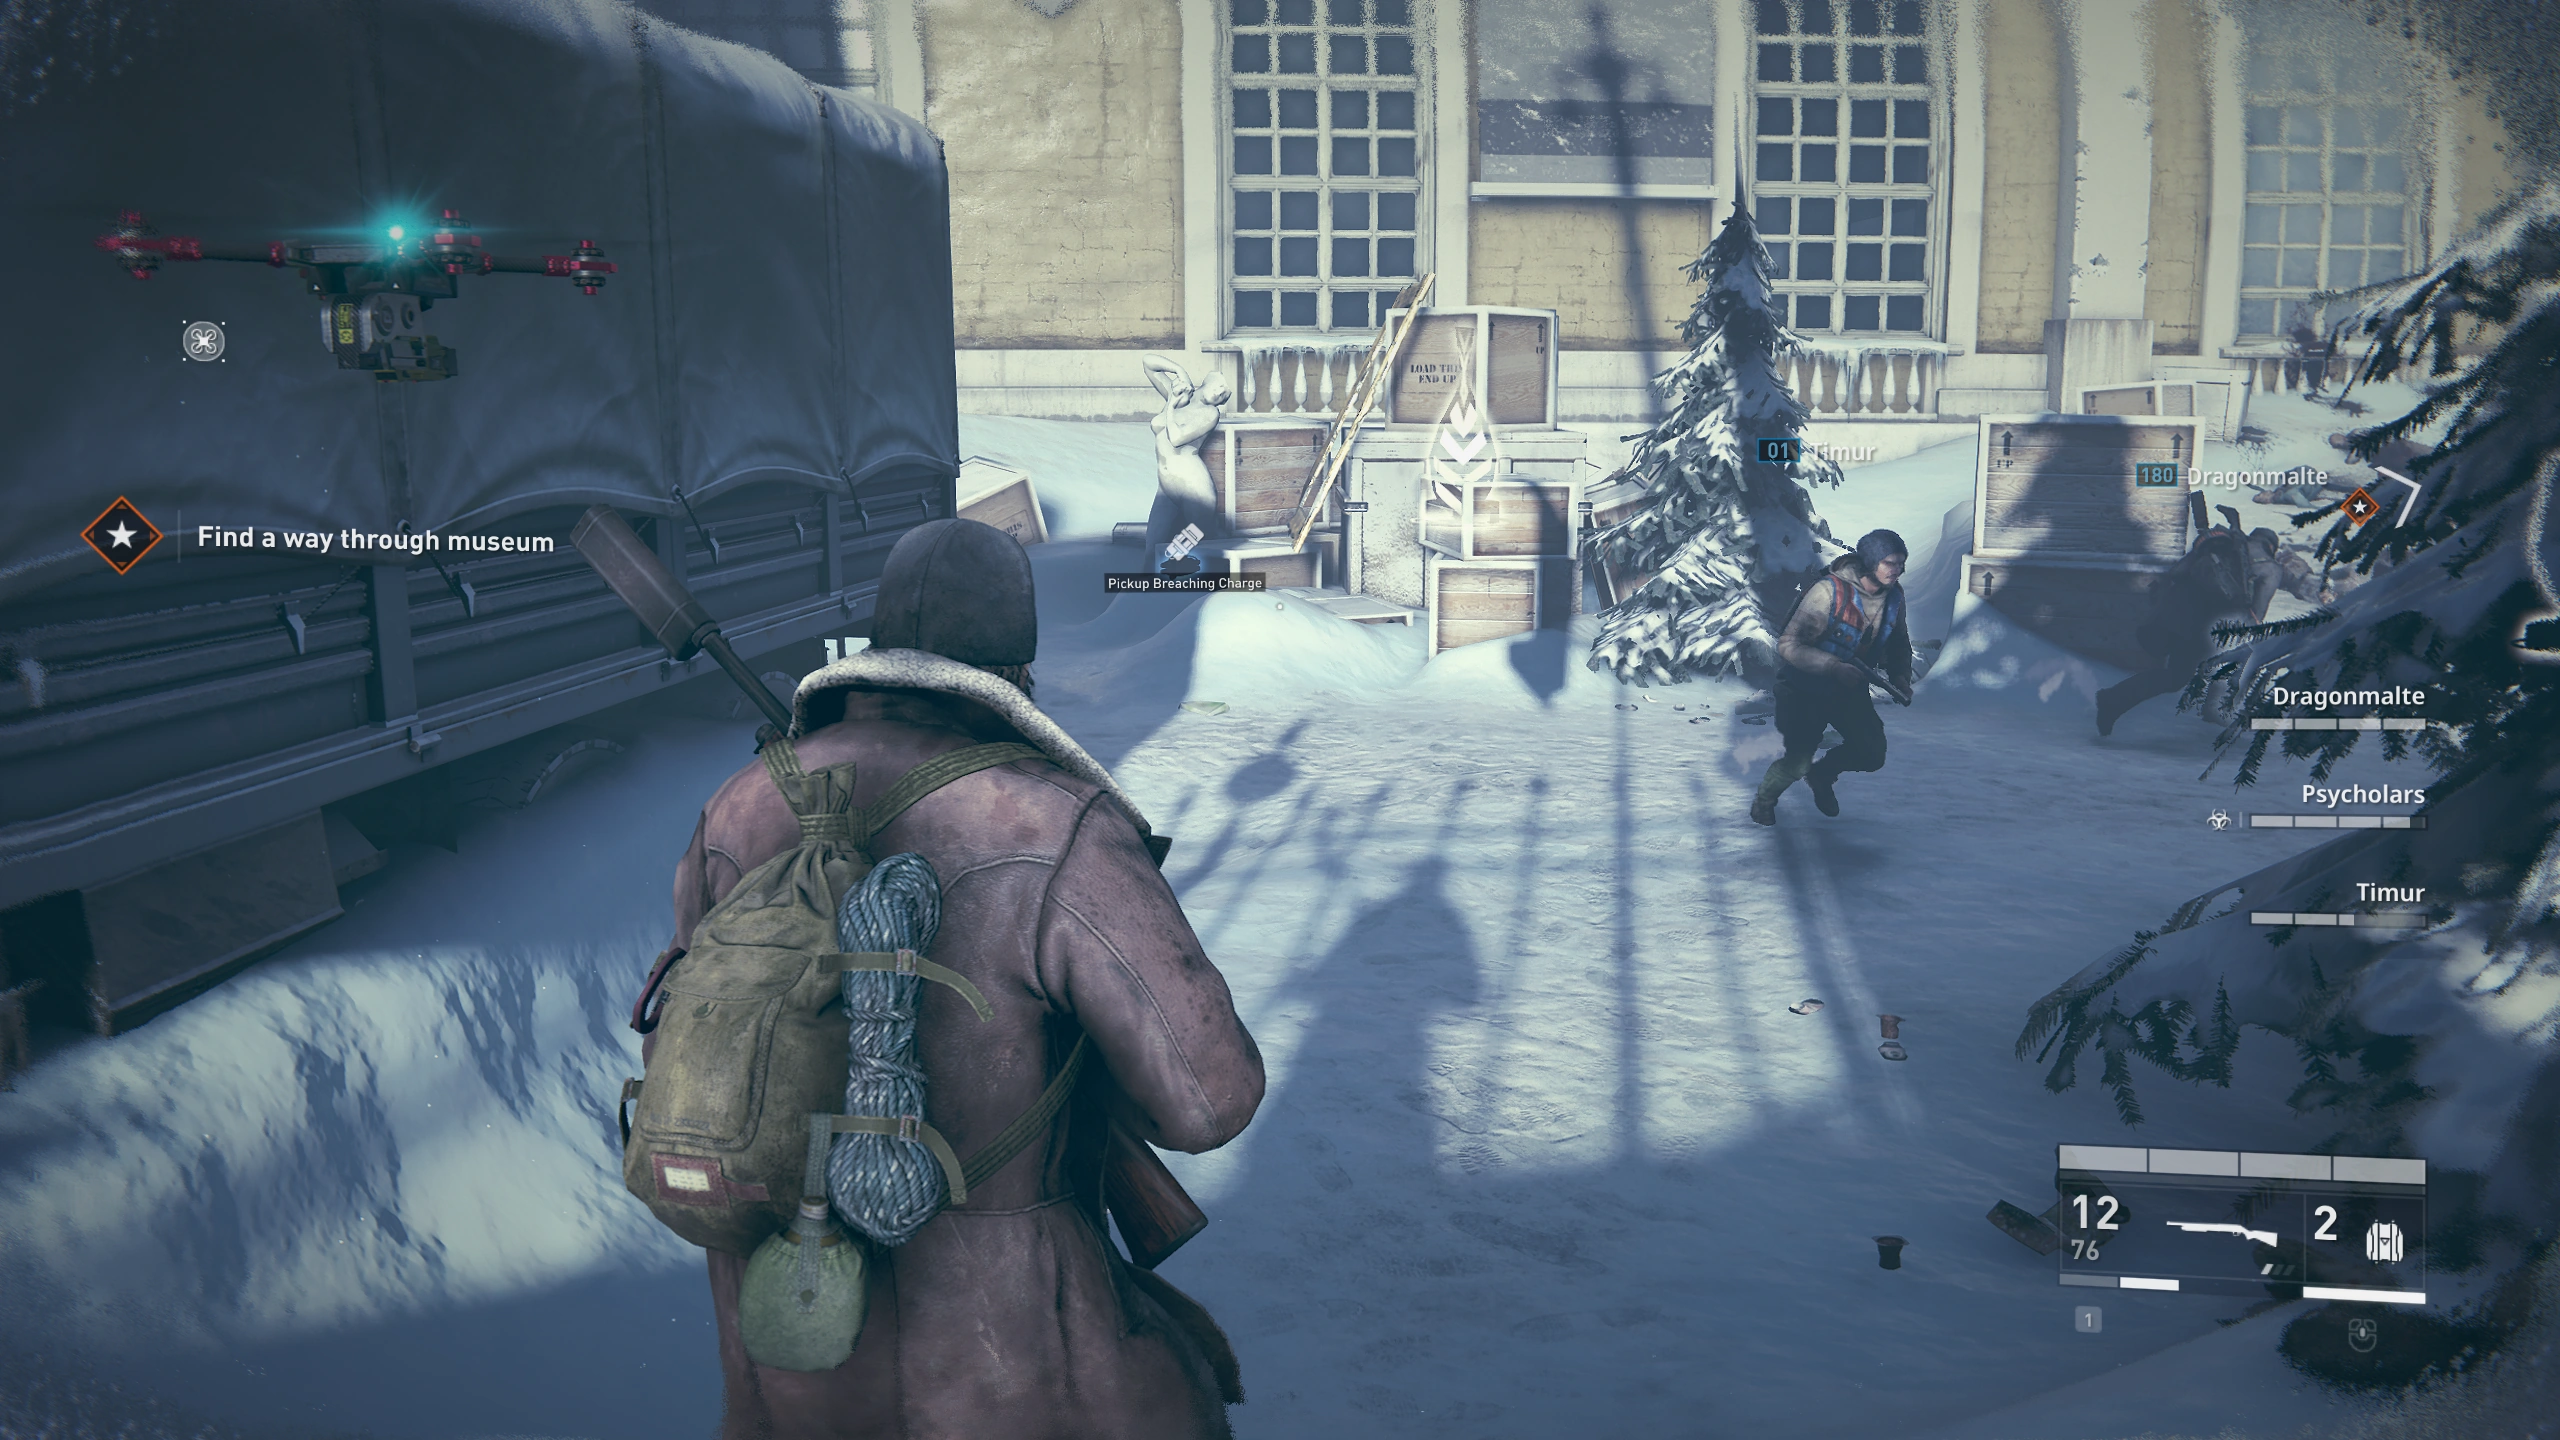
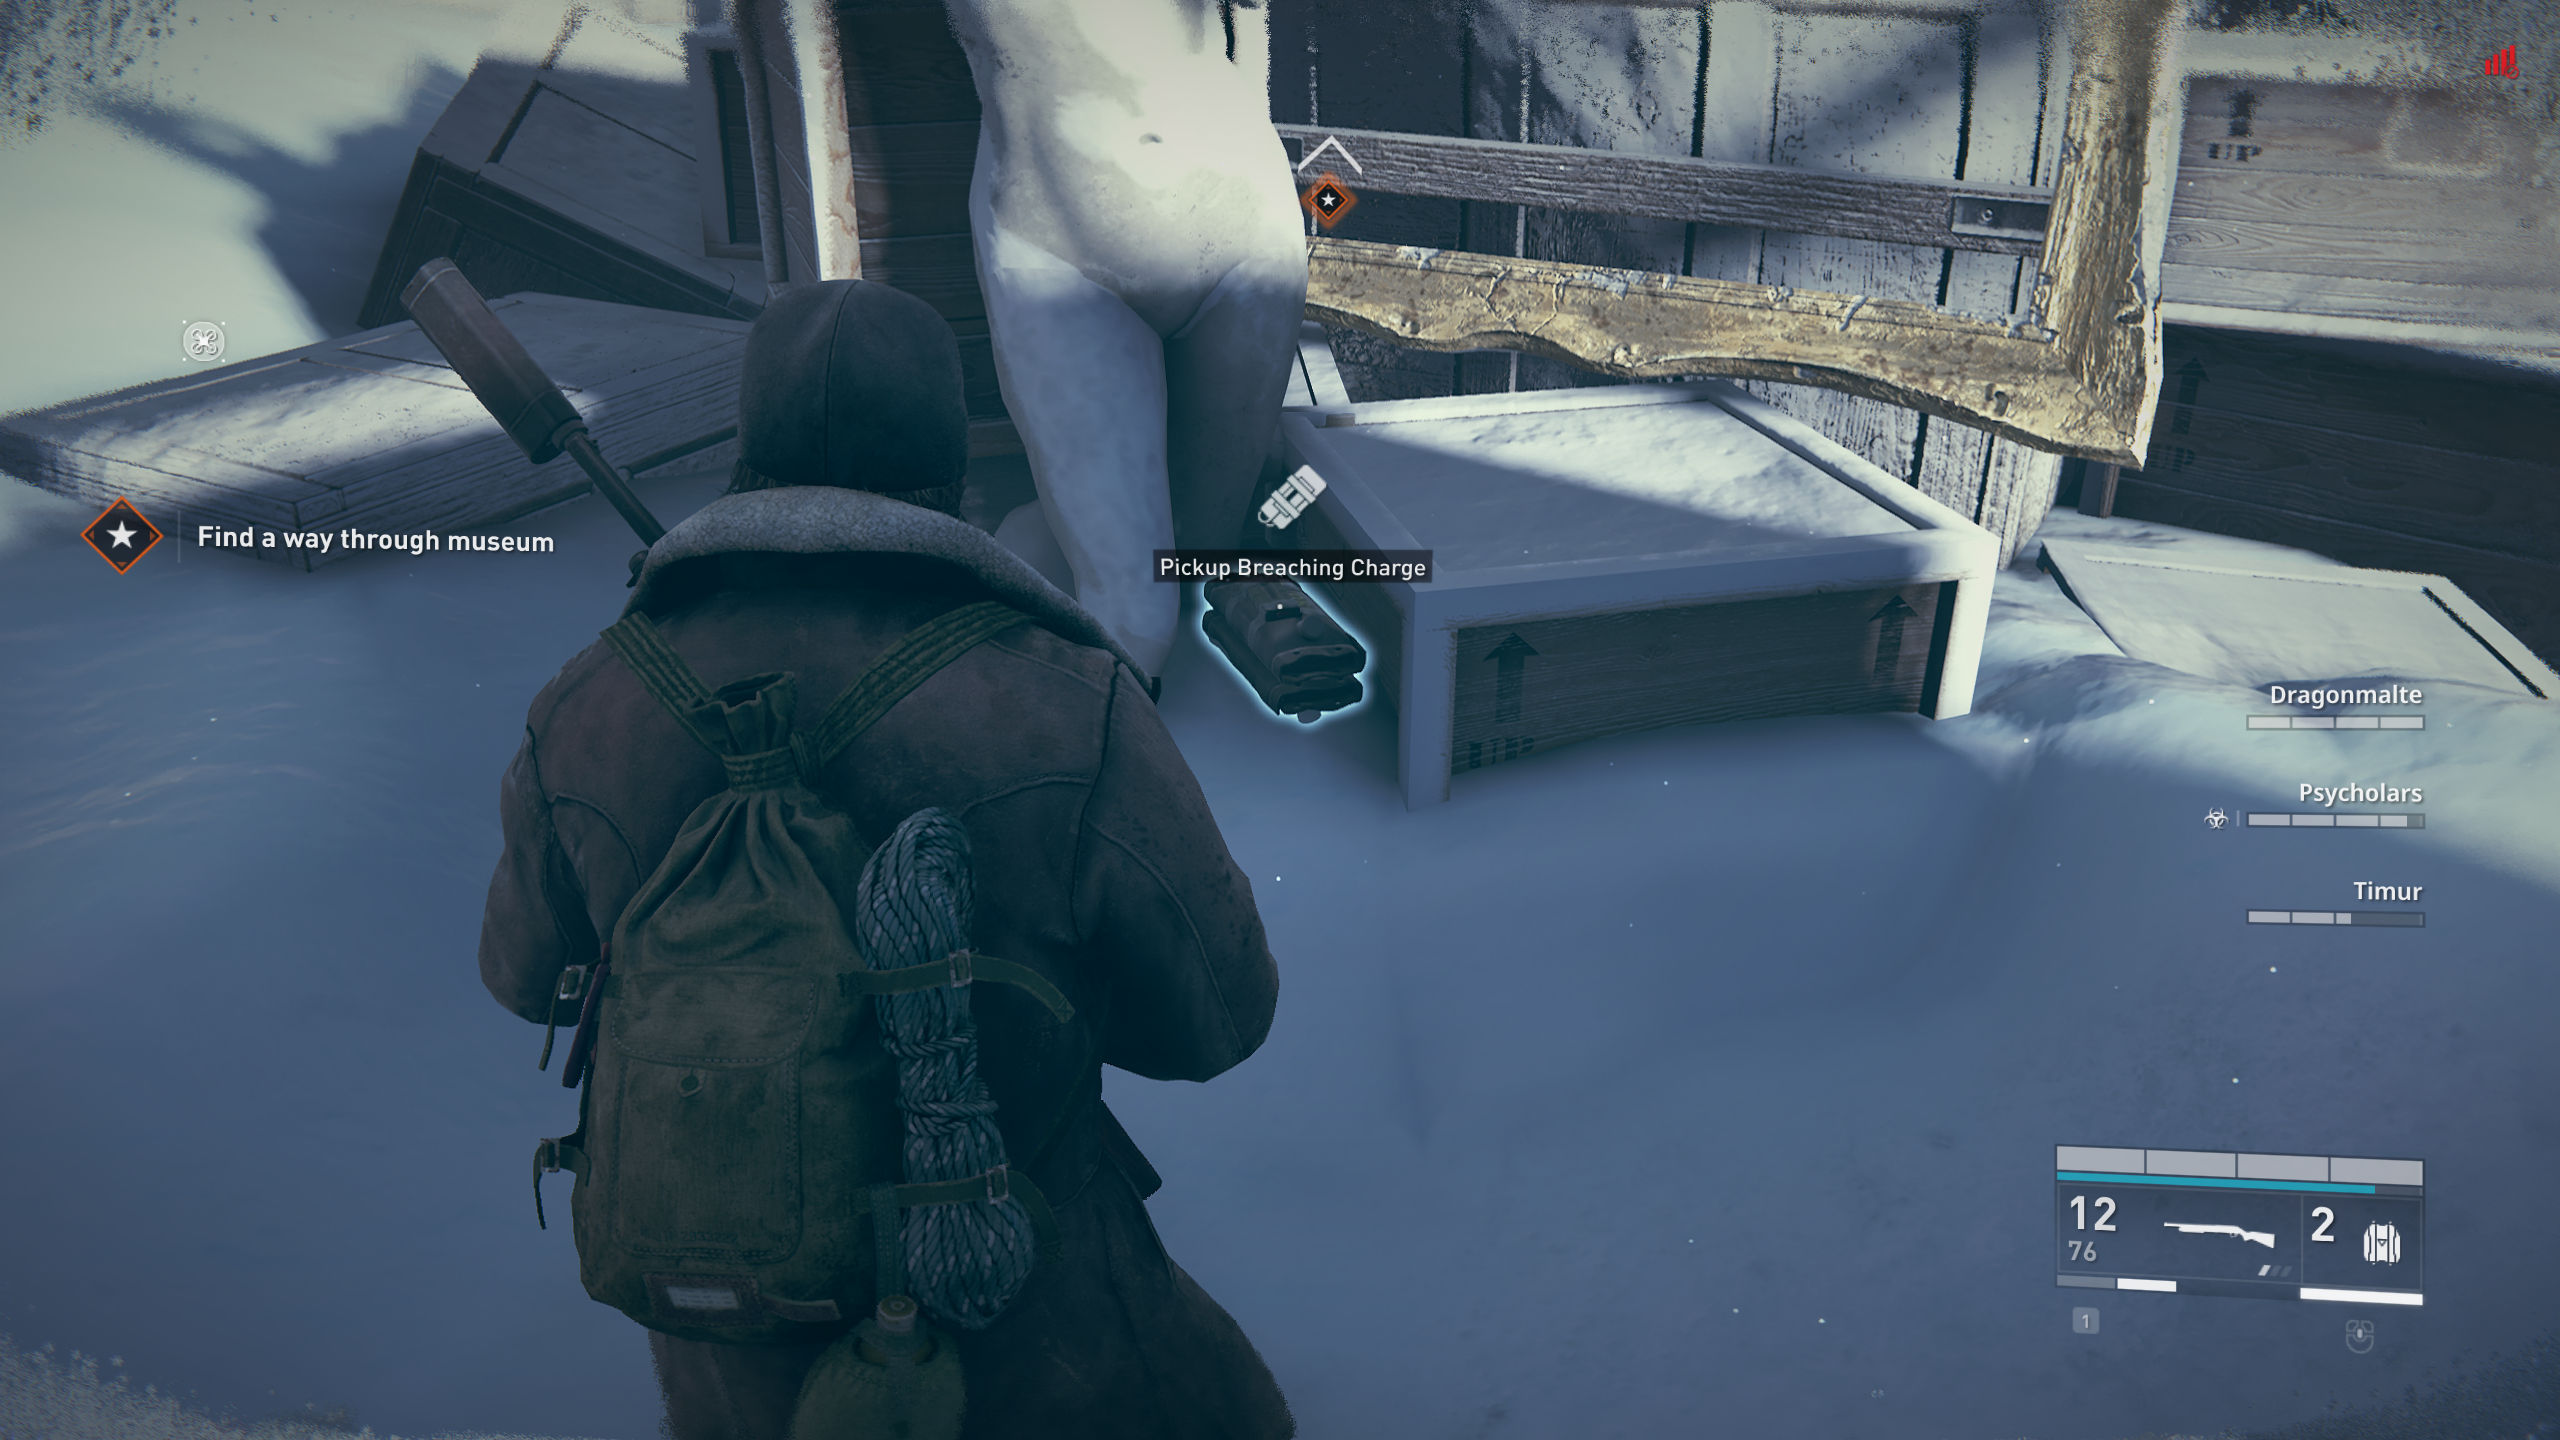
Location 1: ![]()
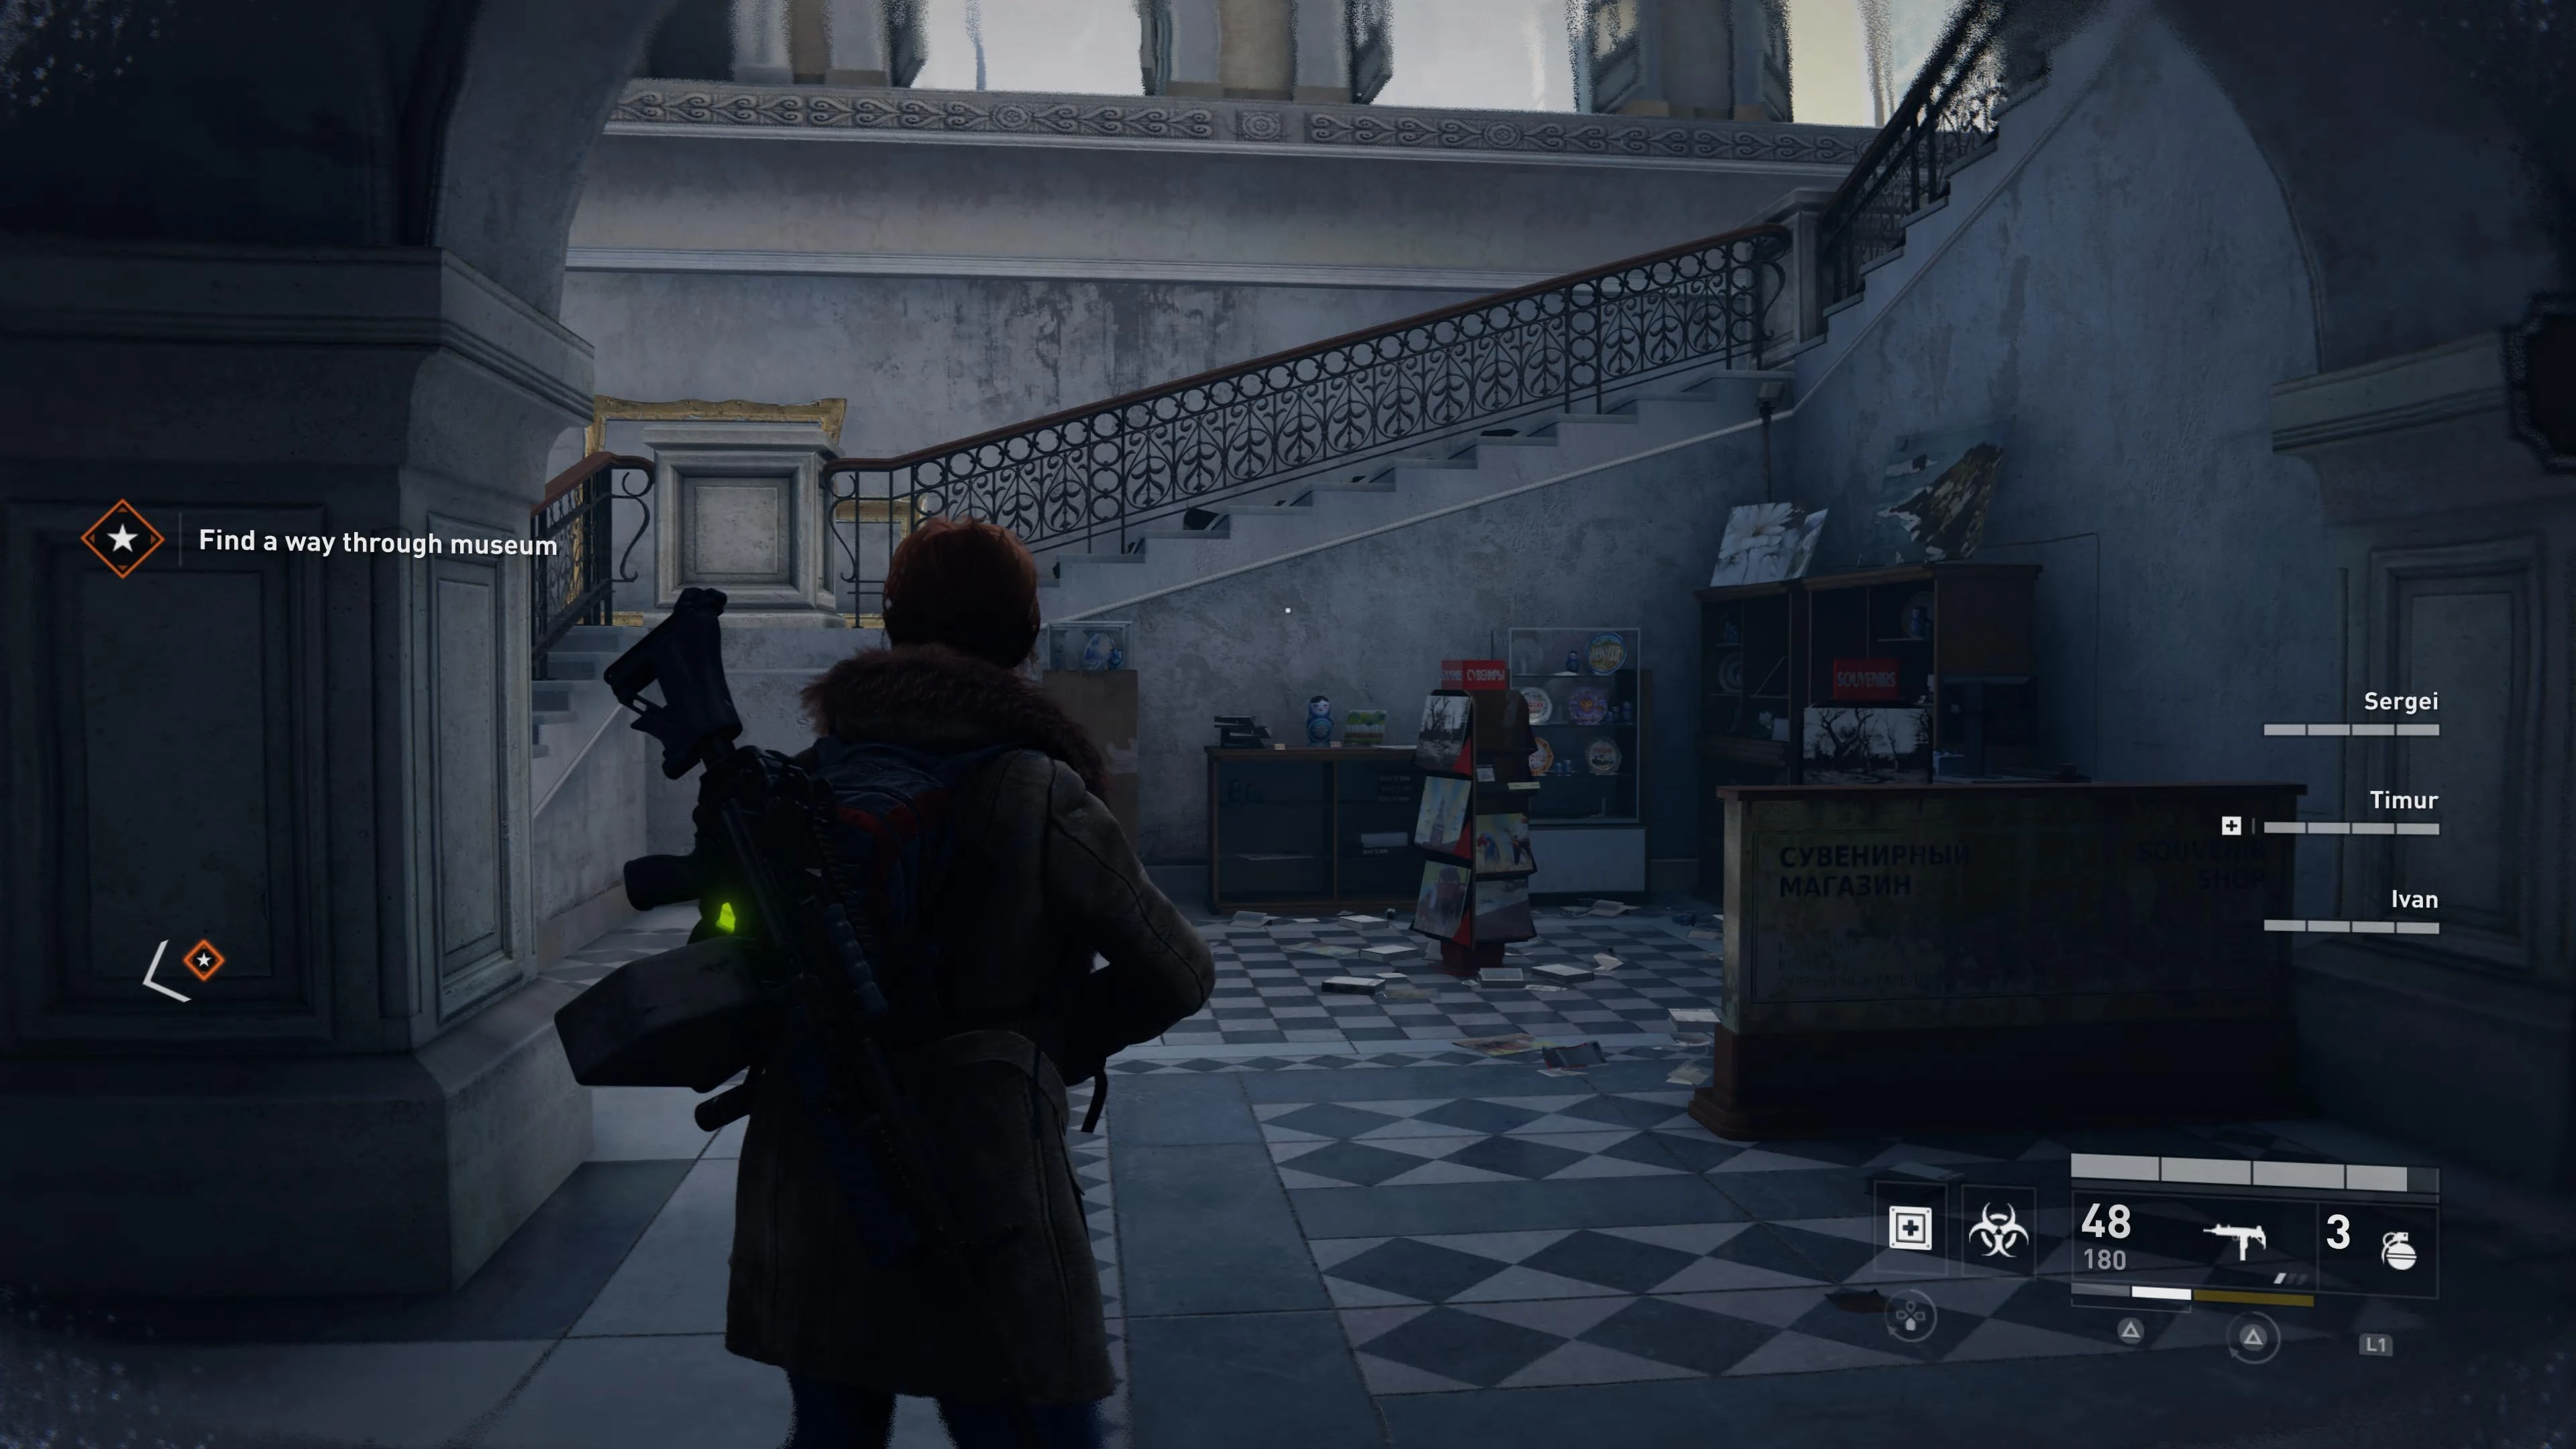
In front of the museum, on the right side, next to the killed soldier.
Location 2: ![]()
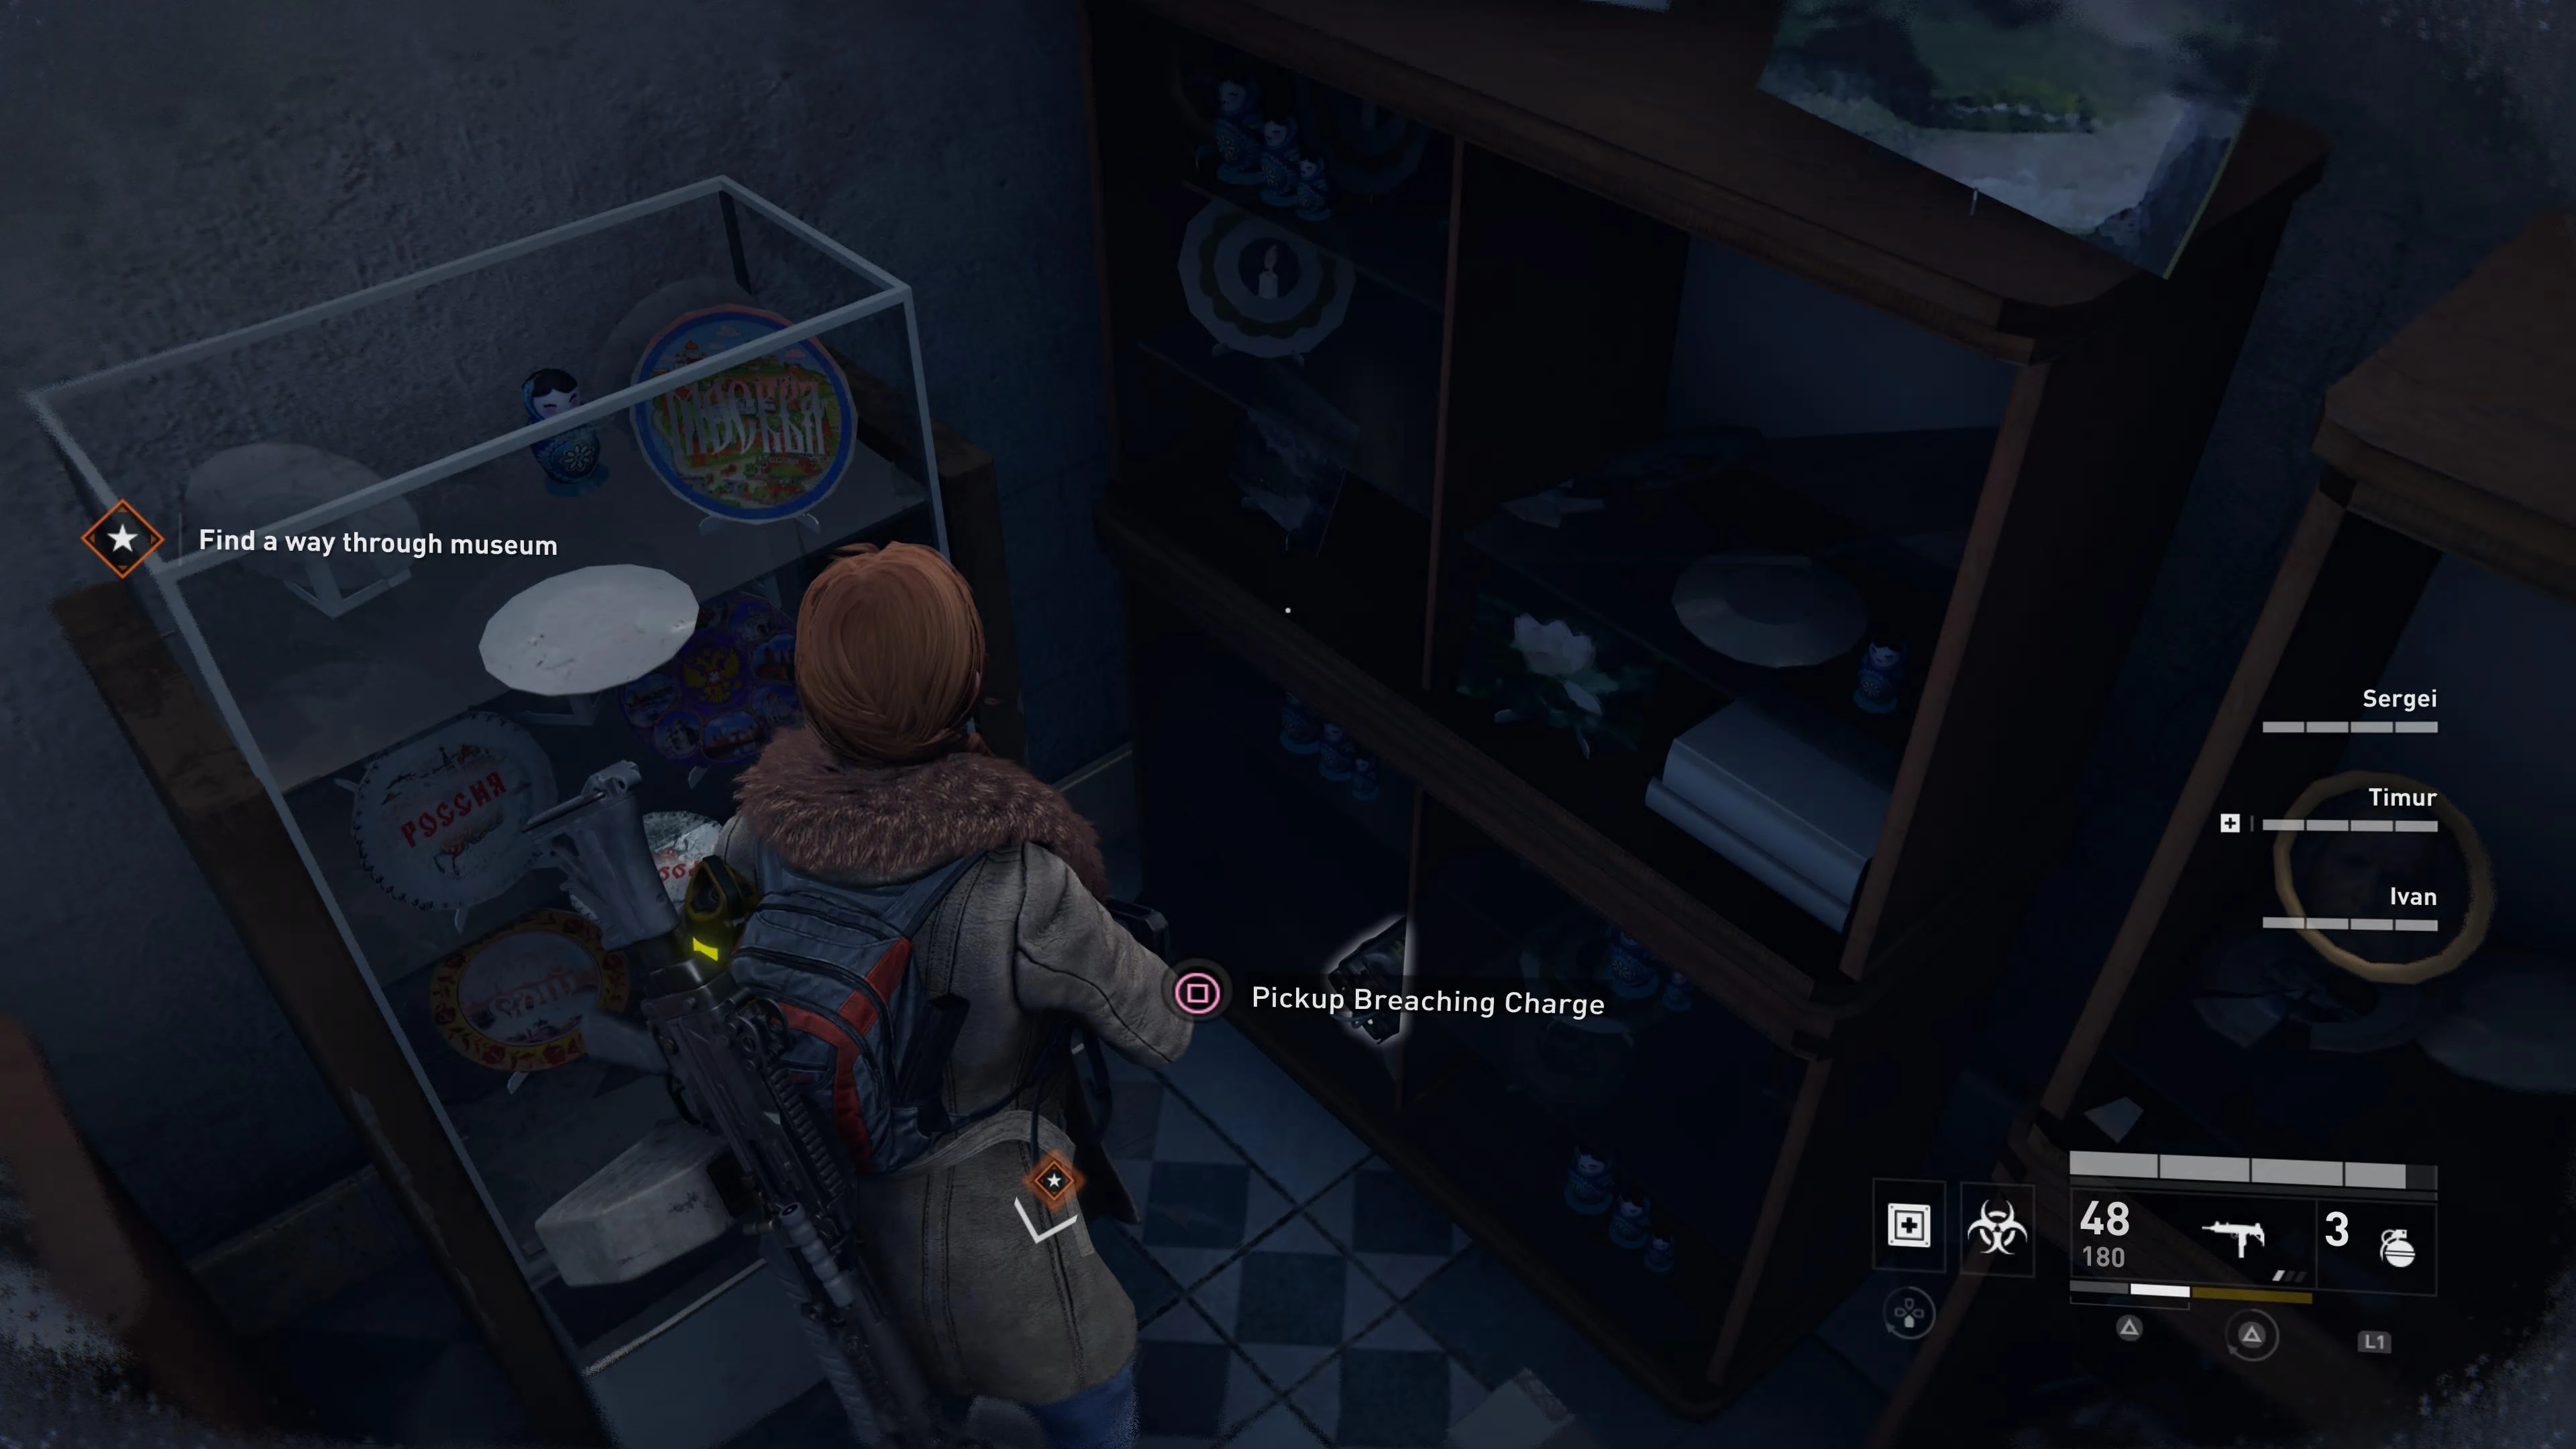
Also in front of the museum, on the left side.
Location 3: ![]()
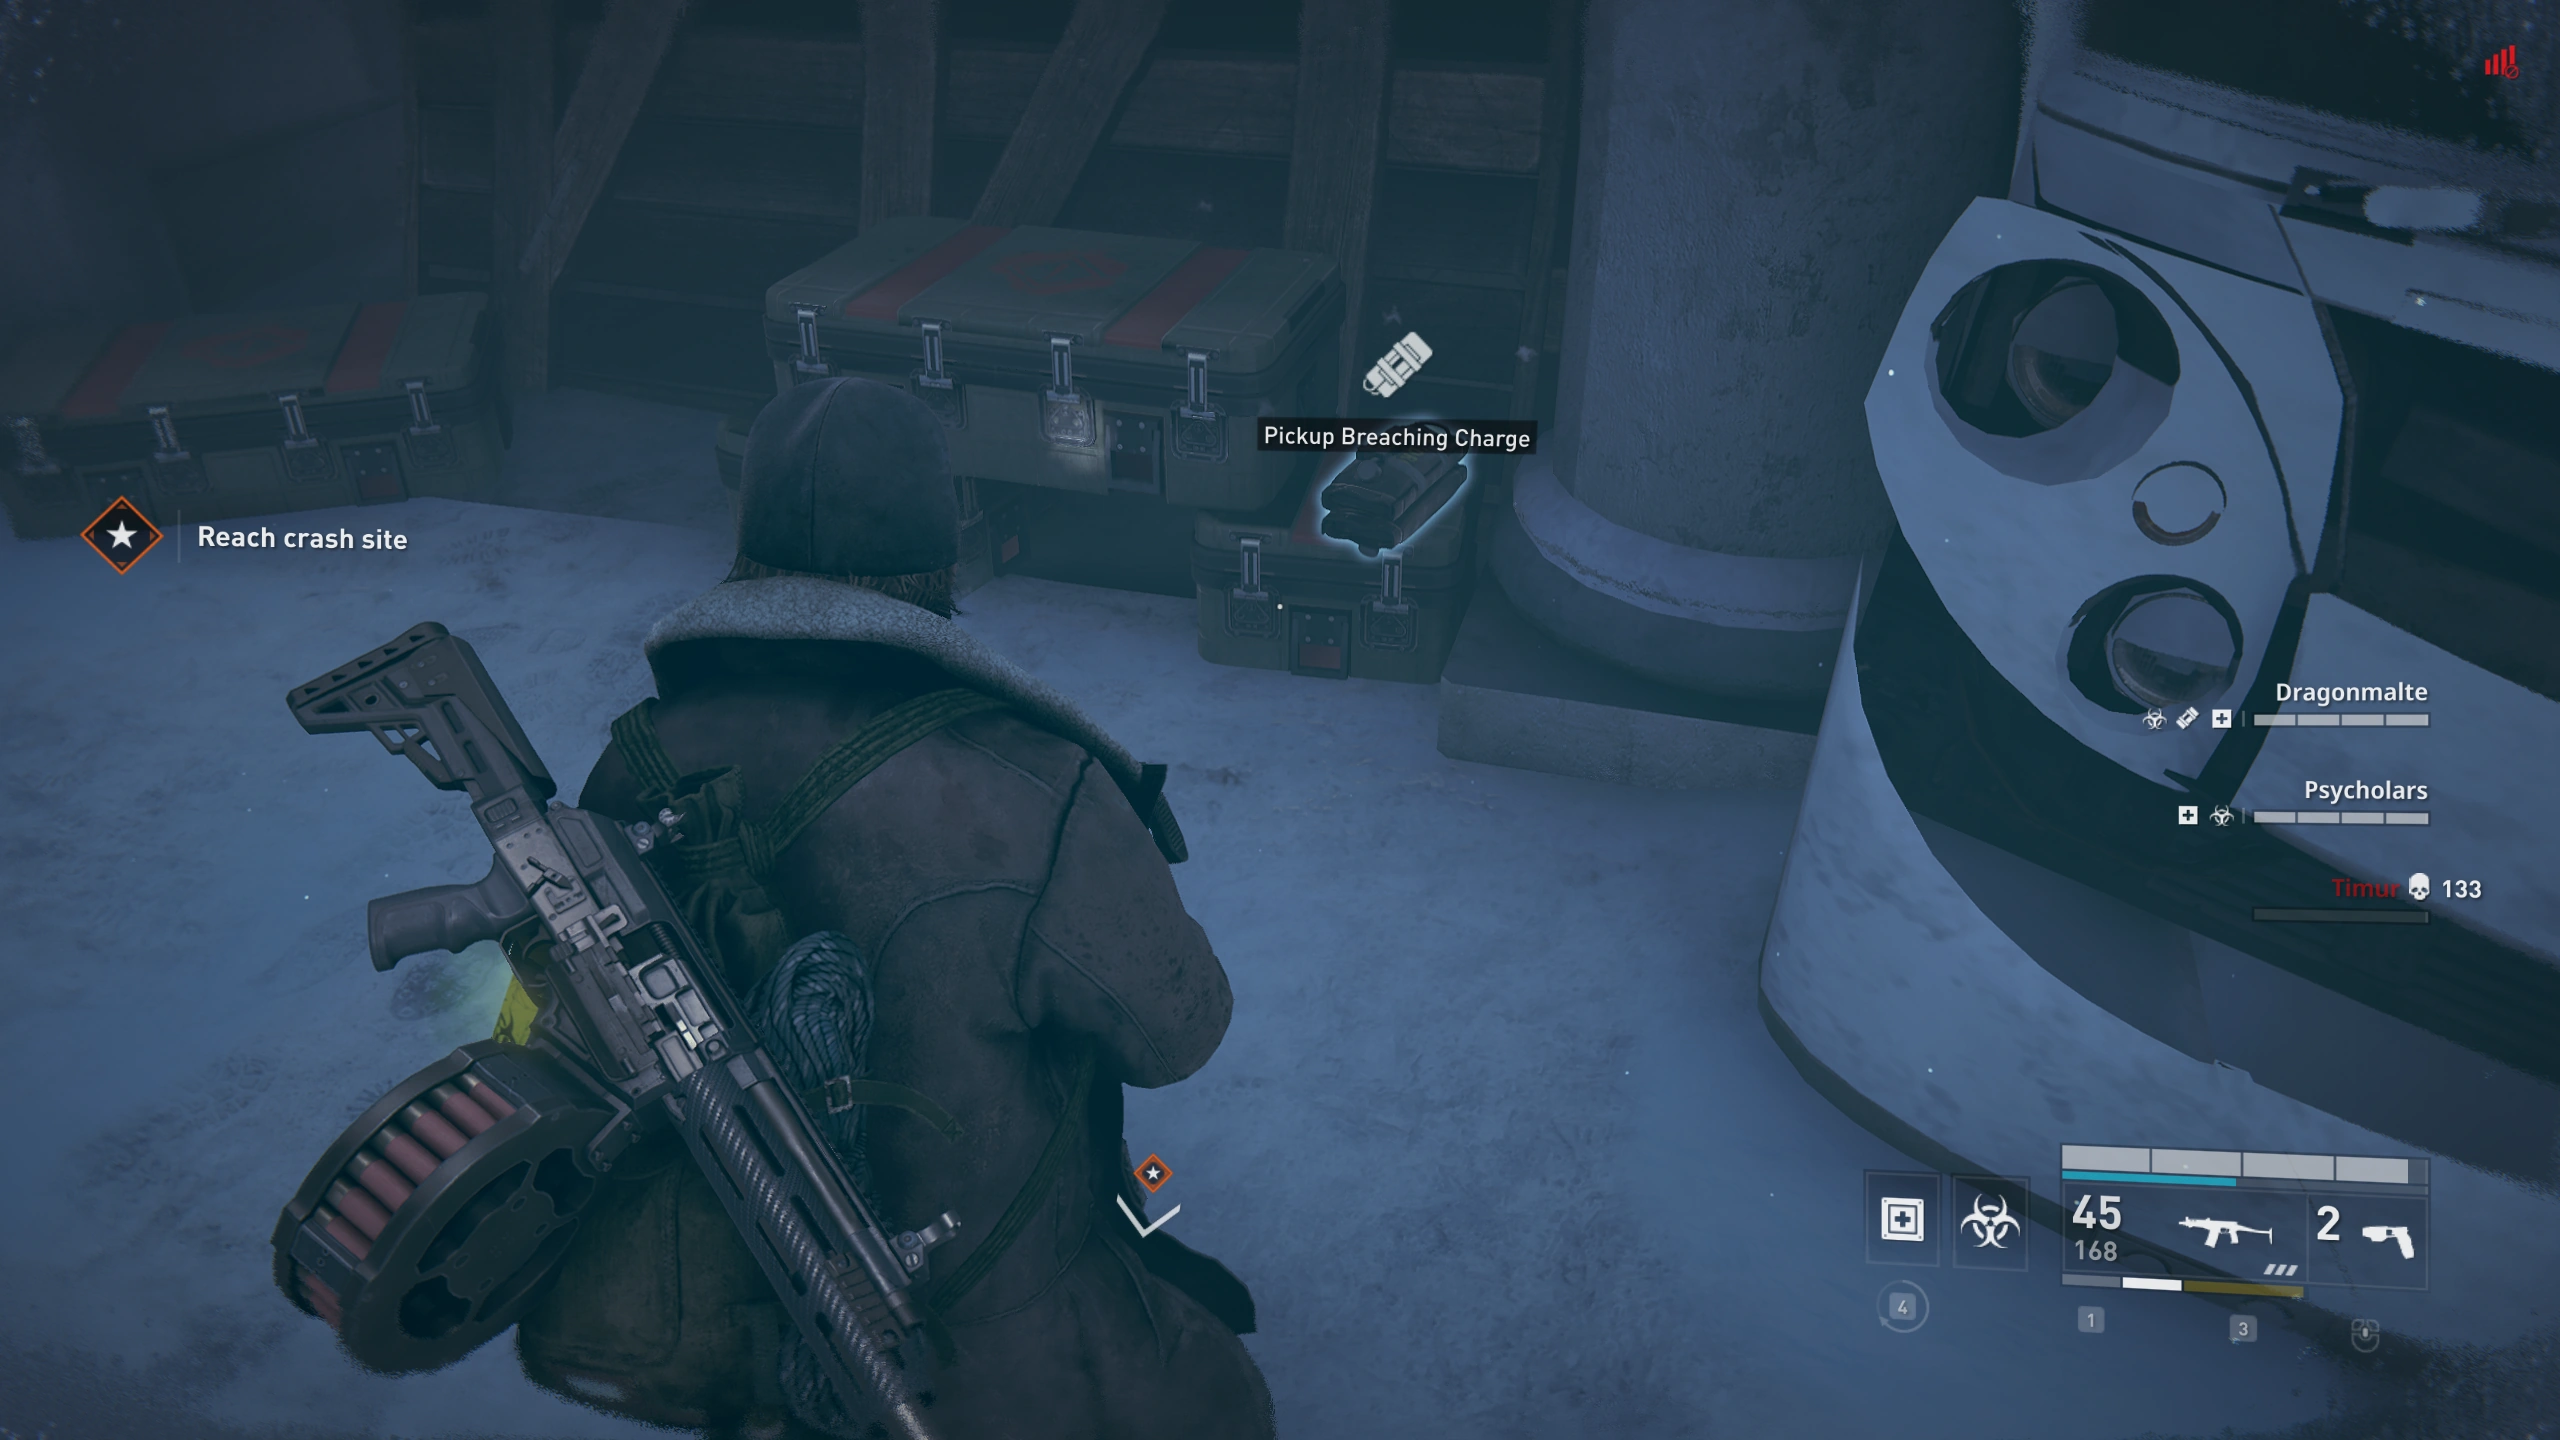
In the room on the right side, before you access the control panel. The charge is on the left on a box.
Location 4: ![]()
Before you go up the staircase, on the right, in the corner of the closet.
Location 5: ![]()
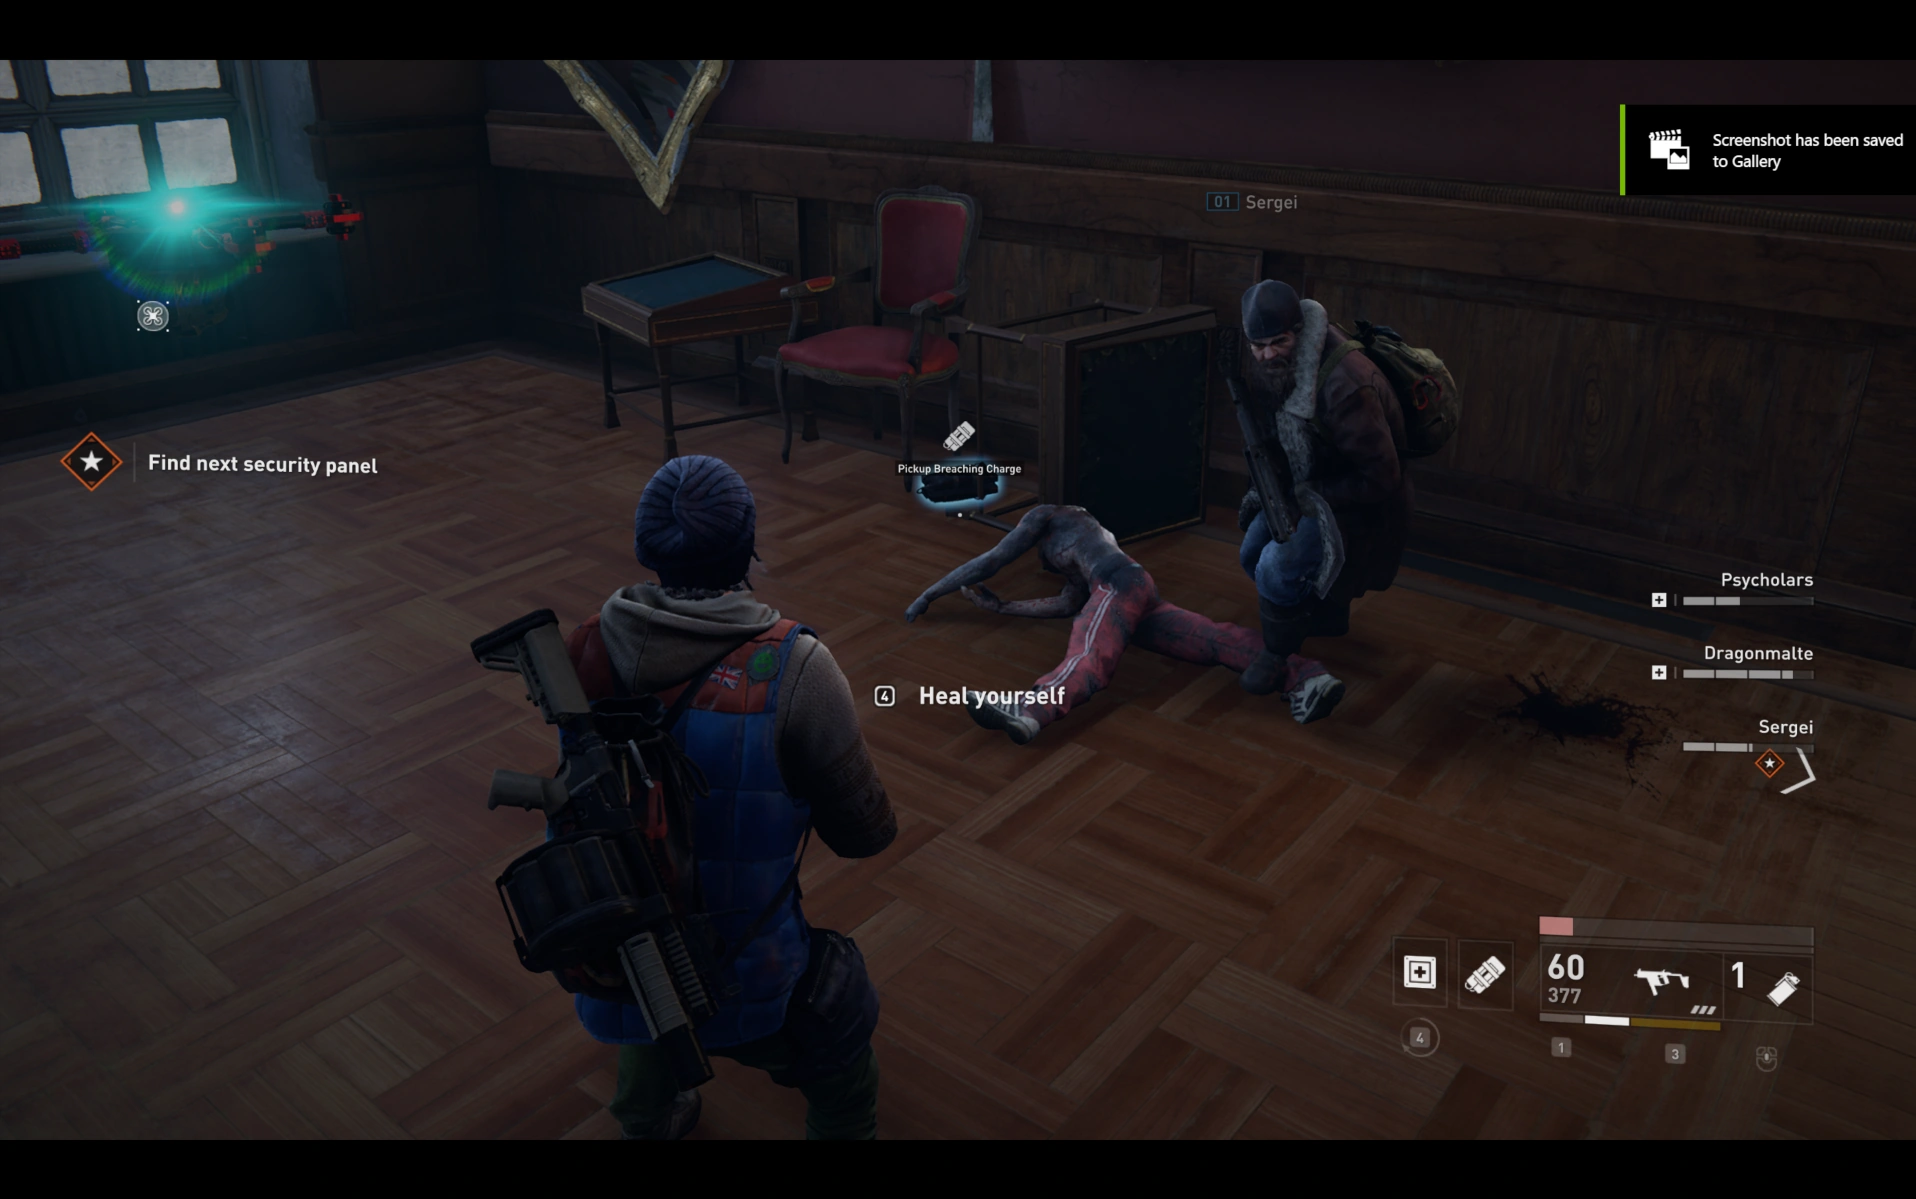
When you enter the gallery, go the right, it will be next to a couch on the left.
Location 6: ![]()
On the upper floor of the museum, on one of the balconies.

Location 7: ![]()
Between the two defense rooms, in the passage that opens first, on the right side of the room.
Location 8: ![]()
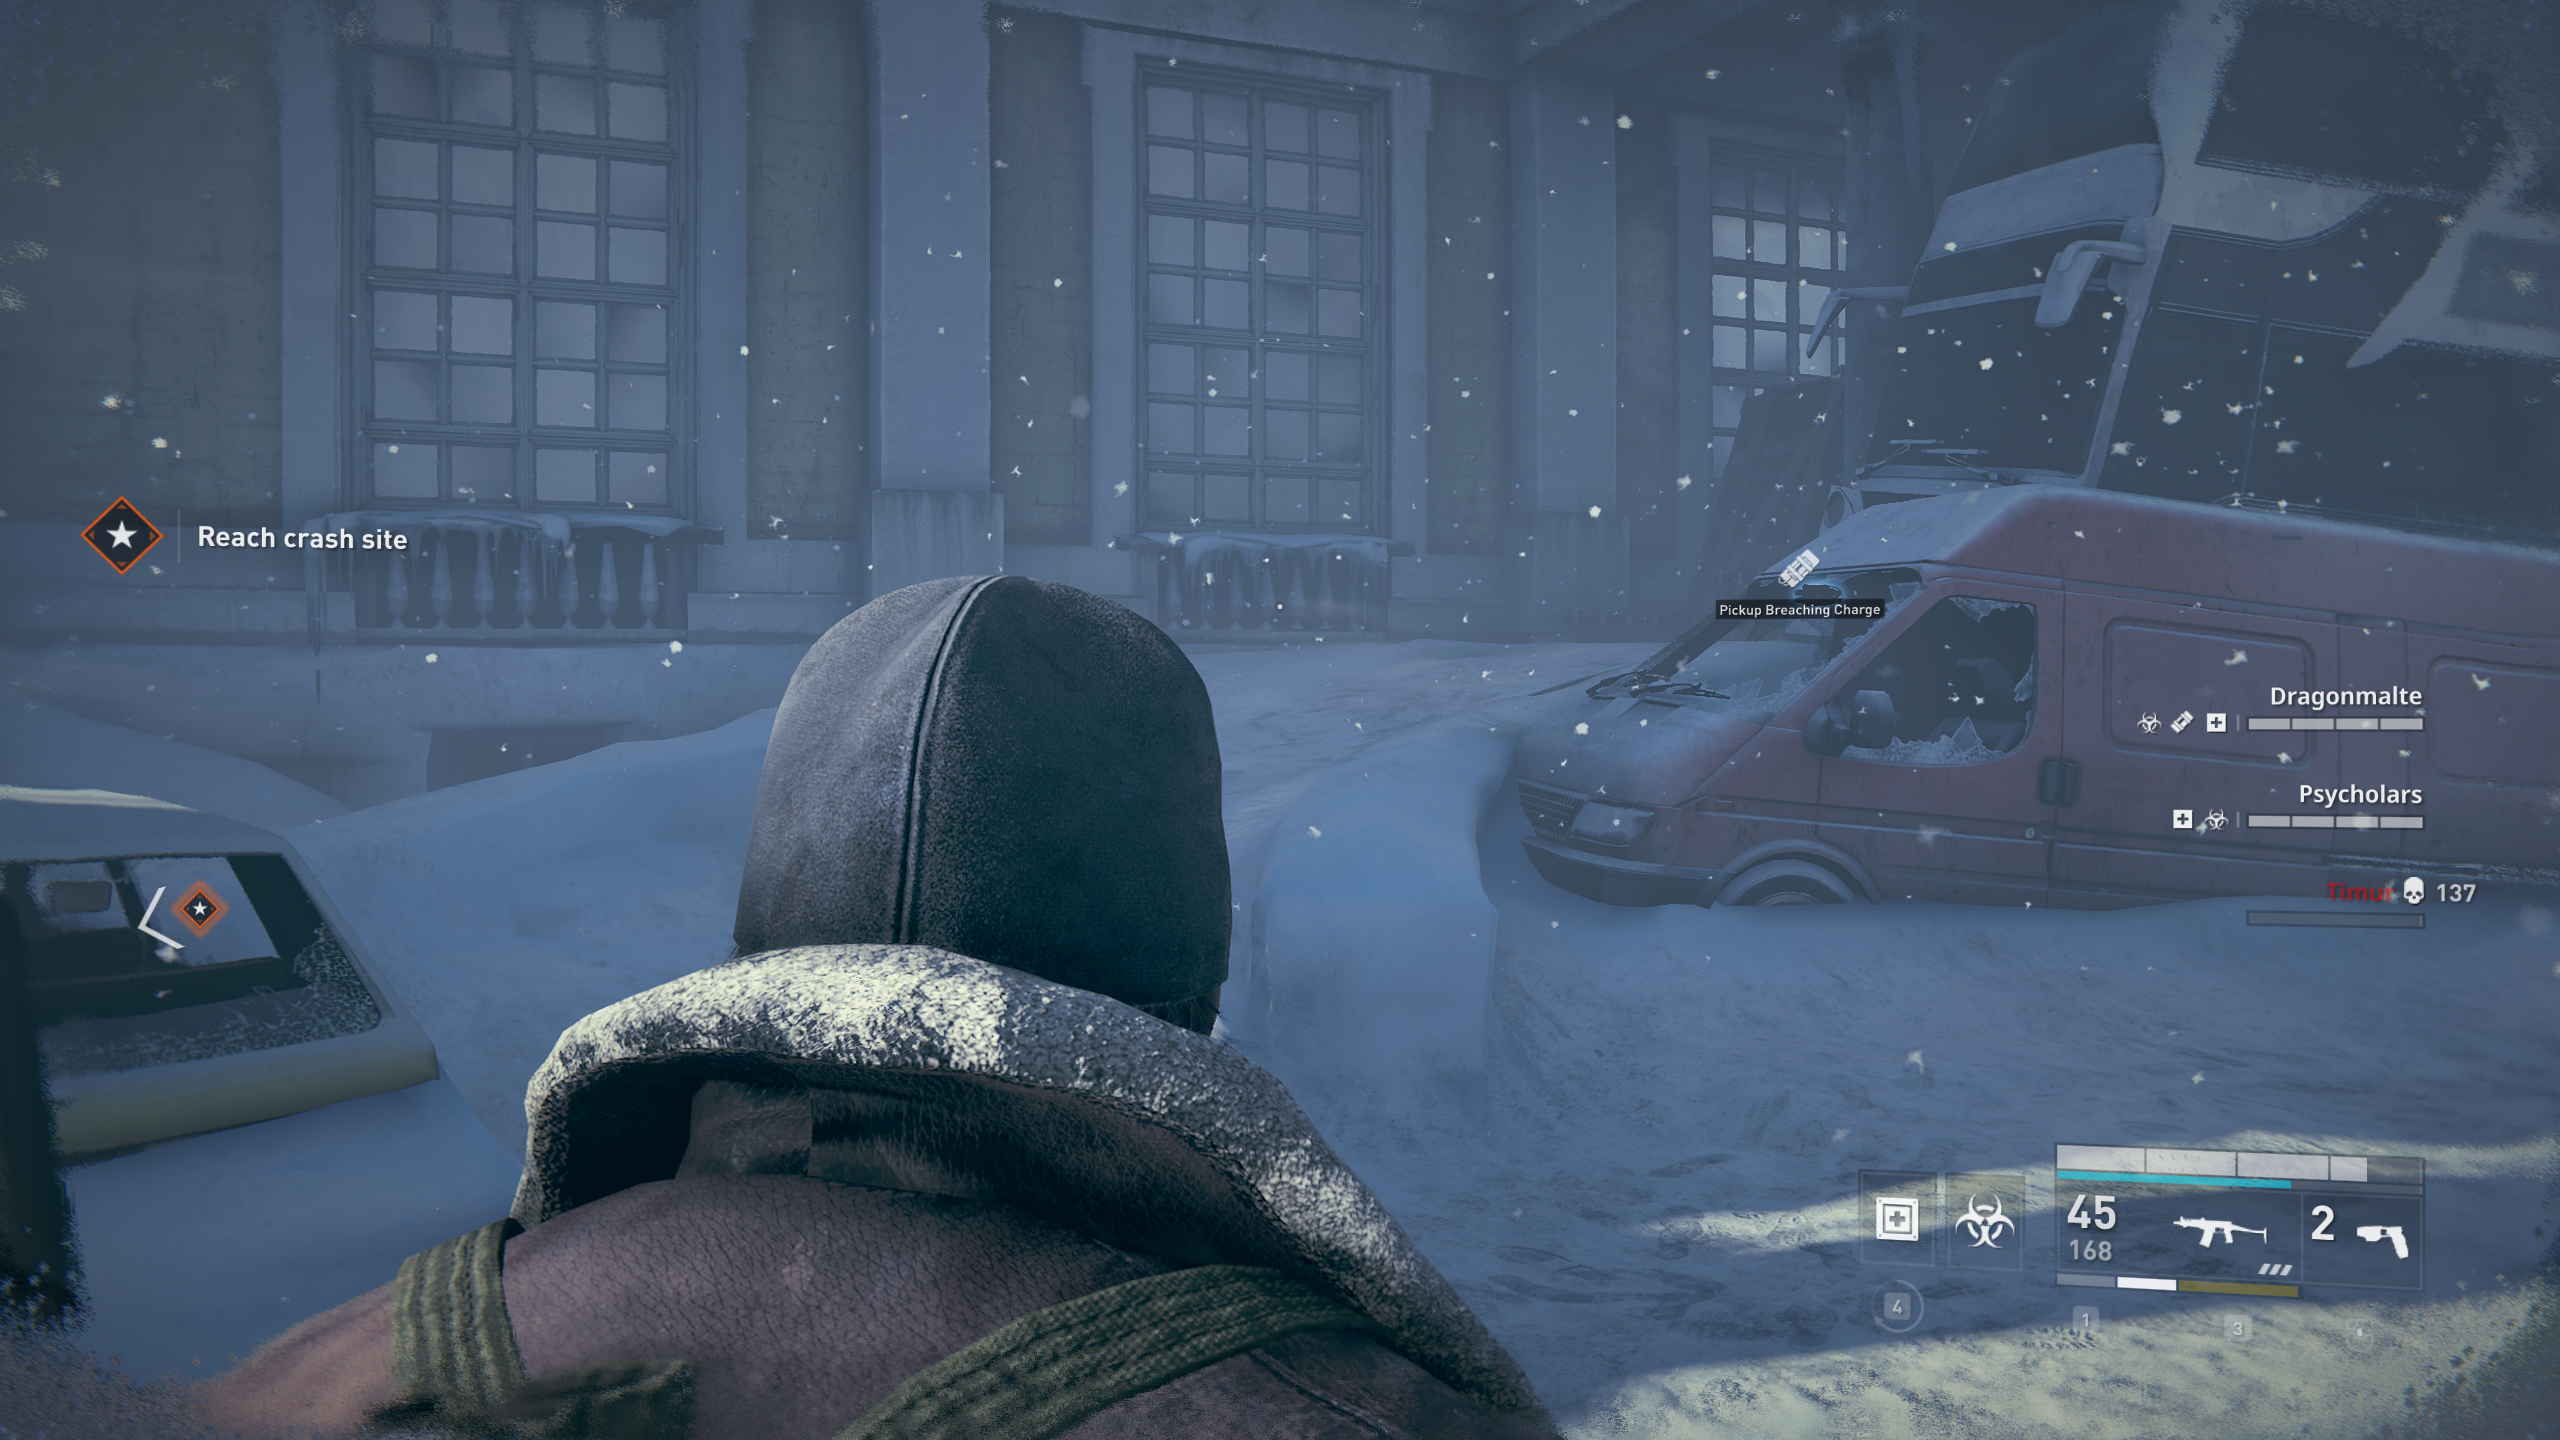
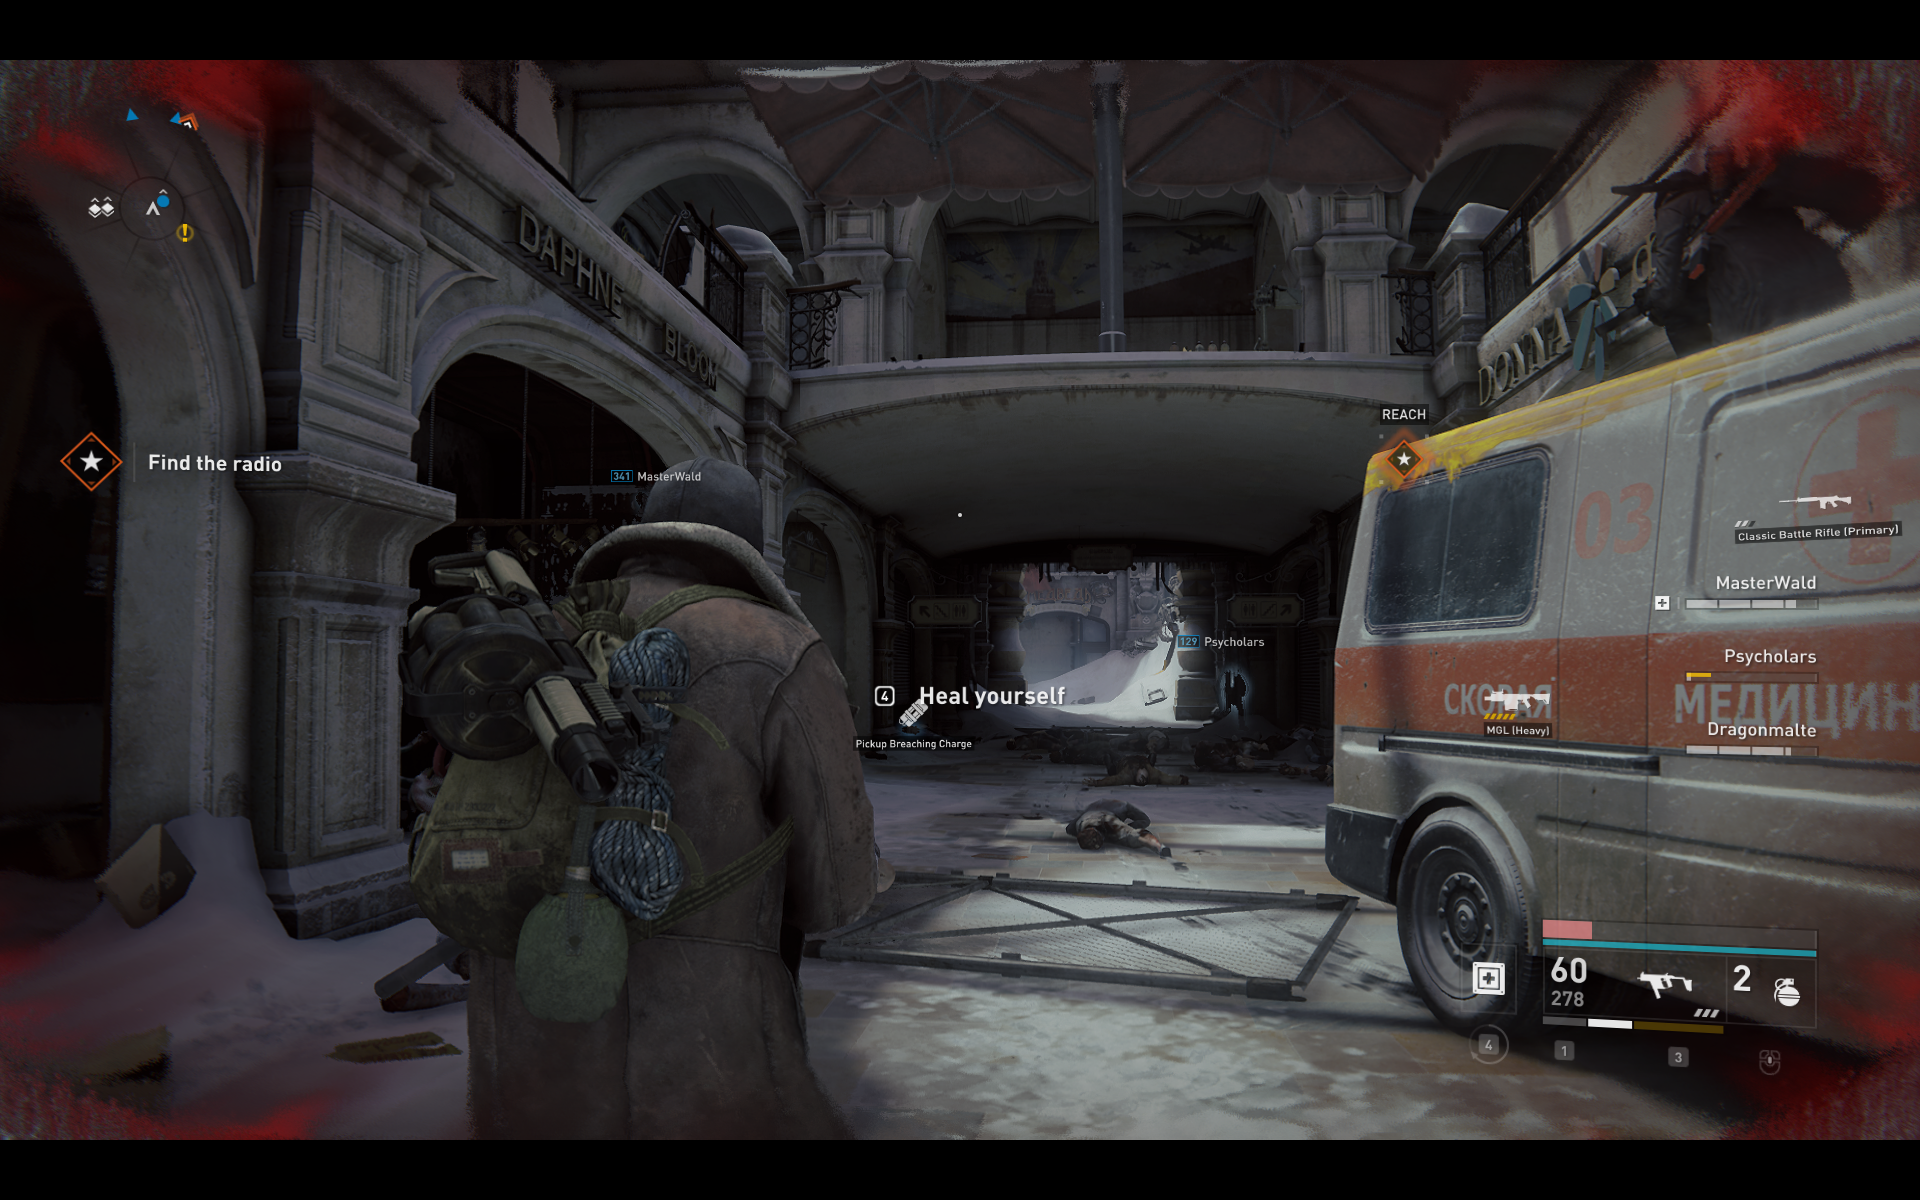
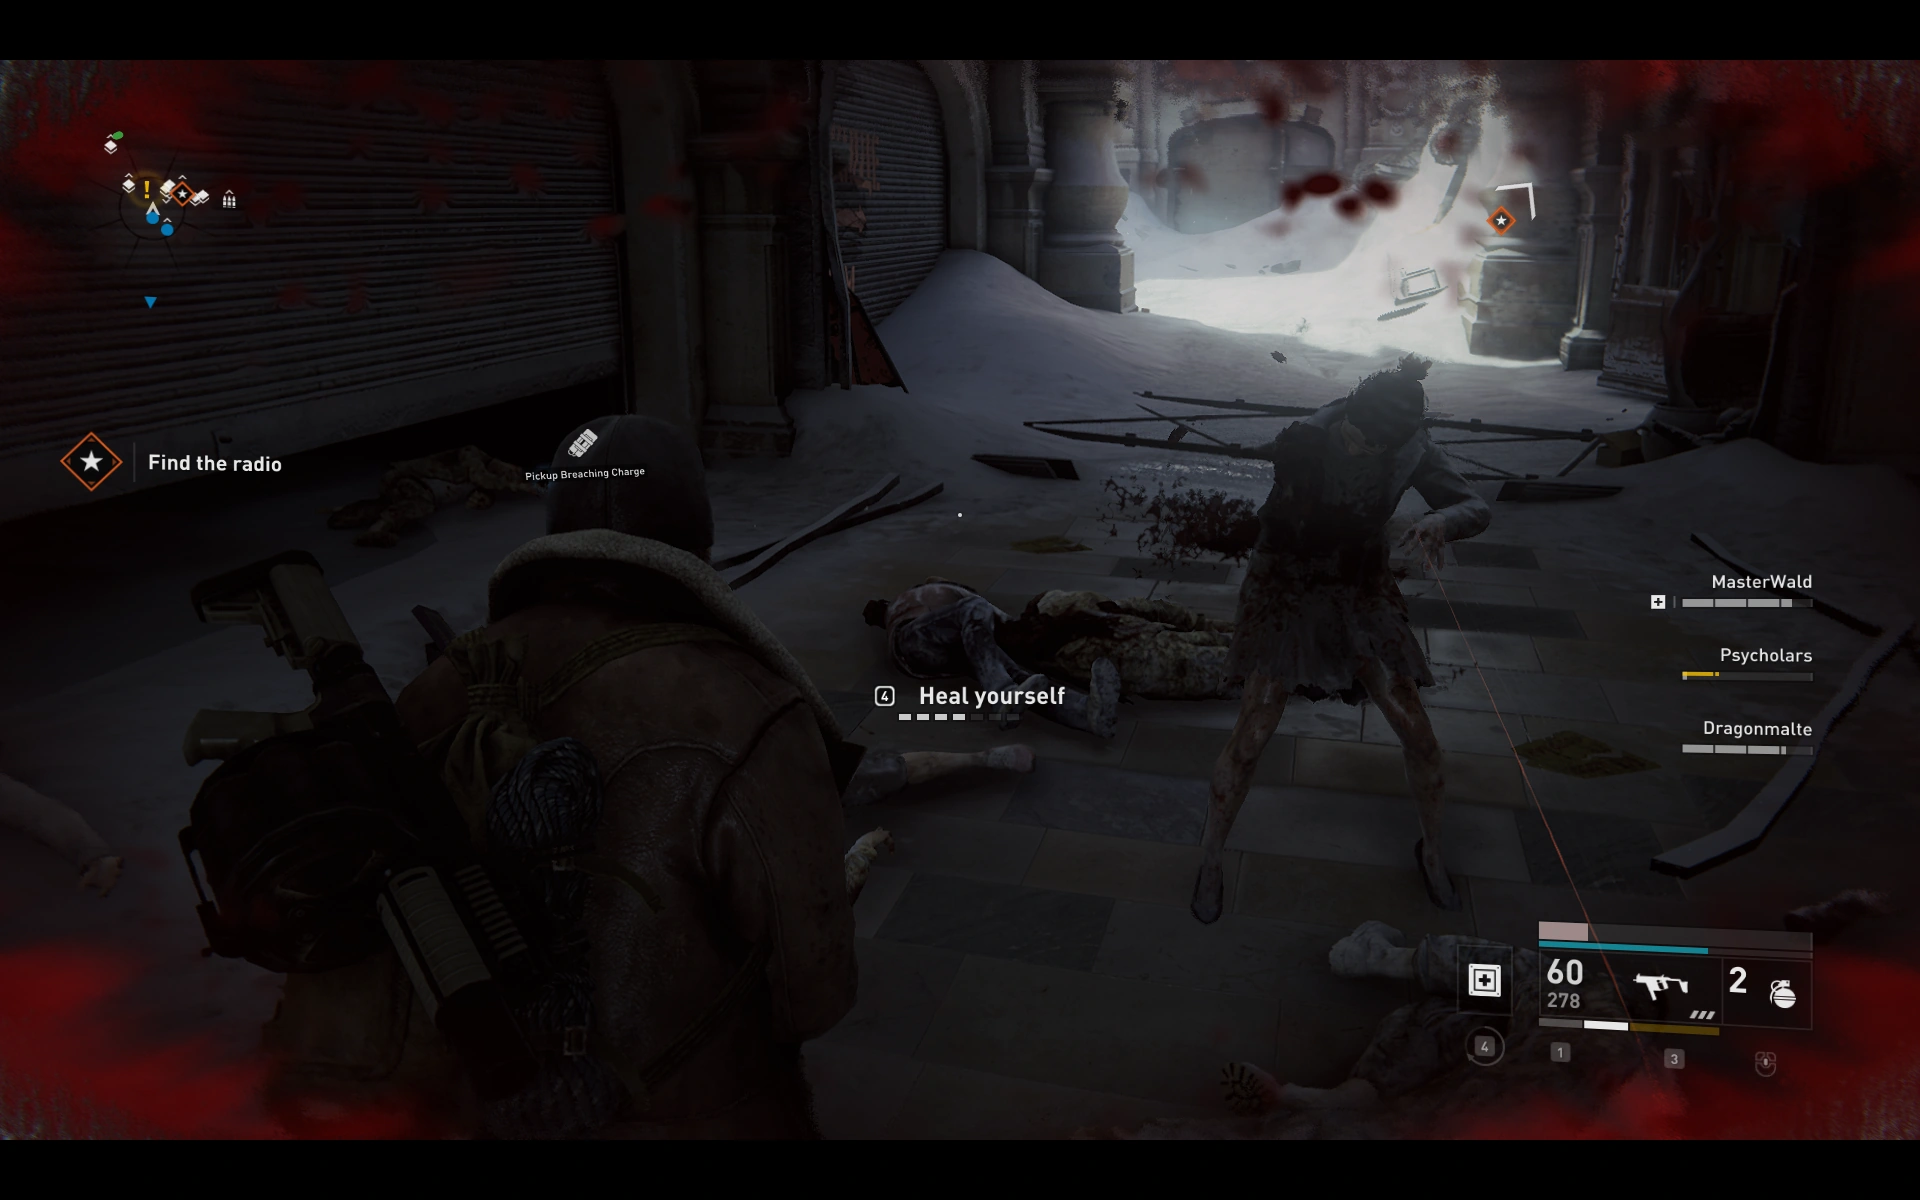
After you exit the museum, on the right side, on the snowed-over stair arc.
Location 9: ![]()
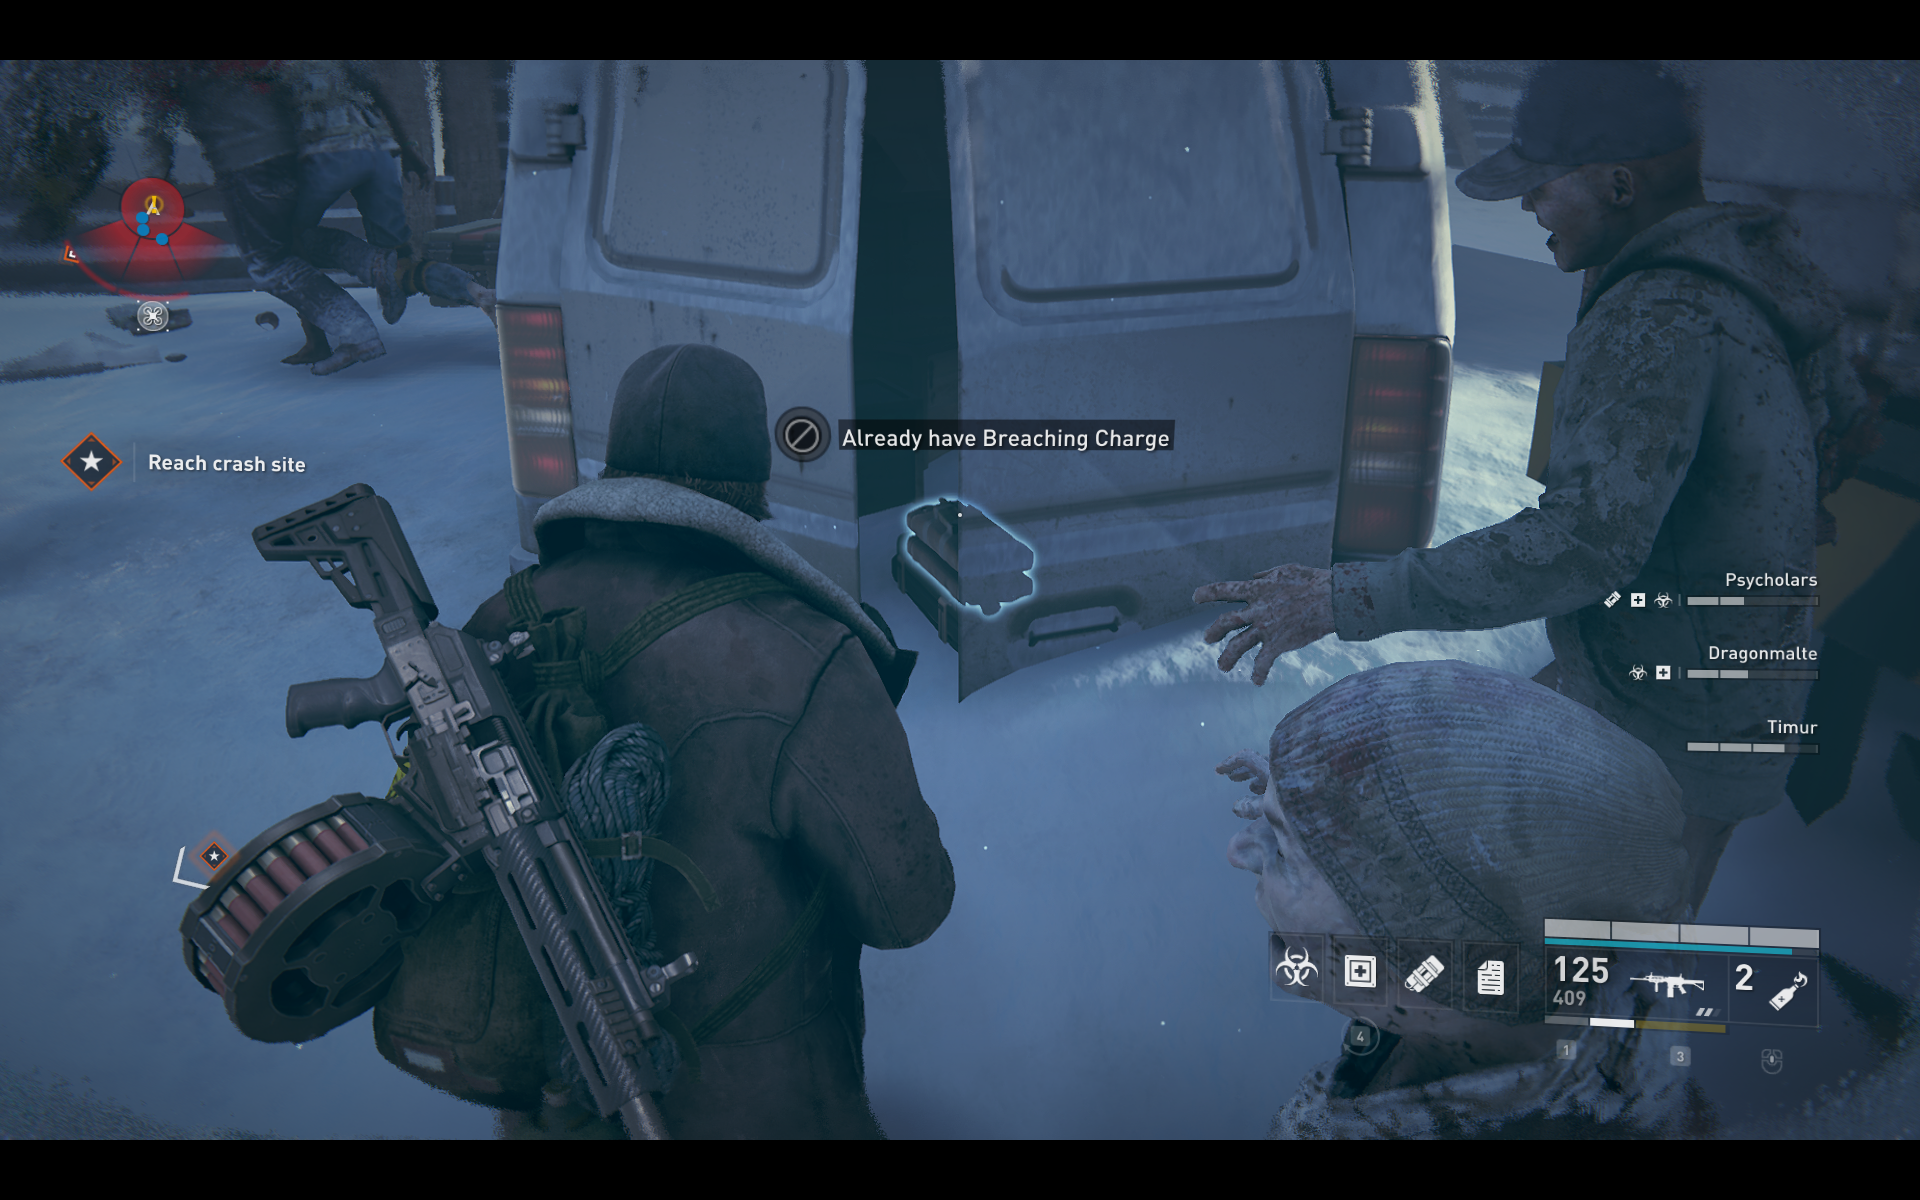
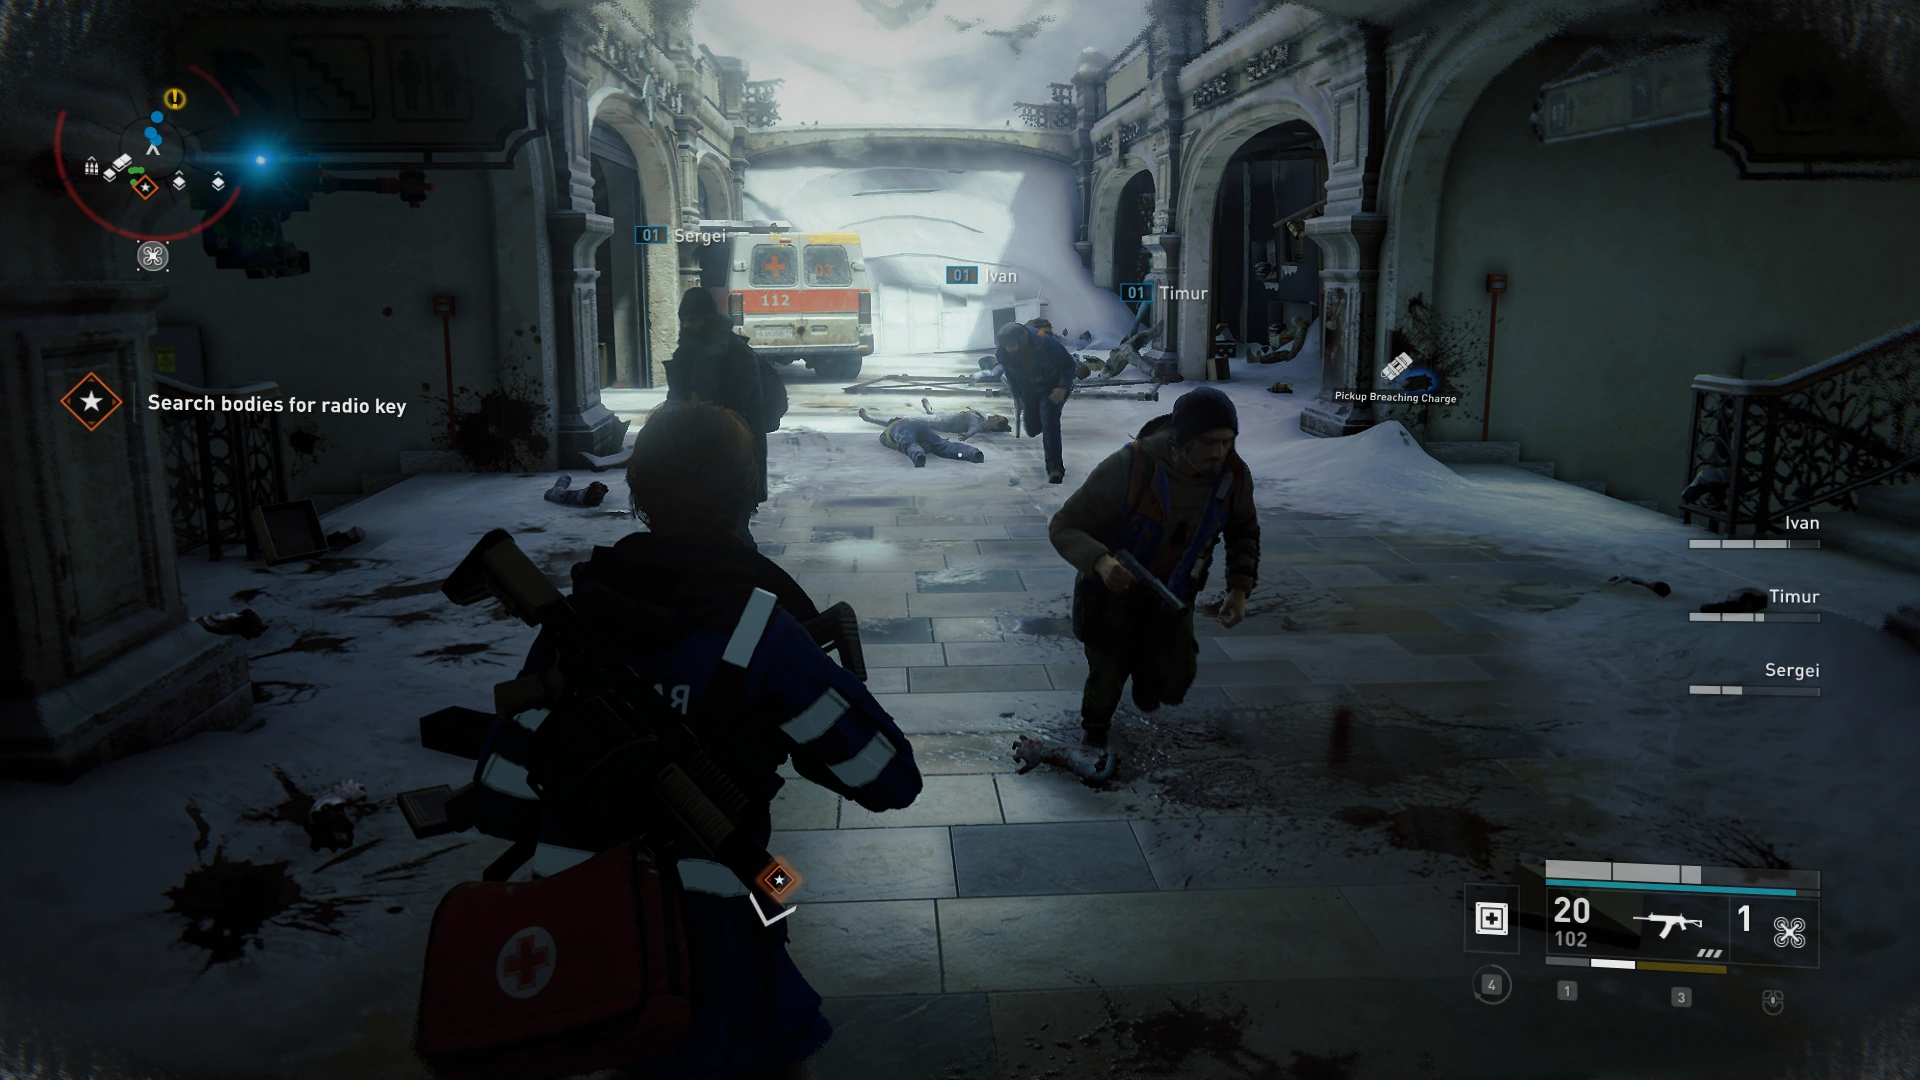
Just before you drop into the final defense, in a white van.
Chapter 2: Key to the City[]
Location 1: ![]()
In the starting room to the right behind a pillar
Location 2: ![]()
On the way to the defense in the short corridor to the left, in an elevator shaft.
Location 3: ![]()
In the first defense area on the left side, in the blocked stairwell to the surface.

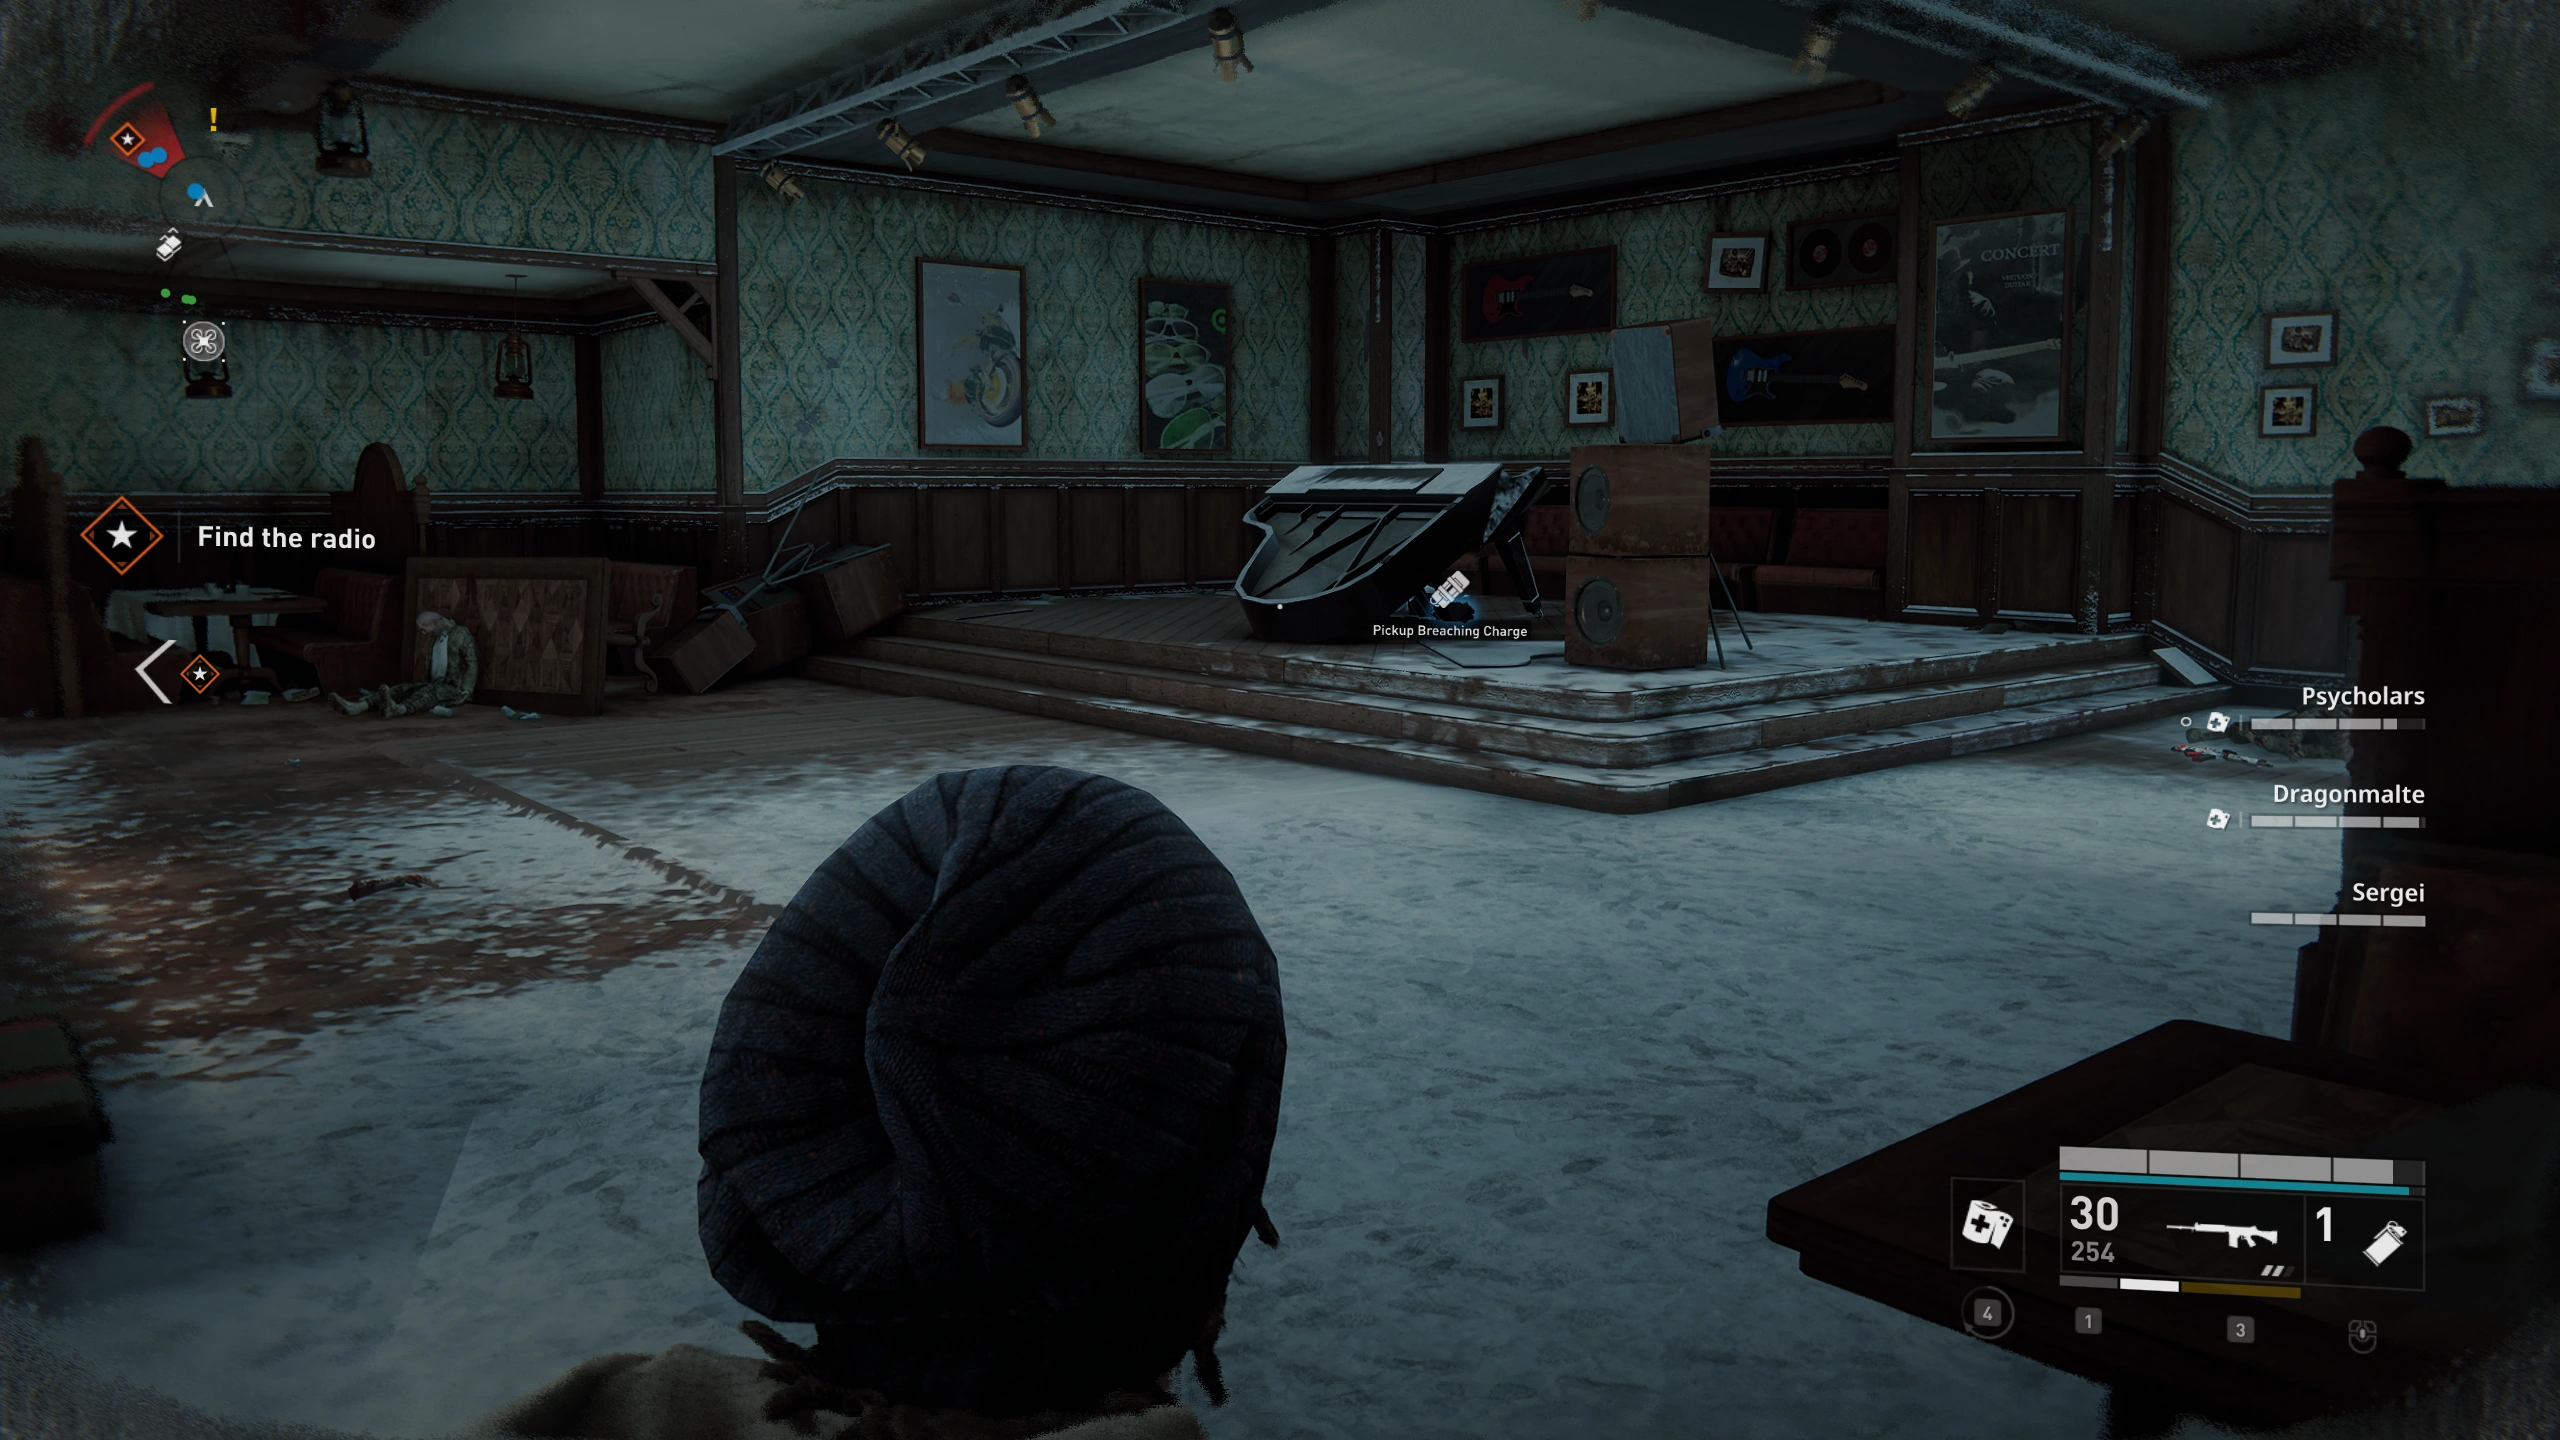
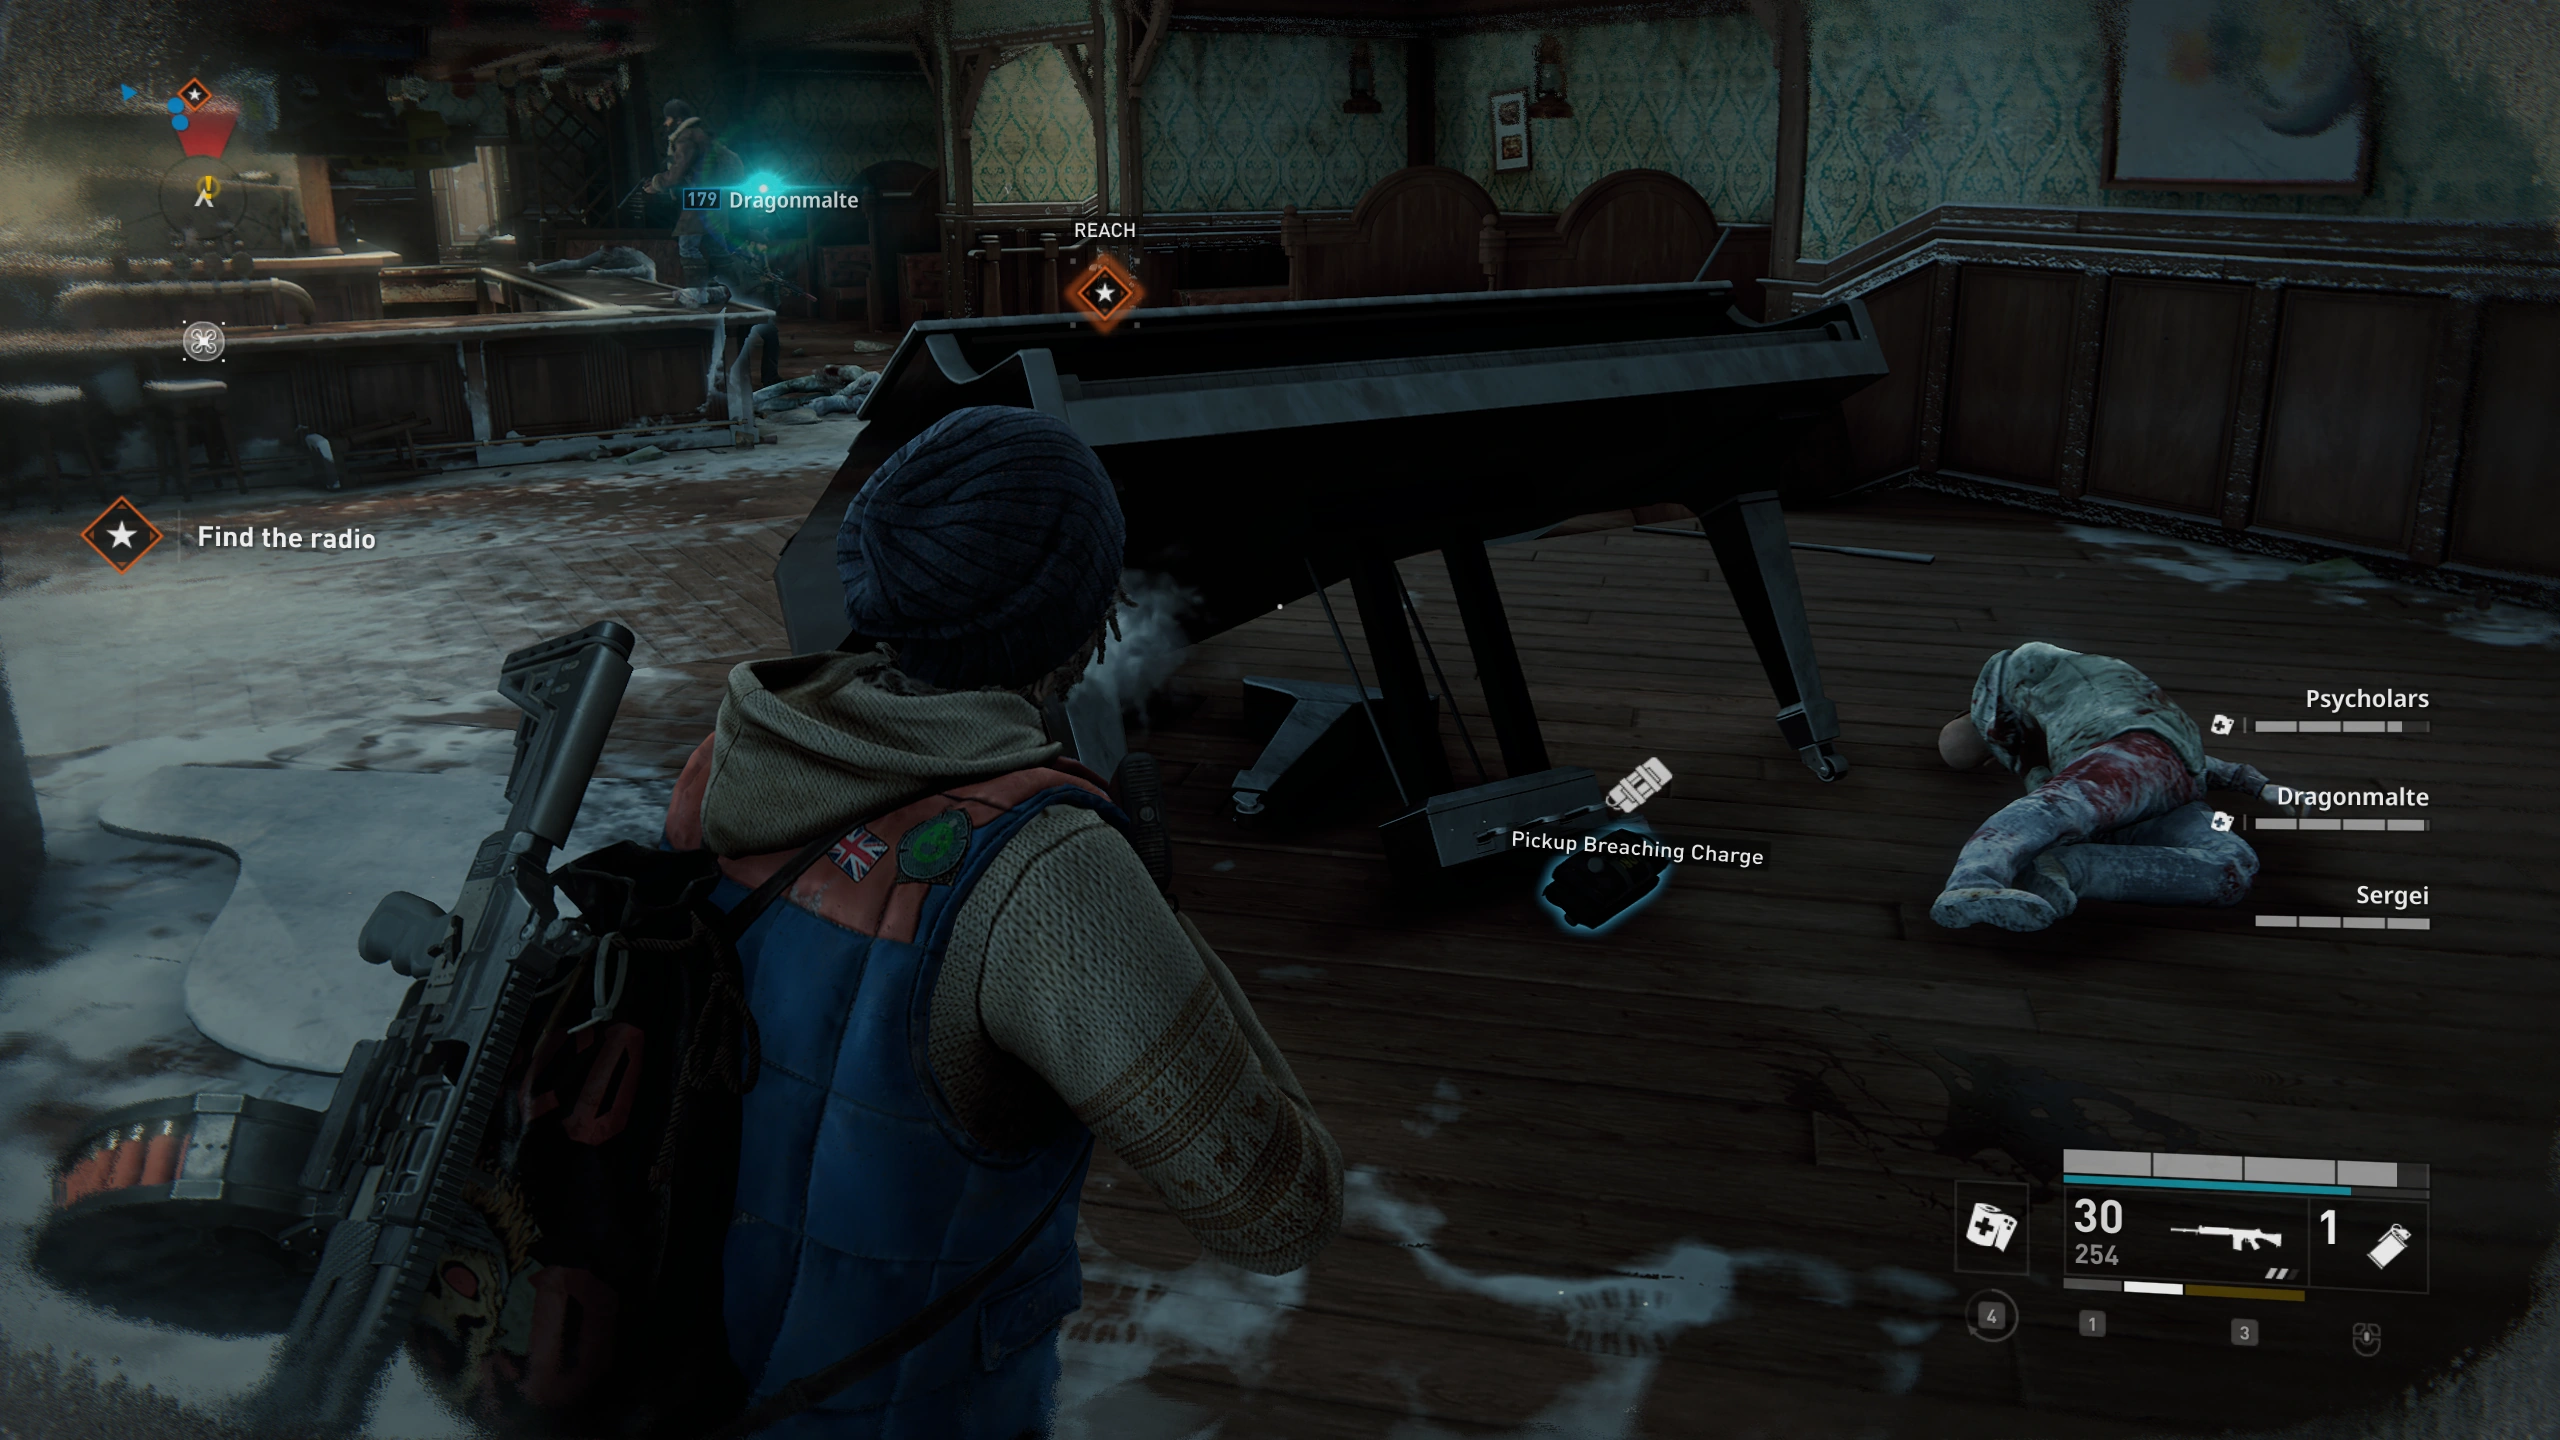
Location 4: ![]()
After the first defense, in the room with the bar in the middle, under the piano.
Location 5: ![]()
Right below the drop towards the final battle
Location 6: ![]()
In the mall area, in the hallway below the room you protect.
Location 7: ![]()
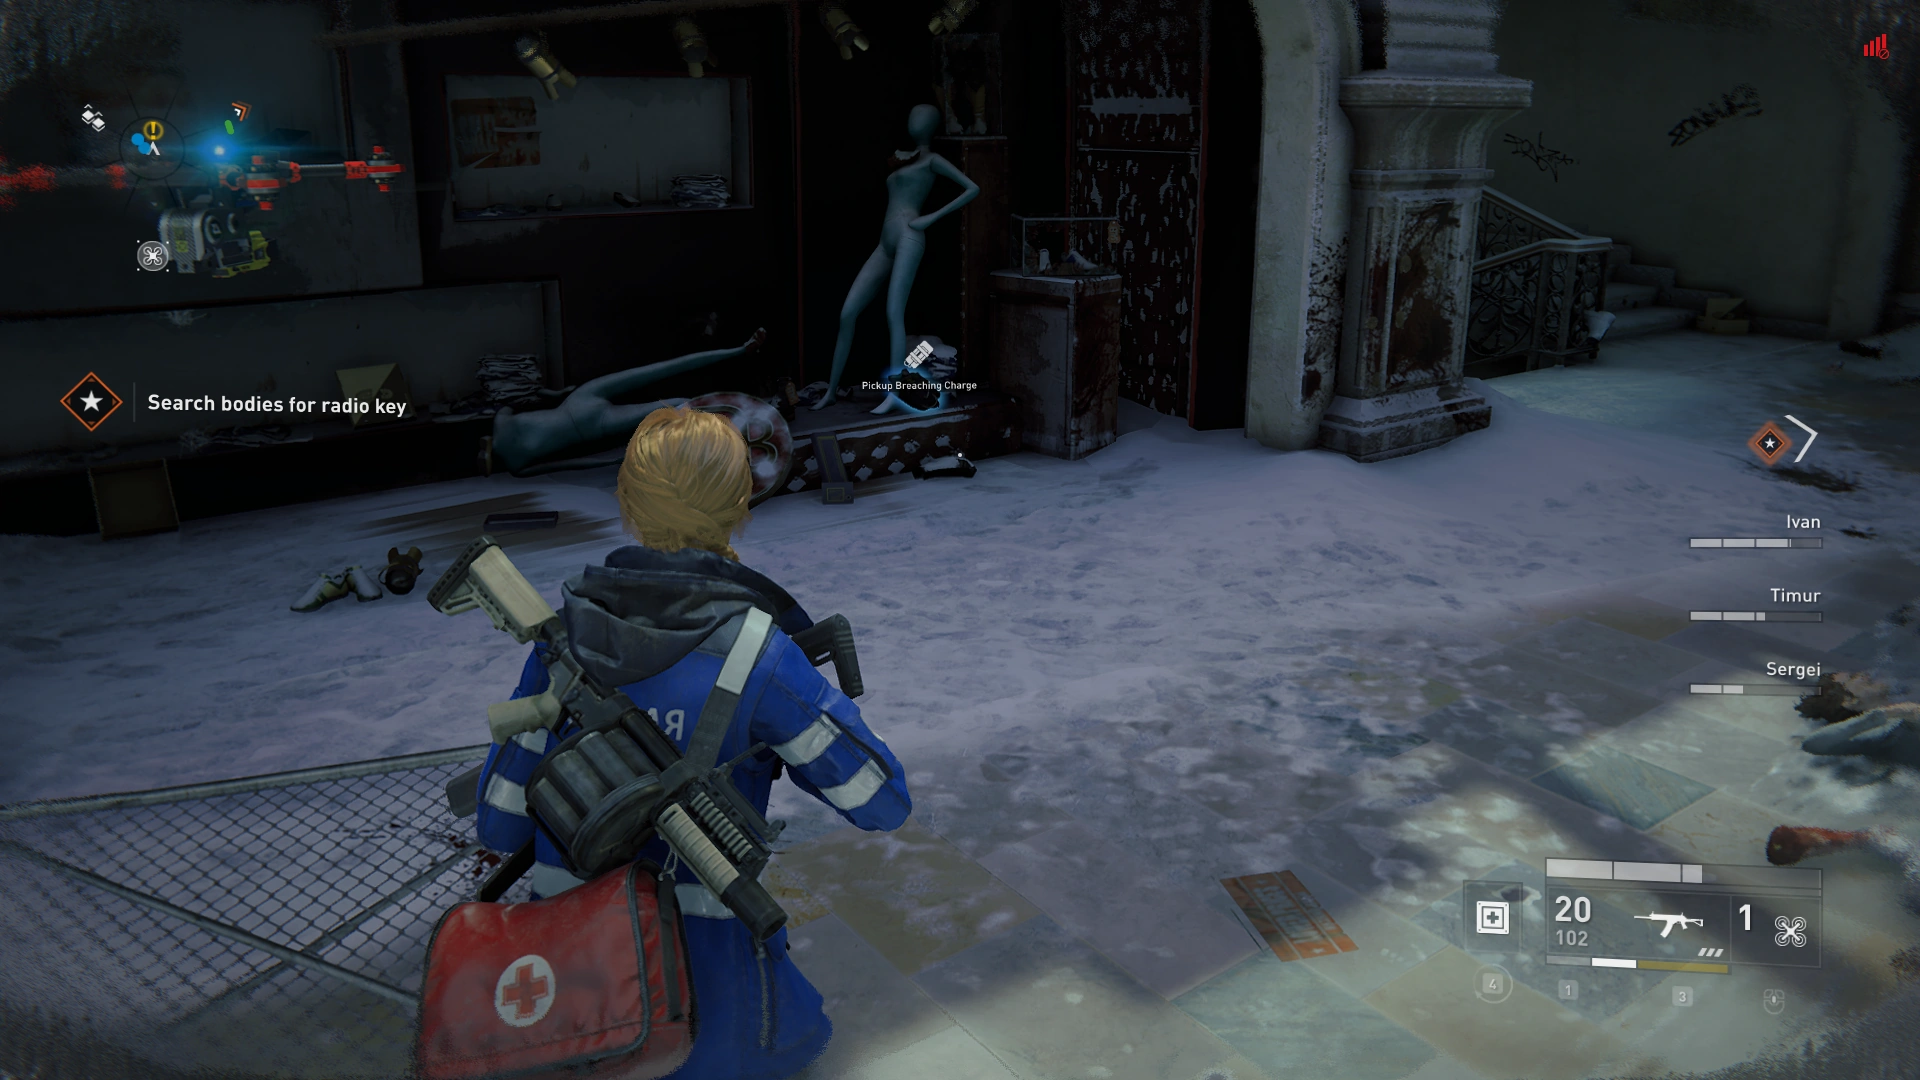
In the mall area at the end of the hallway. The Breaching Charge is beneath some mannequins to the right.
Location 8: ![]()
Location 9: ![]()
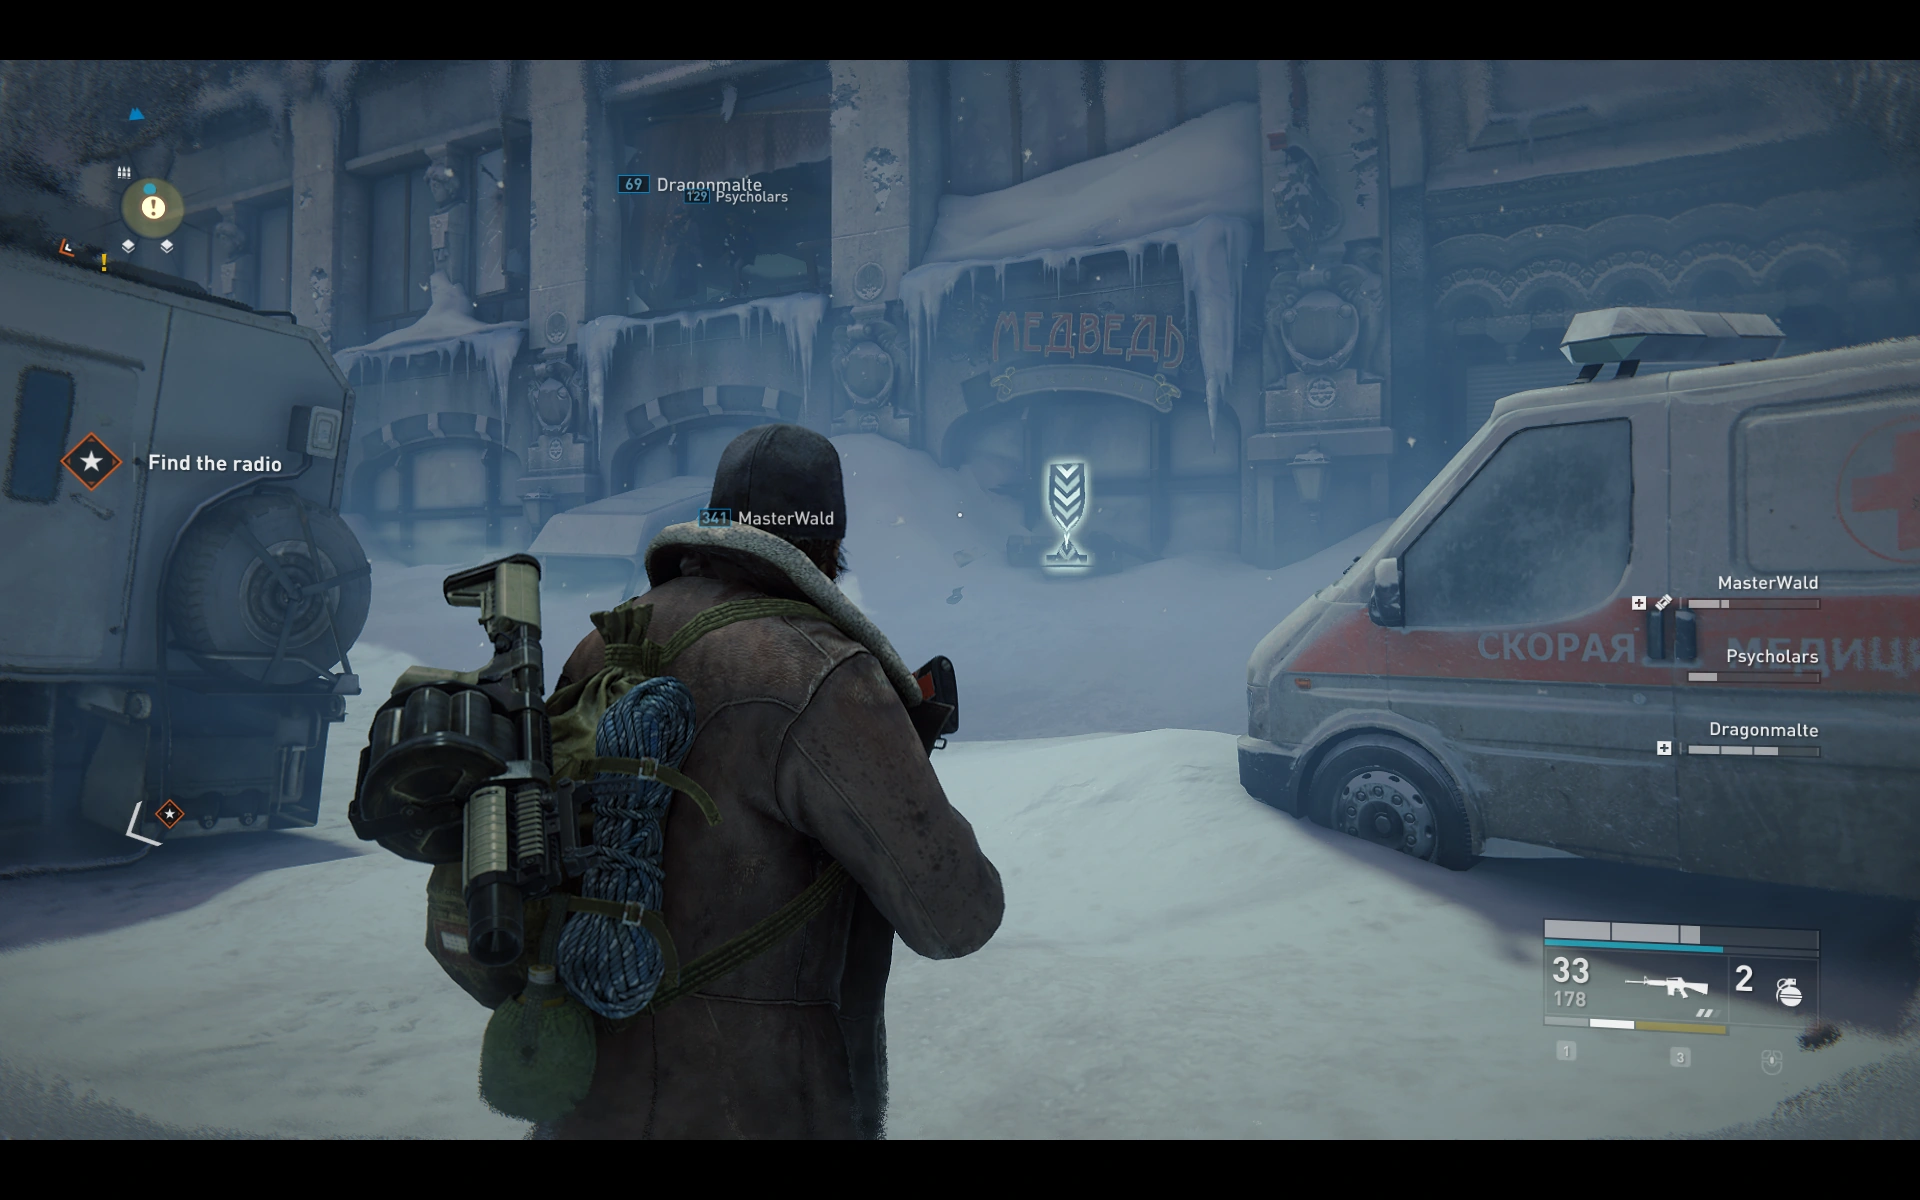
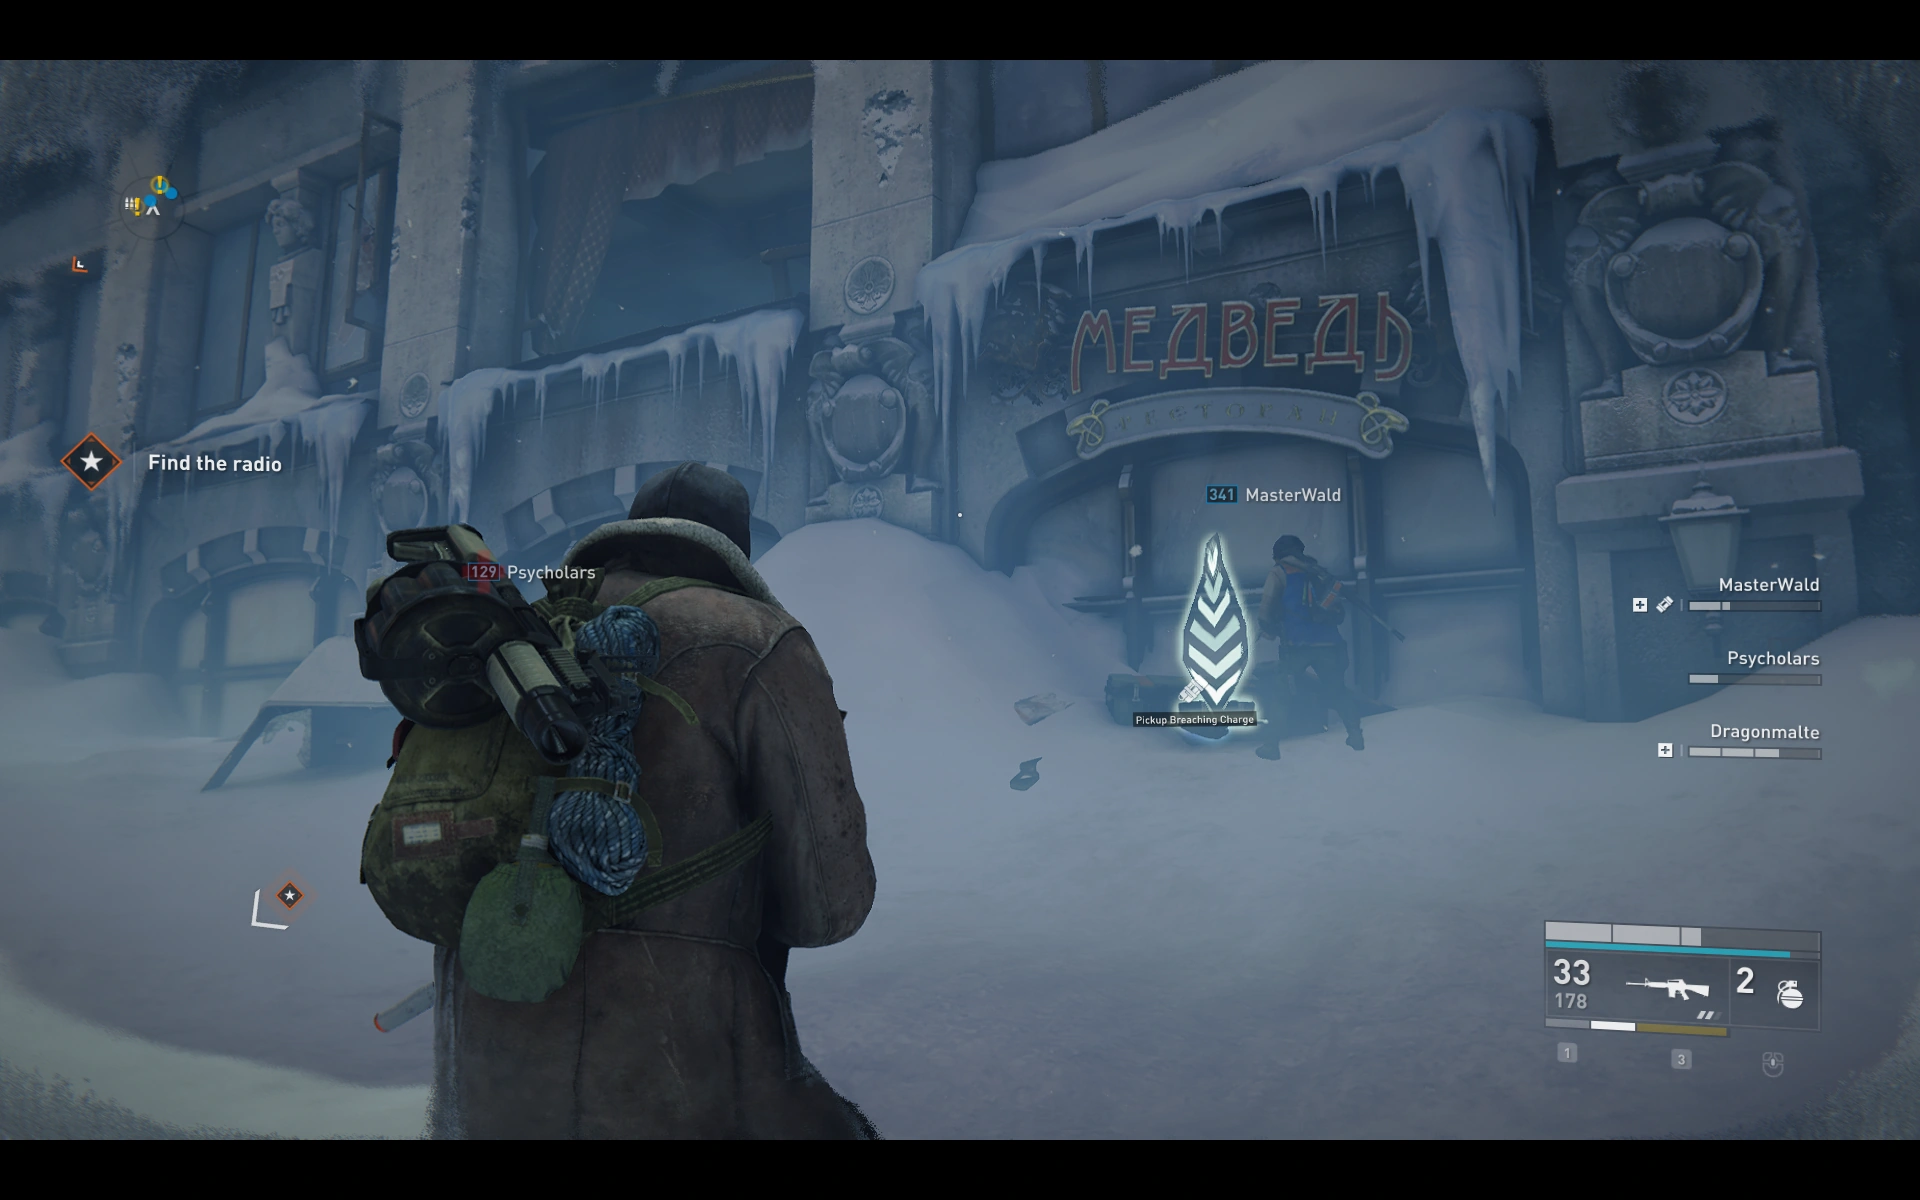
Chapter 3: Battle of Nerves[]
Location 1: ![]()
At the start of the level at the far end of the tunnel before leaving the tracks for the first time.
Location 2: ![]()
At the start of the level after the first staircase at the end of the tracks. In front of the train, on the ground.
Location 3: ![]()
When entering the first defense area, turn left when exiting the tunnel. The Charge is on the ground between the train and the wall.
Location 4: ![]()
When you first enter the main hall, the breaking charge is to the right, hidden on the pallet.
Location 5: ![]()
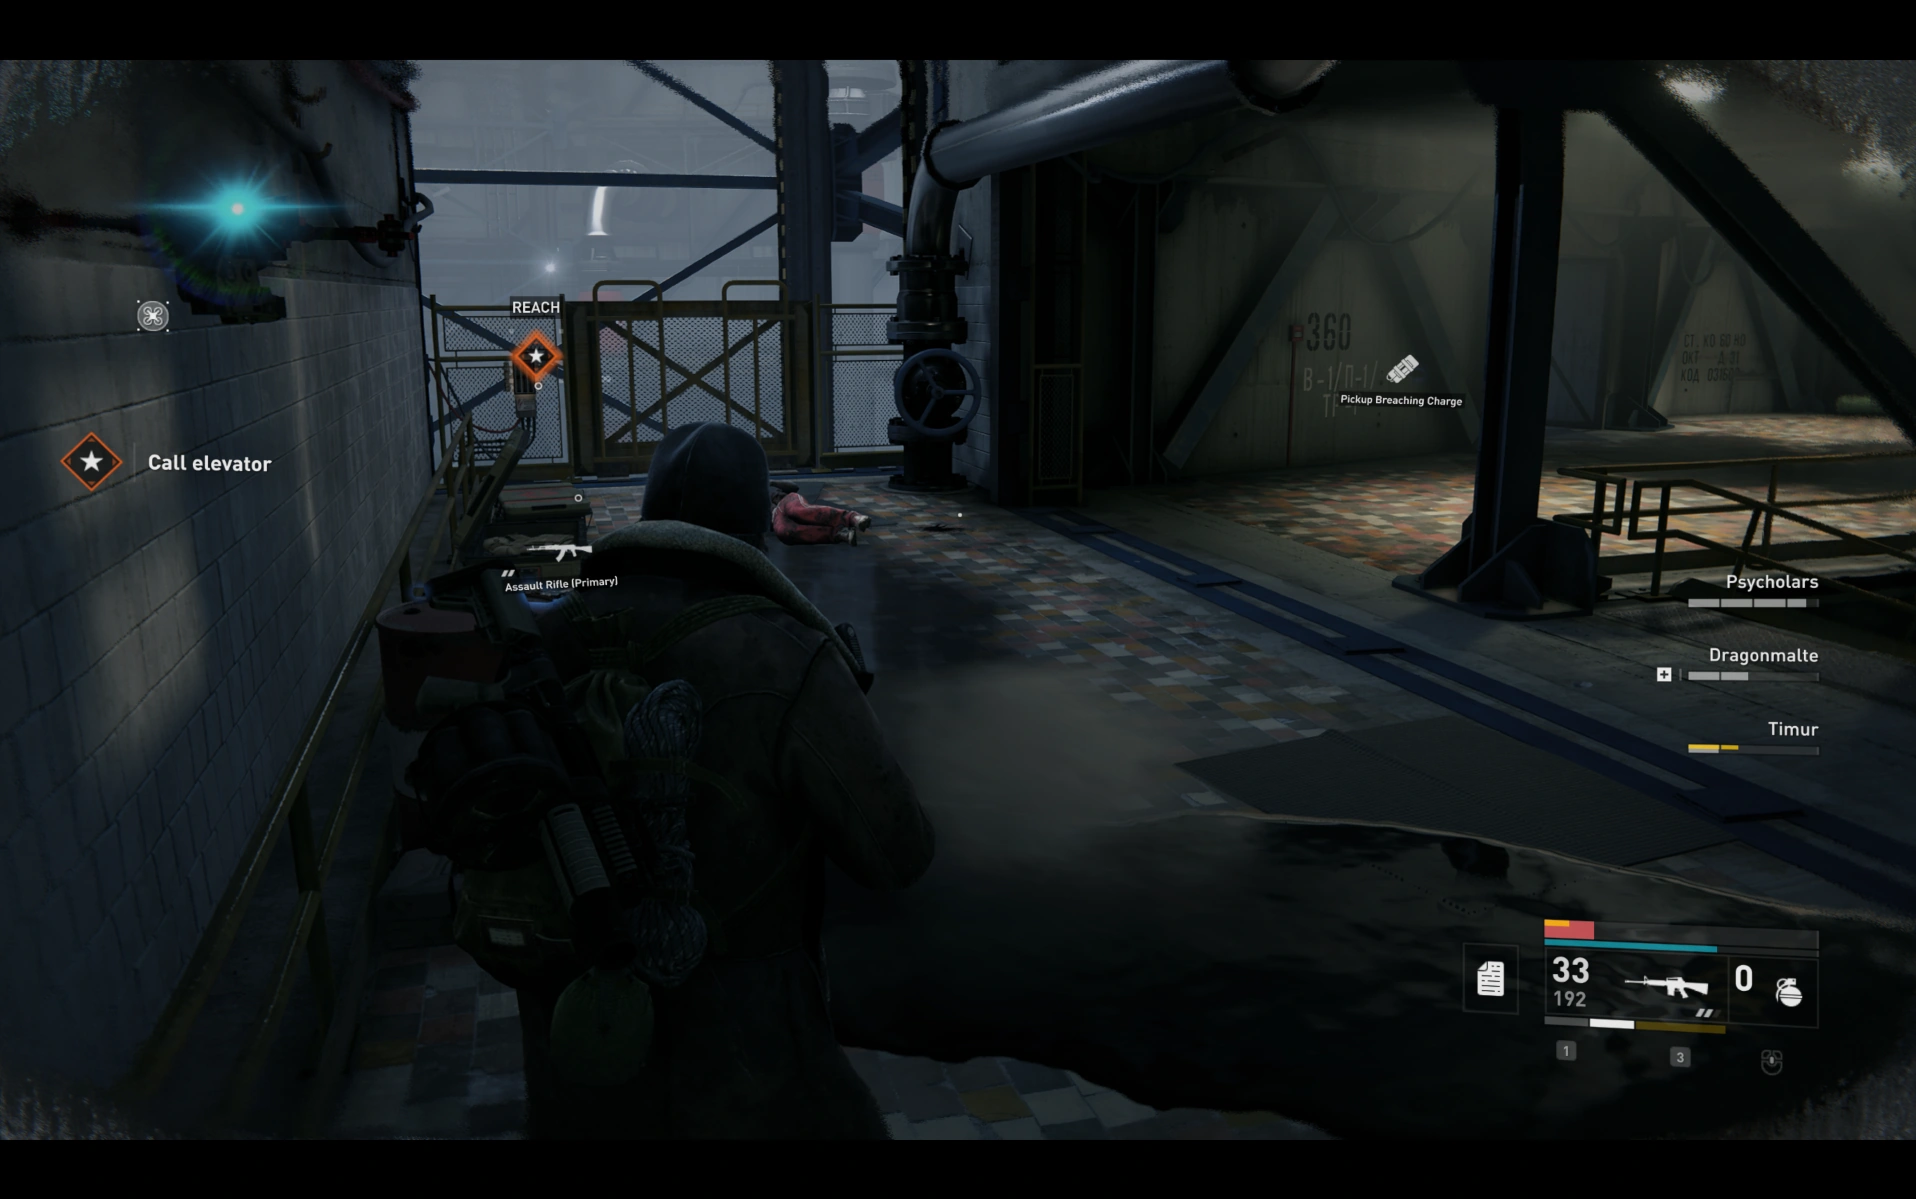
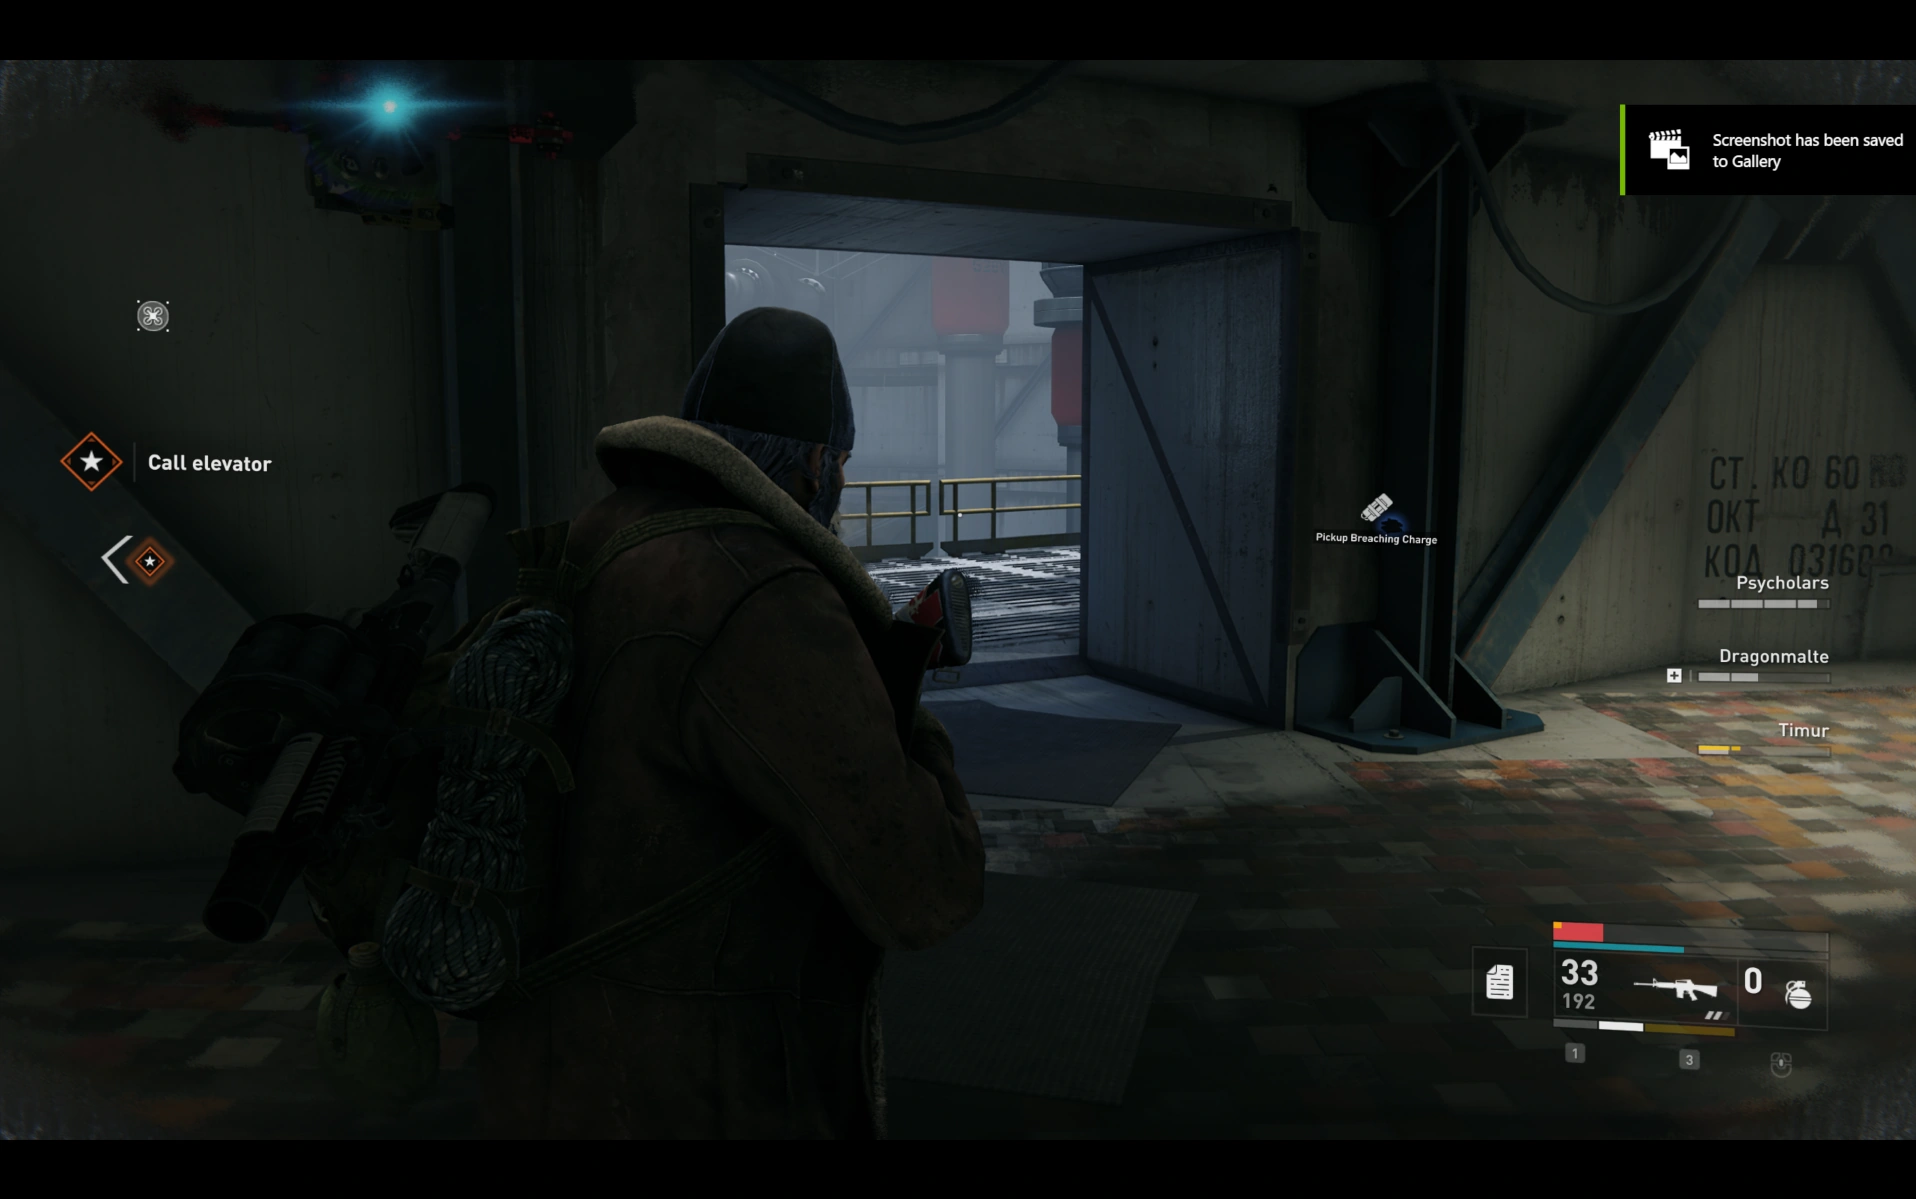
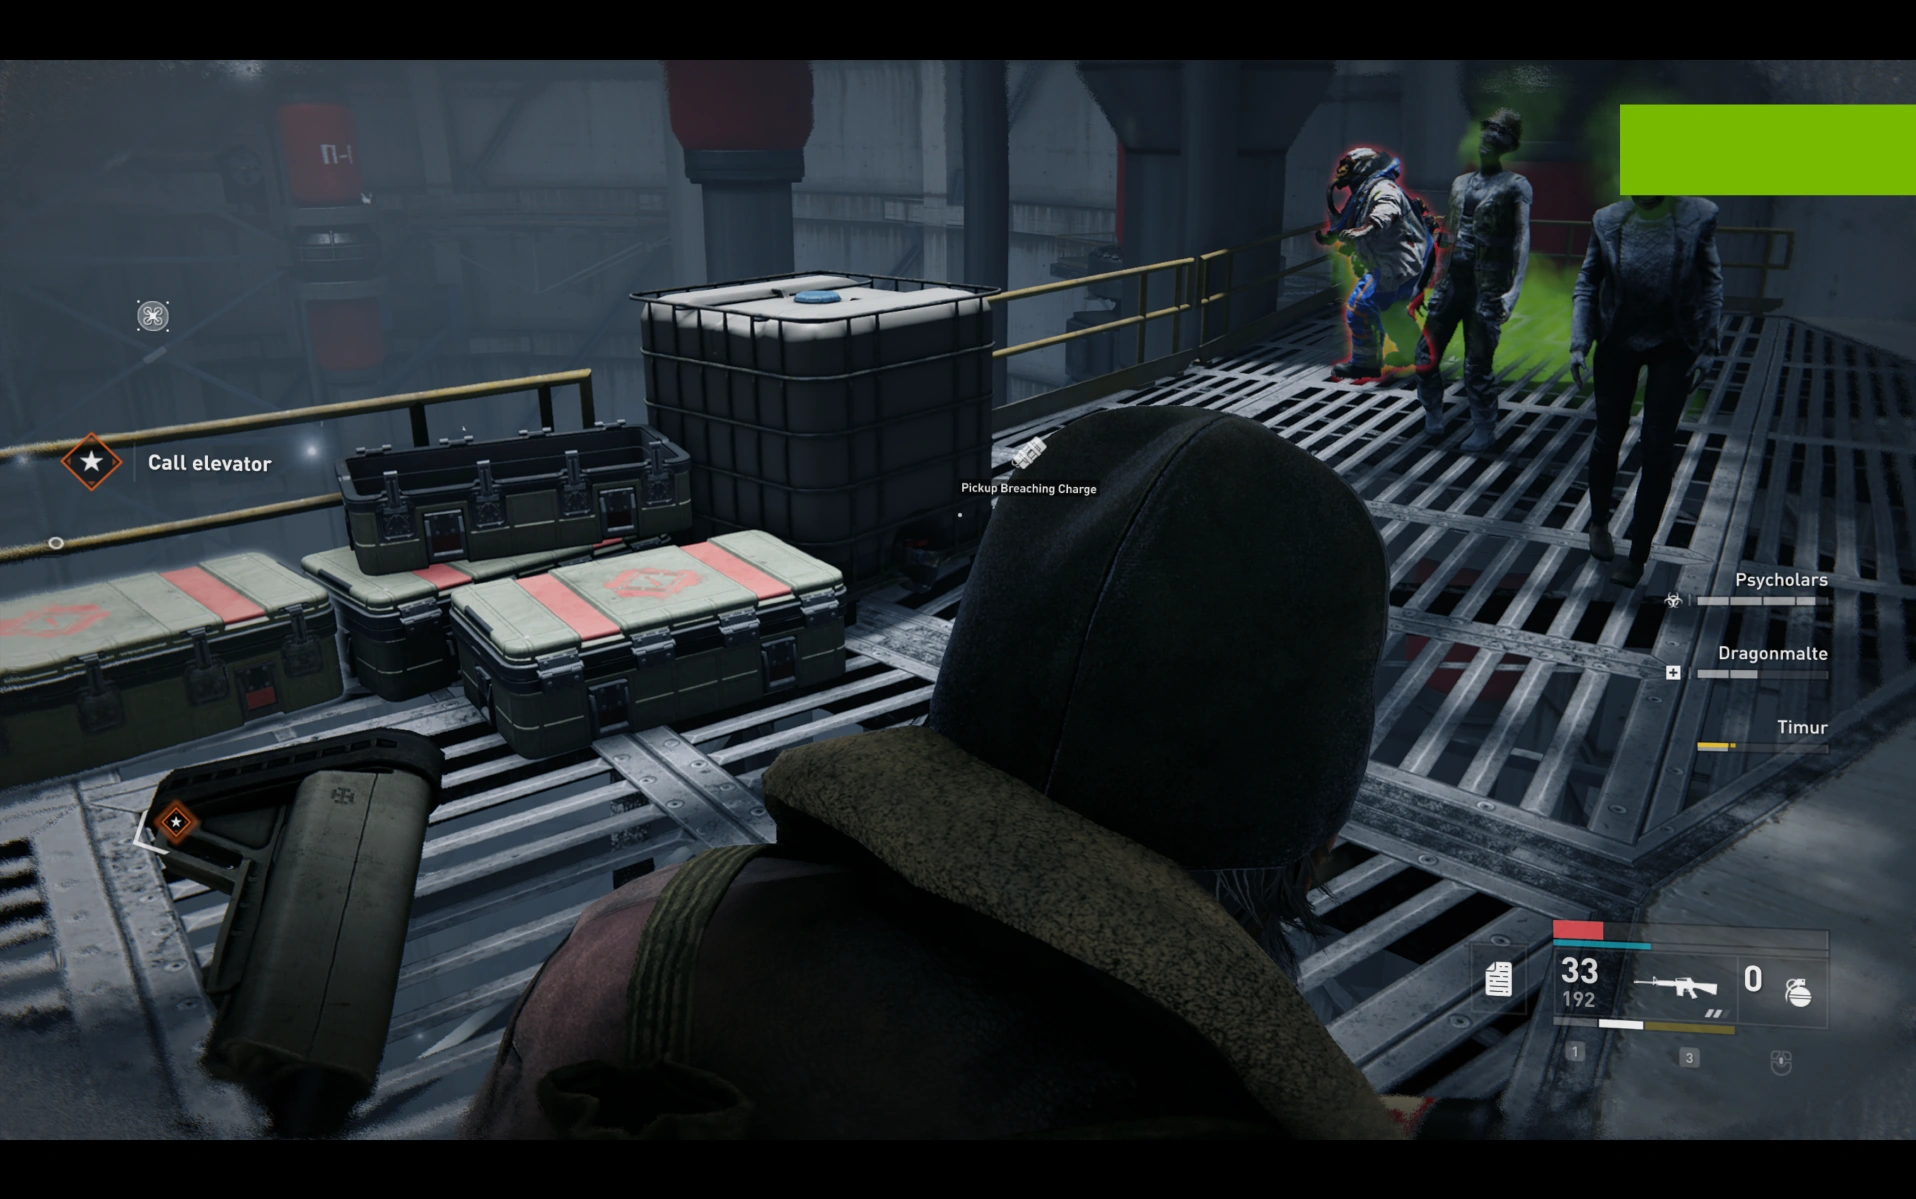
Where you have to call the elevator, on the balcony to the right - you can see this one frome one level above.
Location 6: ![]()
Location 7: ![]()
Location 8: ![]()
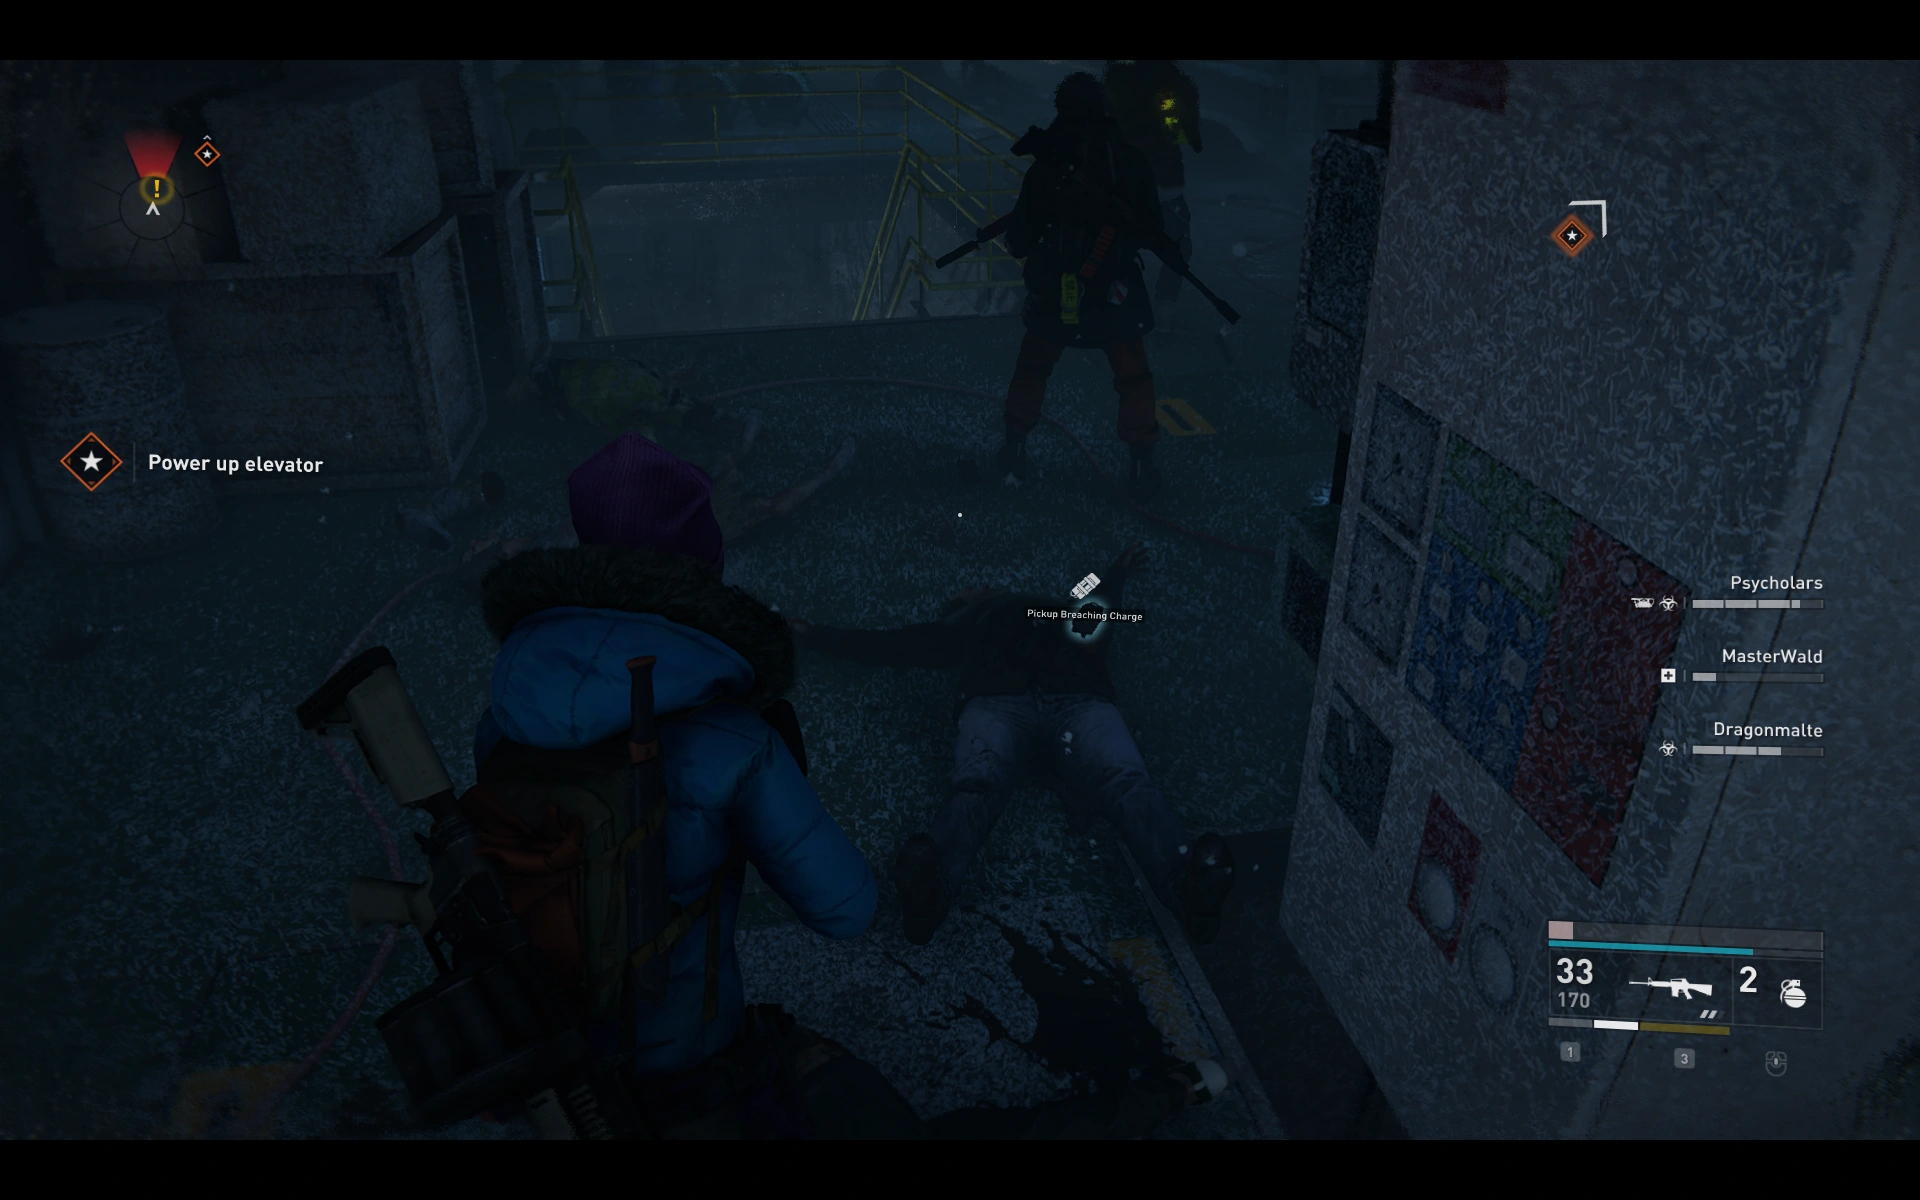
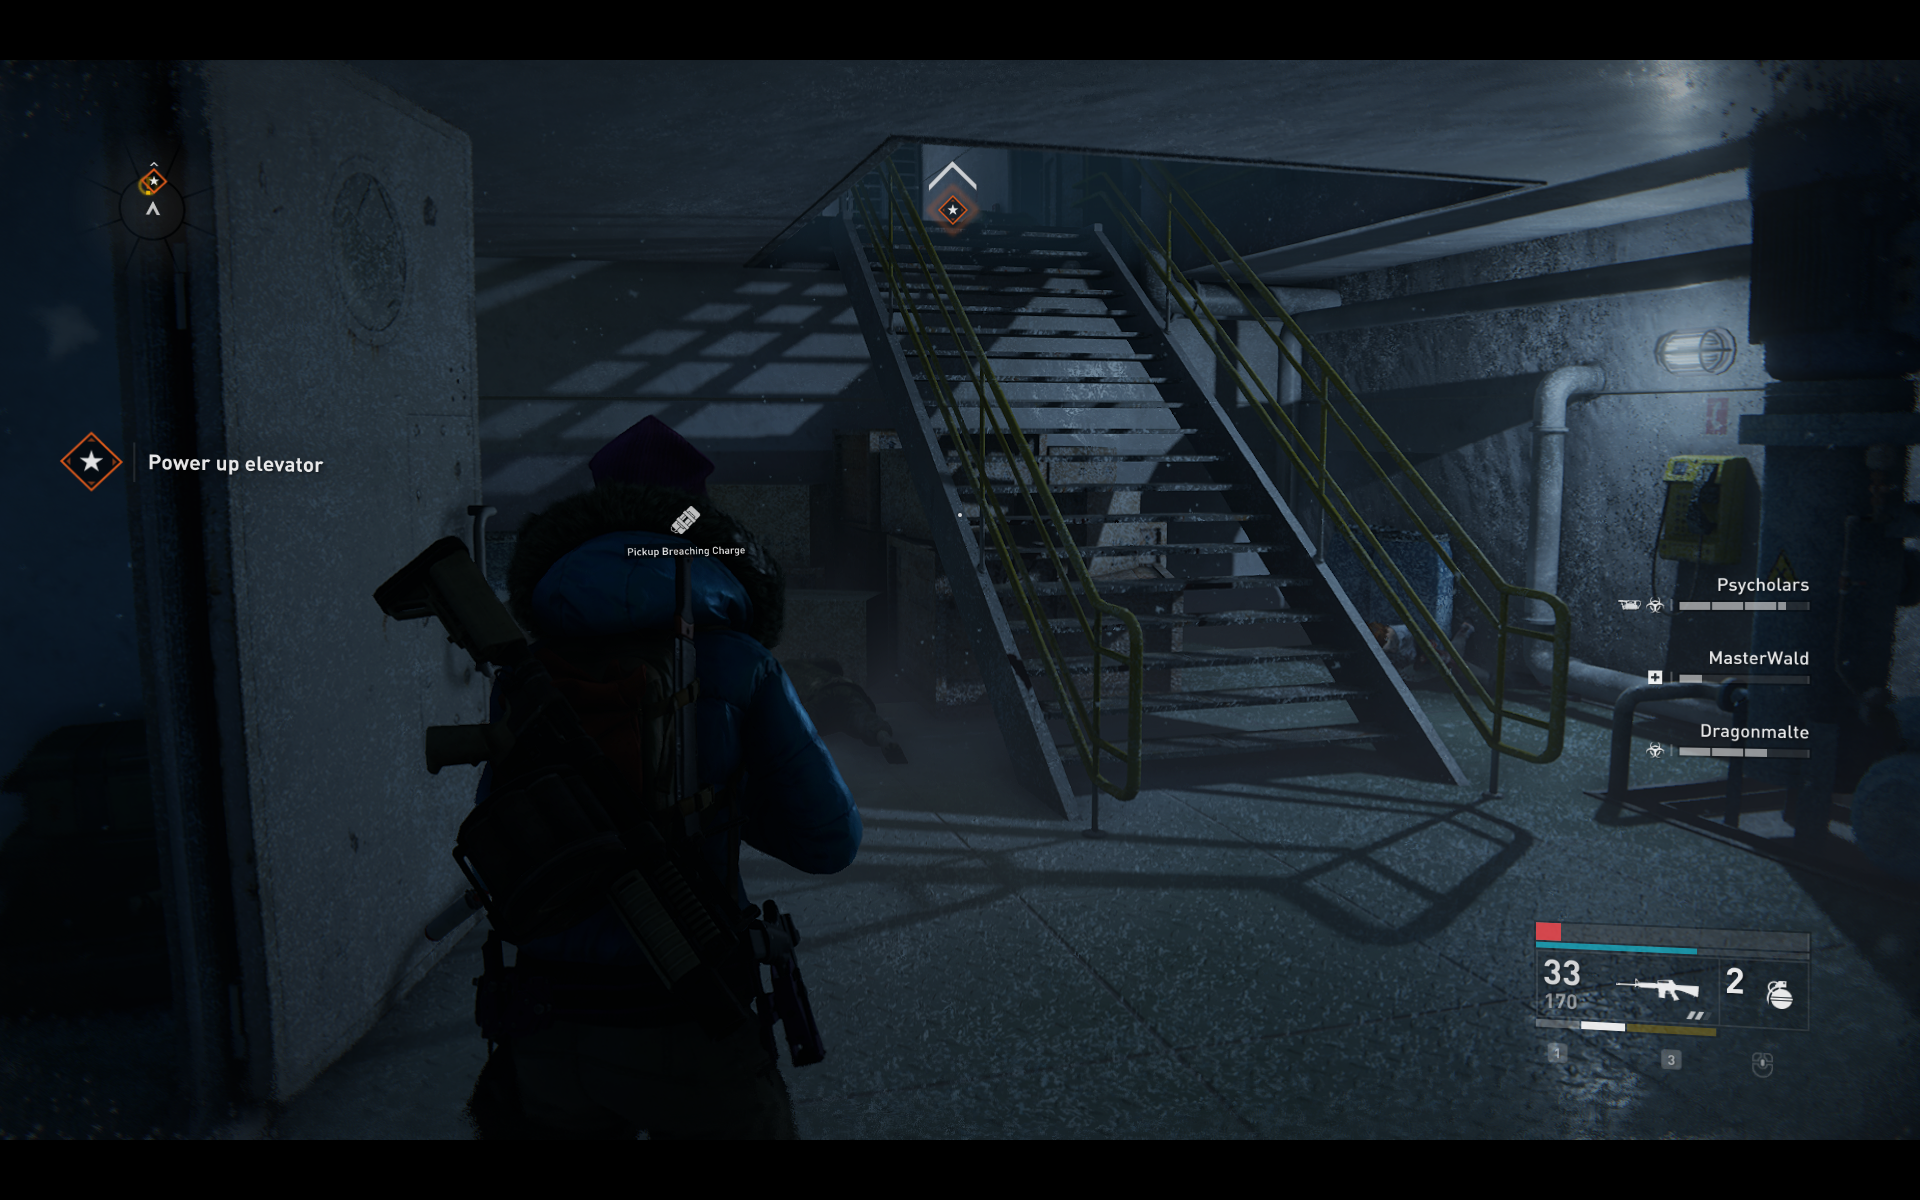
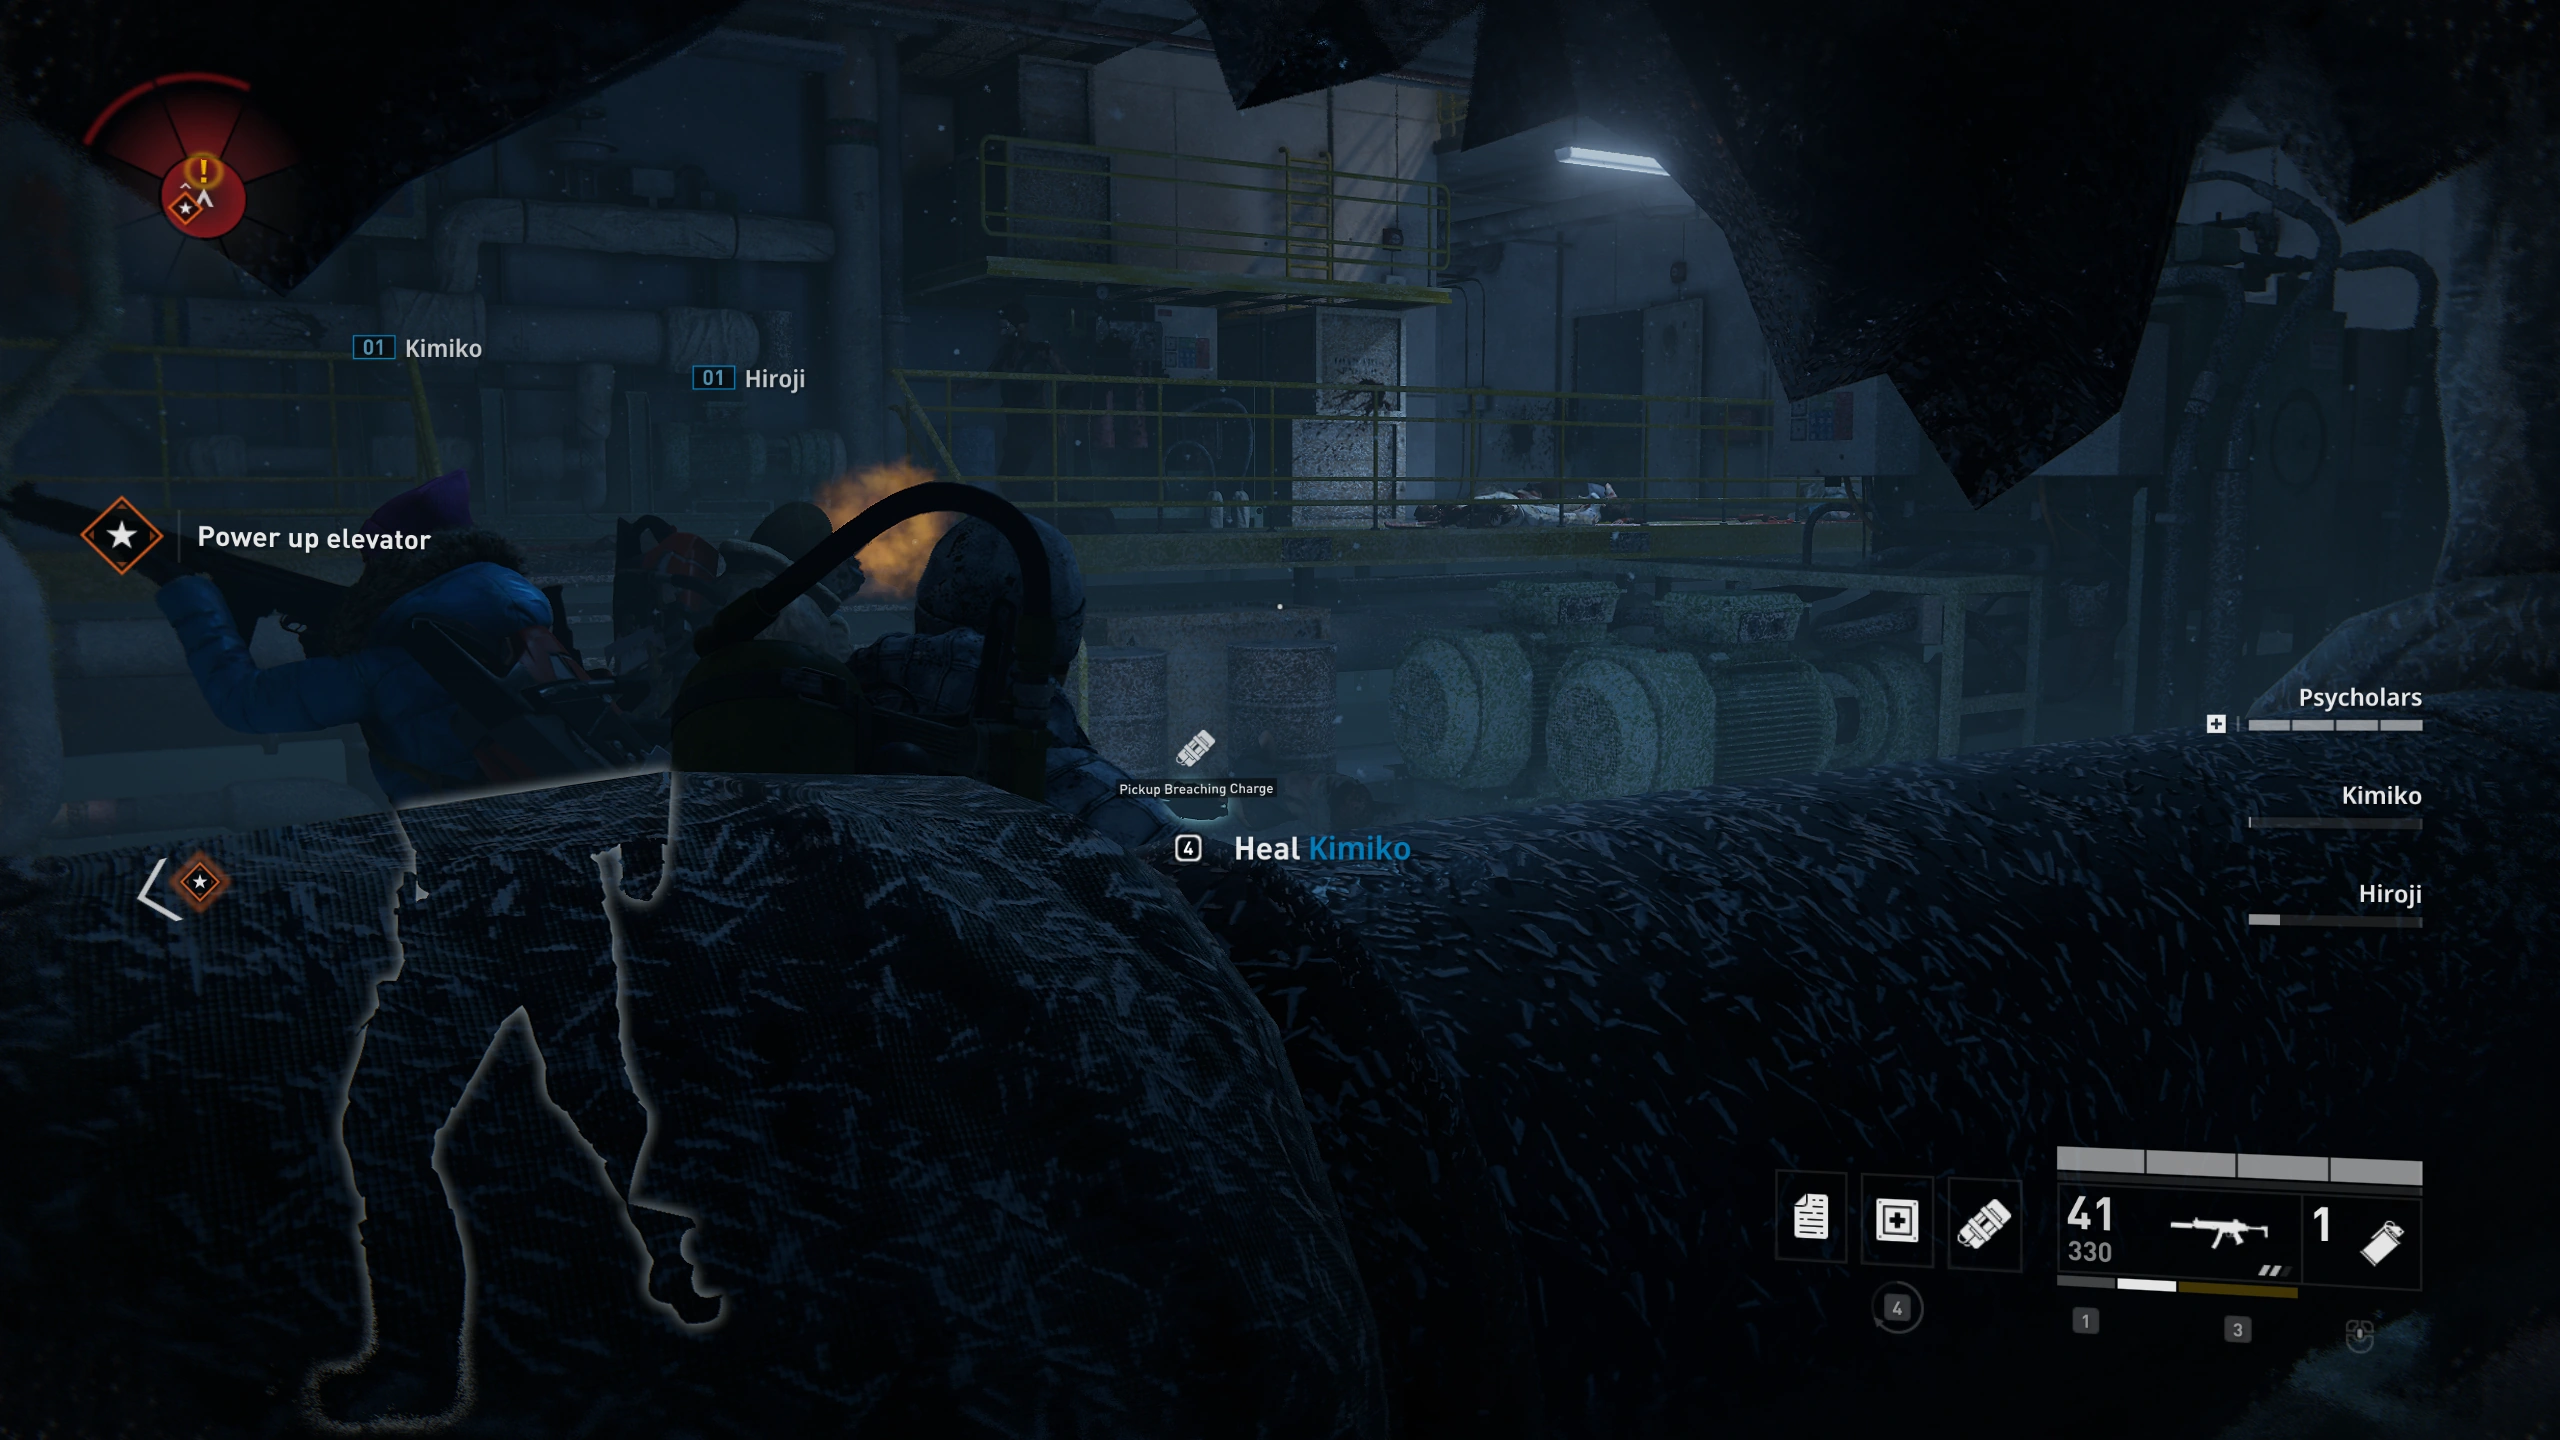
Chapter 4: Resurrection[]
Location 1: ![]()
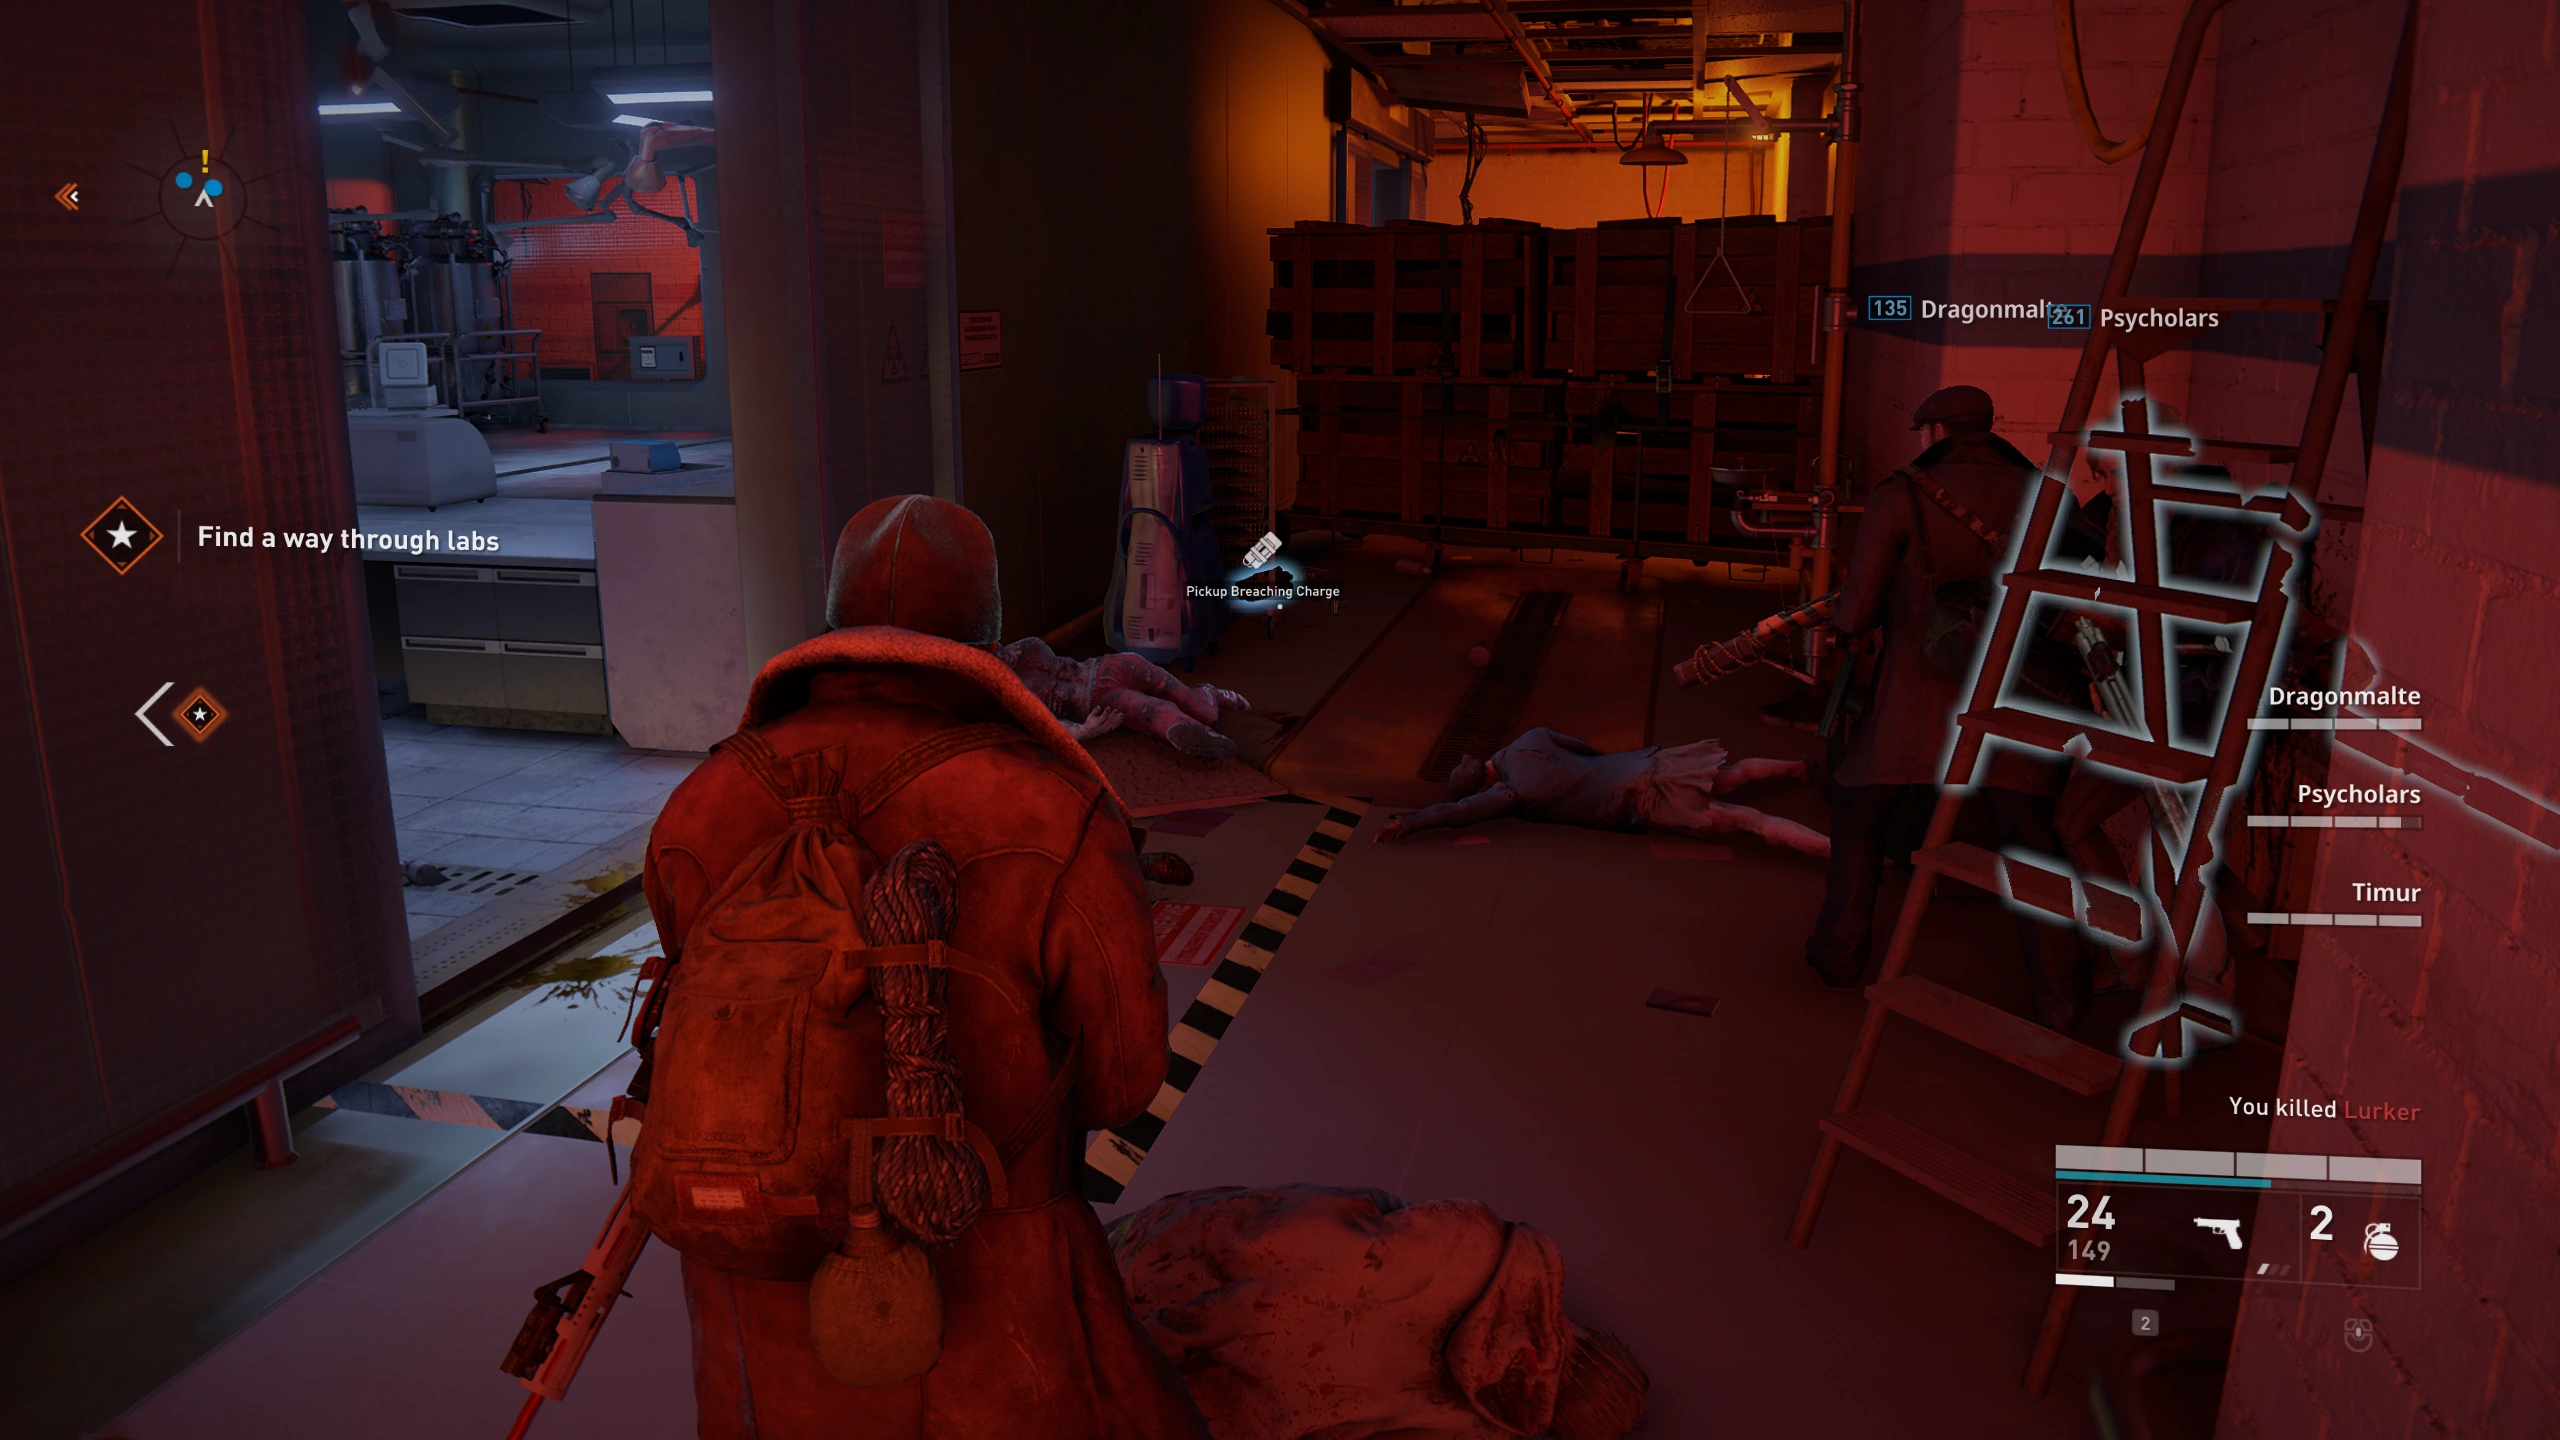
In the first part of the lab, take the second door on the left side in the room that was potentially filled with gas and turn straight left towards the blocked hallway.

Location 2: ![]()
After you exit the area with the automatic turrets, behind some tanks.
Location 3: ![]()
In the first inside the tunnels, the blocked tunnel exit to the far side, on the right.
Location 4: ![]()
Location 5: ![]()
Location 6: ![]()
Location 7: ![]()
Location 8: ![]()
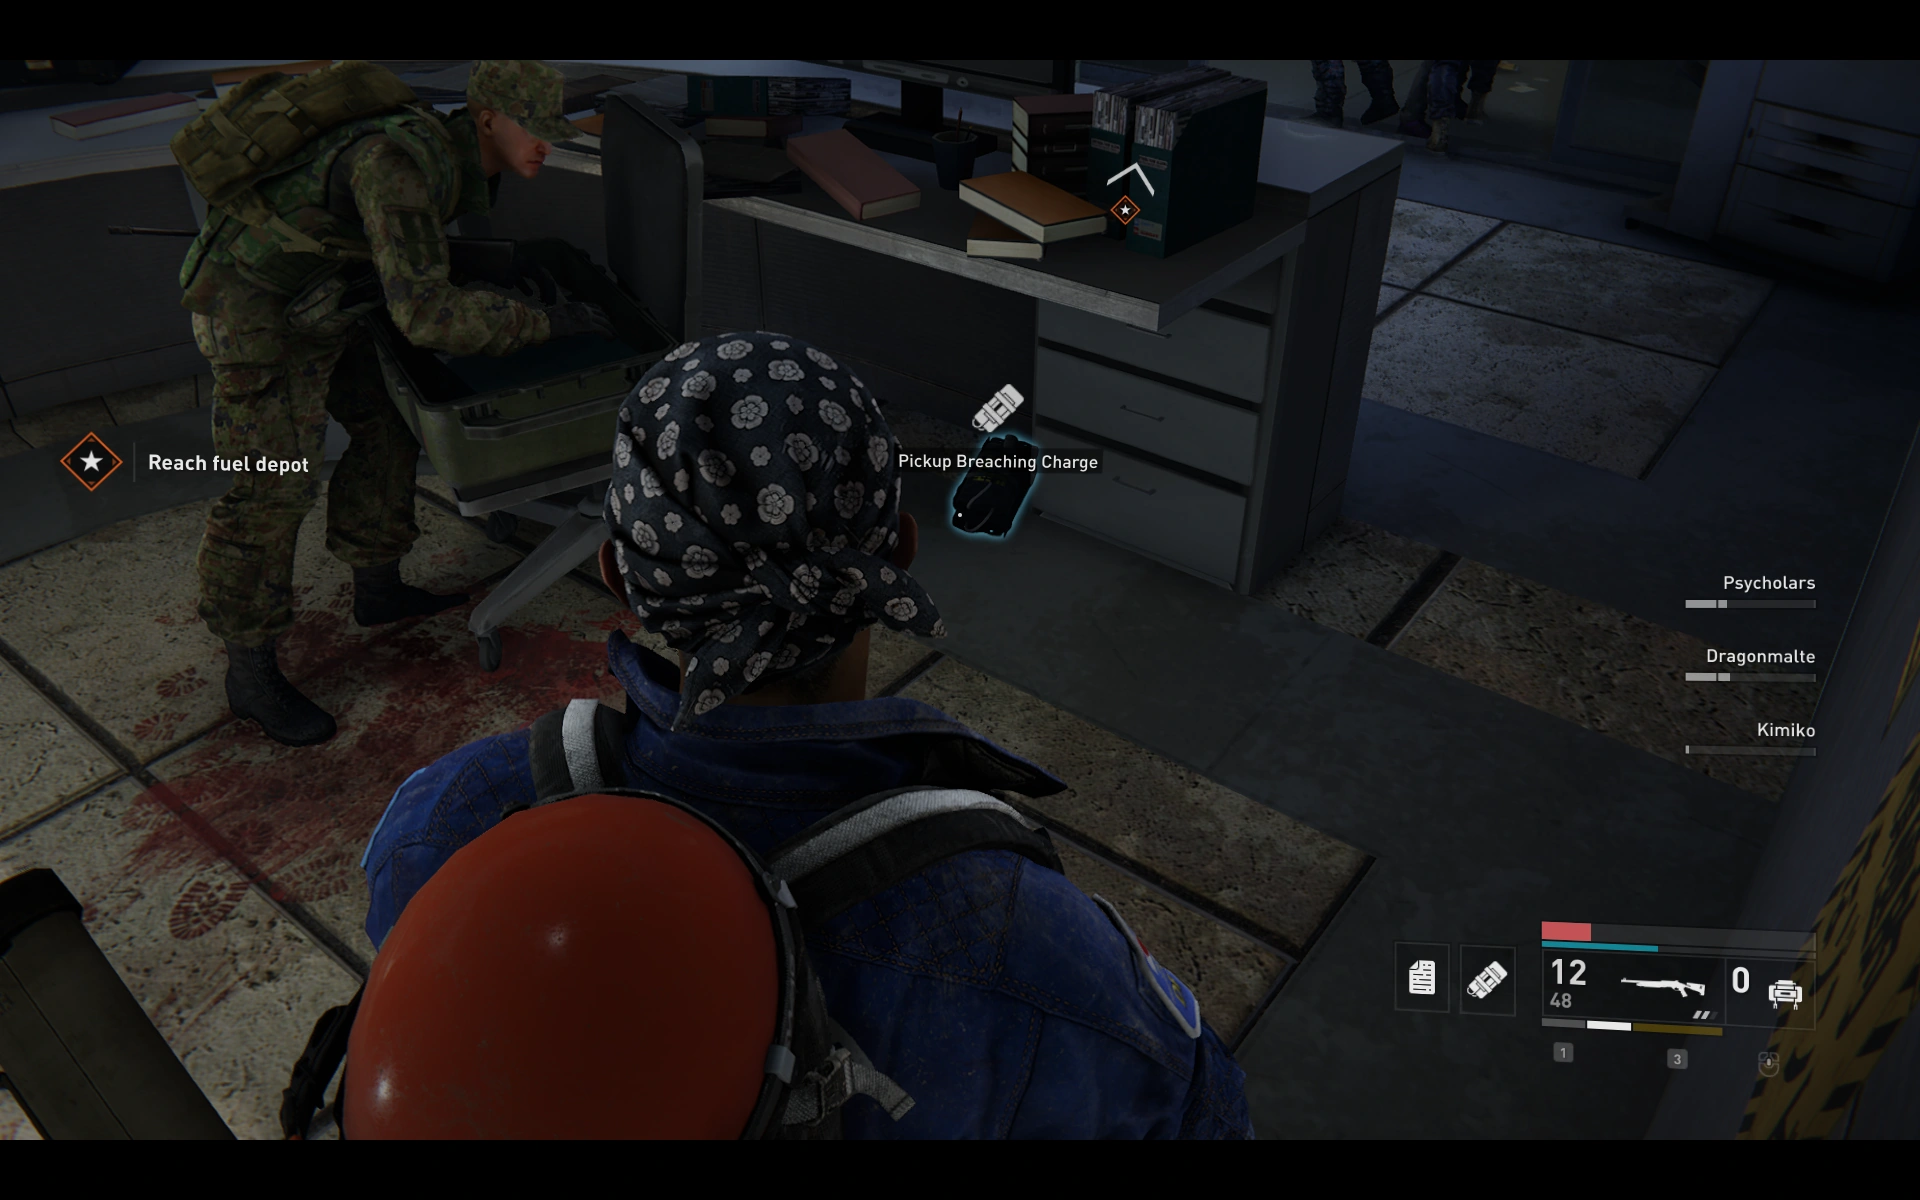
Tokyo[]
Chapter 1: Setting Sun[]
Location 1: ![]()
Location 2: ![]()
Location 3: ![]()
Location 4: ![]()
Location 5: ![]()
Location 6: ![]()
Location 7: ![]()
Location 8: ![]()
Chapter 2: Final Call[]
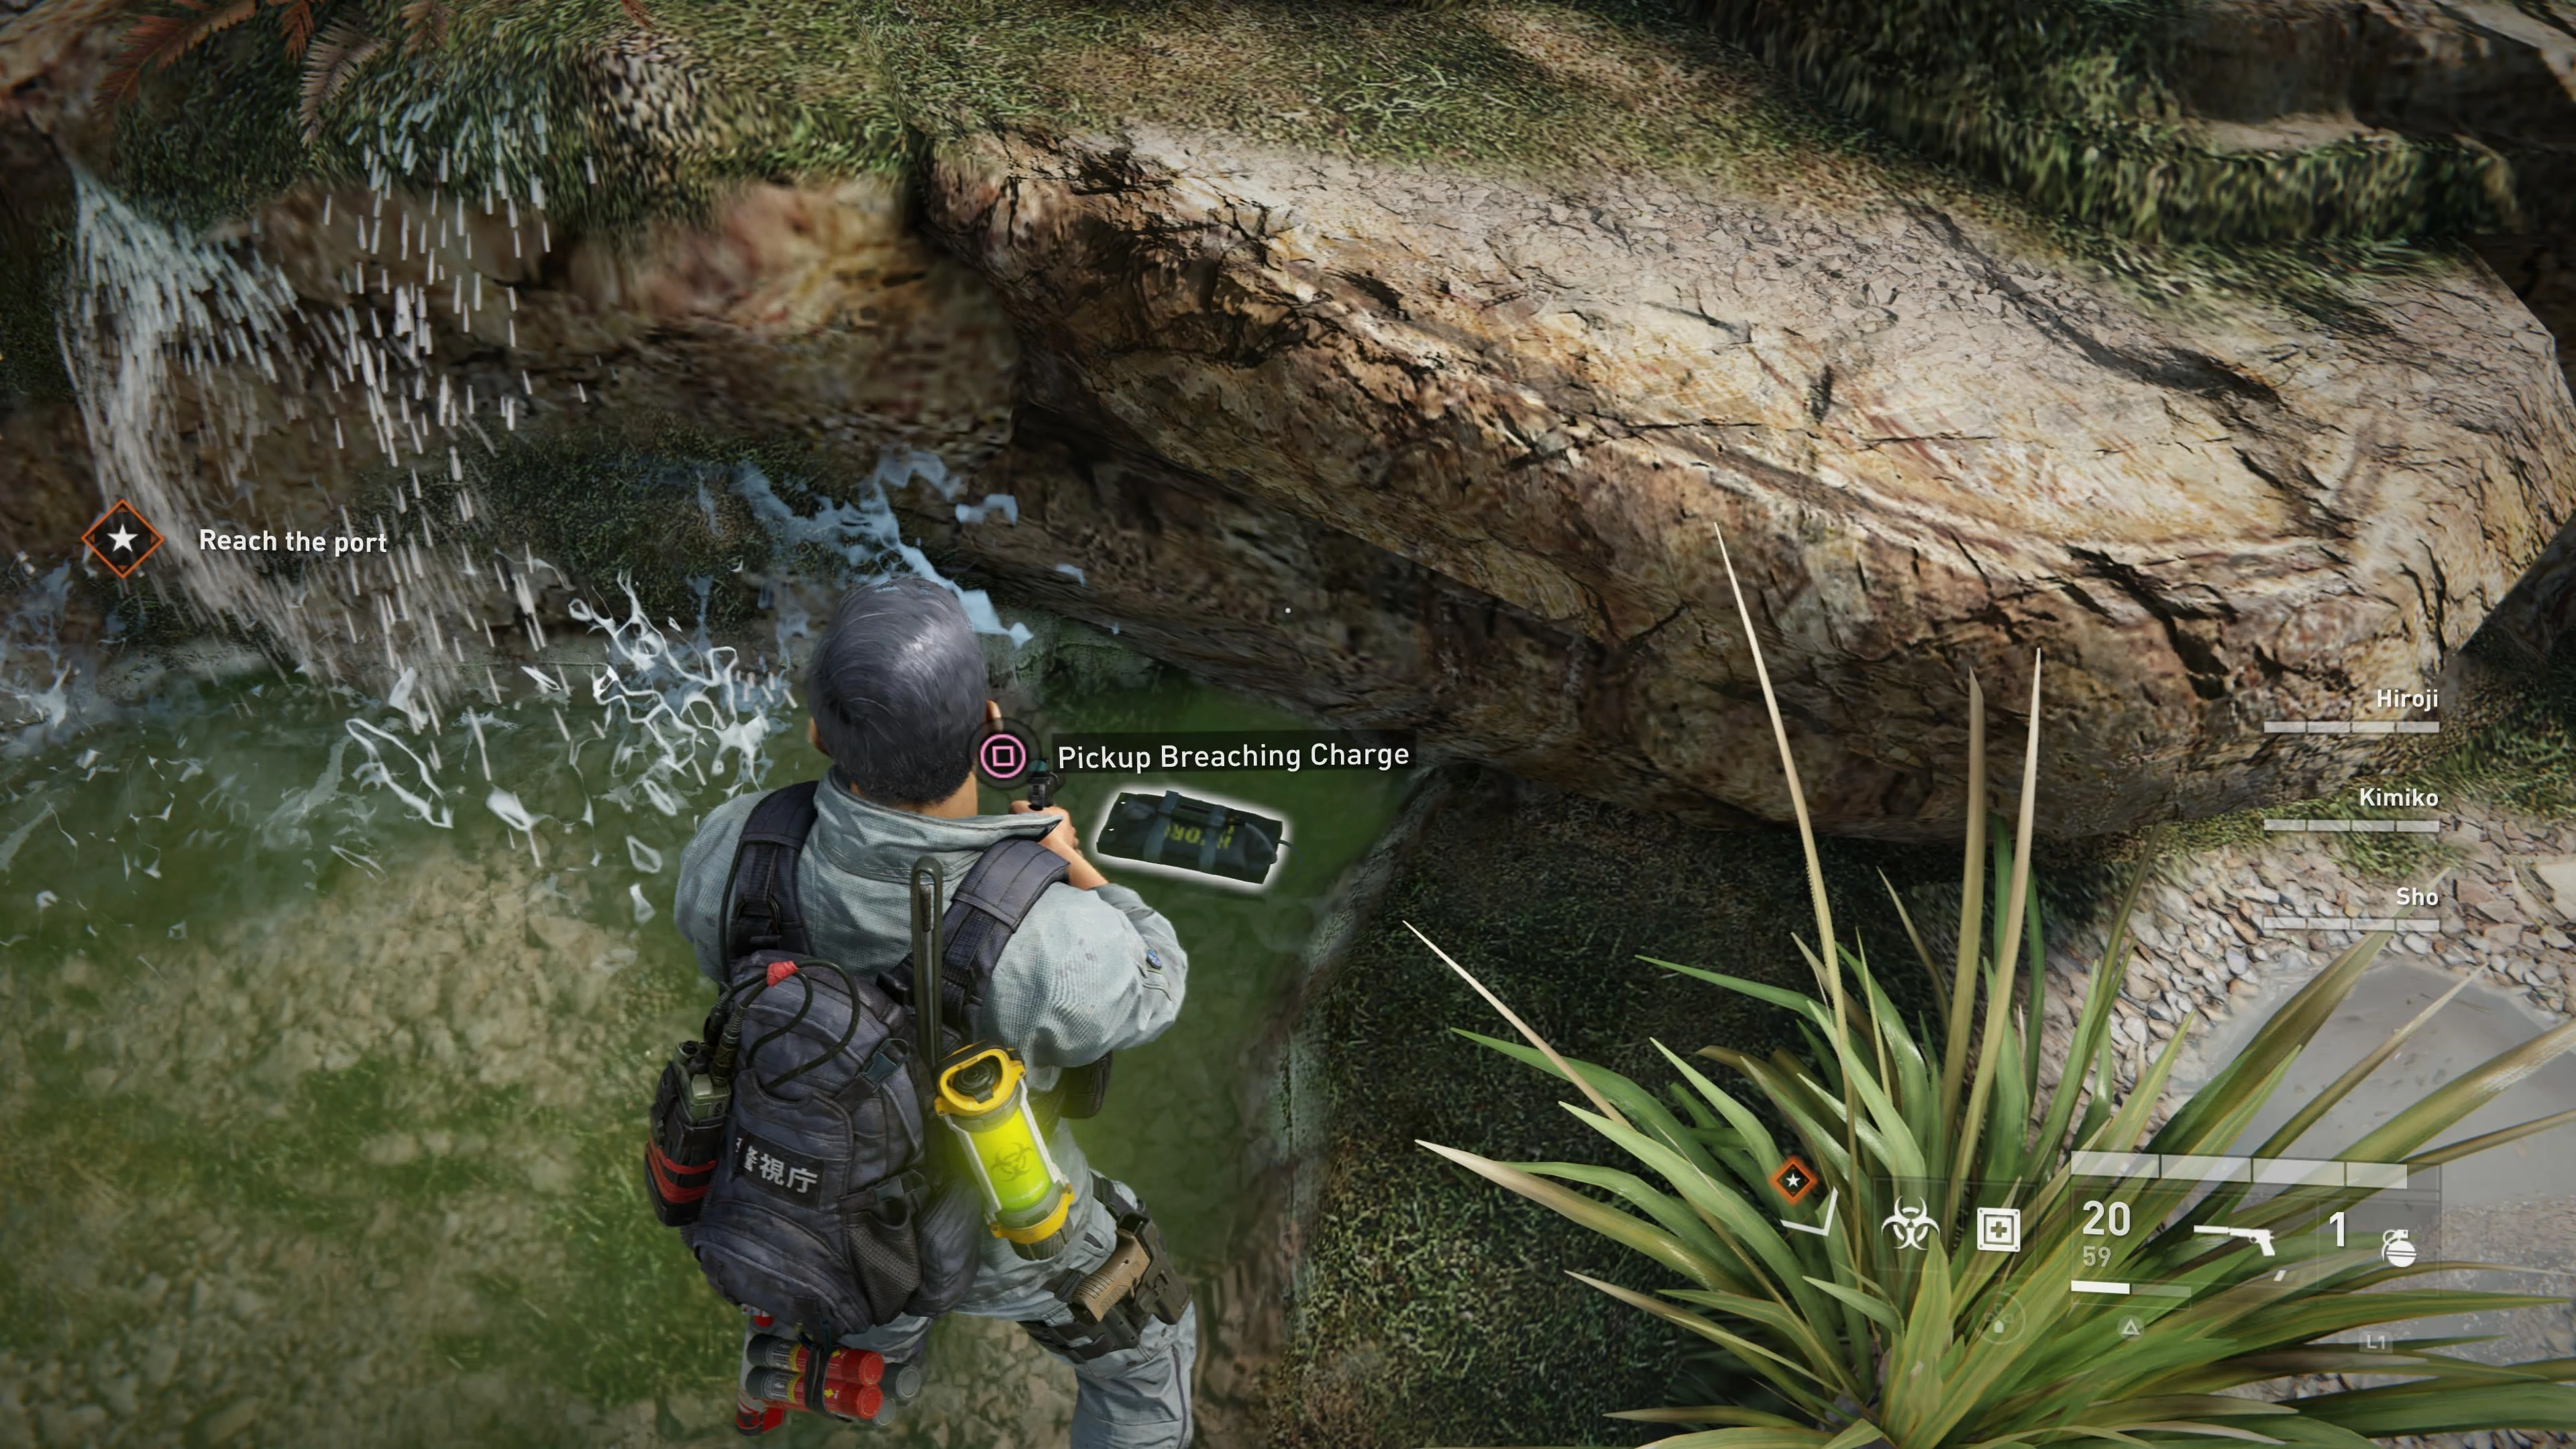
Location 1: ![]()
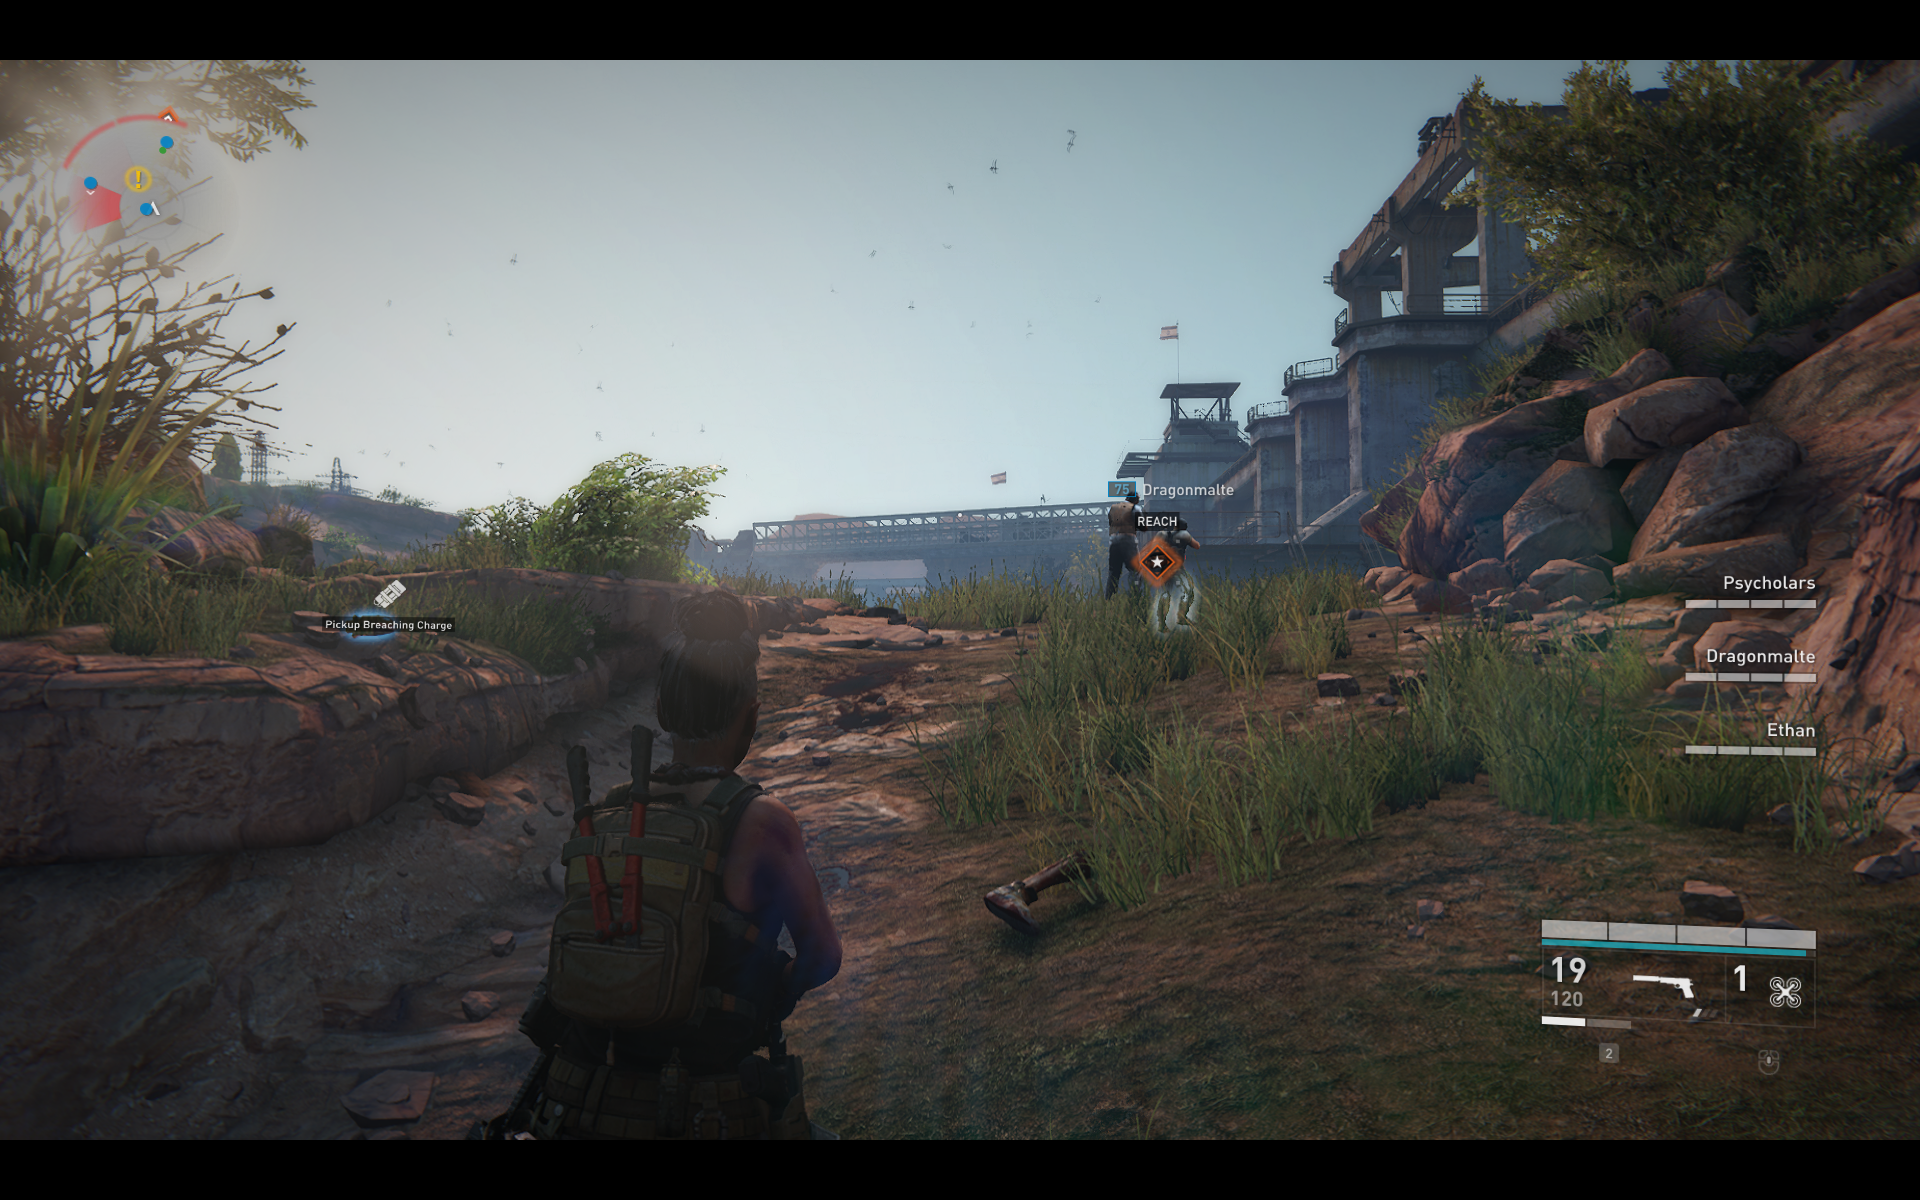
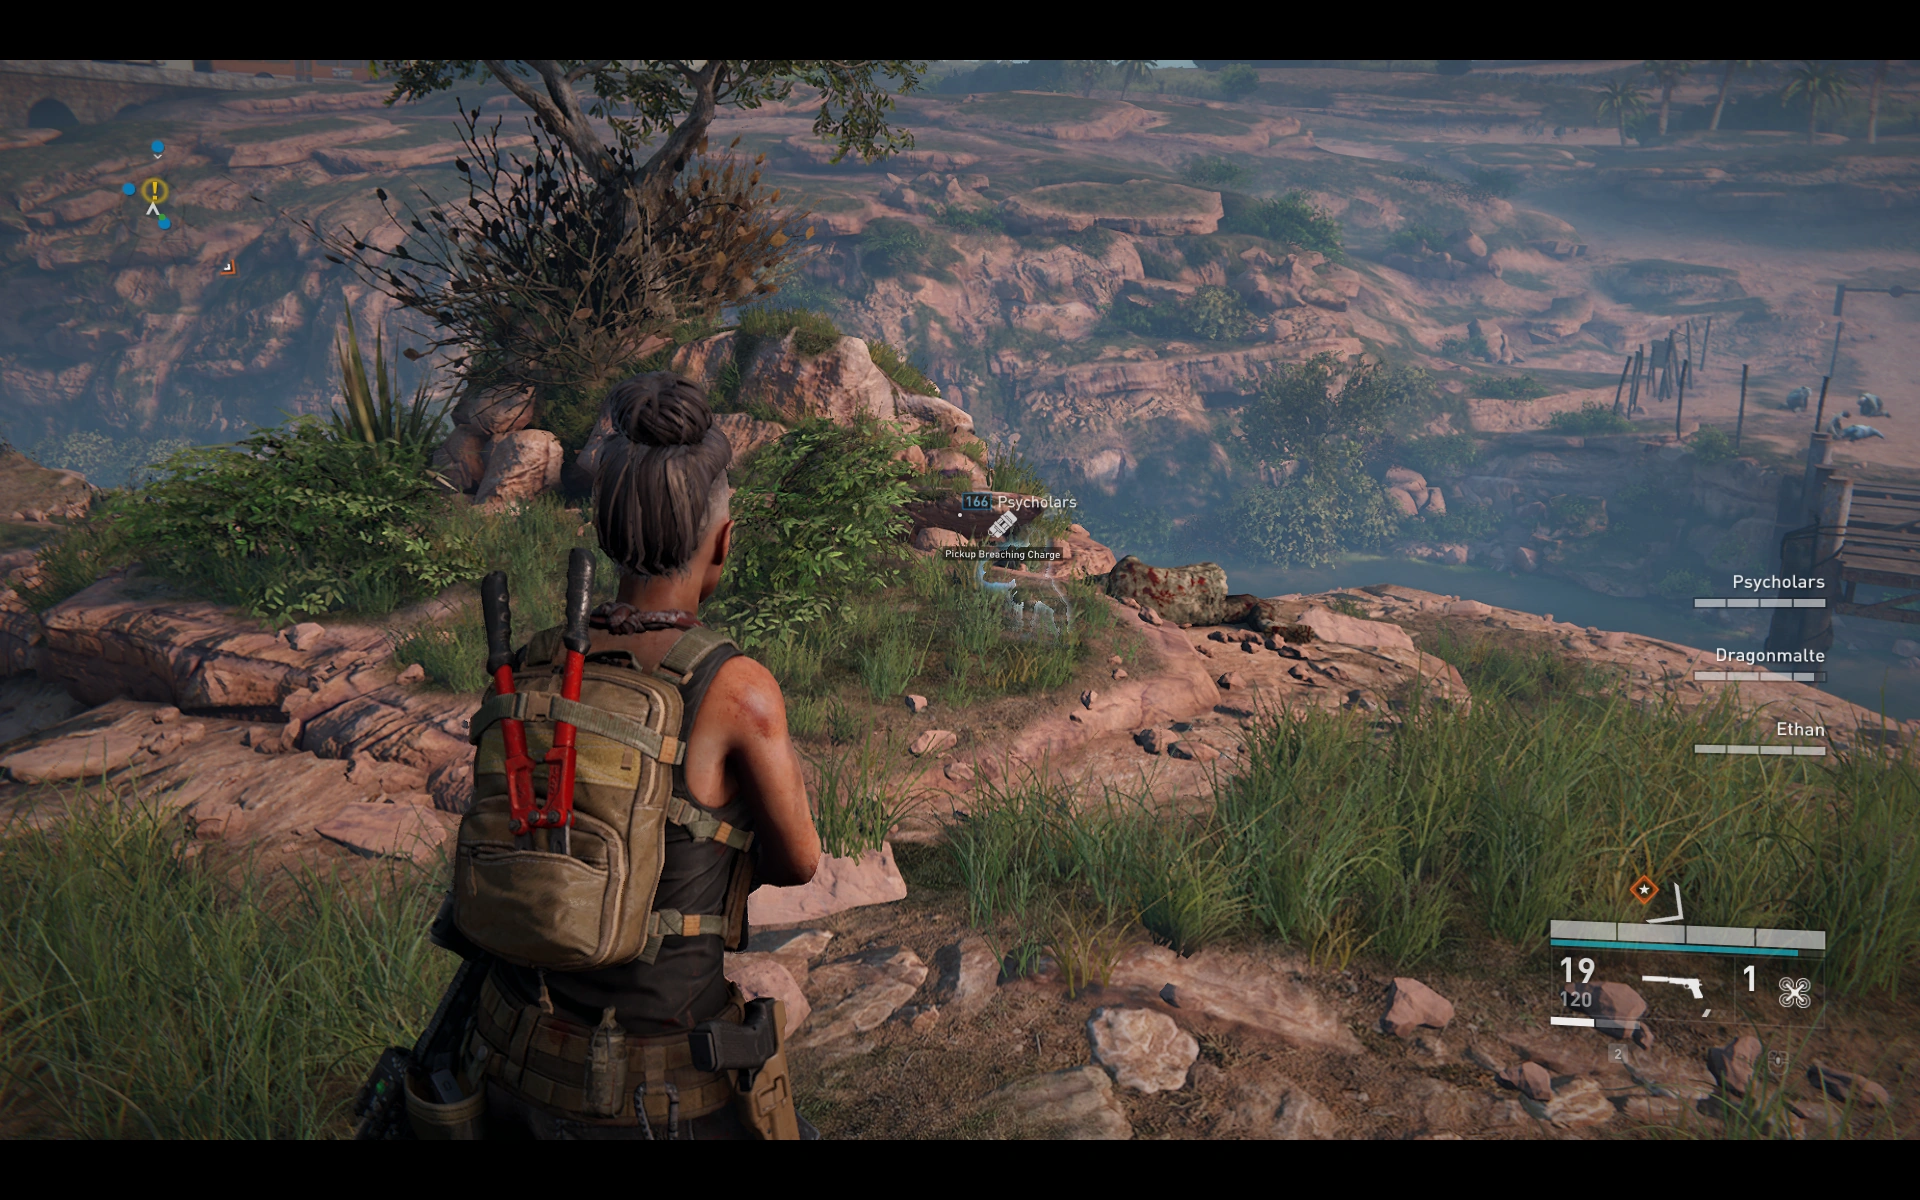
You can find a breaking charge on the right side in the pond before you cross the bridge.
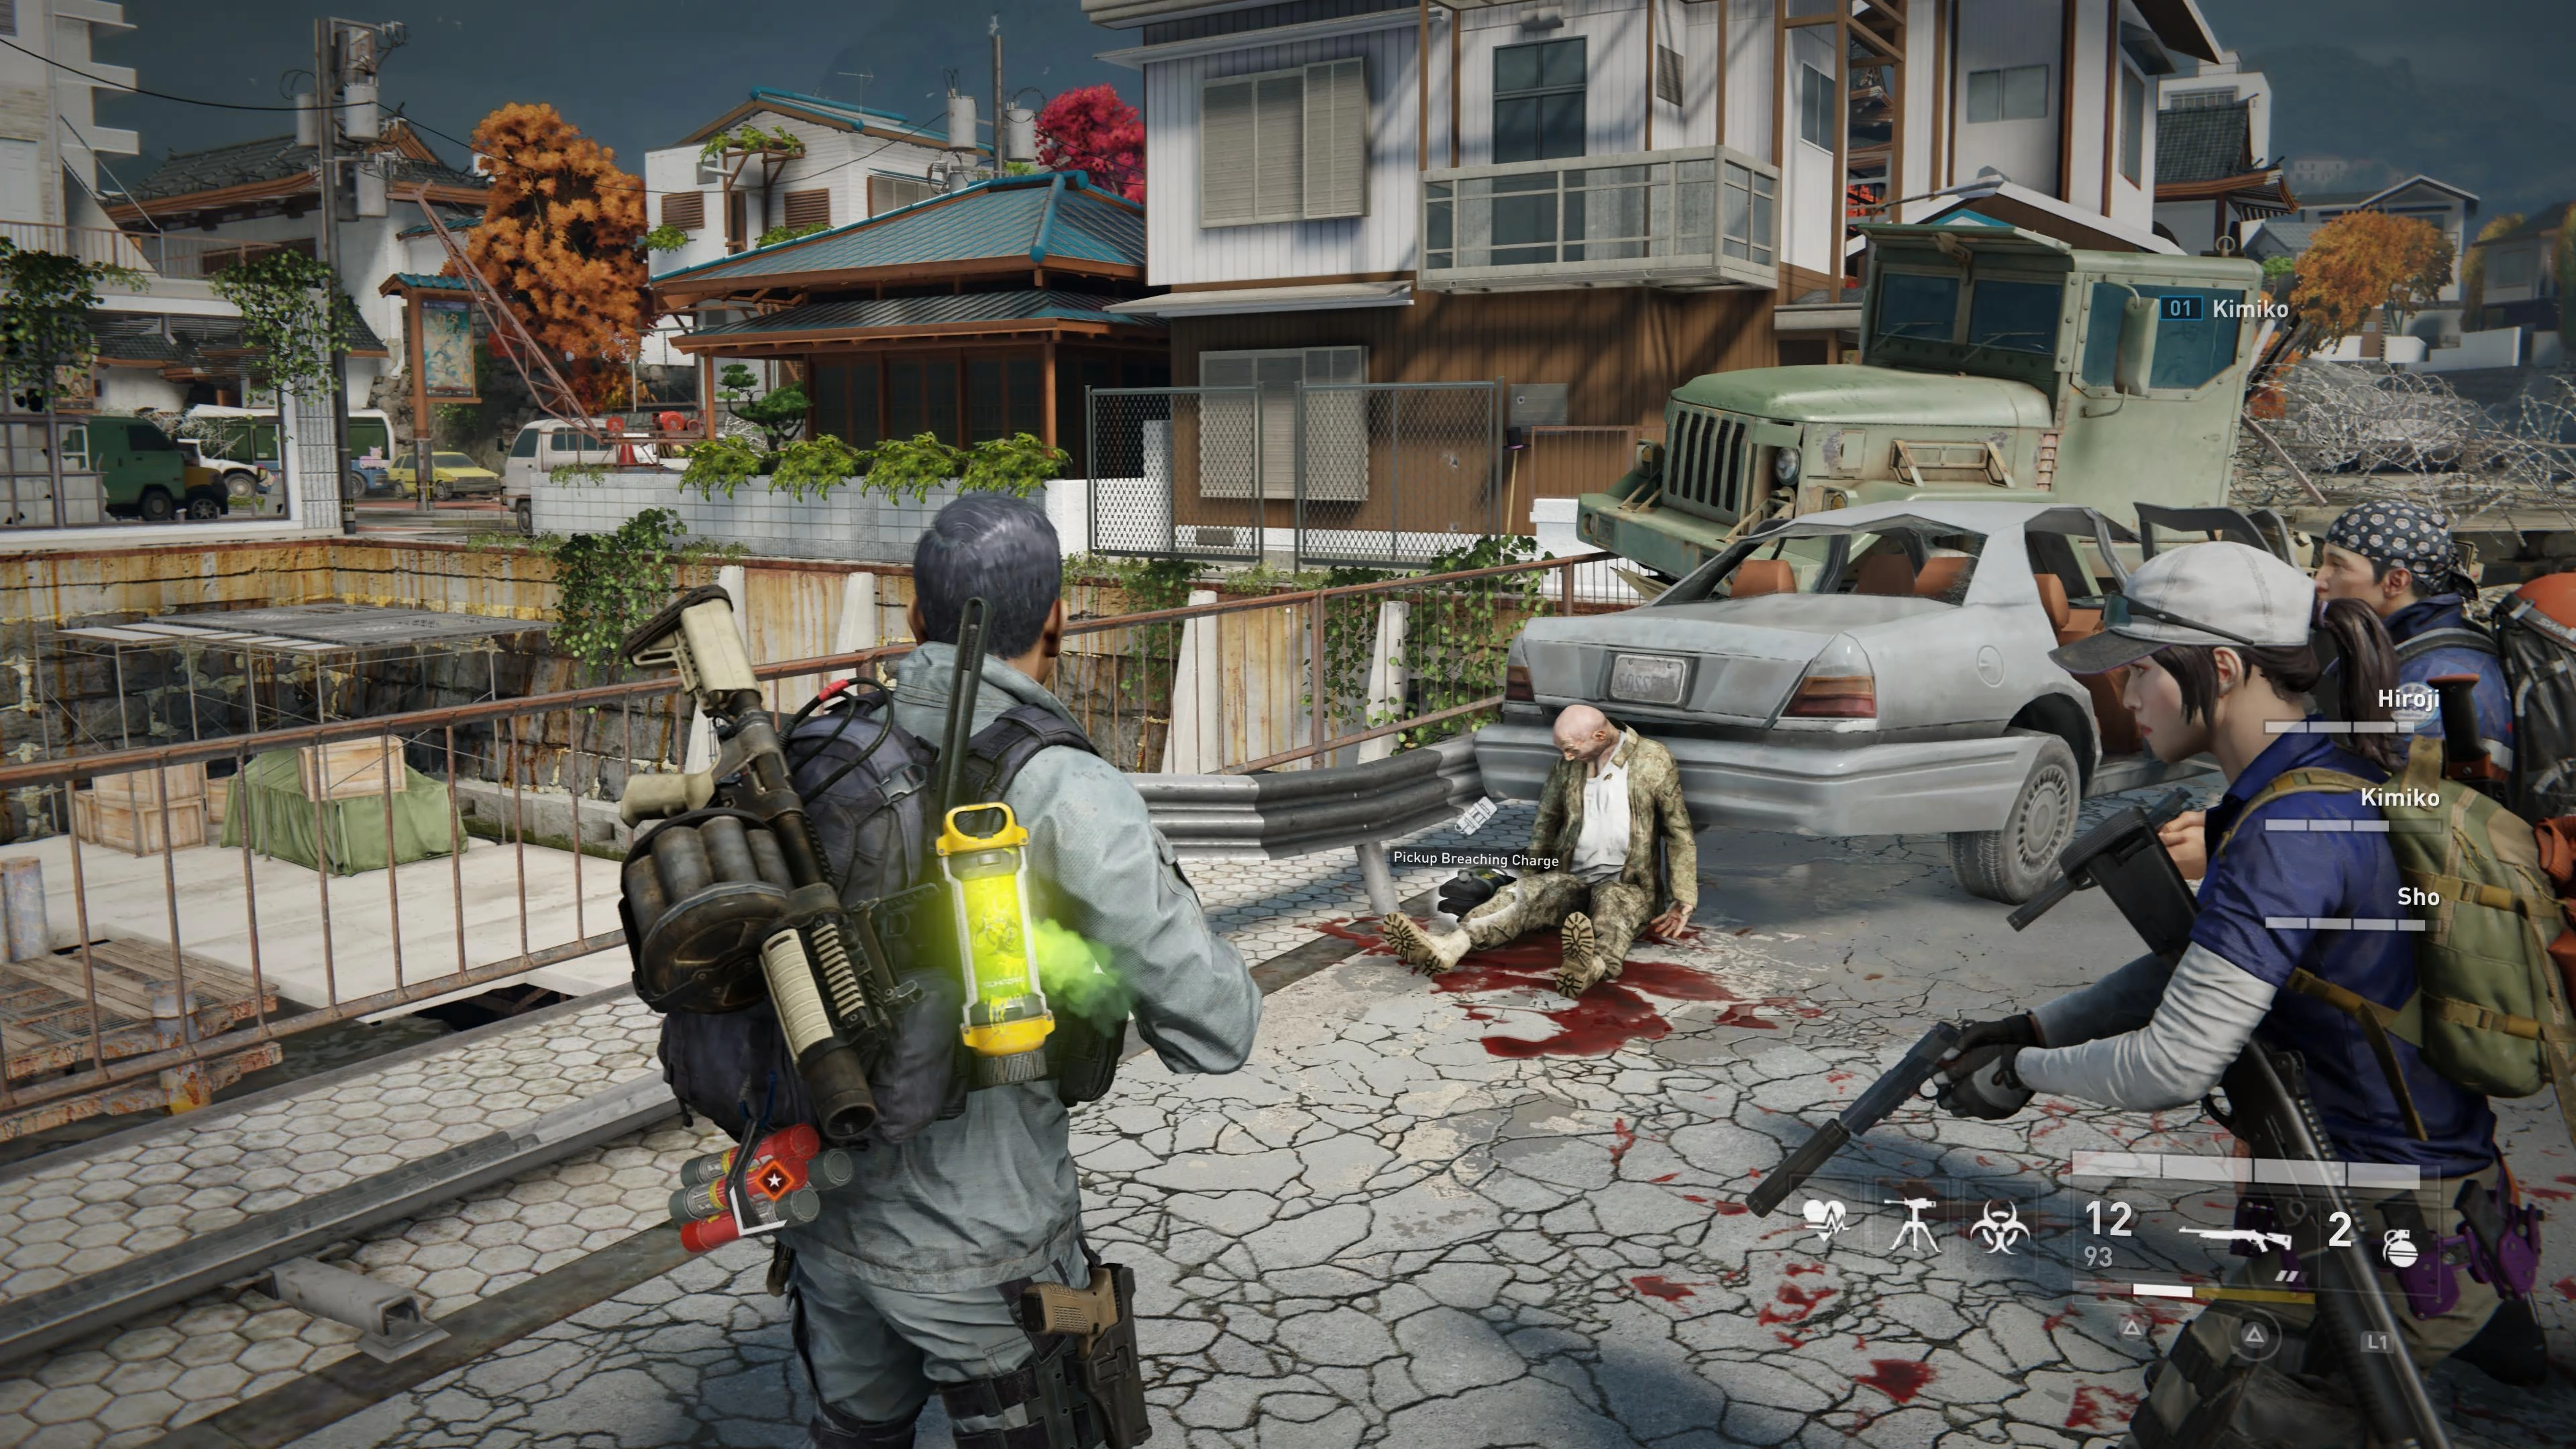
Location 2: ![]()
When you climb on the bridge, you can find the breaking charge next to the soldier sitting against the car in front of you.
Location 3: ![]()
In the first room after the first defense, under the counter.
Location 4: ![]()
When you leave the area where you plant the explosives, on the righthand wall.
Location 5: ![]()
Location 6: ![]()
Location 7: ![]()
Location 8: ![]()
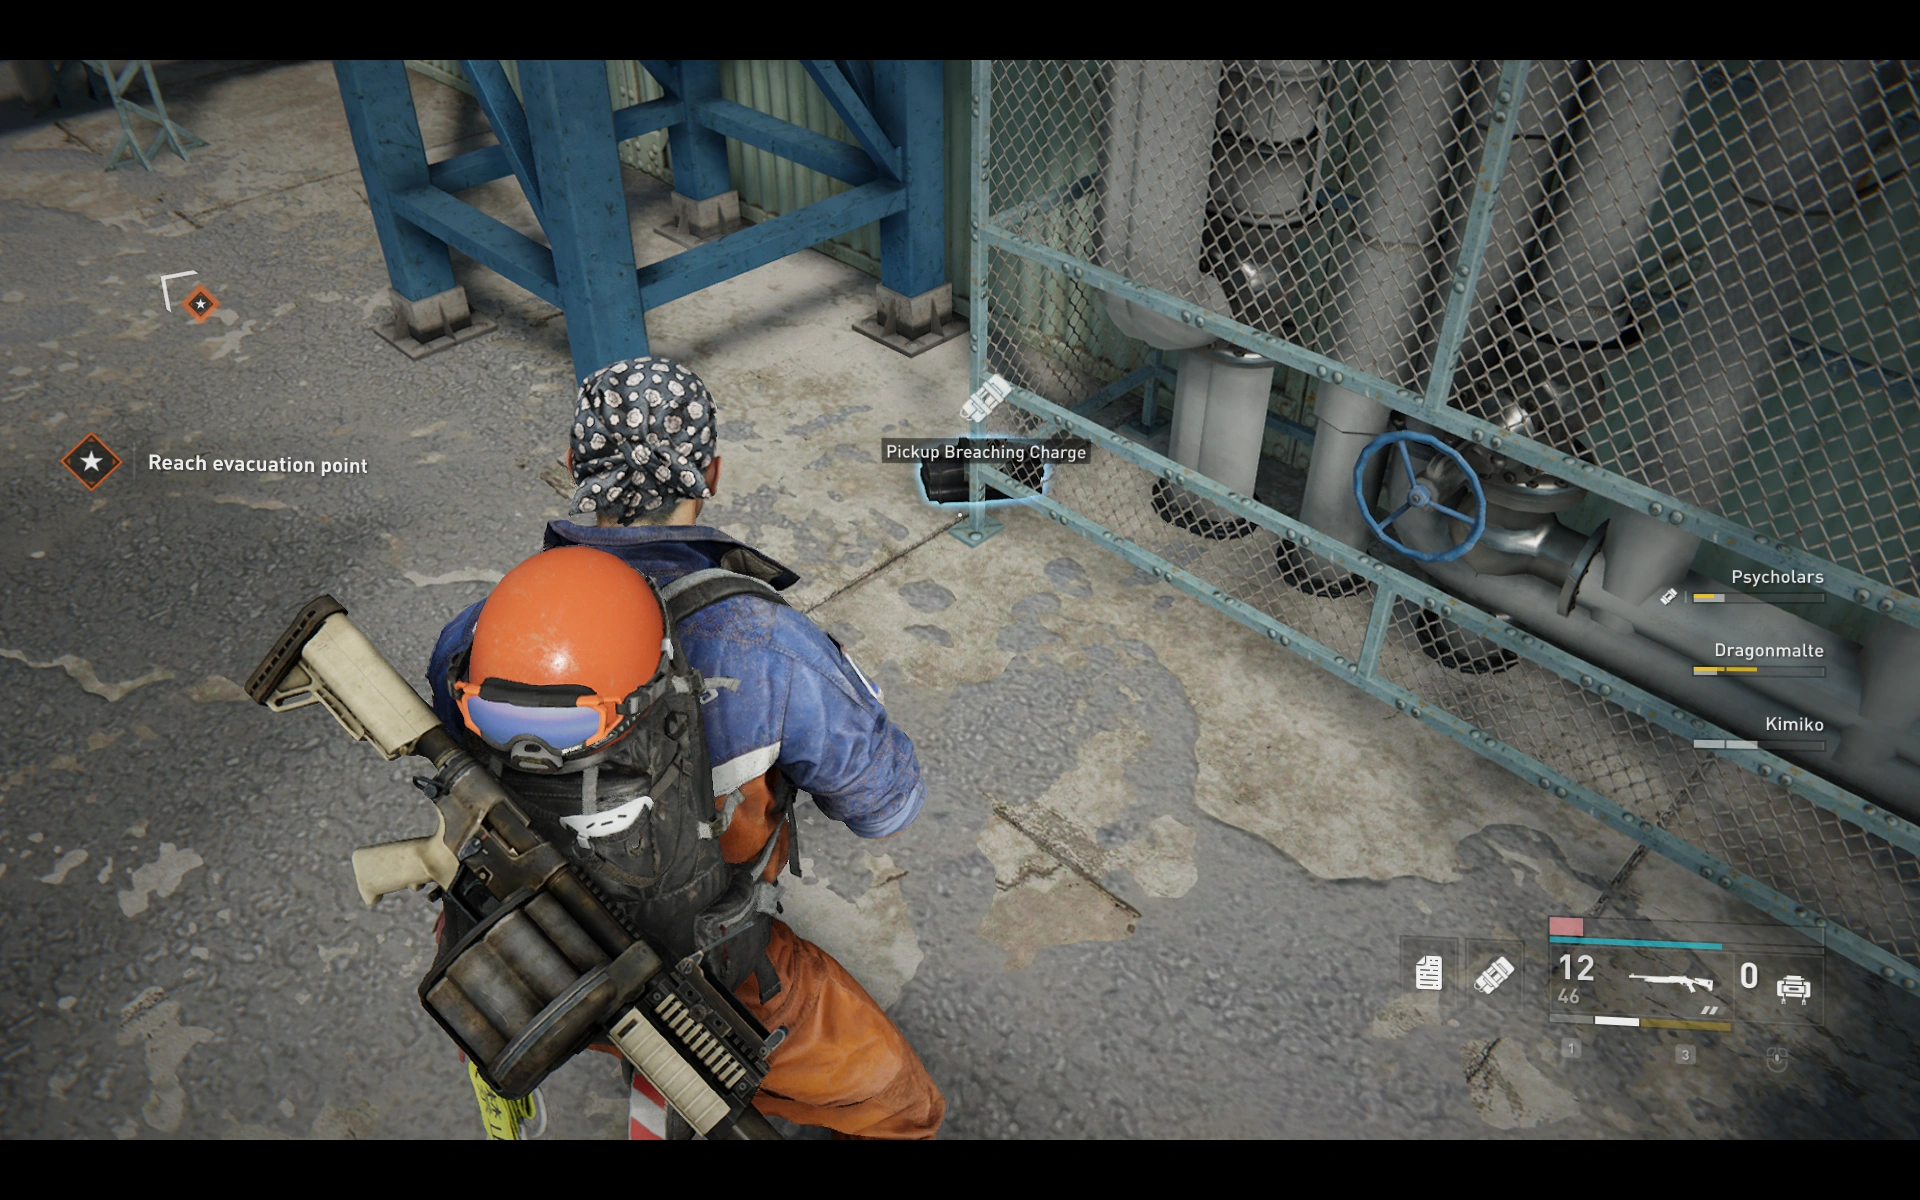
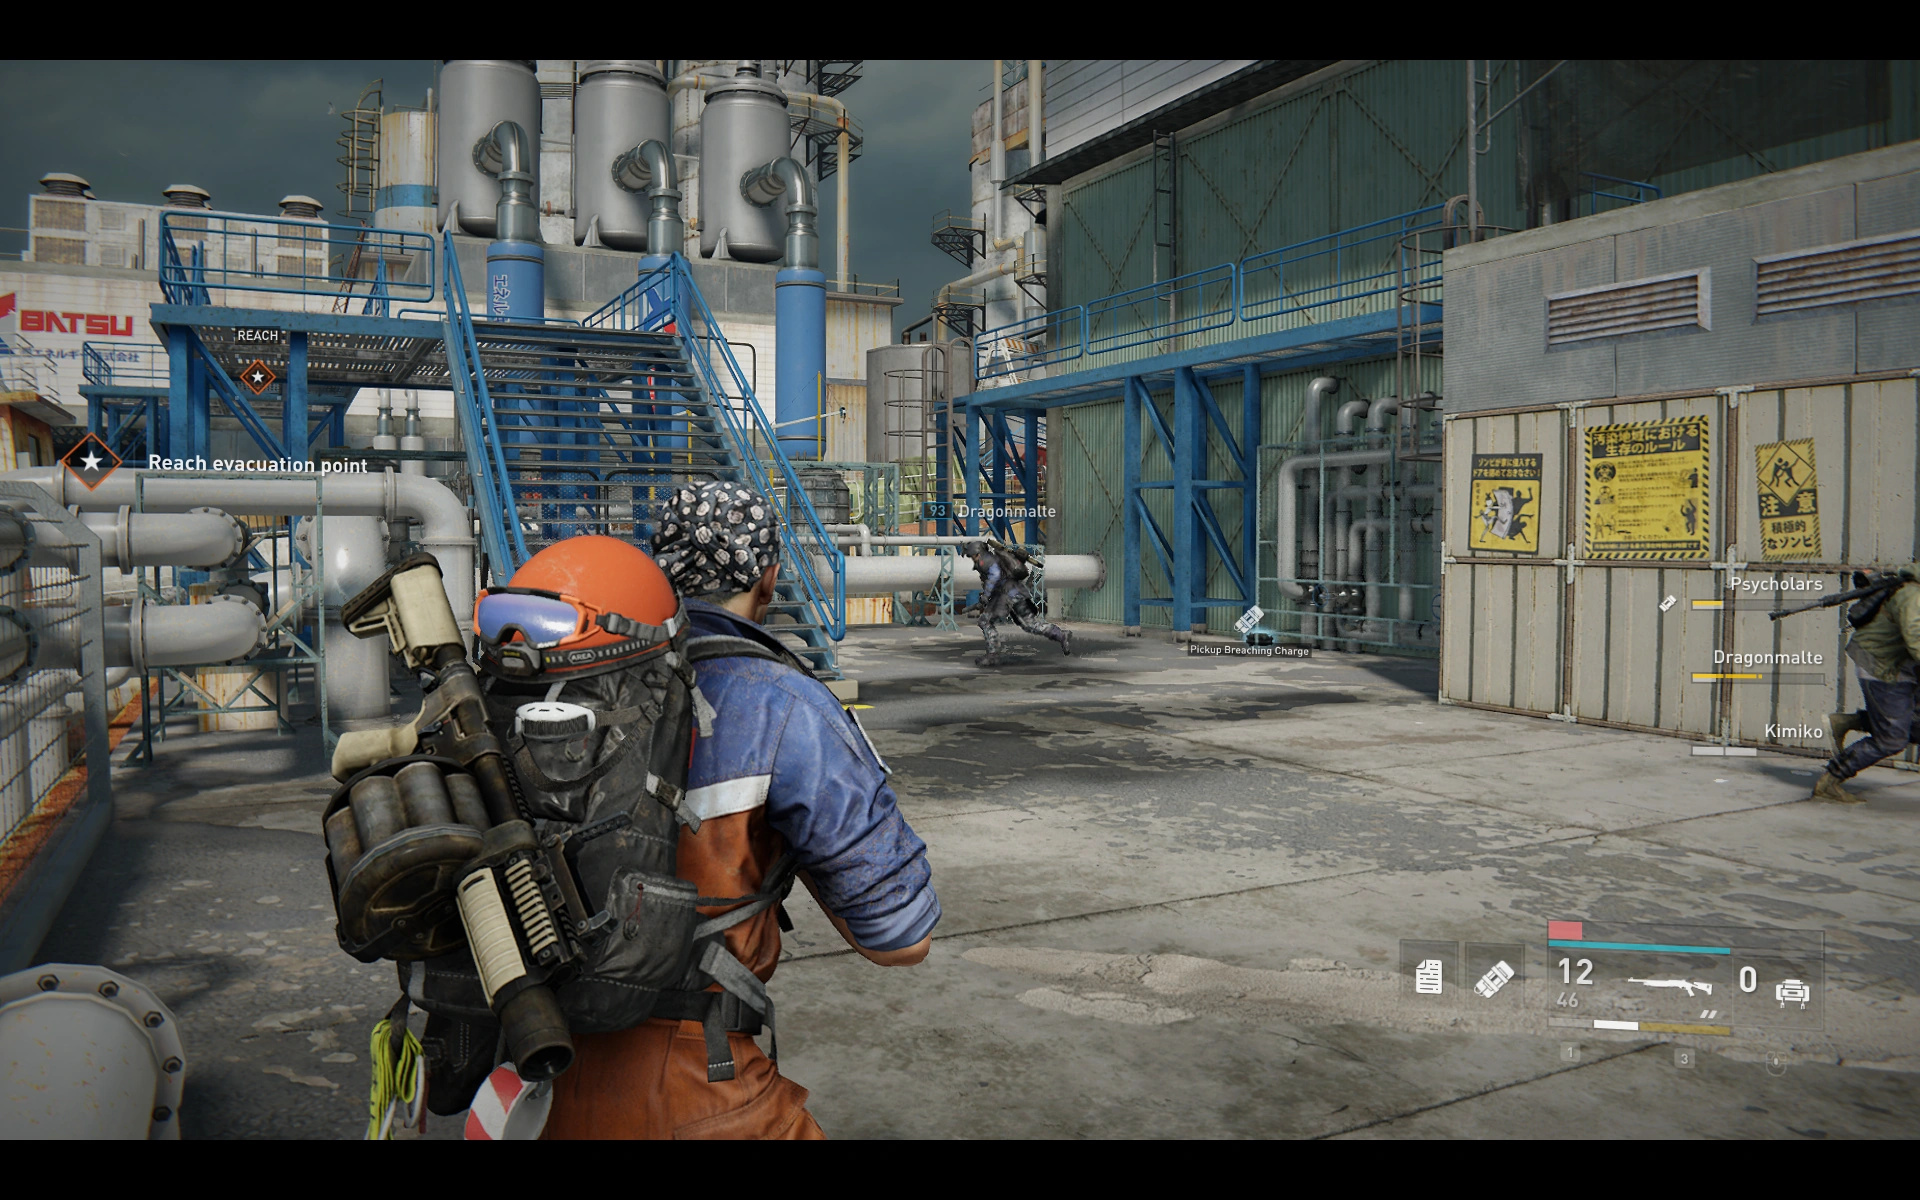
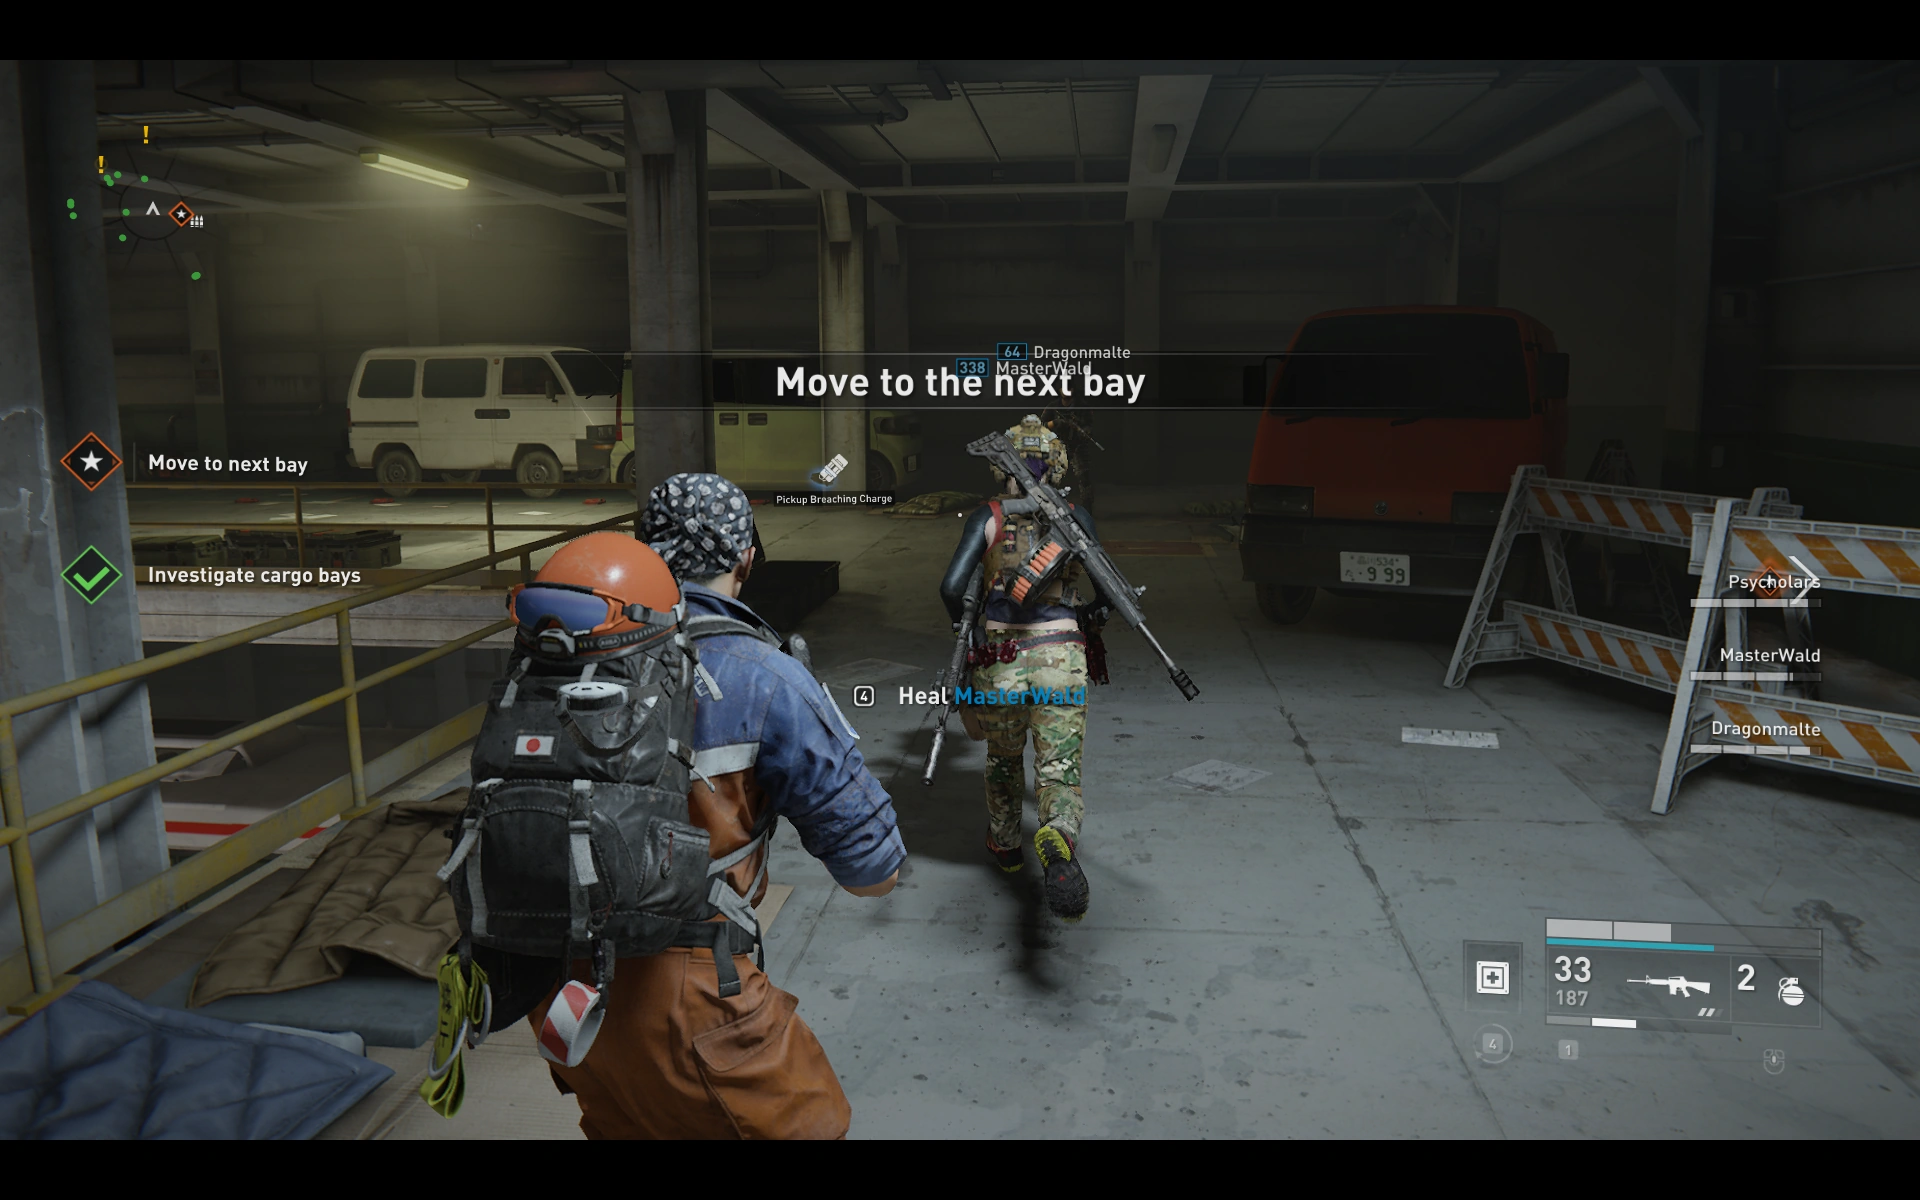
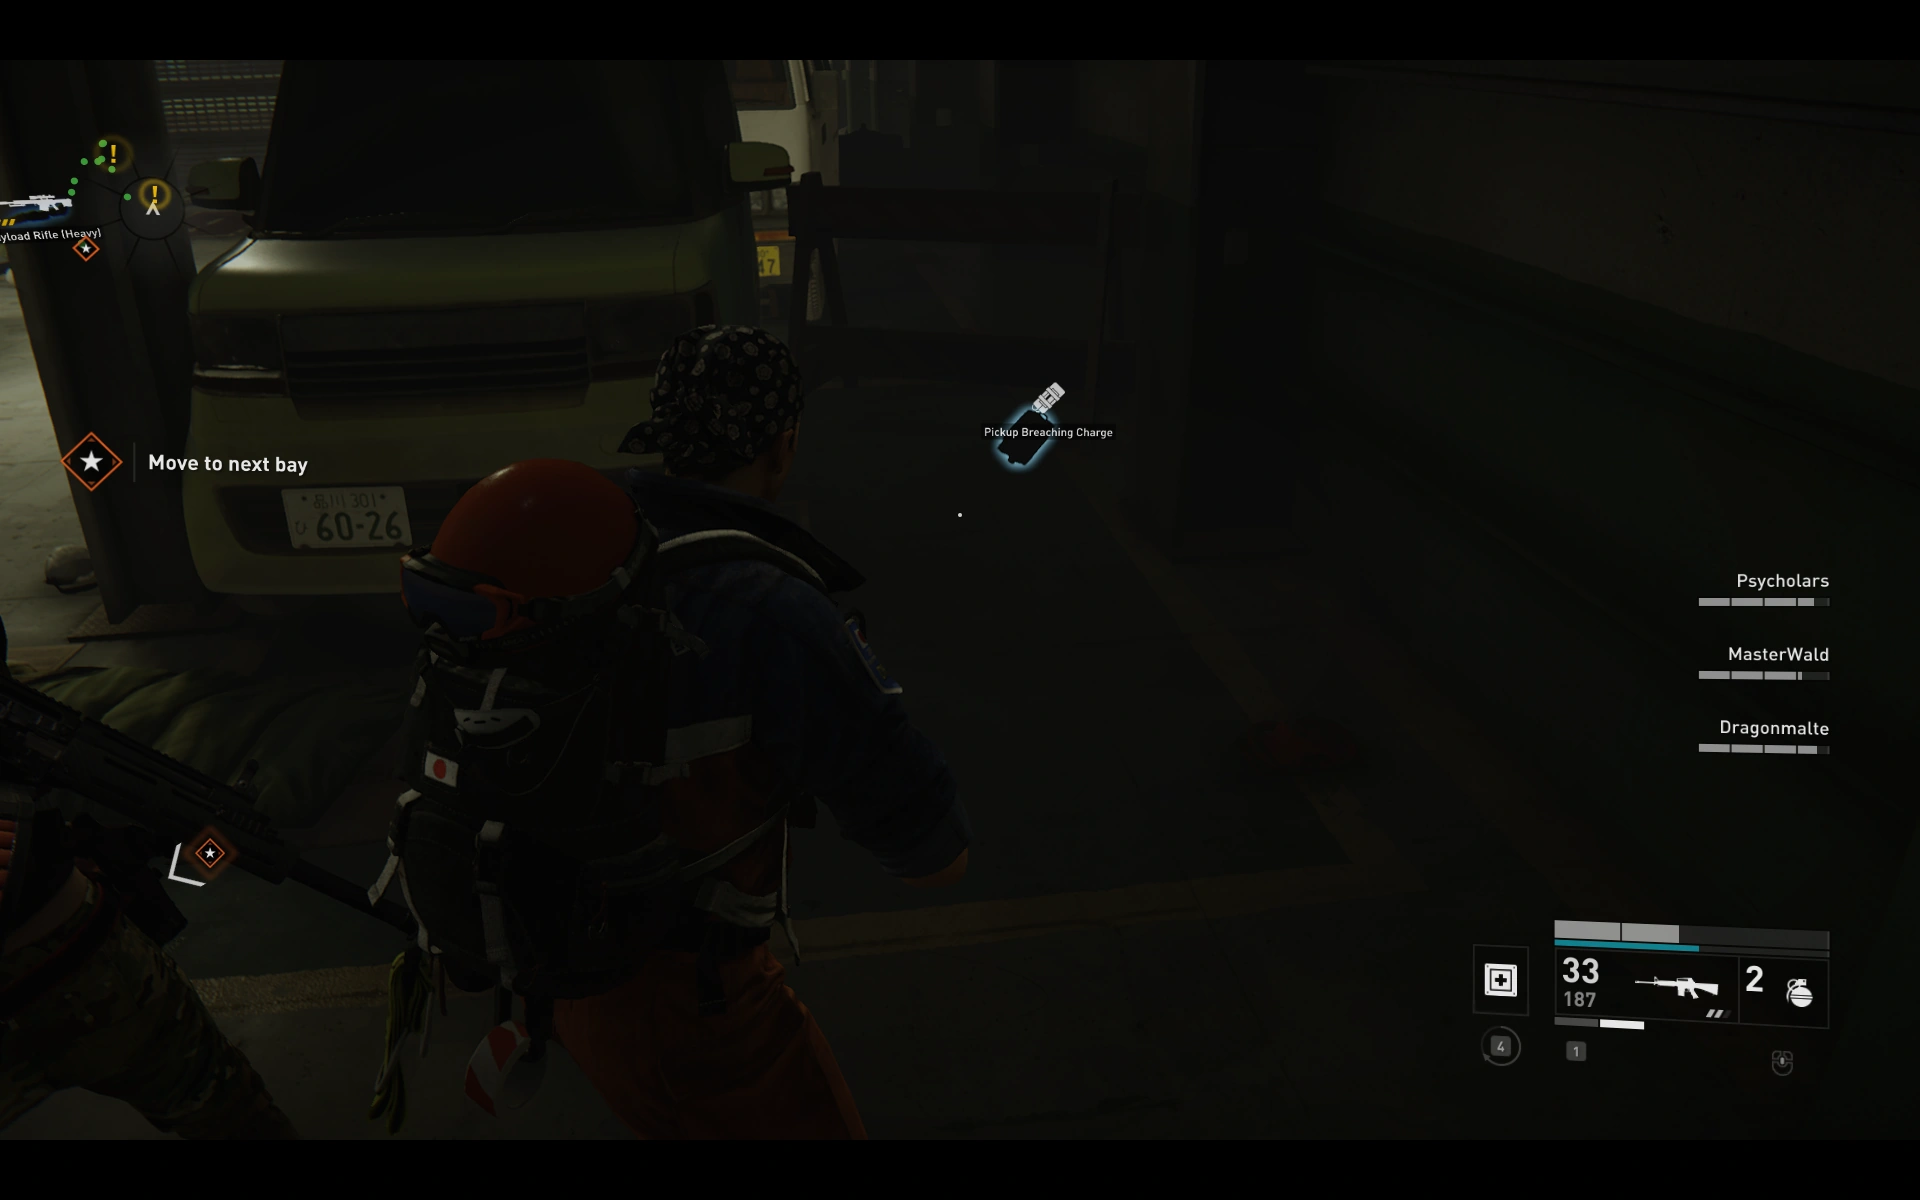
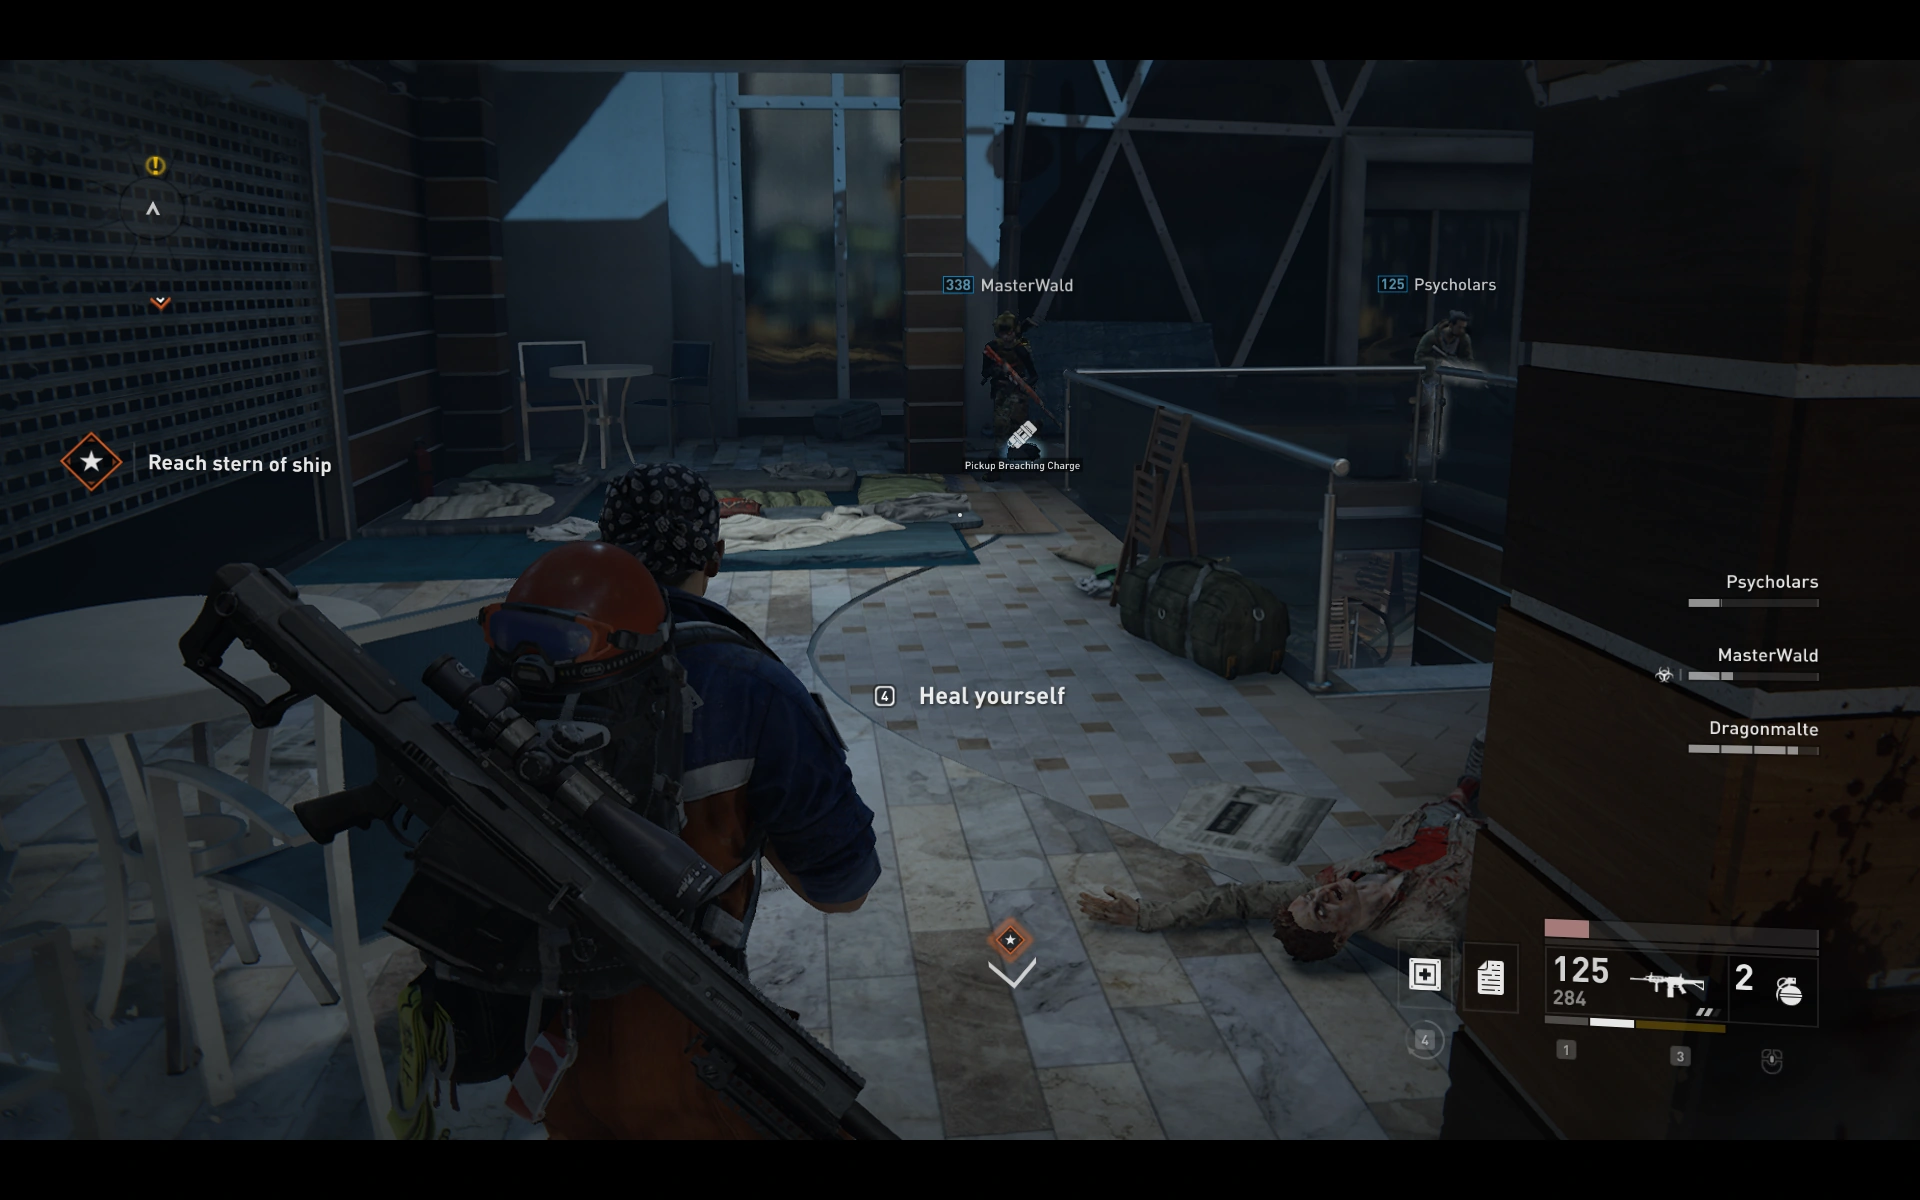
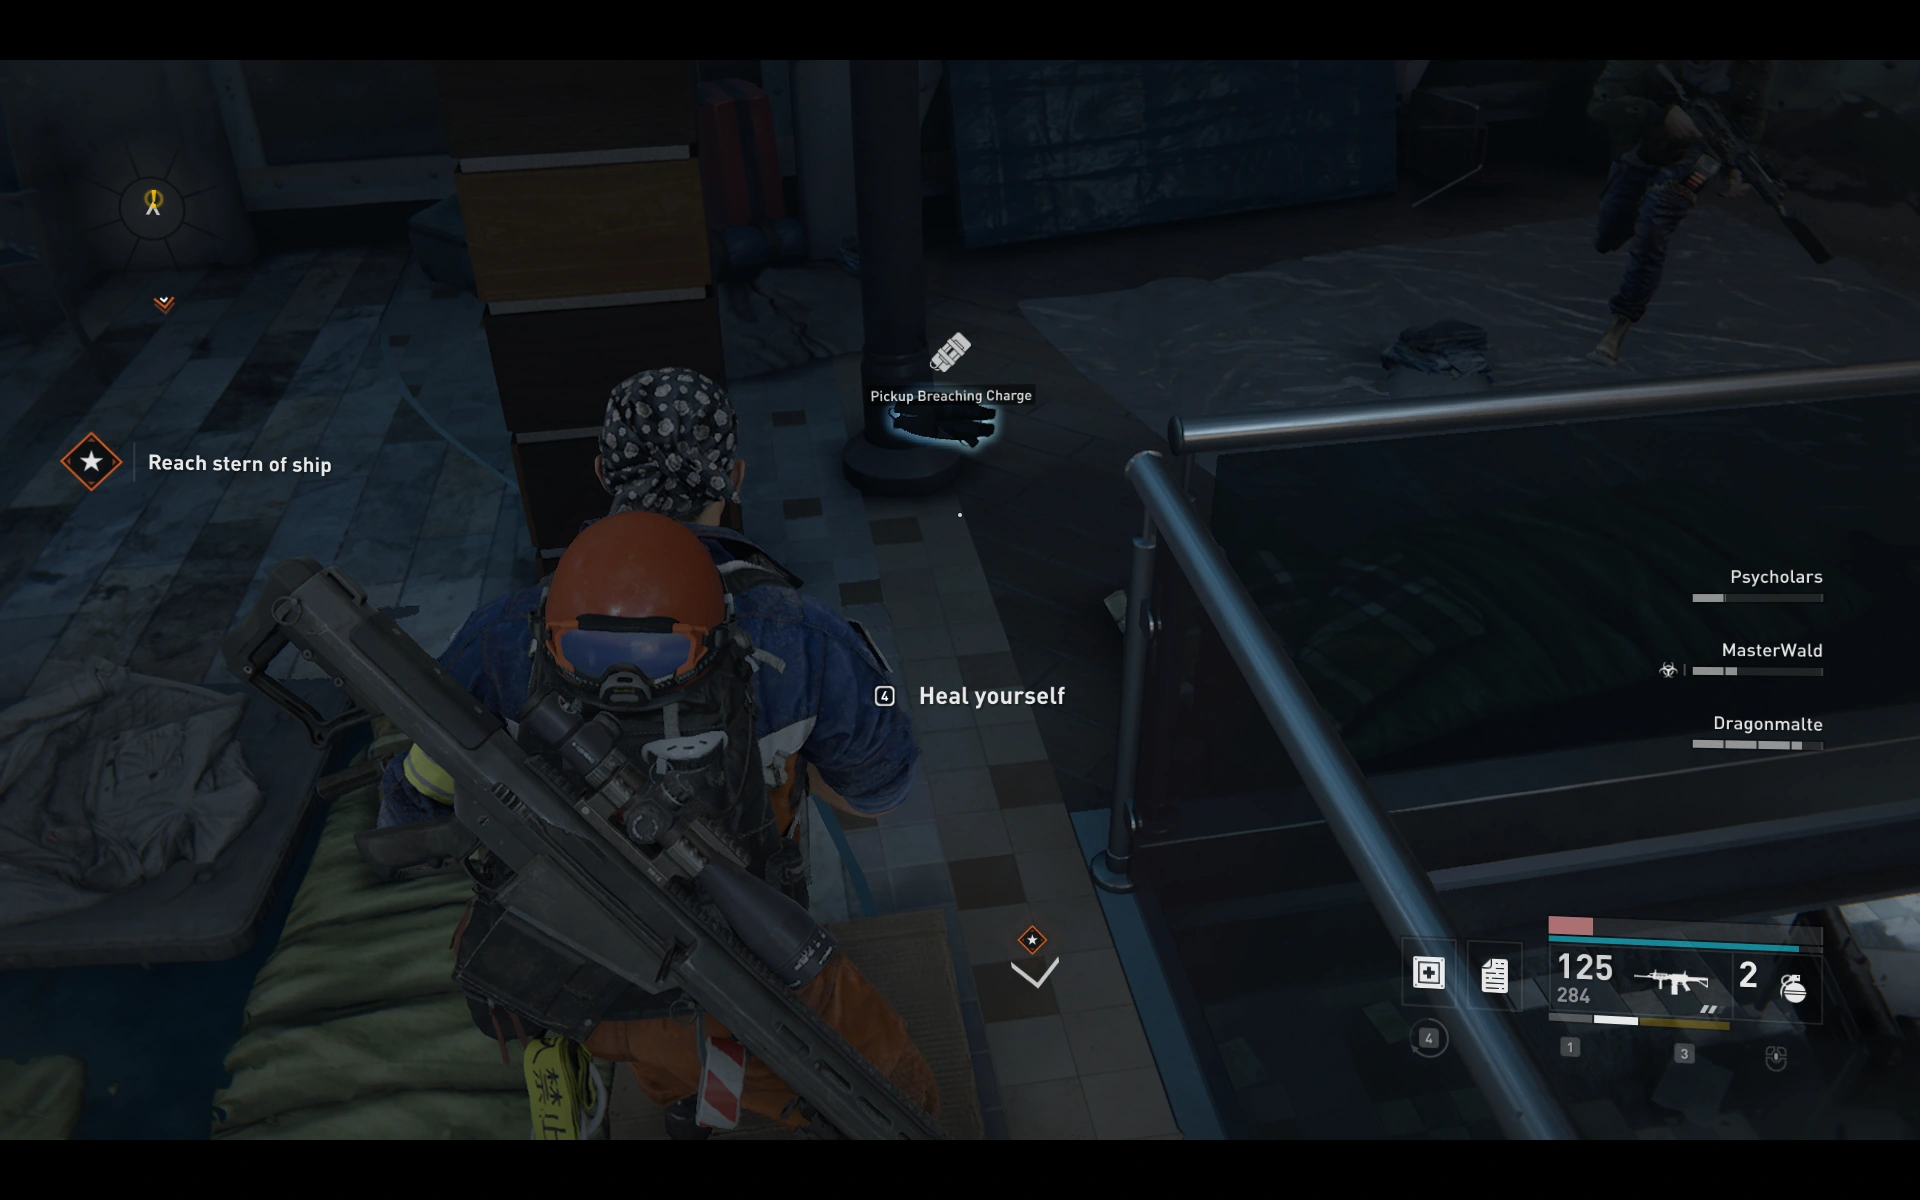
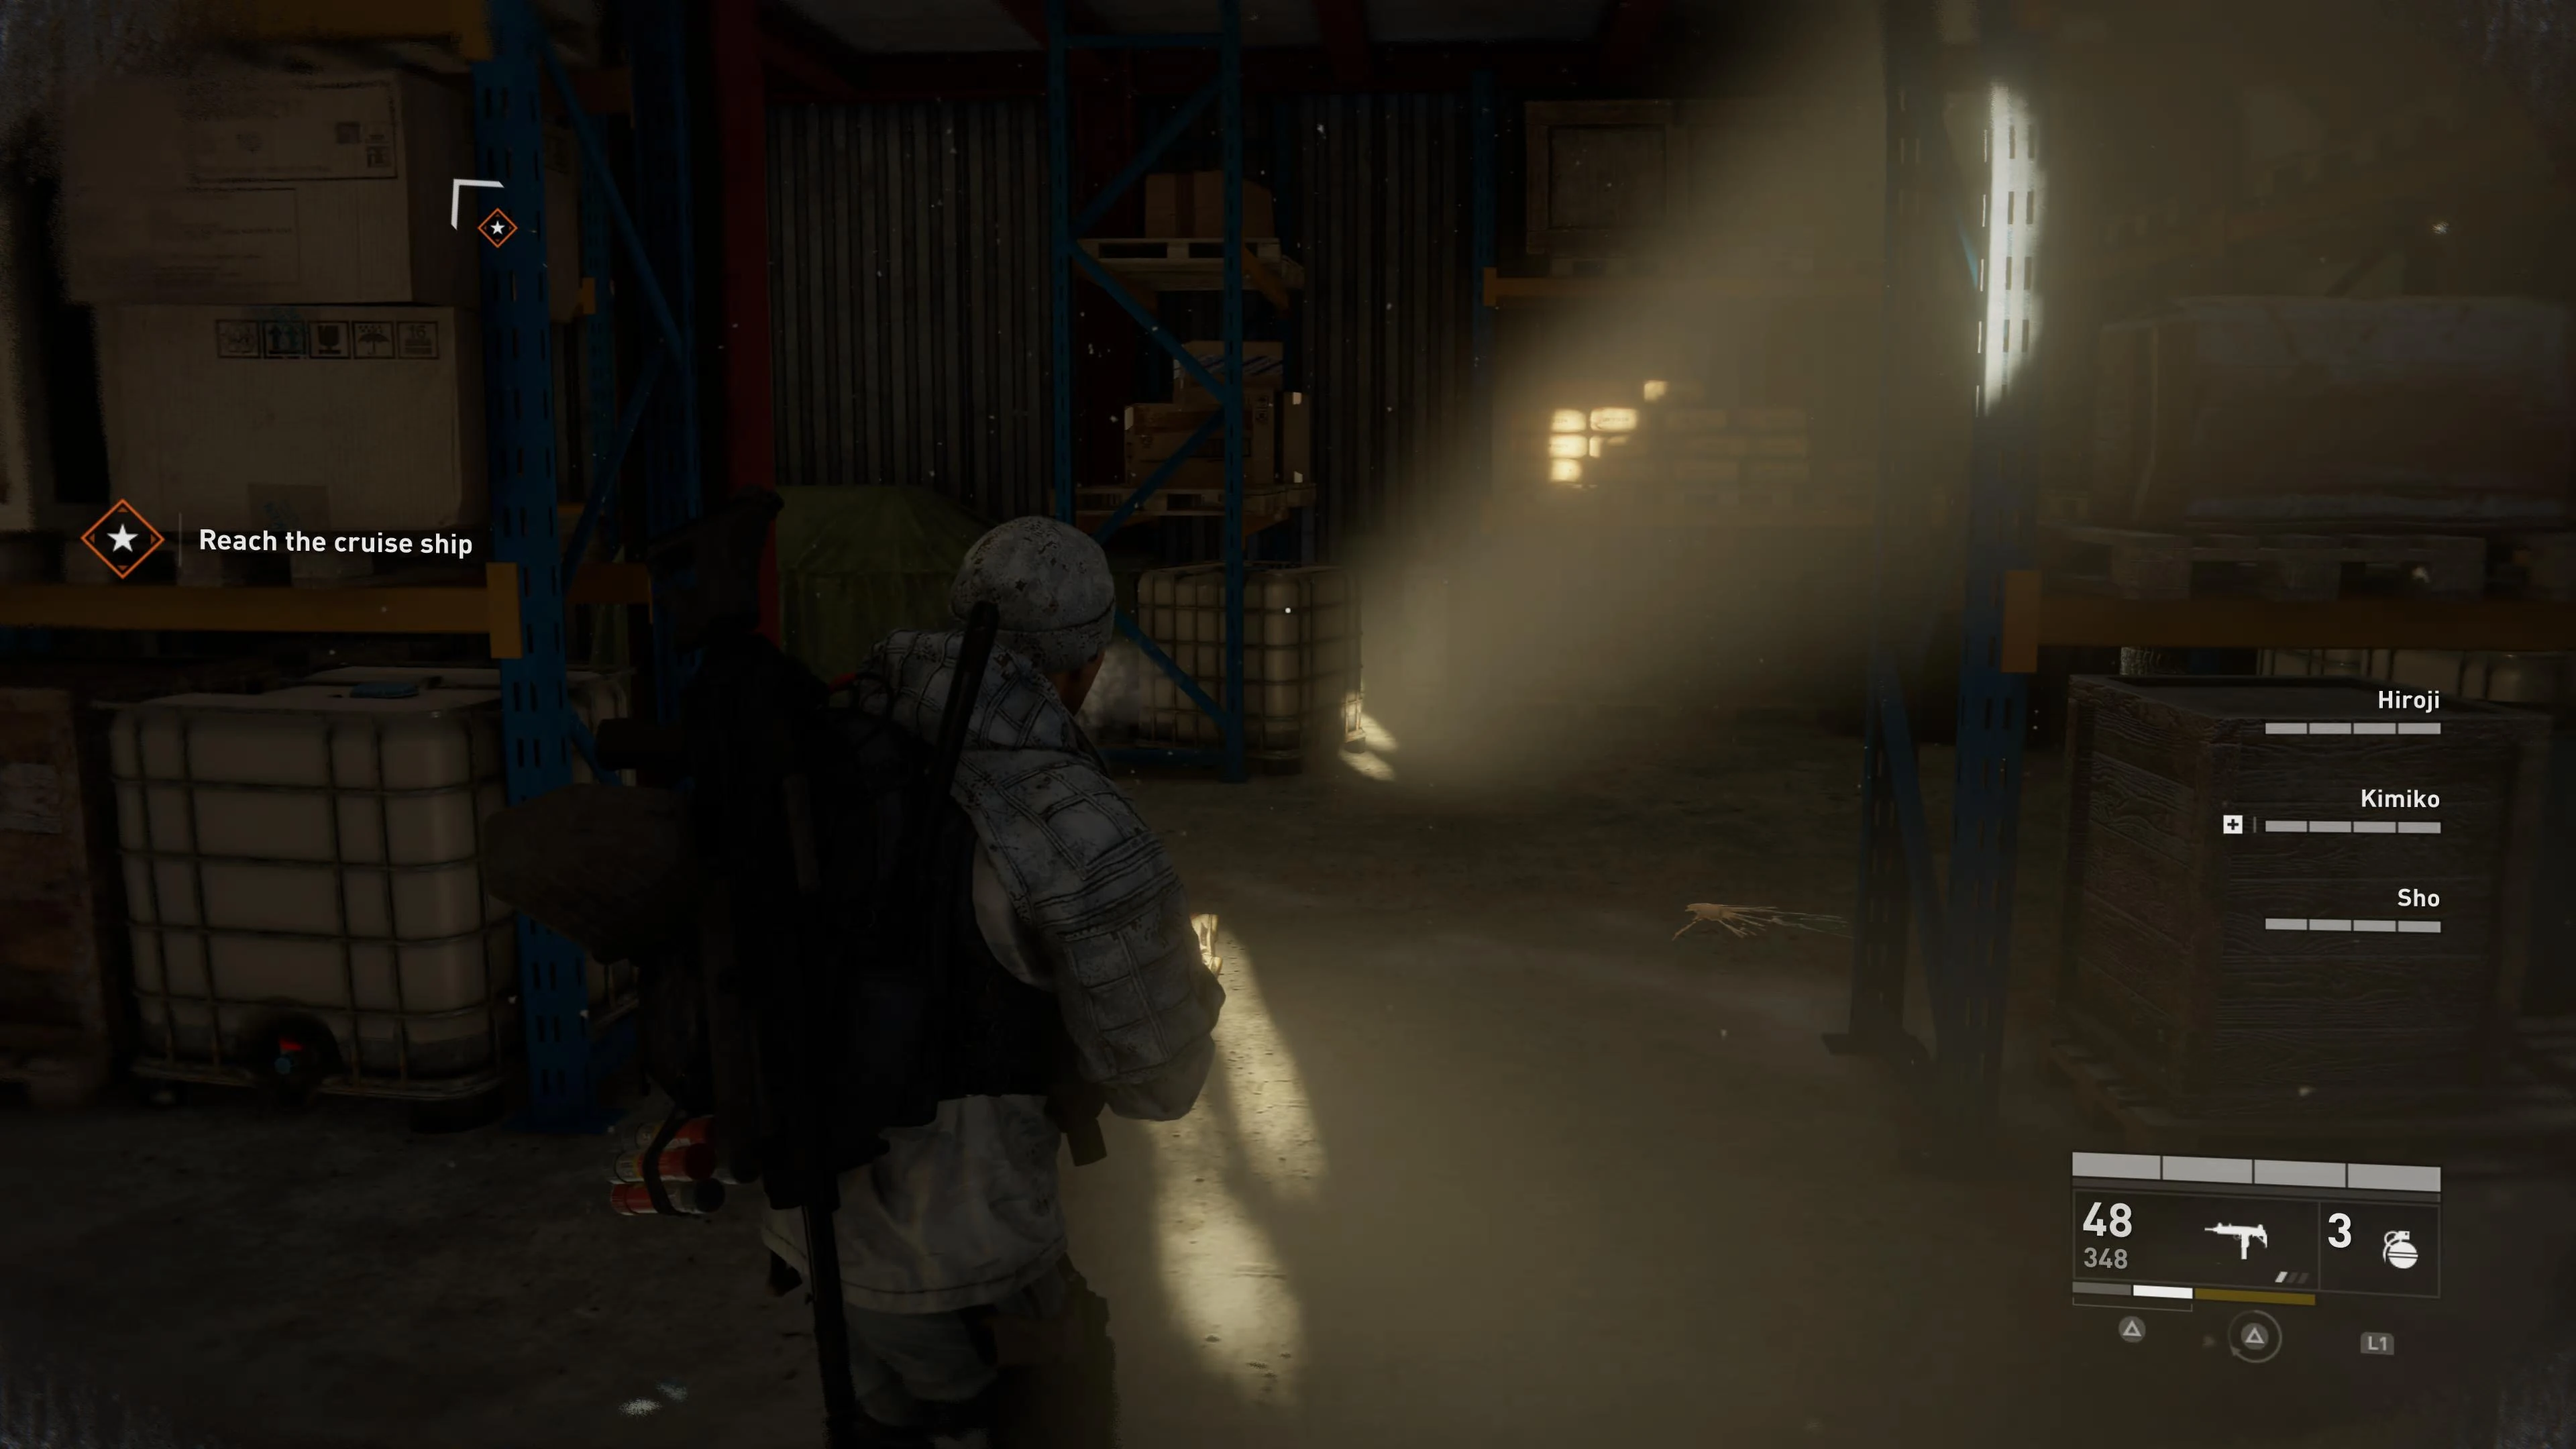
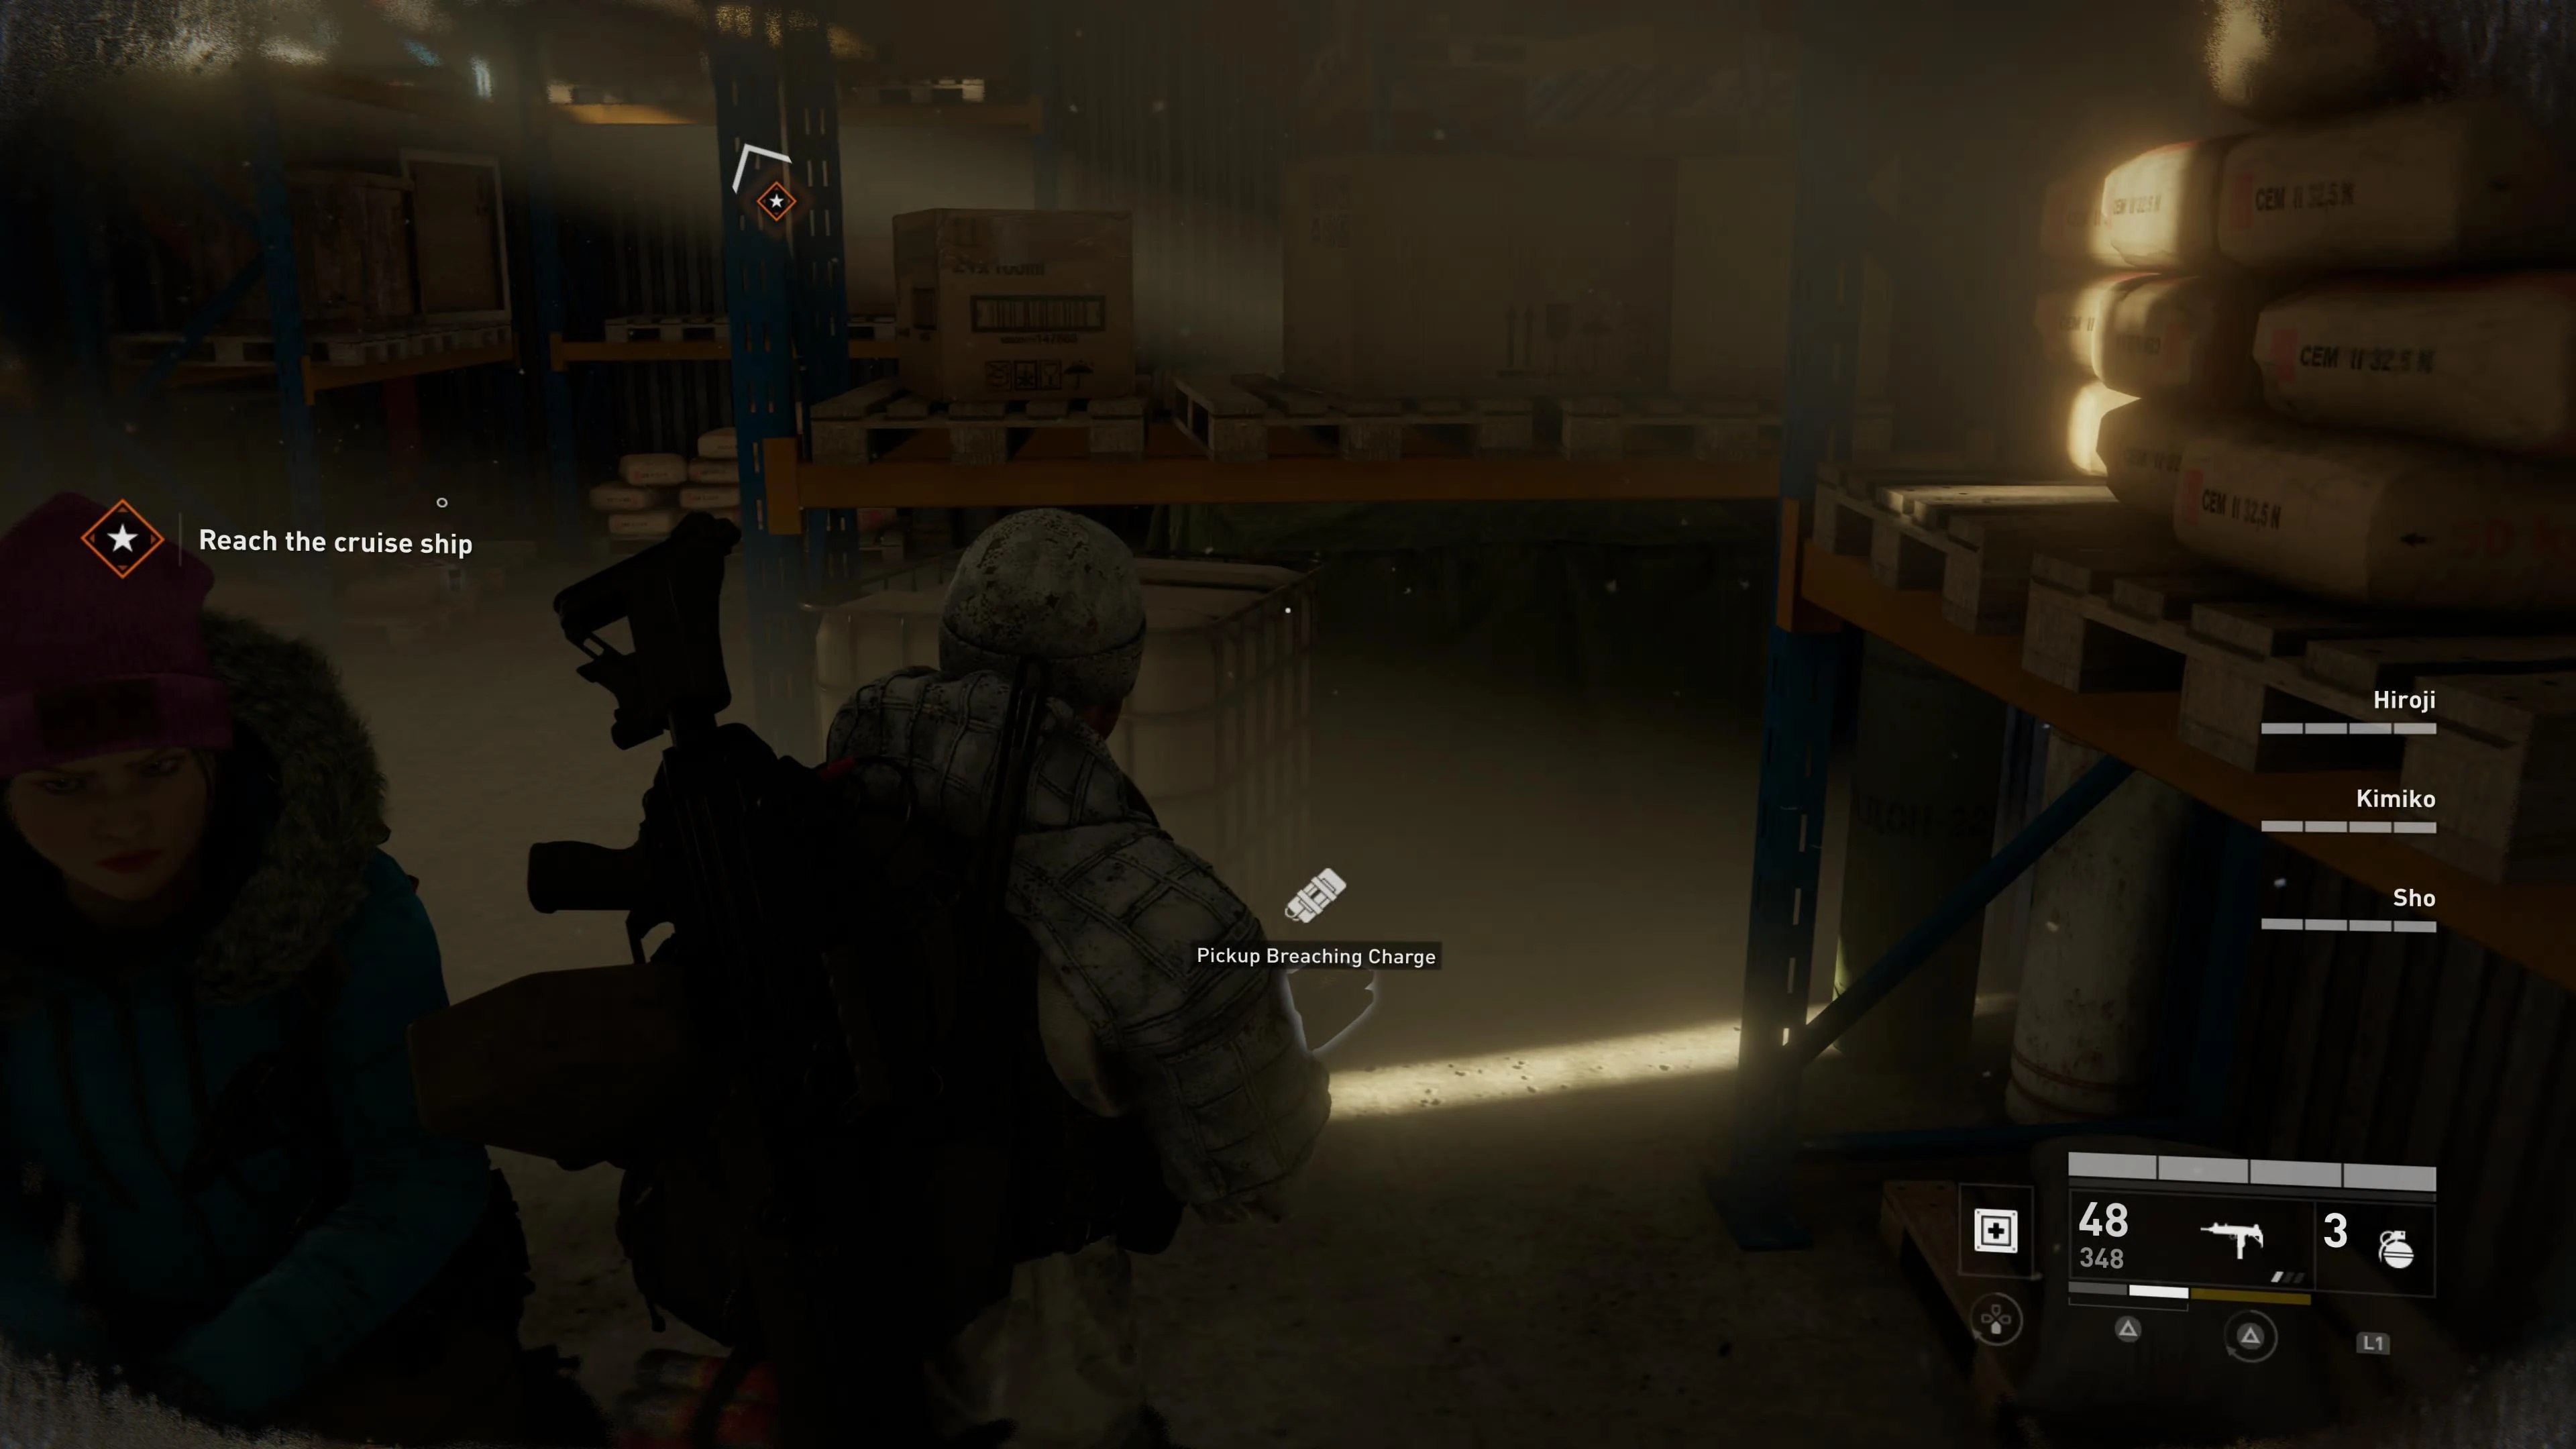
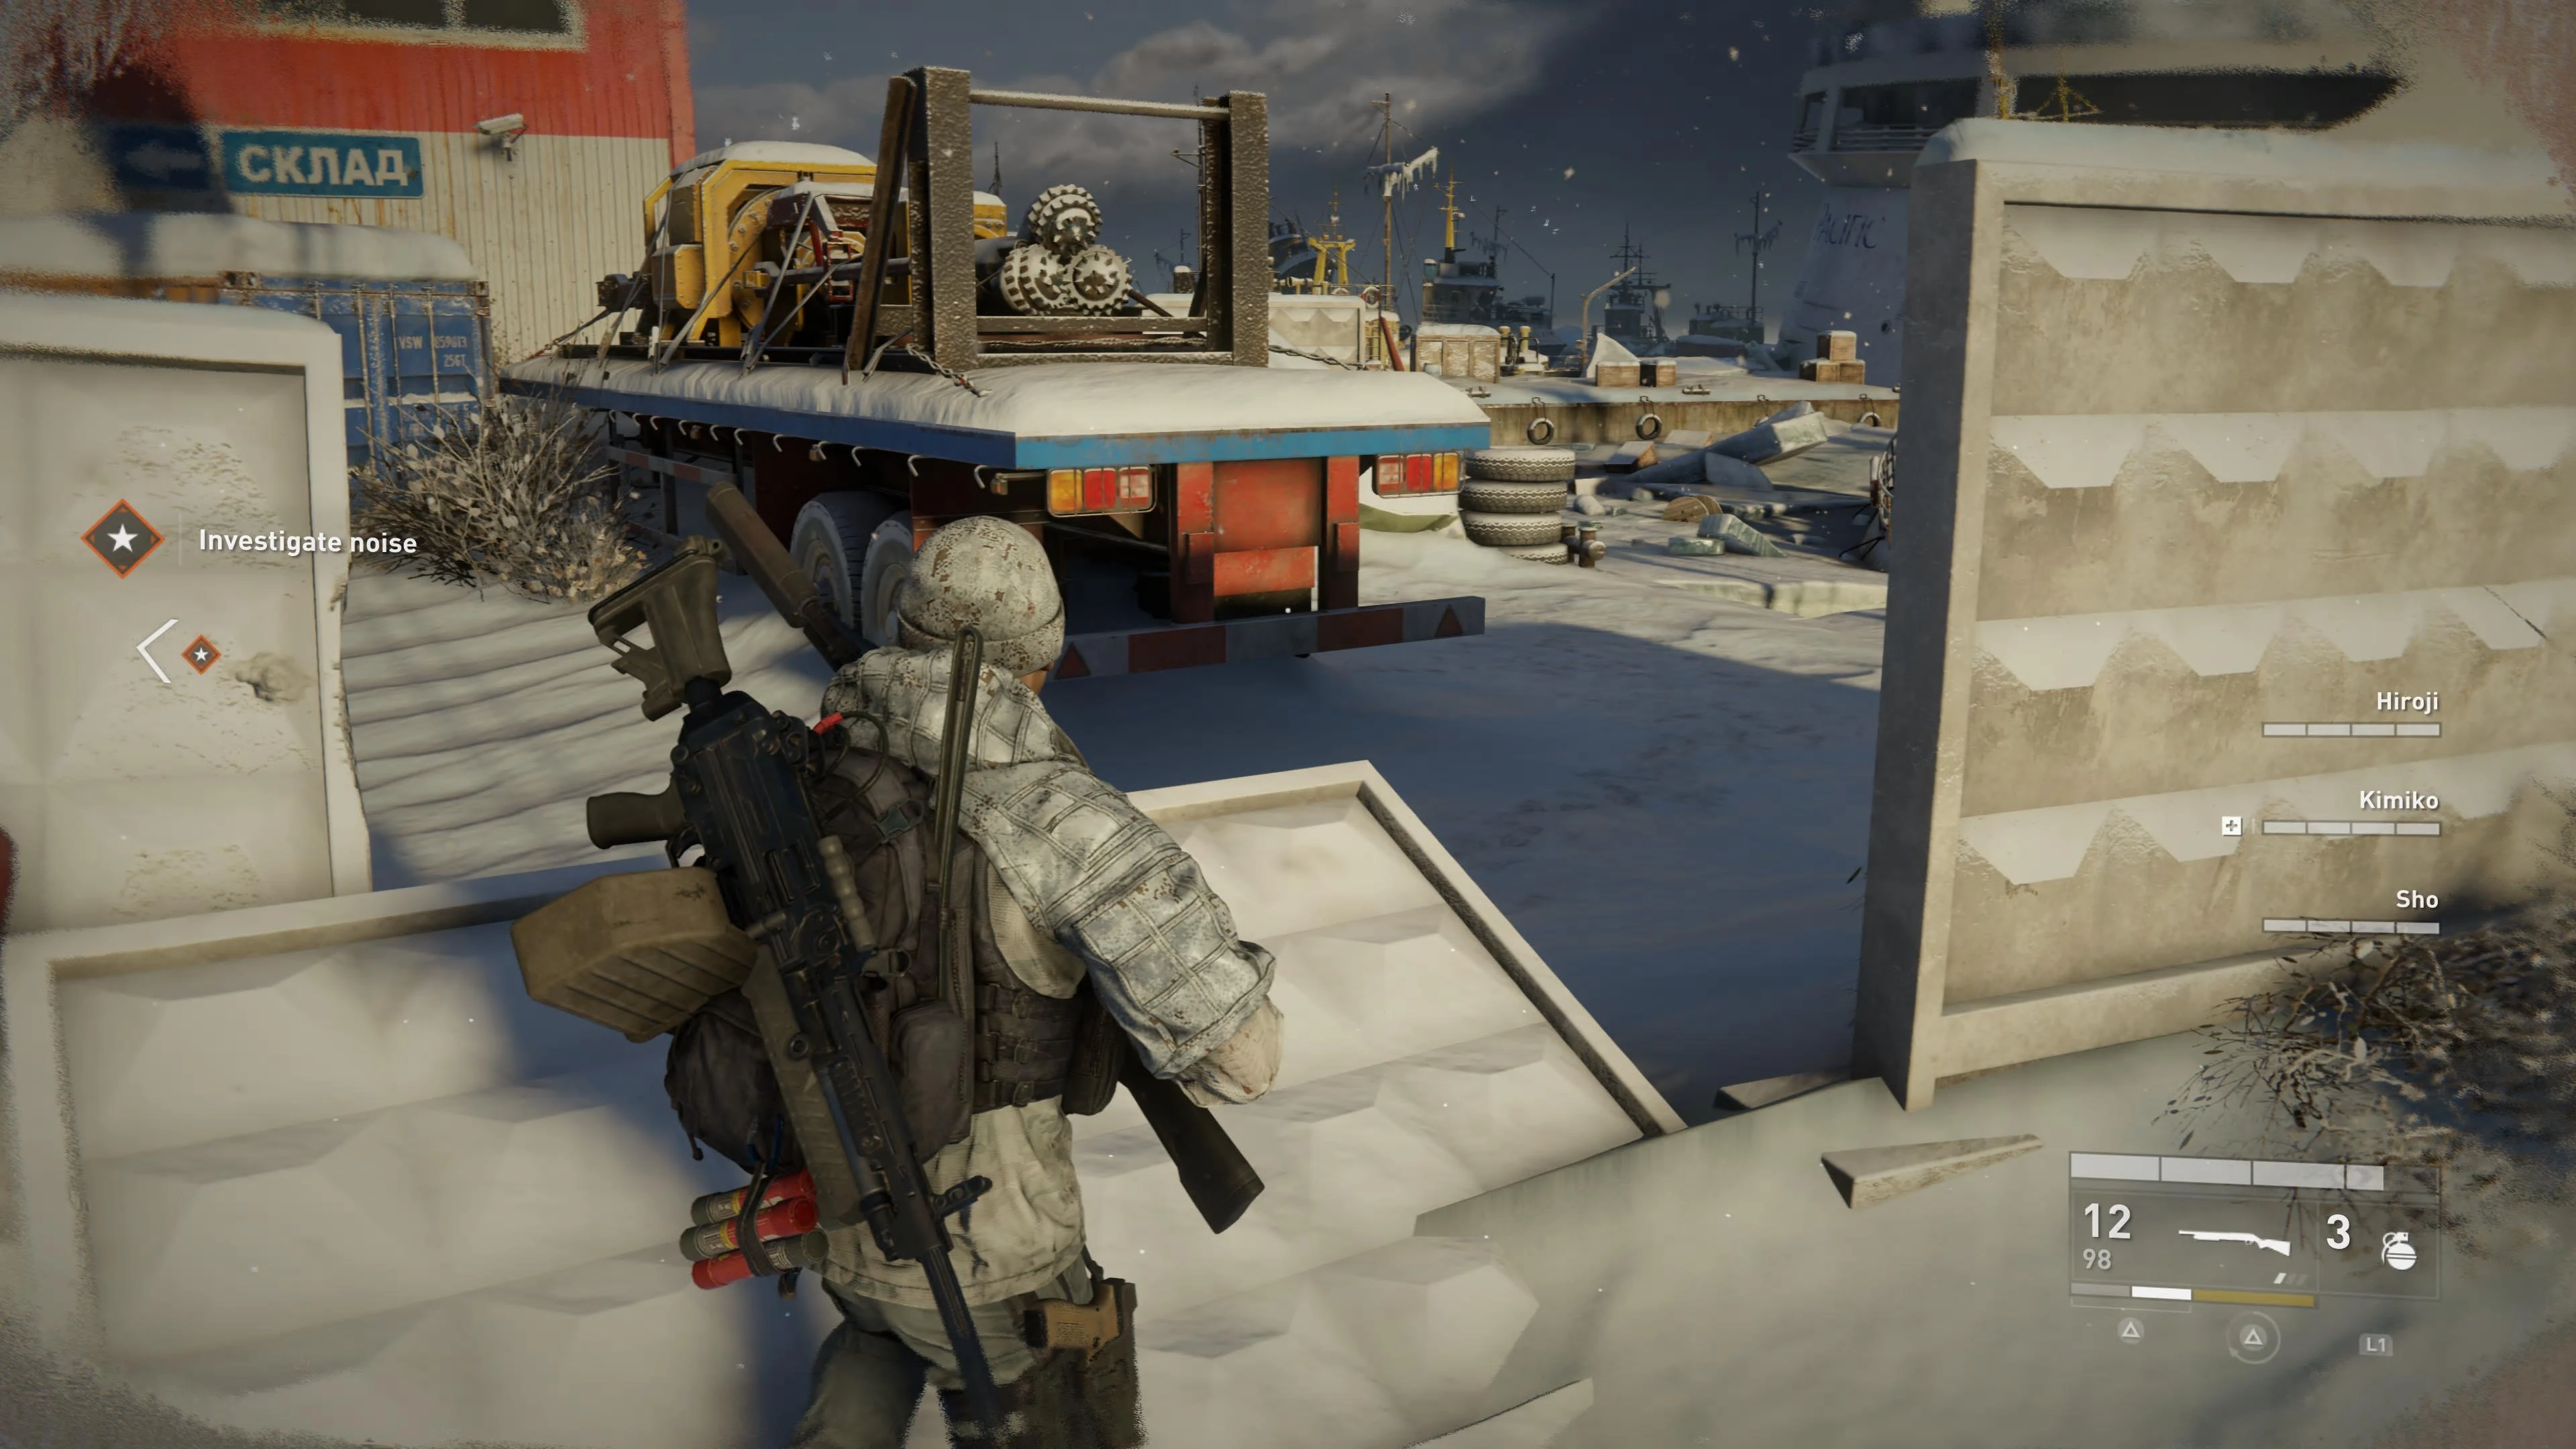
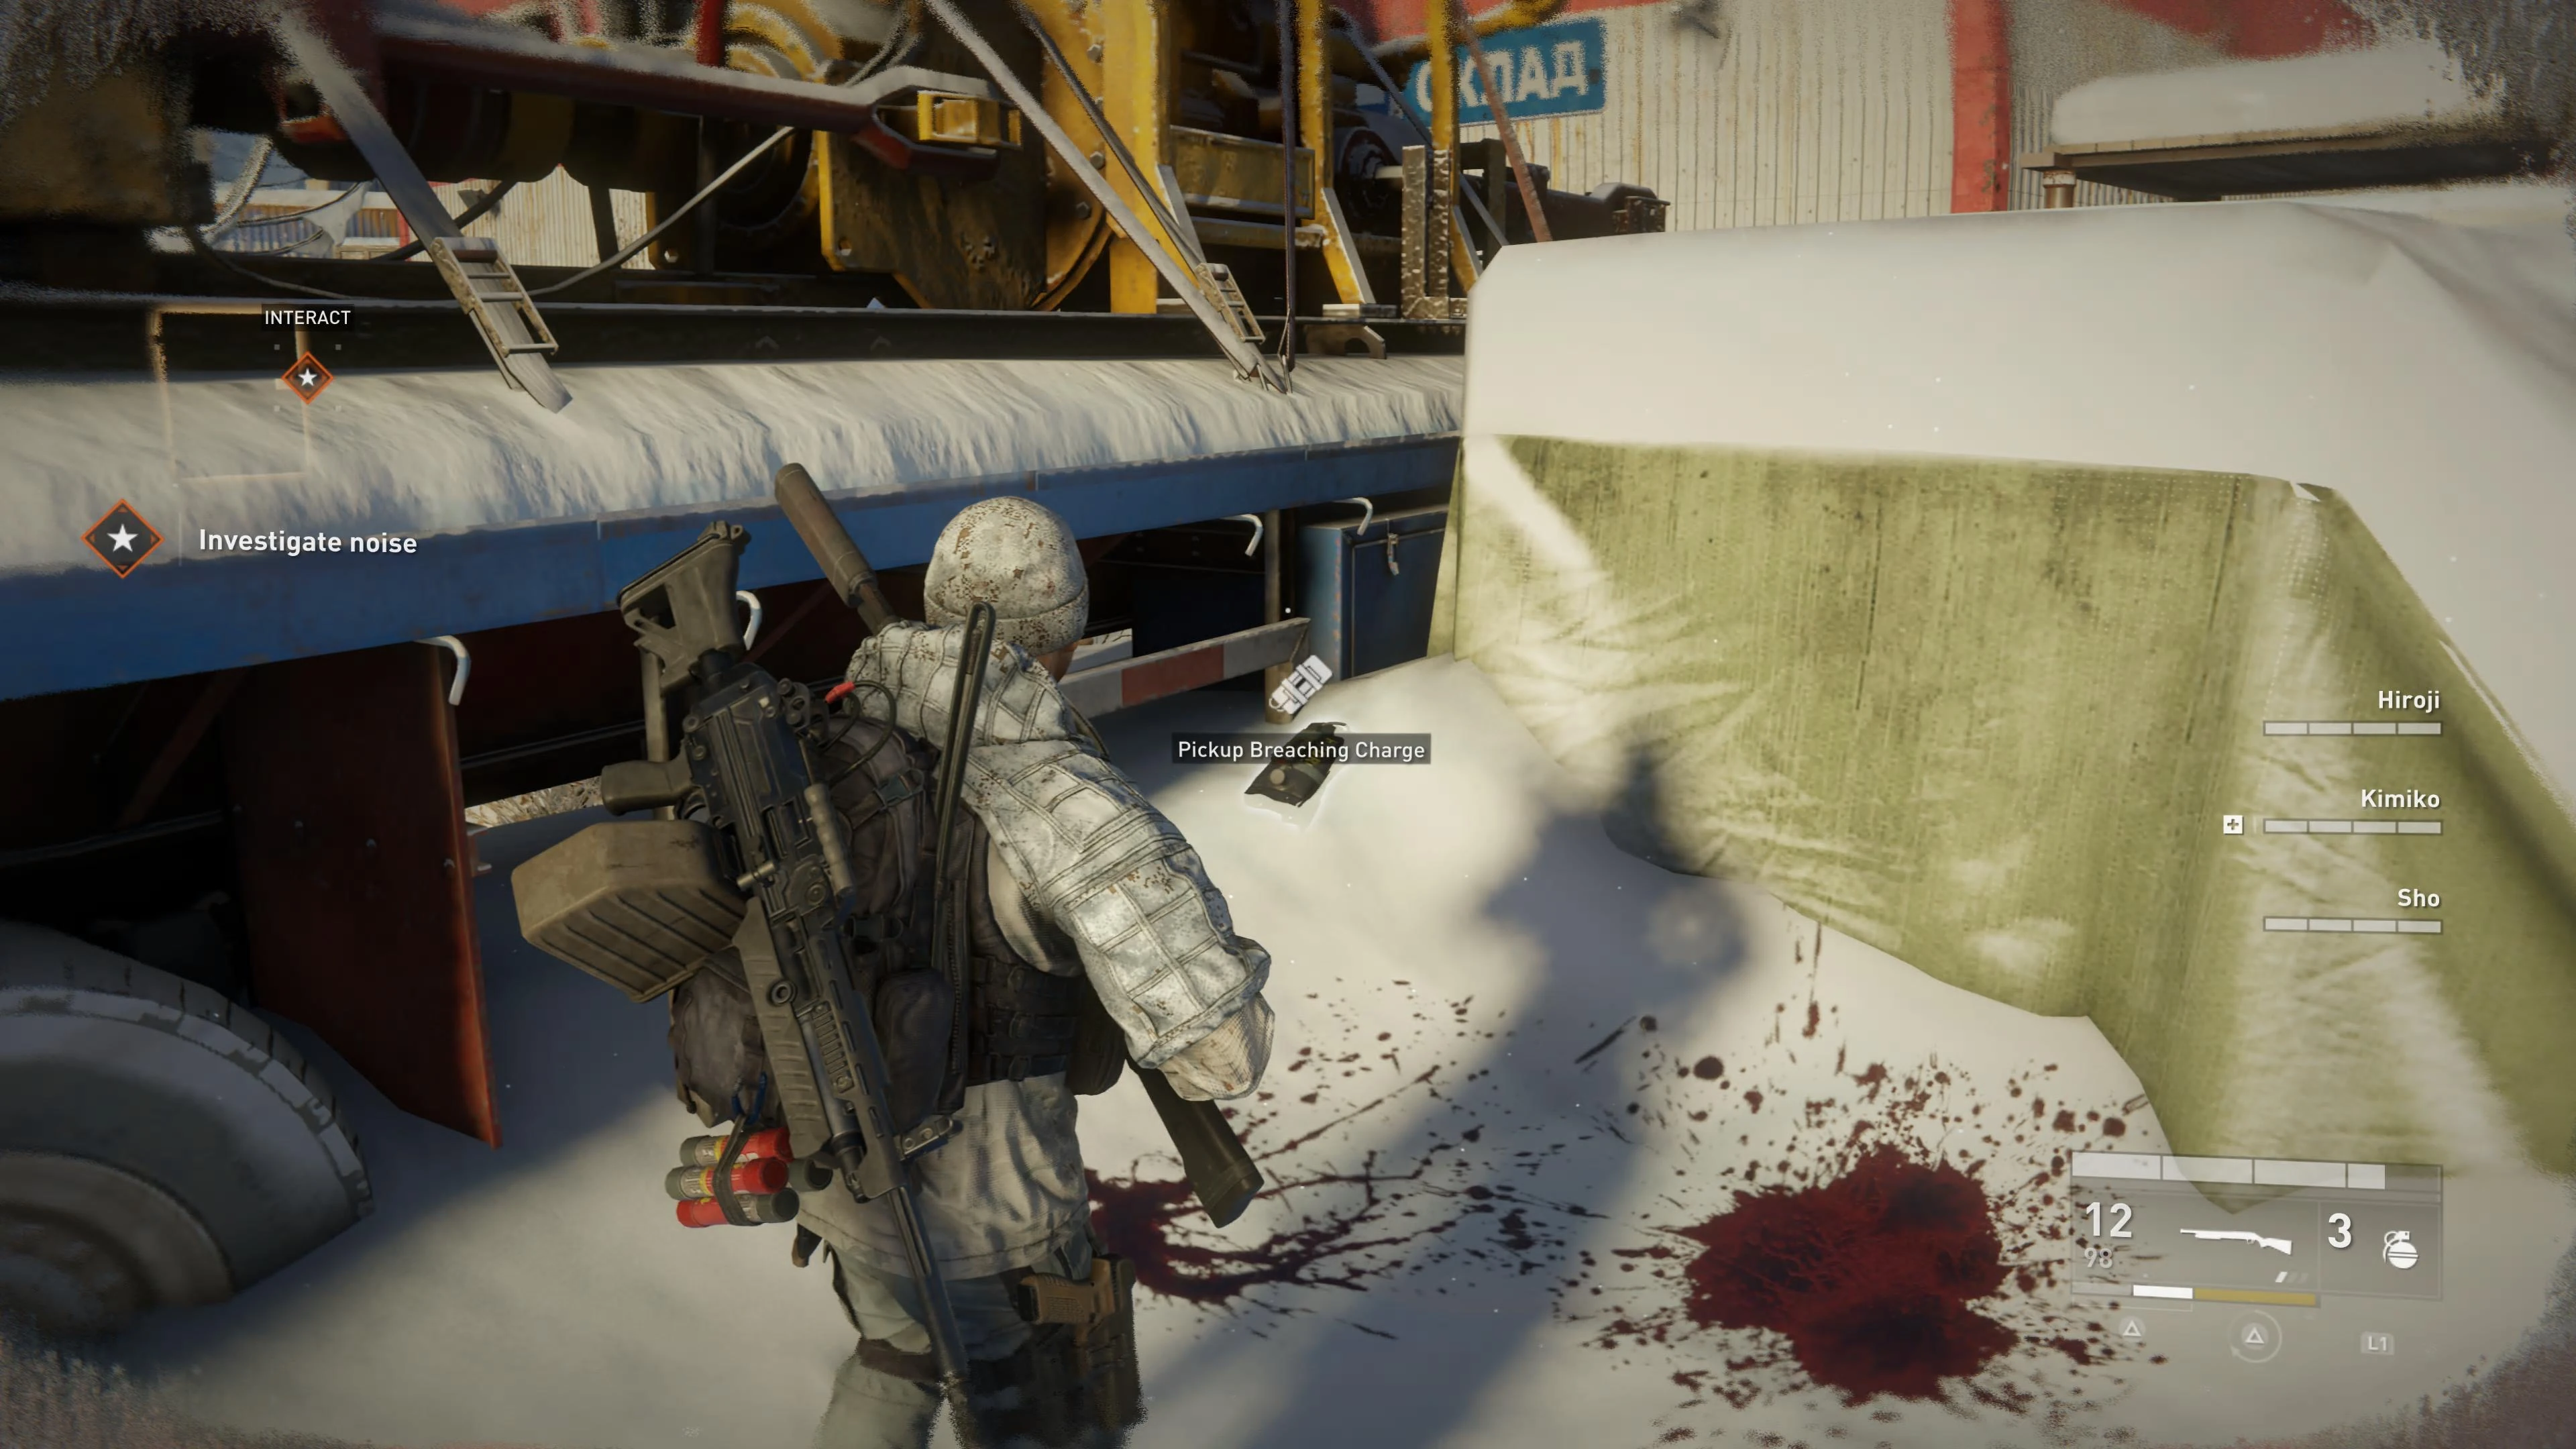
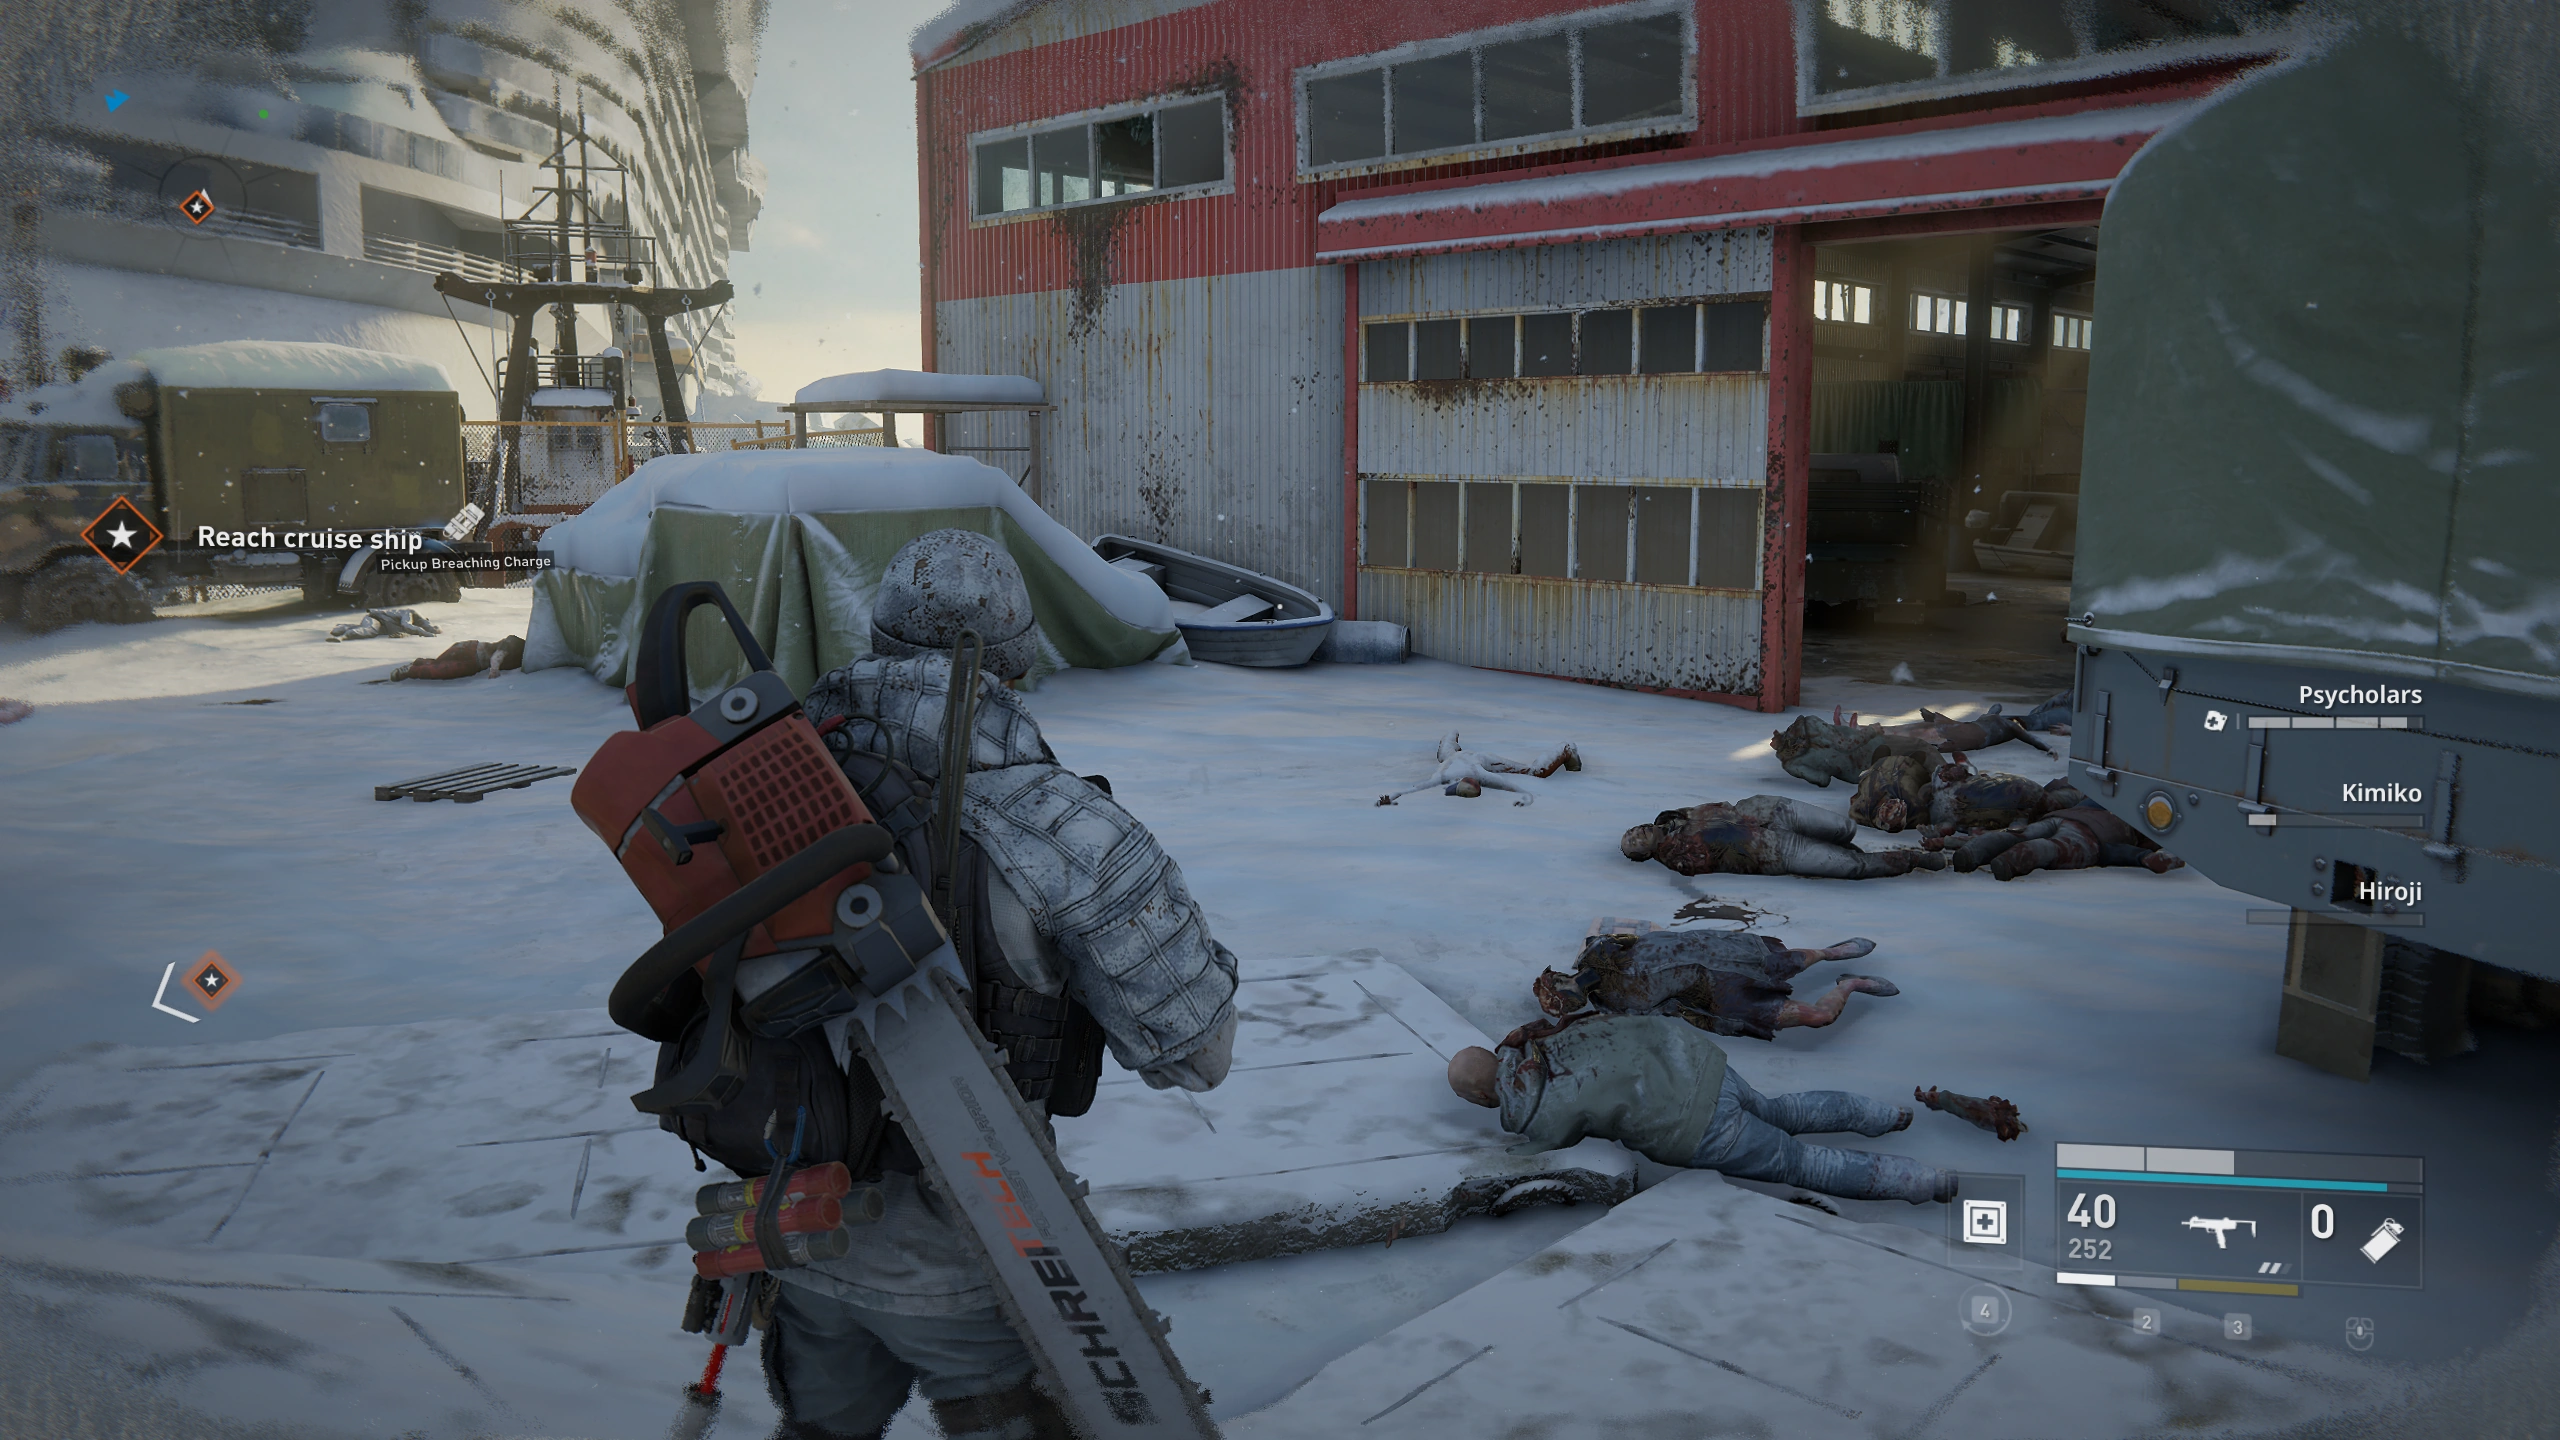
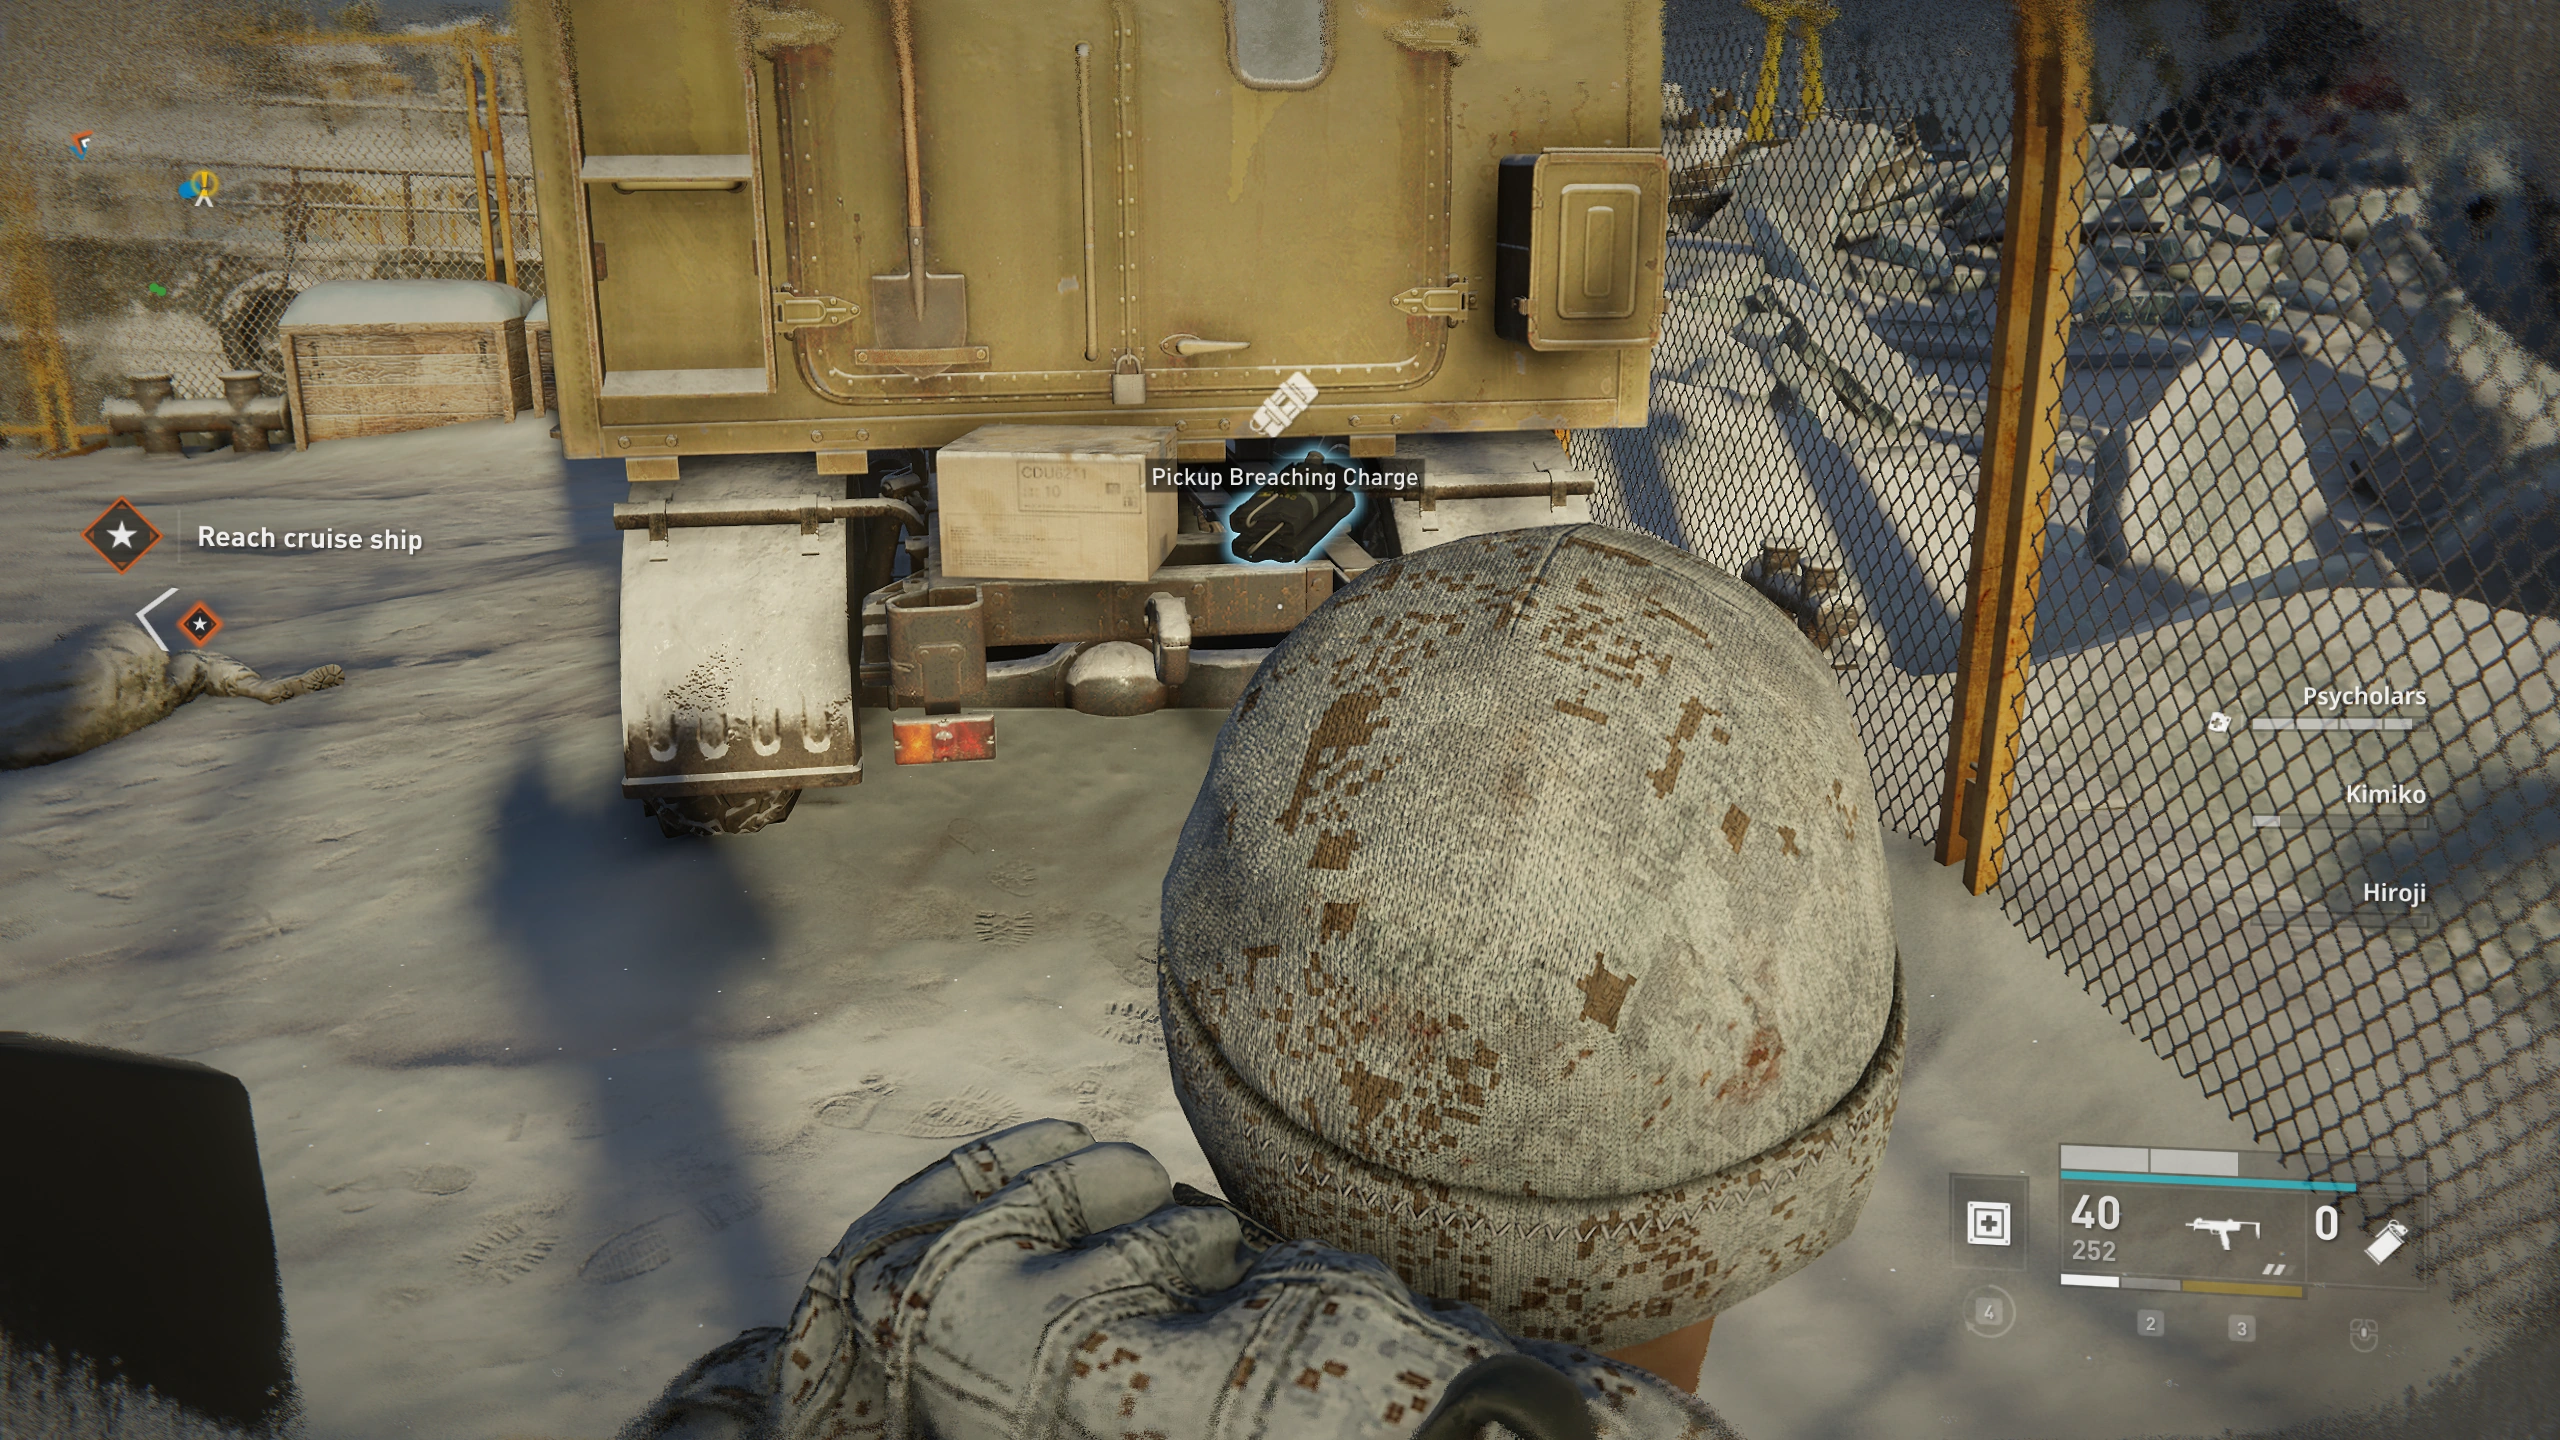
Chapter 3: Cruise Control[]
Location 1: ![]()
At the end of the first section, before you go into the elevator.

Location 2: ![]()
When you enter the cargo area, in the first room with two levels on the left, behind a car
Location 3: ![]()
When you come up into the open after being inside the ship, right before the final battle, behind the stairs you came up.
Location 4: ![]()
In the area of the final battle, on the left side directly behind a crate that you can breach open
Location 5: ![]()
Location 6: ![]()
Location 7: ![]()
Location 8: ![]()
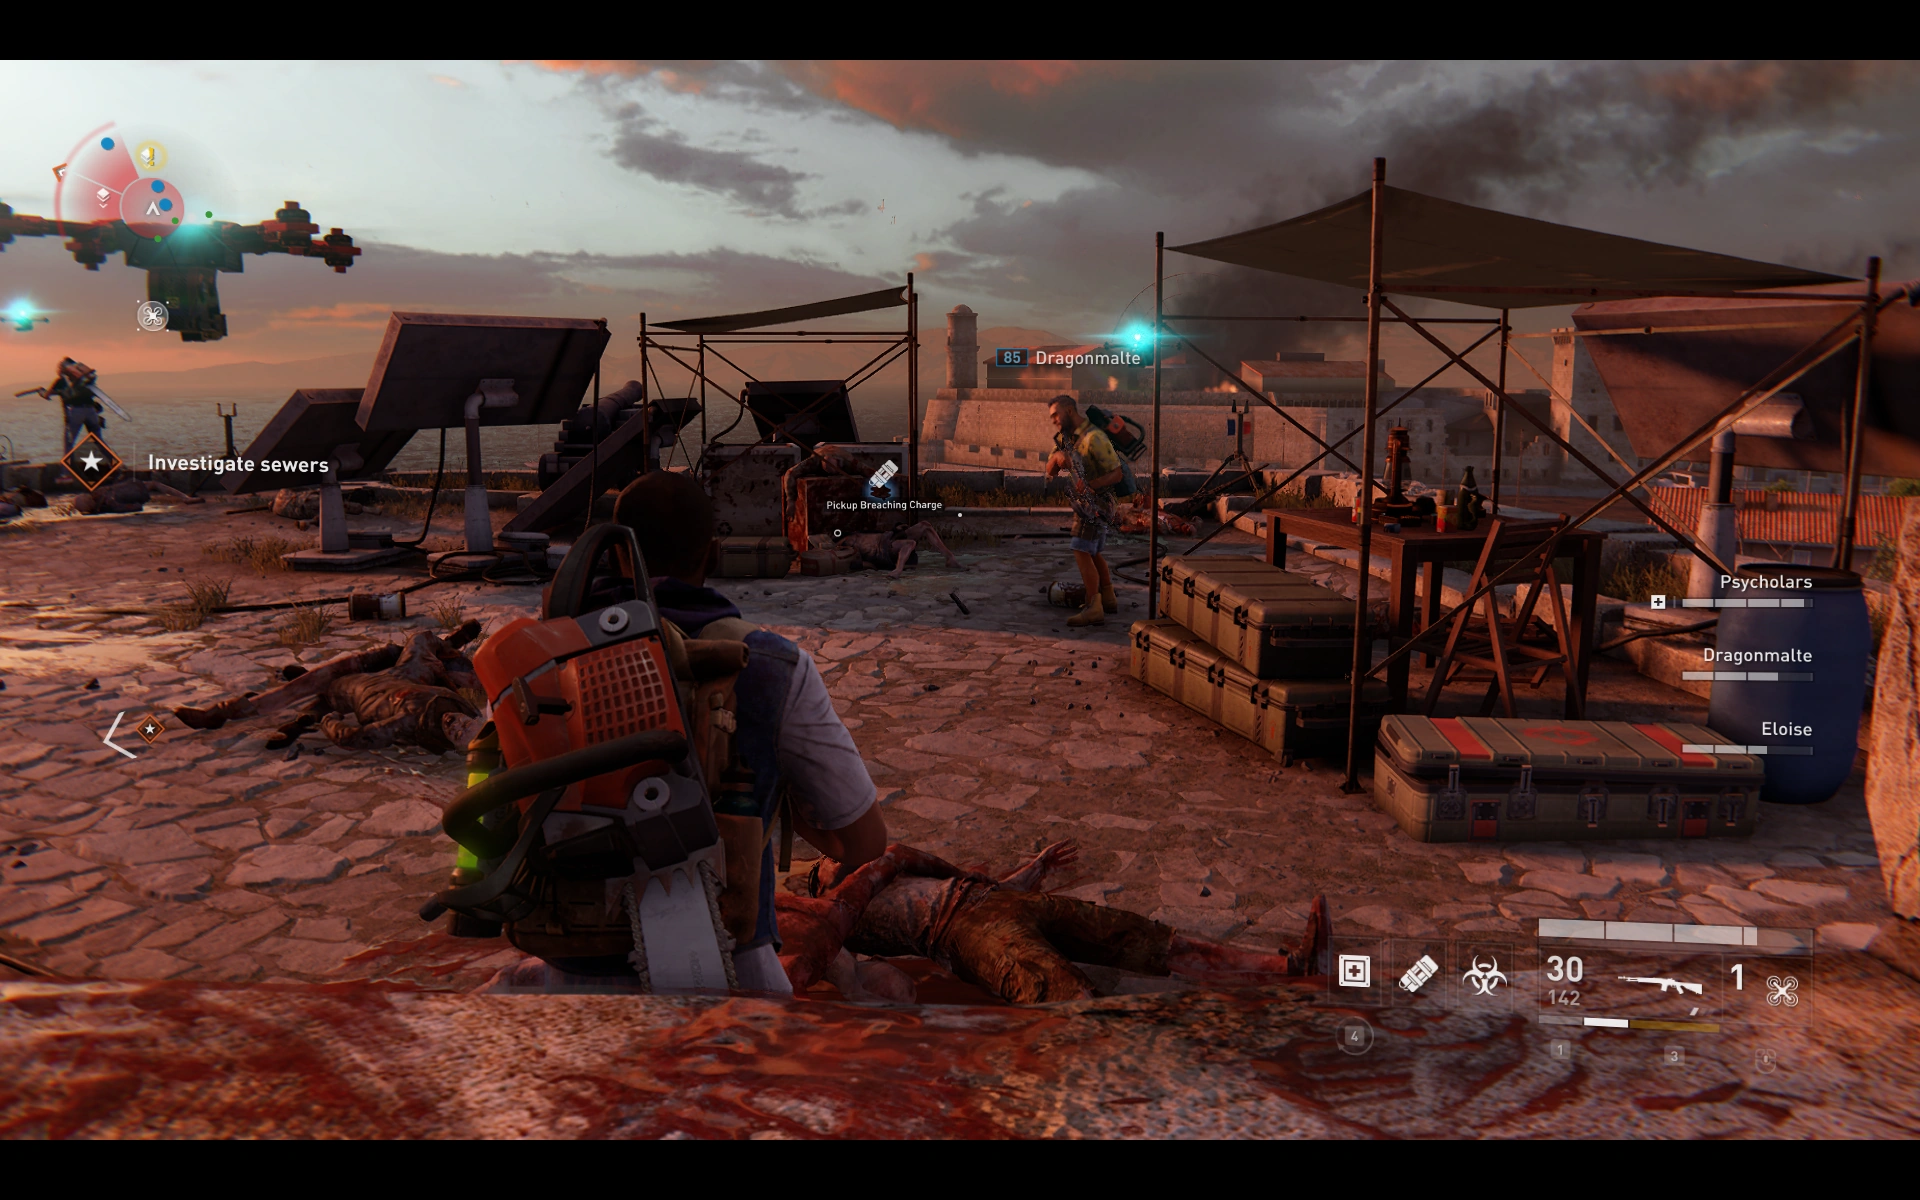
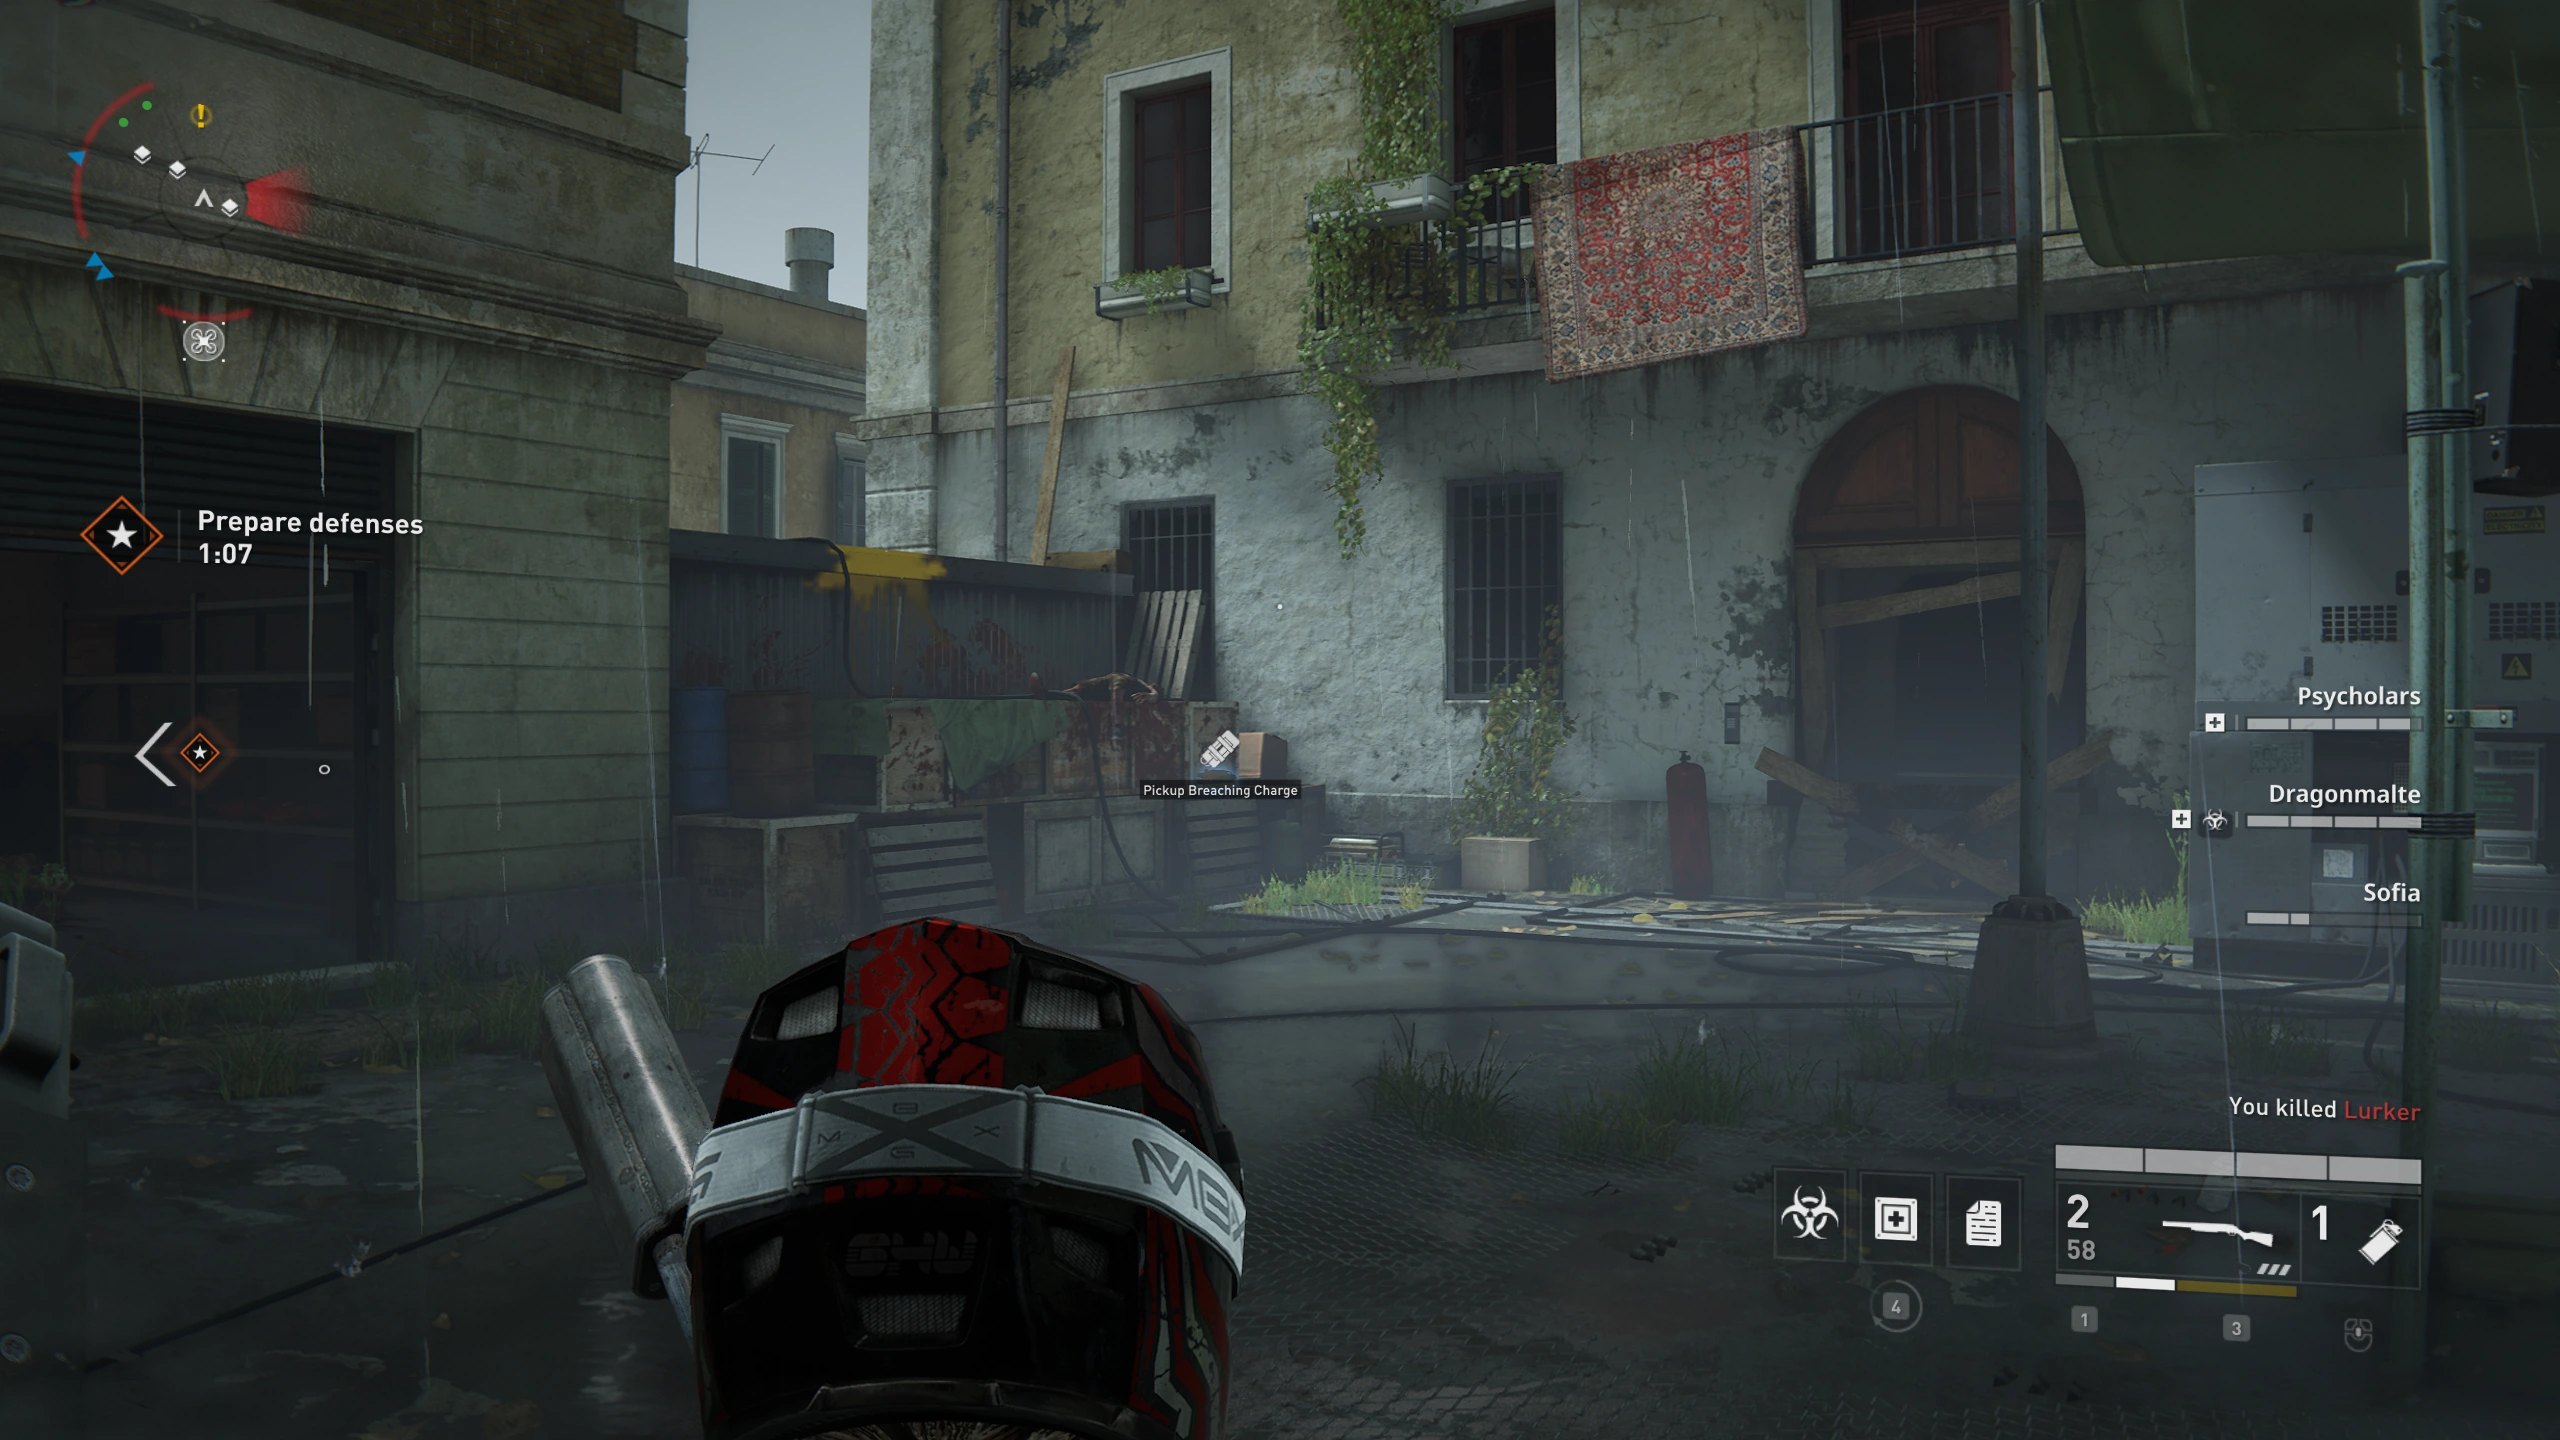
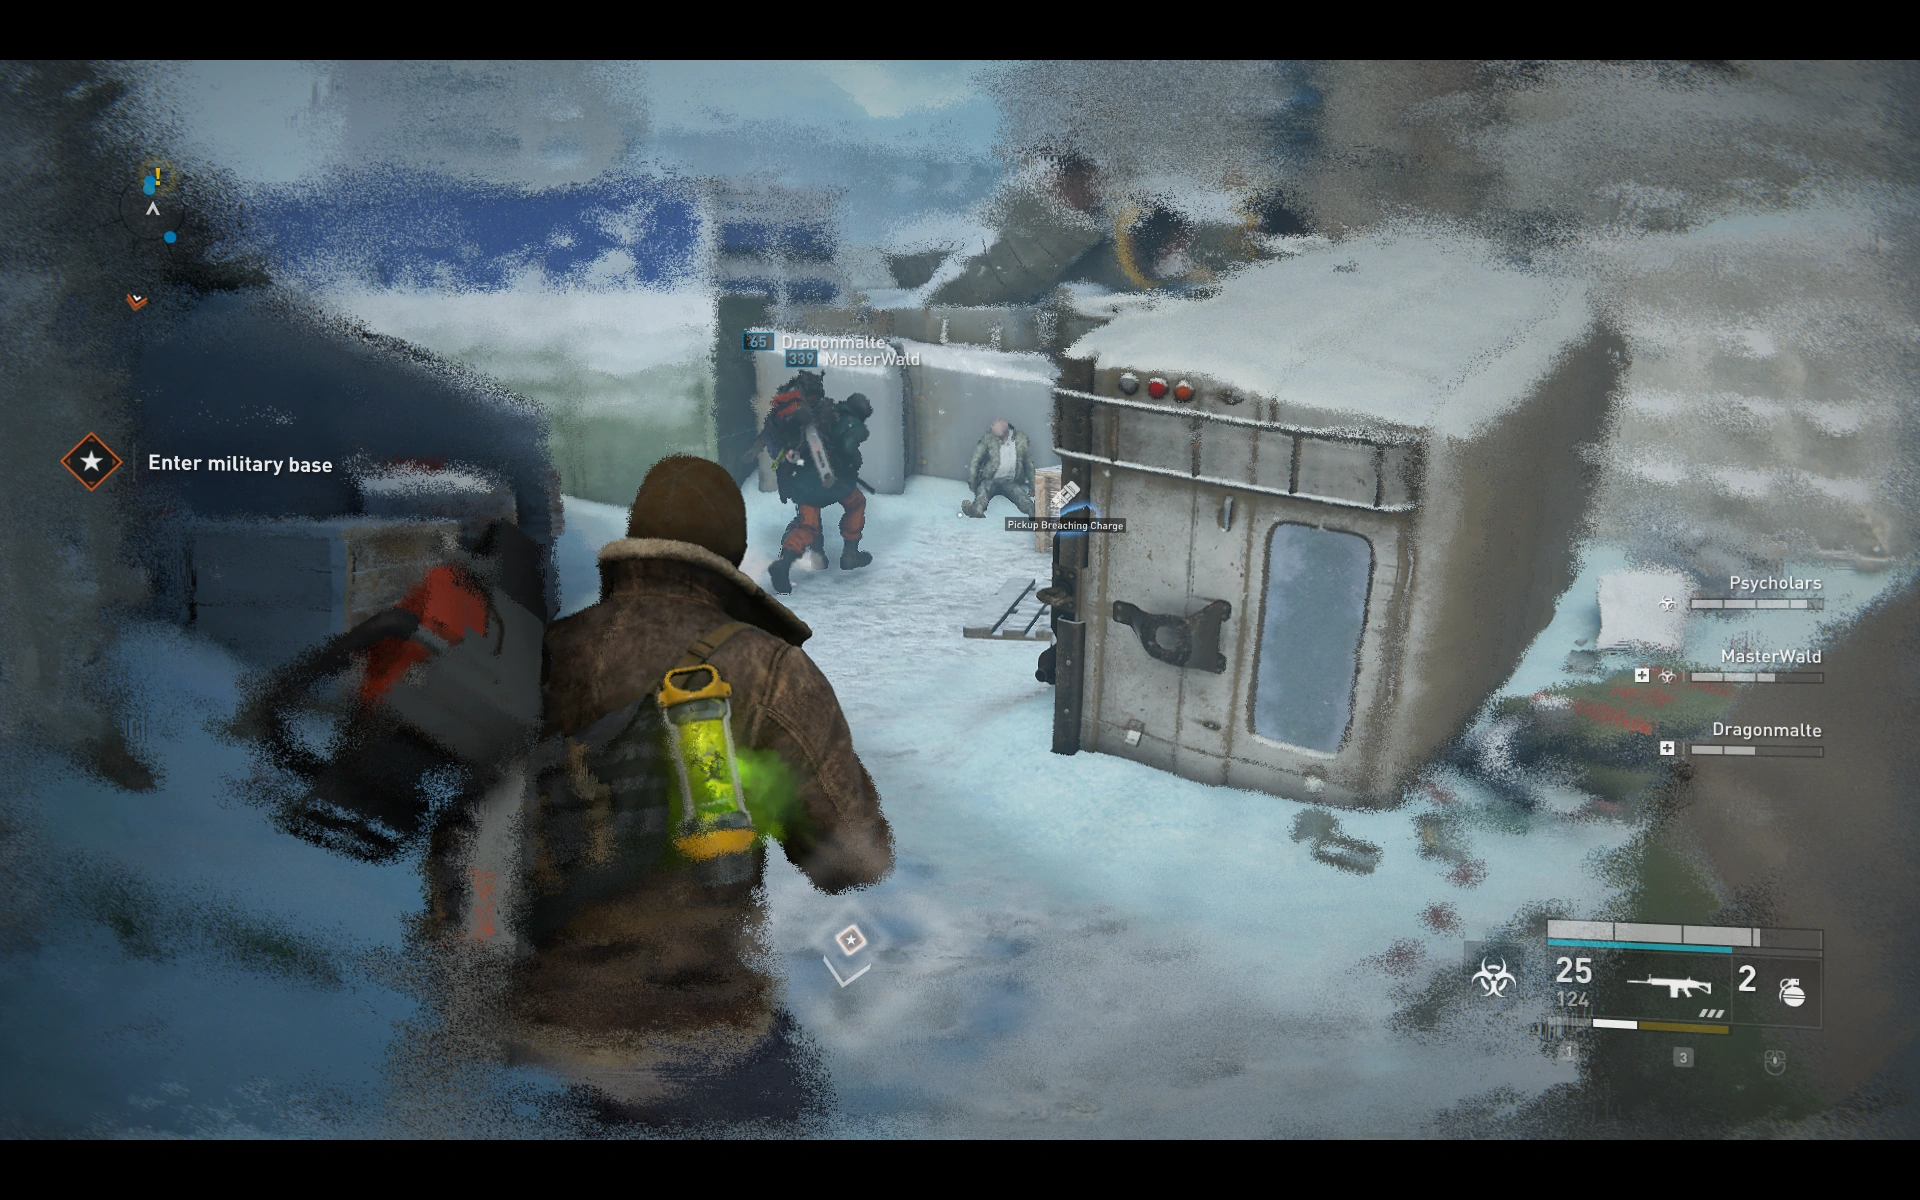
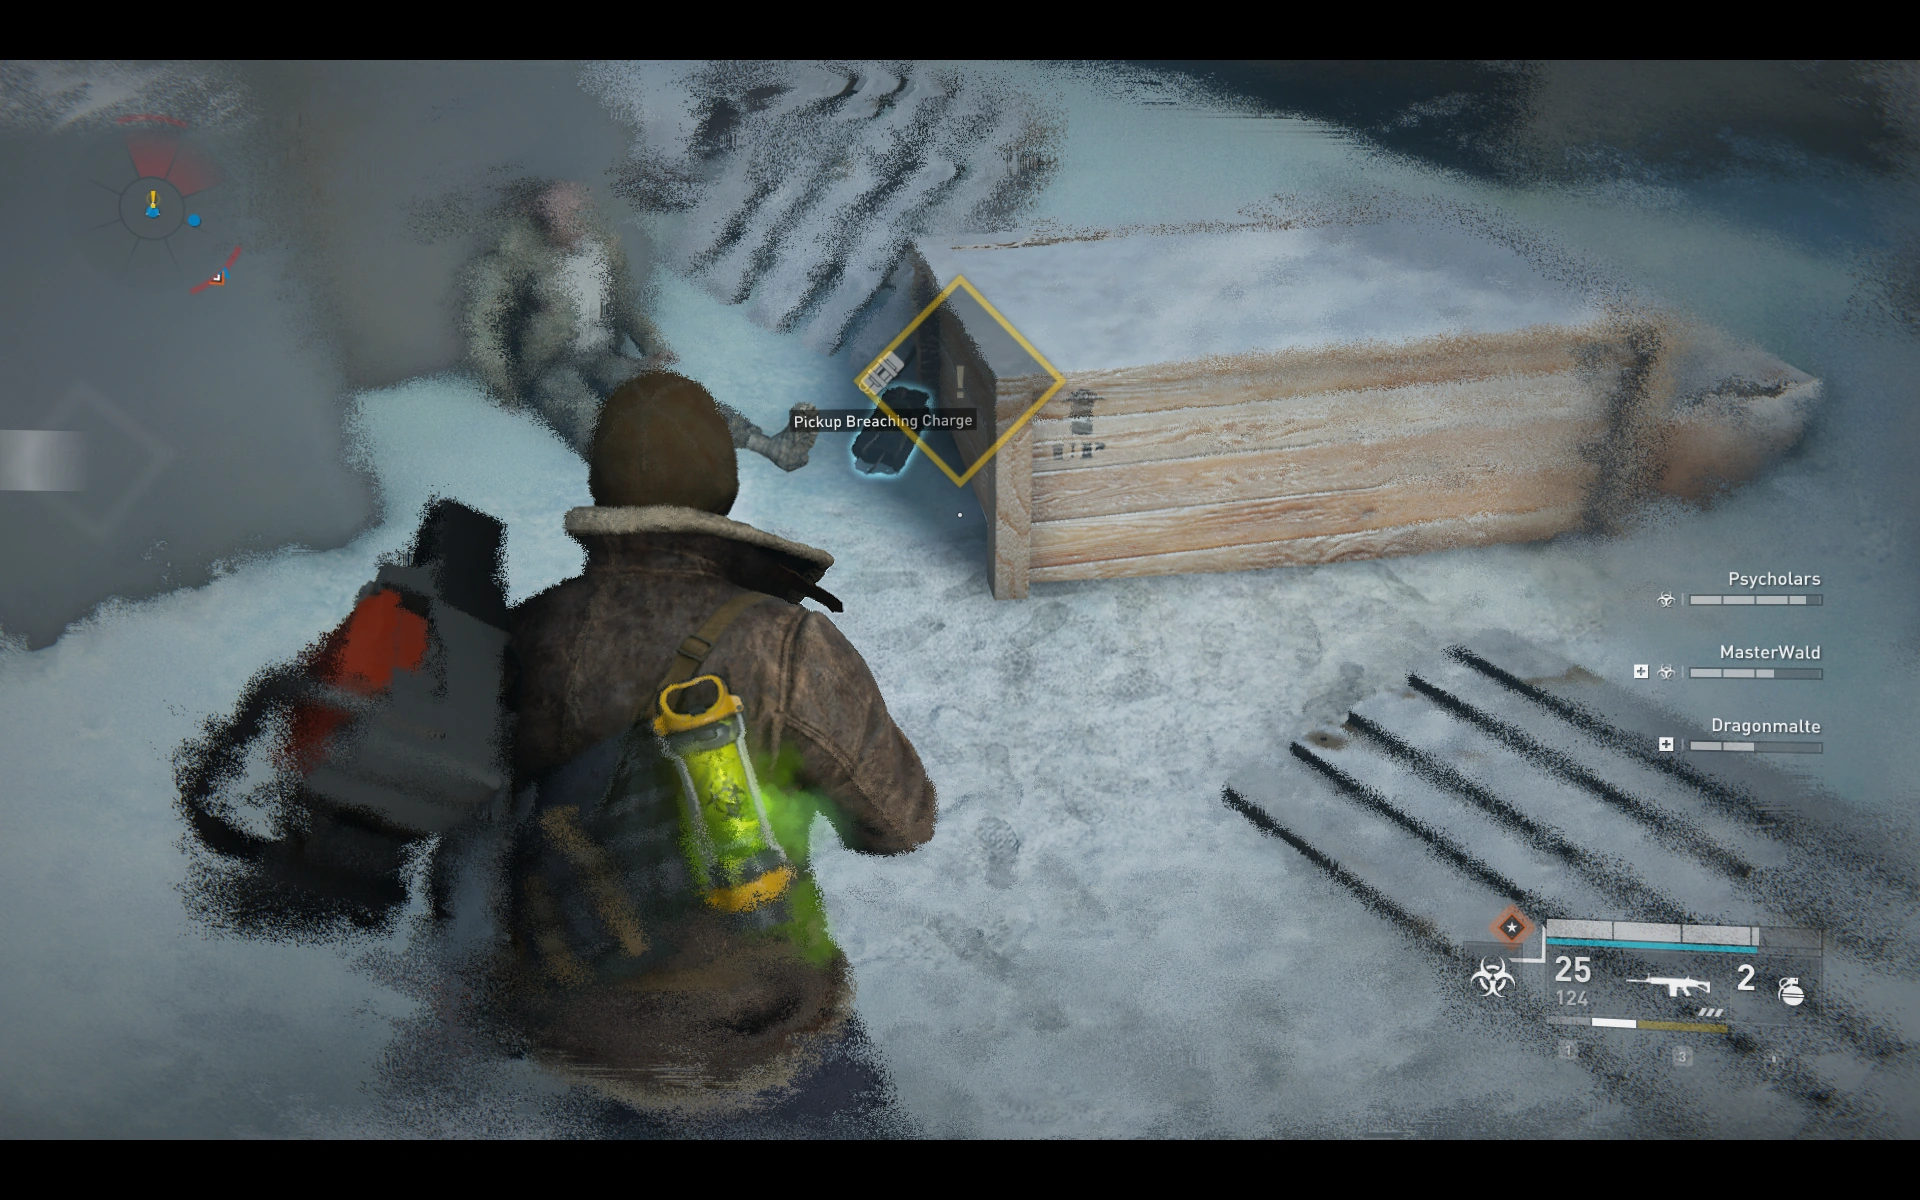
Marseille[]
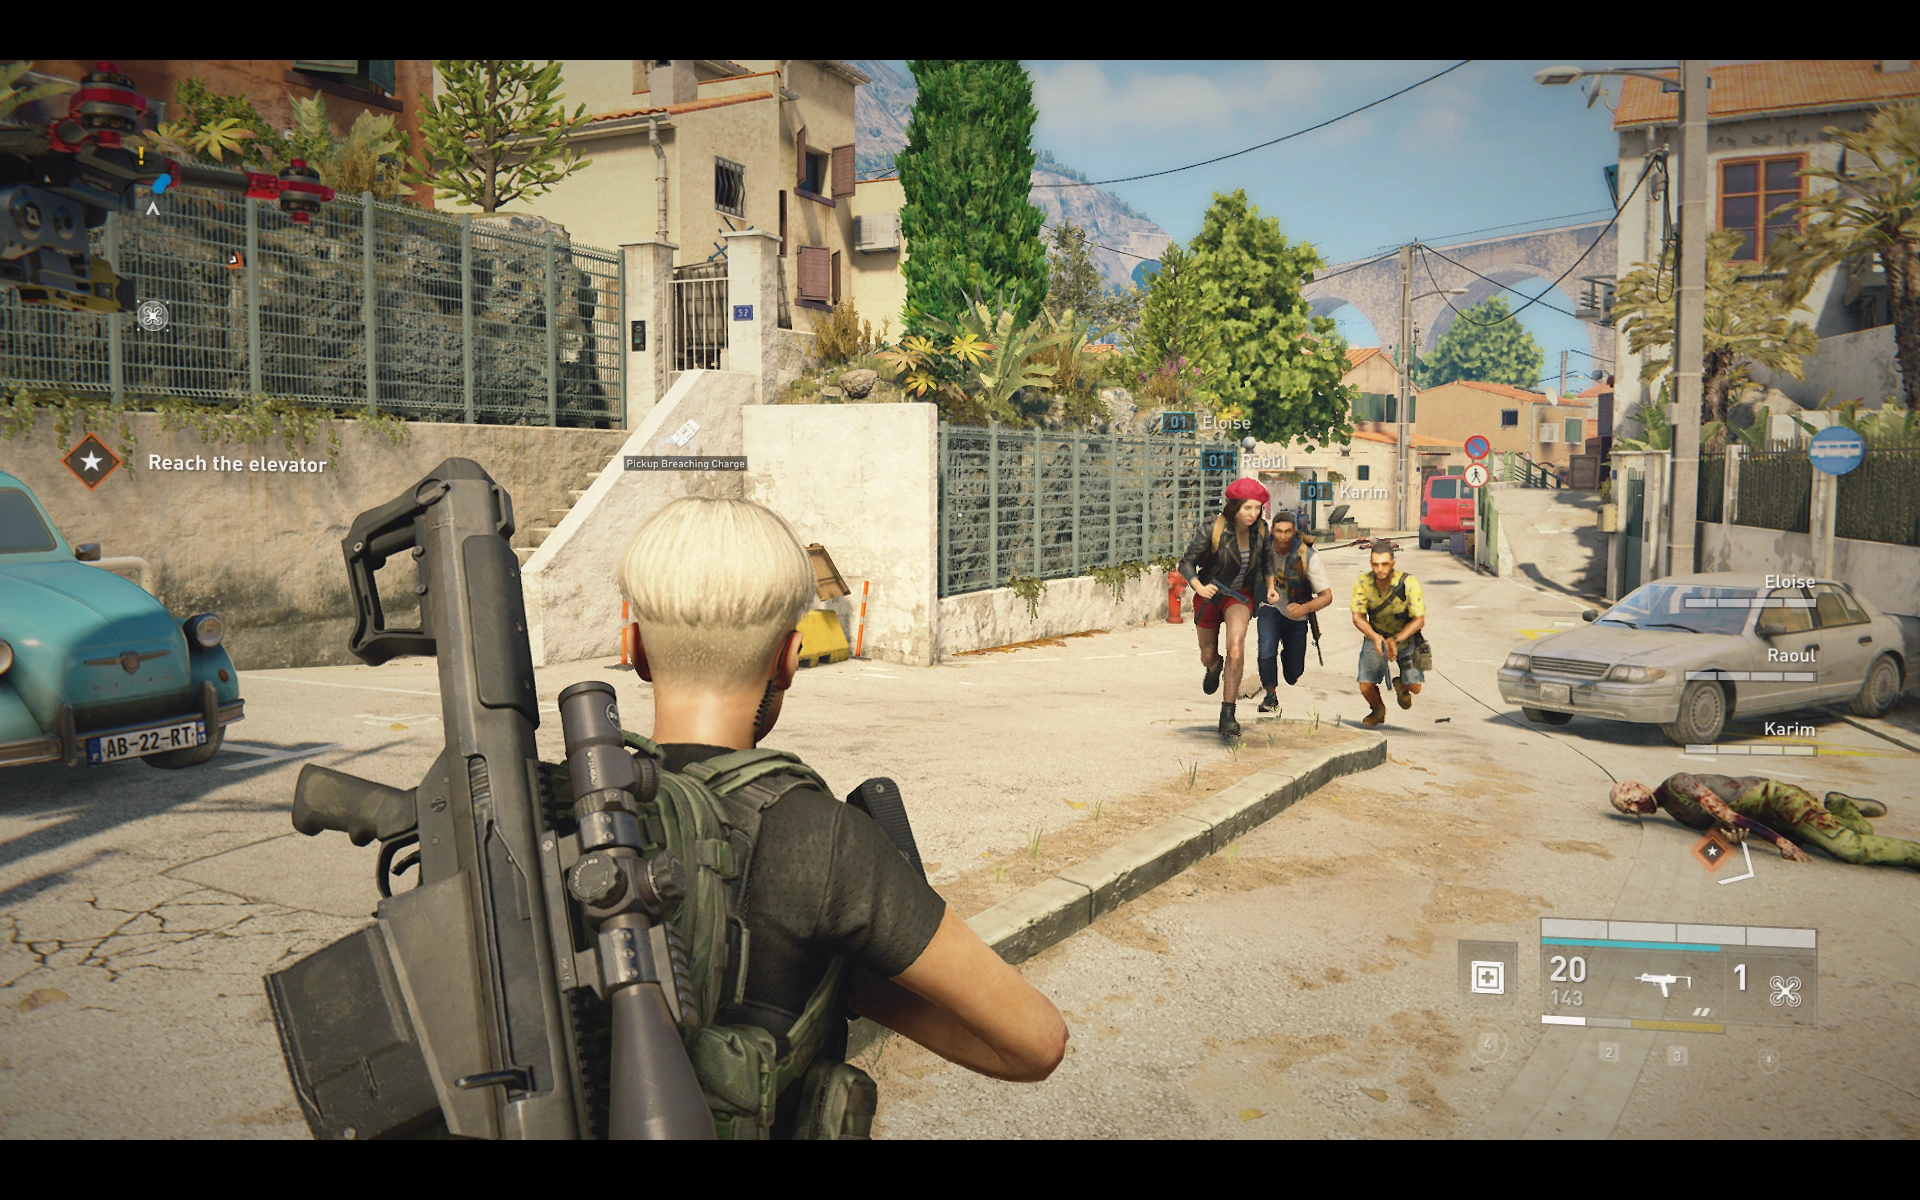
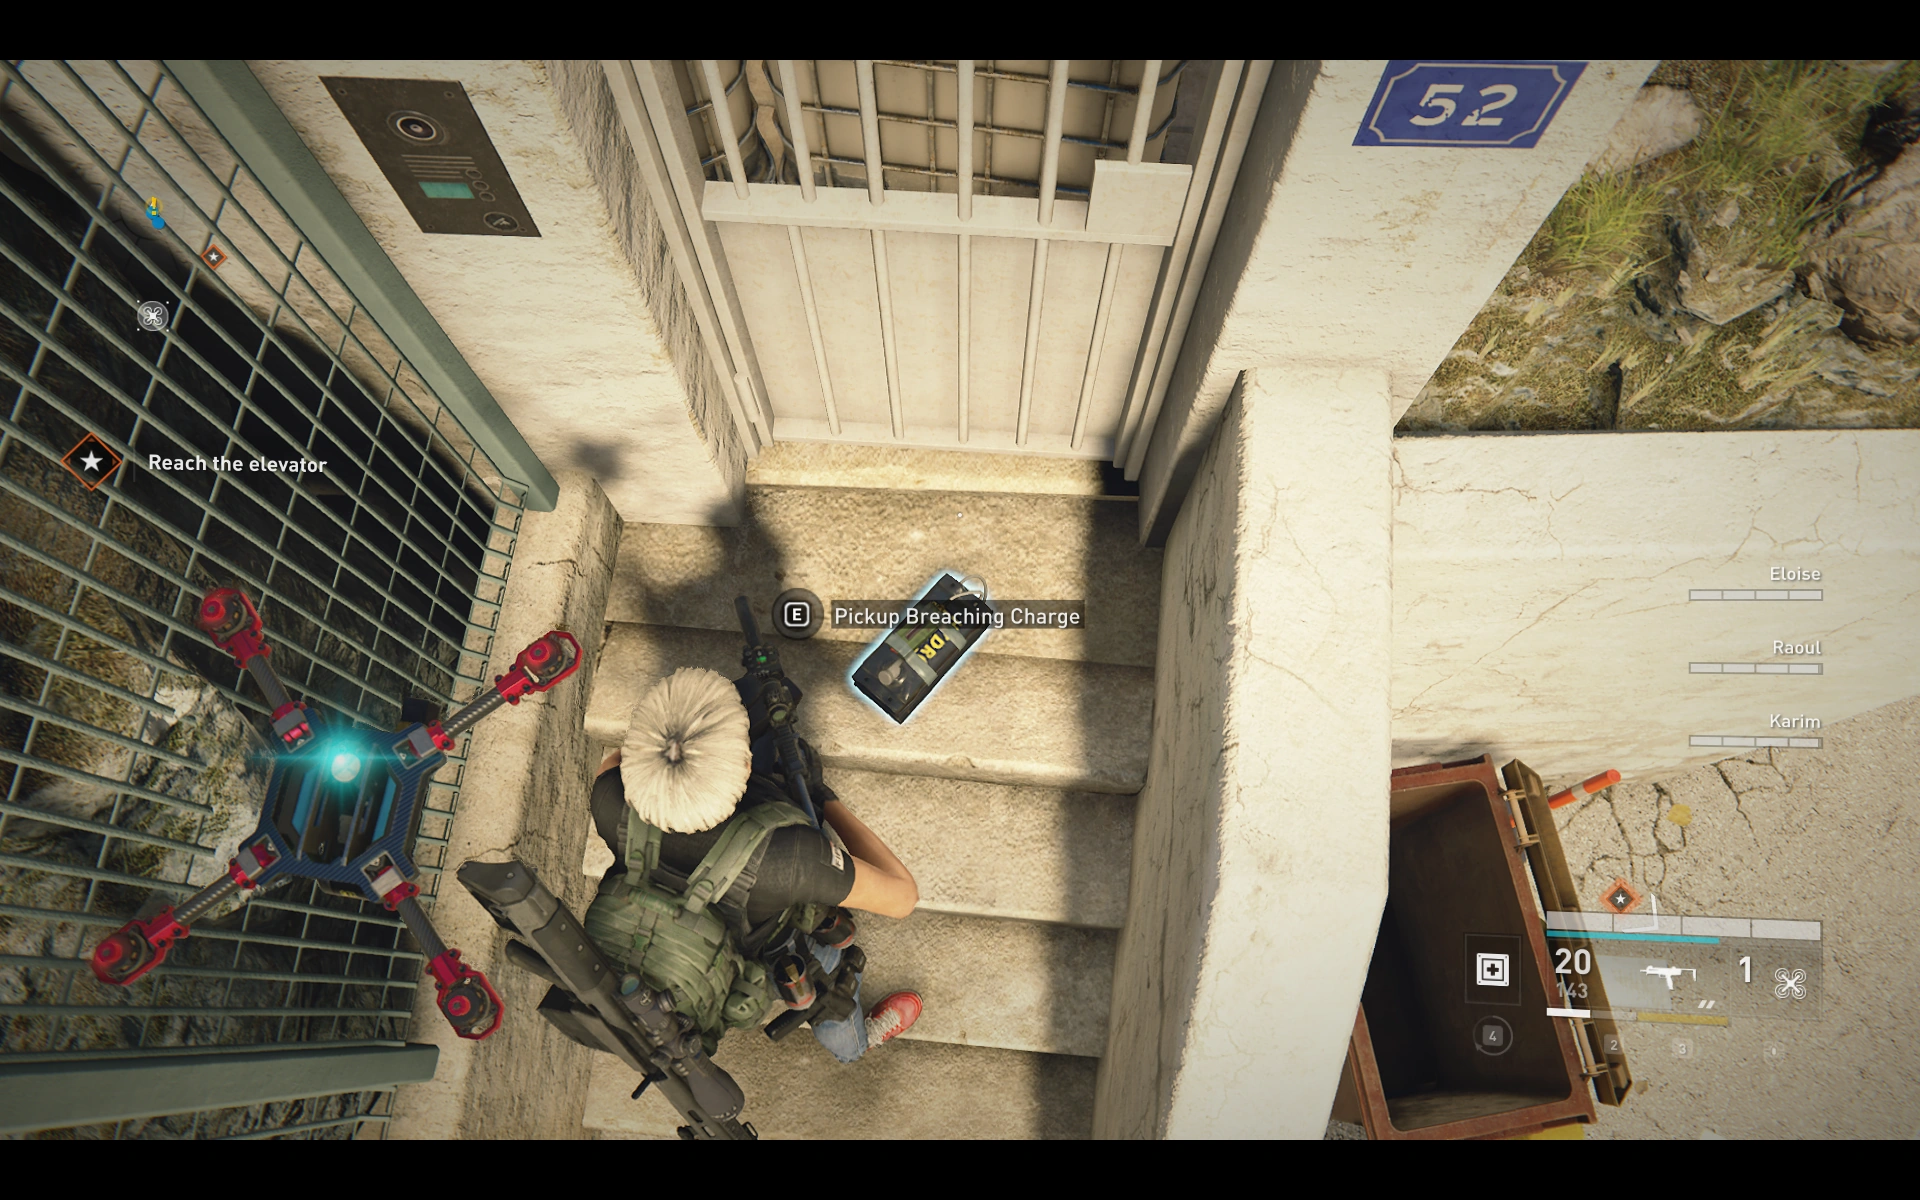
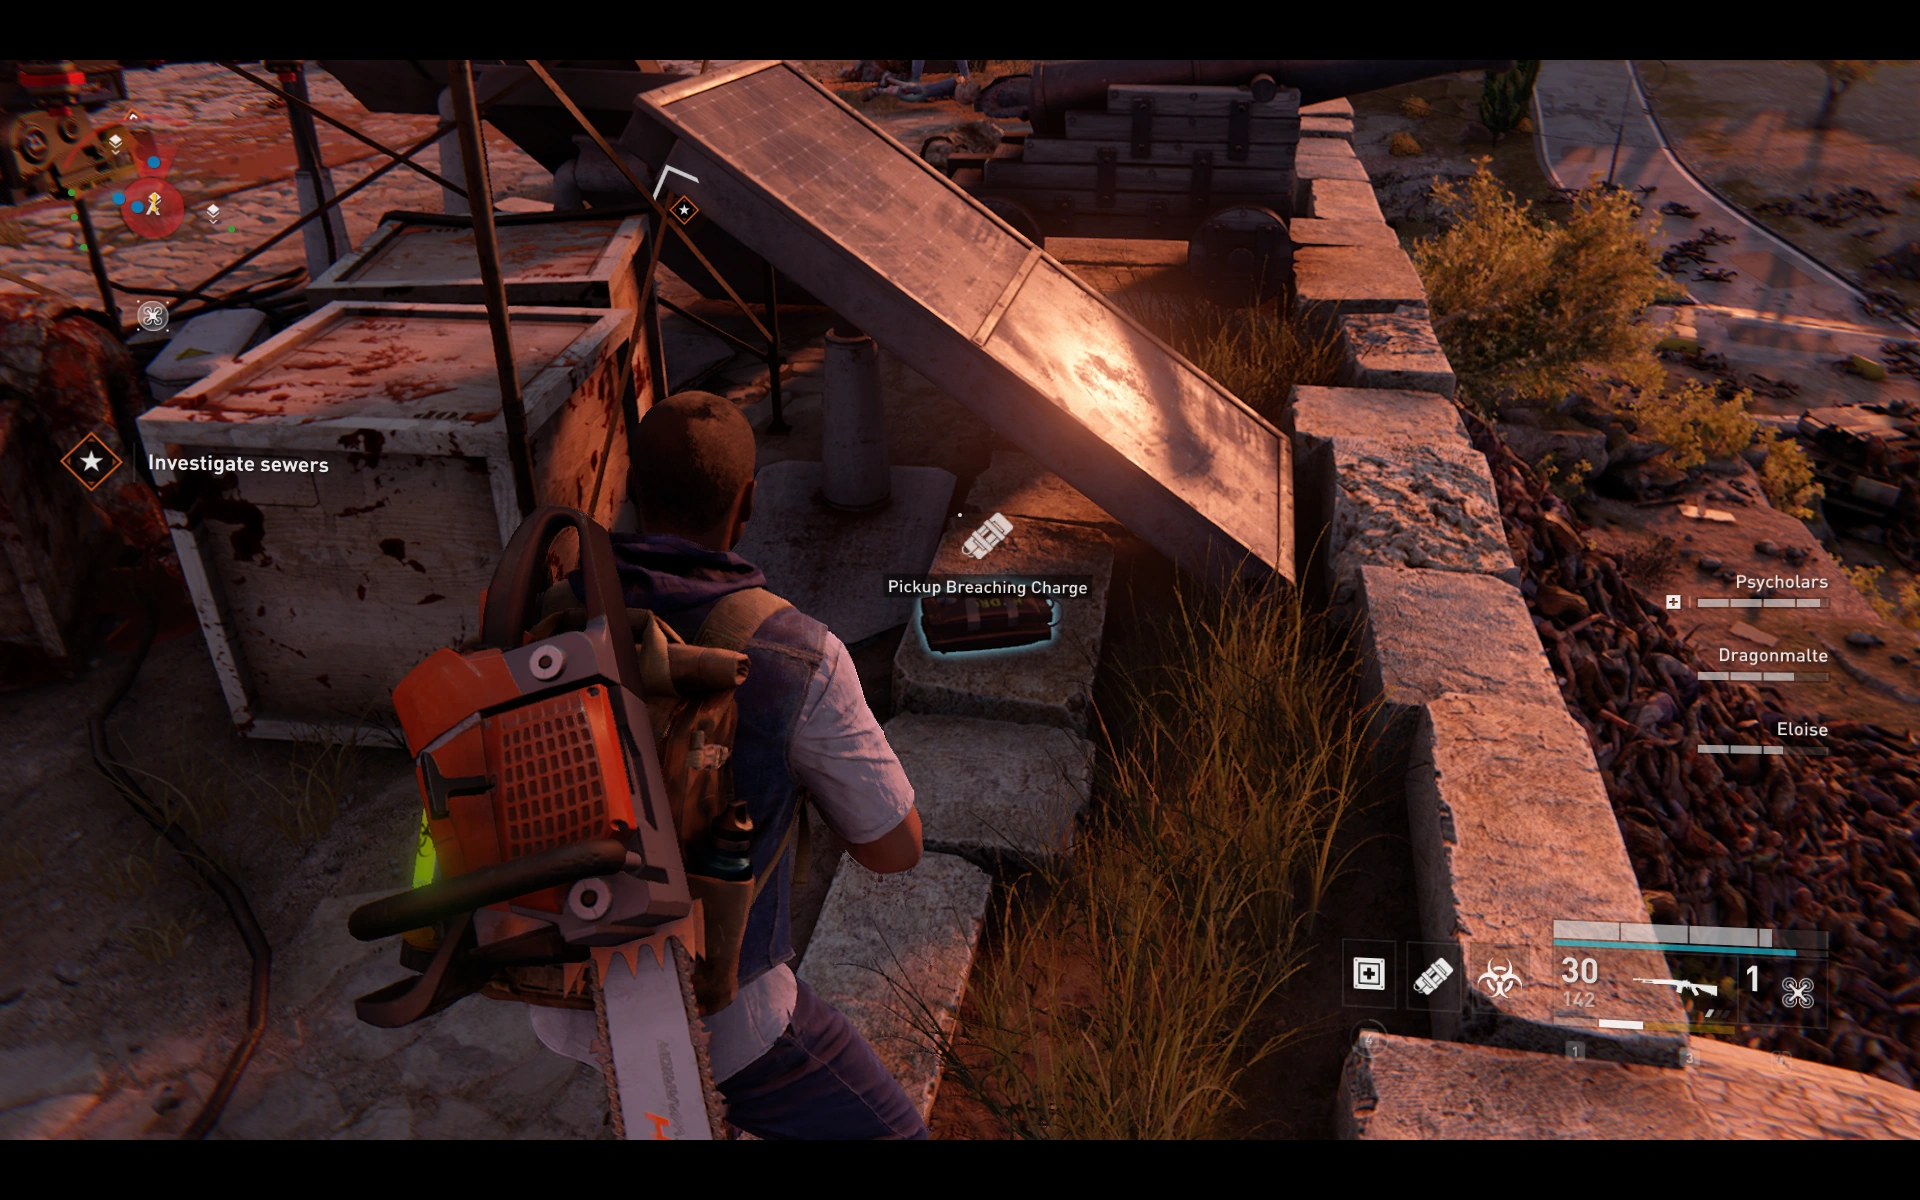
Chapter 1: French Resistance[]
Location 1: ![]() On a square before the first defense, on a wall besides a breachable door.
On a square before the first defense, on a wall besides a breachable door.
Location 2: ![]()
Location 3: ![]()
Location 4: ![]()
Location 5: ![]()
Location 6: ![]()
Location 7: ![]()
Location 8: ![]()
Chapter 2: Missile Command[]
Location 1: ![]()
When the two pathes rejoin, before you start to go up into the factory - on the right side, on a small stairway.
Location 2: ![]()
When you entered the factory building, behind some scaffolding near the stairs - you have to walk around from the right
Location 3: ![]()
At the first defense, just behind the back of the breachable container.
Location 4: ![]()
After you exit the elevator, in the upstairs office room.

Location 5: ![]()
Location 6: ![]()
Location 7: ![]()
Location 8: ![]()
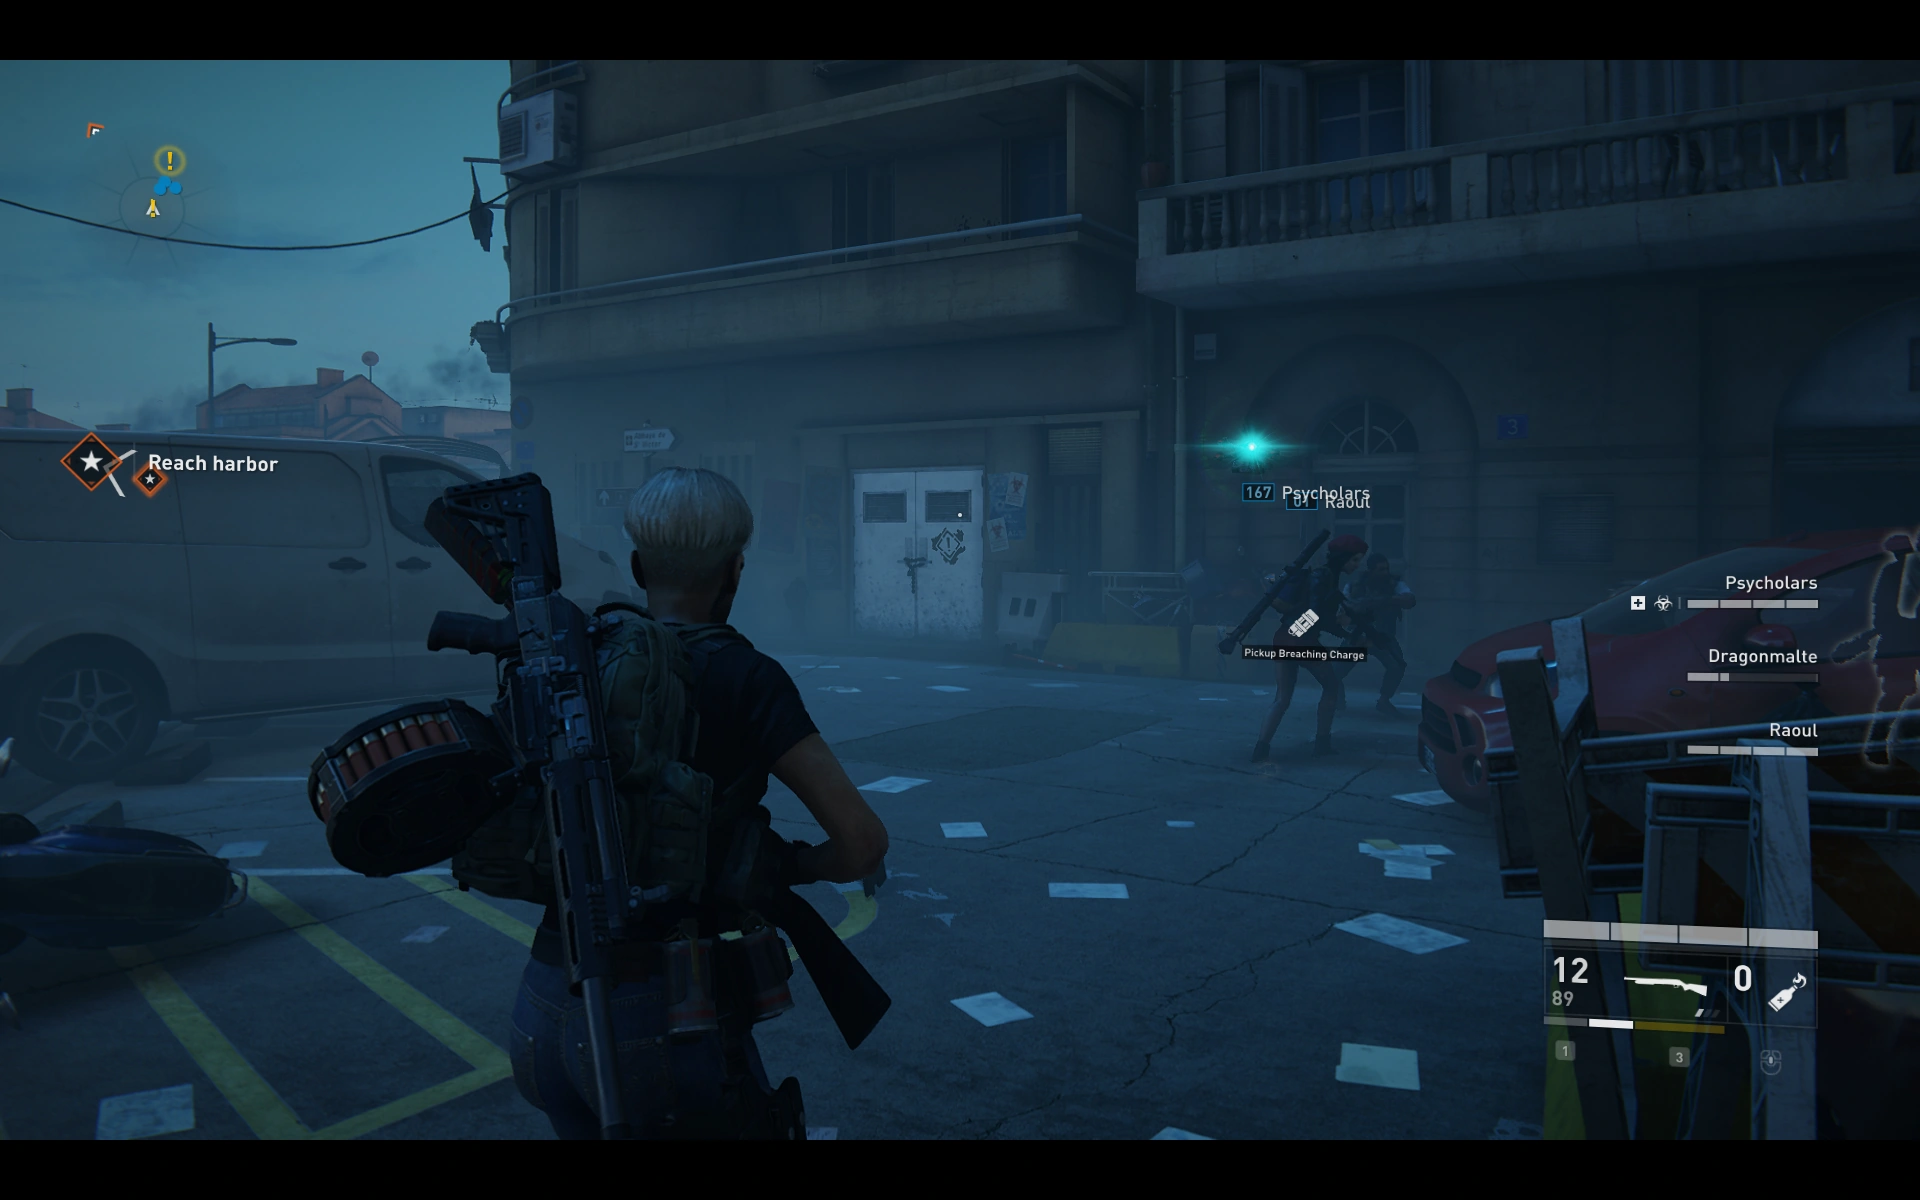
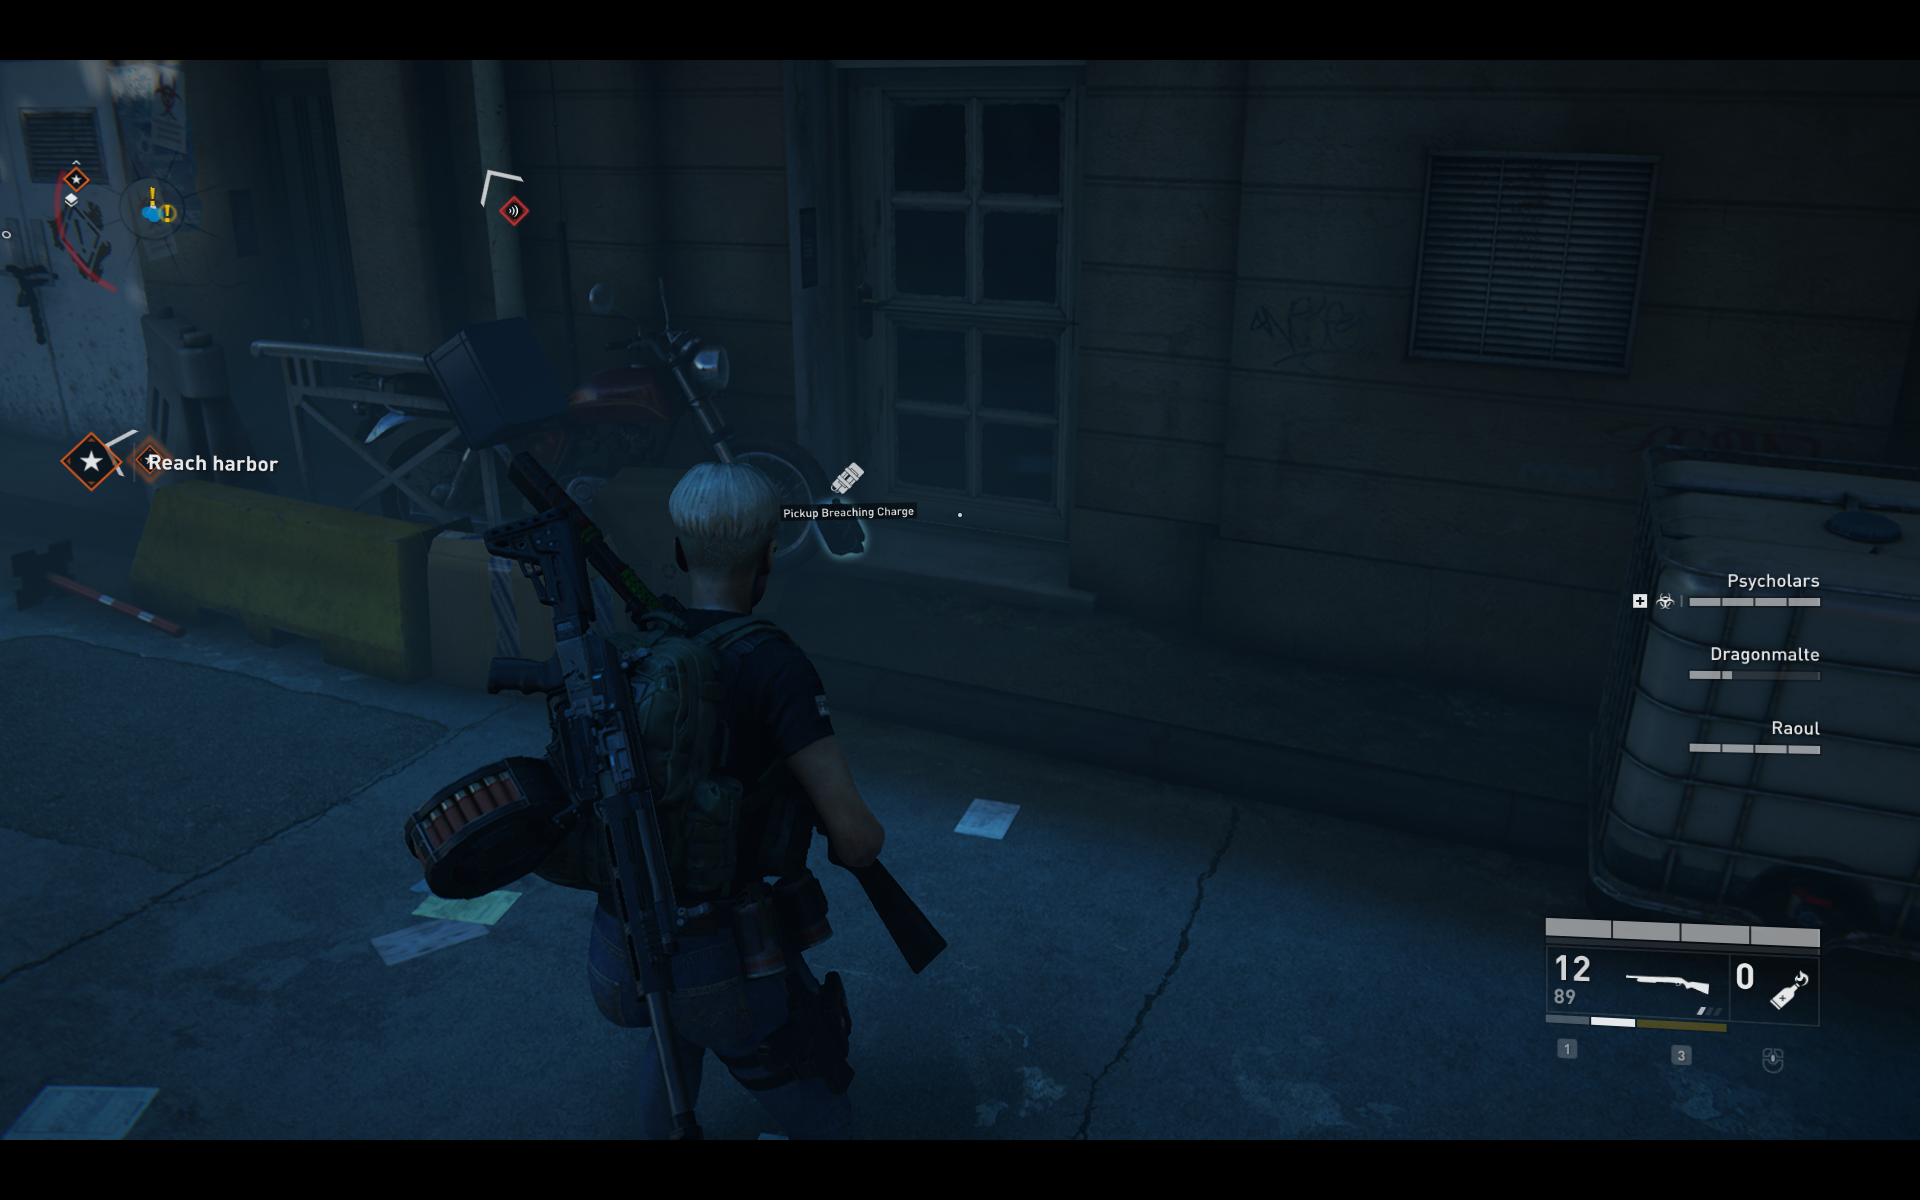
Chapter 3: Last Bastion[]
Location 1: ![]()
In the area with the first defense, on the left side between some boxes near the wall.
Location 2: ![]()
In the area with the first defense, on the left side with the construction toilets and bushes

Location 3: ![]()
After the first defense, there is a path to the left, in the end there.
Location 4: ![]()
Basically where the second Virus Sample is, on the square before you first go down into the sewers - hidden behind some crates.
Location 5: ![]()
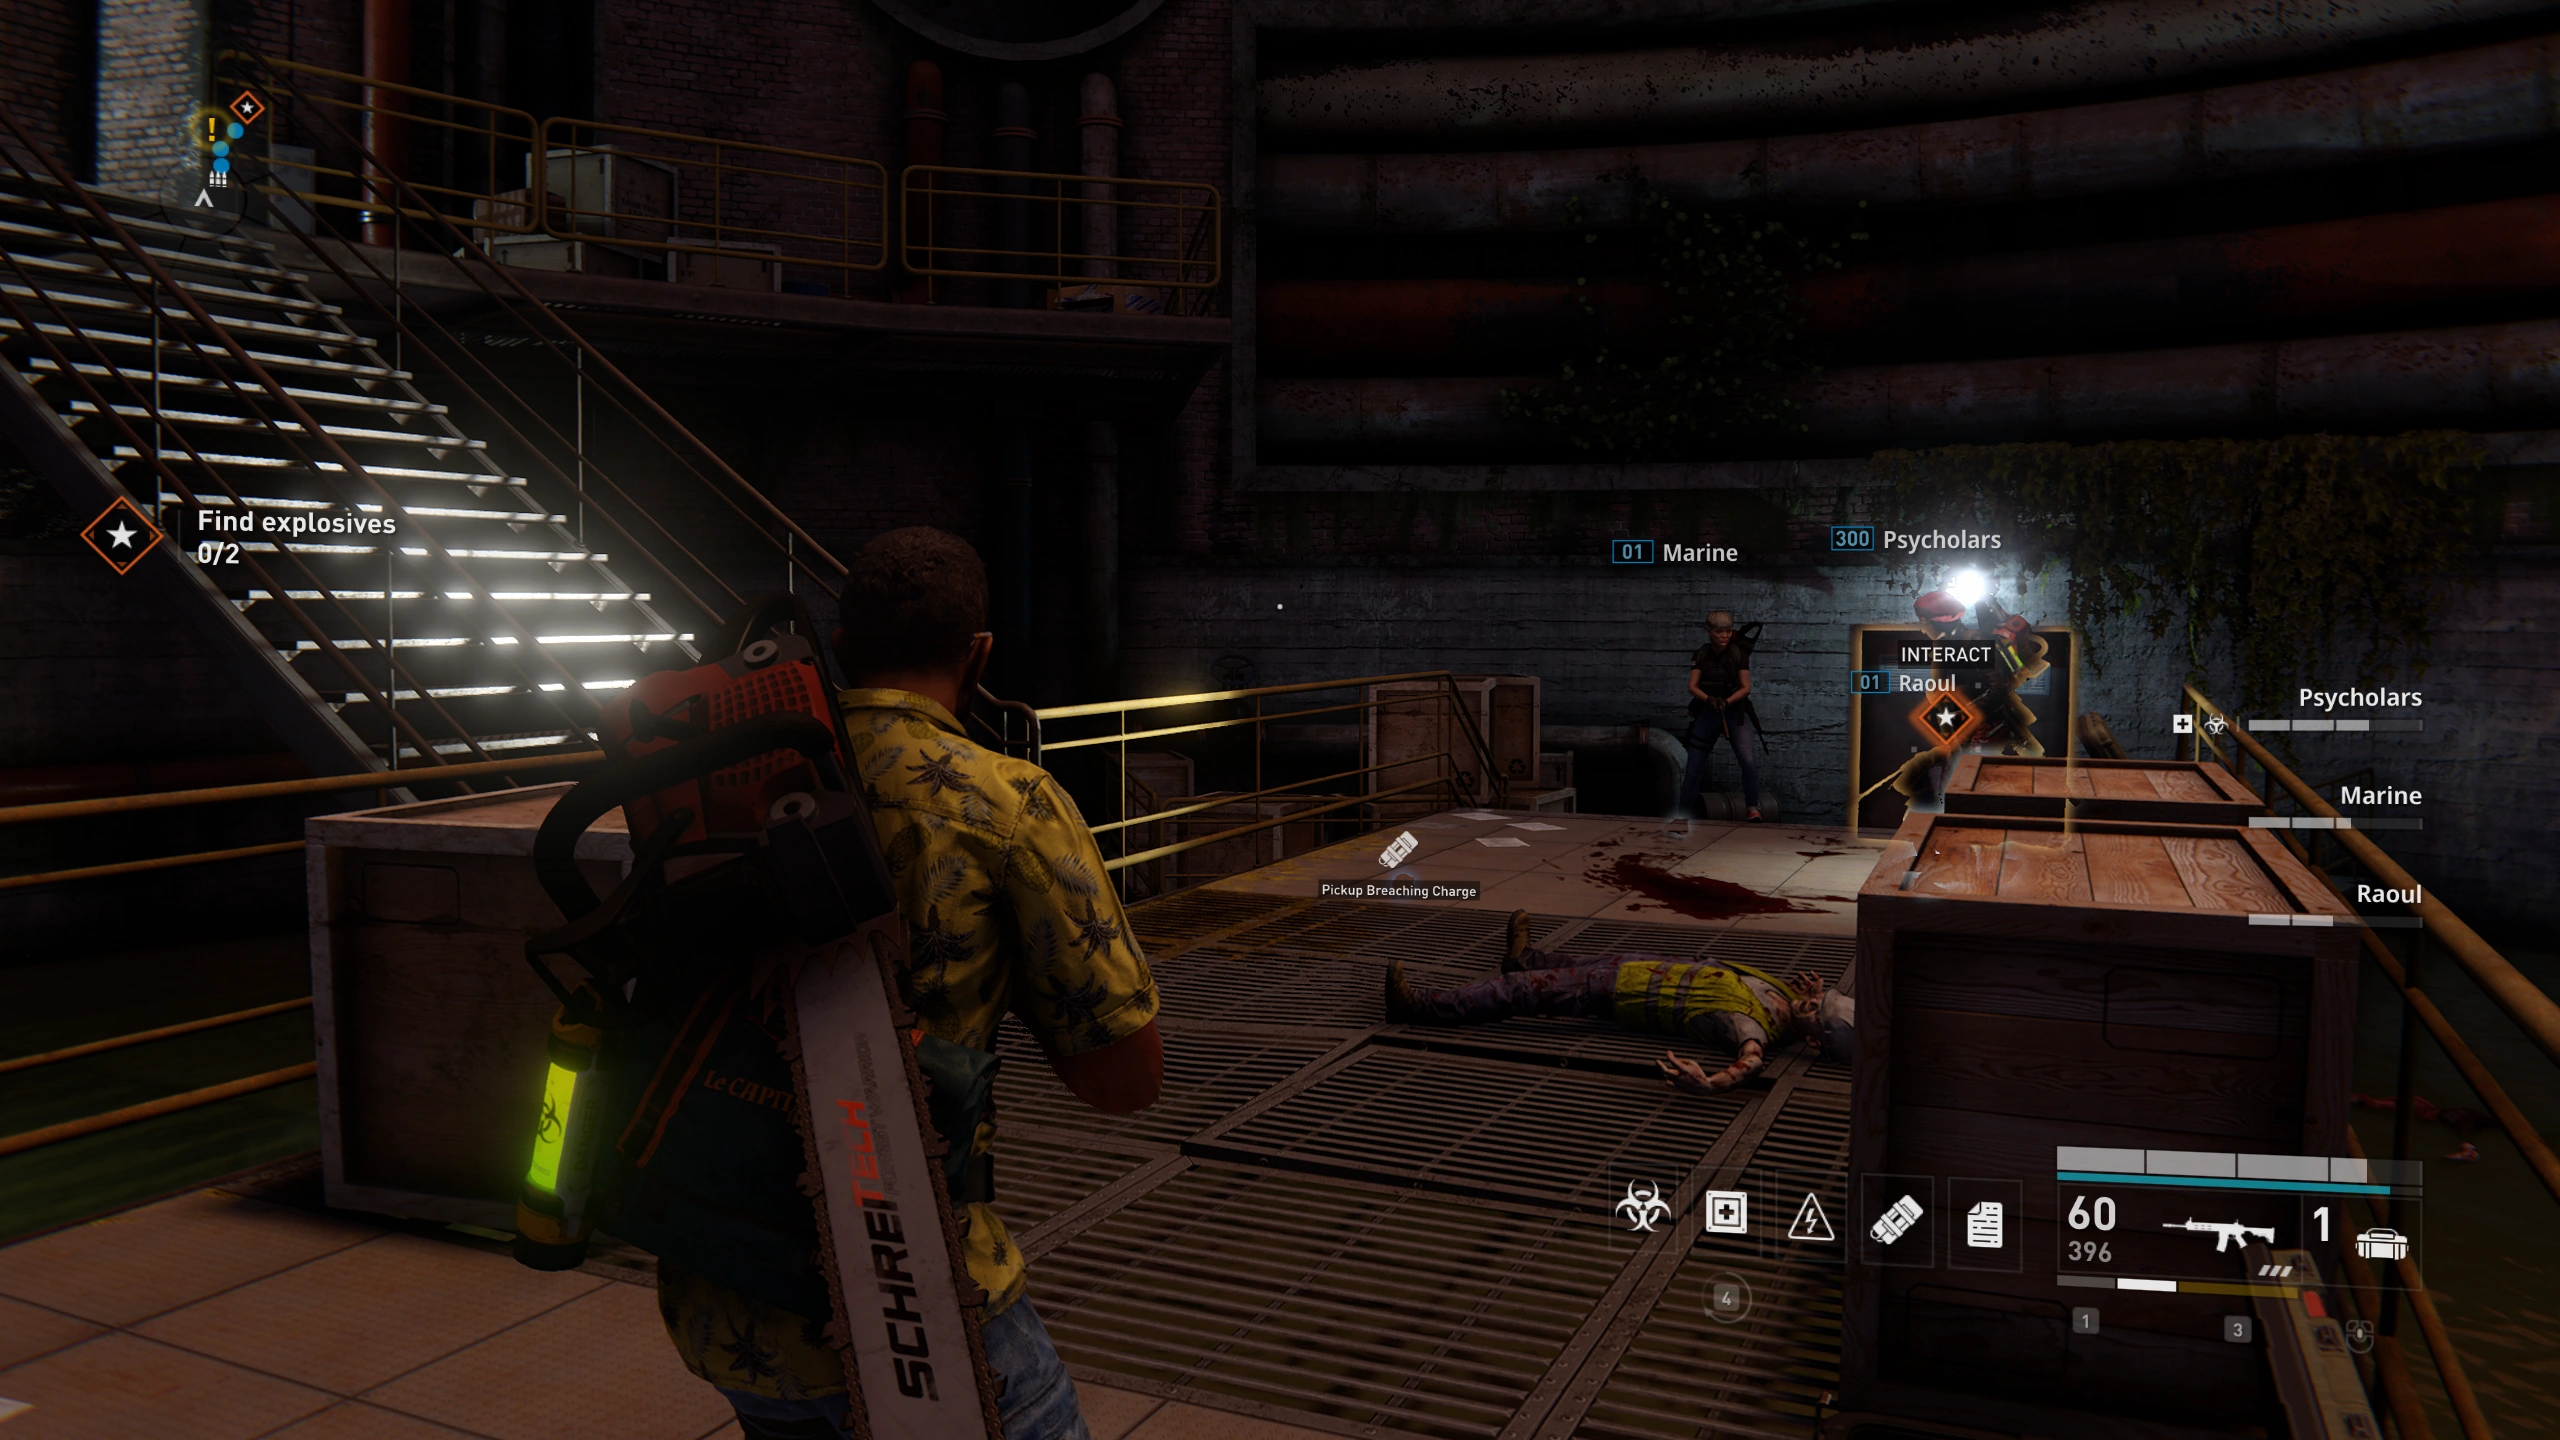
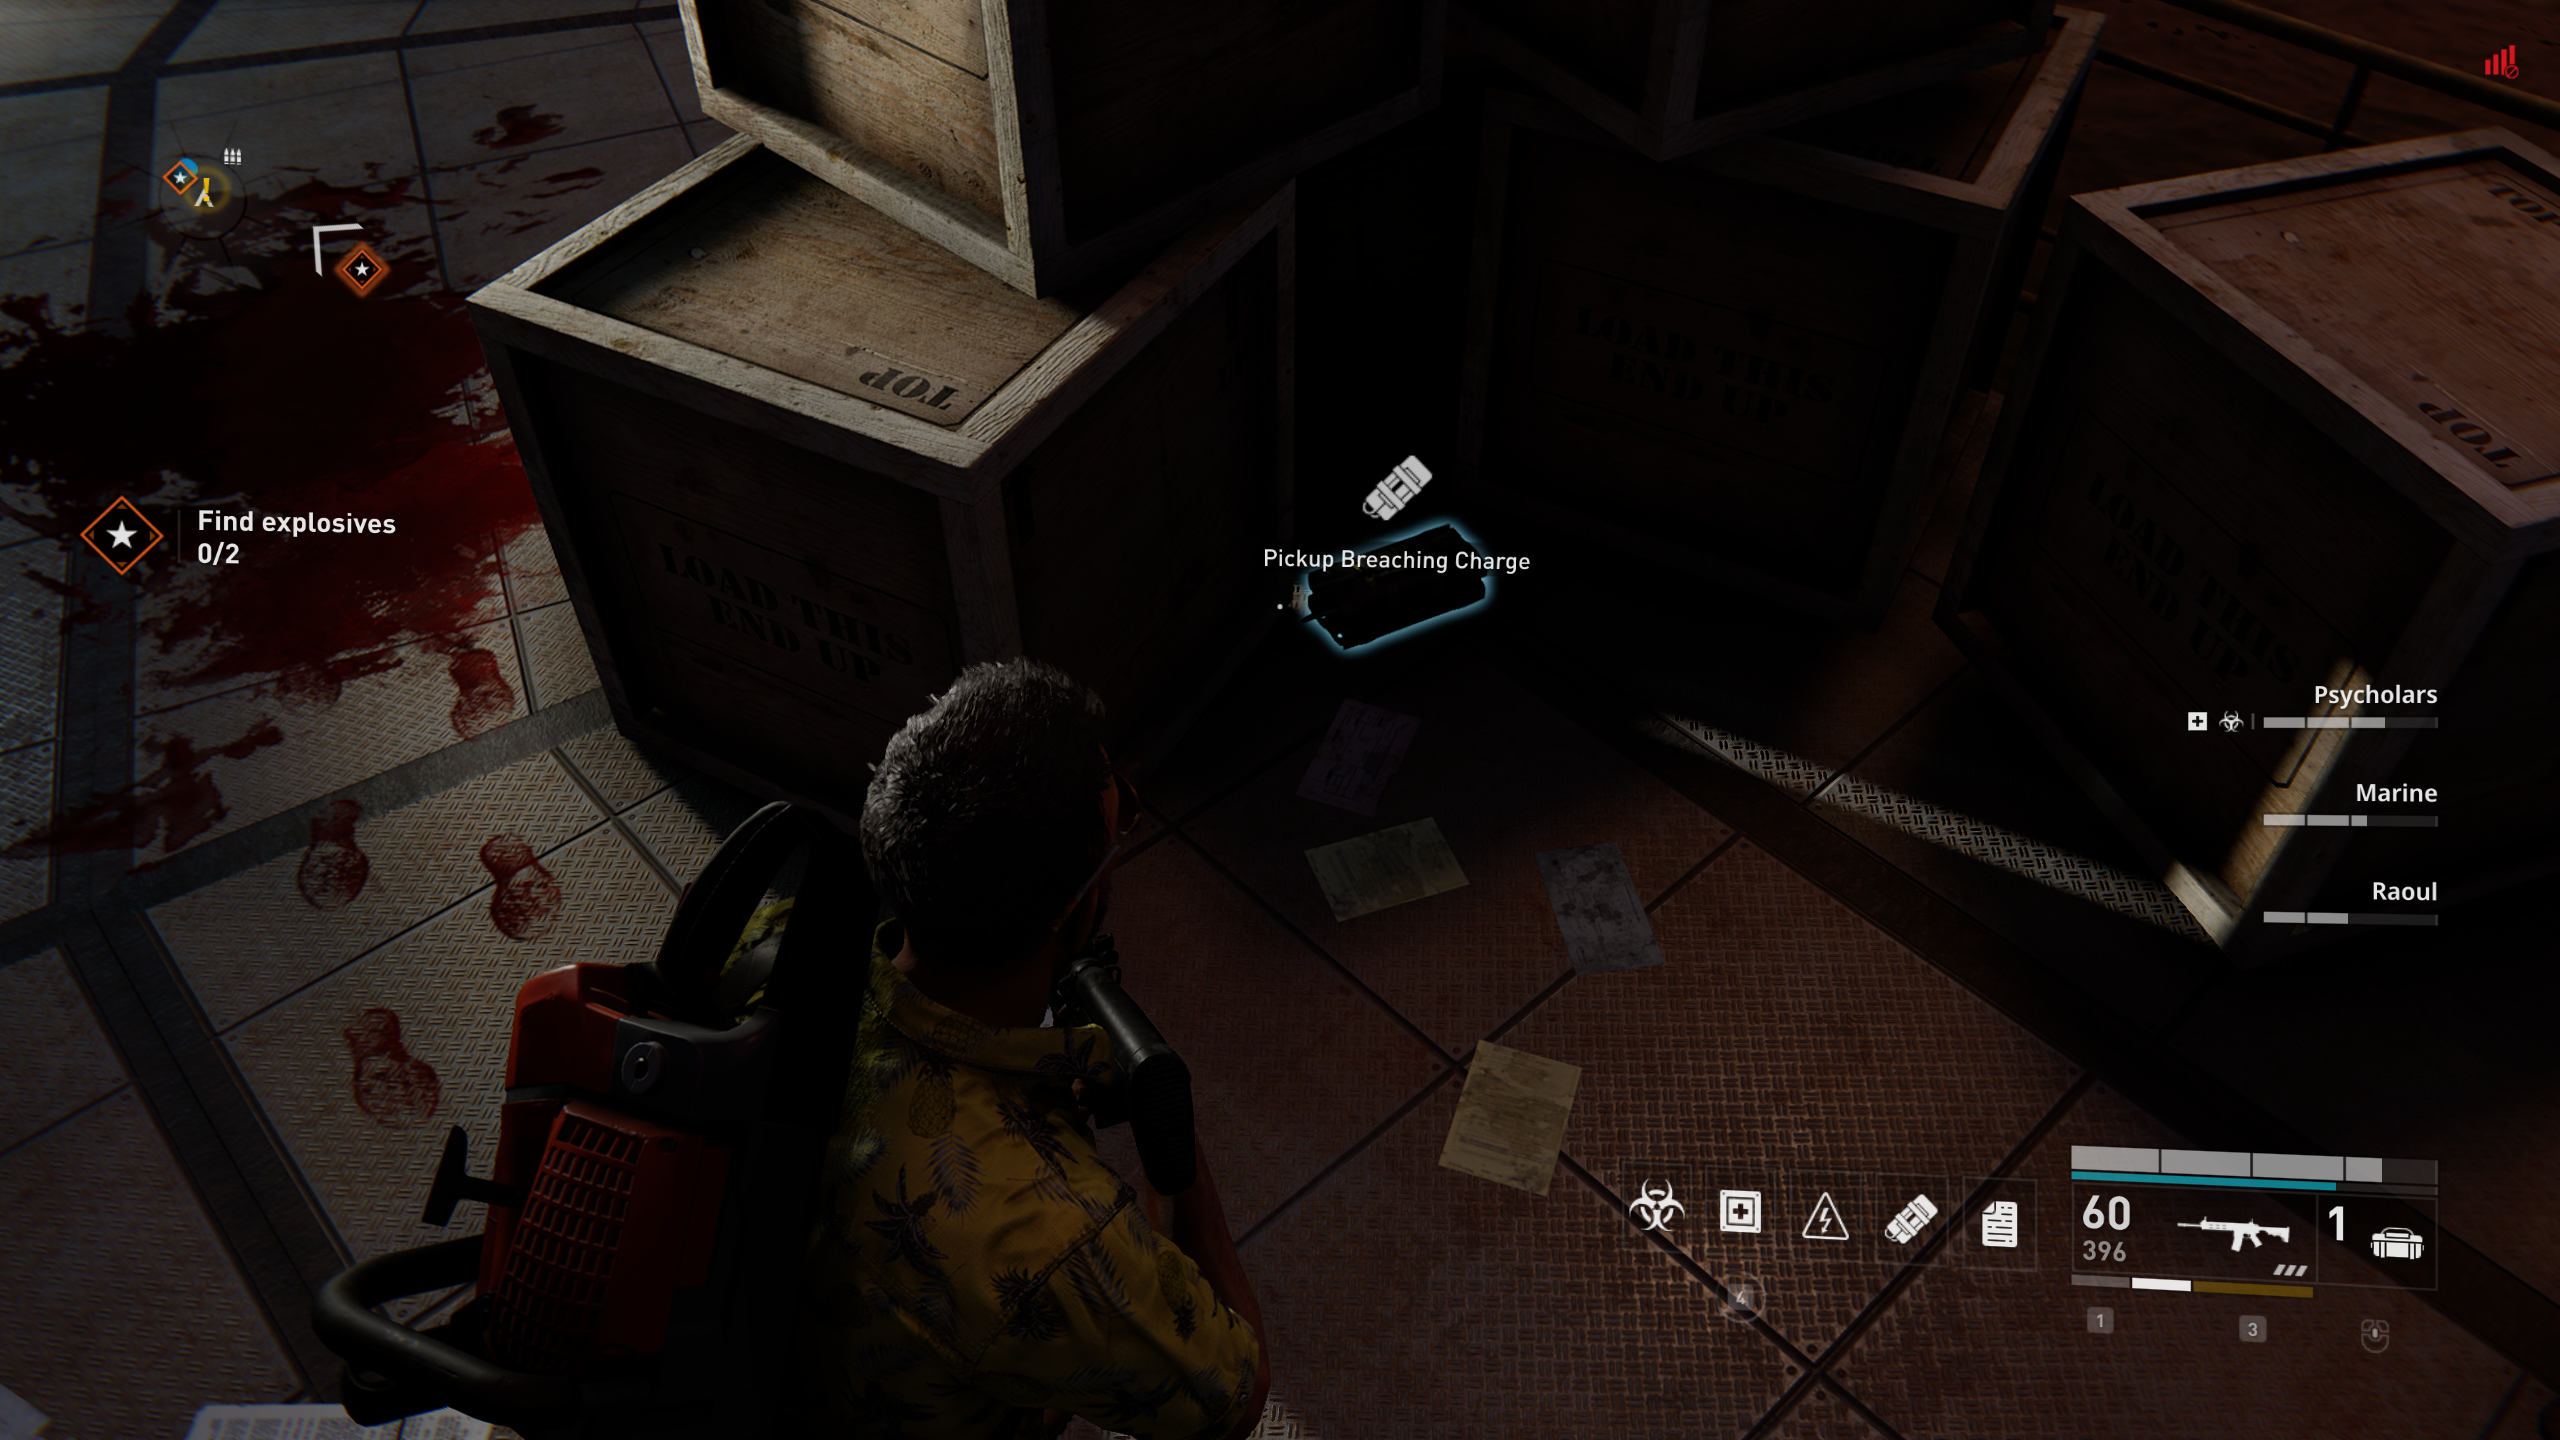
While looking for explosives in the sewers, when picking up the flashlight, near the left exit behind some boxes.
Location 6: ![]()
Location 7: ![]()
Location 8: ![]()
Location 9: ![]()
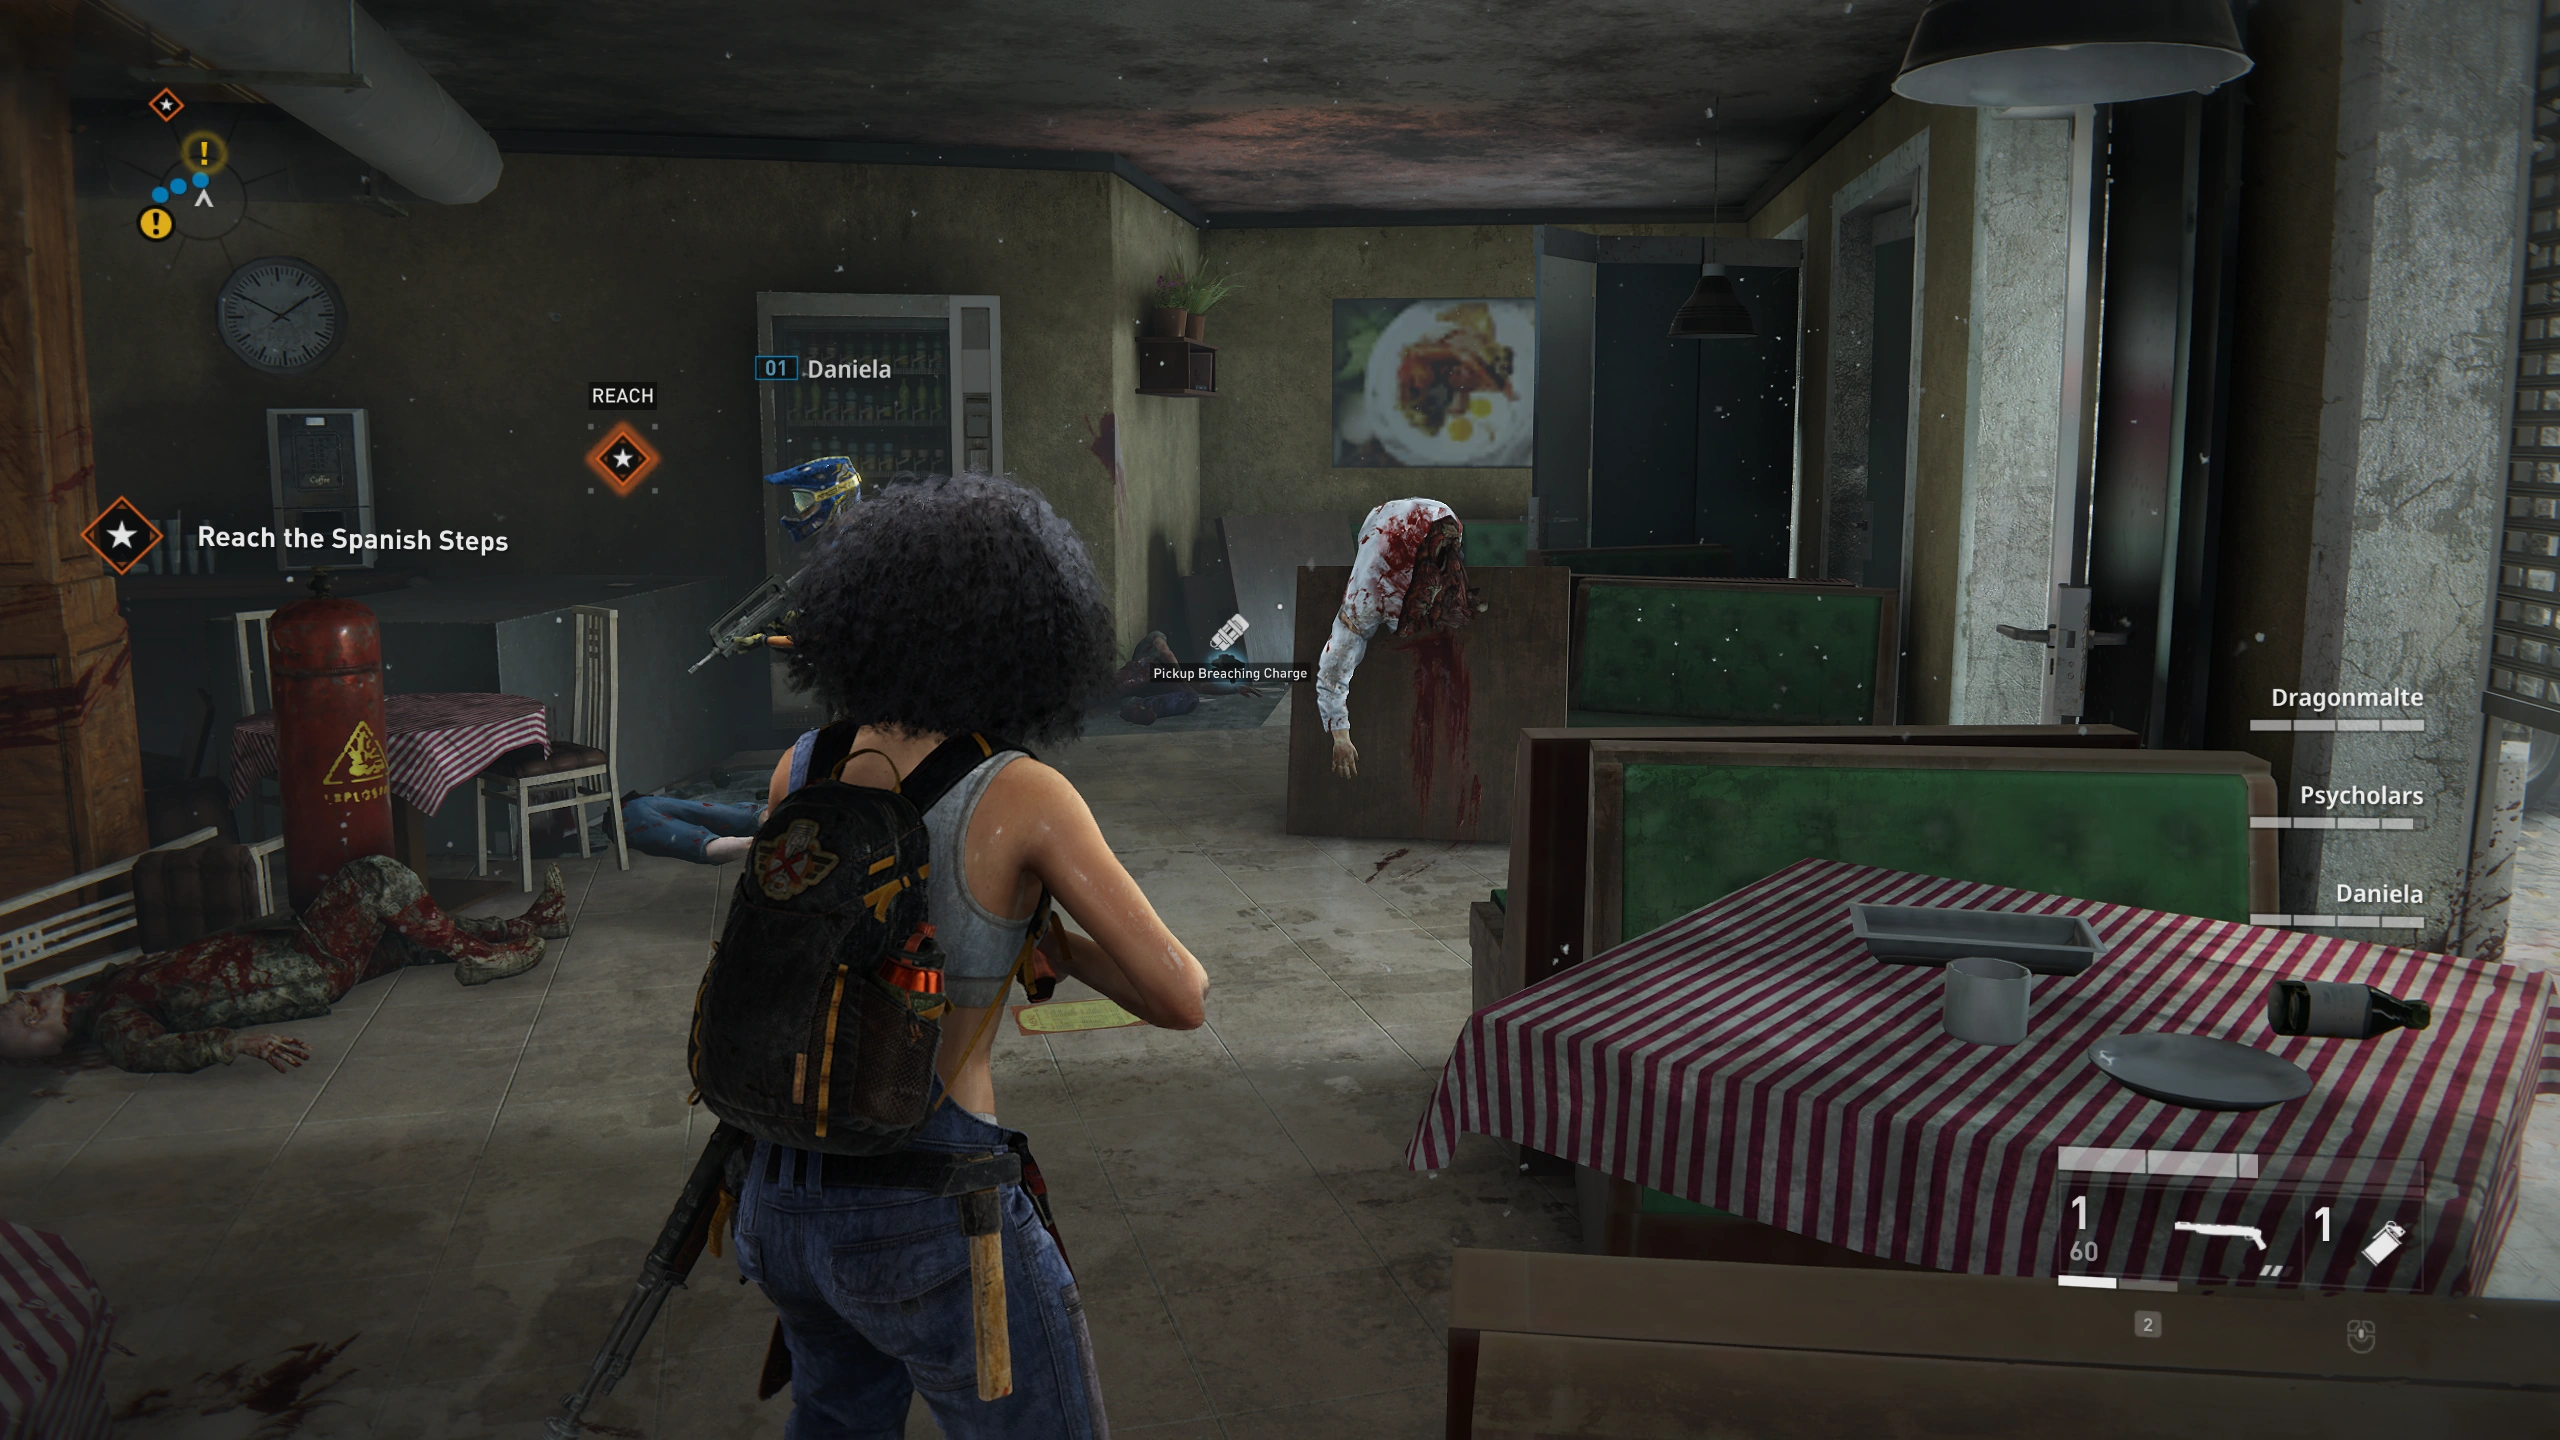
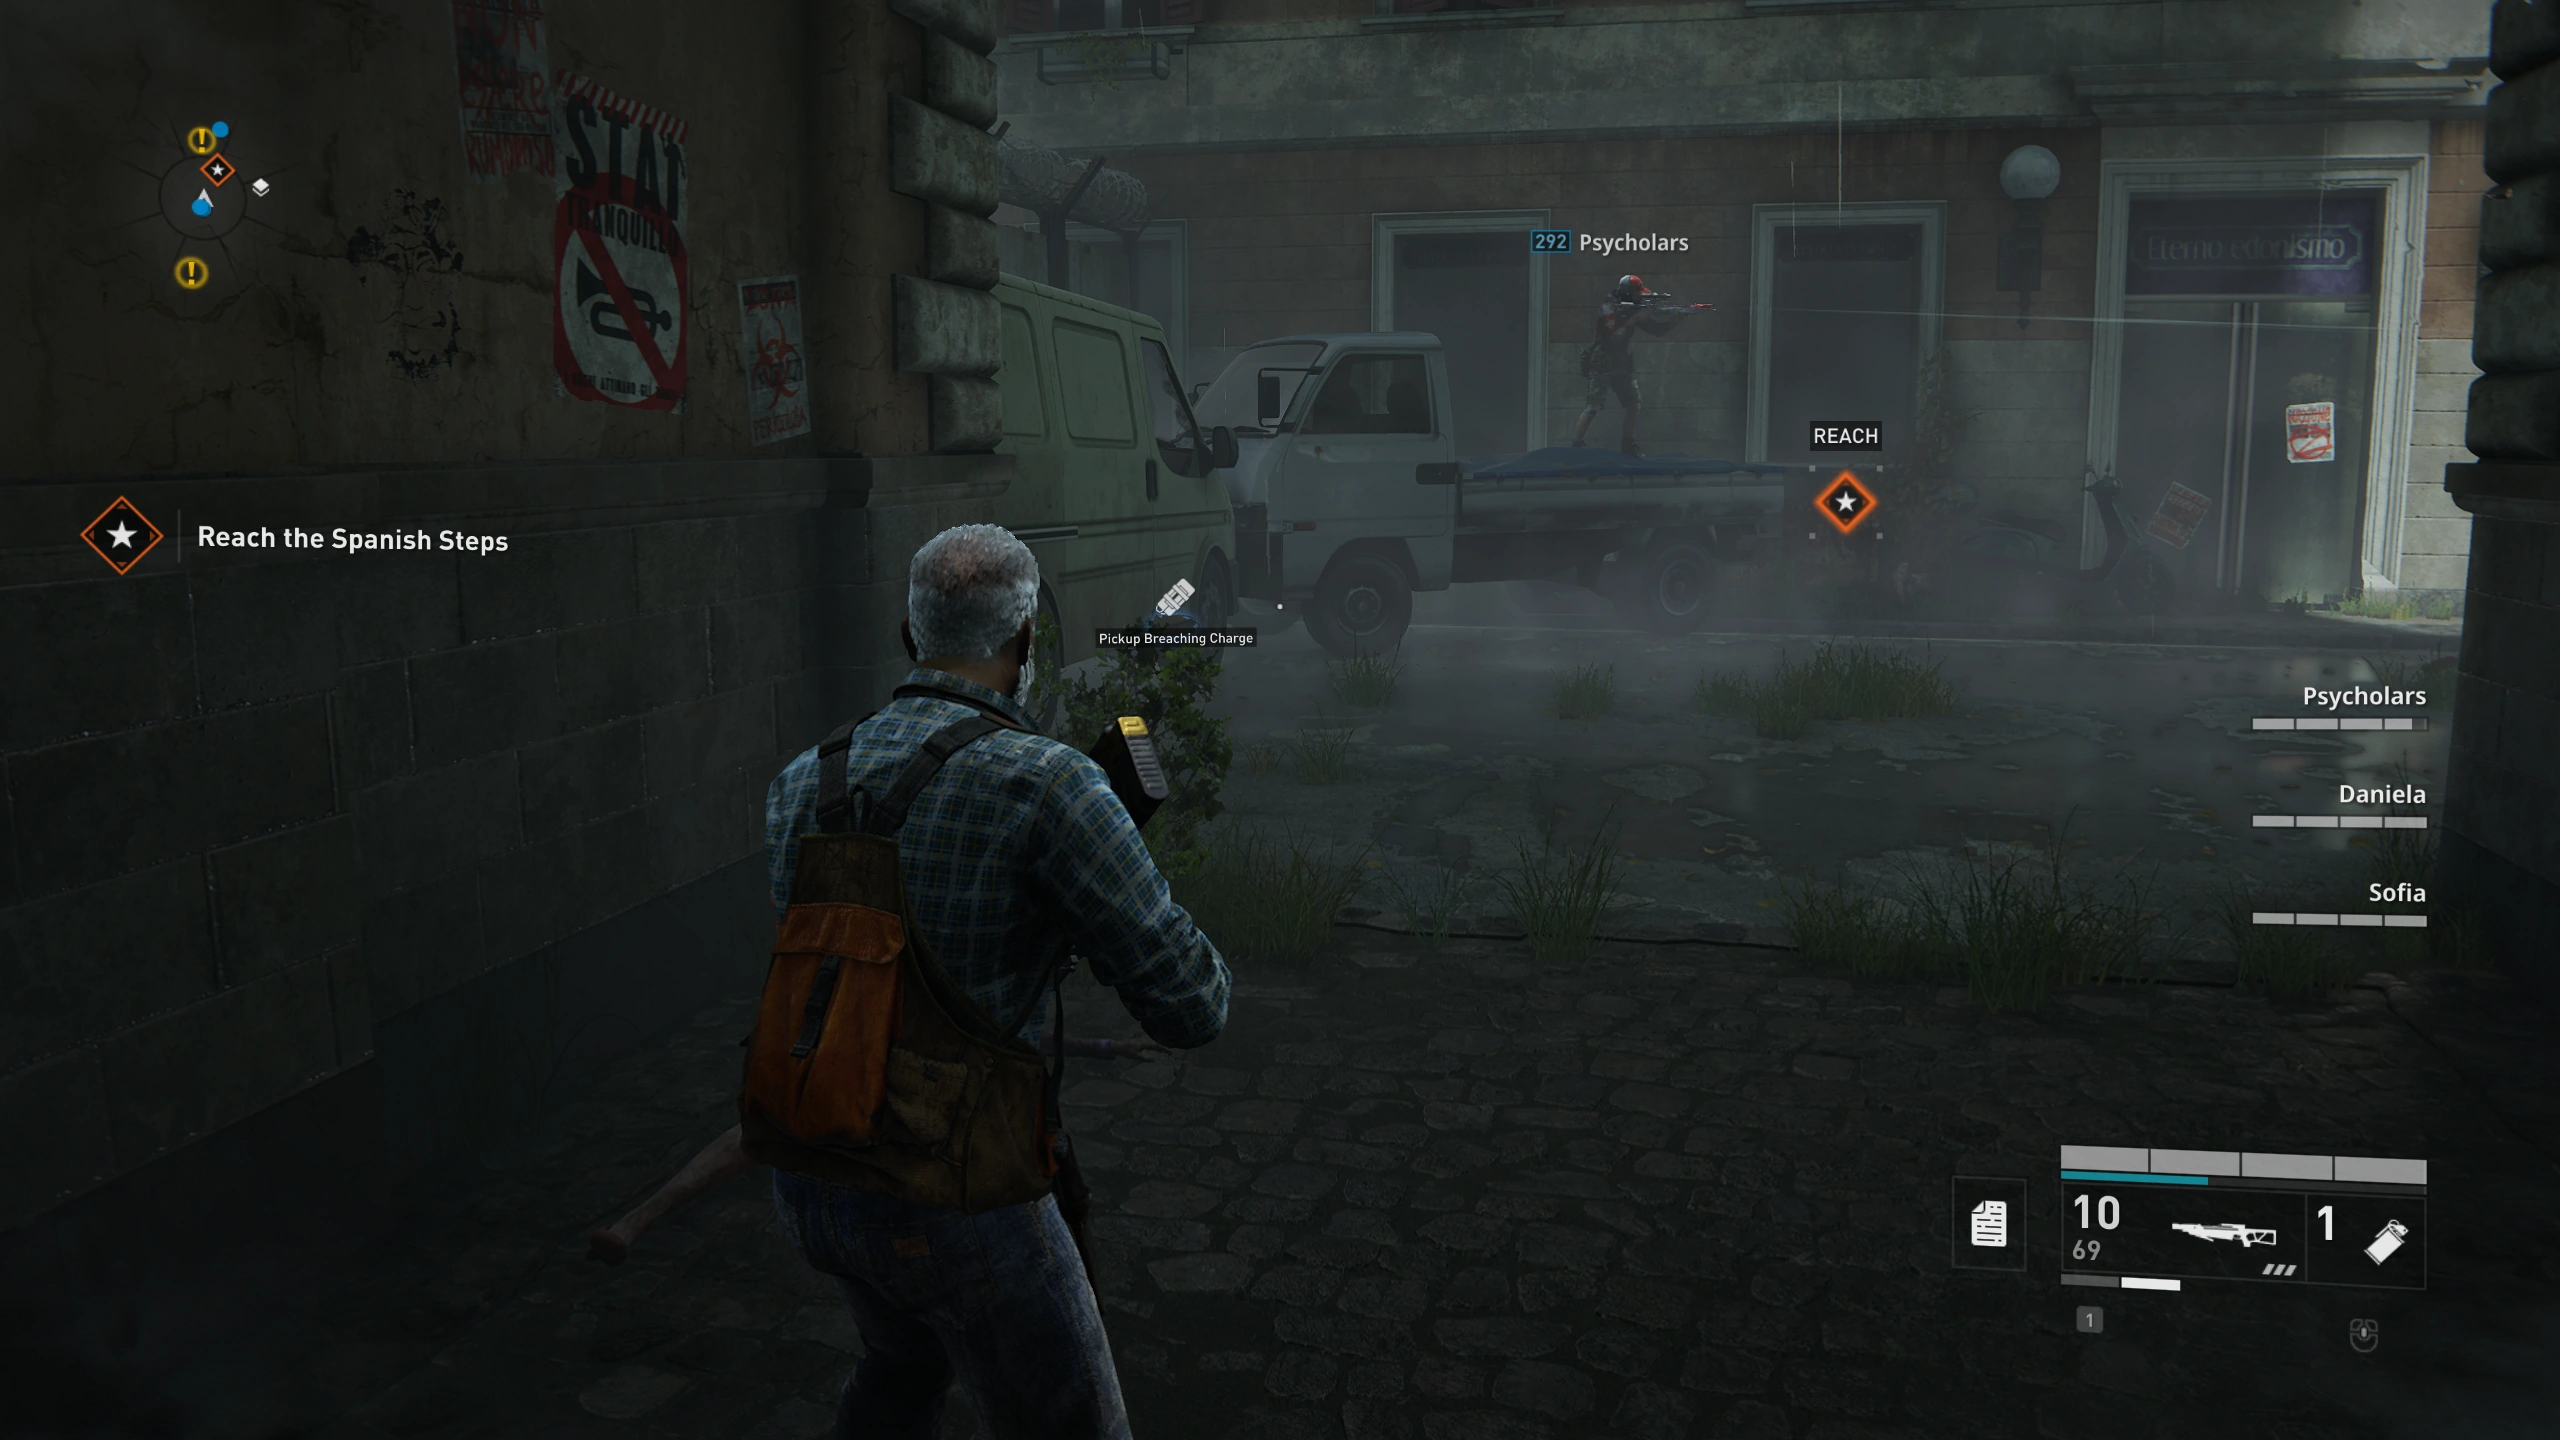
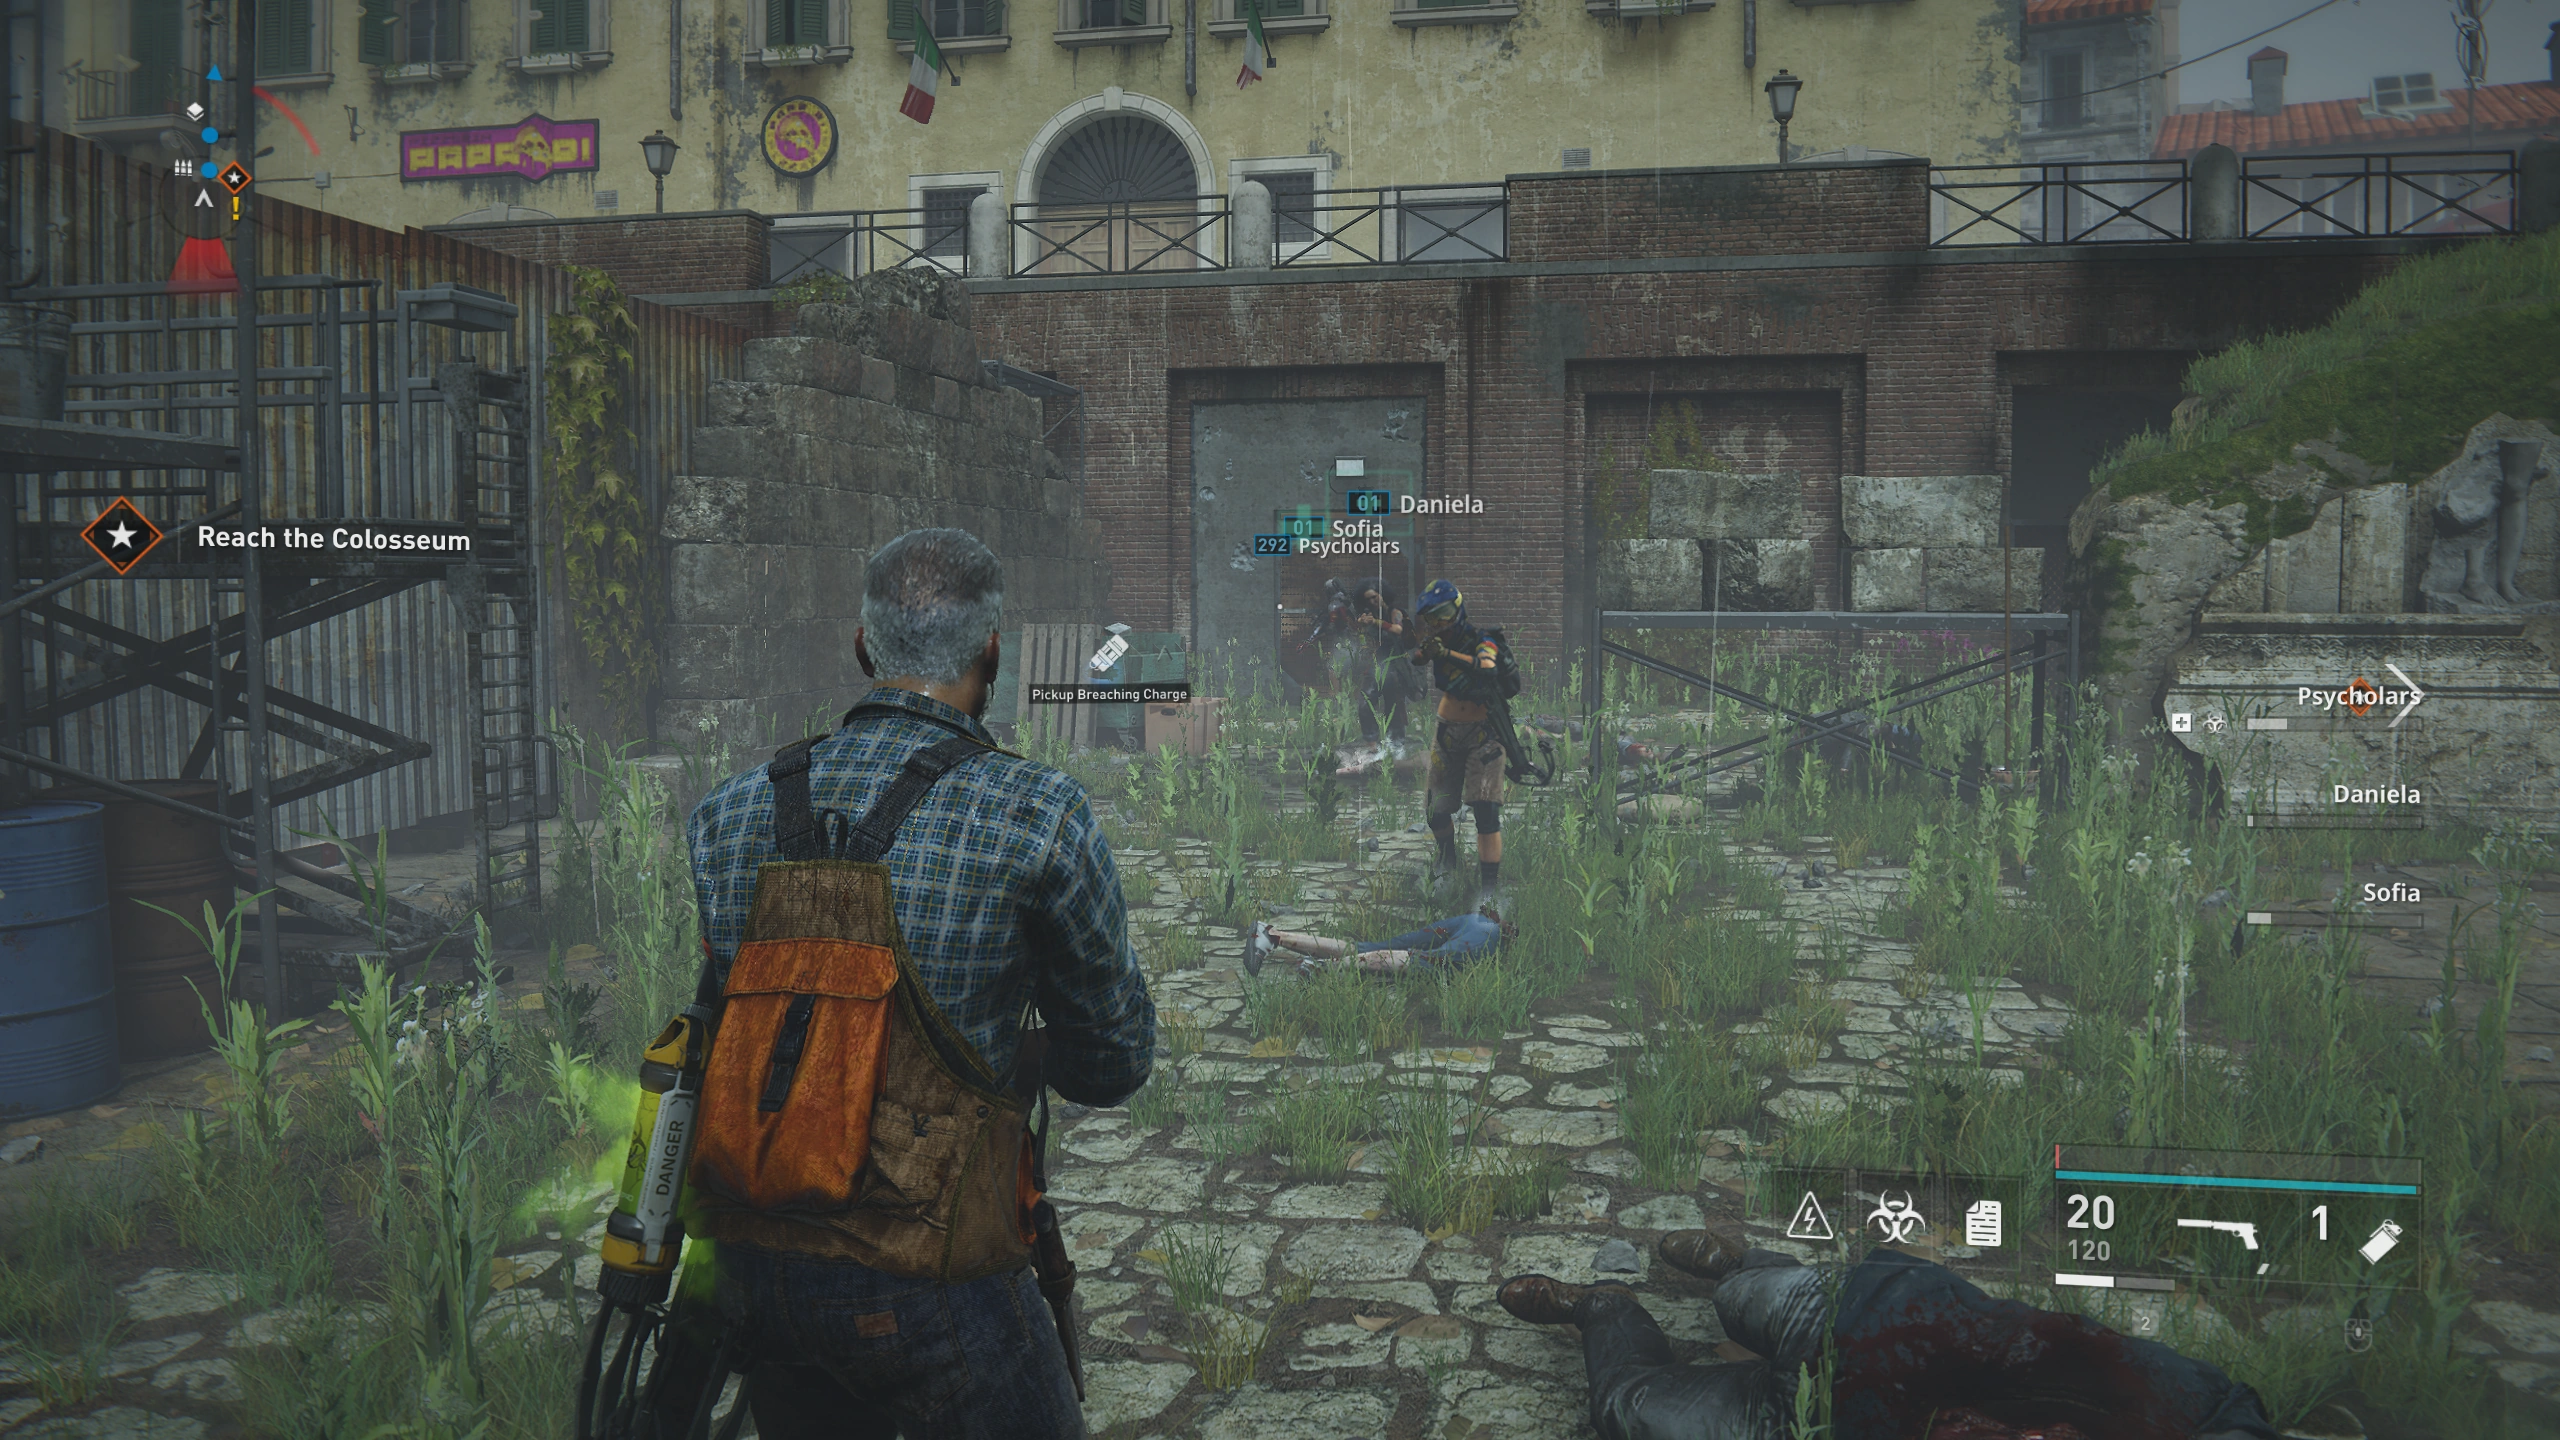
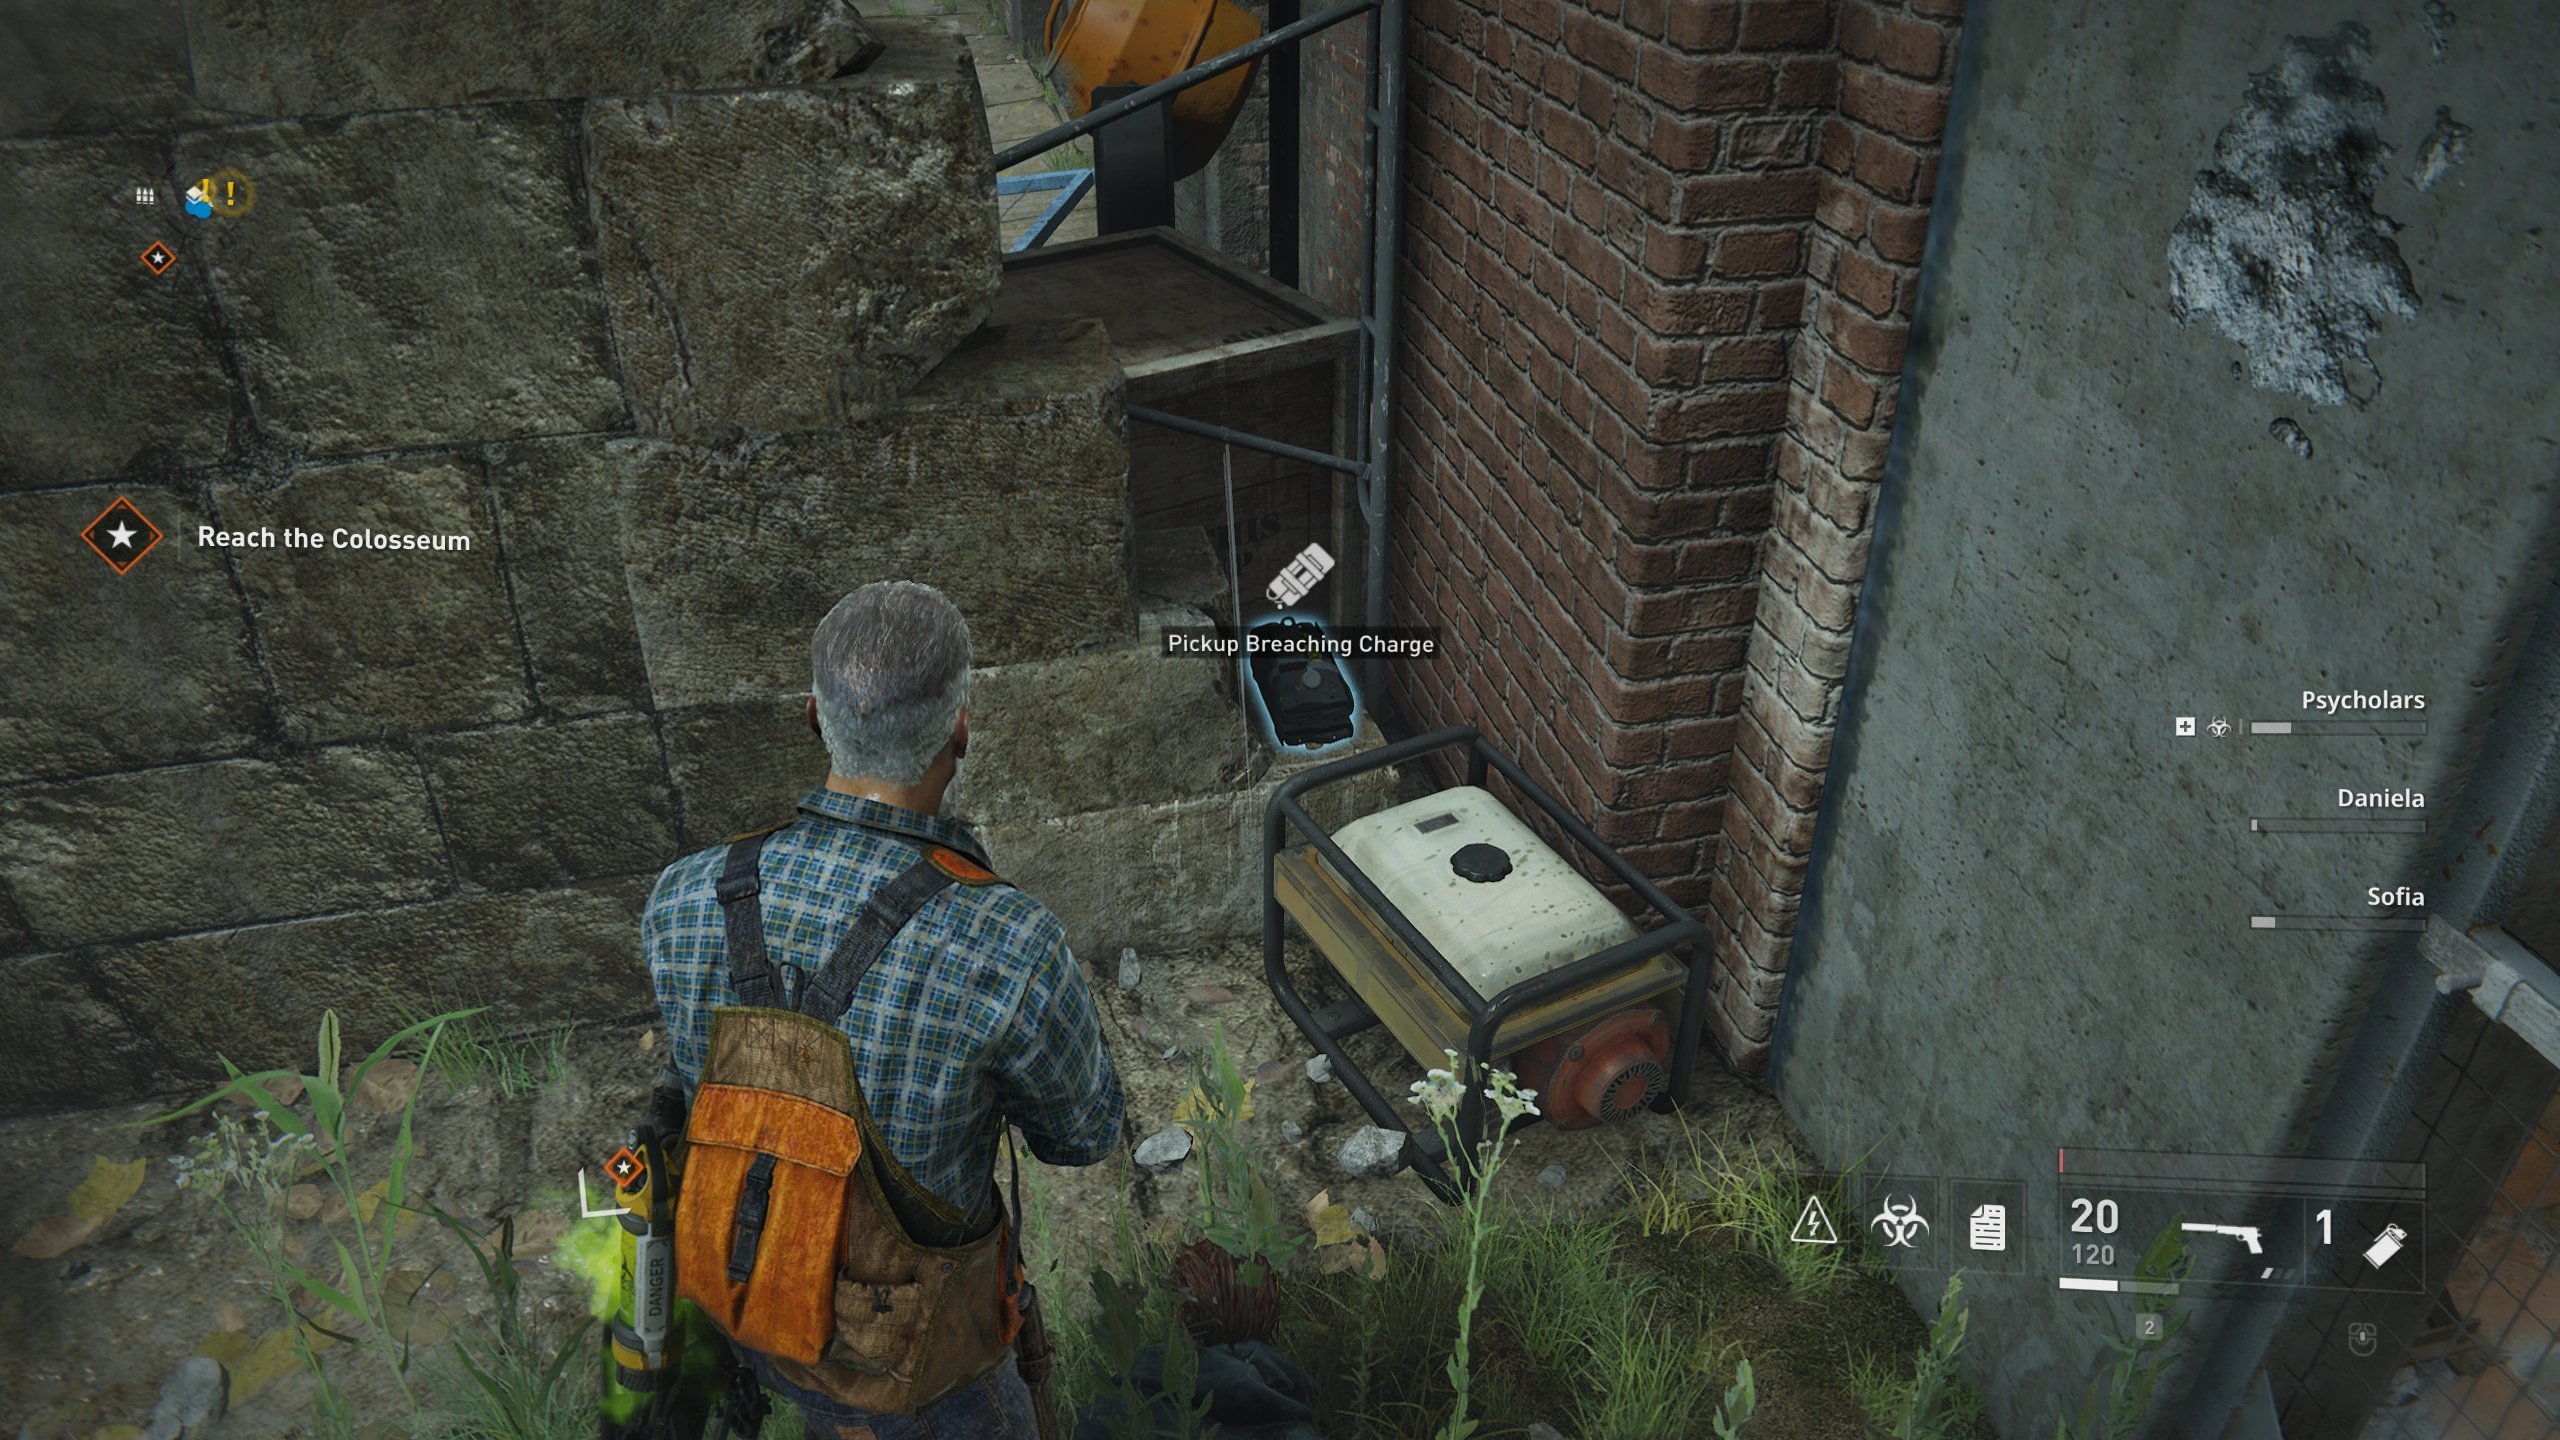
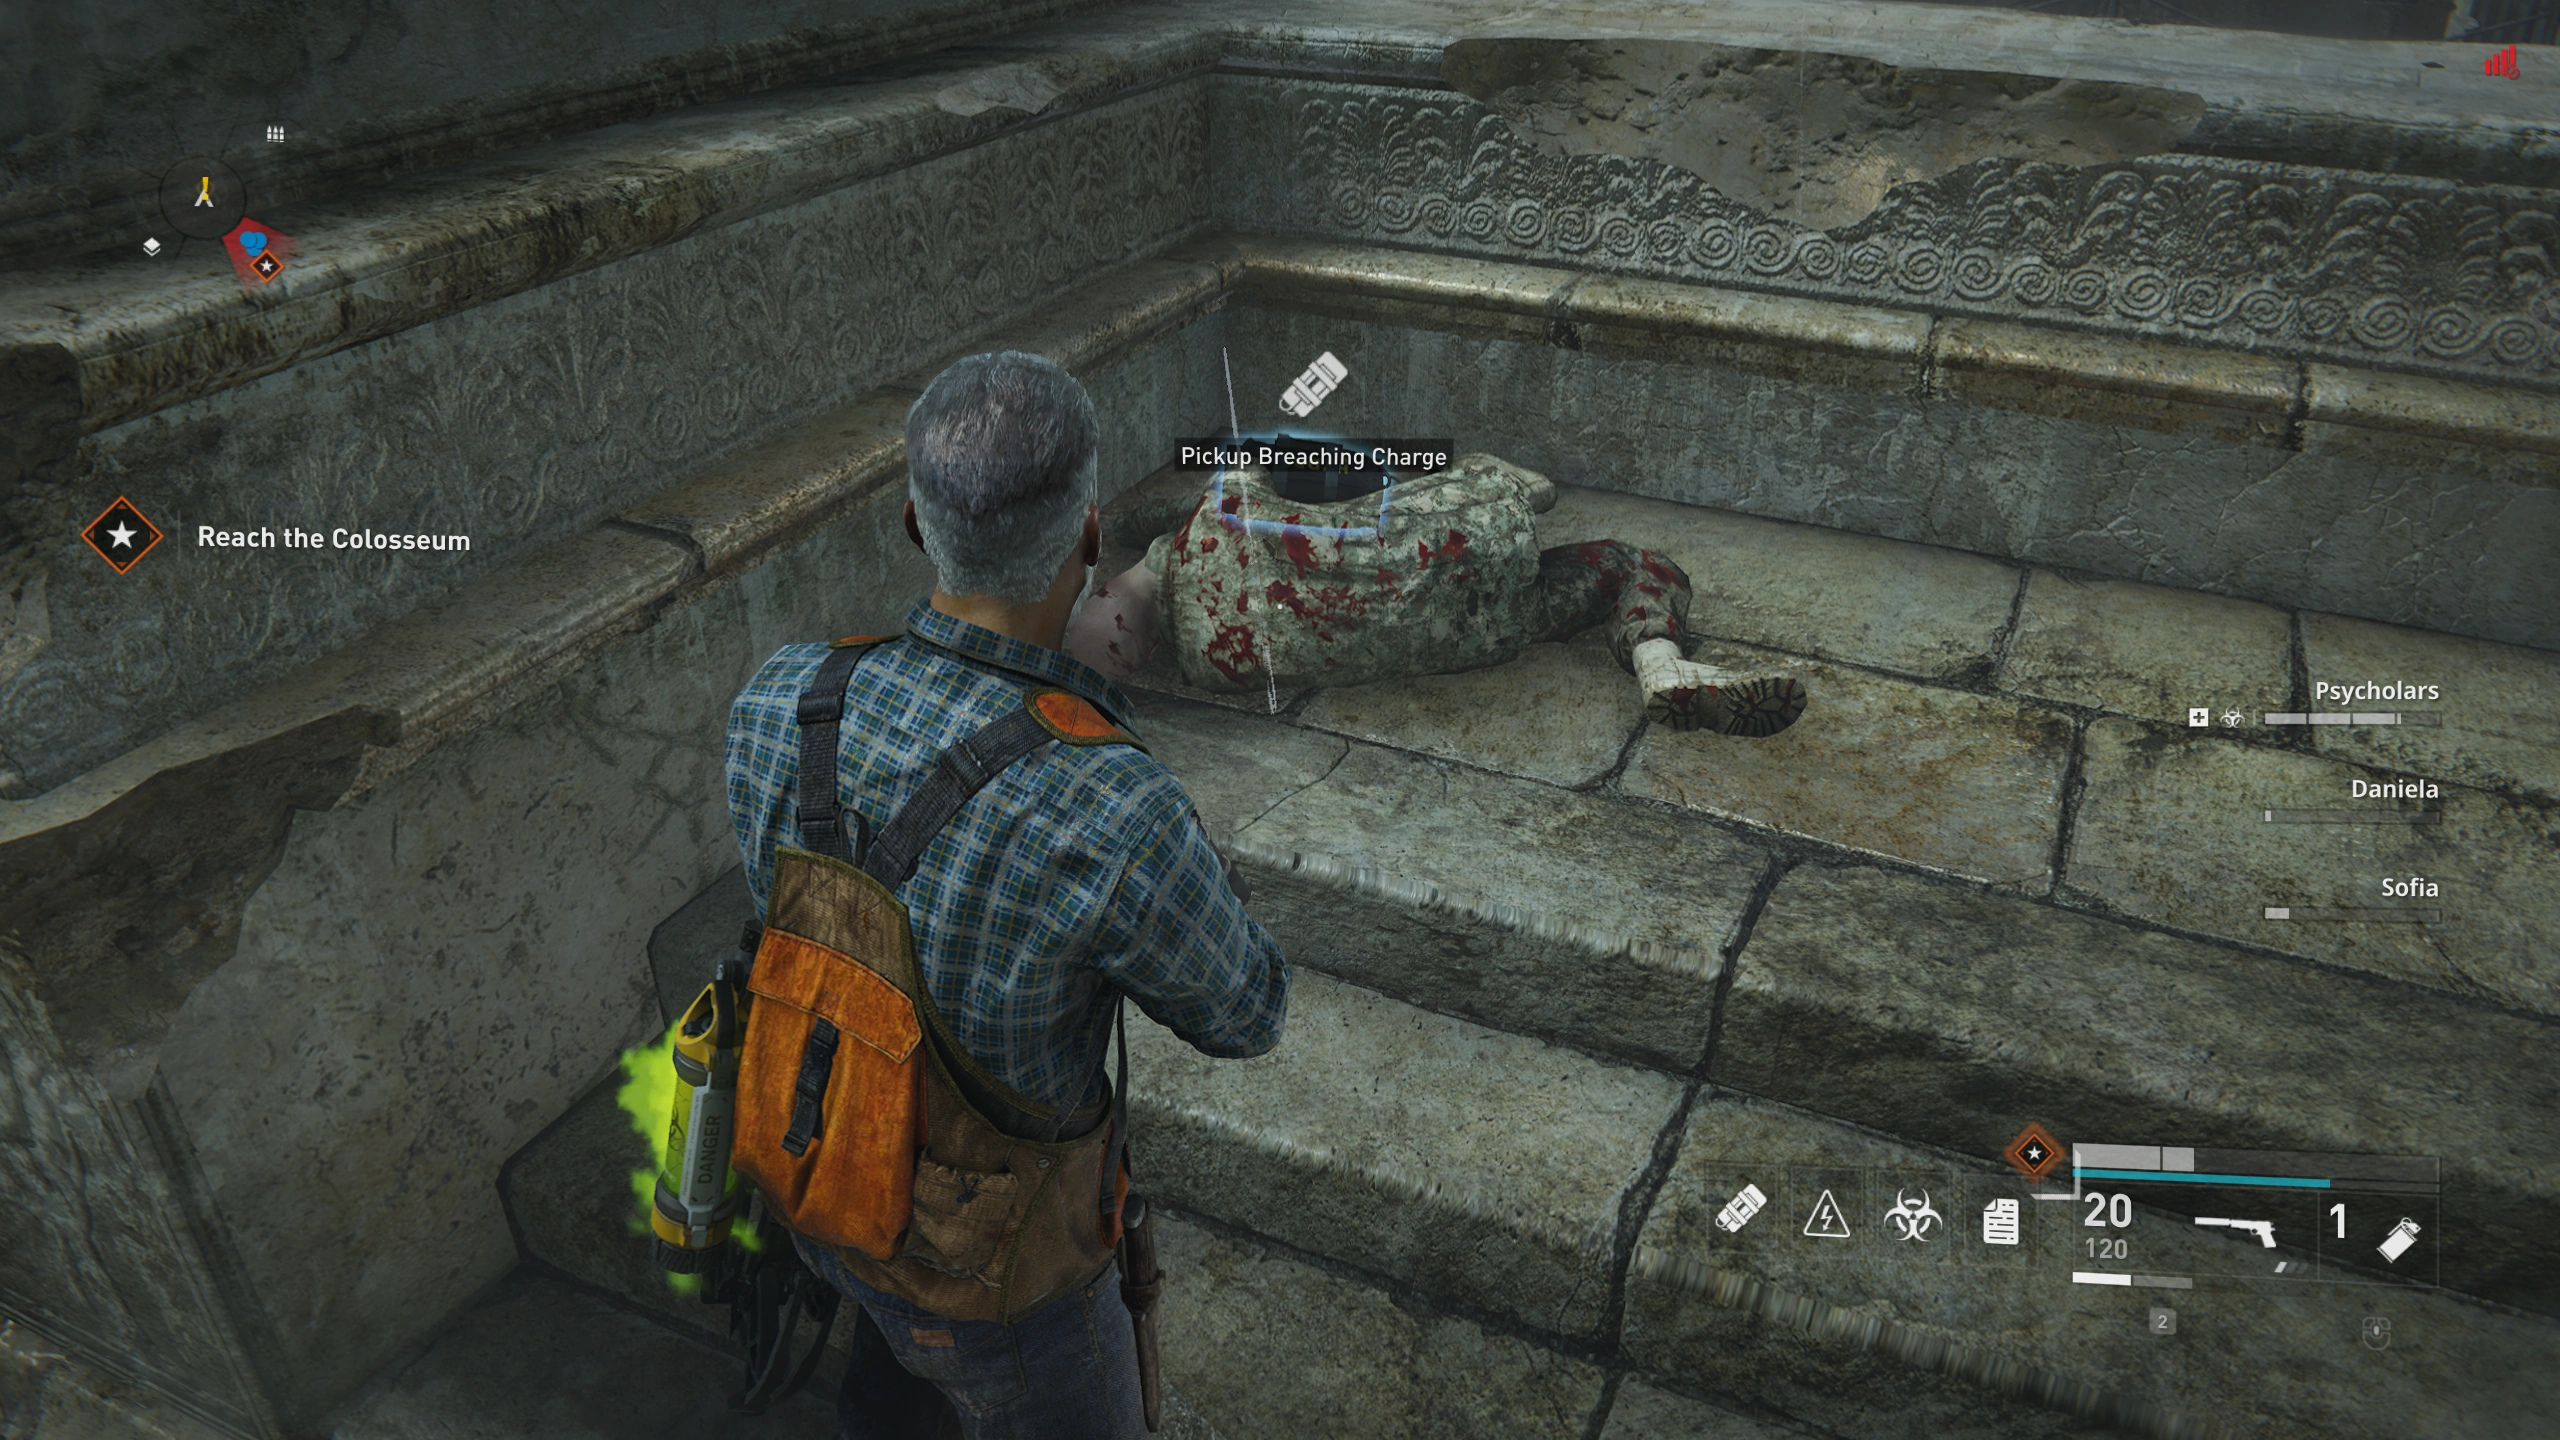
Rome[]
Chapter 1: Holy Ground[]
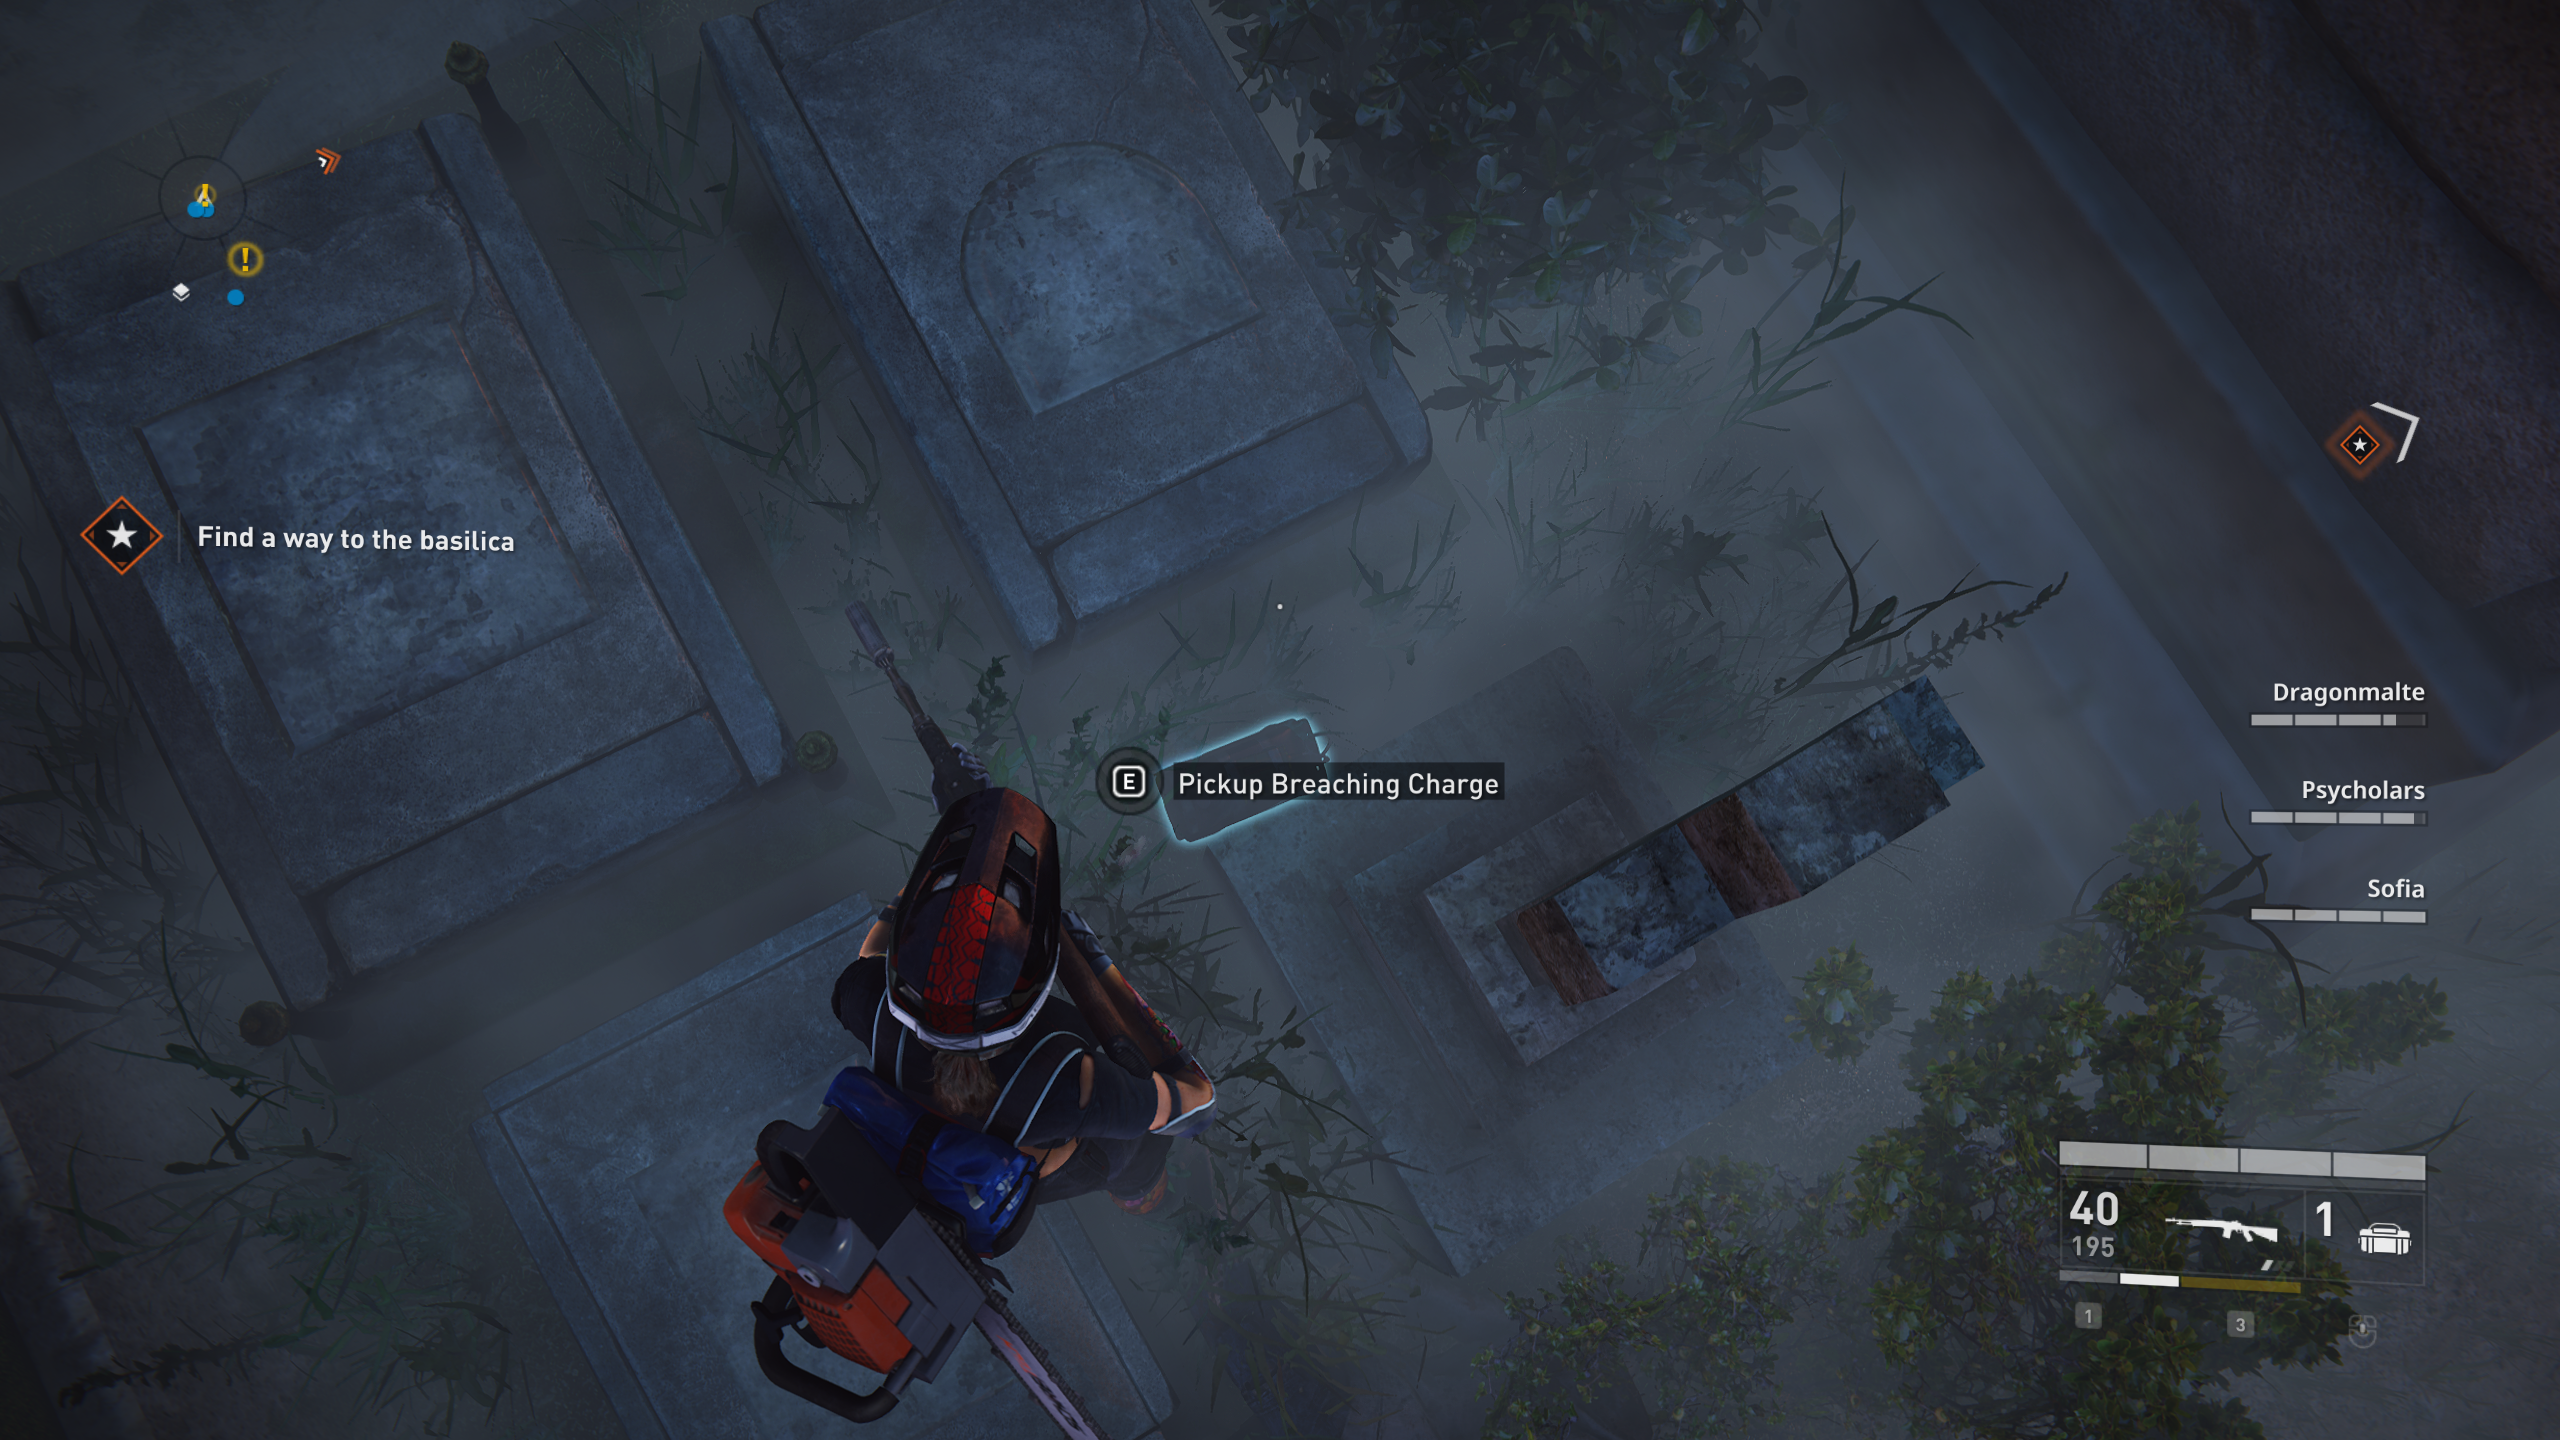
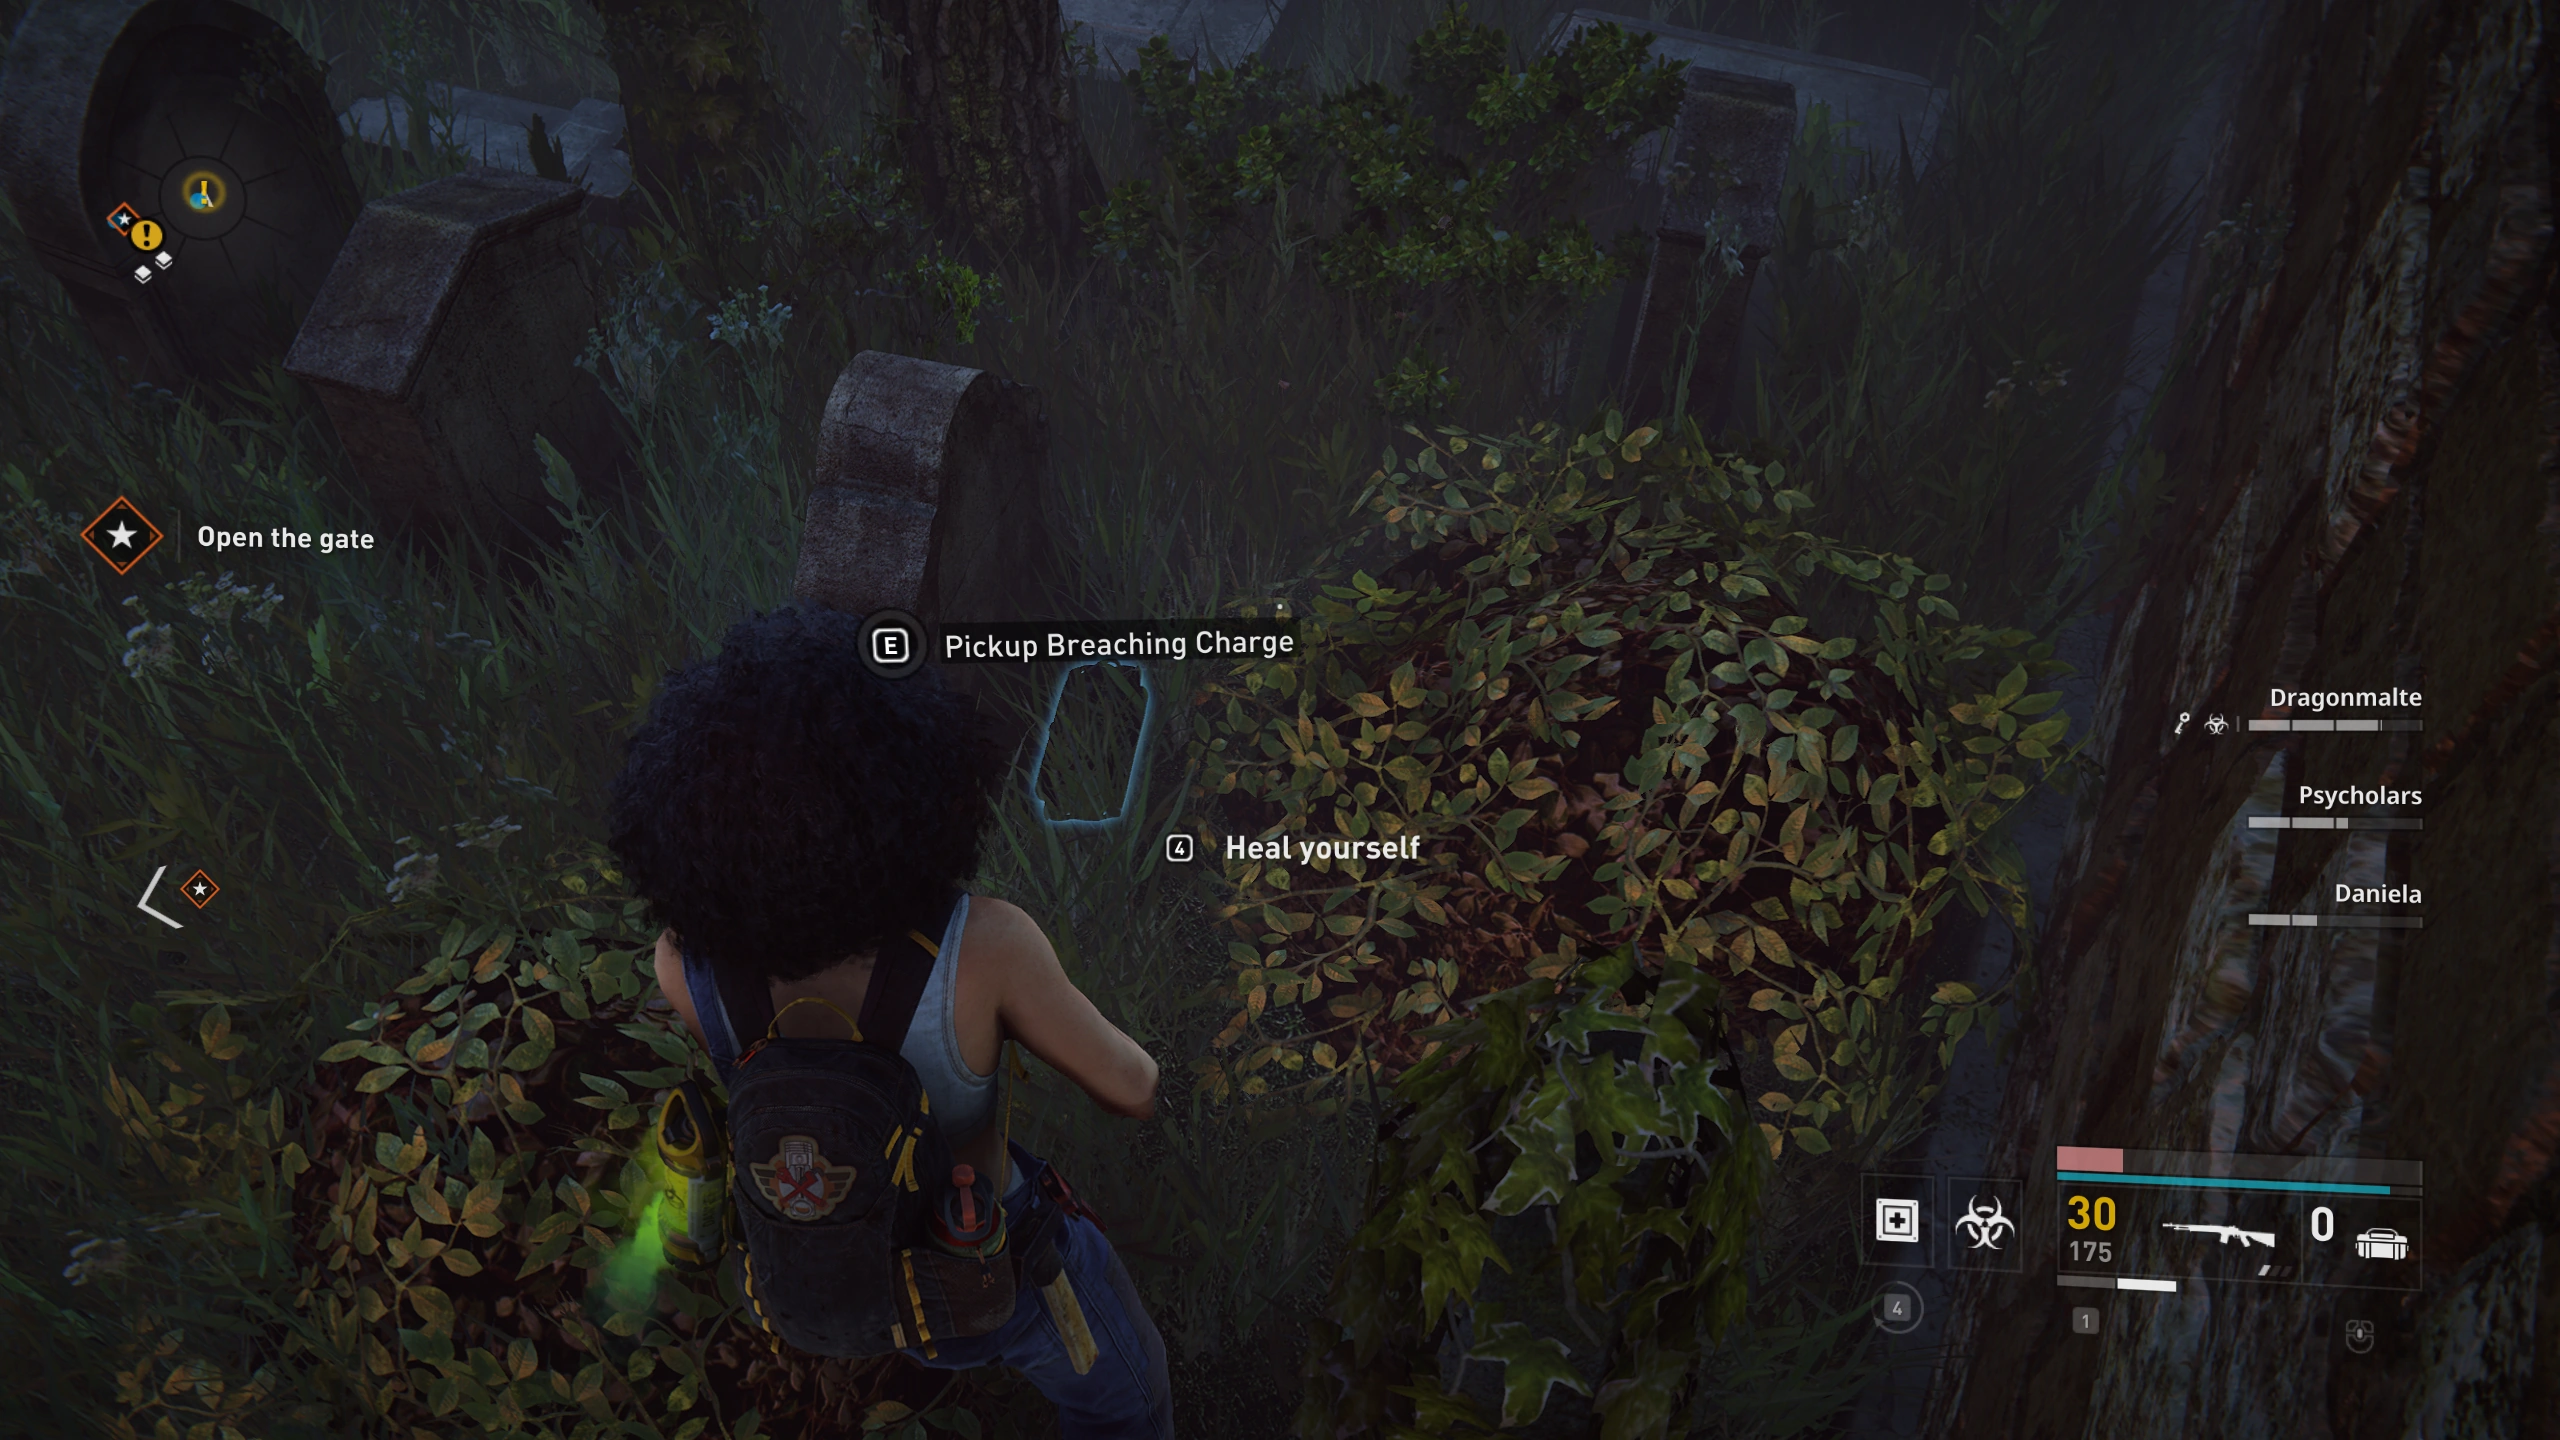
Location 1: ![]()
In the first part of the cemetary, keep right of the round building. Between some smaller graves.
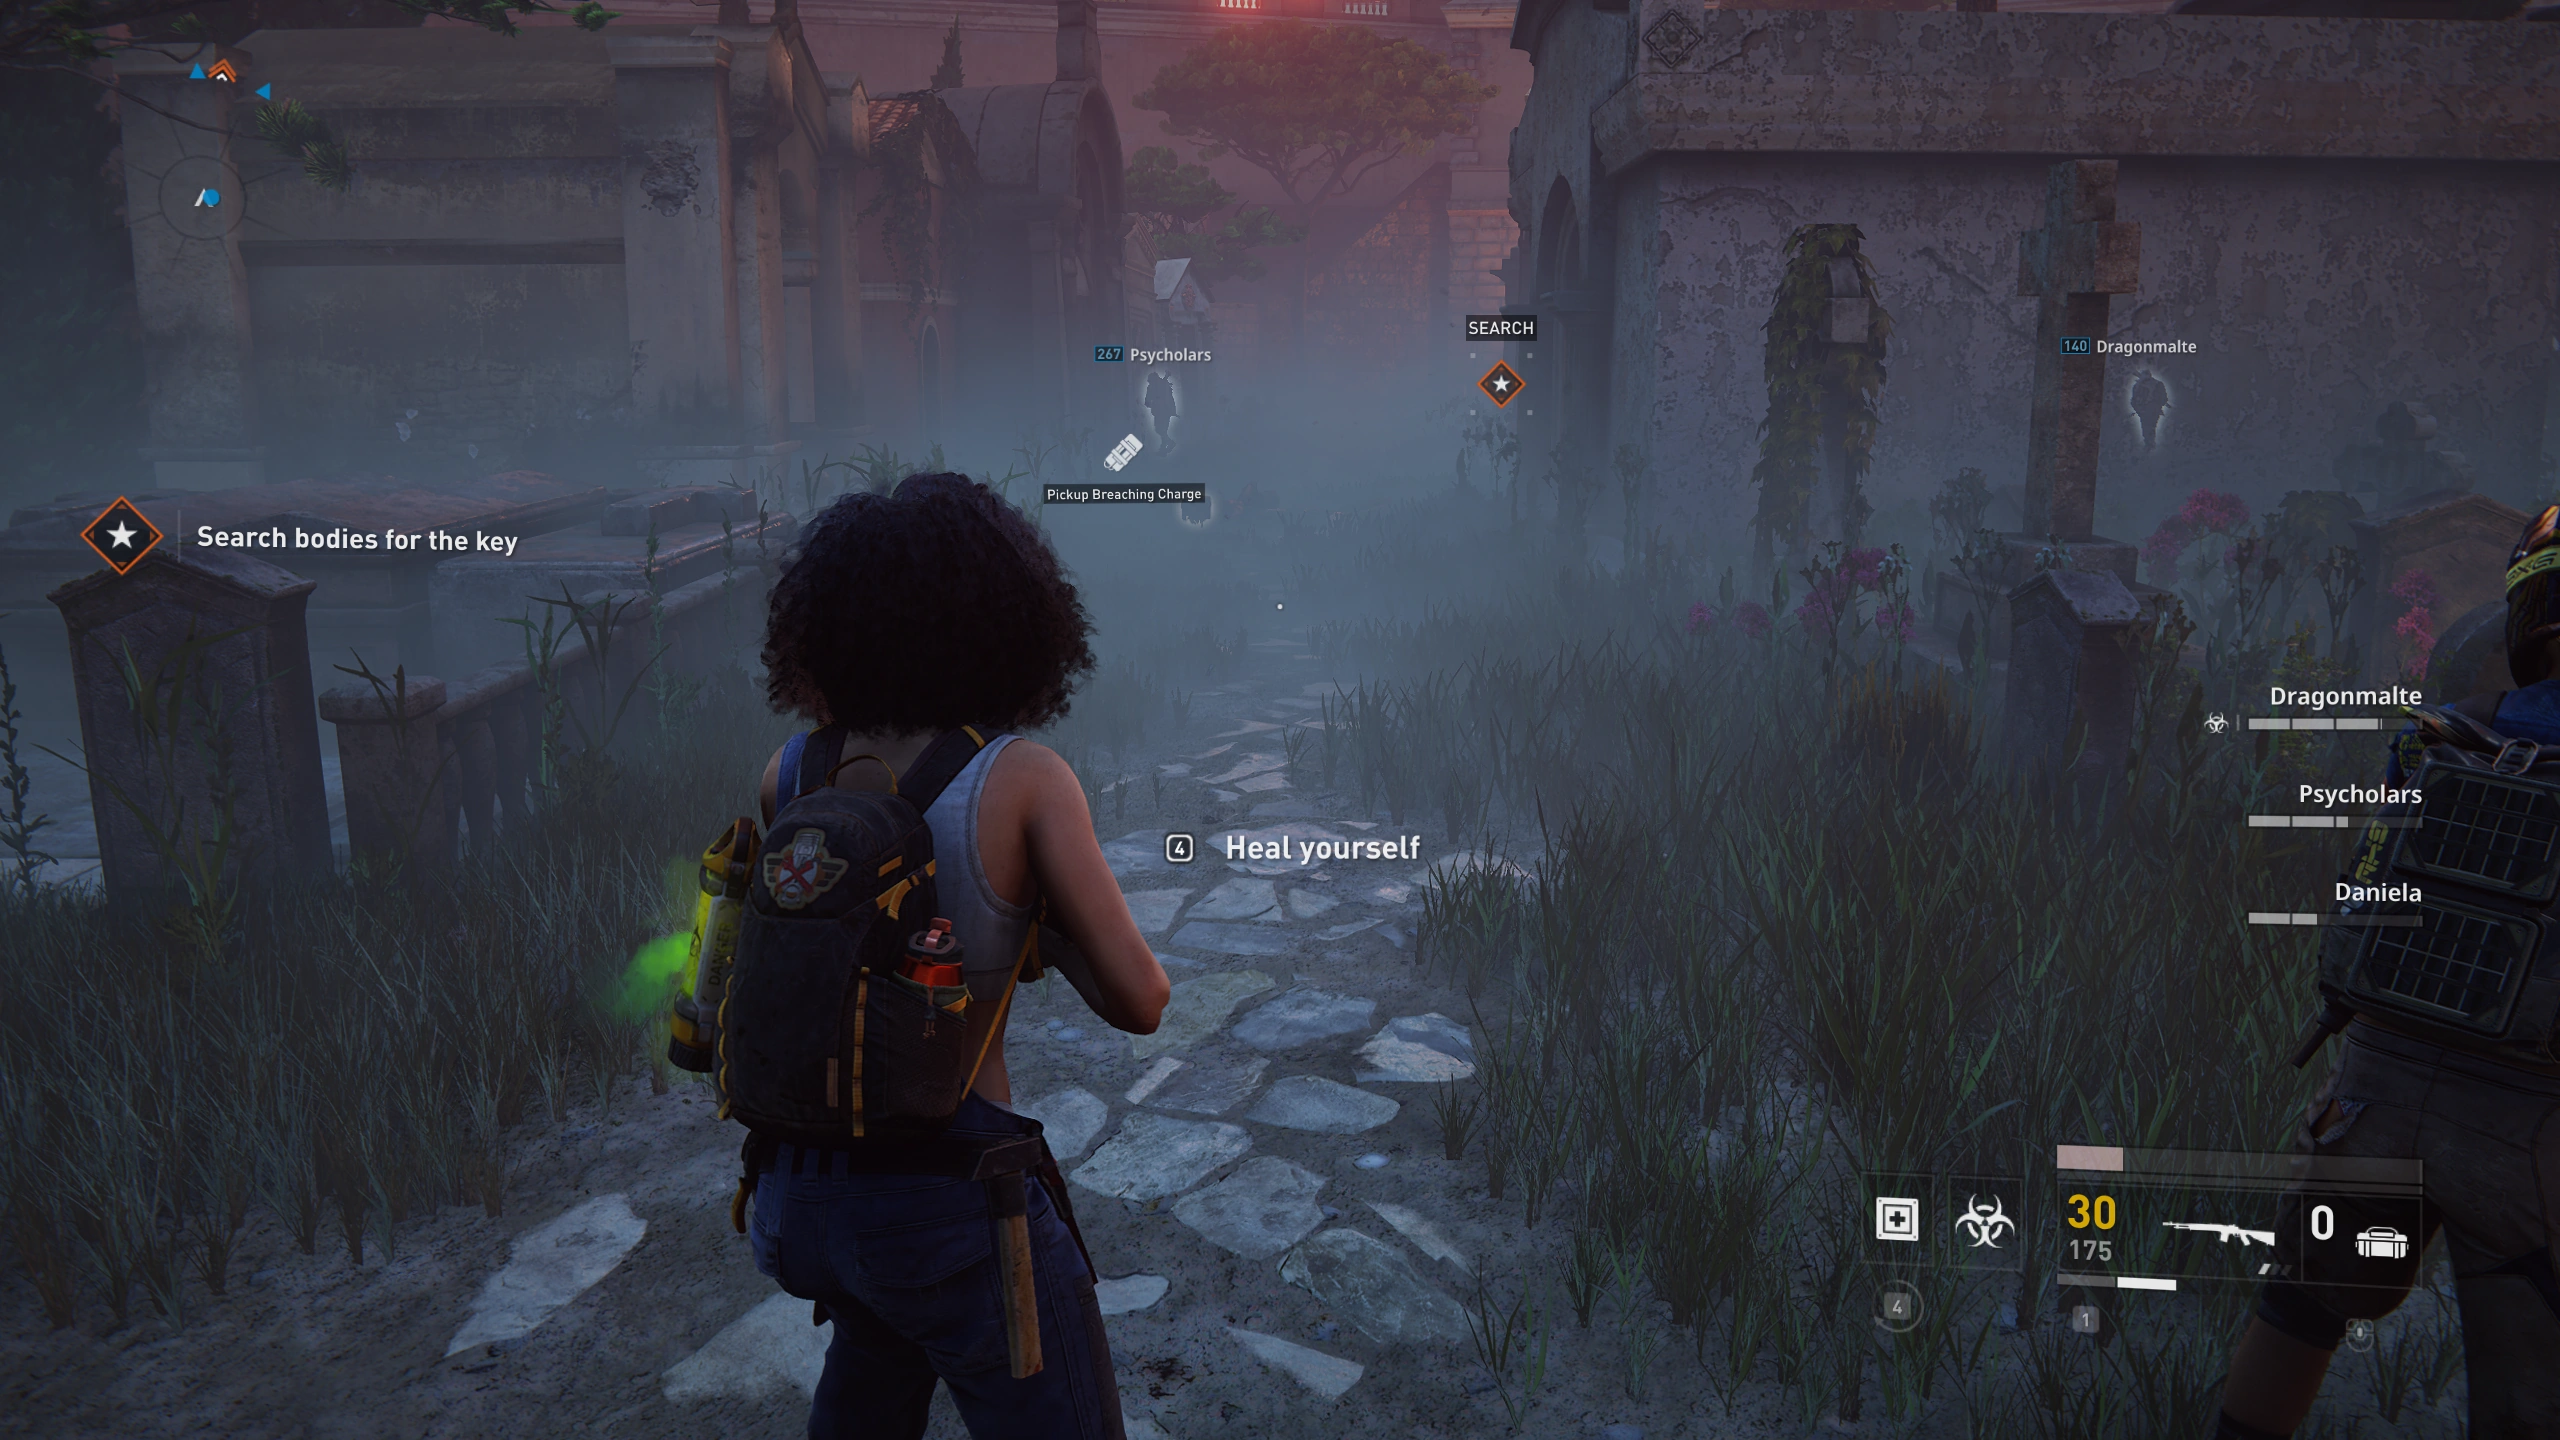
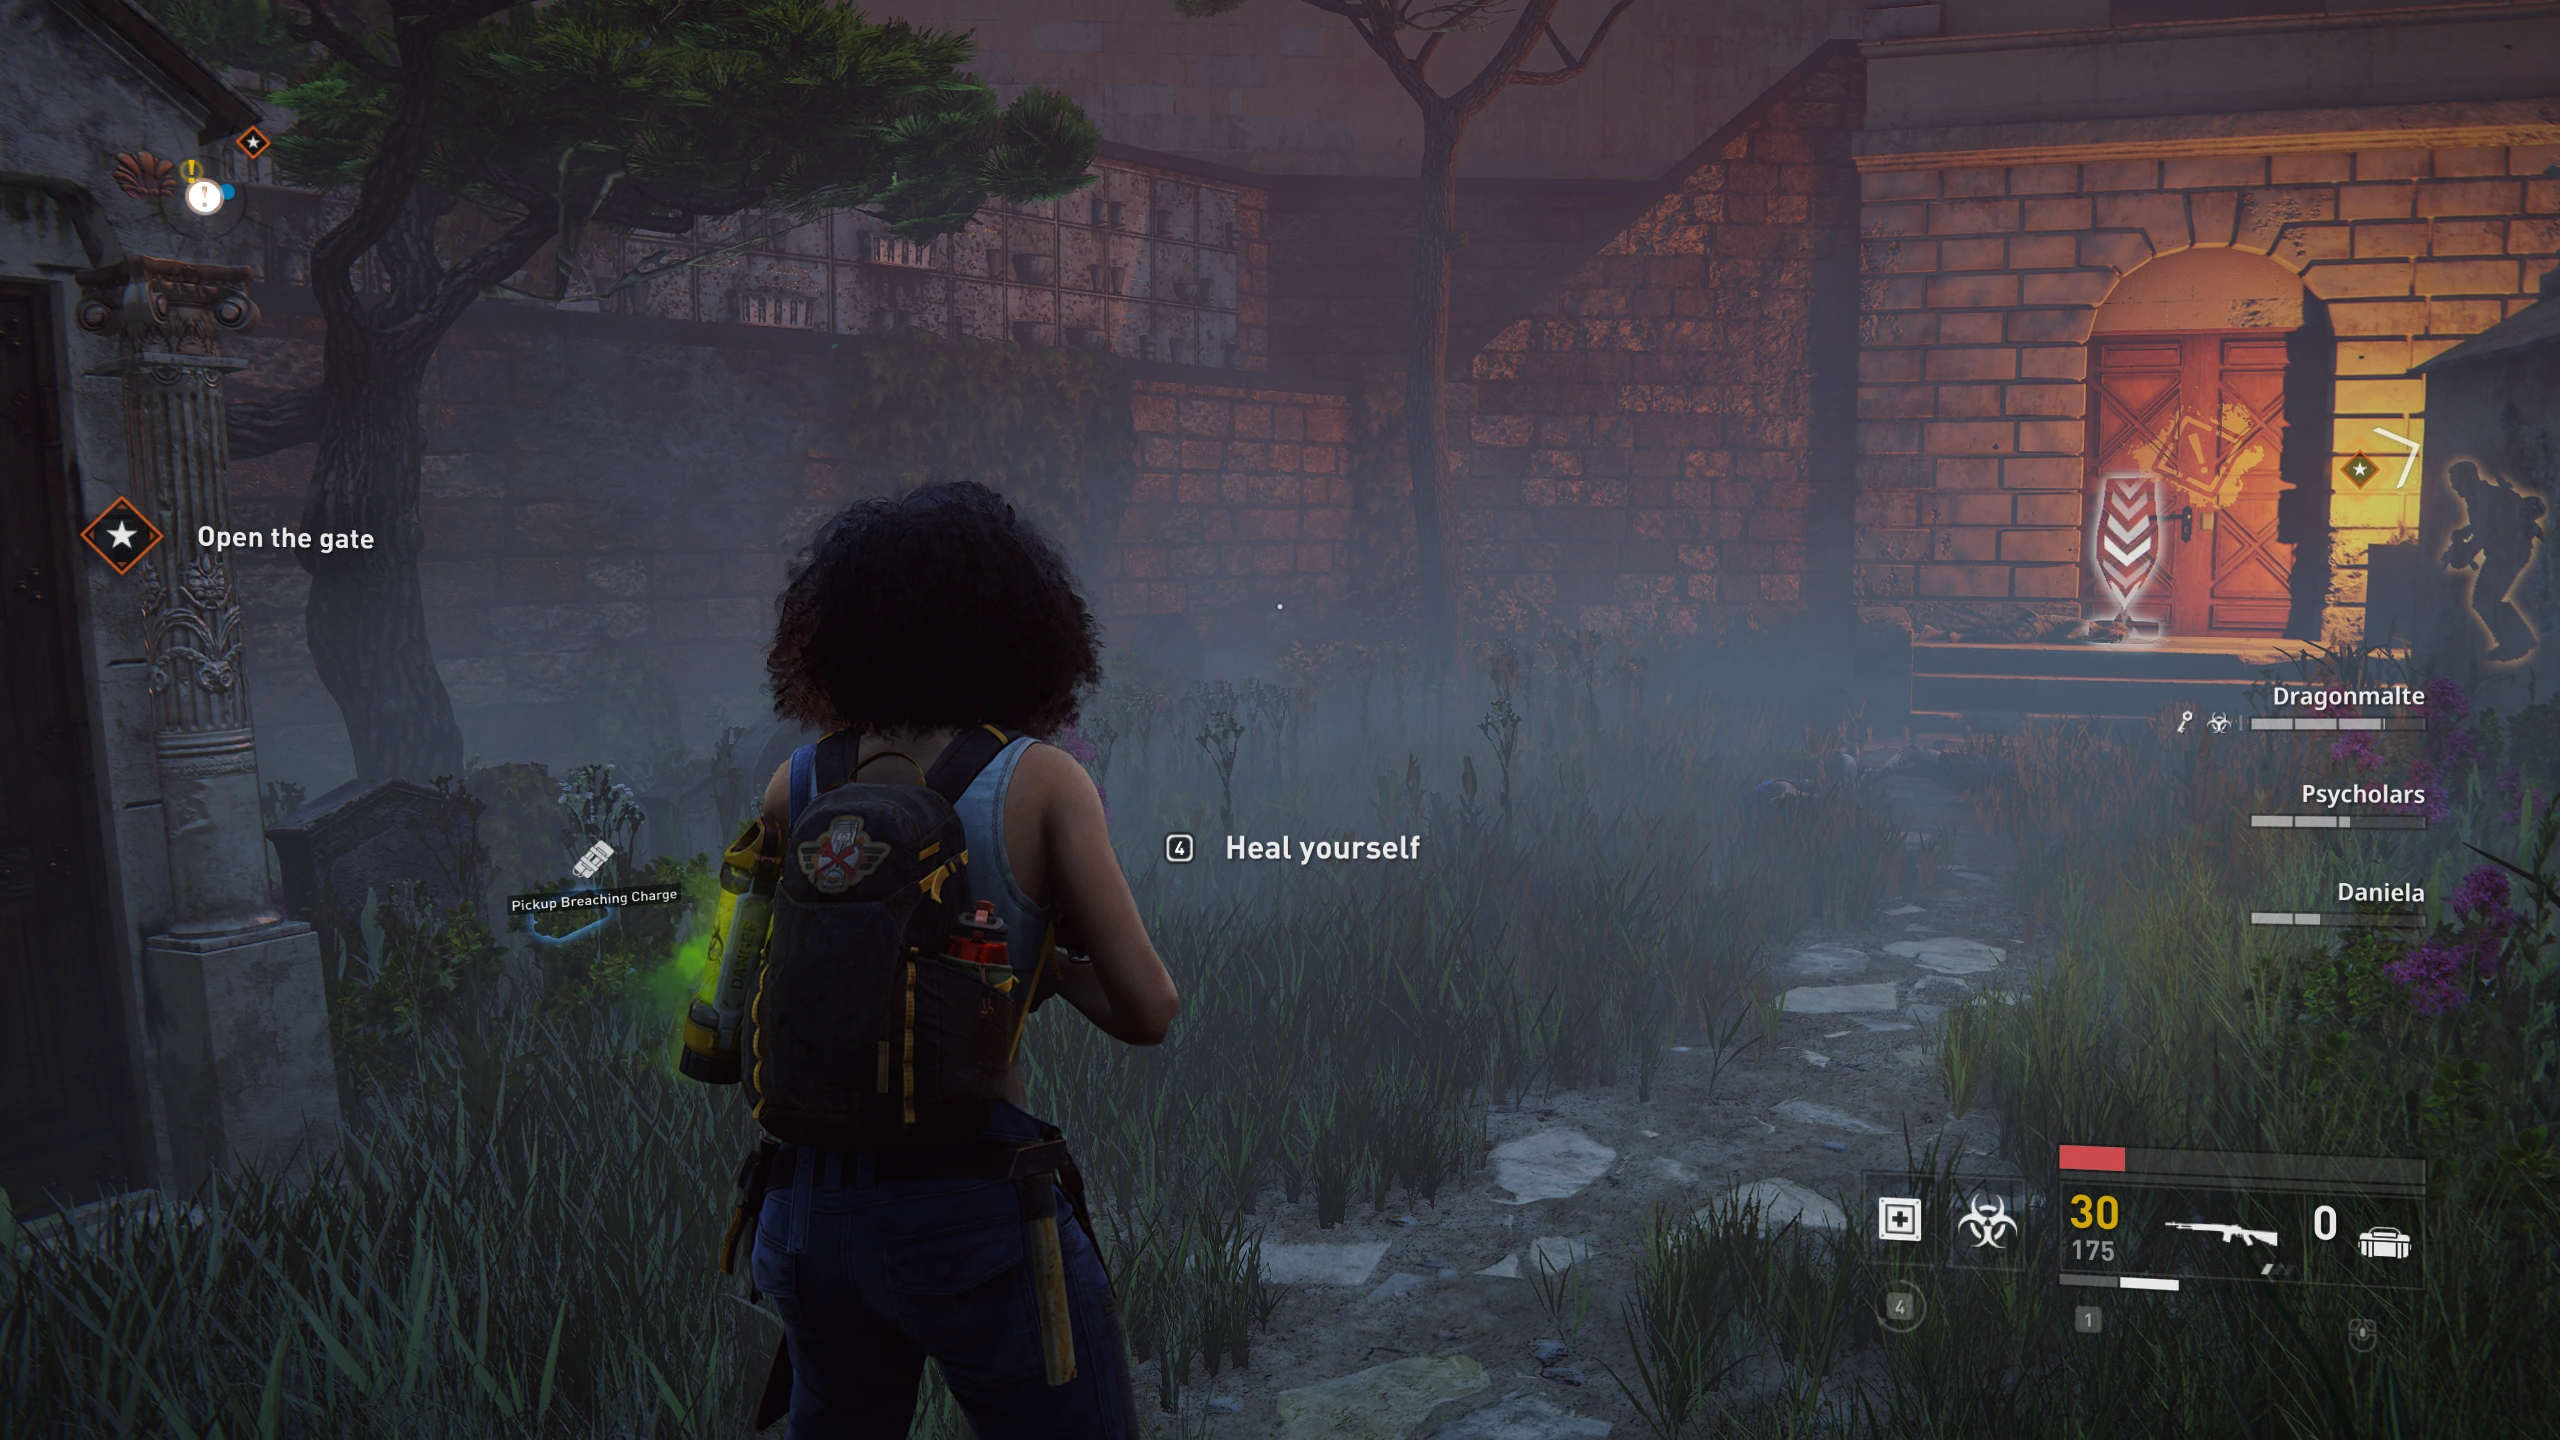
Location 2: ![]()
Before the gate to leave the cemetery turn left an into the side area where you might have to search a key. It is on the left wall, right before the Breaching Charge door.
Location 3: ![]()
Right before hopping the fence to the church, on the right side.
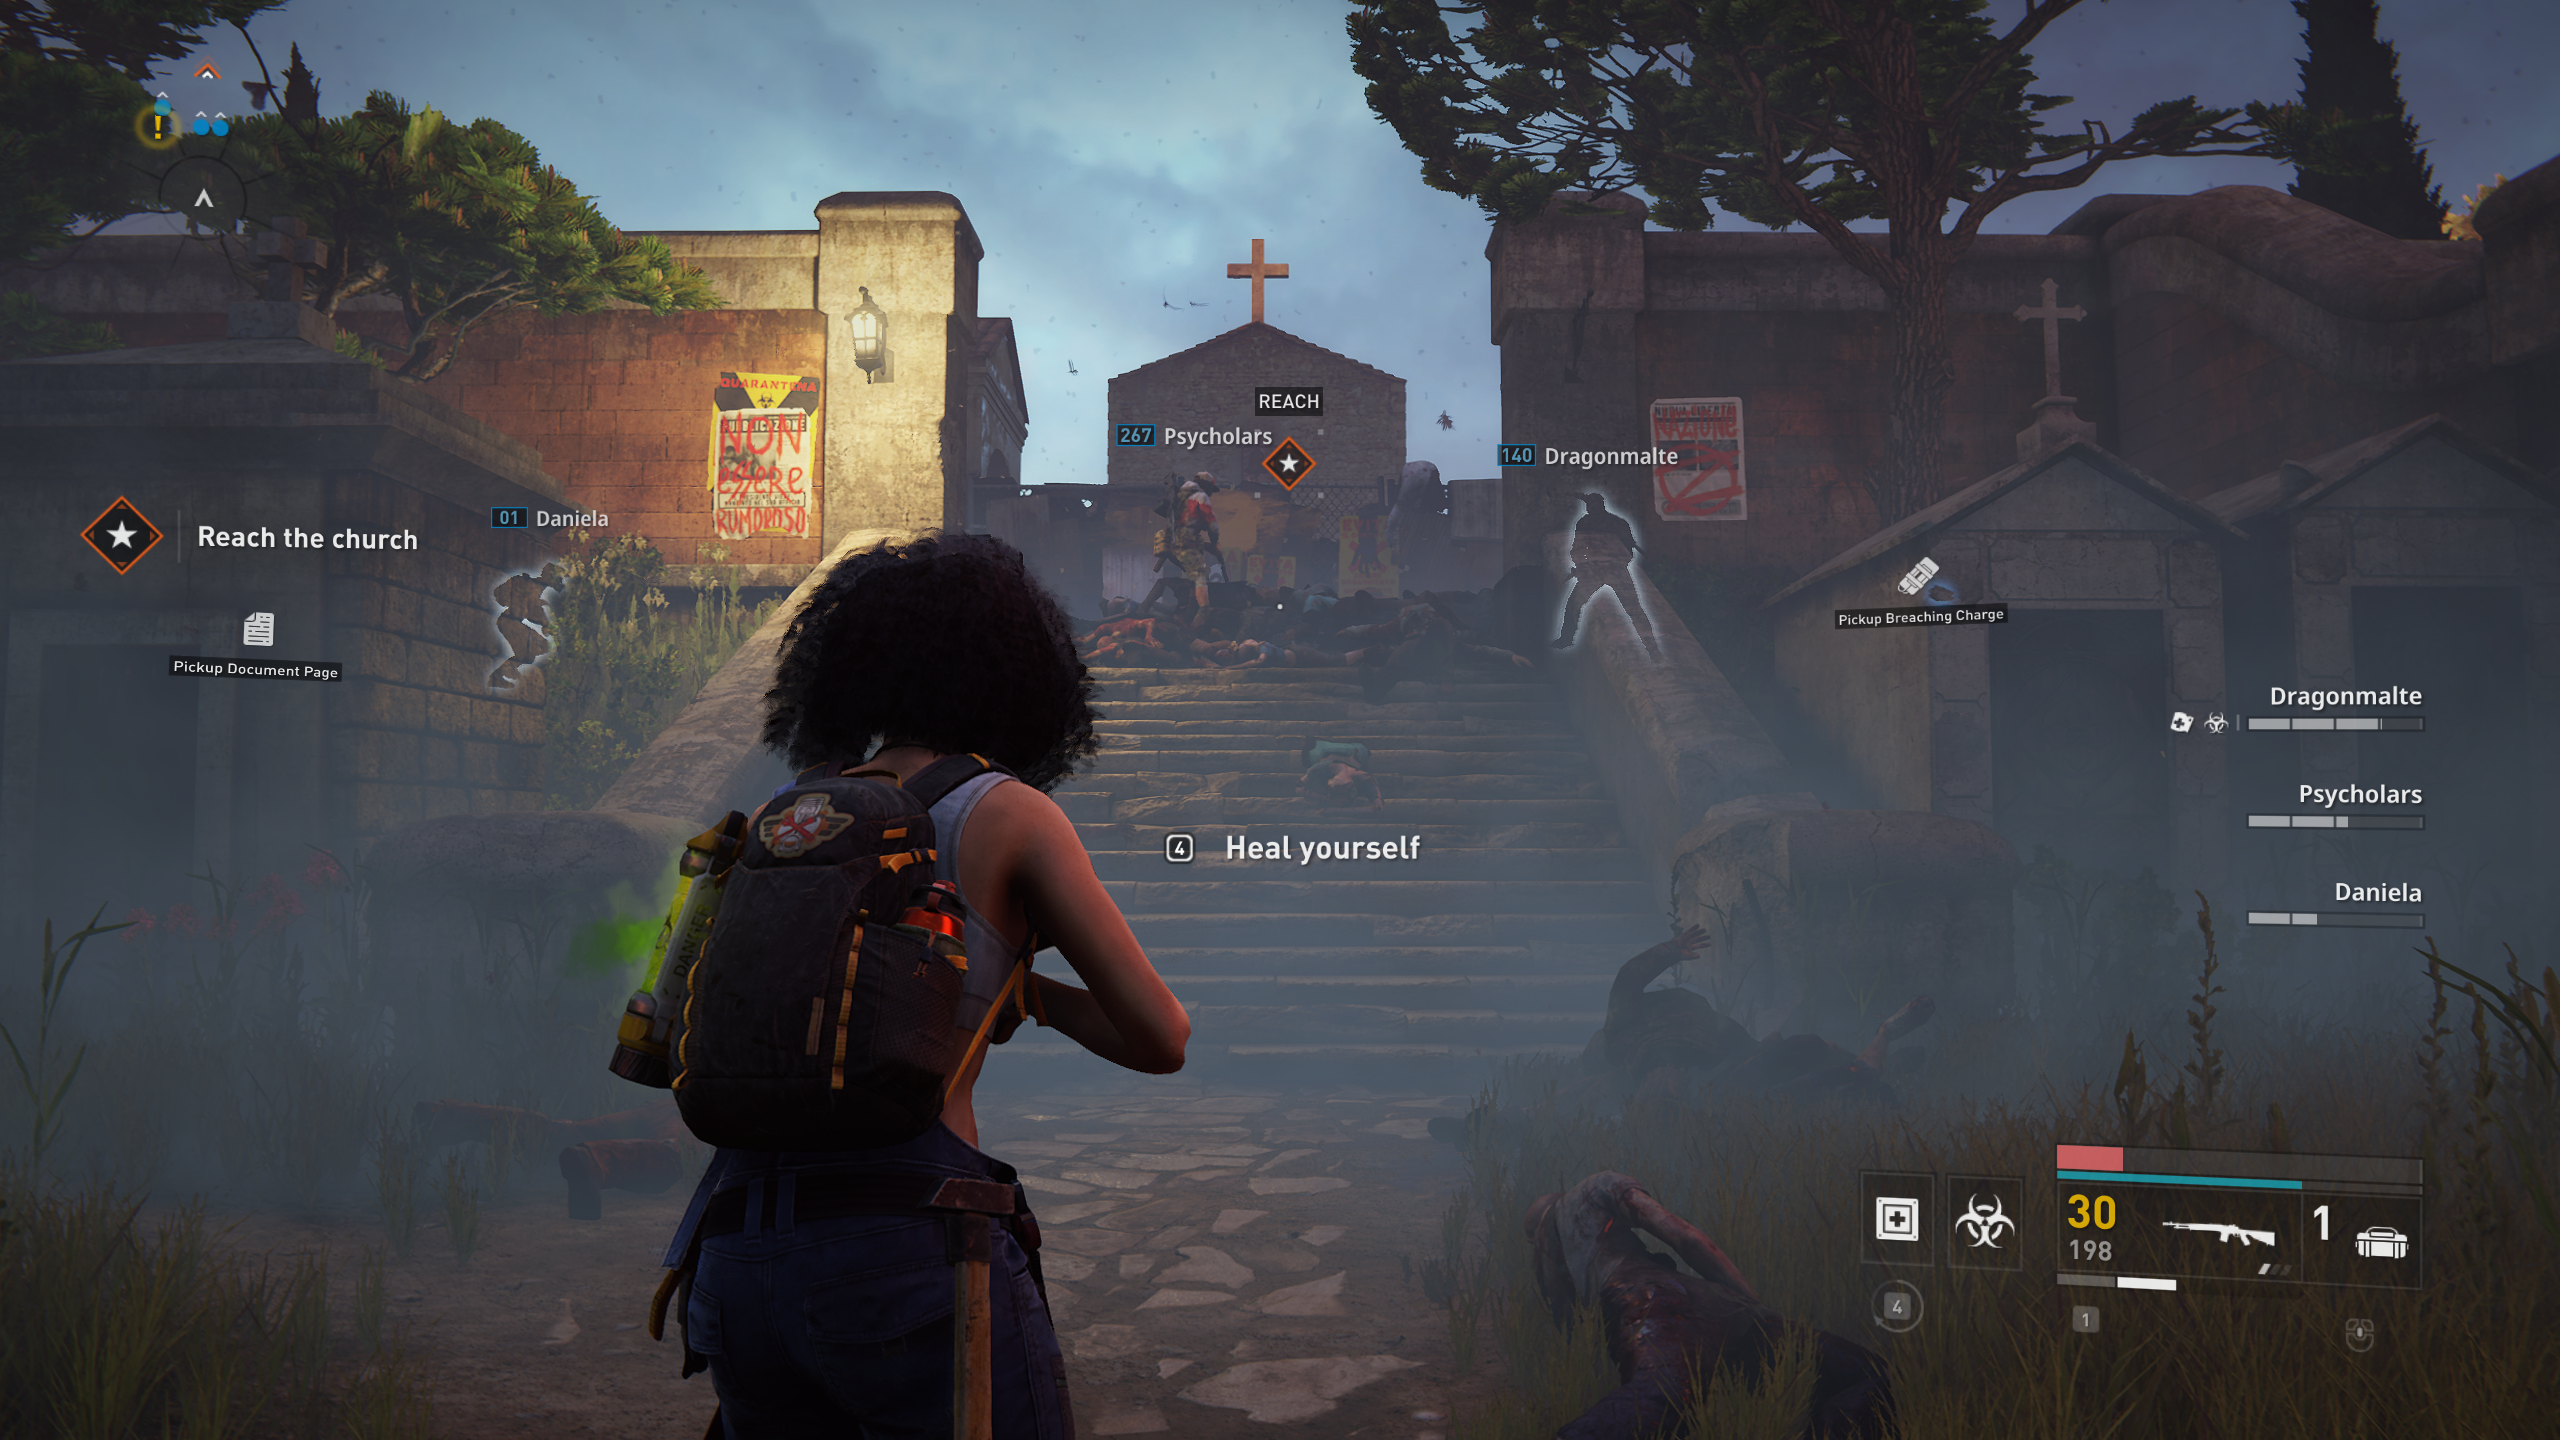

Location 4: ![]()
During the defense in the chruch, outside at the left side of the area on a box.
Location 5: ![]()
Also in the church area, behind a wooden crate in the far right area.
Location 6: ![]()
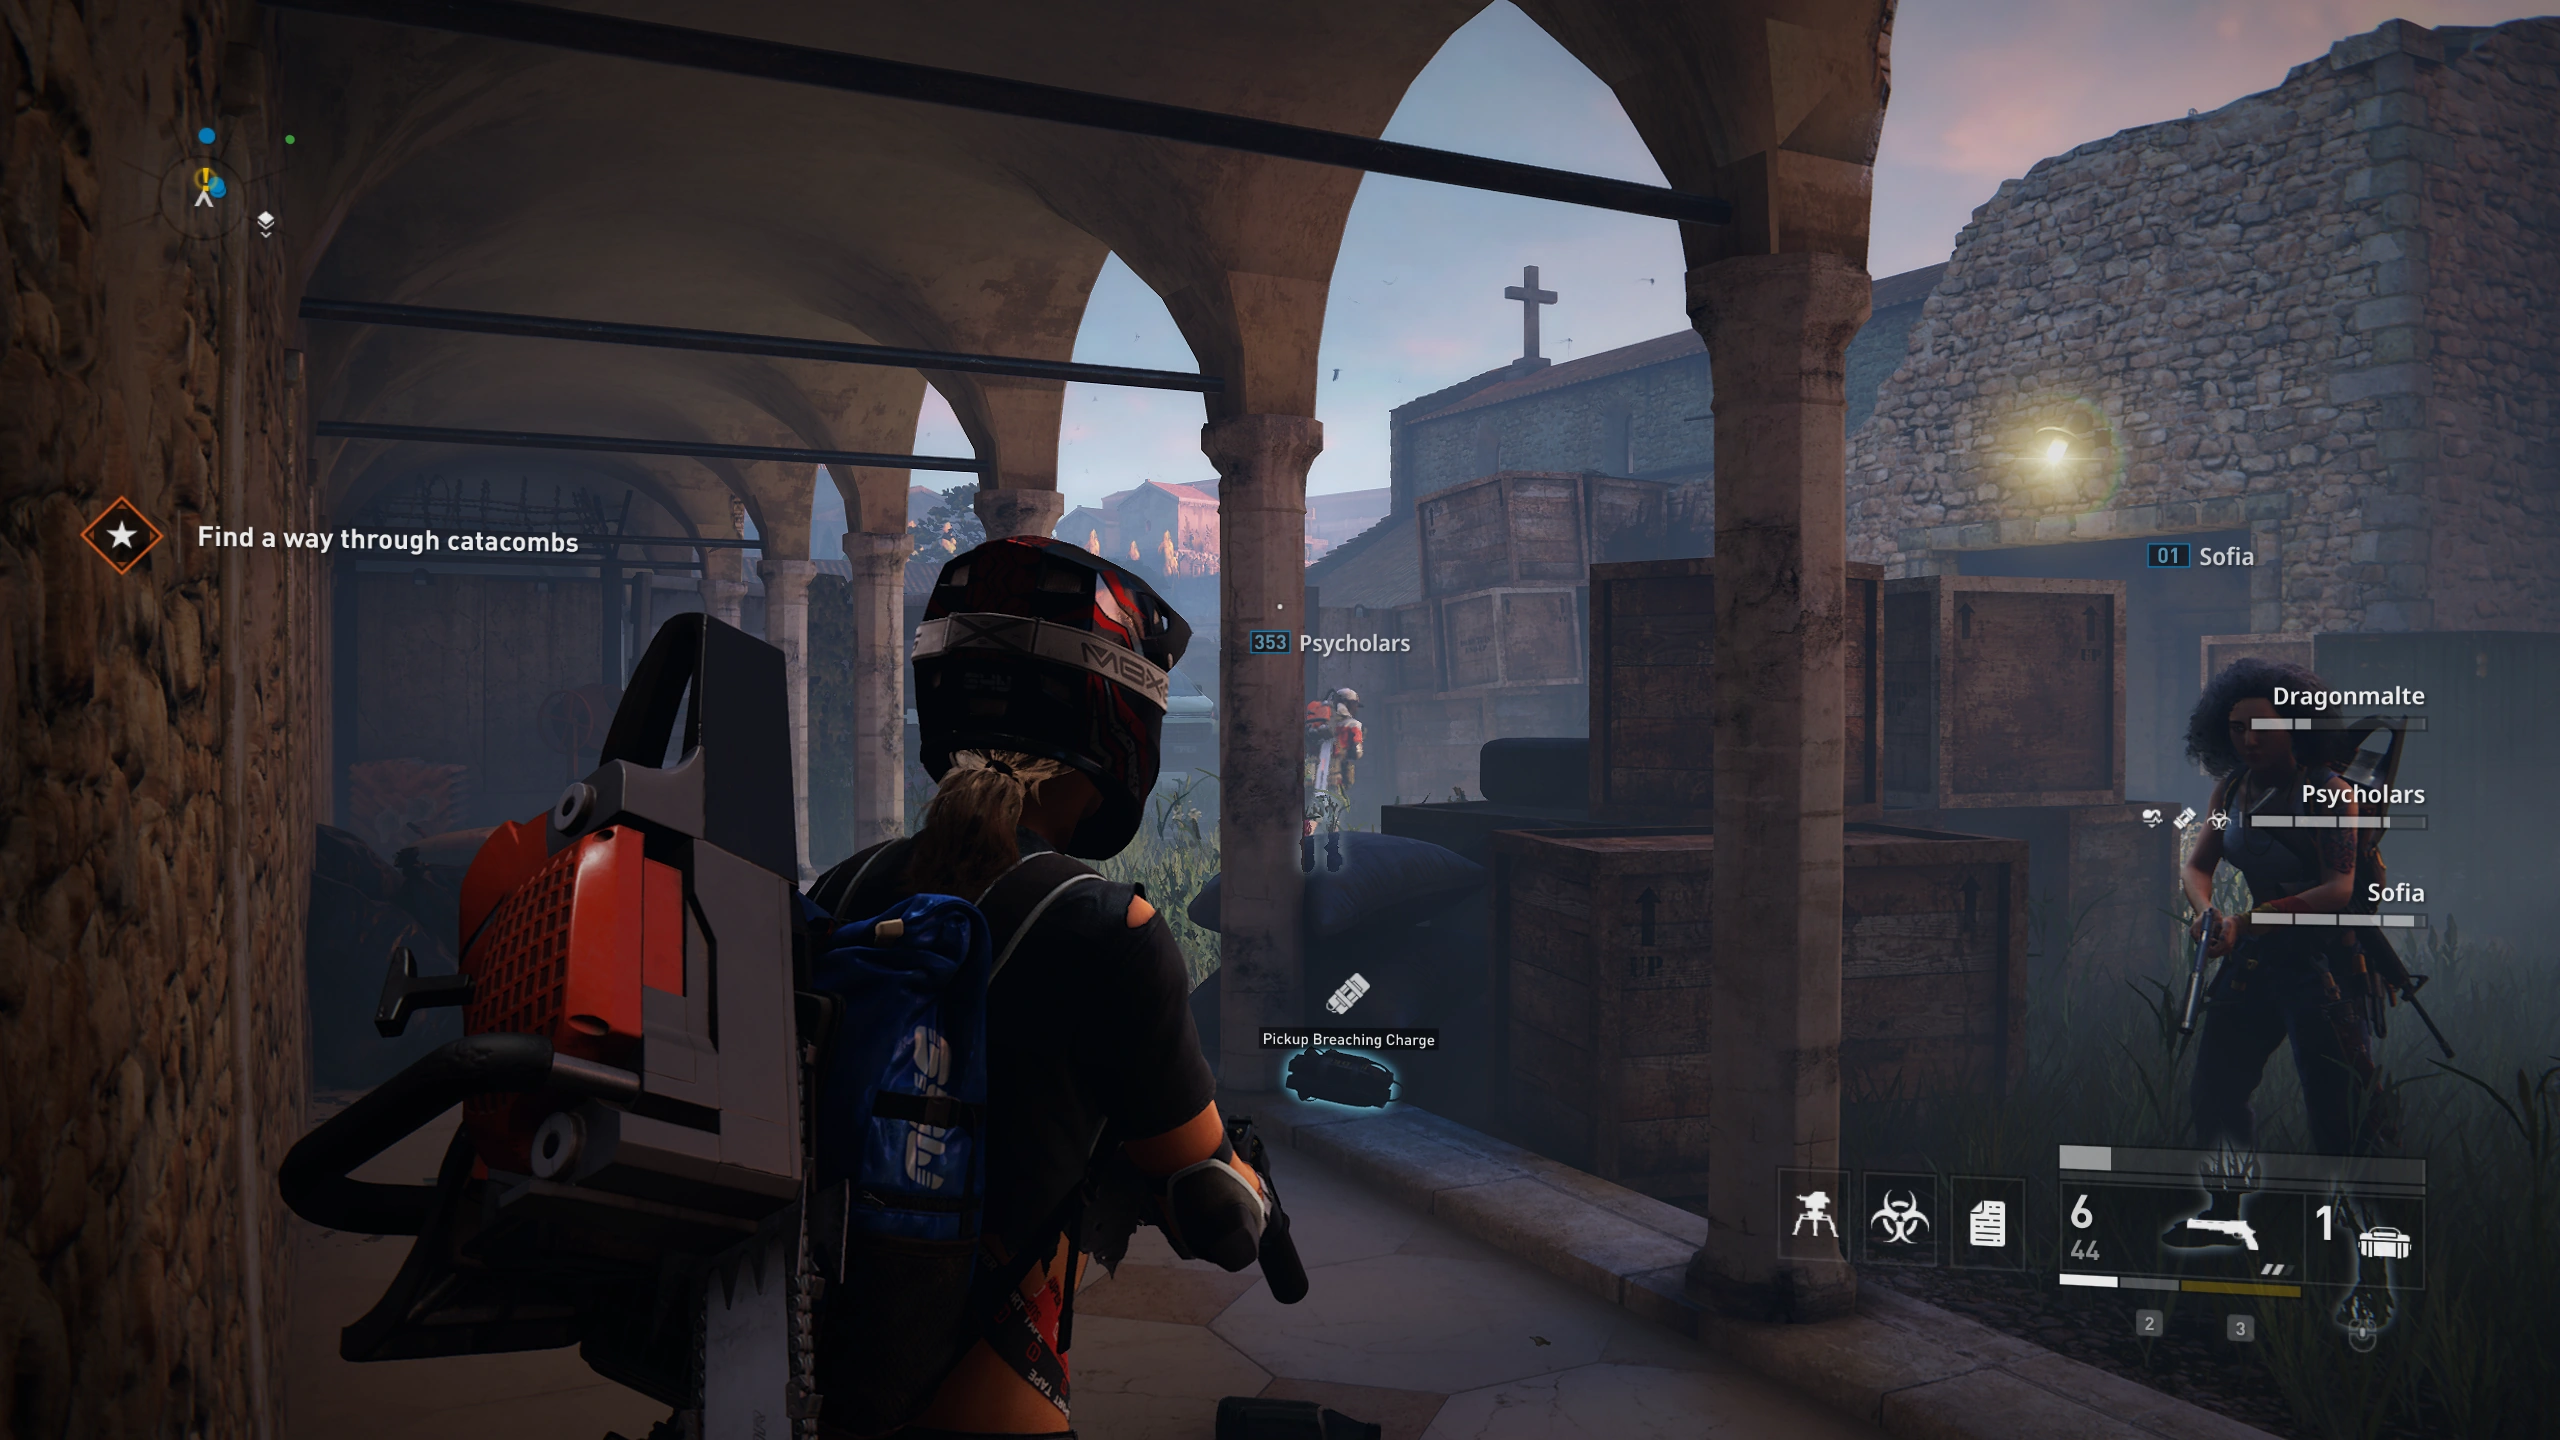
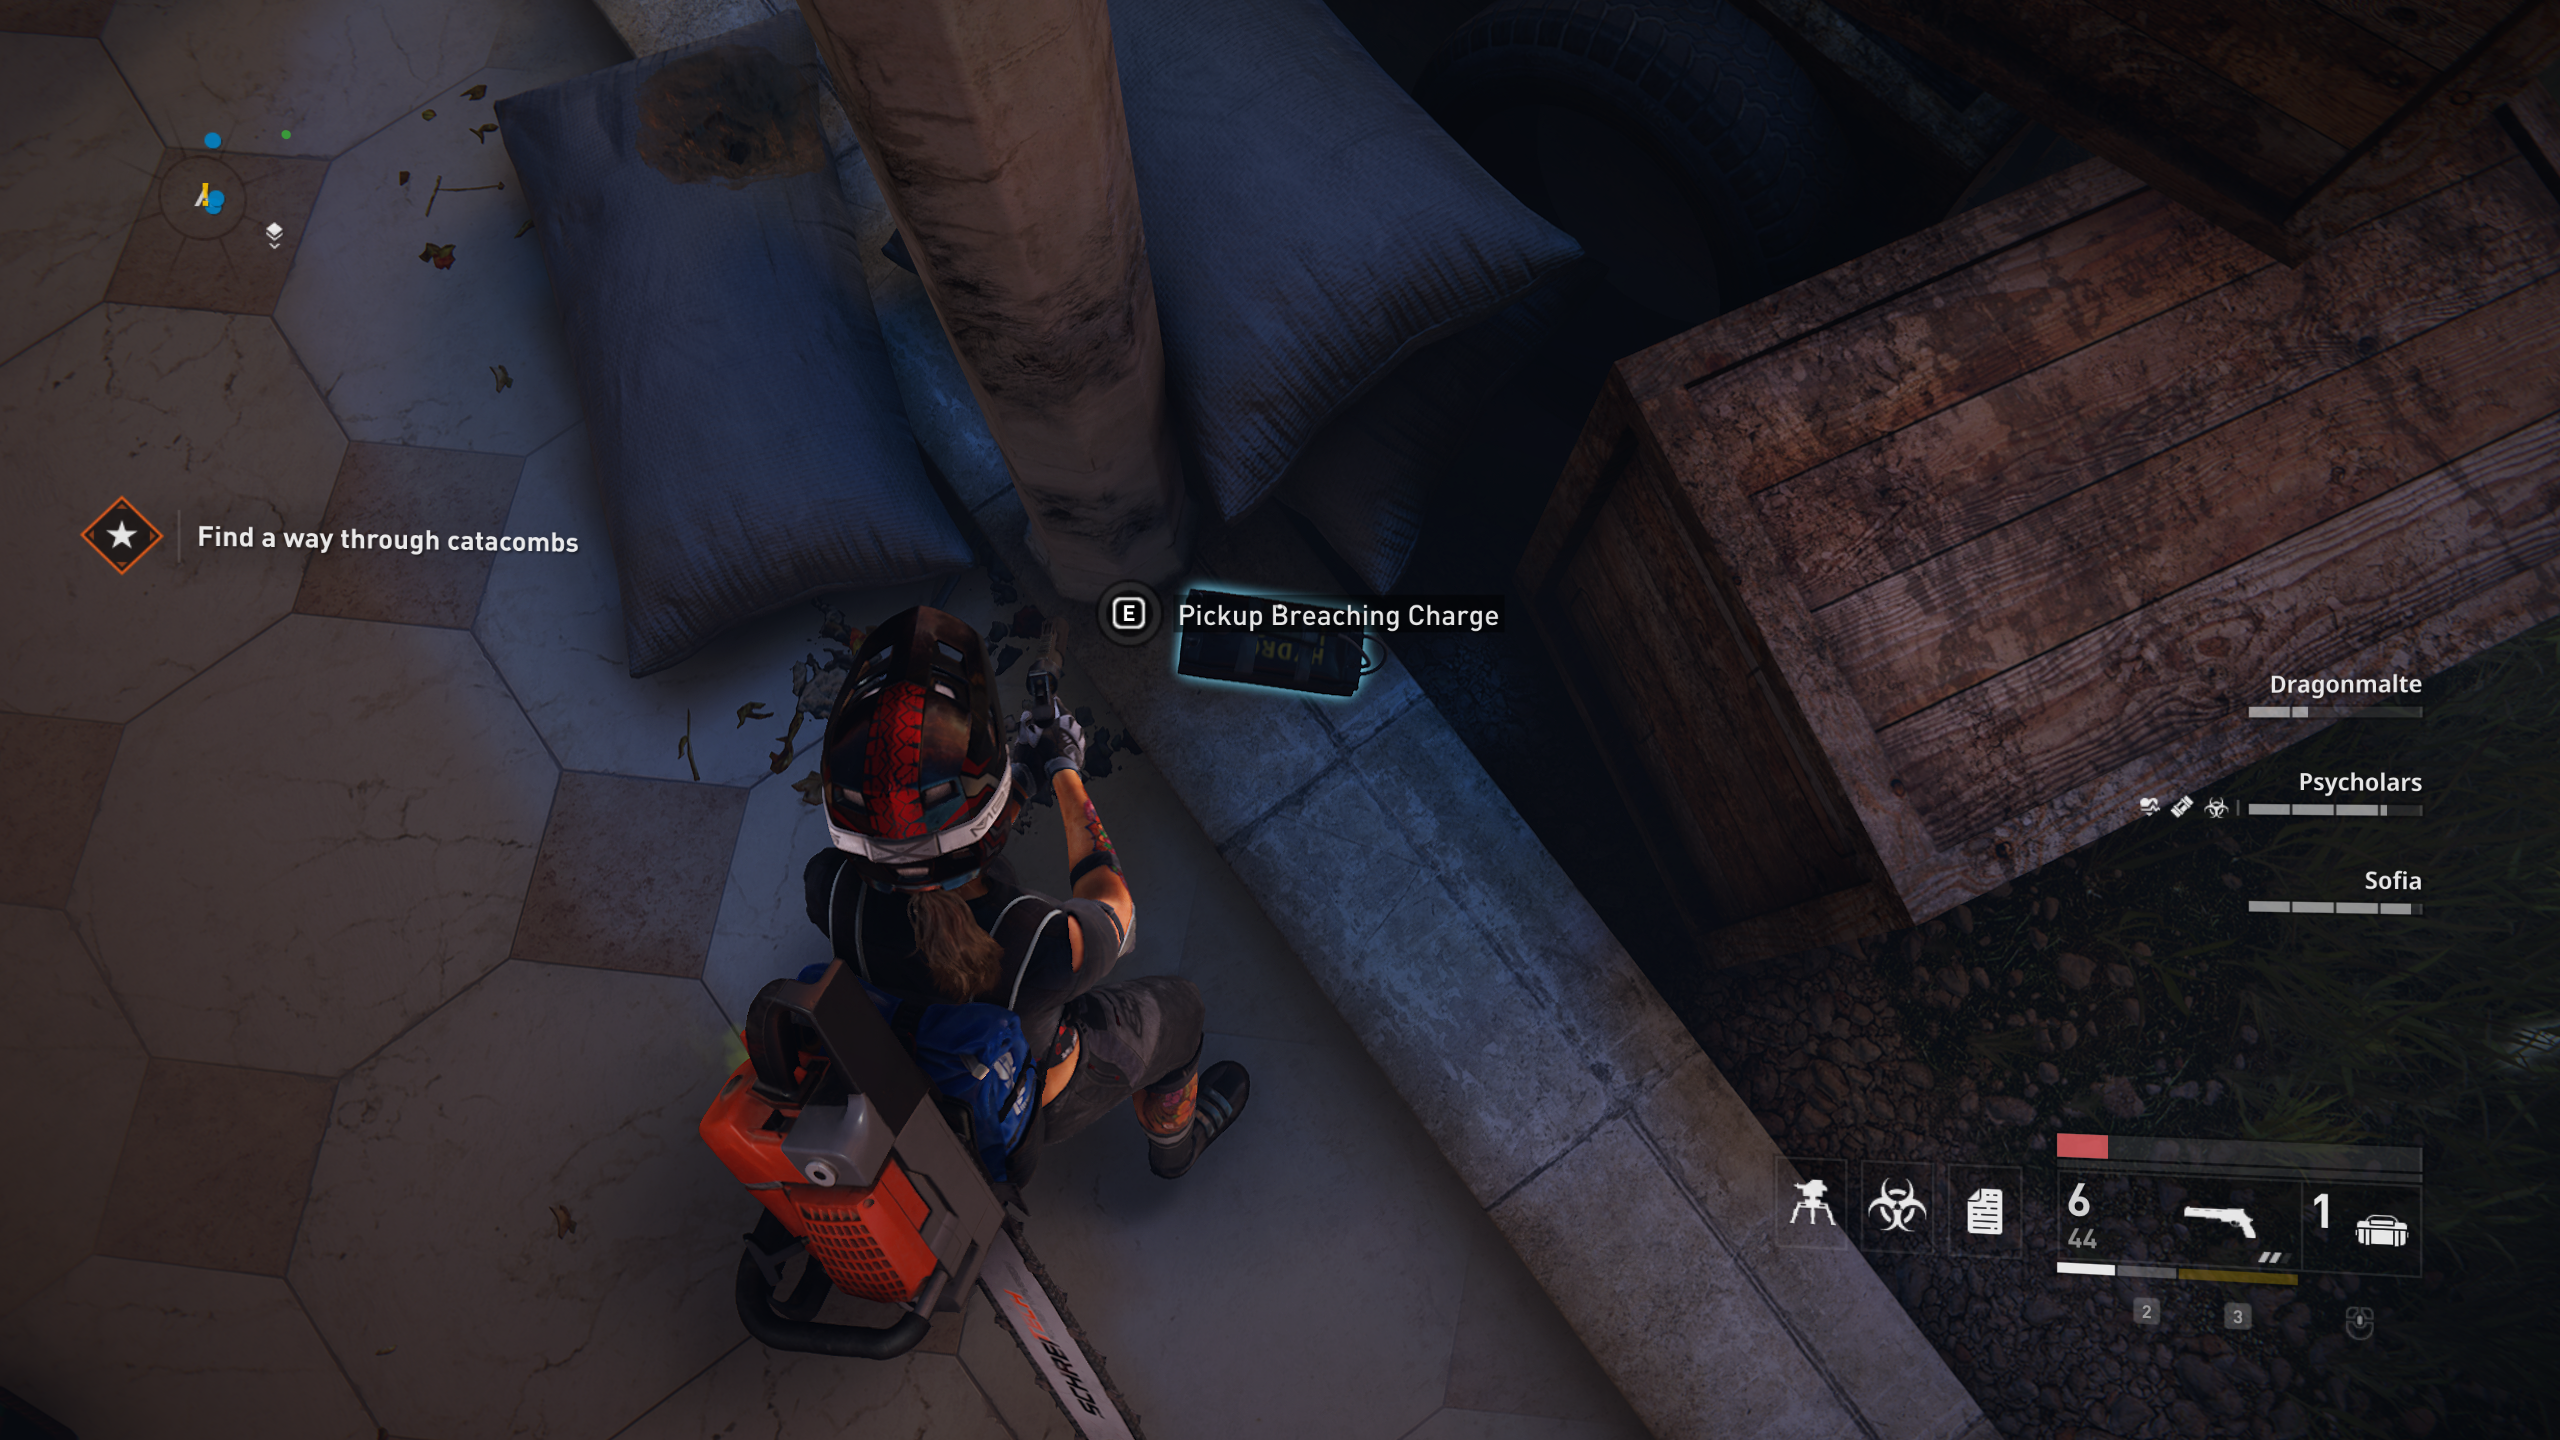
In the catacombs, right below where you defend, where the water was.
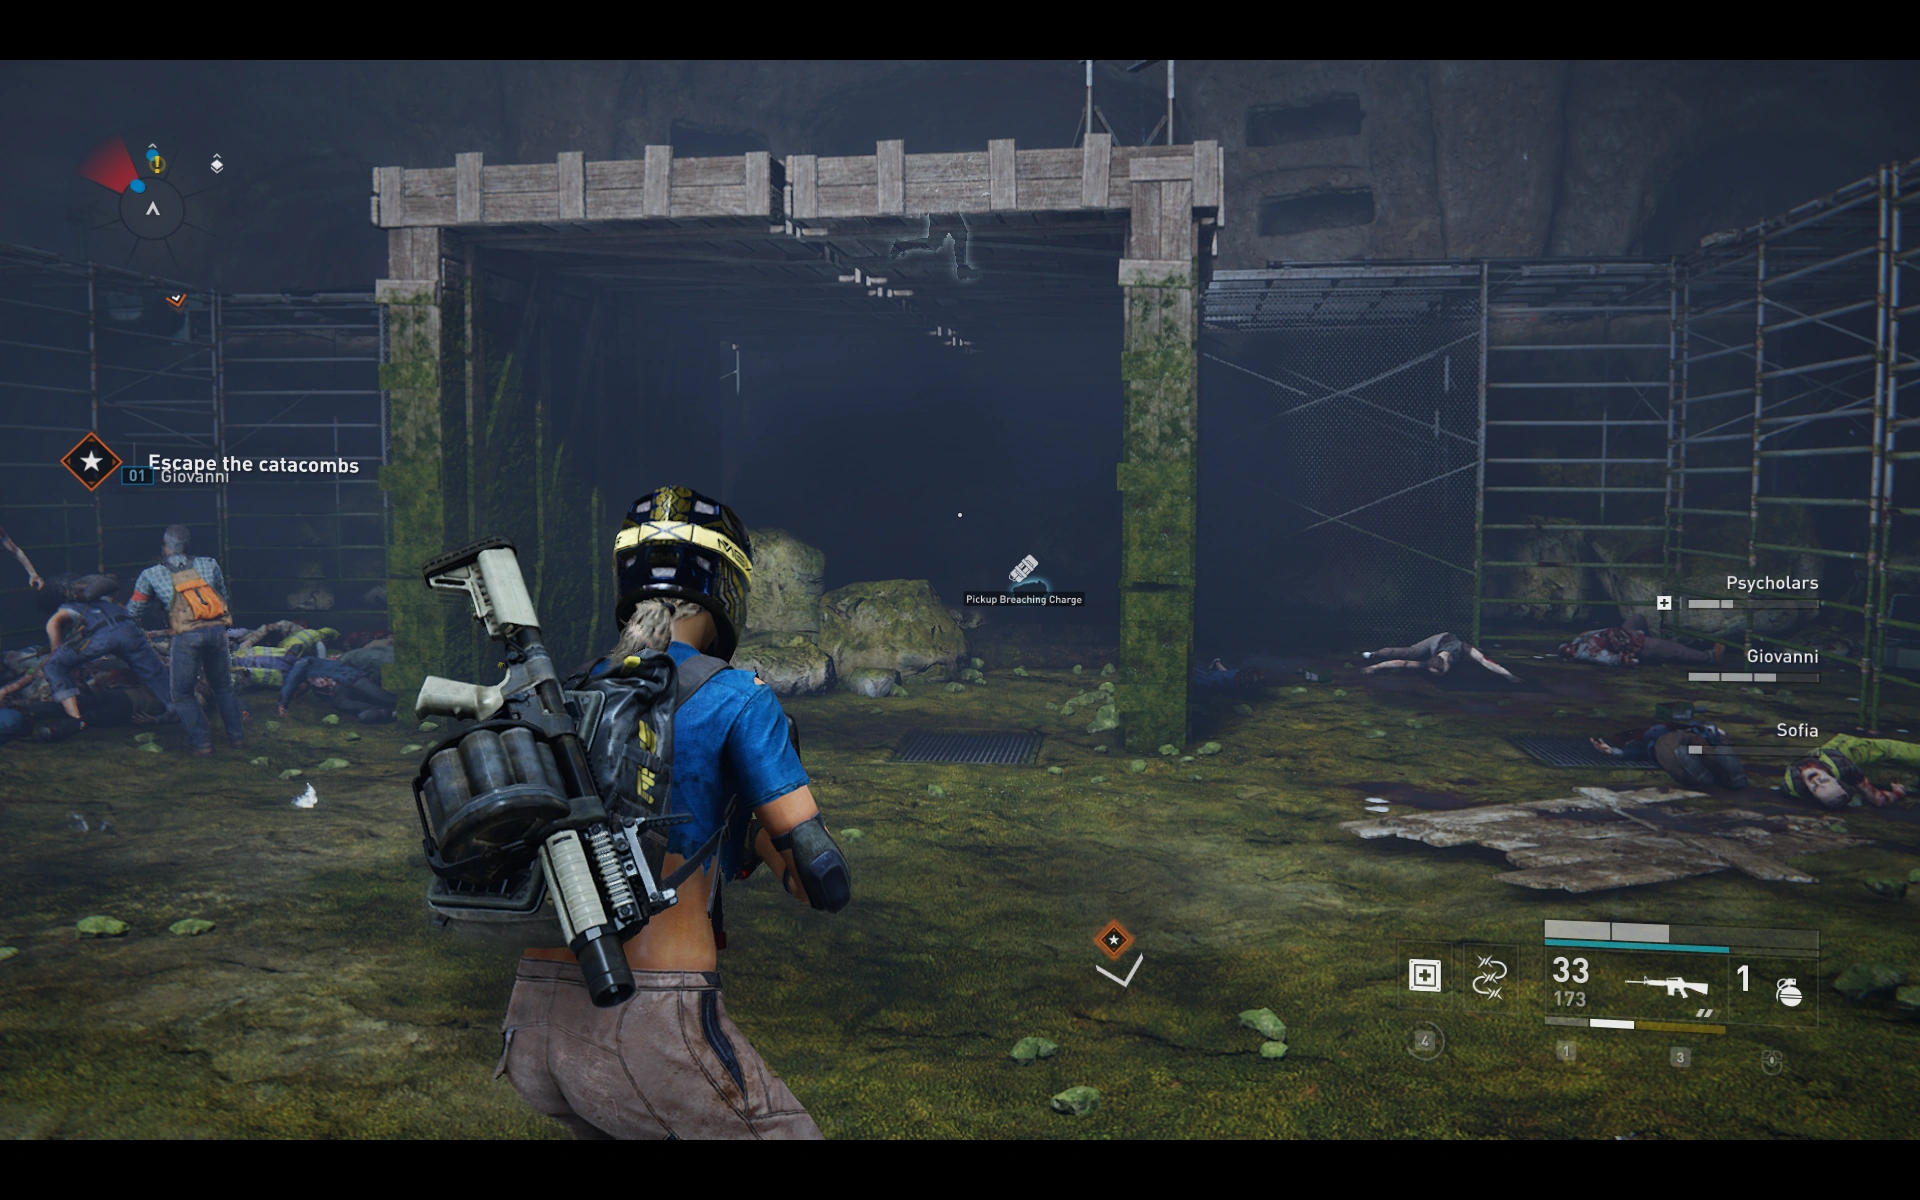
Location 7: ![]()
Location 8: ![]()
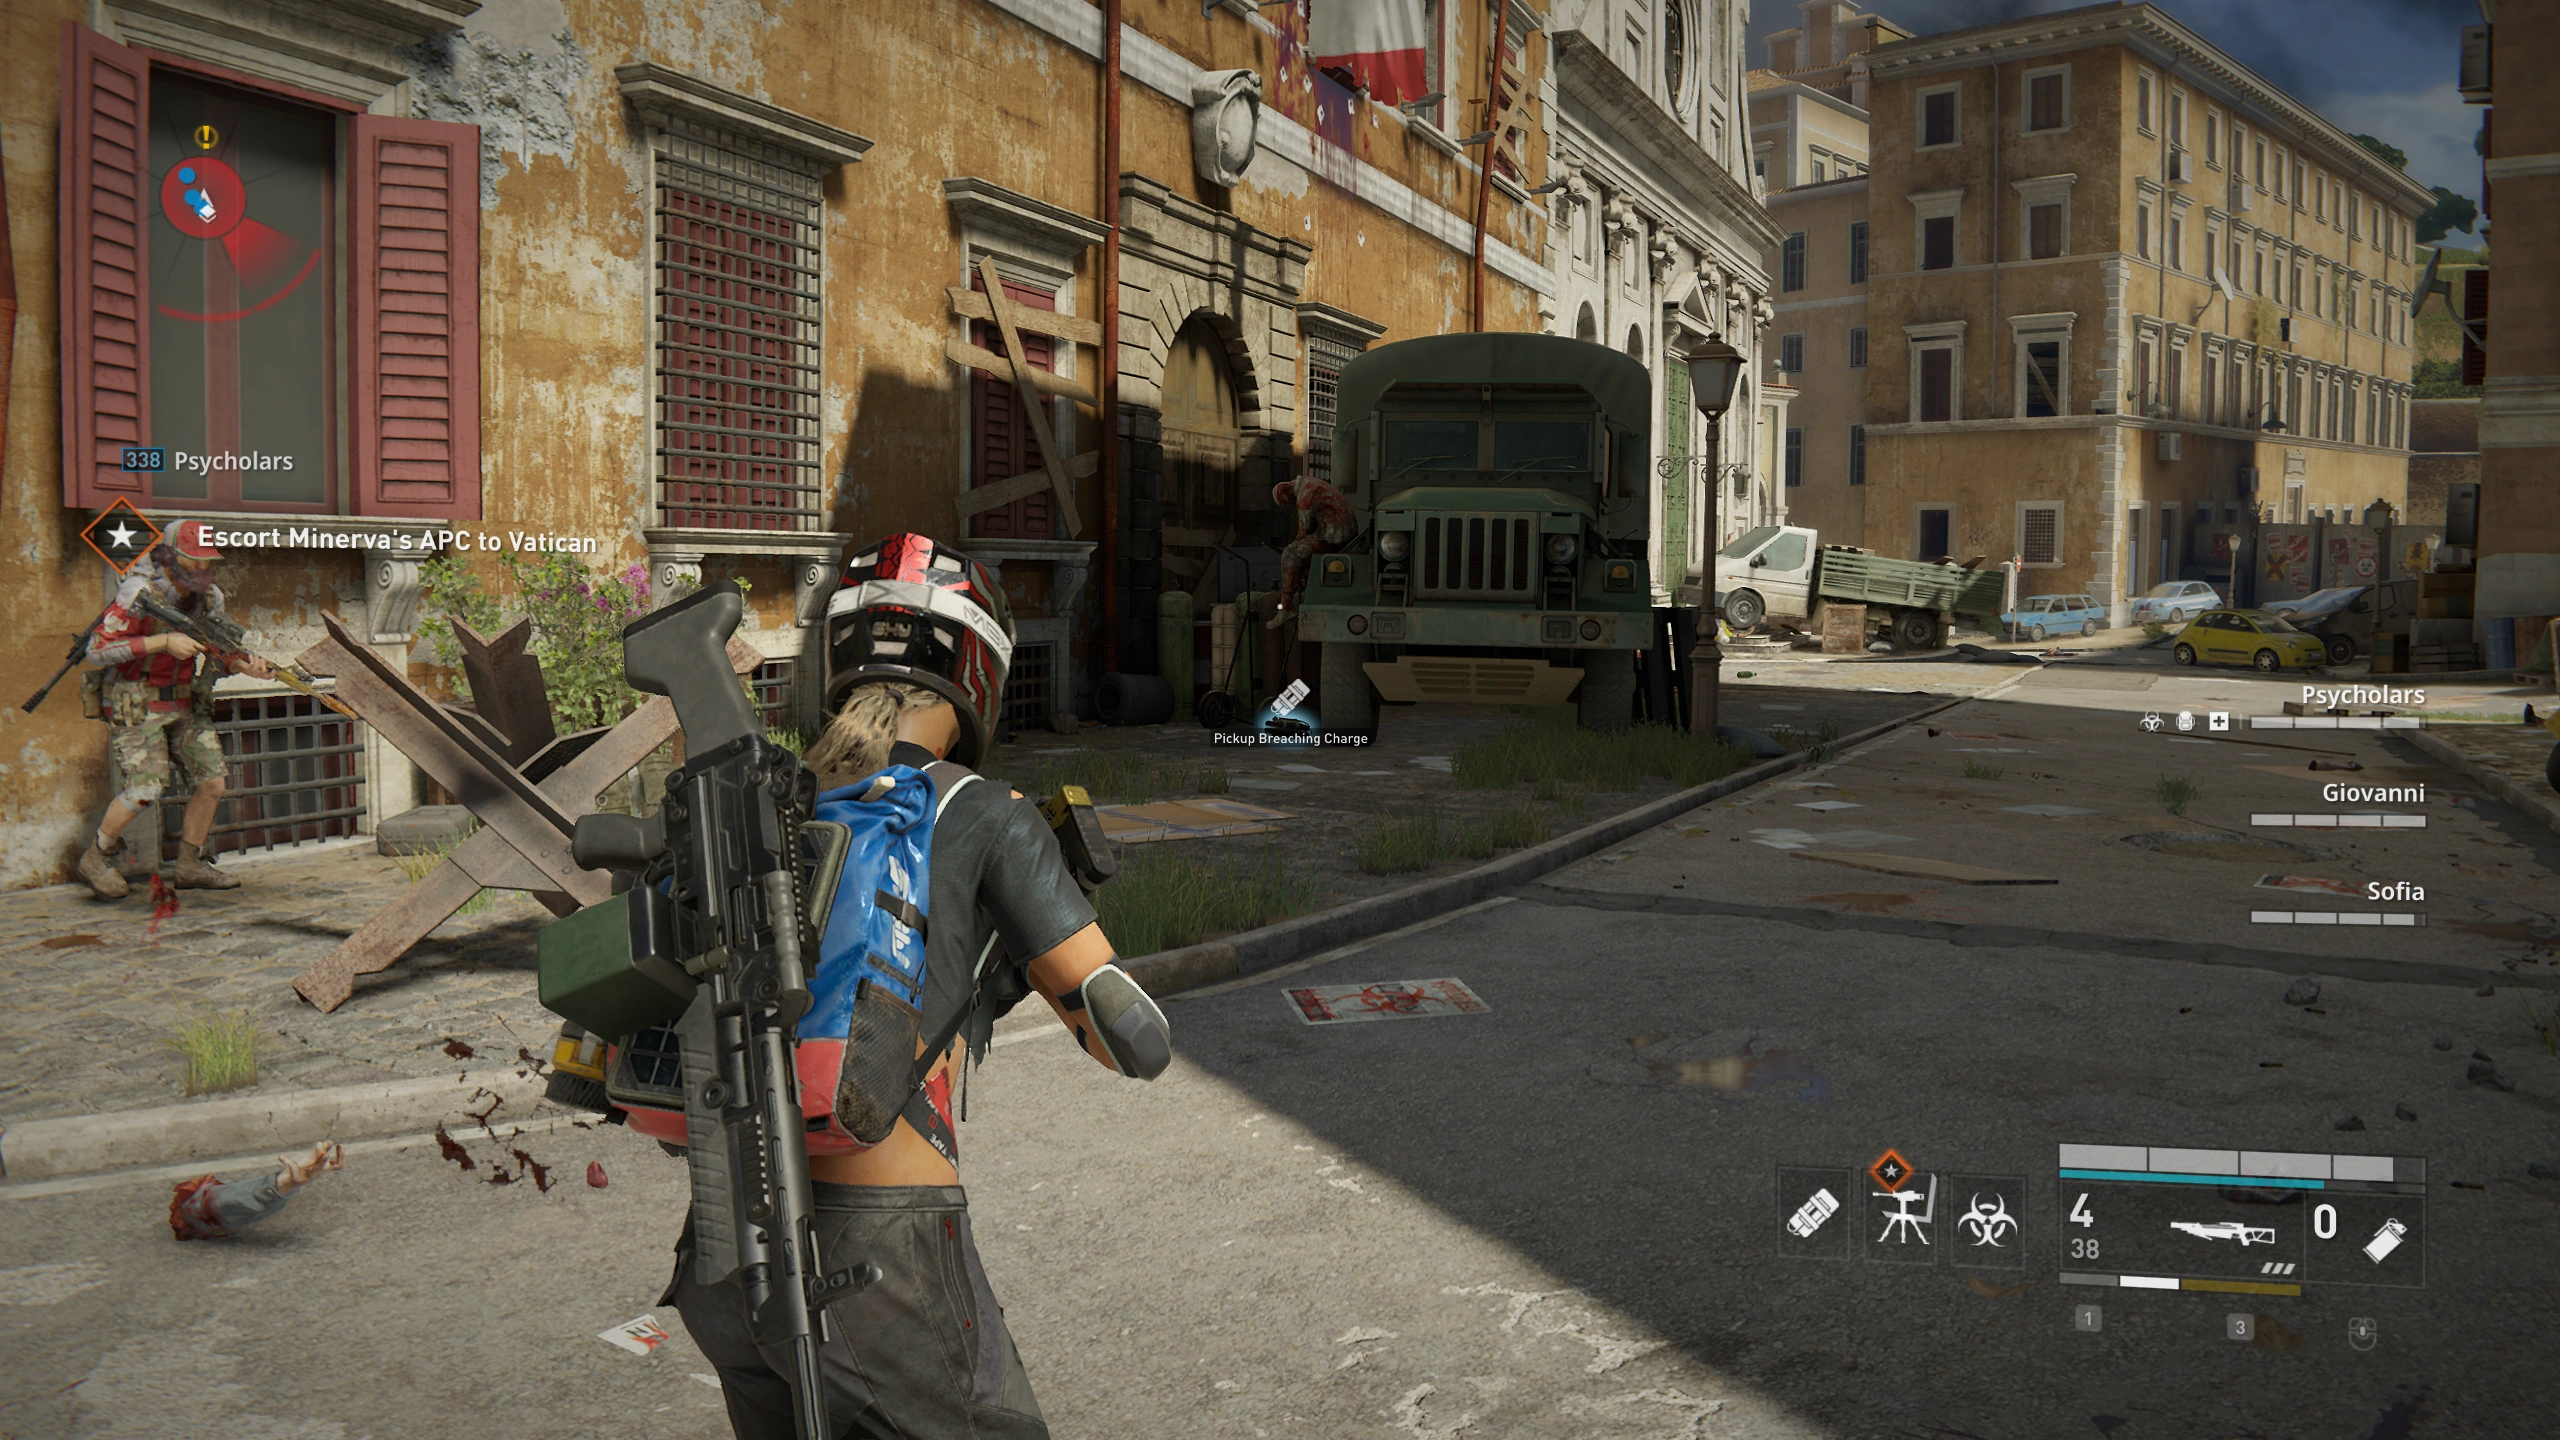
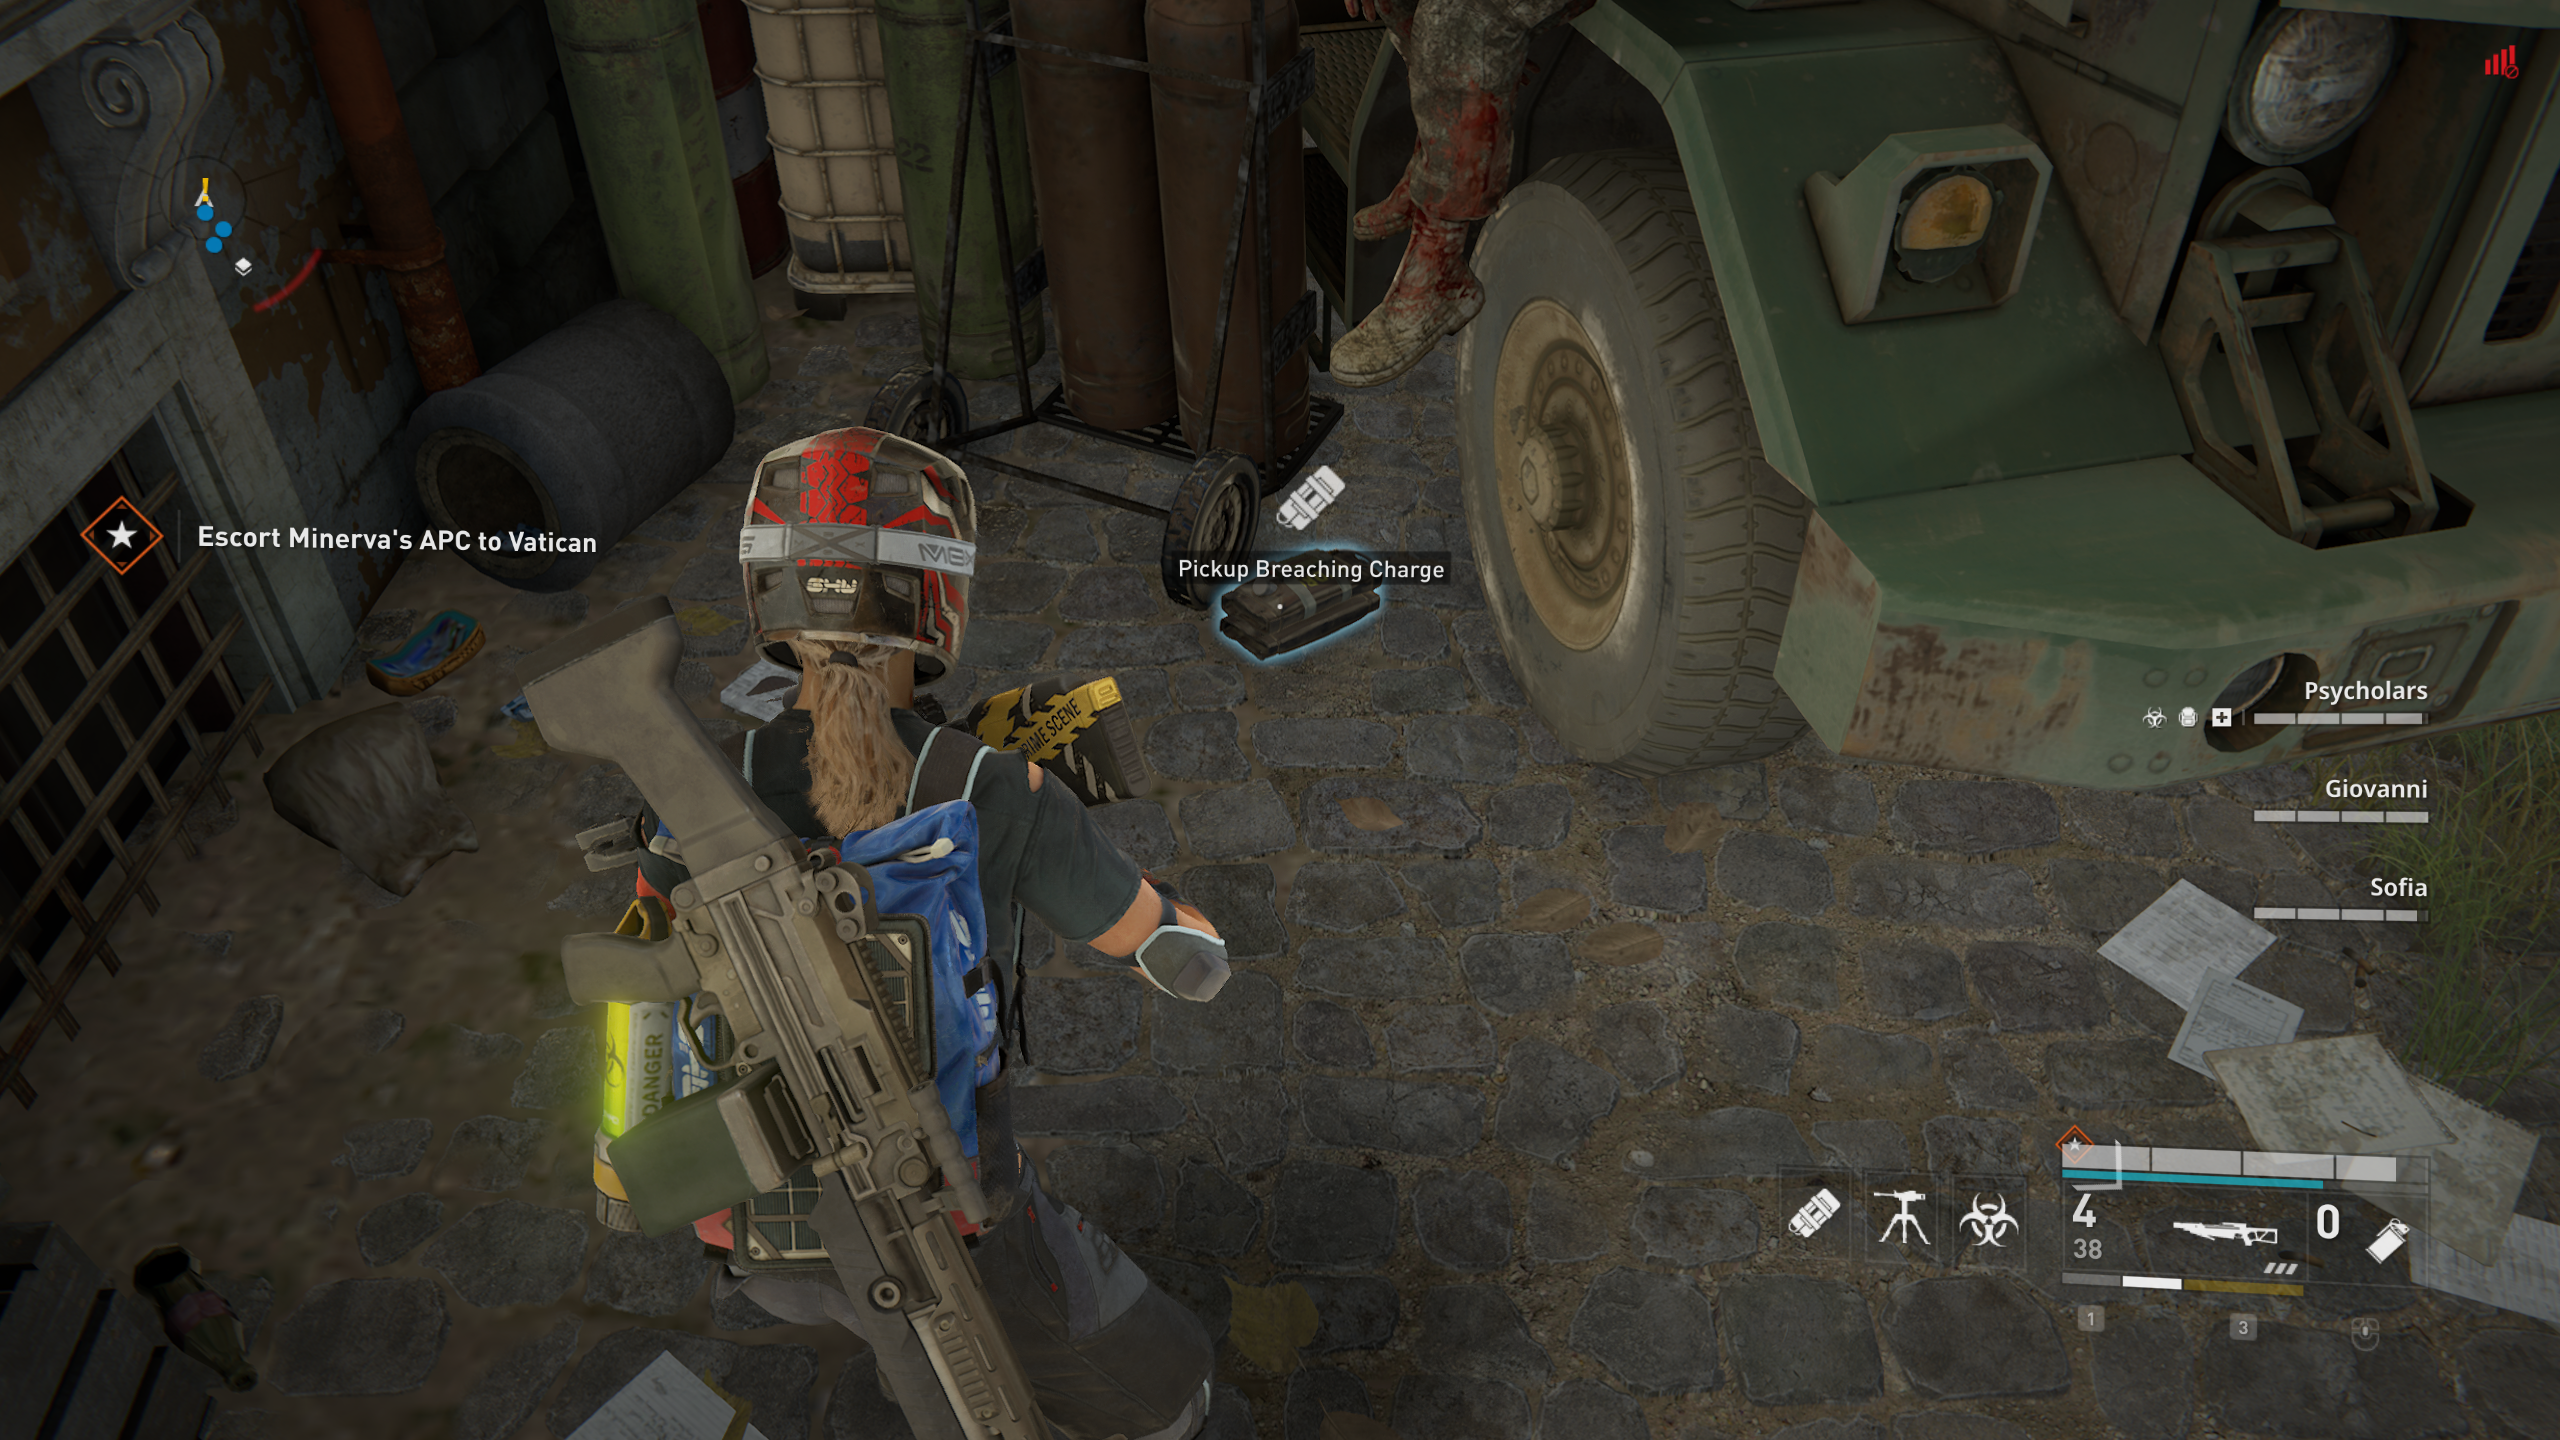
Chapter 2: Call to Arms[]
Location 1: ![]()
Early in the level, in the hospital, you arrive in a courtyard with many pillars. The Charge is on the ground near one of the pillars to the left of the exit.
[[File:World War Z Rome 2 Breaching Charge 1_1.png|400px]
Location 2: ![]()
Early in the level after getting ouside from a courtyard with many pillars, turn left to a dead end. The charge is on the ground in some bushes.

Location 3: ![]()
In the first defense area, near the exit in a cardboard box.
Location 4: ![]()
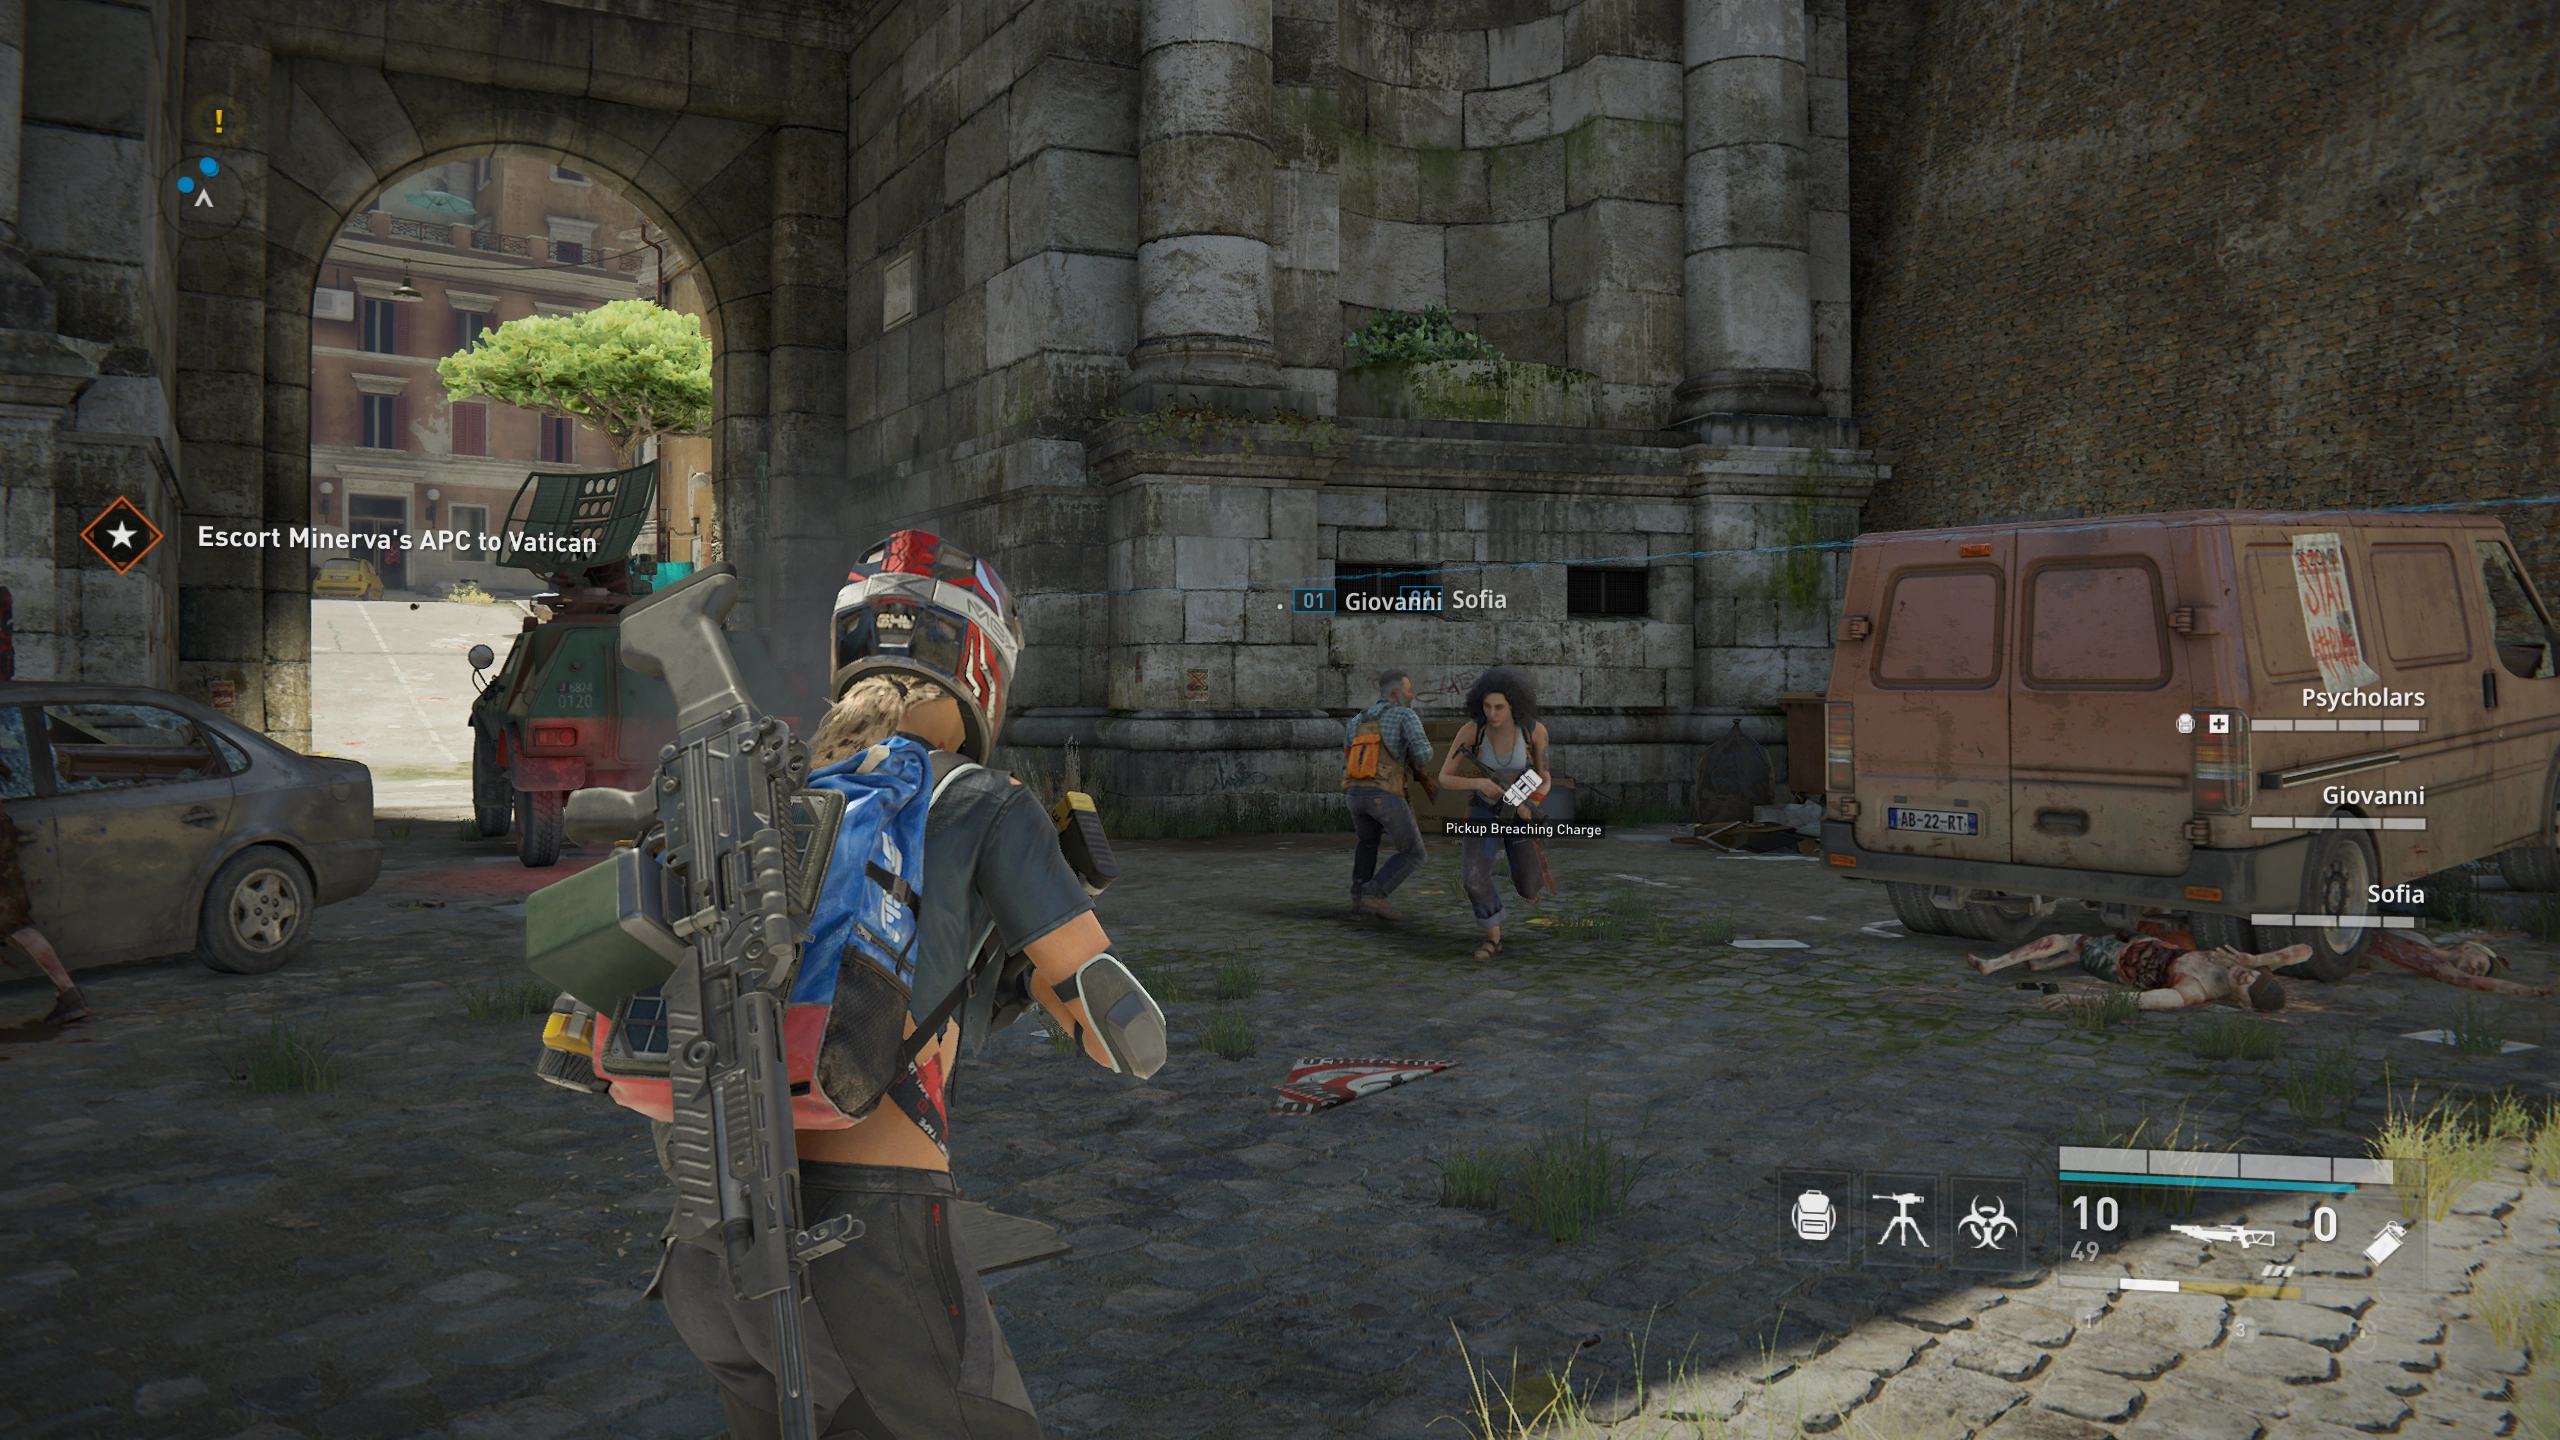
On the first street while escorting the APC. The charge is behind a green truck.
Location 5: ![]()
Location 6: ![]()
Location 7: ![]()
Location 8: ![]()
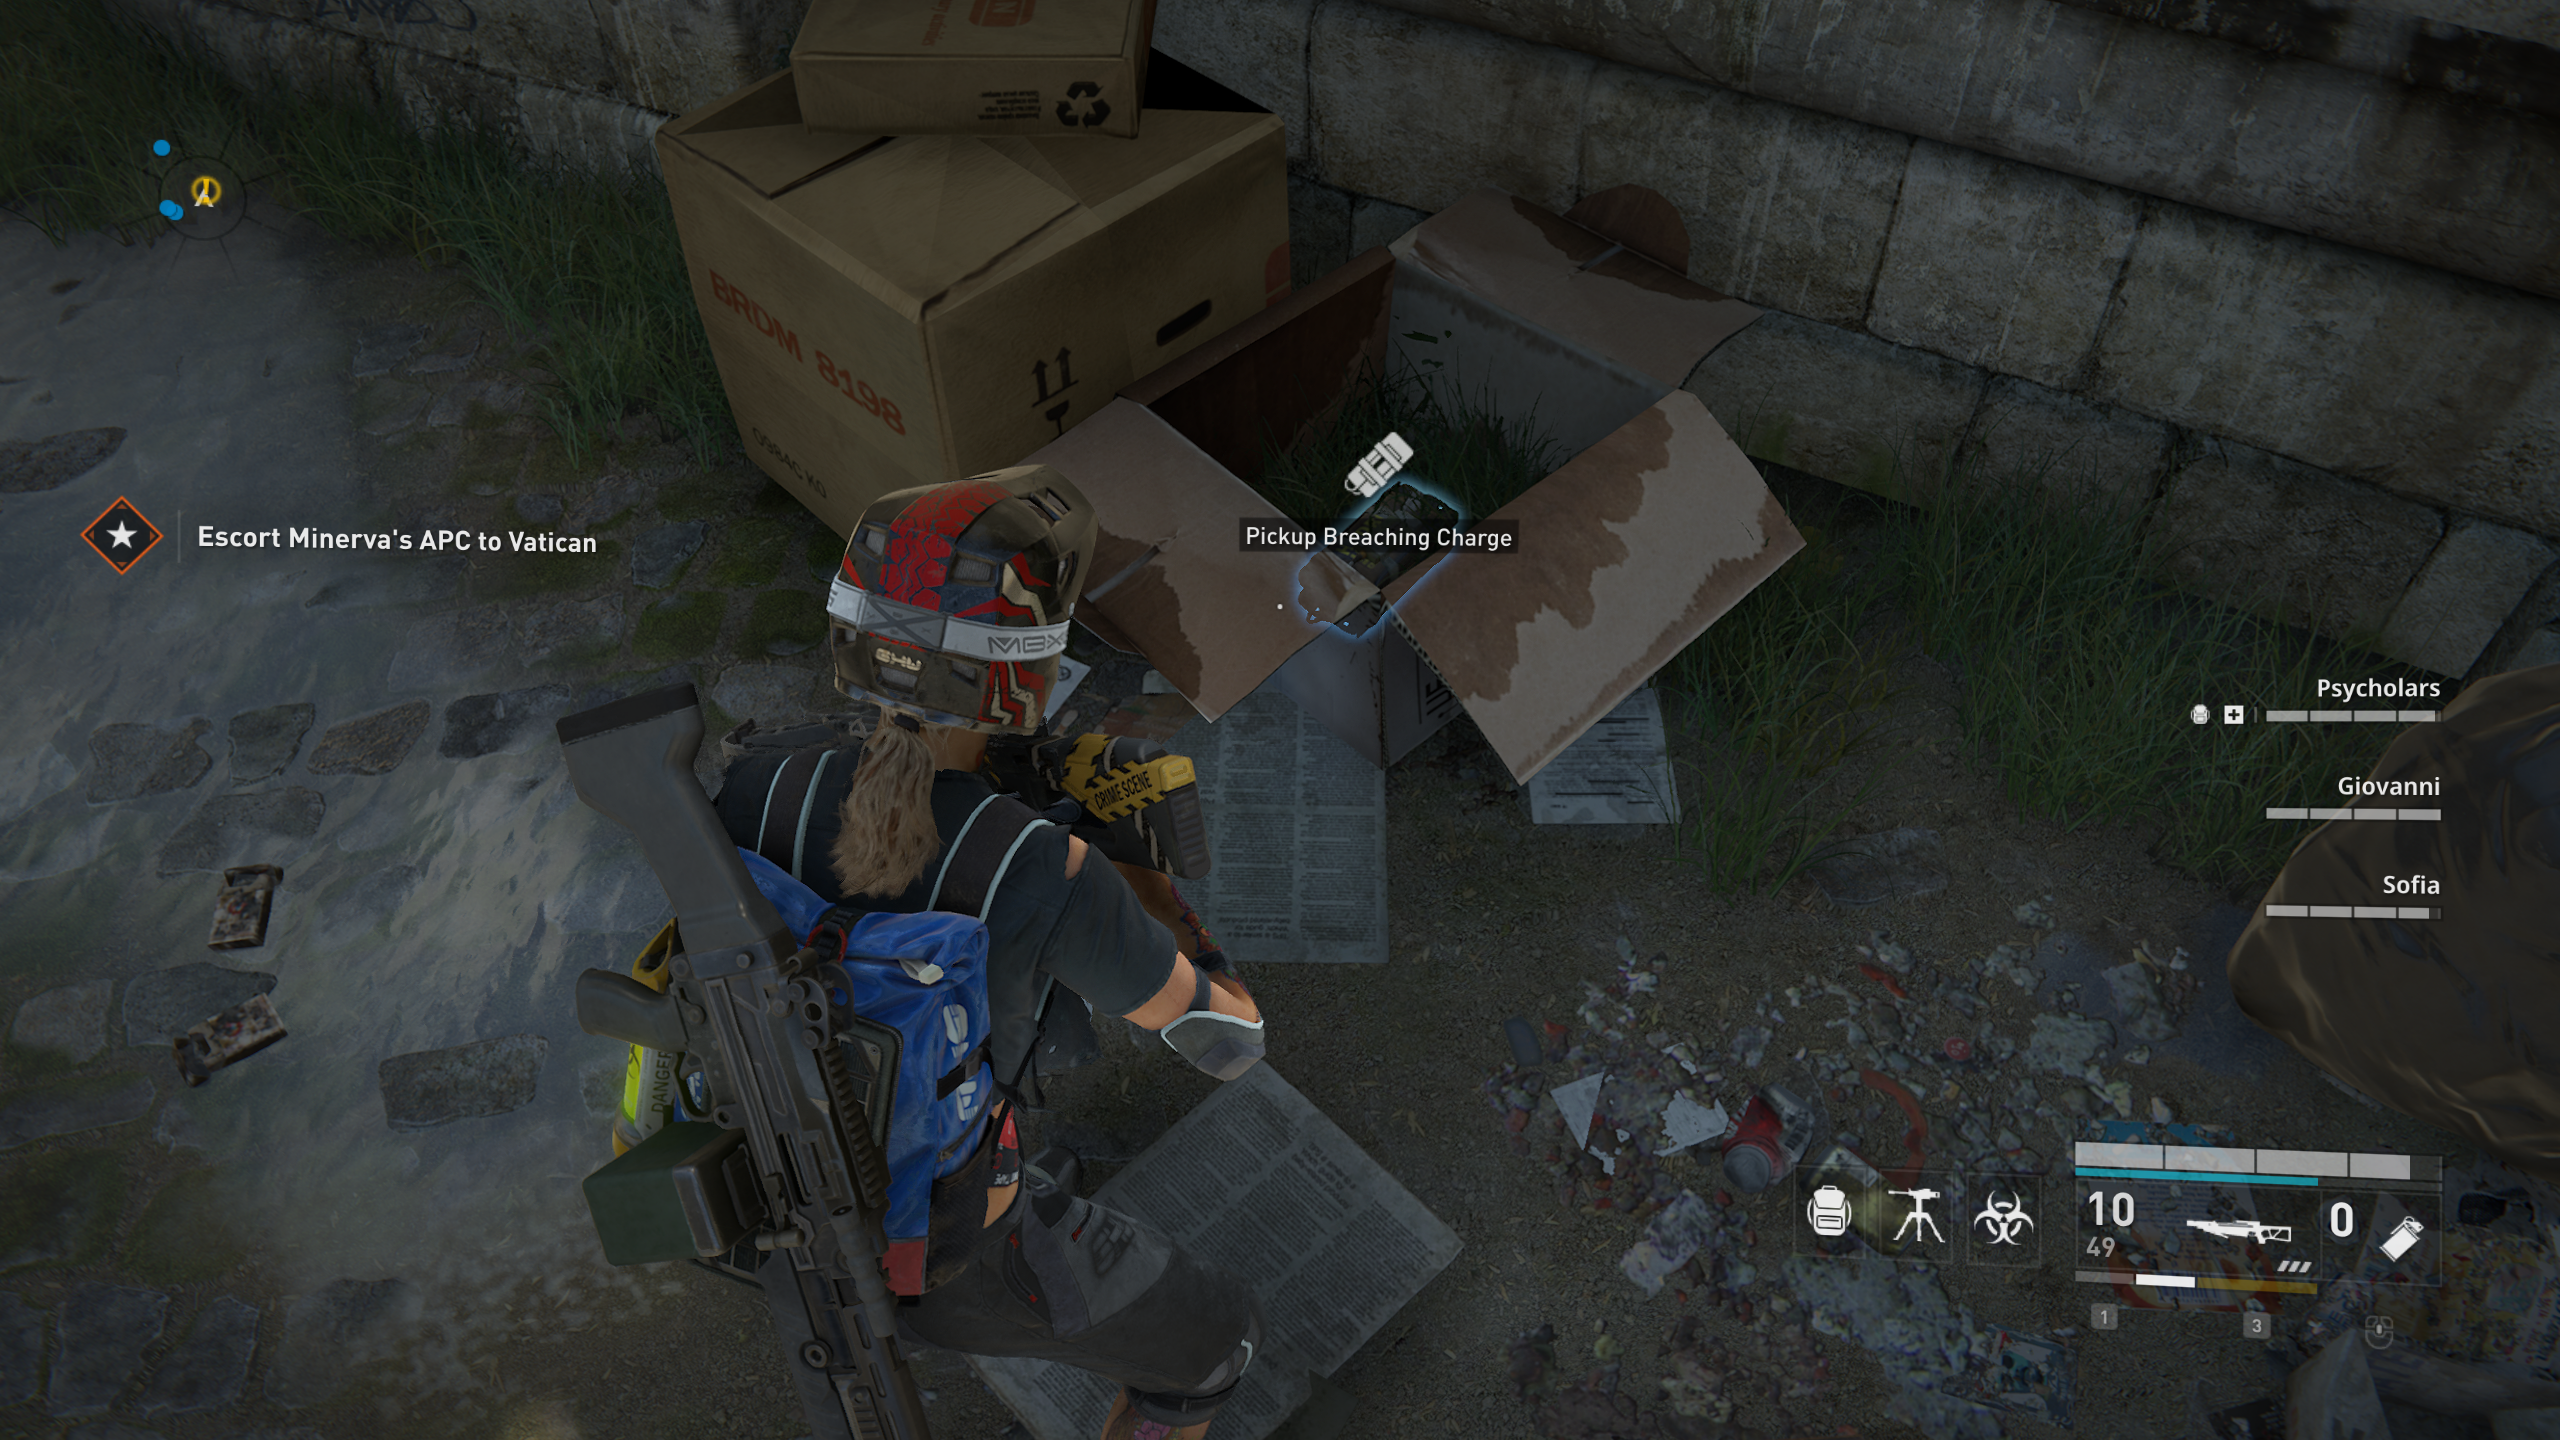
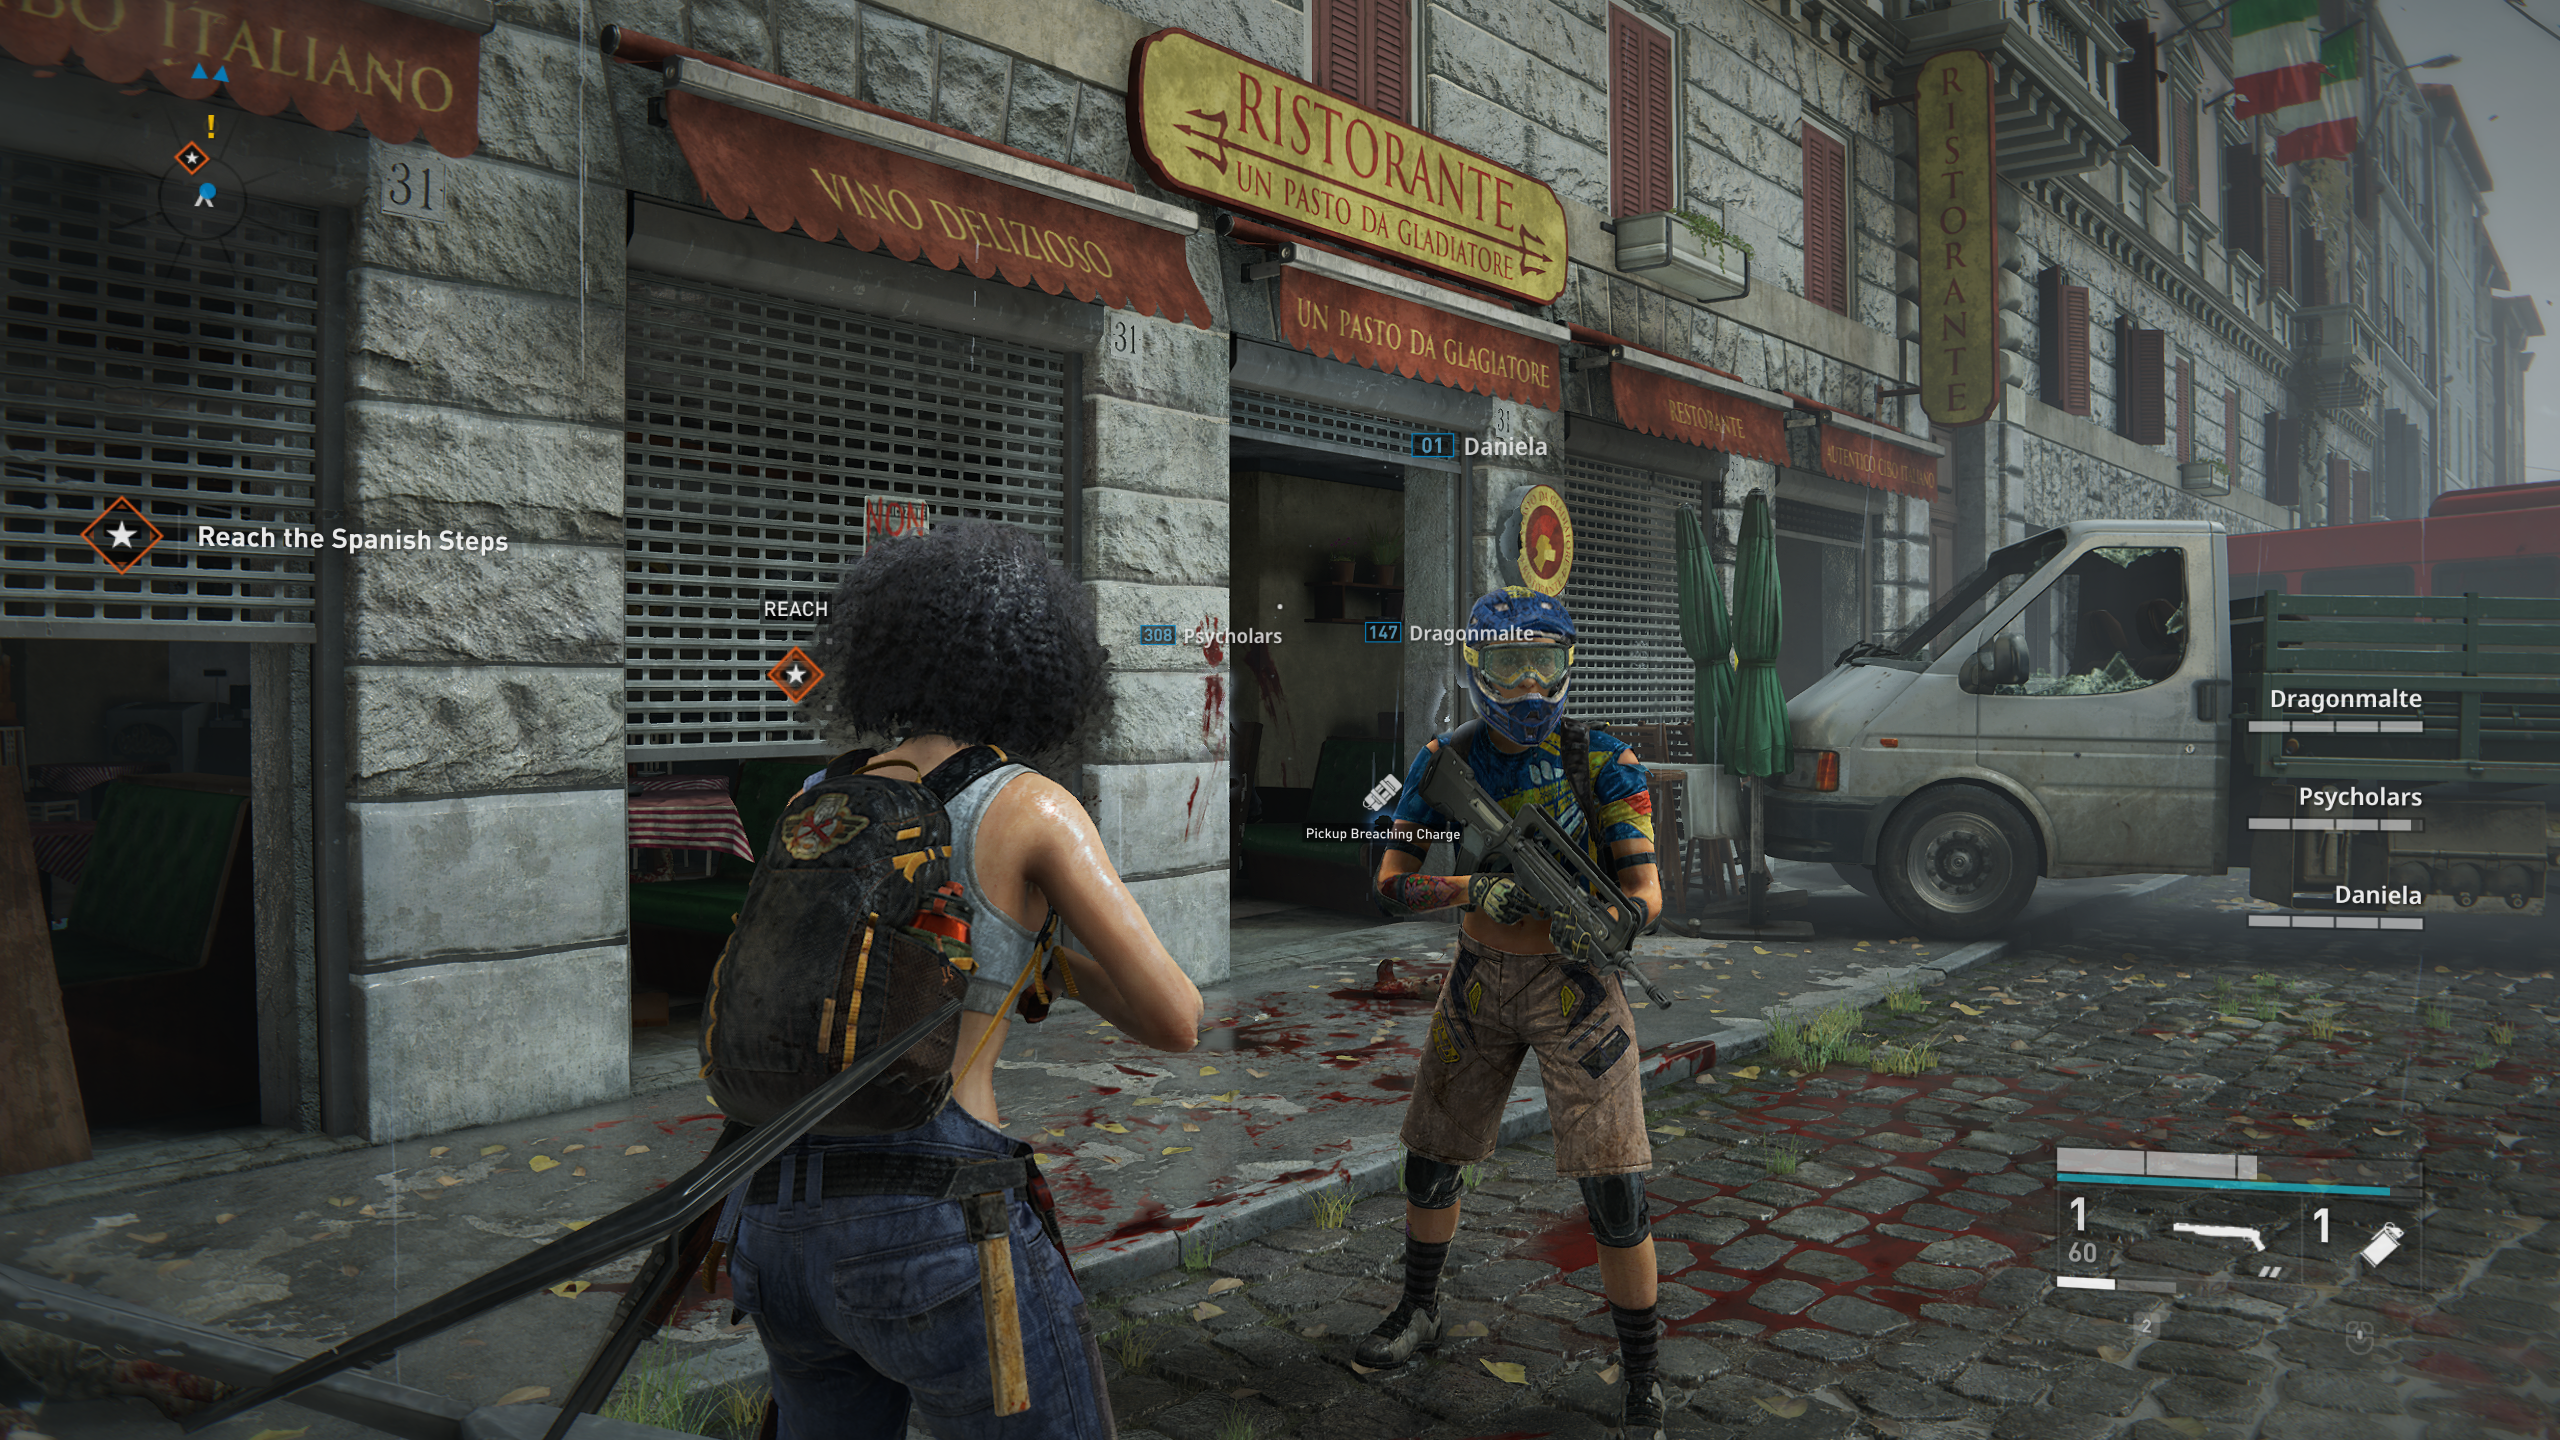
Chapter 3: The Final Push[]
Location 1: ![]()
At the start of the level in the resturant on the left. The charge is hidden behind a turned table in a corner near one of the entrances.
Location 2: ![]()
In the area before the first defense on the left side behind a small truck.
Location 3: ![]()
In the large grassy ruins area after the first defense, on the left side, in an hole in a wall.
Location 4: ![]()
In the large grassy ruins area after the first defense, on the pedestral in the middle of the area.

Location 5: ![]()
In the large grassy ruins area after the first defense, on the near ride side in a corner between walls. The charge is on a small green crate.

Location 6: ![]()
During the final defense. In the area in the back where you have to defend the engineers to the left by a container, which leads back to the entrance.
Location 7: ![]()
Location 8: ![]()
Kamchatka[]
Chapter 1: Dead of Winter[]
Location 1: ![]()
When you enter the first storage facility, go to the right, the charge is behind a pallet.
Location 2: ![]()
When you are moving forwards to the first stage, you can find the charge on the right side of the truck.
Location 3: ![]()
After the first defense, head through the warehouse. Turn right after the exit.
Location 4: ![]()
When you have to restart the generators to get the elevator working, go straight through and turn right at the end. Down the stairs.
Location 5: ![]()
In the area with the generator, in the section with the ladder to go up and down. On the lower floor, between two barrels.
Location 6: ![]()
Location 7: ![]()
Location8: ![]()
Chapter 2: On the Grid[]
Location 1: ![]()
In the area with the first circuit breaker just straight ahead of the drop, in a container to the right.
Location 2: ![]()
In the area with the first circuit breaker on the left side on a pile of boxes.
Location 3: ![]()
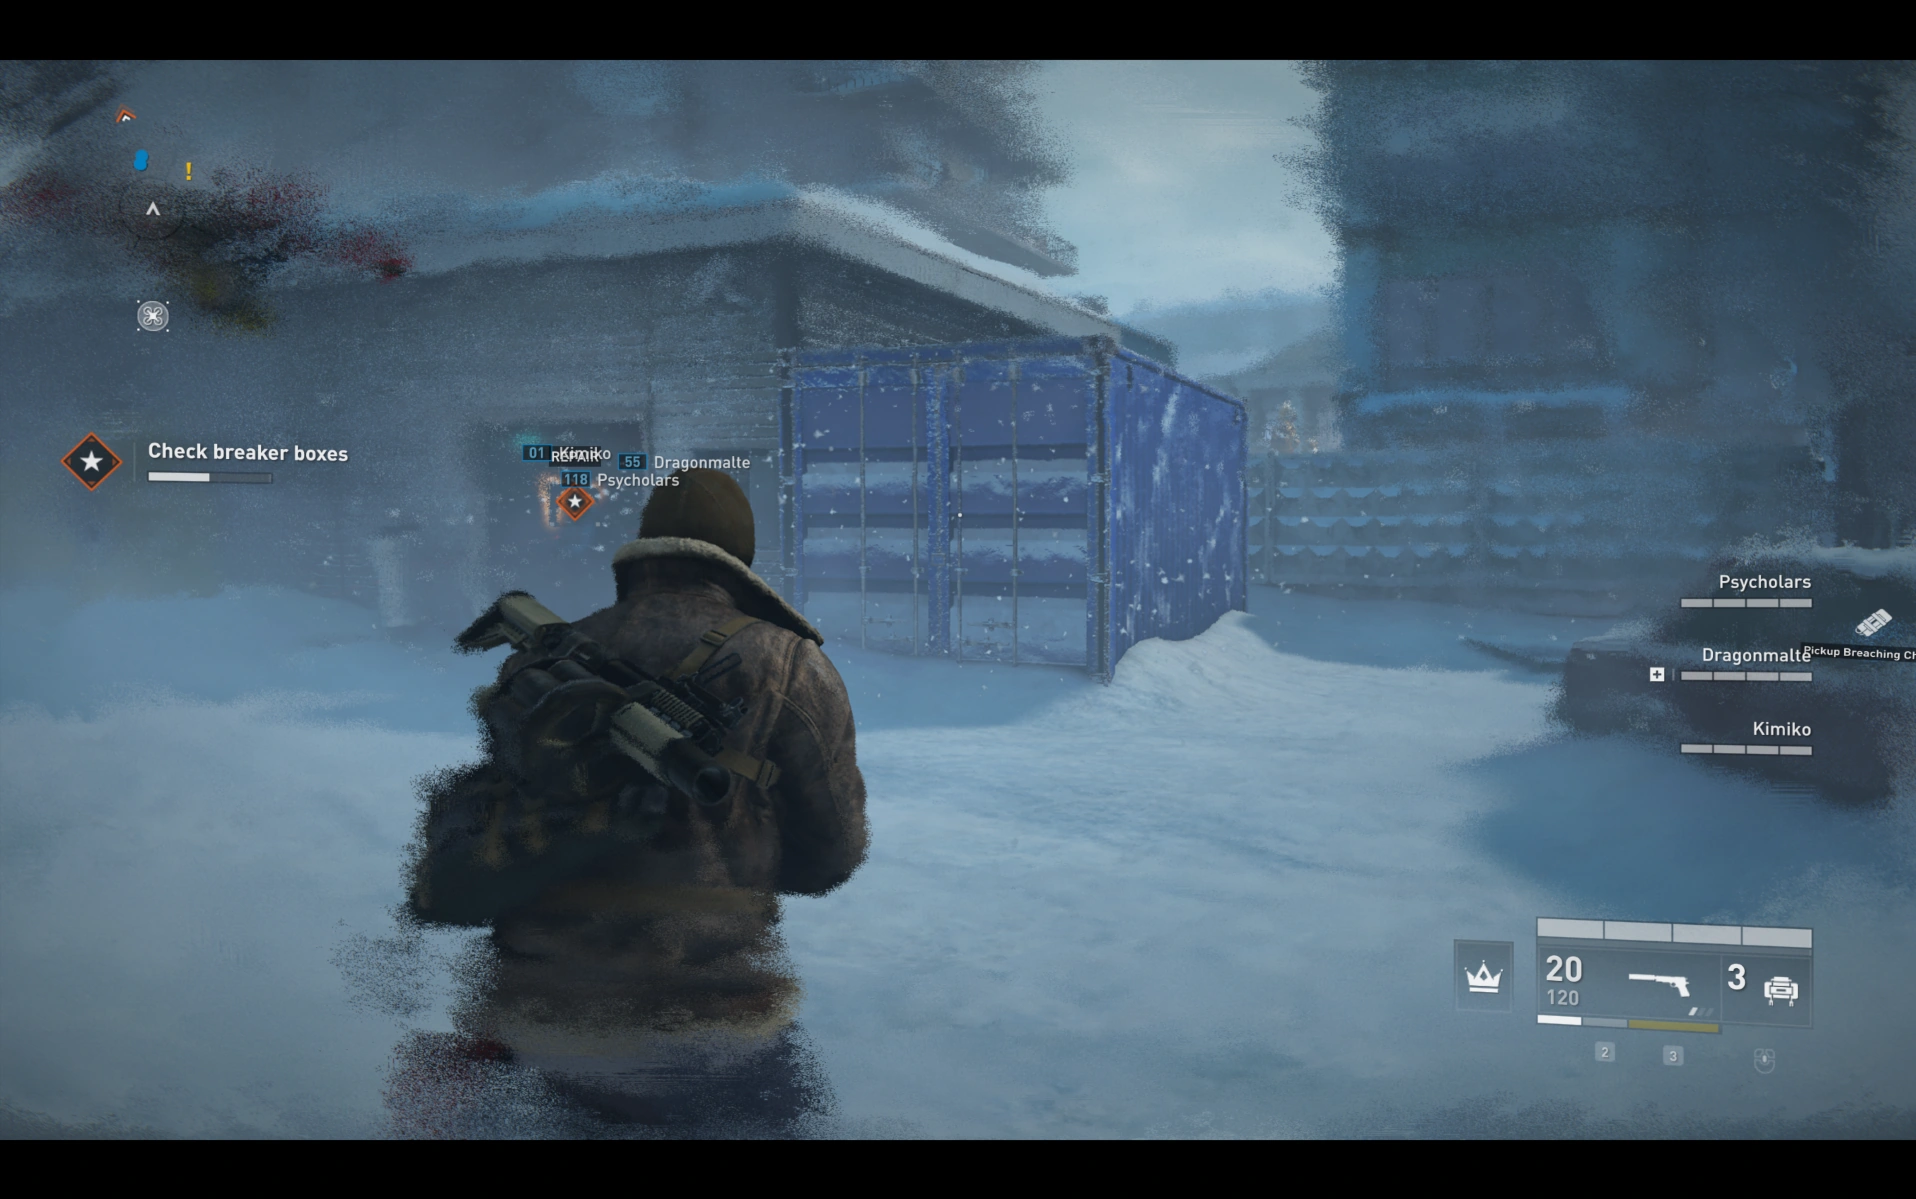
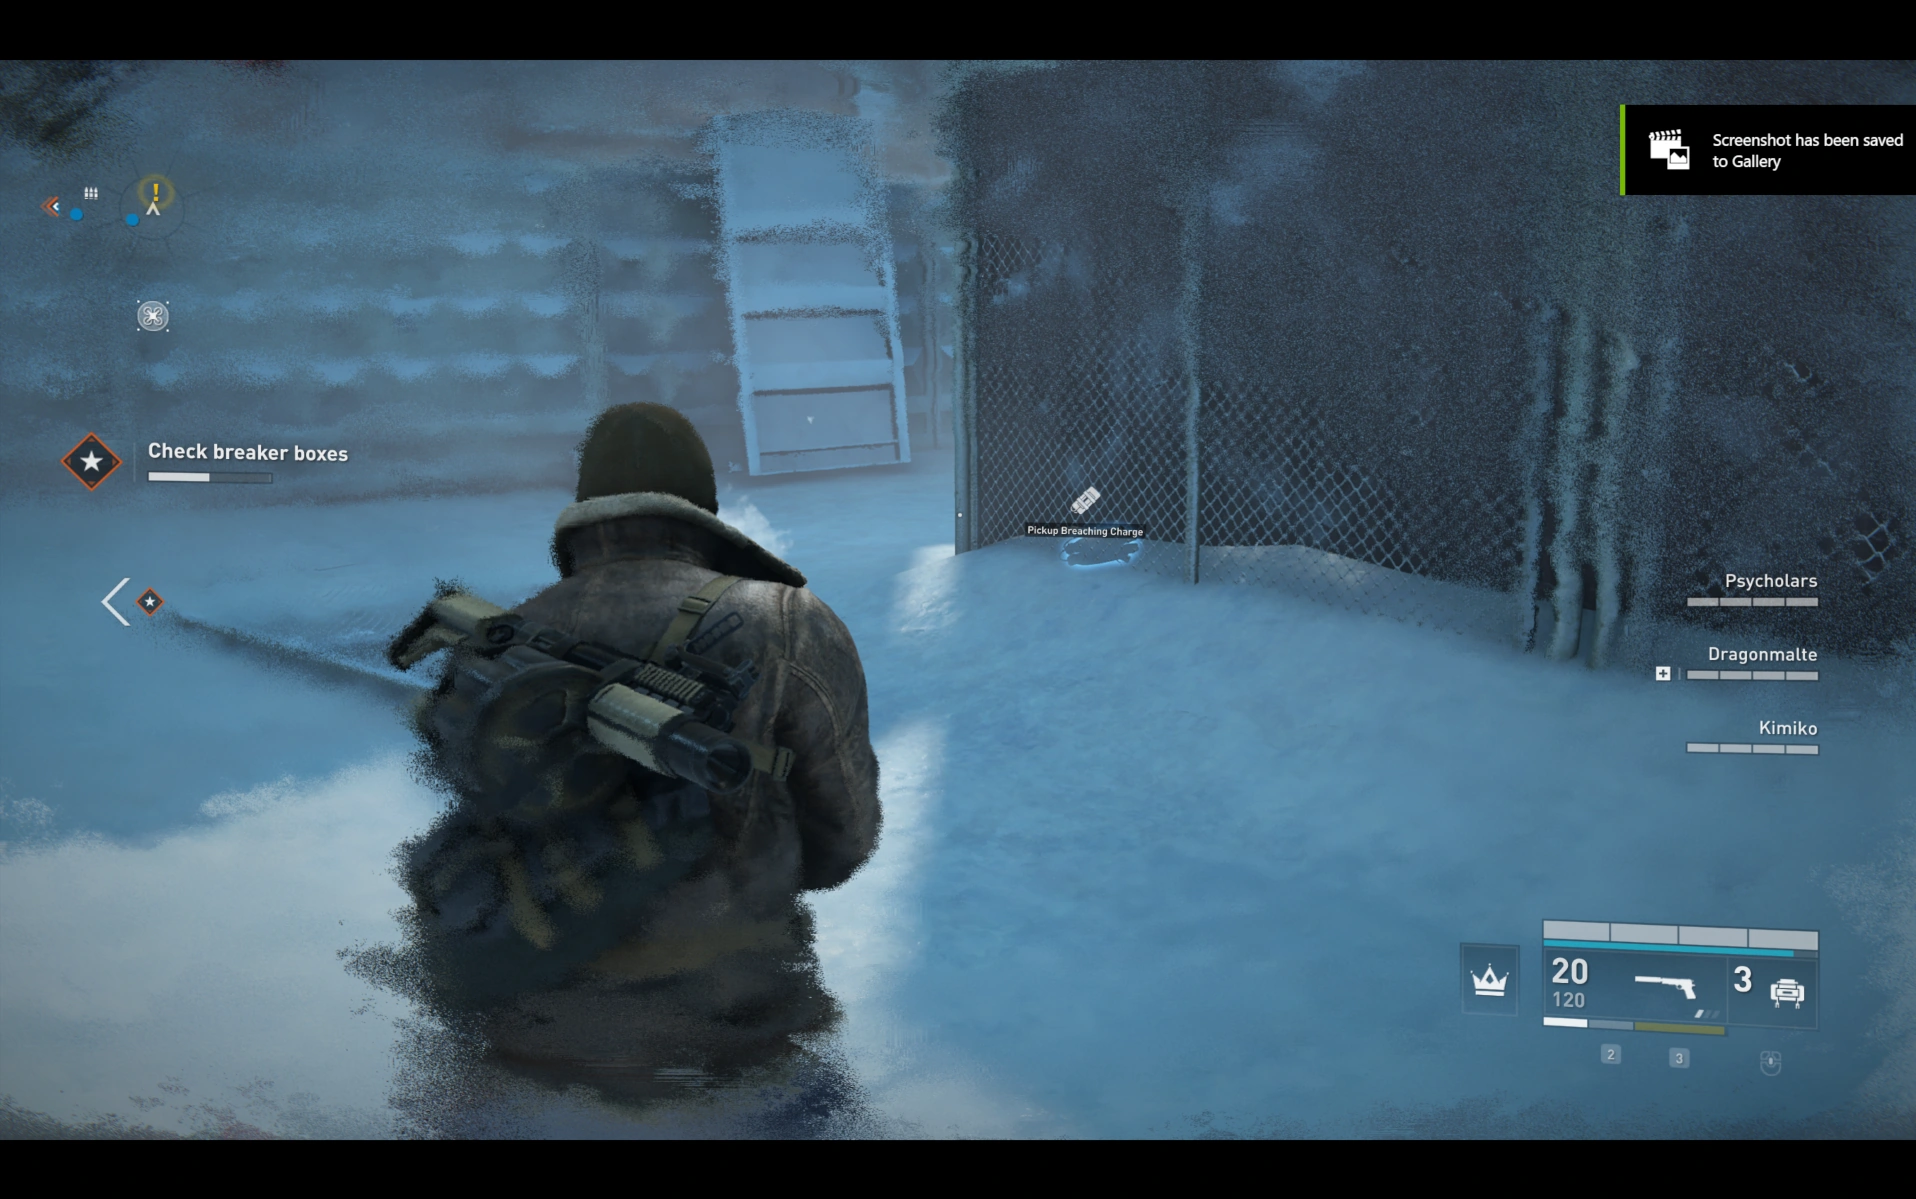
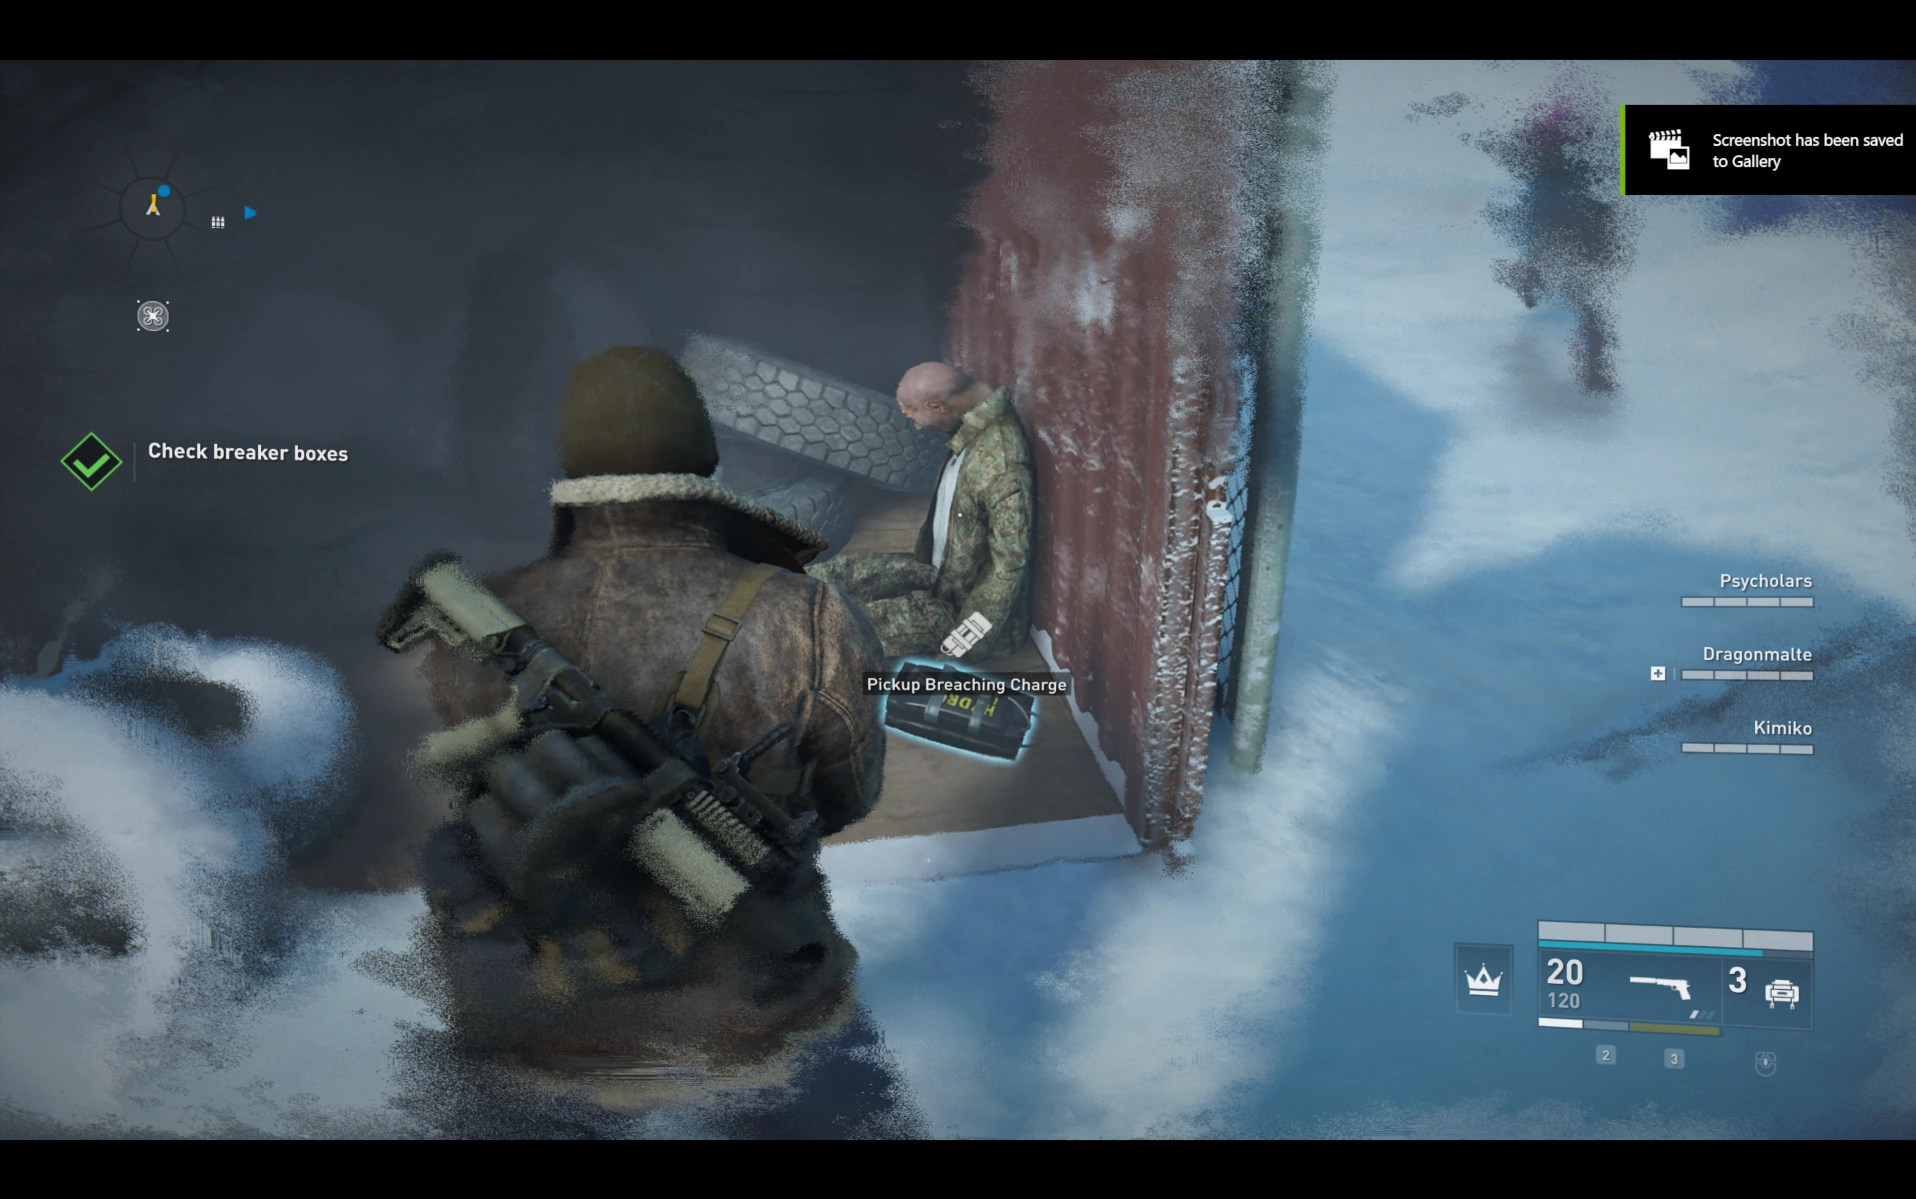
After the town square, on the left side before you enter indoors to the next heater - be careful, the doors close once all players are inside
Location 5: ![]()
After the town square, on the right side before you enter indoors to the next heater on the small container, in a crate.

Location 5: ![]()
After the first defense, go out of the safe room and turn right. Behind a wooden crate.
Location 6: ![]()
Location 7: ![]()
Location 8: ![]()
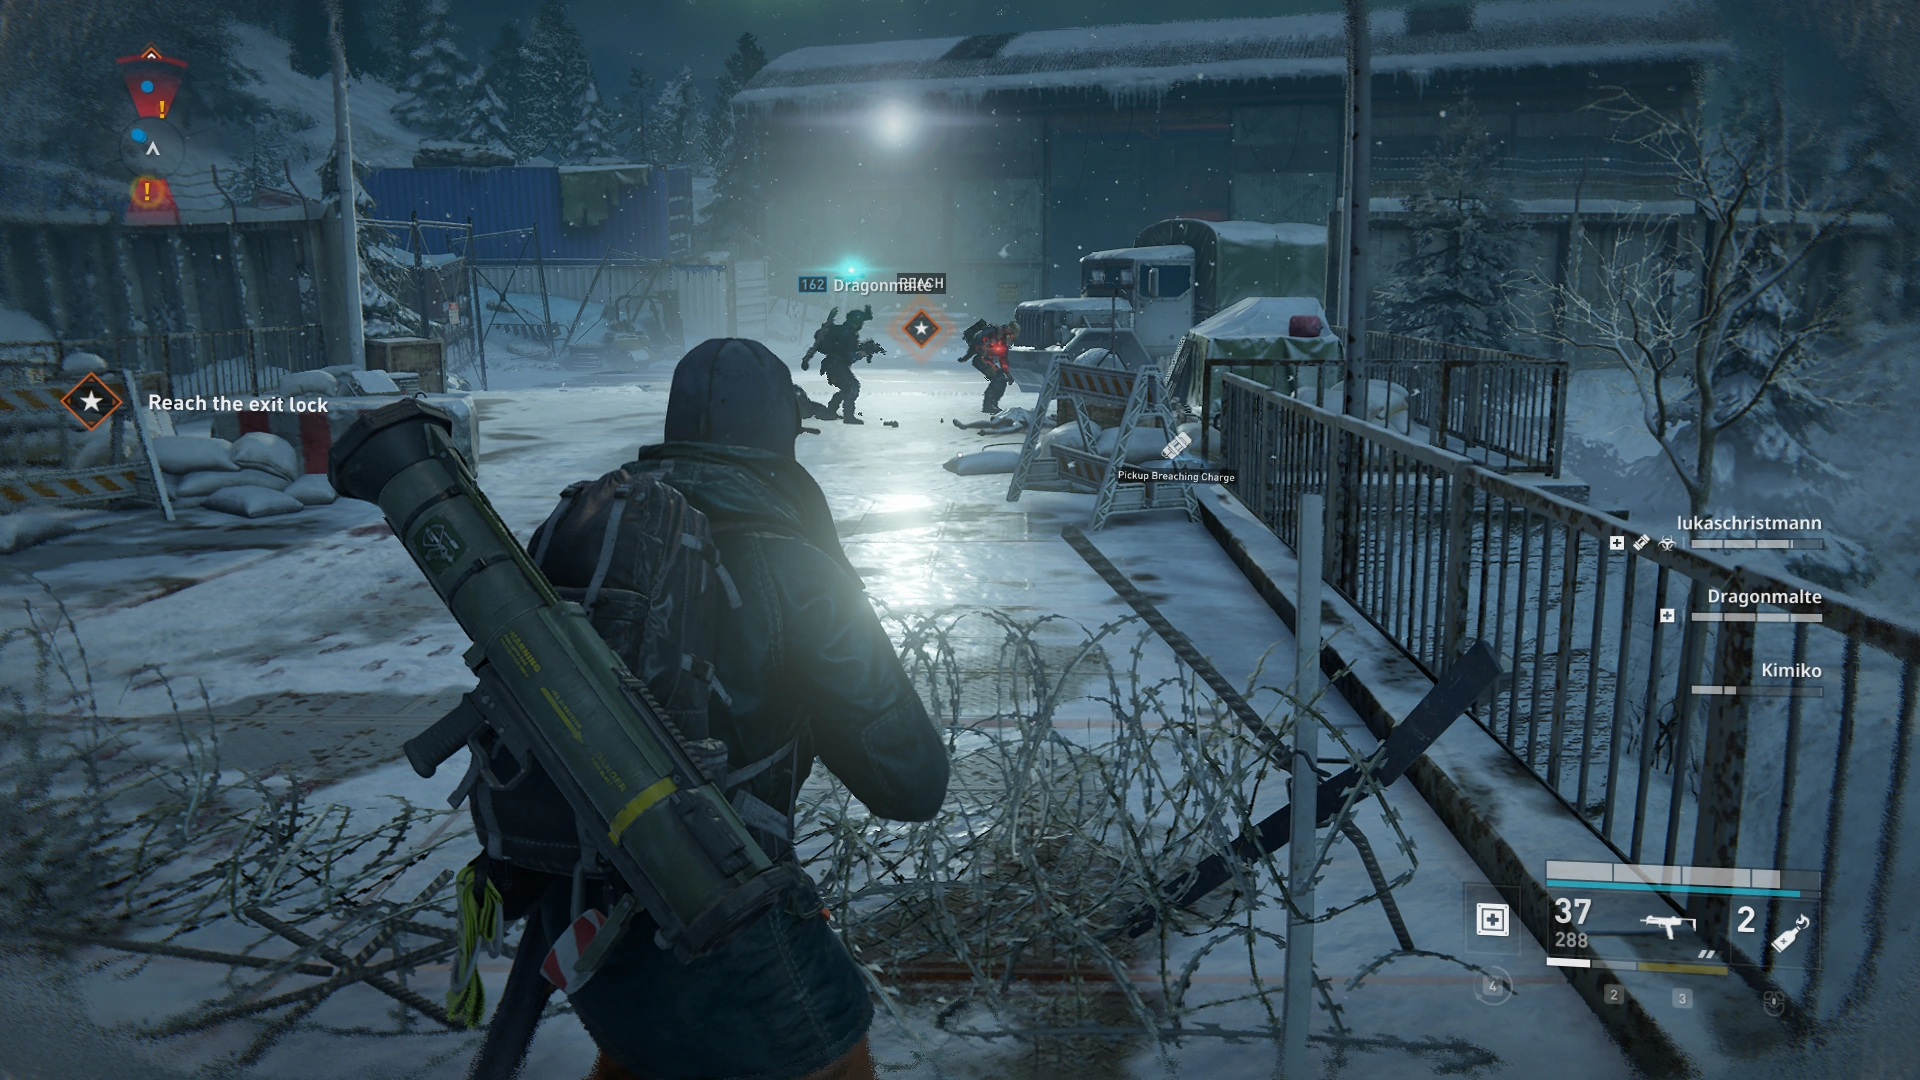
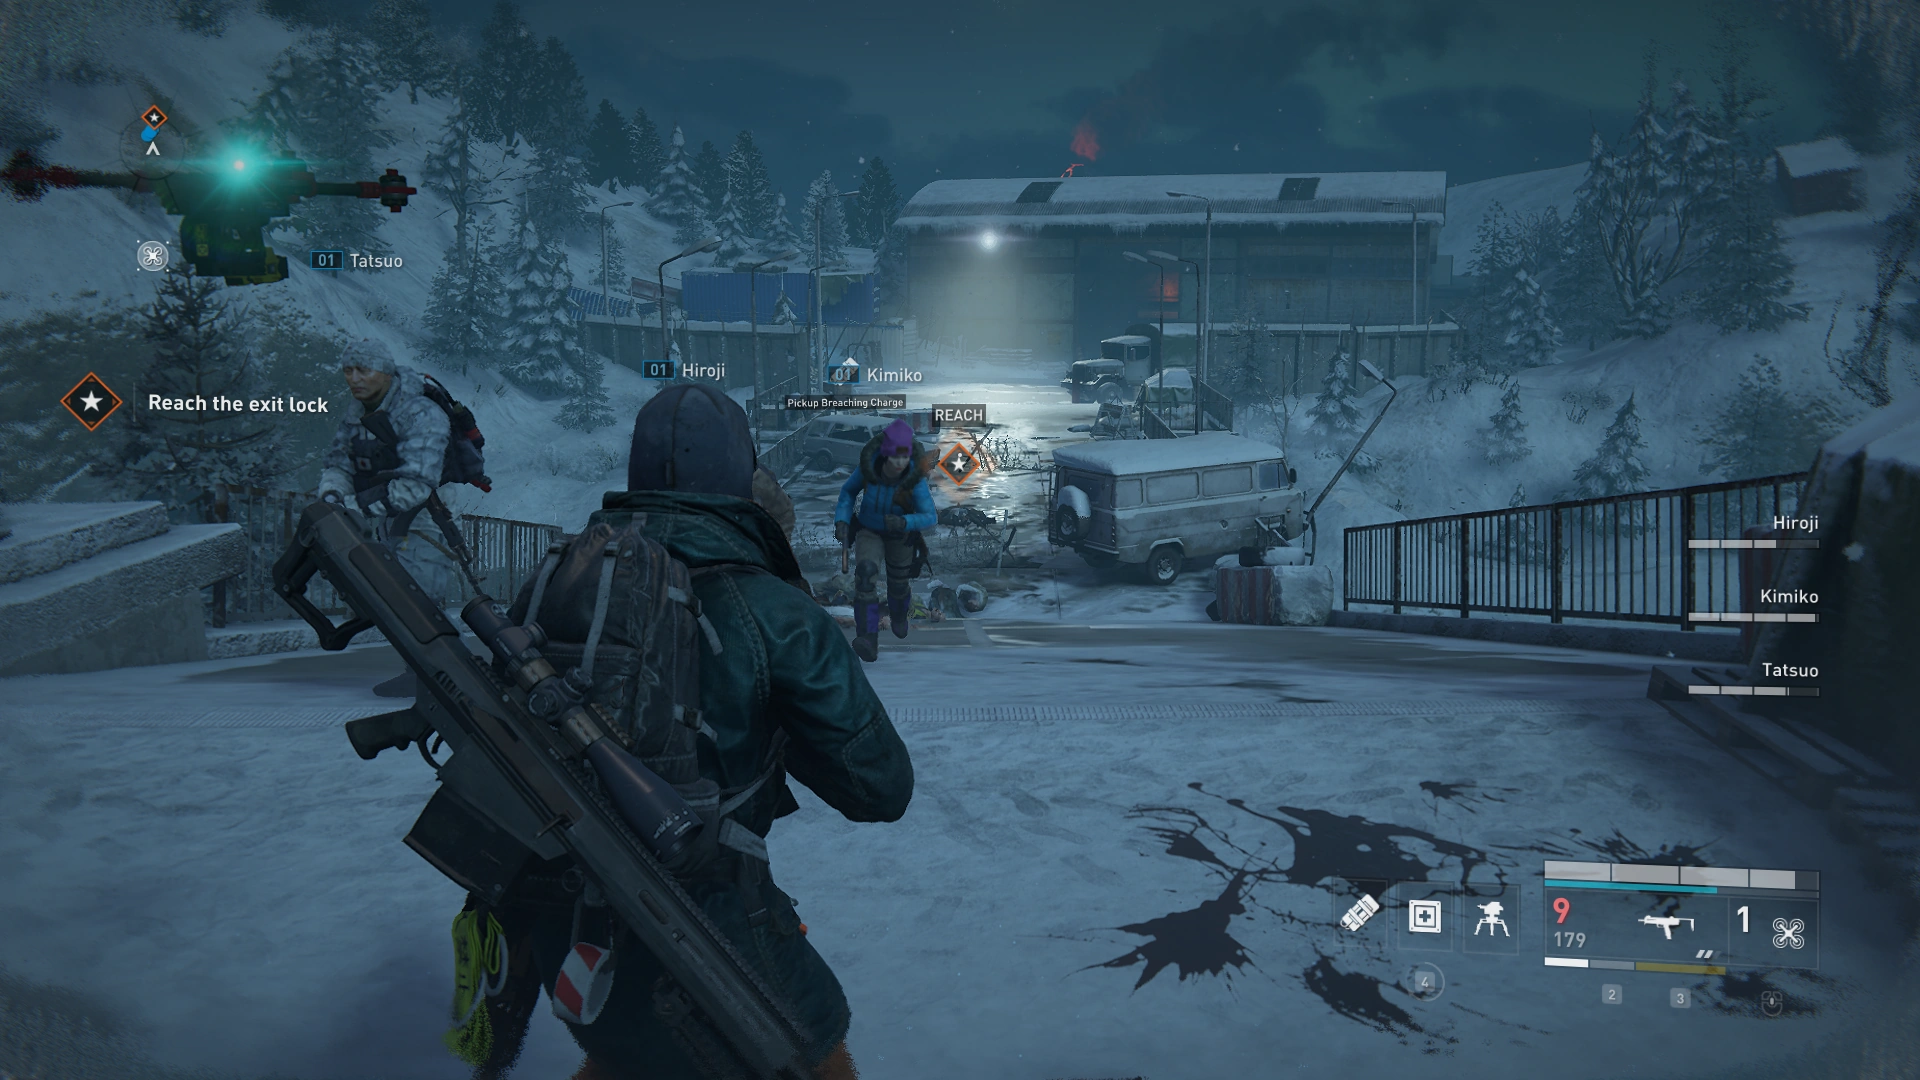
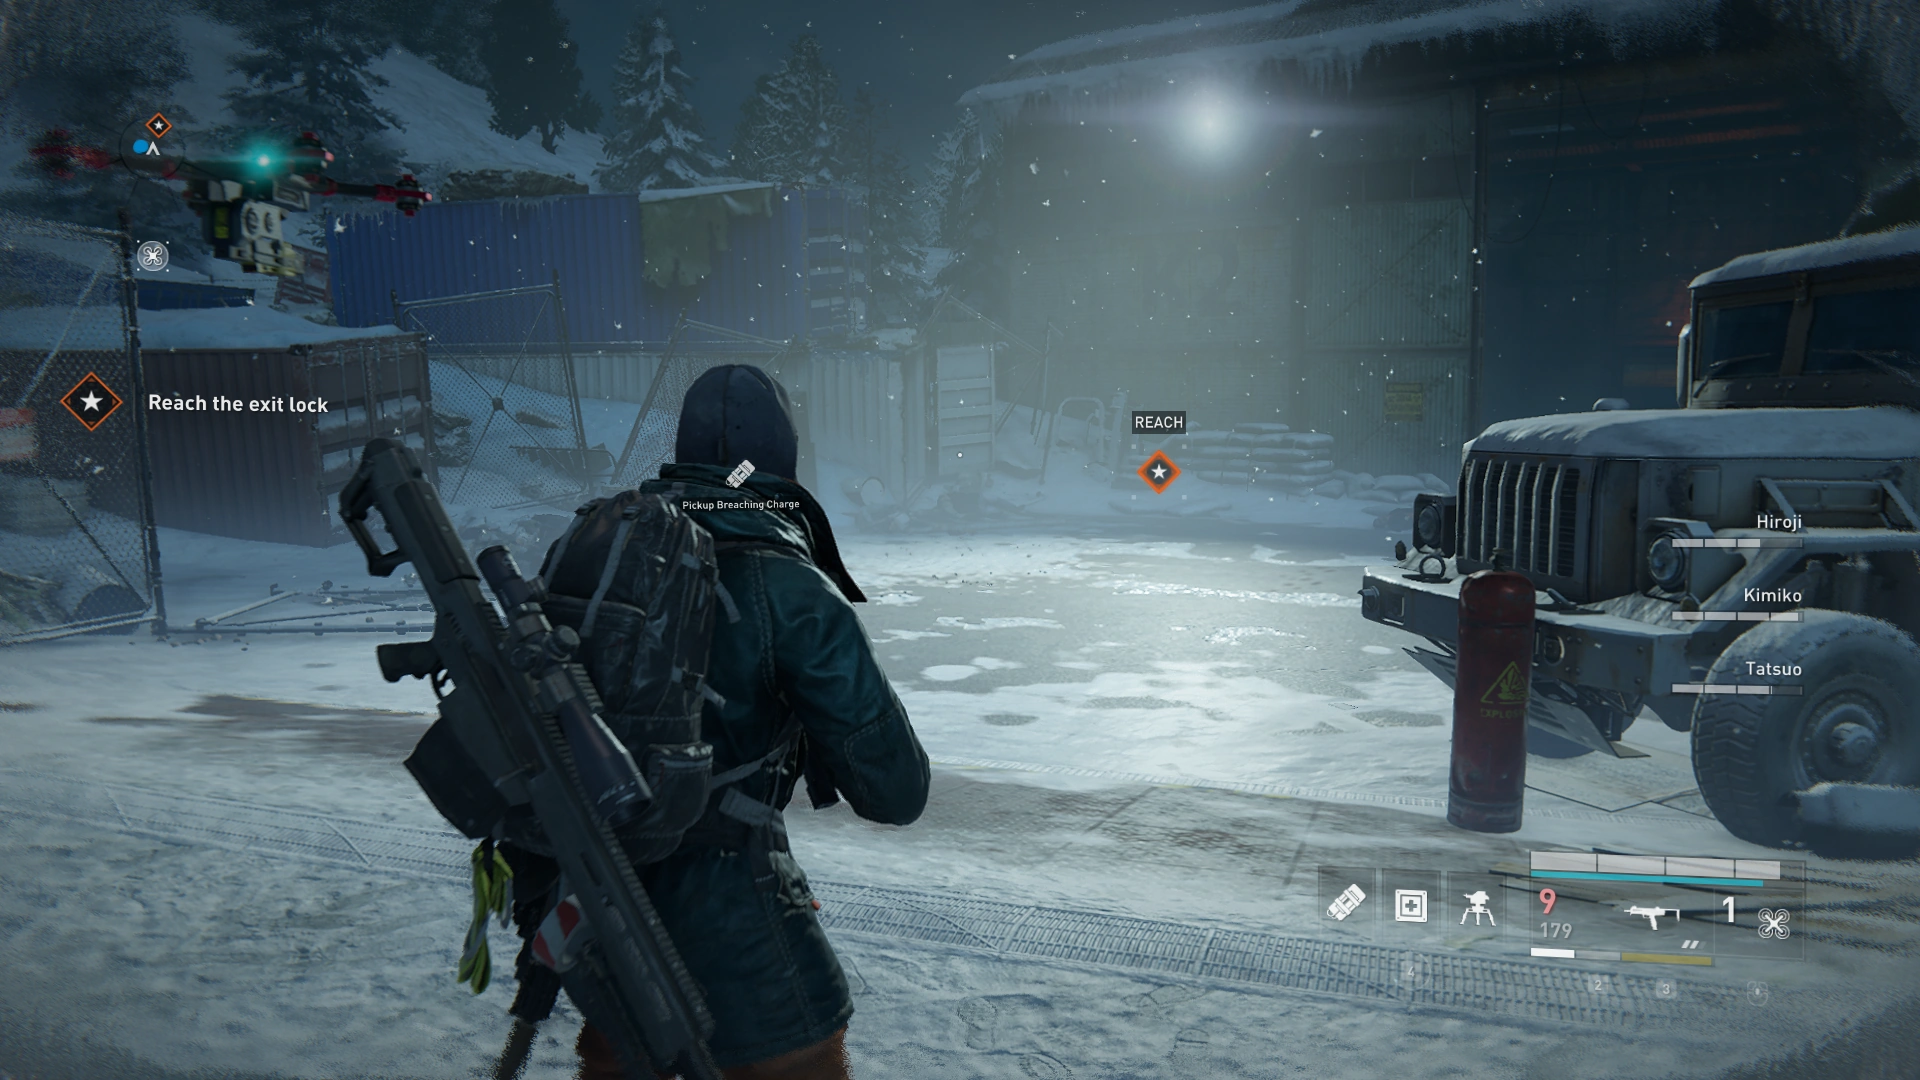
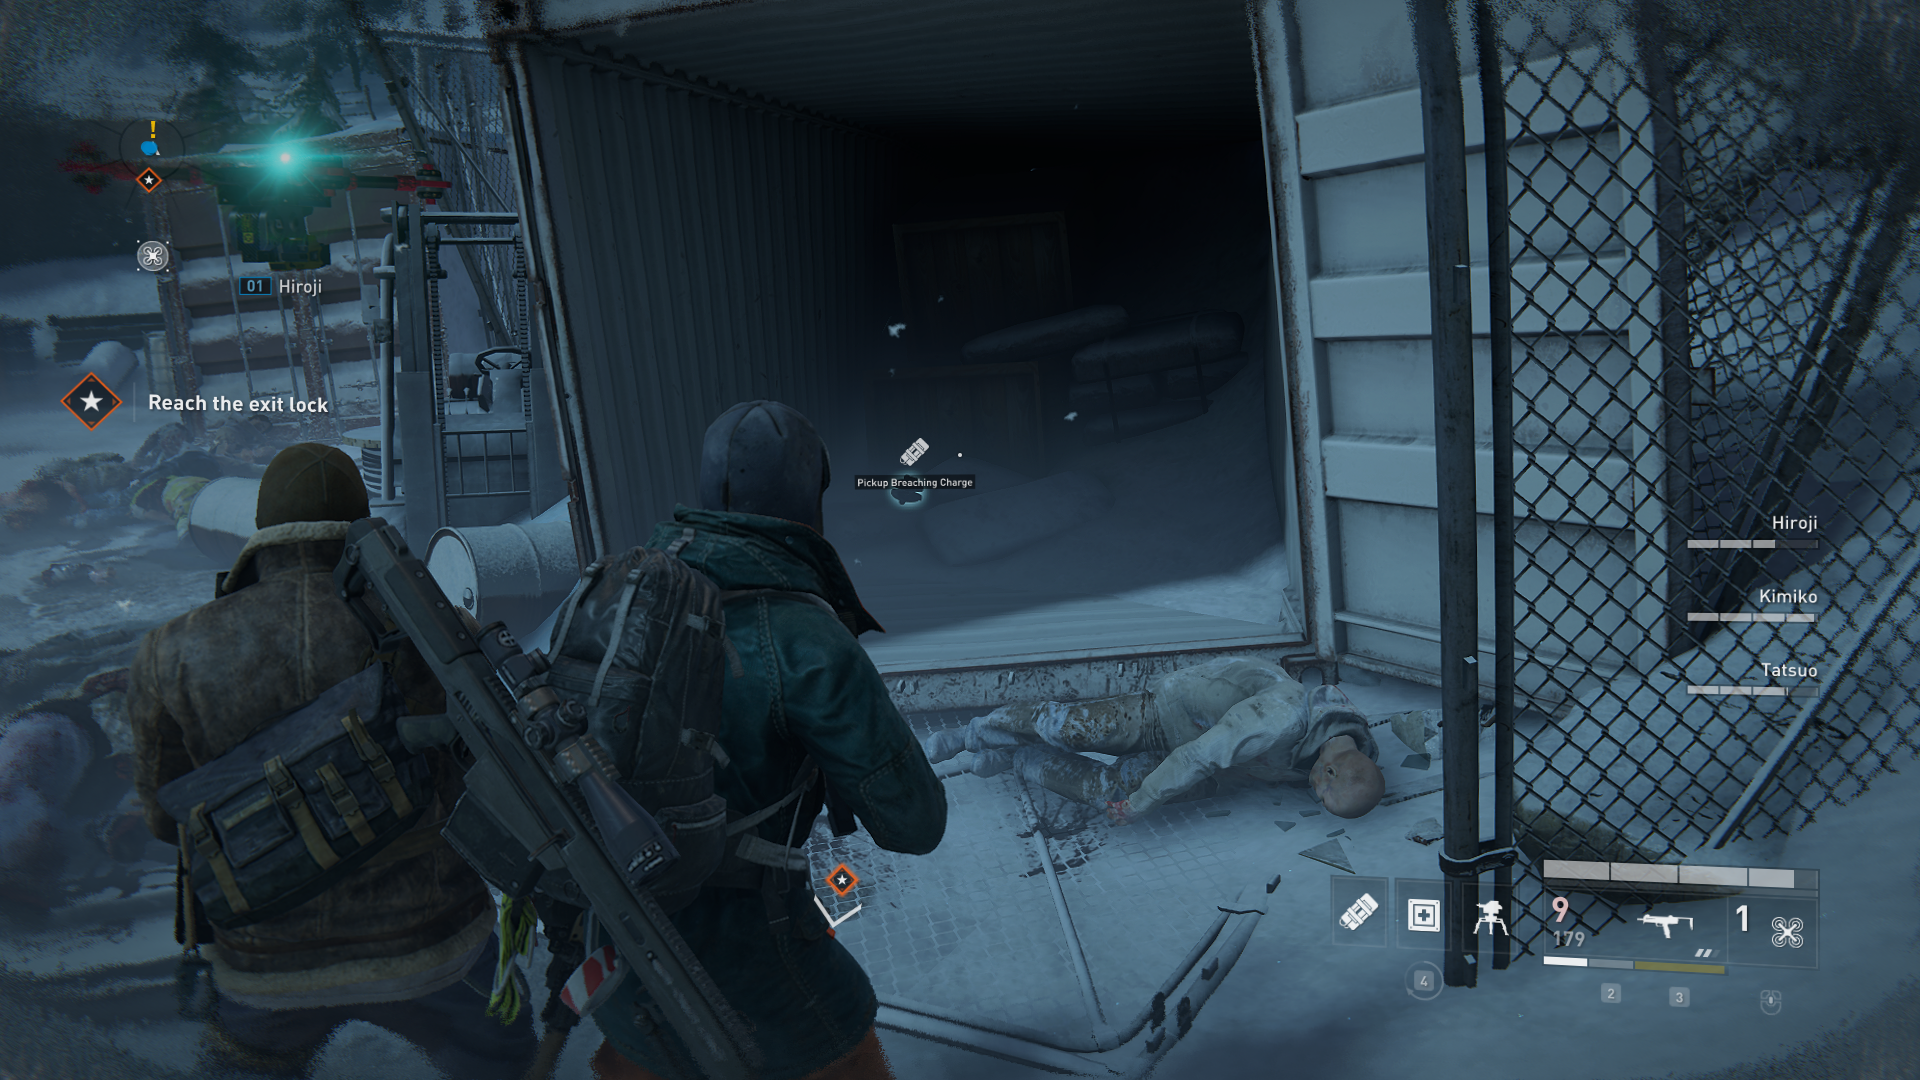
Chapter 3: Atomic Alliance[]
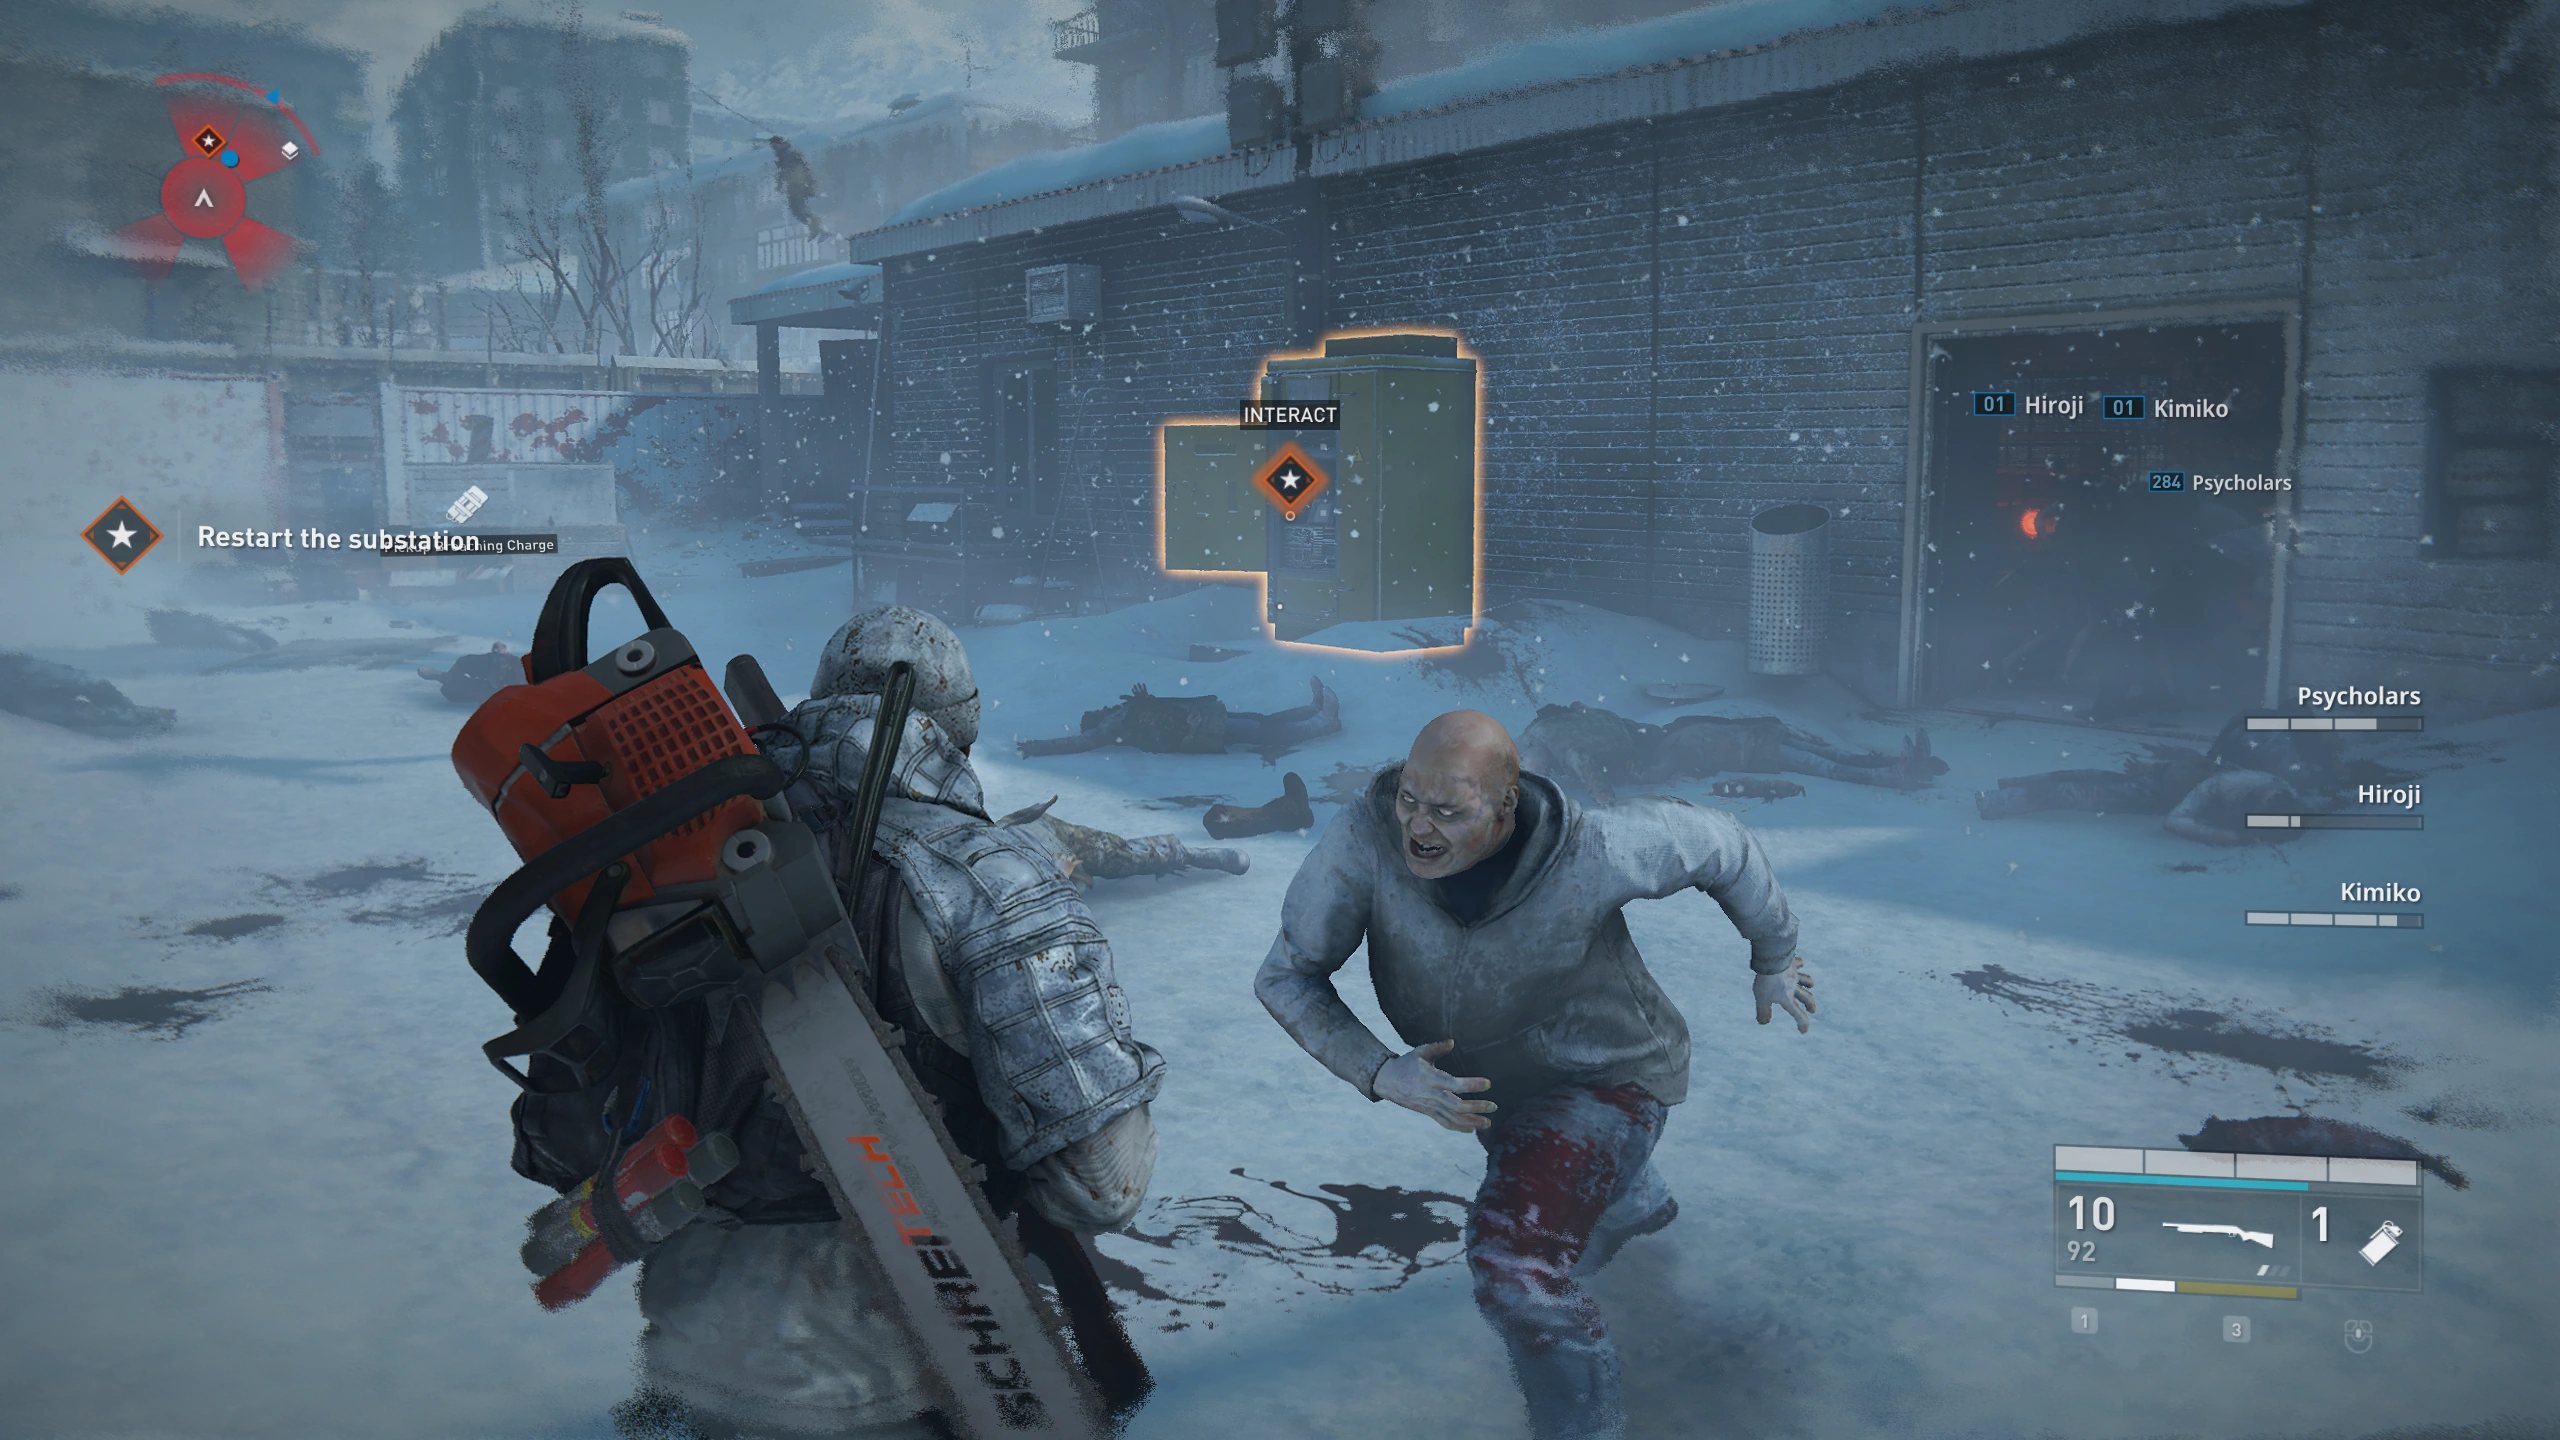
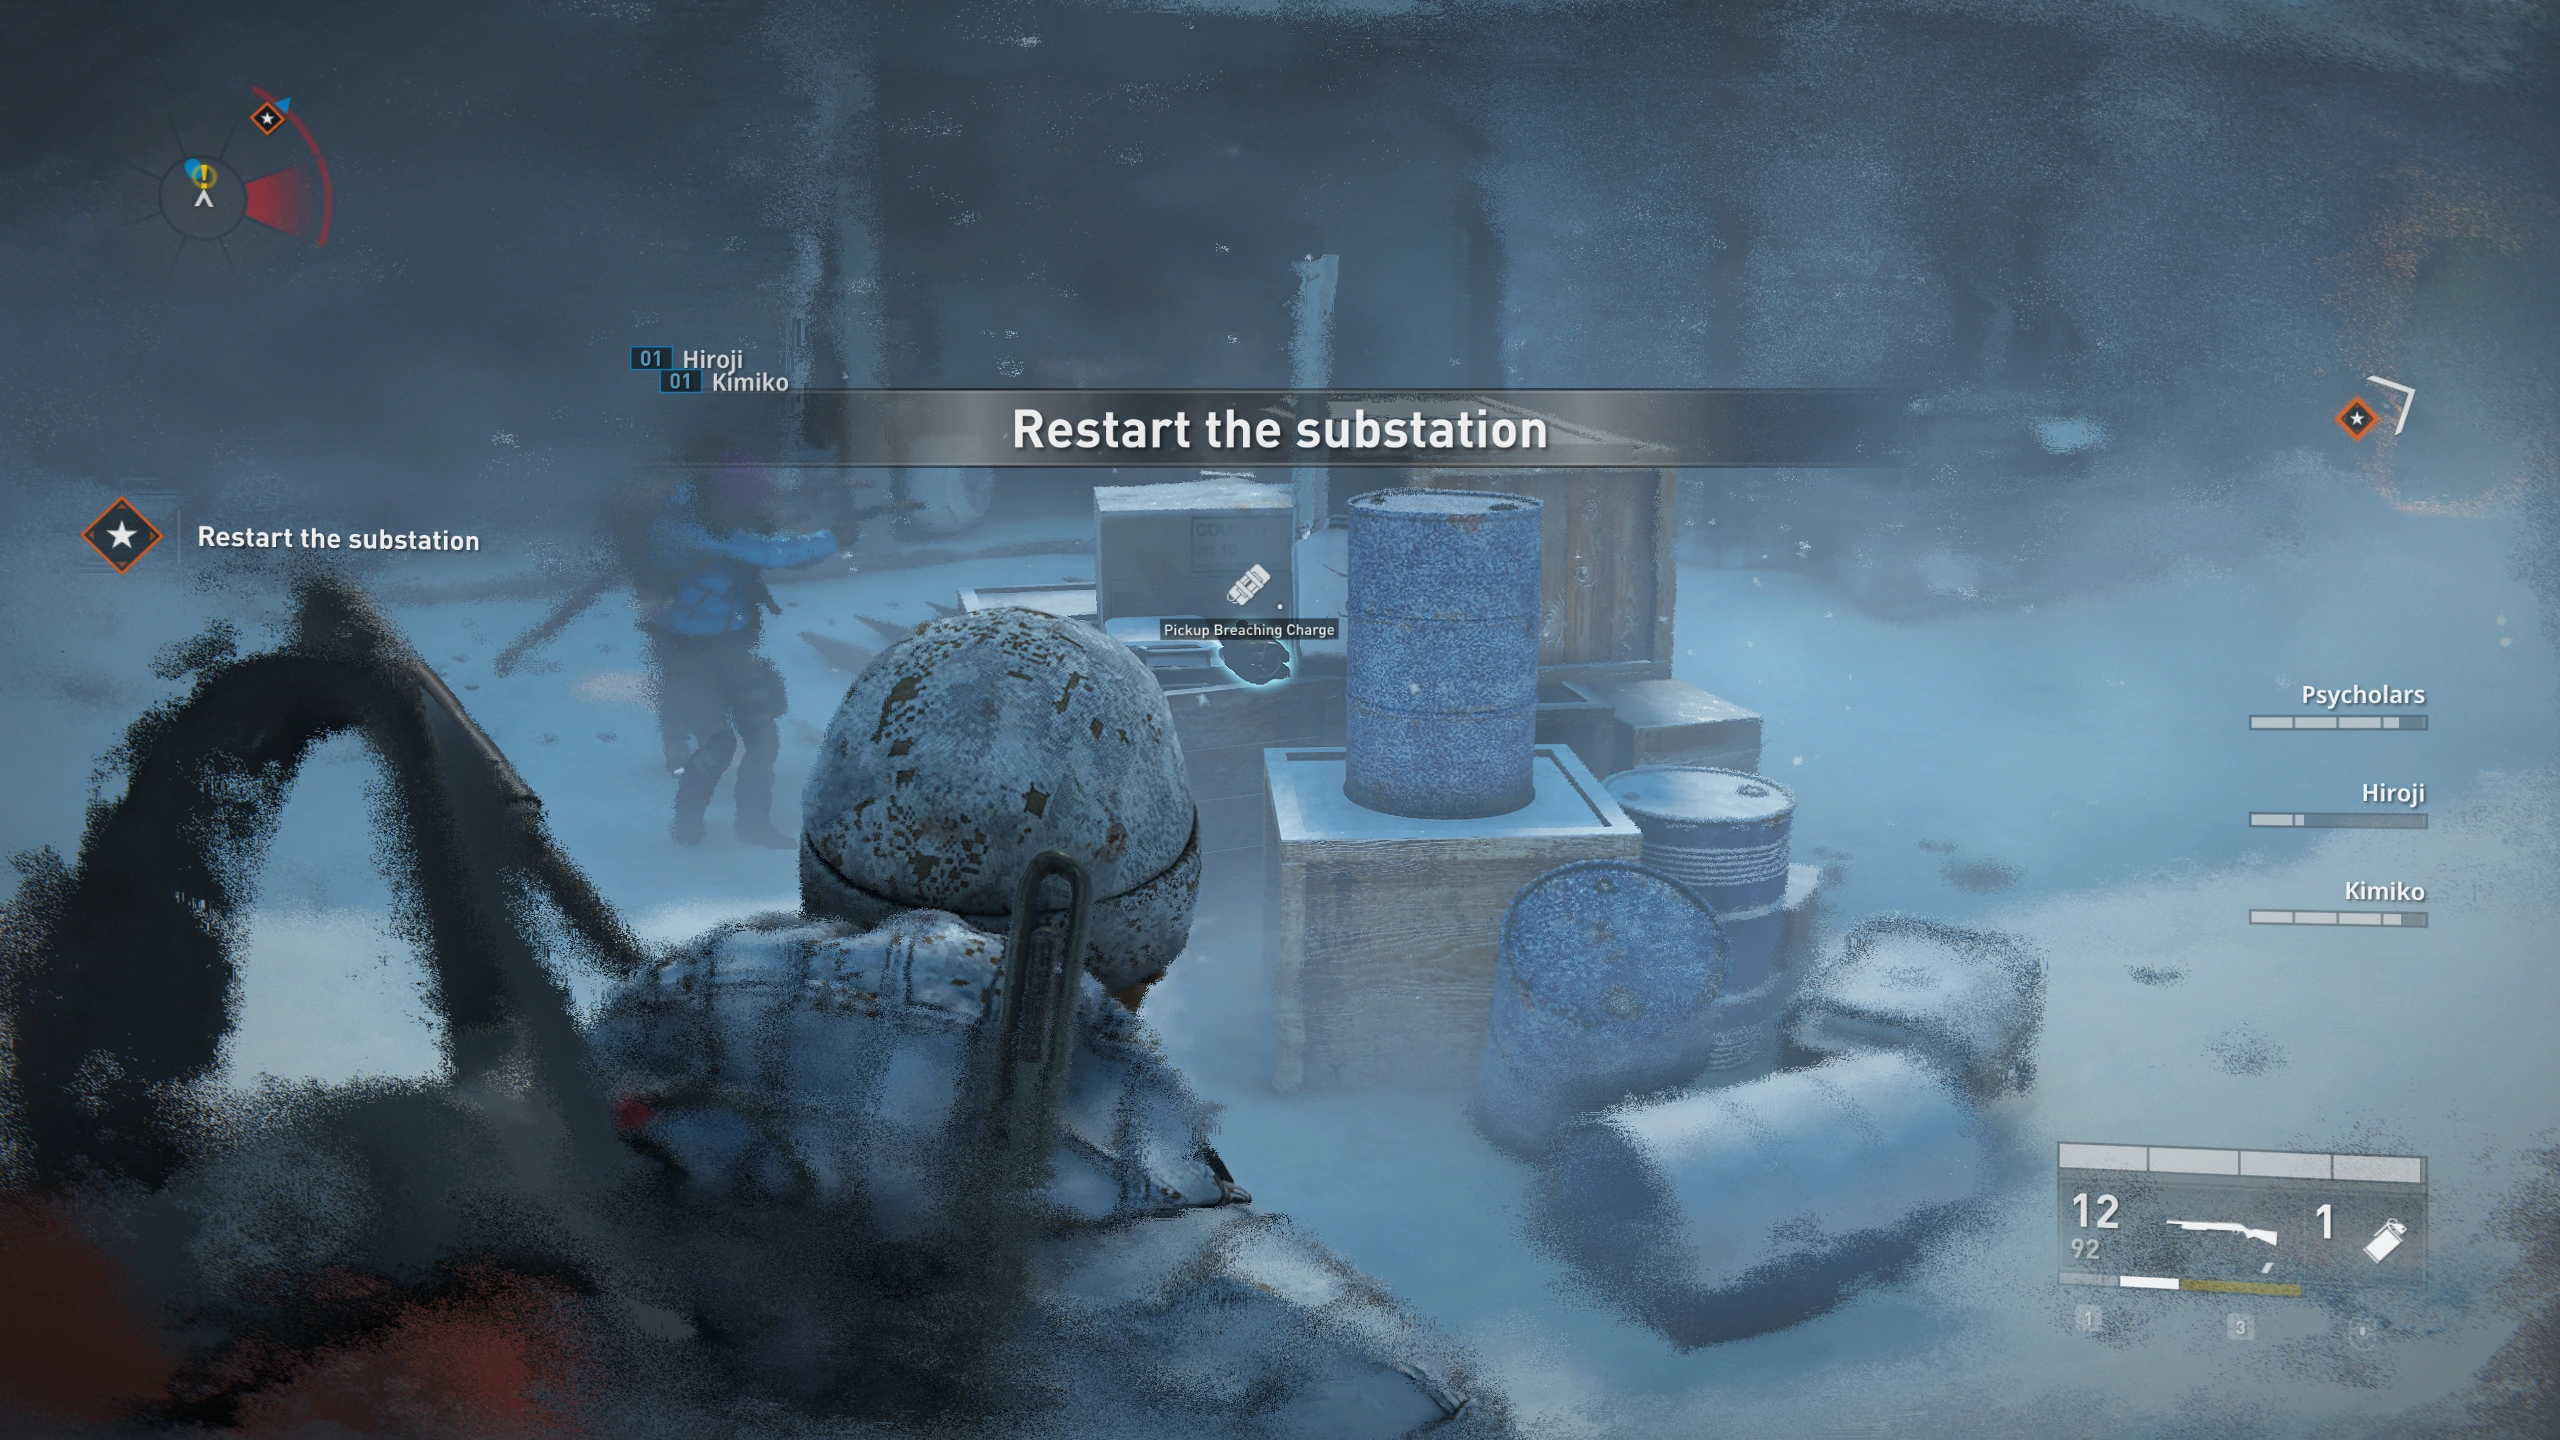
Location 1: ![]()
In the area towards the control room, you can find the breaking charge behind the door, if you walk into the next room.
Location 2: ![]()
If you go to right in the main area, the breaking charge can be found between the pallets.
Location 3: ![]()
After assembling for the first time and meeting up with the escorted npcs again, leave the room and turn left. The Breaching Charge is in front of the fence.
Location 4: ![]()
In the area of the first defense head to the second half and turn left. The Breaching Charge is in a corner at the end of the tunnel.

Location 5: ![]()
In the area where you have to search for a keycard, there is a garage at the far left end. The Breaching Charge is on a truck on the left side.
Location 6: ![]()
At the end of the bridge, where you have to fight a small swarm, to the right, between some sandbags.
Location 7: ![]()
At the end of the bridge, where you have to fight a small swarm, is an open container to the left. The Breaching Charge is in the container.
Location 8: ![]()