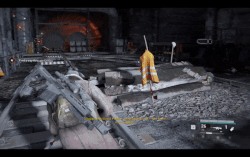
The Bomber is a zeke dressed in a slightly torn black military combat uniform with head covering, a tan tactical vest with several pouches, a tactical SCBA and PAPR system connected to a black breathing mask, combat boots, a black combat glove, a black military tactical belt, and a tan tactical helmet with a set of noise reduction headsets and panoramic night-vision goggles with the battery pack attached to the back by a helmet bridge. A tan drop leg holster carrying a pistol rests on his right thigh while a drop leg pouch rests on the left thigh. A watch rests fastened to the front of the vest's left shoulder strap. A utility pouch attached to the right of his vest has three glowing red lightsticks secured through the MOLLE webbing. Several straps and harnesses are wrapped around his uniform.
Three heavily blood-coated claymores mines are strapped diagonally across the front of the Bomber's vest, each fastened by a pair of side release buckles.
The Bomber's black combat uniform has large tears across the right upper arm sleeve and the left forearm. His right glove is torn as well and he is missing his left glove entirely. The SCBA cylinder monitor that rests on the front has a small section of one of its cable coverings cut, exposing the wires underneath.
The night vision goggles the Bomber wears are still functional, which causes the peculiar green glow on the lenses of his breathing mask.
Abilities & Behavior[]
The Bomber mostly acts and behaves like any other regular zeke. However, on top of the regular growls he makes, he also produces extremely mechanical-sounding groans and constant beeping noises due to his equipment. Other sounds that he makes include blaring sirens, distorted breathing, and lightly-scrambled radio frequency noises.
The Bomber has the ability to cause a large explosion. If the right circumstances are met, his chest bombs will be primed and armed to blow up. A suicidal attack with lethal results when successful, the Bomber should not be toyed with as the explosion he creates is big and deadly.
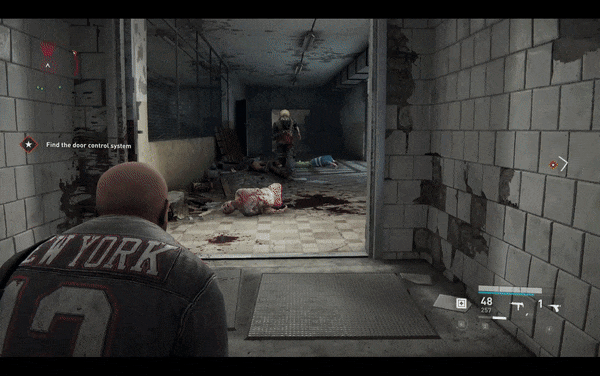
While the Bomber is a dangerously destructive foe, he can also be helpful towards the survivors by offering loot should they manage to take him out without making him explode violently. With precise shots to areas outside of his chest and torso, the Bomber will be forced onto the ground, leaving him a vulnerable and miserably writhing zeke waiting to be killed off properly. However, should survivors leave him down for long enough, he will eventually explode on his own.
Strategy & Tactics[]
"The Bomber is a walking explosive with a sensitive detonator. If you shoot him anywhere besides his legs or let him come near you, he will explode."
"The Bomber is always carrying something useful. Shoot him in the legs and finish him with a melee strike to keep him from blowing up and save the loot."
― Tutorial Tips
Role[]
The Bomber is an enemy capable of exploding, delivering huge amounts of damage across multiple survivors. However, he also drops rewards for skillful takedowns.
General[]
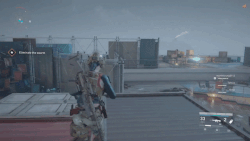
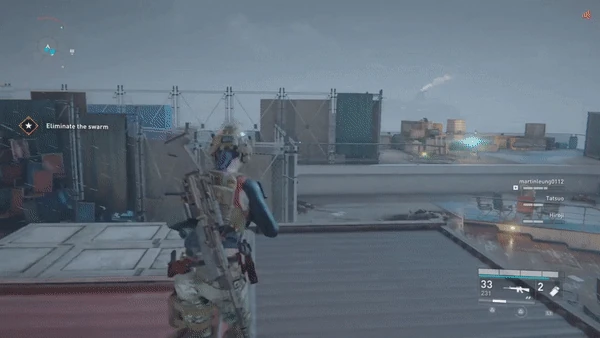
Keep your distance. Given that the Bomber creates a large explosion on death, staying away from him as much as possible is the very least you can do. On higher difficulties, the Bomber can prove devastatingly effective at crippling a closely packed team of survivors. Distancing yourself from your teammates when the Bomber is around or running away if he is chasing you can reduce the risks and the damage you and your fellow survivors take from his death explosion.
Listen carefully. The Bomber makes a lot of peculiar sounds and the audio cues he makes will be important in making your next move. As usual, he makes distinctly mechanical groans to announce his appearance so be prepared to act once he arrives. When near survivors, he will start beeping which indicates that he has started the countdown for his explosives. The beeps will progressively become faster until he makes one final beep and explodes. When shot down, he will beep as well. However, in this situation, it does take longer for him to self-destruct so do not worry as much when approaching him for a melee finisher.
Always mark your targets. As with all special zombies, marking lets players know where a particular threatening zeke is and/or where it is about to go. The red outline can be seen through obstacles and is hard to miss, so press the key that marks them and make their appearance even less of a surprise. Given how dangerous the Bomber can be, mark and single him out if you cannot deal with him yourself at the moment. If your teammates spot an incoming Bomber, they can use that info to their advantage such as being able to more easily identify and target his legs.
Be aware of alternate routes. Most special zombies prefer to arrive through paths and areas that are less common than the ones where many zekes congregate towards. Be mindful of your surroundings, watch your back, and keep note of any uncommon spots where special zombies may appear from.
Communicate. If you have a microphone, use it. Many players often just shoot at a Bomber until he blows up, not knowing that he carries helpful things around with him. If you have spotted a Bomber, and you plan to carefully defuse him, telling others of your actions could help avoid a nasty situation where they may shoot him on sight while you are in the danger zone. Keep in mind that this, as well as team chat, only works across PC players only. Players of the Xbox and PlayStation versions of the game cannot communicate across different platforms. Groups containing players from different consoles will require third-party communication tools to communicate with each other.
Bots often go for Bomber-defusing shots. Bot teammates almost always shoot the Bomber in areas that disable him whenever they have a clear shot of him. Use this to your advantage if a Bomber has been carefully struck down. You can then easily finish him off with a melee finisher and take his loot with less effort on your part. However, depending on the situation or the weapons they happen to be carrying, it is still possible for bots to blow him up anyway, so do not expect the same results every time. Given this possibility, you should also maintain a good distance until you see that the Bomber has been shot down. Bots can also shoot him after he has been disabled. The reason for why they may do this is unclear, but they may shoot him accidentally while aiming at other zekes, so be quick to defuse the Bomber in situations where an oncoming wave of enemies are approaching to avoid this happening.
Against[]
Despite his militaristic appearance, the Bomber is as weak as a normal zeke. While he is capable of surviving a few headshots thanks to his helmet, he is easily killed with a couple of shots or a solid hit to the chest where his explosives rest.
The Bomber can produce a highly damaging explosion. Whenever the Bomber is set to blow up, he explodes in a large fiery ball of blood, body parts, and scraps of destroyed military-grade equipment. The closer someone is to the explosion, the more damage it causes, and the explosion can hit multiple survivors. This is why it is important that players run away from the Bomber because the more space that is made from him by the time he explodes, the less damage you will take even if only by a bit. If the right moves are made, you can entirely sidestep, outrun, or take cover out of his effective explosion area and avoid damage entirely. If you allow him to be right next to you when he blows, you will take the full brunt of his suicide attack which can easily spell incapacitation or death for you and others in higher difficulties.
The Bomber's explosion has a chance of stumbling you. If the Bomber goes boom, you may stagger and be forced into moving in a direction opposite of the explosion, unable to do anything until you recover. If the explosion does not incapacitate you, you might be left vulnerable to any nearby enemies for a very short moment afterward as you will be momentarily stunned instead.
Do not let the Bomber approach you. If he runs up and manages to get close enough to the proximity of a survivor, he will automatically trigger a countdown for his explosives to go off after a small amount of time has passed. Each of the Bomber's explosives during this state makes loud beeping noises and blinks bright red.
The Bomber at this point can no longer be carefully defused. Once his explosives blink red, he is guaranteed to explode no matter what. Attempting to shoot his legs, or anywhere, will likely cause him to blow up instantly. Since most forms of attack will cause him to immediately self-destruct, the only option now is to run away and/or shoot him once enough distance has been created to avoid his death explosion.
If a Bomber is chasing you with his vest fully armed, do not run to your teammates. You will end up putting them in serious or mortal (not to mention highly unnecessary) danger. Keep the Bomber from getting near anyone else and harming them as well when doing so can be avoided. If keeping your teammates away from the blast radius means putting yourself in most of the danger, then so be it.
Shooting the Bomber in the chest will cause him to trigger his countdown. Just like letting him approach you, shooting him anywhere in the body (without immediately killing him) will cause him to prime his explosives to blow up after a short while. The same rules still apply, so either keep shooting and kill him or run away.
The Bomber takes additional damage to the legs. This unique weakness is crucial in disabling him and earning his valuable loot. In order to receive his loot, two steps must be followed:
Shoot him in the legs until he falls down to the ground.
Performing a melee finisher.
If you manage to shoot the Bomber enough times in the legs, he will be put in a disabled state where he will be brought down to the ground laying over his explosives. He will uselessly struggle on the floor and flail around, unable to move or get up. Each of the Bomber's explosives during this state makes loud beeping noises and blinks bright yellow.
The Bomber can now be killed with a melee finisher. Simply approach him and use a melee attack to "defuse" him. Attacks from the Chainsaw also work. When the Bomber is killed in this manner, he will die without exploding and drop items that can be picked up by you or your teammates. An item he will always drop is a weapon. It can be either a random primary weapon or a heavy weapon. If a primary weapon happens to be dropped, it will be either tier II or tier III. The other item he can drop is a Virus Sample.He will only drop one of them the first time he is taken down without exploding. All Bombers afterward that are taken down with leg shots and killed with a melee finisher will not drop another Virus Sample, even if players did not take the one dropped from the first one. Bombers will also not drop another if the player that was carrying the Bomber's sample dies.
Shooting the Bomber in the torso while he is down will cause him to explode prematurely. While you are capable of shooting him anywhere else while in this state, all that will accomplish is waste ammo. Once you see him fall to the floor and flash yellow, cease fire on the Bomber. This is especially true if a teammate is rapidly approaching to deliver a melee finisher. Should the Bomber be left to wallow on the ground long enough, he will eventually explode on his own.
The maximum amount of time the Bomber has before his self-destruct timer is up is different depending on what color his explosives are blinking. If his explosives are blinking red, everyone will only have five seconds to get away from him. If his explosives are blinking yellow, everyone will have 20 seconds to make a move before he explodes on his own. During the last three seconds of his 20-second countdown, the beeps will become much faster. Unless you are close to the Bomber when you hear these rapid beeps, run for cover. You may not make the last-second defusion, so just sprint the other way and hit the deck instead of risking it.
Although the easiest way and most well-known method of disabling a Bomber is by shooting his more vulnerable legs, there are other ways to do disable him.
Headshots: This alternate method of disabling him is only slightly more difficult to do normally given that the Bomber's head is a smaller target compared to both of his entire legs. You can also accidentally hit his body and blow him up more easily. Additionally, he can survive several headshots before he finally goes down. Although it is possible to combine the damage from shooting both his head and his legs, it would be more practical to simply attack his legs only. However, shooting him in the head becomes practical when the Bomber is trying to break through a door or barricade. Given that almost every door that can be closed covers a large area of a zeke's body, the Bomber's legs would no longer be easy targets for disabling him unless you were somehow behind him. However, the Bomber will stand in place, making his head an easier target than if he was moving around. Carefully shoot his head and he should be brought down to the floor.
Arm shots: Shooting the Bomber in the arms will not trigger him to explode and enough damage can cause him to fall. However, this is an extremely impractical feat to accomplish due to the Bomber constantly moving his arms as he runs towards you. Even while standing still, his arms are still fairly small targets and take some time and effort to shoot without accidentally hitting his chest. Just like with the head, it becomes much easier to hit when the Bomber is pushing up against a closed door with his arms reaching out.
Angel shooting up a masking stim and striking a clueless Bomber until he falls and drops his loot
Sergei puts all of his faith in a kick to disable a Bomber that suddenly descended next to him like a graceful angel from above, mutters a quick prayer under his breath, then delivers another swift and merciful kick to finally put him to rest at last
Melee: Despite how stupid it sounds, it is possible to melee a Bomber into submission. As explained earlier, approaching the Bomber is what causes him to prime his chest bombs. Rendering yourself invisible in the eyes of the zekes can prevent the Bomber from seeing you and automatically triggering his explosives into a countdown, and this can easily be achieved using masking gas. While masked, the Bomber can now be approached without risk of him setting off the timers on his explosives. Attack him with your melee weapon (attacks using the Chainsawwill not work) until he goes down before the masking effect wears off. With the Bomber disabled, deliver the final melee strike and earn your loot. Technically, this method can be done without the masking effect, but they are extremely situational and marginally slim chances of being able to pull this off in time as there are just very few situations where the Bomber can be approached unmasked without immediately setting off his timer.
In general, shooting the Bomber in areas besides his torso will work. While under the effects of masking gas, you can safely approach and attack him in melee without arming his bomb vest. While his legs remain the most consistent and easiest targets, other methods do exist and it would benefit players to know them for when the situation would apply to try other methods.
Since the Bomber only drops a single Virus Sample for the entire chapter, it might be a smart decision to kill most of the Bombers that appear throughout the majority of the game. Only towards the end should you make an active effort to disarm any Bombers that appear. When enough damage is taken, a Virus Sample leaks out its content and infects you. Subsequent infections caused by a Virus Sample will take even less damage to infect you again. Instead of worrying about cleaning yourself in the middle of a swarm or a zombie wave, it will be much more convenient for you to wait until a much later point in the game before picking up his sample and remain in relative comfort up until then.
Another thing you could do is wait until you are able to escape before picking up a Virus Sample. Instead of immediately picking up a Bomber's sample, keep a mental note of it and its location. Wait until somewhere just before the end of the chapter when it is time to leave or you are just about done eliminating the last of a large swarm. Once you reach this point, go back and pick up the Virus Sample. It is important that you do not wait too late to pick up this sample or else you will very likely put all your teammates' safety at risk or the ending cutscene plays before you managed to reach and pick up the sample.
Kimiko watches as a teammate blows up a Bomber that ends up taking an unfortunate Screamer down with him
You can use the Bomber's explosion to your advantage. The Bomber's explosion can kill/grievously injure other zombies. Depending on the situation, blowing up a Bomber on sight can be a great thing. The most useful thing a Bomber's explosion can be used for is killing other special zombies. Since special zombies sometimes come together in little groups, you can shoot the Bomber to make him explode to easily take care of any others. This is especially helpful if the Bomber happens to arrive alongside the Bull or the Infector. Given just how tough both of them are, blowing up the Bomber can deal some serious explosive damage, sometimes even killing them, and save you a lot of effort.
An advanced strategy is to shoot him in the legs and leave him on the floor, converting the Bomber into a landmine you can choose to detonate at any time in the next 20 seconds. As he squirms on the floor, you can wait for a more opportune moment to shoot him and make his death explosion really count. You should communicate with your teammates if you plan on doing this though since others may mistake your strategic tactic for simply not wanting to approach the disabled Bomber and take his loot.
Not all guns will work on the Bomber if you are aiming to take his loot. Be careful with what you use to shoot the Bomber. Explosive weapons such as the Grenade Launcher, Crossbow, and Advanced Combat Weapon cannot be used at all as it will immediately blow him up. While it is certainly possible to use them, practically all shotguns can present a challenge when attempting to defuse Bombers. Due to their natural spread, even a single pellet can accidentally hit the Bomber's chest, trigger his explosion countdown or blowing him up entirely. If you are plan to disable the Bomber with a shotgun, aim very low at his feet. They are the largest and easiest targets for shotguns and doing so will minimize the chances of the pellets hitting anything else. If a Bomber is approaching you from an angle where leg shots are too difficult, move away until you can get a clear shot.
Being killed by the Bomber's explosion will not cause survivors to return as a zeke. As is the case with any other explosive, being blasted will kill you without causing your corpse to reanimate.
The Bomber can get trapped in Barbed Wire. What is great is that the Bomber is now far less of a threat now that he is incapable of moving any further. On top of that, the damage caused by being in it does not trigger his explosives. You can use this to your advantage by shooting at his vulnerable areas, causing him to no longer be trapped in the wire, but also leaving him in his disabled state for an easy melee finish. However, you must act quick since you will only have seconds before the Bomber simply explodes on the wire. Additionally, other zekes may pile on or climb over and get in front of the Bomber, making him a difficult target to shoot at and take down without exploding.
Even if he is stuck and the Barbed Wire itself cannot set off his chest bombs, do not approach him. He is still capable of rigging his explosives to blow up if someone were to get close enough to him while he struggles.
There are a few instances where a Bomber can be disabled but still have his explosives blink red. The can occur if the Bomber is in an animation and receives enough damage to his legs, head, or arms to be put into his disabled state, and then receive damage to the chest. Because the Bomber is currently in the middle of an animation, he cannot go into his disabled state which is a different animation that can only be done while on solid ground. With the damage taken to his vulnerable spots, he will immediately go into his disabled state after finishing whatever animation he was currently performing, whether he was climbing, about to jump down from an obstacle, or even falling and landing. However, by taking damage to his chest, his explosives are triggered to inevitably explode. Combined, the Bomber becomes a deadly trap to unsuspecting players who know what to do when they see him down in his vulnerable state. While it is practically rare for this circumstance to happen by accident, stay aware. If you see a Bomber with a red light, never approach him even if he is down. Getting close will only put you in serious danger of his death explosion. It is especially worse if you manage to perform a melee finisher on him in the short amount of time before he explodes normally since you will be in the closest possible distance to him and suffer the full brunt of his deadly attack. Keep a safe distance from him and shoot if you see red.
The Gunslinger starts with a core perk called Gimme a Reason. This perk has passive buffs that improve the player's accuracy with guns. The Bomber is a fairly delicate target and his legs may not always be the easiest targets to hit, so Gunslinger's steadier aim can prove beneficial.
At level 10, the Gunslinger unlocks a core perk called Seek and Destroy. This perk's utility gives all teammates an advantage on any special zombies that come within range. Given how dangerous the Bomber is, this perk can serve greatly as a warning tool that a Bomber is rapidly approaching.
At level 11, the Gunslinger can unlock a perk called Bounty Hunter. This perk's utility expands across every special zombie in the game. With it, the perk can be used either to kill the Bomber even sooner or deal even more damage to his legs and disable him sooner.
At level 2, the Hellraiser can unlock a perk called Here Kitty. This perk allows you to draw in zekes towards a C4 charge shortly after deployment. This can be a lifesaver against a Bomber that has unfortunately gotten too close to you and your team. Simply throw one on the floor nearby and watch as the Bomber and any other nearby zekes flock towards the explosive. If the Bomber has not exploded on his own, you can detonate the C4 and take care of him yourself.
At level 4, the Hellraiser can unlock a perk called Welcome Mat. This perk allows you to draw in zekes towards a Claymore Mine shortly after deployment. Similar to the Here Kitty perk with C4s, Claymore Mines can also be used to draw away the attention of a Bomber. However, it has a shorter timespan to attract zombies and will explode afterward unlike the C4 where you have a bit more control. Its application would be better if used ahead of time. If you see an approaching Bomber, use a mine to bait him and sprint away before the combined double explosion occurs.
At level 11, the Hellraiser can also unlock the perk called Bounty Hunter. Again, you deal increased damage against any special zombies you encounter, Bombers included.
At level 26, the Medic can unlock a perk called Secret Ingredient. This perk grants five seconds of the masking effect after firing a stim. The masking effect can be useful for disappearing from a Bomber if he gets too close. In case he still manages to explode, the temporary health provided by the Stim Pistol can help absorb most of the damage caused by the explosion. As mentioned earlier, you can use the masking effect to approach the Bomber and melee him until he is in his disabled state.
The Fixer starts with a core perk called Mule. This perk starts you off with the Supply Bag. While this powerful equipment should generally be saved for swarms or other threats, a Bomber can be easily killed if you happen to come across one while carrying some explosive ammunition. Alternatively, the extra damage by the explosive ammunition can come in handy to disable the Bomber very quickly. Interestingly, the Bomber can destroy Supply Bags with his death explosion, so be careful not to let him blow up near one or you will lose a source of extra damage.
At level 4, the Fixer can unlock a perk called Night Owl. This perk replaces your Supply Bag in exchange for the Masking Gas Grenade. Using a Masking Gas Grenade can hide you from a Bomber before or after he approaches you close enough to arm his chest bombs. Underneath the veil of the masking effect and with additional temporary health on top of that, you can easily take aim at his legs (as well as other areas besides his chest) or run away depending on the status of his explosives.
The Fixer's level 5 perk called Side Effects does not work against the Bomber. While highly situational, the Bomber is immune to the Masking Gas Grenade's now lethal gas. However, it will still kill all other zekes that are in the gas, leaving the Bomber the sole survivor in the cloud, thus rendering him an easy target to kill or carefully take down.
The Slasher starts with a core perk called Shock Troops. This perk starts you off with the Stun Gun. You can stop a Bomber and other nearby zombies dead in their tracks and make some distance. The zap will trigger the Bomber shortly into exploding so run away soon.
At level 11, the Slasher can unlock a perk called Trophy Hunter. This perk behaves exactly the same as the Bounty Hunter perk.
The Exterminator starts with a core perk called Firestarter. This perk makes you deal 25% more damage to all enemies during swarm events, Bombers included.
The Dronemaster starts with a core perk called Flying Start. This perk starts you off with a Quadrocopter armed with a Stun Gun. If a Bomber gets too close, the Quadrocopter will stun him for a slighter higher charge cost than normal.
At level 23, the Dronemaster can unlock a perk called Eye In The Sky. This perk functions similarly to the Gunslinger's Seek and Destroy core perk but with slightly less range and only when the Quadrocopter is out. Again, it will act as a warning system if he manages to get close.
Most of this section is conjecture, made up largely of observation and interpretations in an attempt to provide a reasonable and possible explanation of the subject in question. Do not consider everything written here to be entirely factual or definitive of the subject matter.
Nickname[]
The nickname "Bomber" came from the explosives that are strapped to his chest and his suicidal method of attack. The word Bomber describes a person who operates and sets bombs or any type of explosive weapon.
Origin[]
The Bomber used to be an explosives expert up until his zombification. What that means is that he may have been a part of some sort of armed forces. This is backed up by all of his military-grade equipment and the weapons (both the pistol on his leg and the one he drops as loot) he carries around with him. While he is referred to as an explosives expert, it is used more to describe what the Bomber generally appears to be: a soldier that heavily utilizes explosive weaponry. However, a more appropriate term for explosives expert would be explosive ordnance disposal (EOD) technician. It is possible that the Bomber was still knowledgeable in this field of expertise and at least knew how to handle undetonated explosive tools appropriately.
The Bomber has a set of claymore mines rigged to the front of his chest. There are a couple of oddities to note about these explosives. First, the claymores are a noticeable red color as opposed to the usual green. Close inspection reveals the red to be blood. Be it zeke or human blood, it was likely splattered all over them from a prior incident and was not wiped off. Second, the claymore mines strapped across the Bomber's chest have blinking lights attached to them that can be either red or yellow and produce incredibly audible beeping noises. Given that the Bomber wears his loud and noticeable explosives on his vest, it could suggest that he failed to pull off a last-ditch suicide attack against the zekes when they managed to corner him. The tears on the Bomber's sleeves suggested there may have been a struggle, leading to him getting infected from his arms and was ultimately prevented from detonating his explosives.
Sounds[]
As with all special zombies, the Bomber produces unique sounds to differentiate himself from regular zekes. Different from the rest of the special zombies, the Bomber does make the same groaning sounds the regular zekes make. However, this can only be heard by listening very closely to the Bomber while he is alone as these sounds tend to get drowned out by all the other noises he makes. On top of his claymore mines that make beeping noises when activated as mentioned earlier, he can be heard making a variety of loud, garbled mechanical sounds. These noises likely stem from his equipment. Given his appearance, it is possible these noises are being produced from communication systems belonging to the Bomber. Given how warped and staticky these sounds are, as well as the fact that they produce erratic beeping noises, they were likely damaged at some point before or after the Bomber's zombification.
Intelligence & Physical Abilities[]
Compared to most special zombies, the Bomber does not display any sort of outstanding traits, lining him up more closely with regular zekes in terms of overall behavior. However, he proves to be slightly more aggressive as he never shows any hints of self-preservation. Regular zekes sometimes react to the survivors pointing their weapons at them and will purposefully dodge out of the way in an attempt to avoid bullets. In contrast, the Bomber will always run headfirst into the survivors, ensuring that if he gets close enough to them or they shoot his body, he will explode and deal heavy damage.
When the Bomber is taken down carefully, he will fall to the ground unable to move. Despite not being able to do anything in this state, he will visibly show resistance until he dies, either from his explosives or a melee attack from the survivors. If it were to be assumed that the pre-infected Bomber really did have the determination to blow himself up to kill as many zekes as he could, then it is possible that the Bomber's resilience may have carried over into his death which may explain why being shot in the limbs do not seem effective in killing him, instead leaving him to writhe on the floor. Unlike regular zekes, he will not move or be able to attack survivors that get close while laying on the floor. However, as a last act of defiance, he will set off his explosives into exploding, albeit with a more lenient amount of time before they do and with the chance of being stopped. Any attempts to kill him while he is on the ground by shooting more bullets into his arms or legs will be futile, and while headshots can also cause him to fall into a disabled state, any further shots to the head will prove equally pointless. Unless he is given a proper send-off with a deadly melee finisher or shot in the chest, he will spend his last moments as a zeke as he tried while he was still human: going out with a bang.
Related Achievements[]
There is one achievement related to the Bomber that can be earned.
Icon & Name
Description
Gamerscore (XB)
Trophy (PS)
Effective communication
Mark special zombies 50 times
20
Bronze
Notes[]
The claymore mines strapped across the Bomber's chest have blinking lights attached to them that can be either red or yellow and produce incredibly audible beeping noises. However, nothing can actually be seen on the claymores on close inspection to show where these lights and noises are coming from. Why the Bomber's explosives have blinking lights and loud beepers in the first place may have been for gameplay purposes since they help to more easily display, both visually and auditorily, the status of his explosives.
A more logical explanation could be that the Bomber modified the mines prior to his infection to be outfitted with light and sound emitting devices as a means of attracting zombies to them once they were deployed (although there is no in-game observation of this happening since they are only used to warn players that his bombs are going to blow). The fact that the explosives can flash two different colors suggest that he purposefully set them to explode at different intervals depending on how he wanted them to. The red lights were to signal that the claymores were going to blow up extremely quickly. Contrastingly, the yellow lights provided the longest period before they blew up. A variation of this idea can be seen with the Hellraiser with the Welcome Mat perk active where deployed mines produce a sound that attracts zekes towards it for a few seconds before exploding if enemies were detected.
If the tutorial tips are to be taken literally, the Bomber possesses a detonator for his explosives. However, one cannot be seen anywhere on his person, making it appear as though his explosives are primed to blow up automatically without any sort of explicit action from the Bomber indicating that he has done so. The same is also true for when he is killed with a melee finisher and his explosives immediately stop ticking down to exploding. Again, this may simply be a gameplay mechanic.
After the Crossplay Update, Virus Samples laying around in the chapters tend to be found near the corpses of soldiers. Given that the Bomber is likely a soldier, it would make sense that he would be carrying one around.
Before that same update, the Bomber also used to carry a Medkit or two equipment bags which had a chance of being dropping as loot when taken down without exploding. However, these were both removed as possible loot drops.
Shooting the Bomber's corpse or undetonated explosives will not cause an explosion. Despite how fragile he is to exploding while he was still moving around, nothing can be done to cause his body to explode after he has been carefully disarmed with a melee finisher. However, this can be chalked up to gameplay since shooting at corpses, especially those belonging to special zombies, does not really do anything.
Despite the fact that the Bomber is capable of surviving the Fixer's Masking Gas Grenades if they have the Side Effects perk active, the Bomber cannot survive the nerve agent from the third chapter of the Moscow episode. If you and your team managed to bring a Bomber into the sealed room where the nerve agent's potency against the zekes is first demonstrated to the survivors, he will soon explode without his explosives blinking red first shortly after the gas is released. Unlike the Gasbag, the Bomber does not wear full-body protection designed to ward off chemicals. In fact, the Bomber's uniform has a few tears in certain areas around his arms, likely allowing the nerve agent to be quickly absorbed through the exposed skin. This causes him to succumb to the nerve gas, and the damage caused by it triggers him into blowing up.
Bombers cannot be found idling. An idle Bomber can be seen in the Horde Mode Z Update trailer.
Gallery[]
World War Z - Horde Mode Z Update Trailer
Trailer where Bomber was officially revealed
World War Z - Bomber
Segment from the trailer specifically focused on dealing with the Bomber
Bomber art from the Season 2 Roadmap
Bomber's silhouette in Jerusalem (Reveal tease from the Kill it with Fire Update trailer)


")
")
")
")
")
")
")